AuthKit
Easy to use authentication platform designed to provide a flexible, secure, and fast integration.
Introduction
Integrating AuthKit into your app can be done in less than ten minutes. In this guide, we’ll walk you through adding a hosted authentication flow to your application using AuthKit.
In addition to this guide, there are a variety of example apps available to help with your integration.
Before getting started
To get the most out of this guide, you’ll need:
- A WorkOS account
- Your WorkOS API Key and Client ID
Want to skip the manual setup? The WorkOS AI Installer & CLI detects your framework, installs the SDK, configures your dashboard, and writes the integration code – all with a single command.
Let’s add the necessary dependencies and configuration in your WorkOS Dashboard.
For a client-only approach, use the authkit-react library to integrate AuthKit directly into your React application. Start by installing the library to your project via npm.
A redirect URI is a callback endpoint that WorkOS will redirect to after a user has authenticated. This endpoint will exchange the authorization code returned by WorkOS for an authenticated User object. We’ll create this endpoint in the next step.
You can set a redirect URI in the Redirects section of the WorkOS Dashboard. We recommend using http://localhost:3000/callback as the default here.
WorkOS supports using wildcard characters in Redirect URIs, but not for the default Redirect URI. More information about wildcard characters support can be found in the Redirect URIs guide.
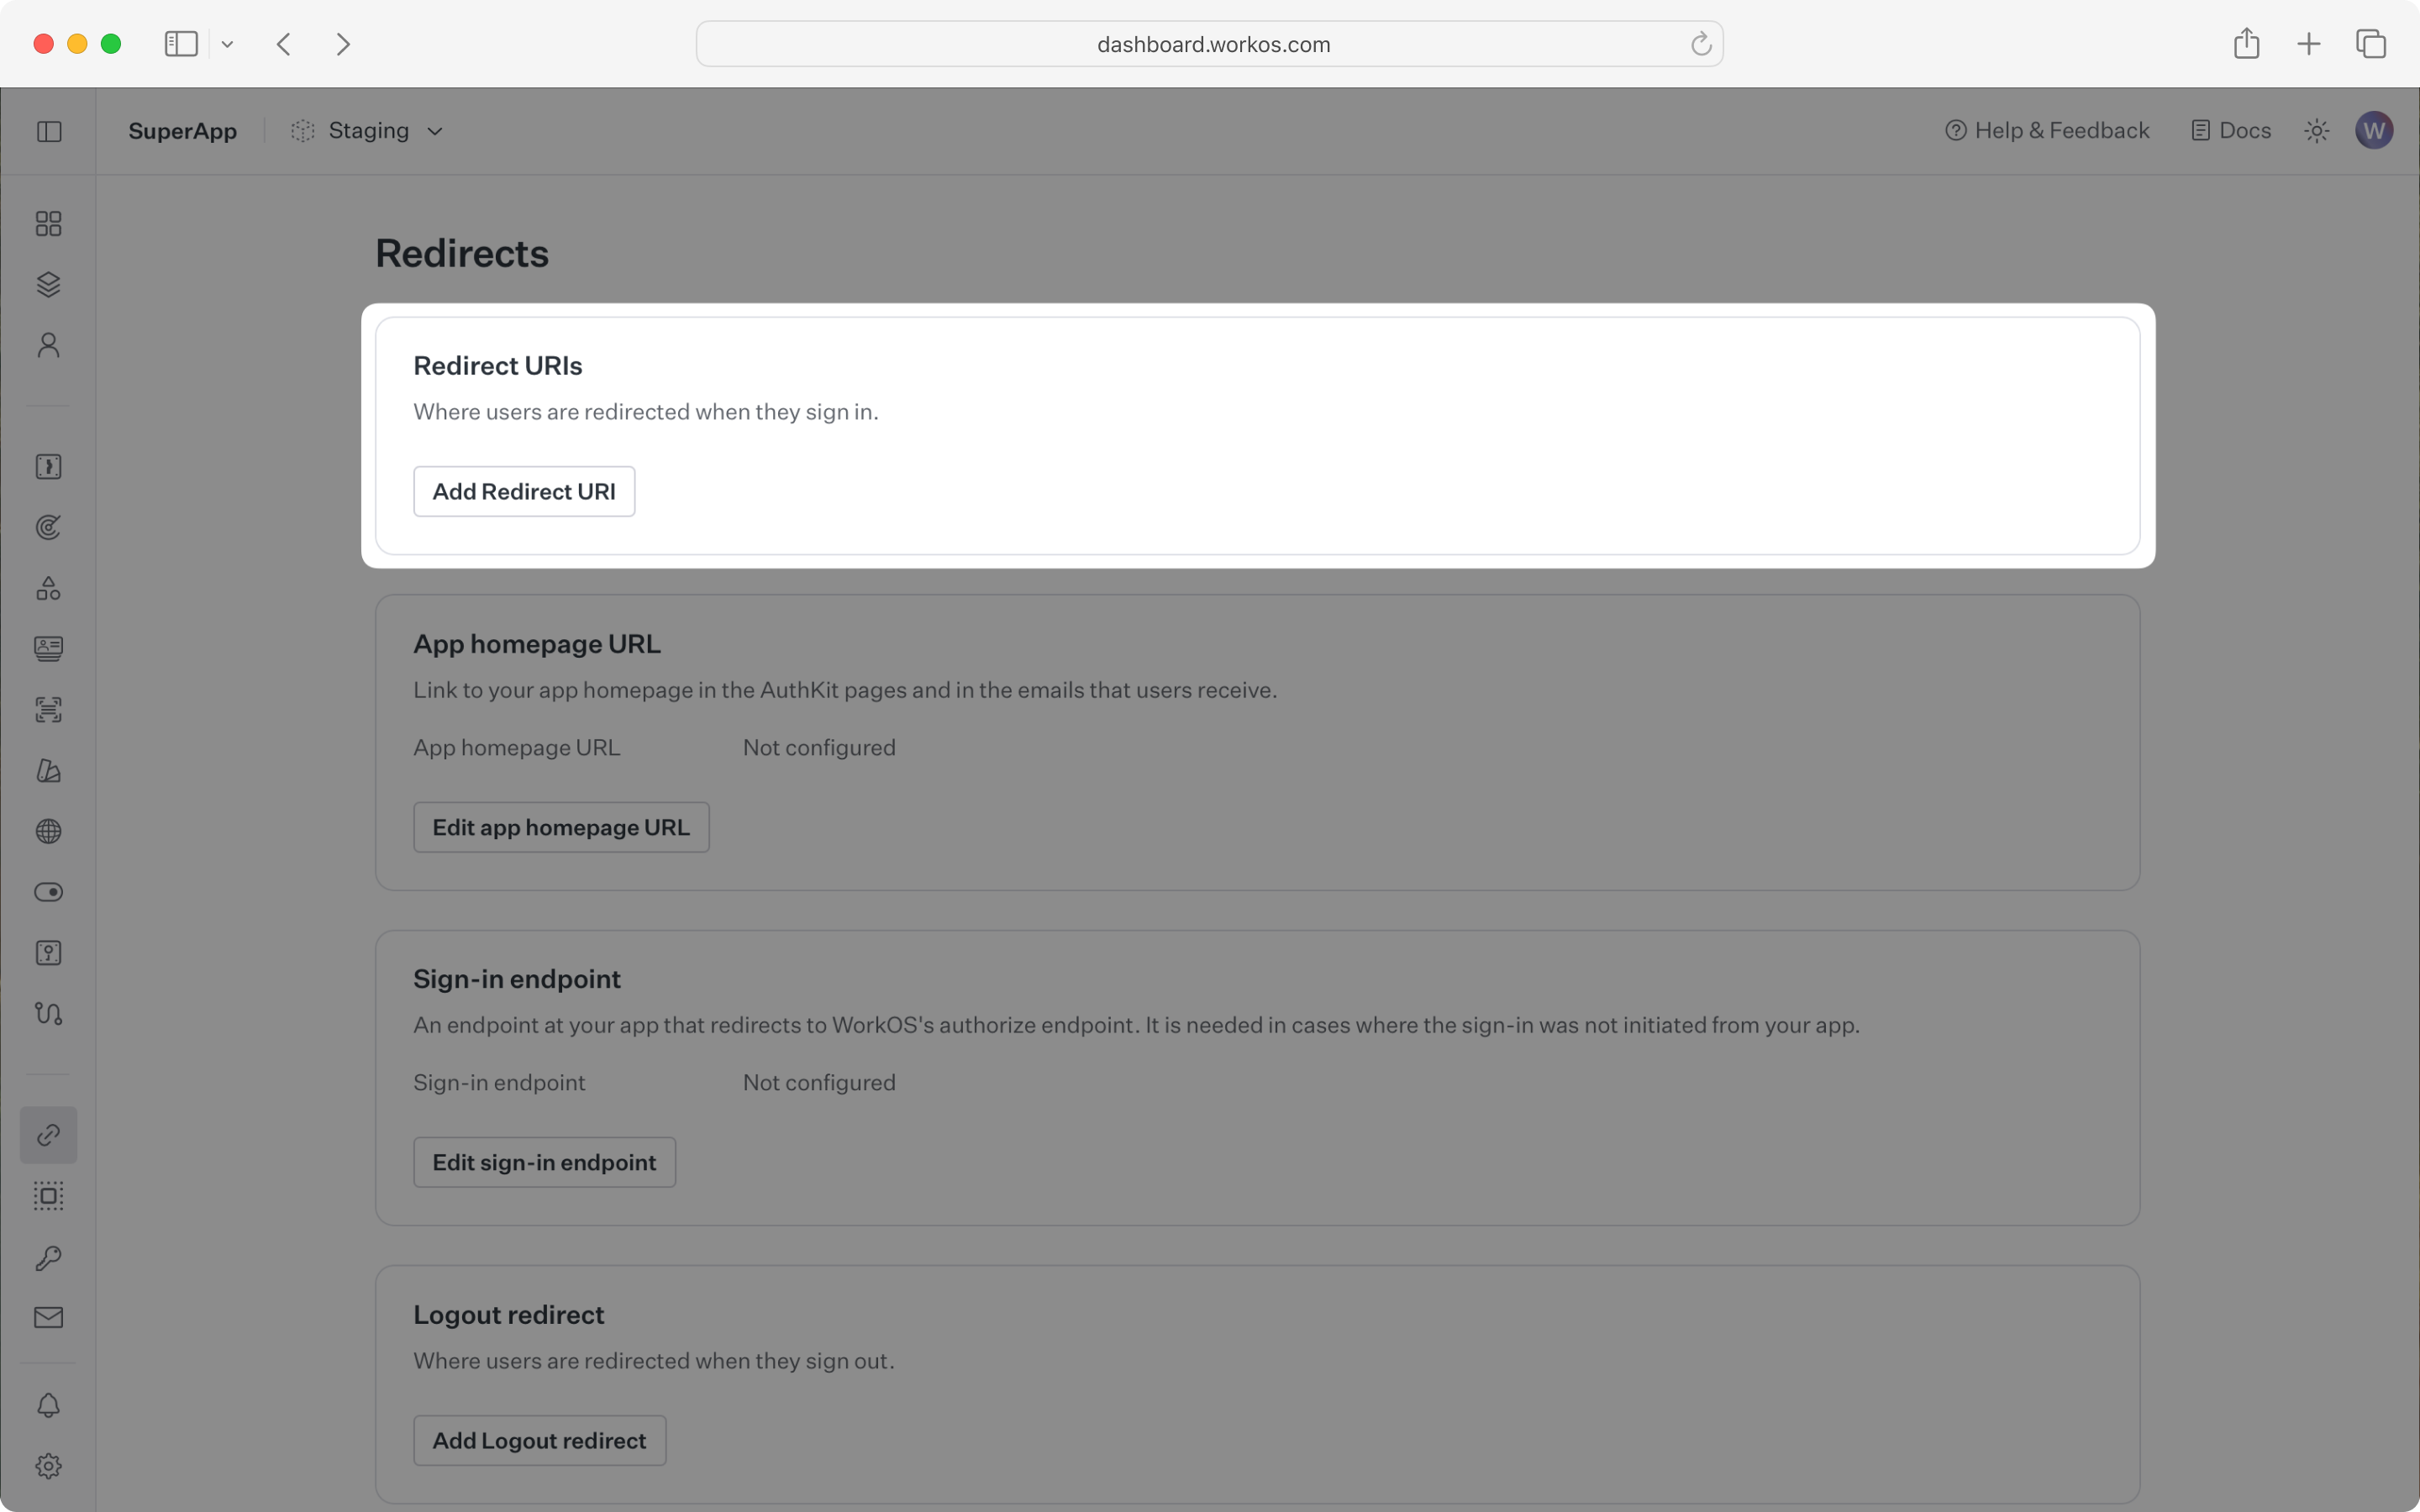
When users sign out of their application, they will be redirected to your app’s Sign-out redirect location which is configured in the same dashboard area.
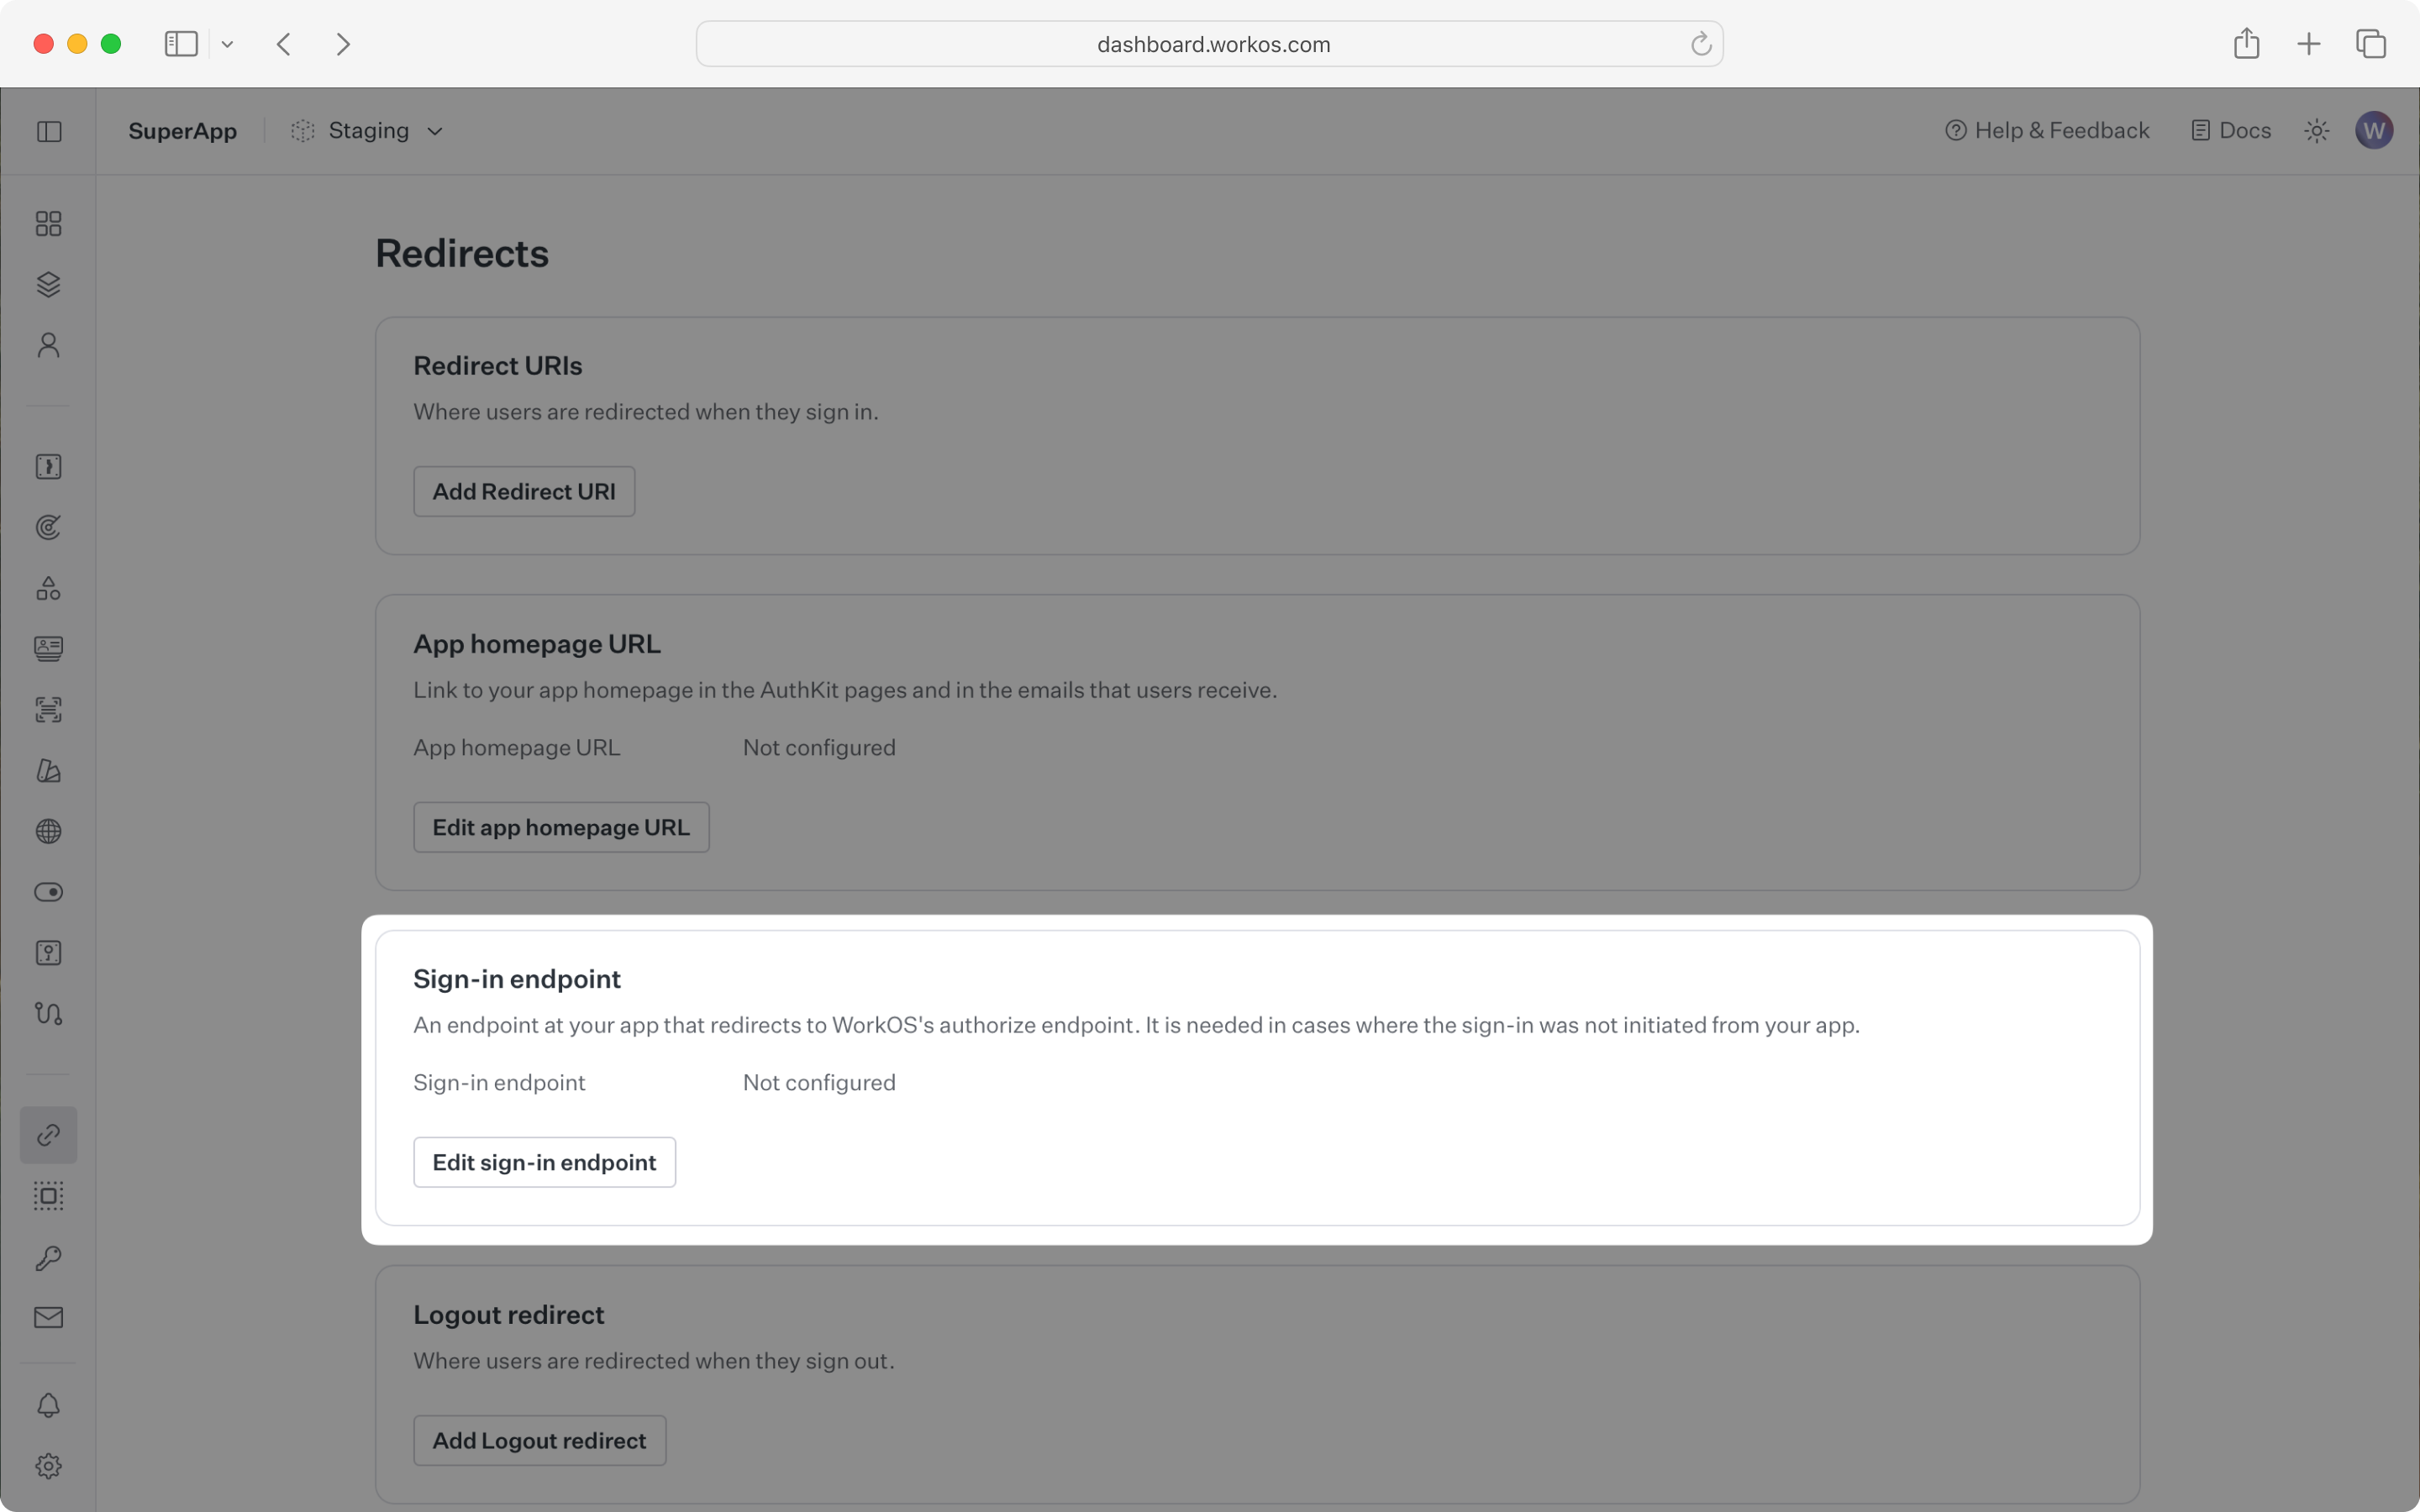
All sign-in requests must originate at your application for the PKCE code exchange to work properly. In some instances, requests may not begin at your app. For example, some users might bookmark the hosted sign-in page or they might be led directly to the hosted sign-in page when clicking on a password reset link in an email.
In these cases, AuthKit will detect when a sign-in request did not originate at your application and redirect to your application’s sign-in endpoint. This is an endpoint that you define at your application that redirects users to sign in using AuthKit. We’ll create this endpoint in the next step.
You can configure the sign-in endpoint from the Redirects section of the WorkOS dashboard.
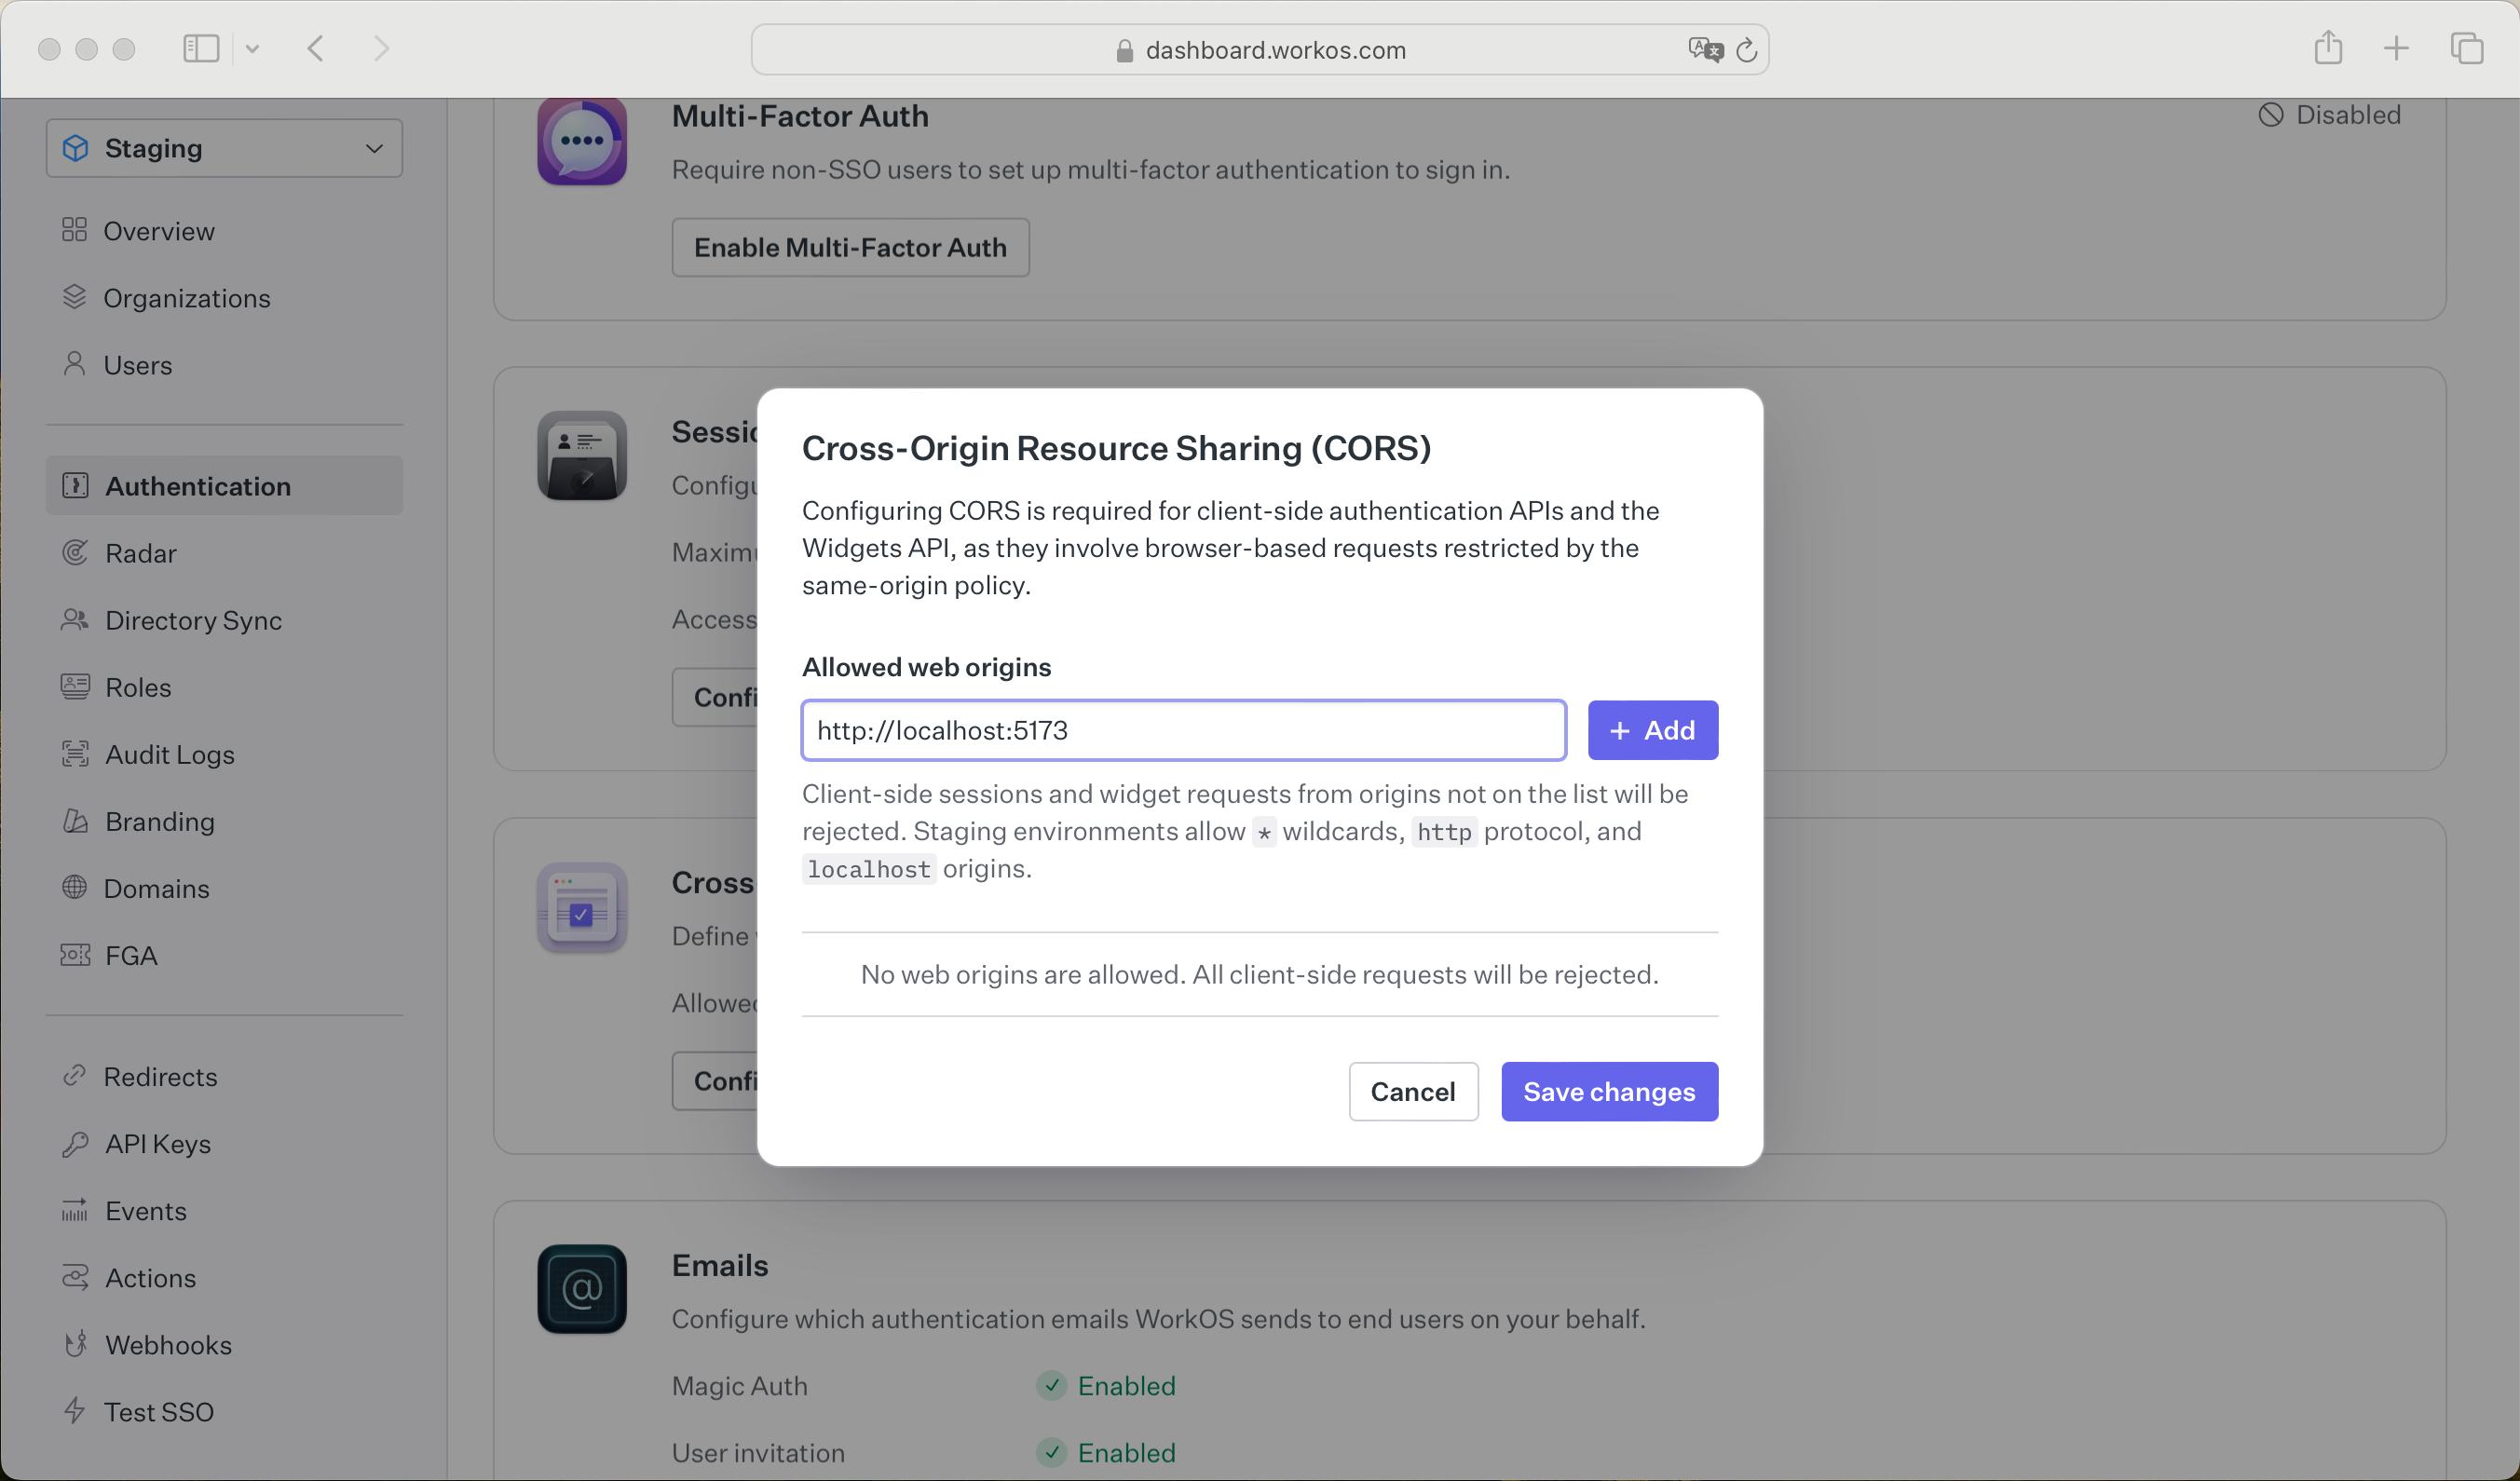
Since your user’s browser will be making calls to the WorkOS API directly, it is necessary to add your domain to the allow list in your WorkOS Settings. This can be configured in the Configure CORS dialog on the Authentication page of the WorkOS dashboard.
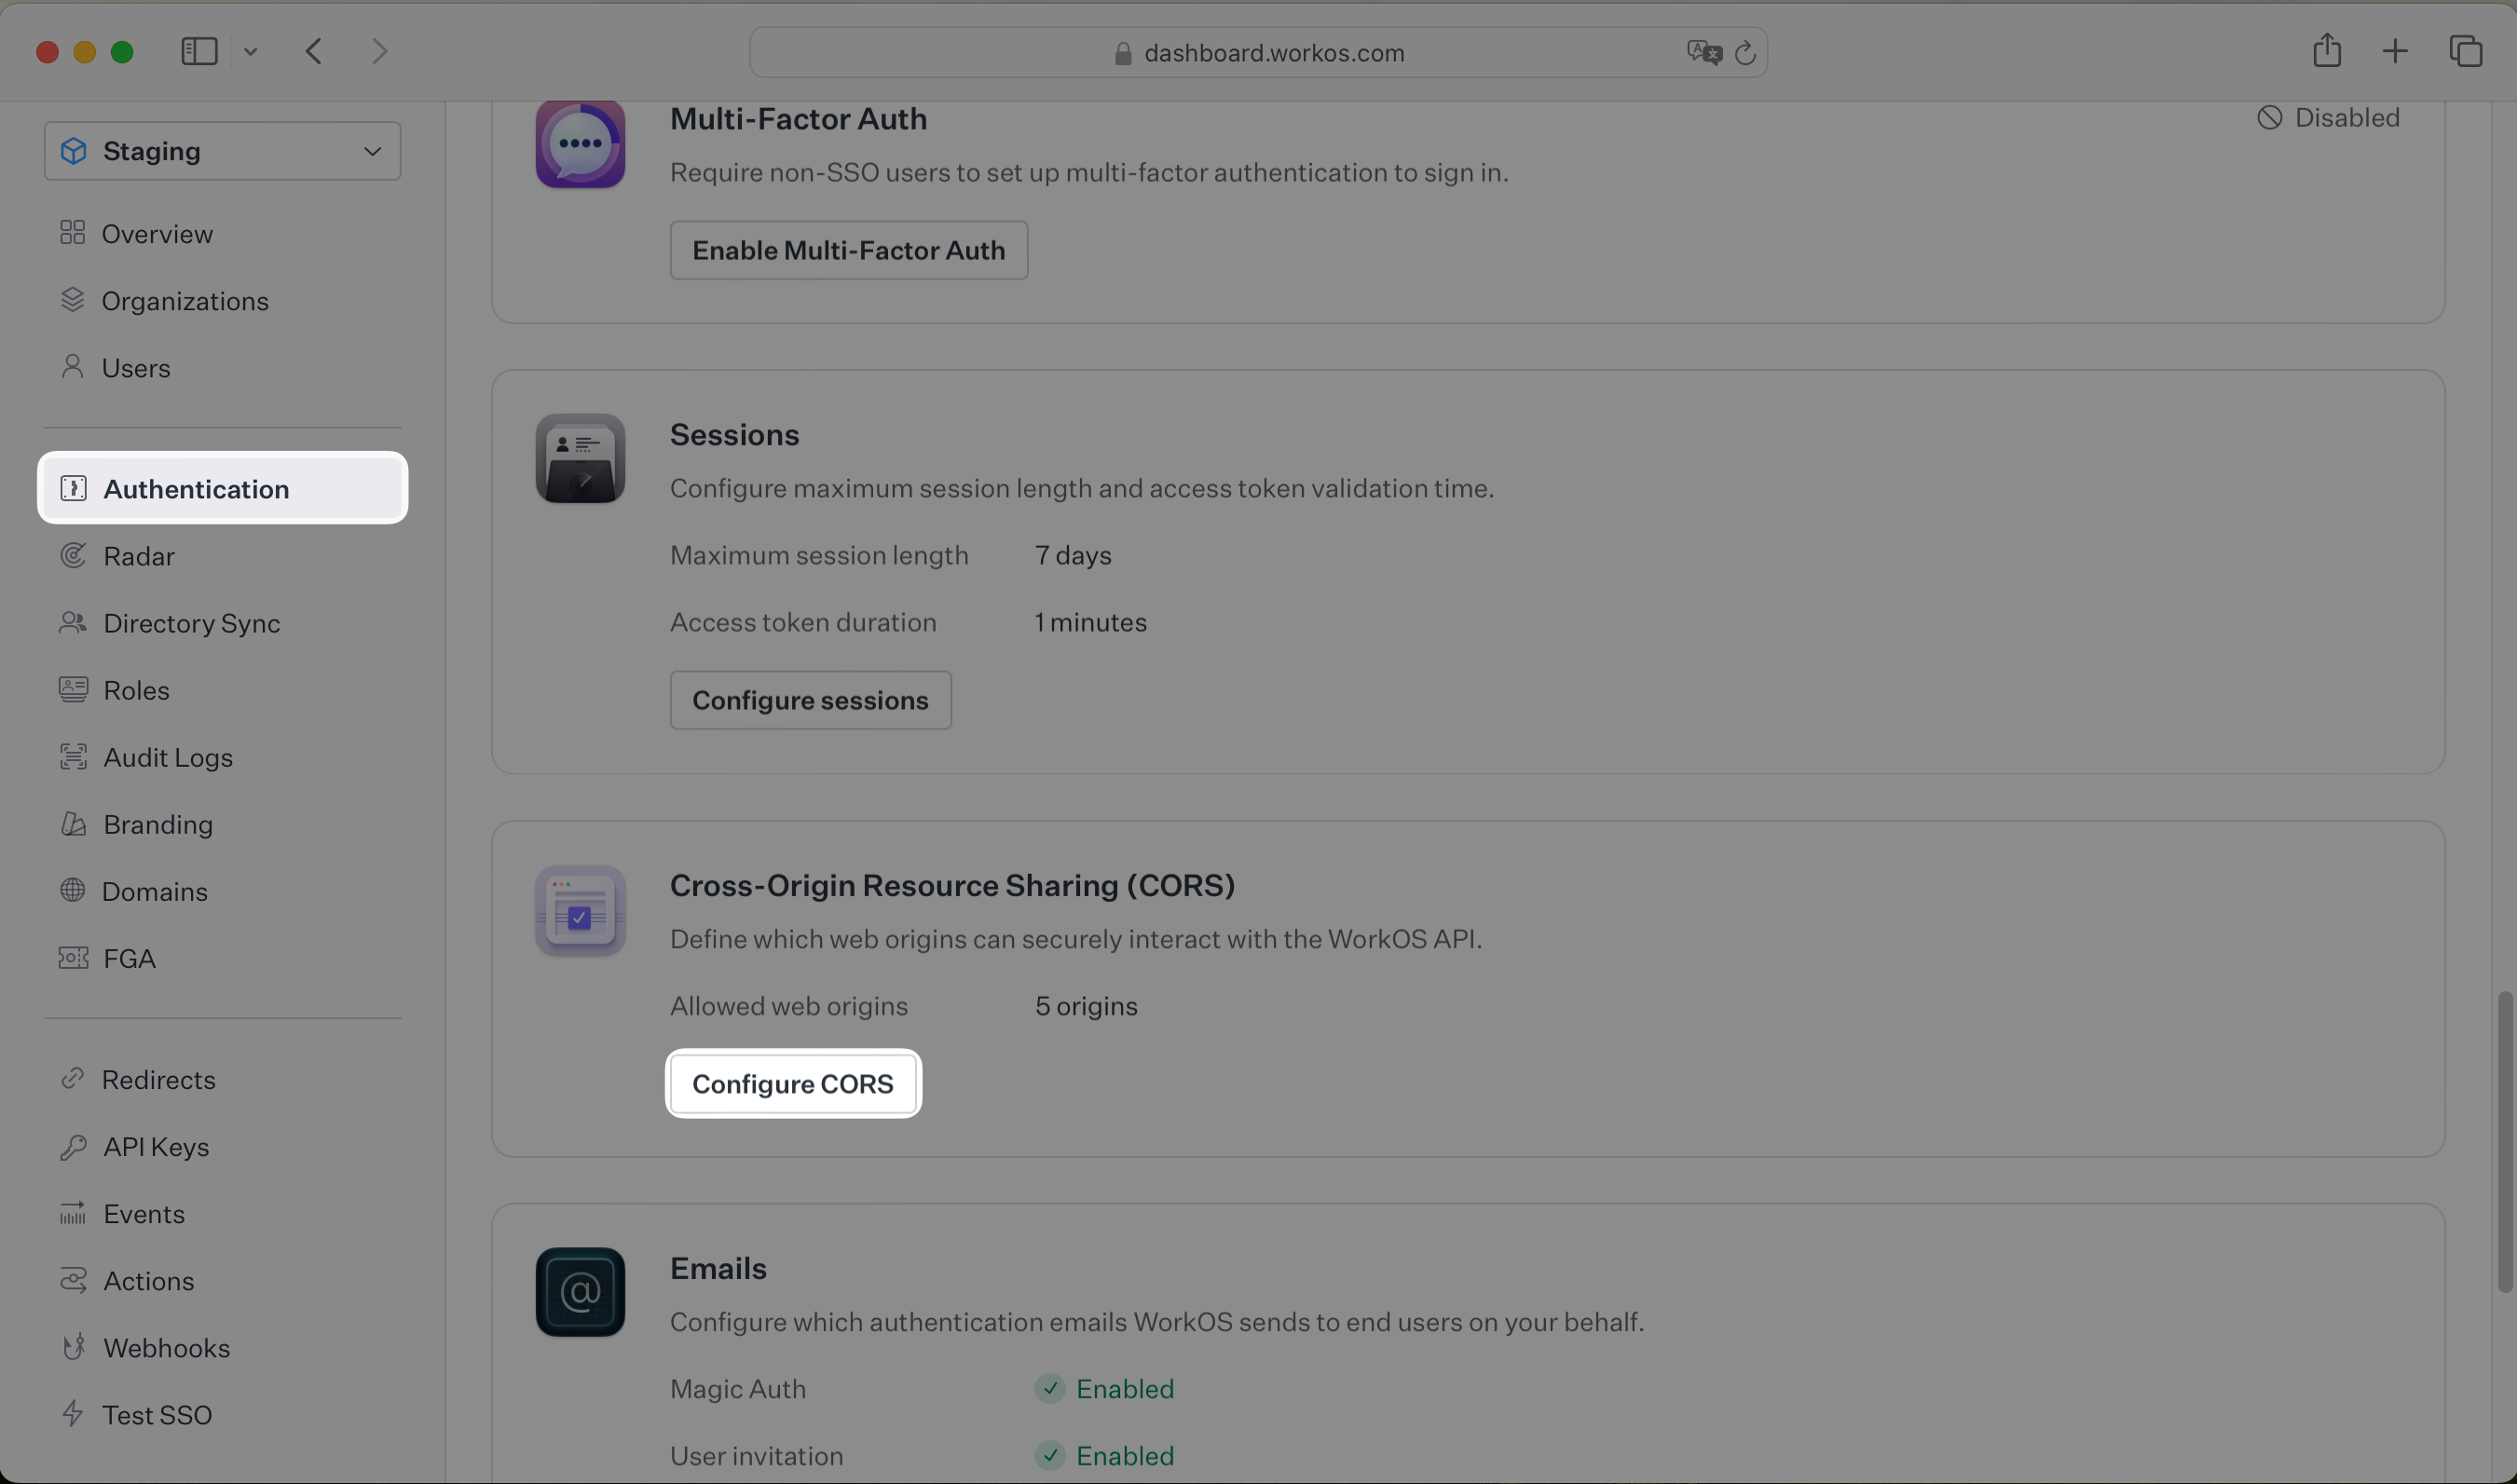
While building your integration in the Staging environment you should add your local development URL here. In the example below we’re adding http://localhost:5173 to the list of allowed web origins.
The AuthKitProvider component will handle the redirect from Hosted AuthKit, refresh the session when needed and provide context for hooks used in the components of your app. Initialize it with your client ID, which you can find in the WorkOS dashboard. You should also specify your custom authentication API domain.
devMode={true} on <AuthKitProvider />. This will keep the refresh token in local storage instead of a secure, HTTP-only cookie.
iframe.
The useAuth hook will return user information and loading status. It also provides functions to retrieve the access token and sign in and sign out the user.
If you have routes that you wish to only be accessible to logged in users, you can use a custom React hook.
Then use that hook to protect your mandatory sign in routes.
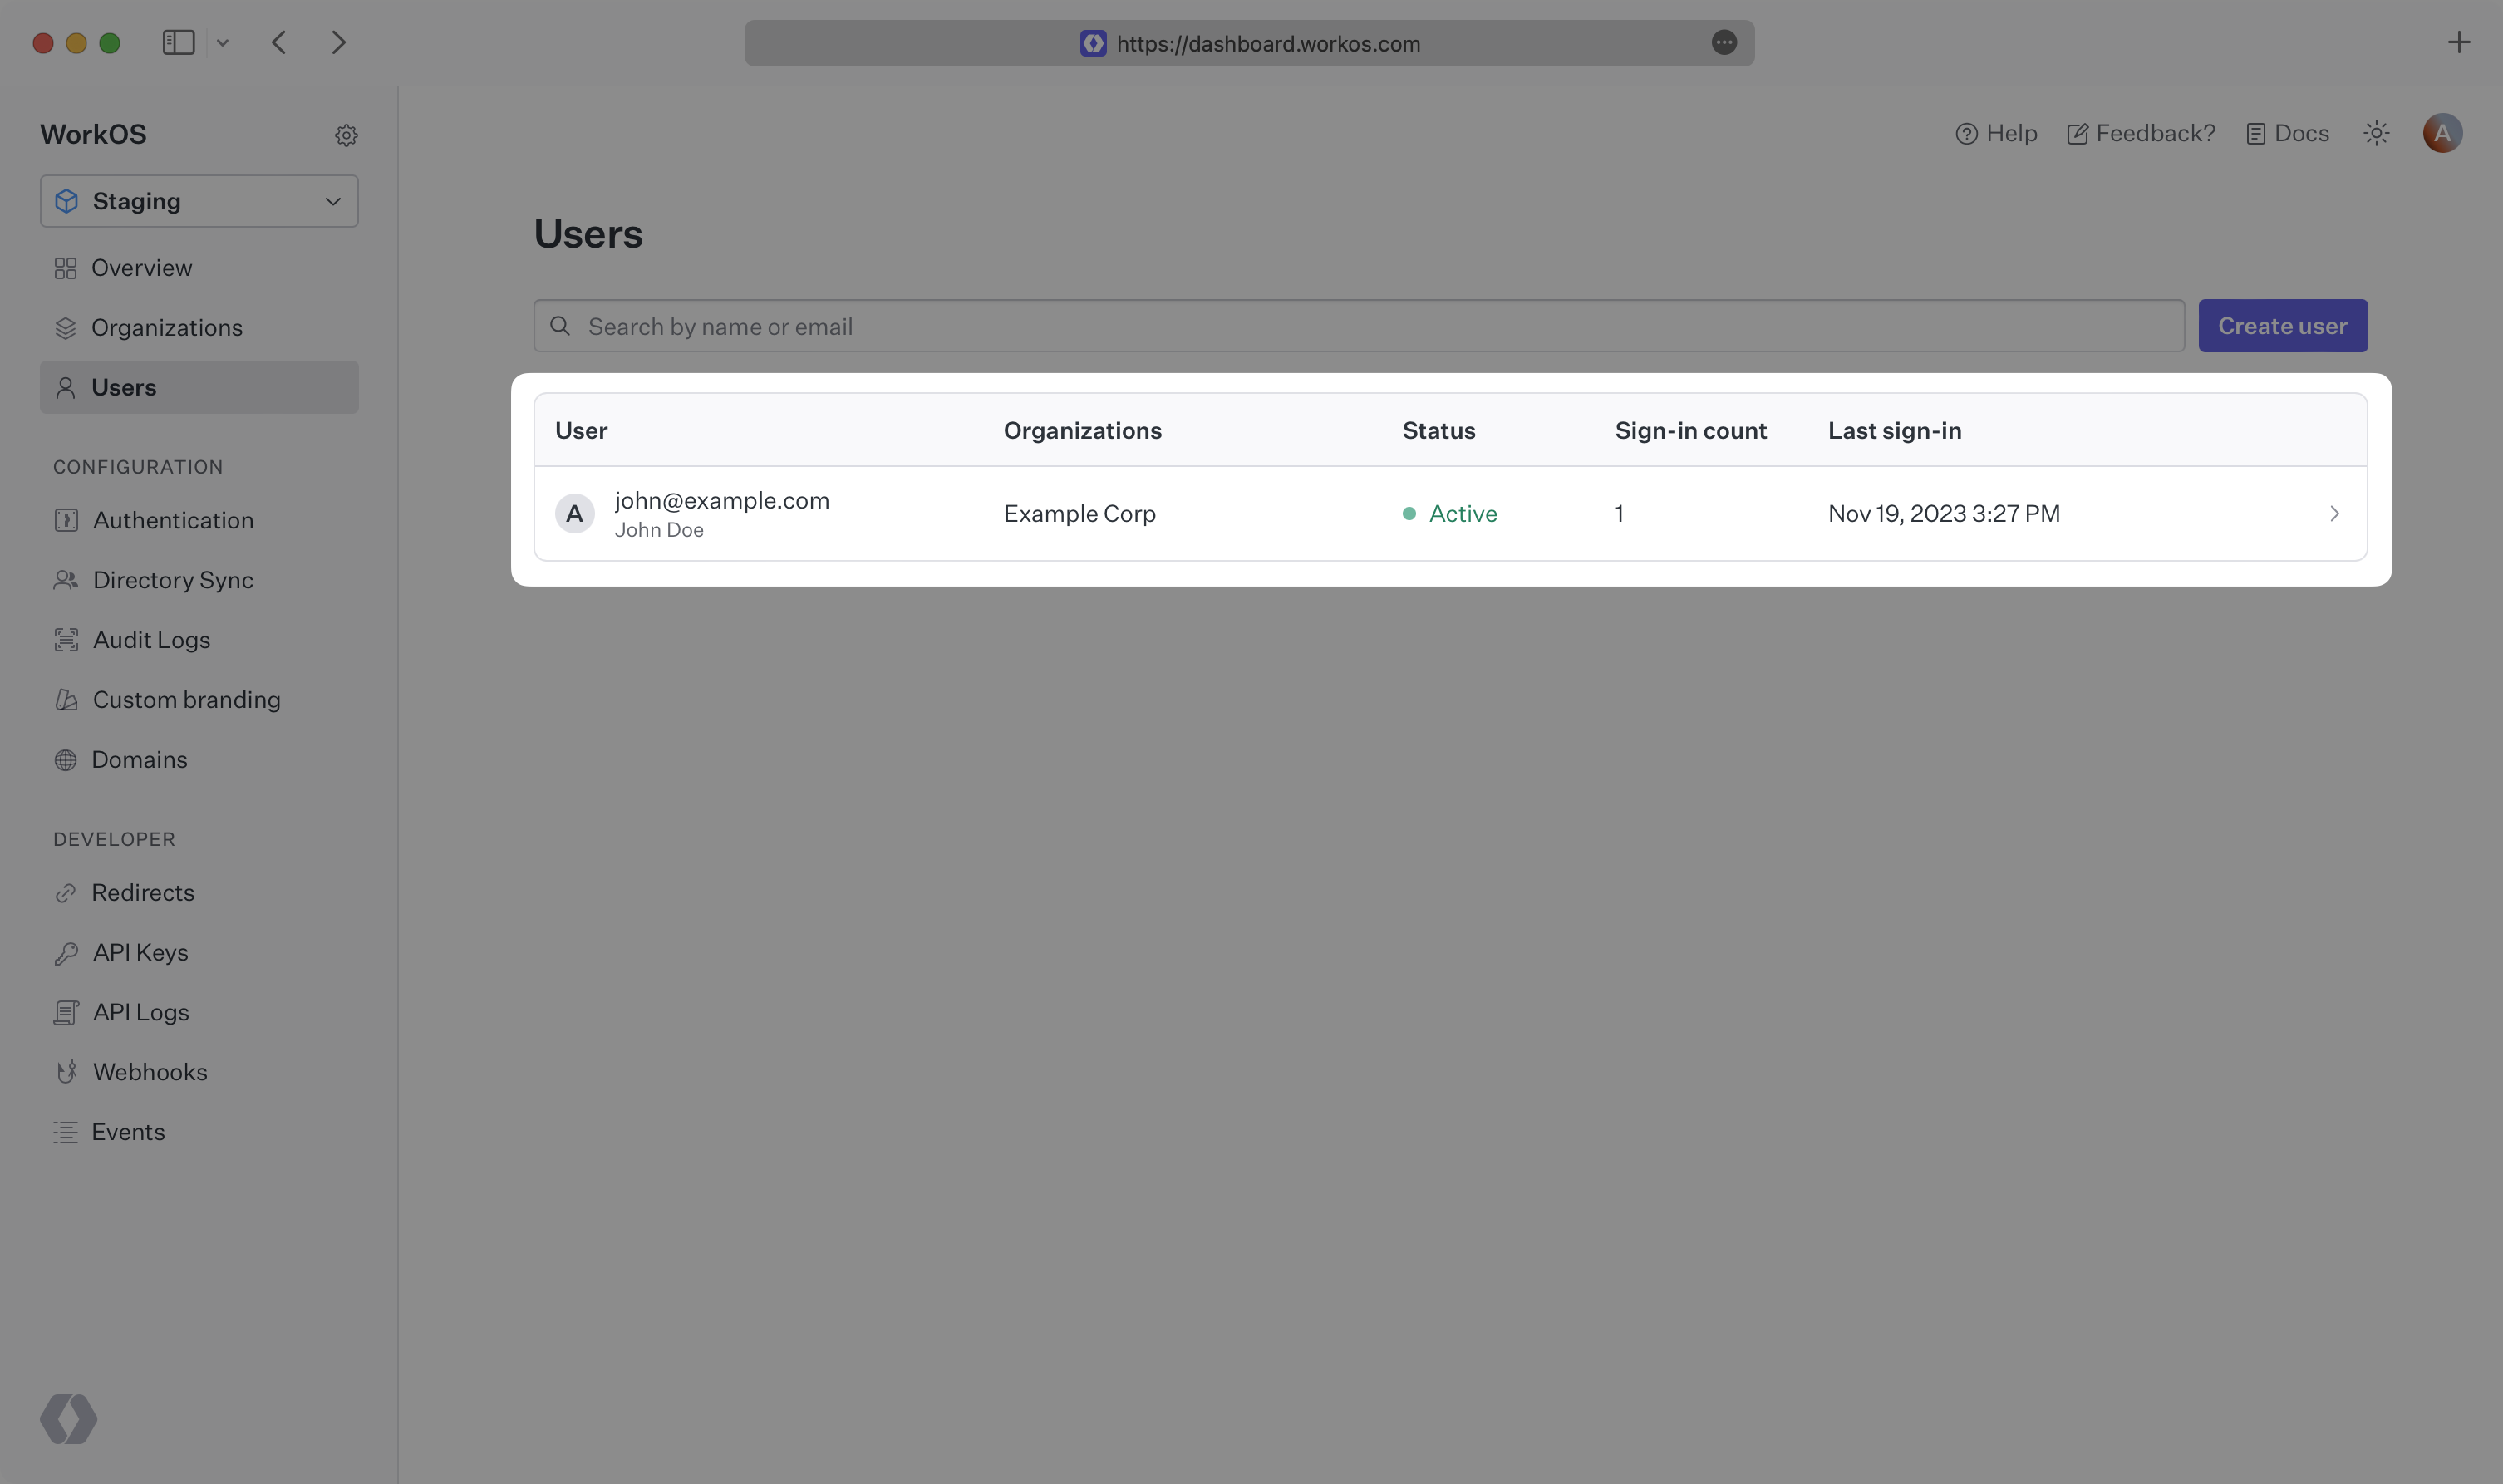
You can then sign in with the newly created credentials and see the user listed in the Users section of the WorkOS Dashboard.