PingOne SAML
Learn how to configure a connection to PingOne via SAML.
Each SSO Identity Provider requires specific information to create and configure a new Connection. Often, the information required to create a Connection will differ by Identity Provider.
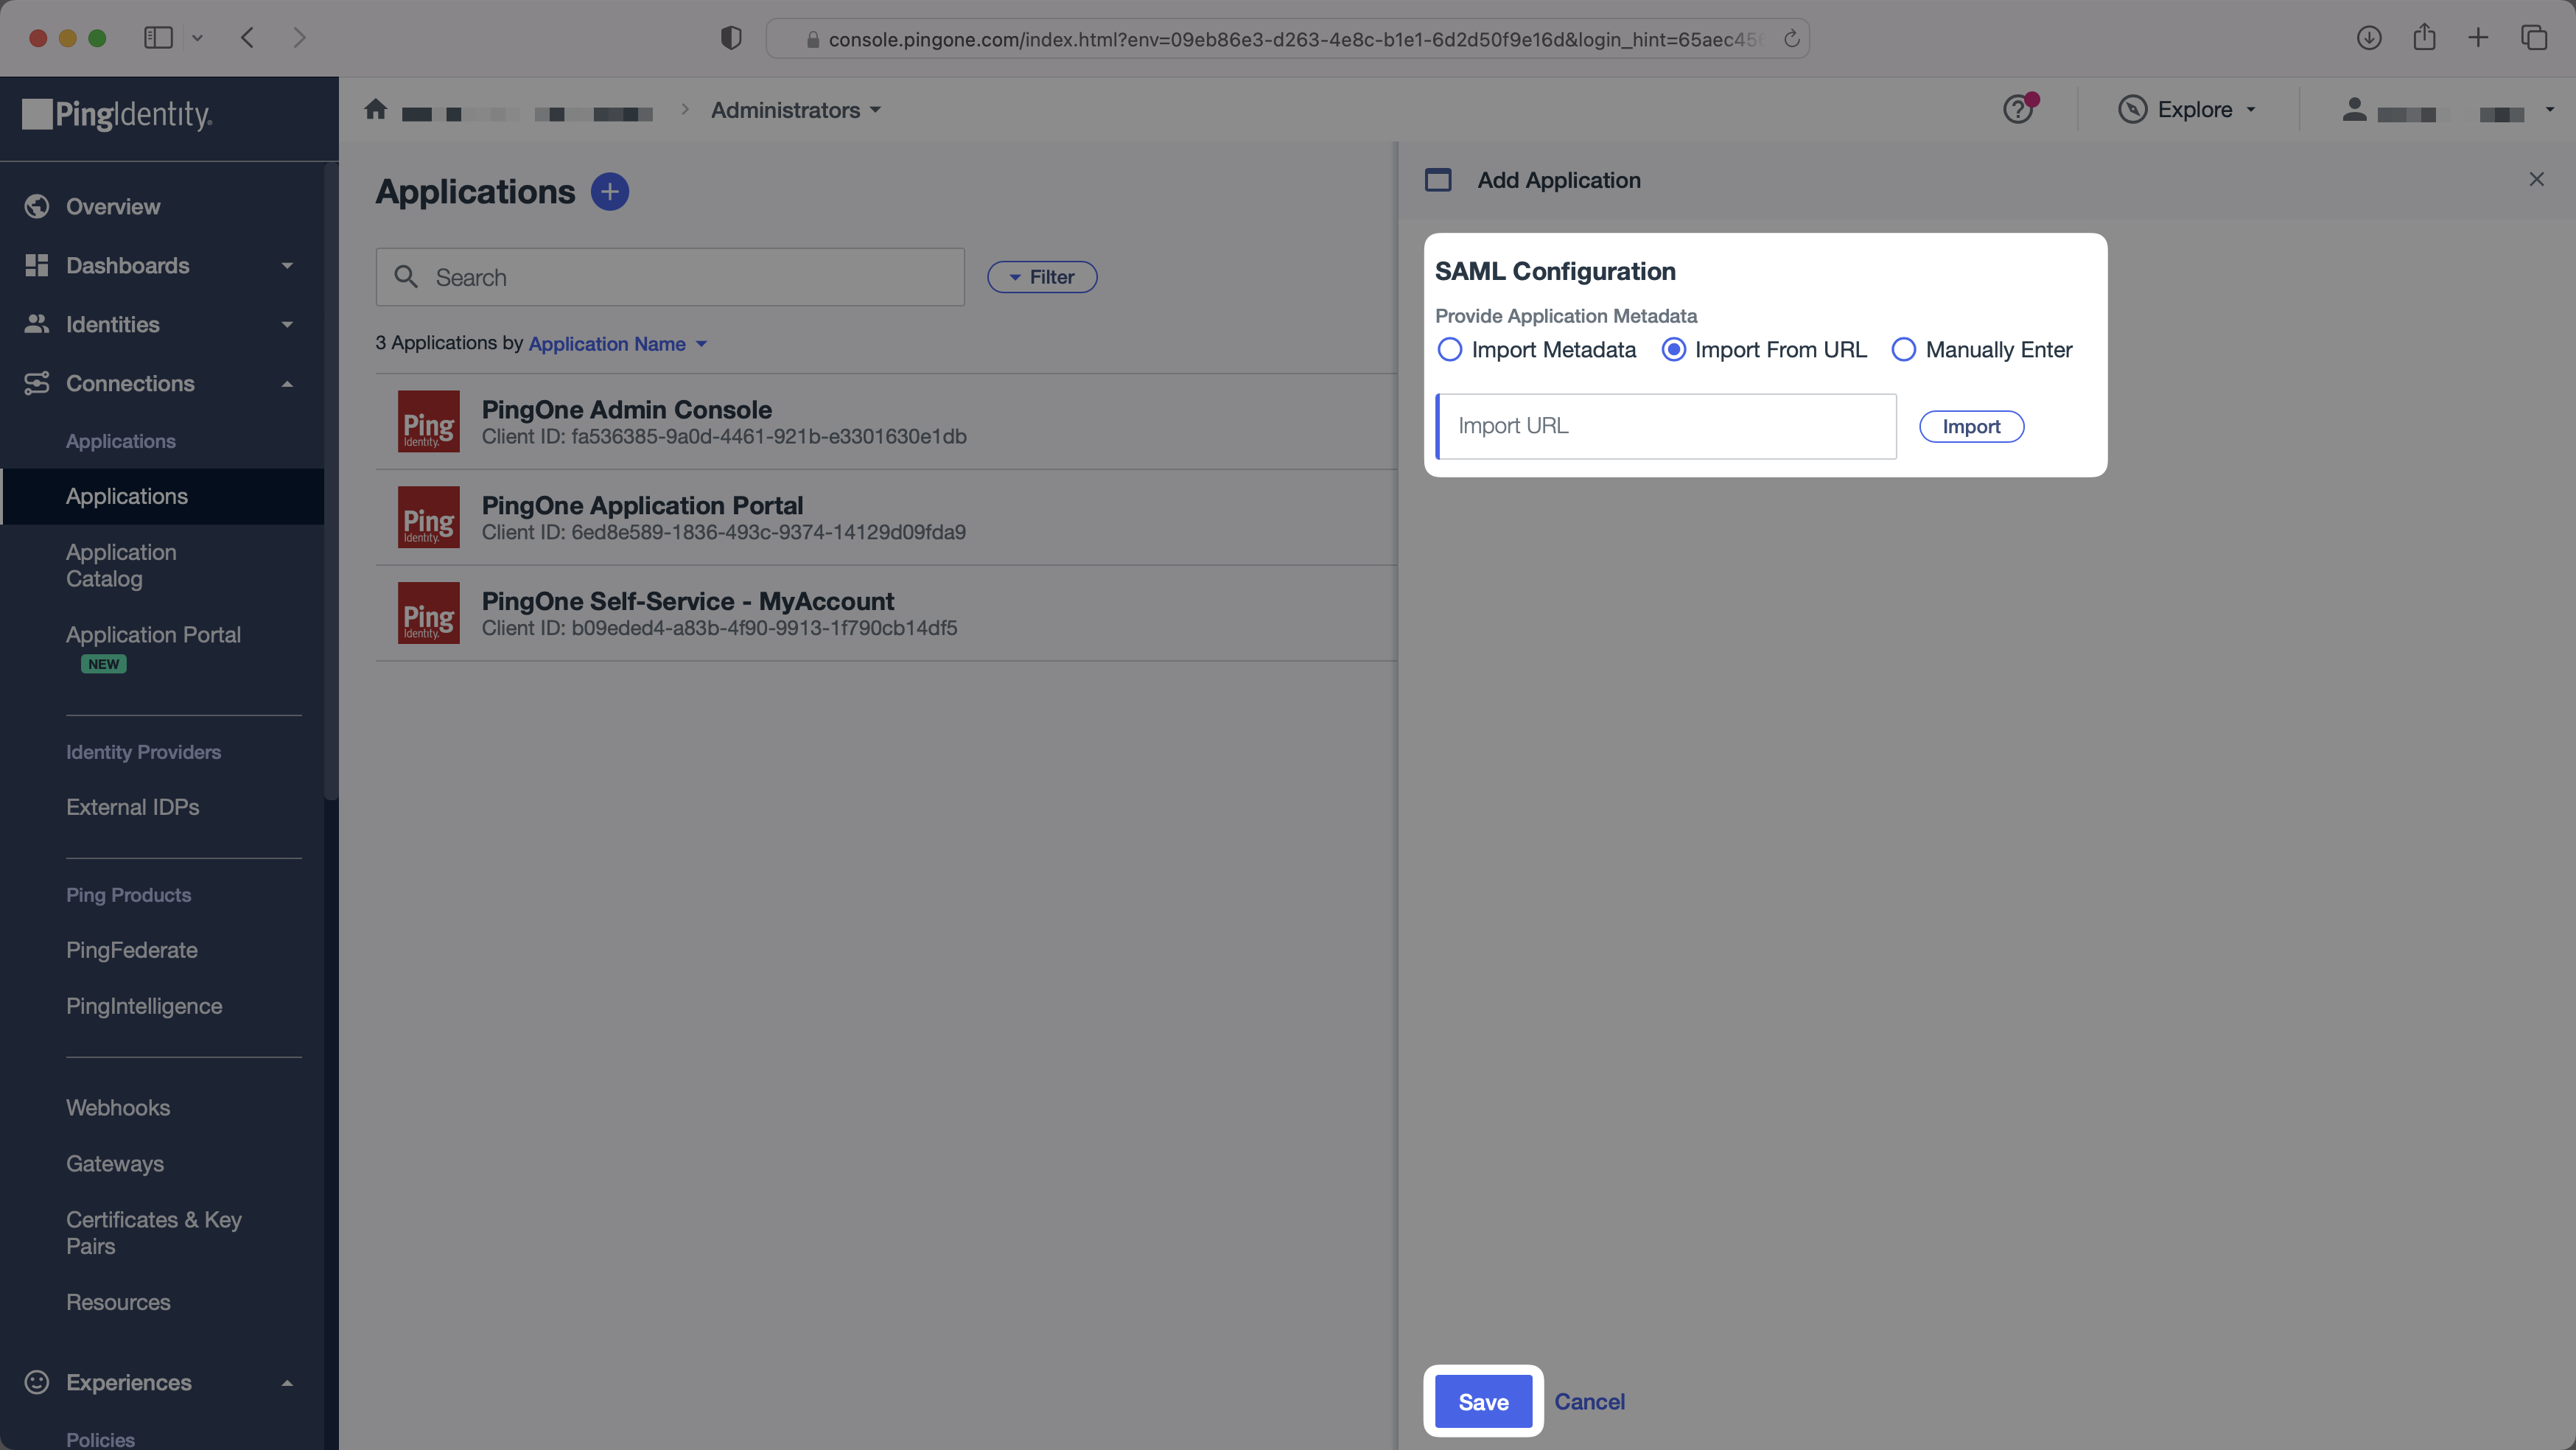
To create a PingOne SAML Connection, you’ll need two pieces of information: an SP Metadata URL from WorkOS, and an IdP Metadata URL from PingOne.
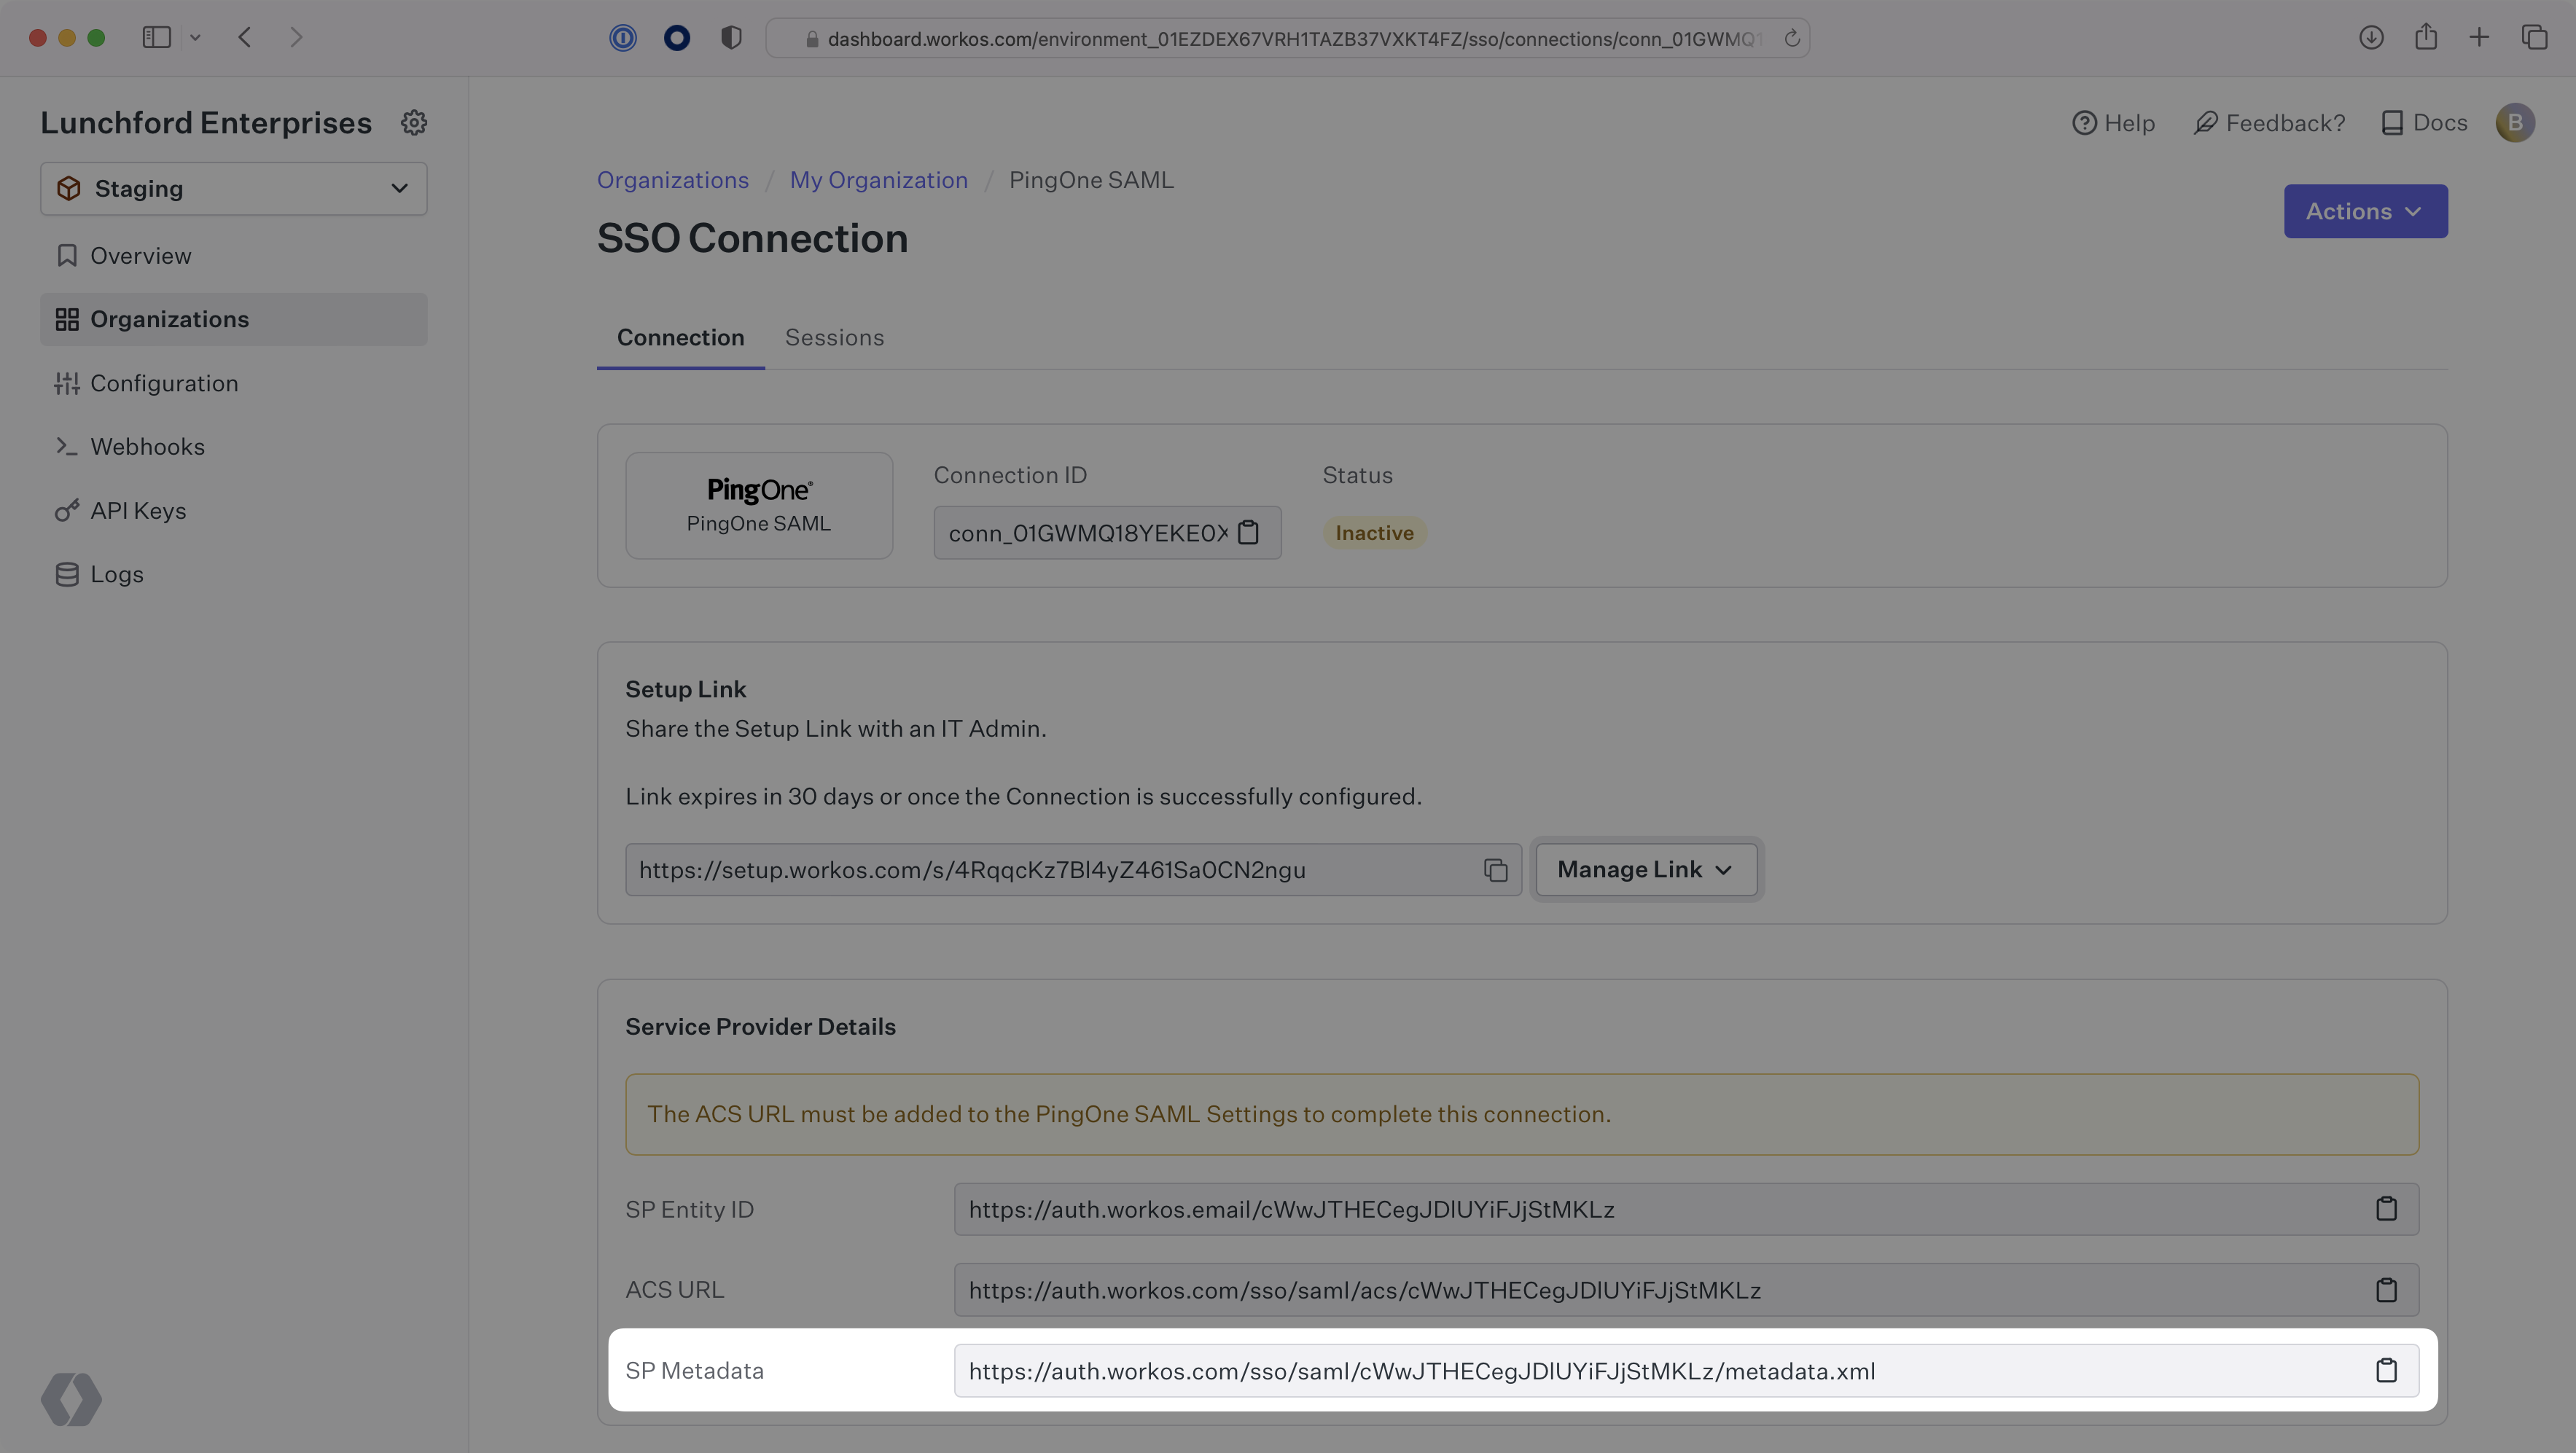
WorkOS provides the SP Metadata URL. It is readily available in your Connection settings in the WorkOS Dashboard.
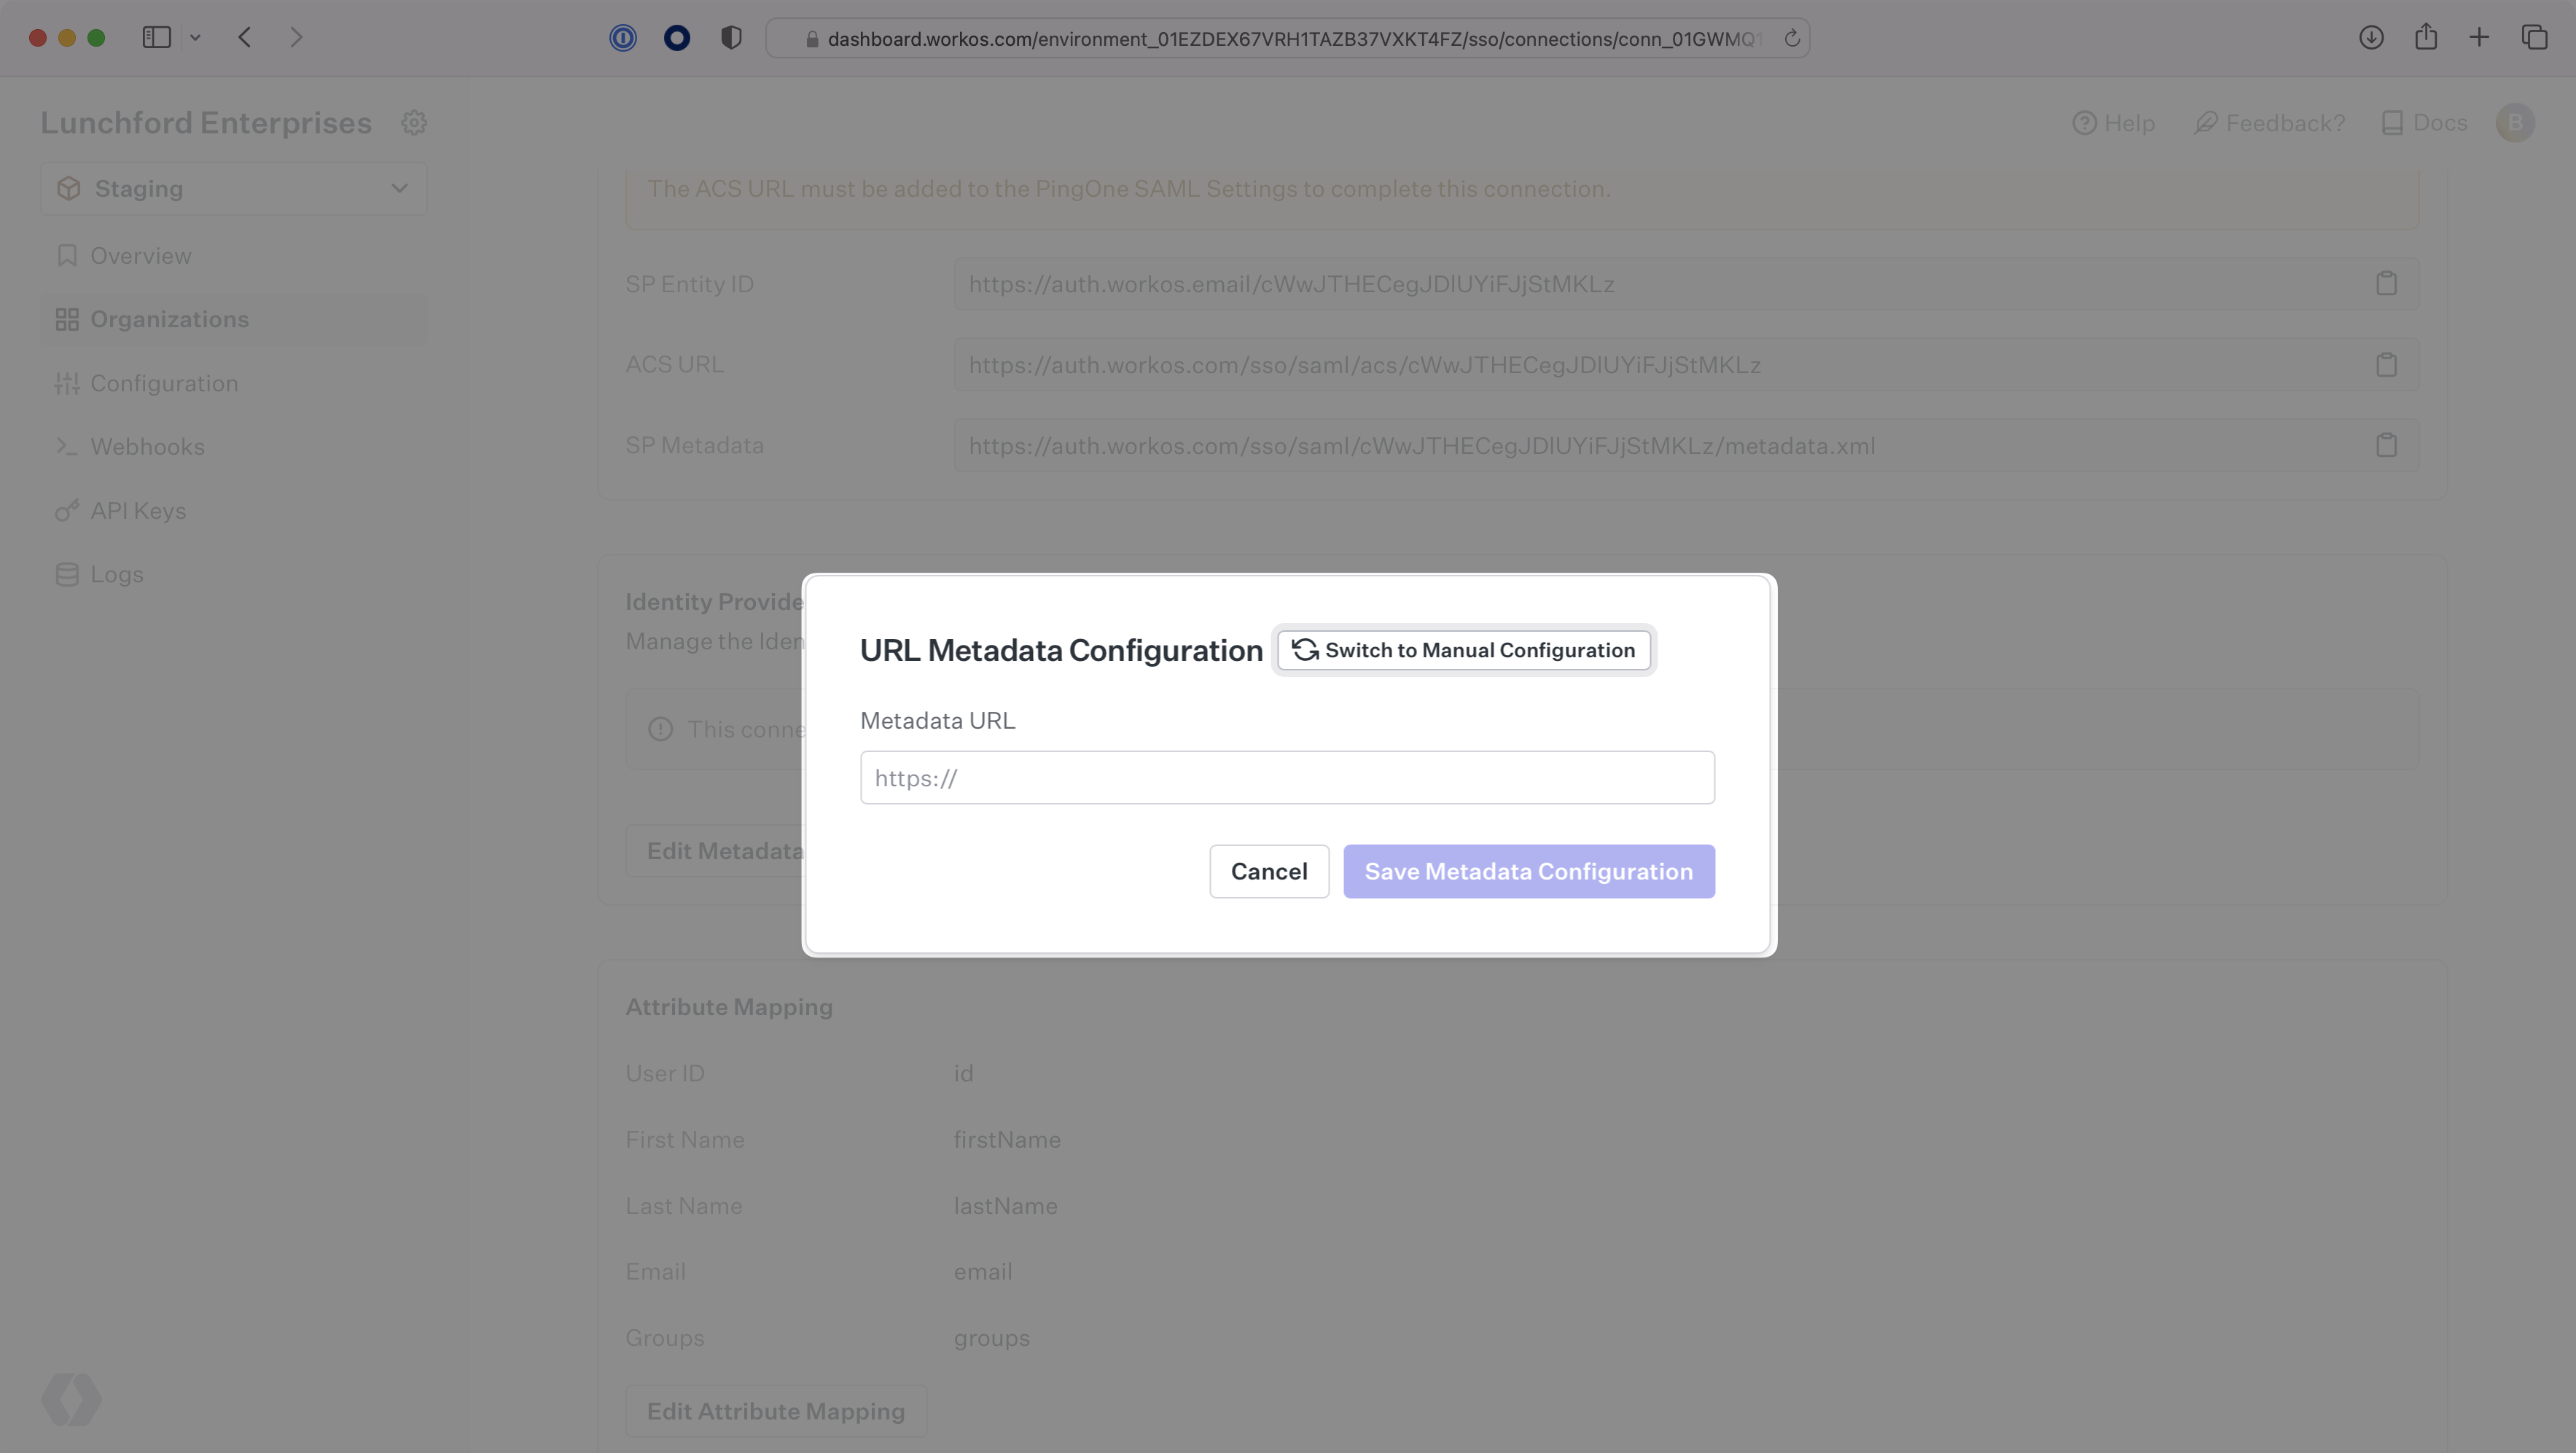
The SP Metadata link contains a metadata file the organization can use to set up the SAML integration. In PingOne’s case, the SP Metadata URL needs to be set by the organization when configuring your application in their PingOne instance.
Specifically, the SP Metadata URL will need to be set on the SAML Configuration page:
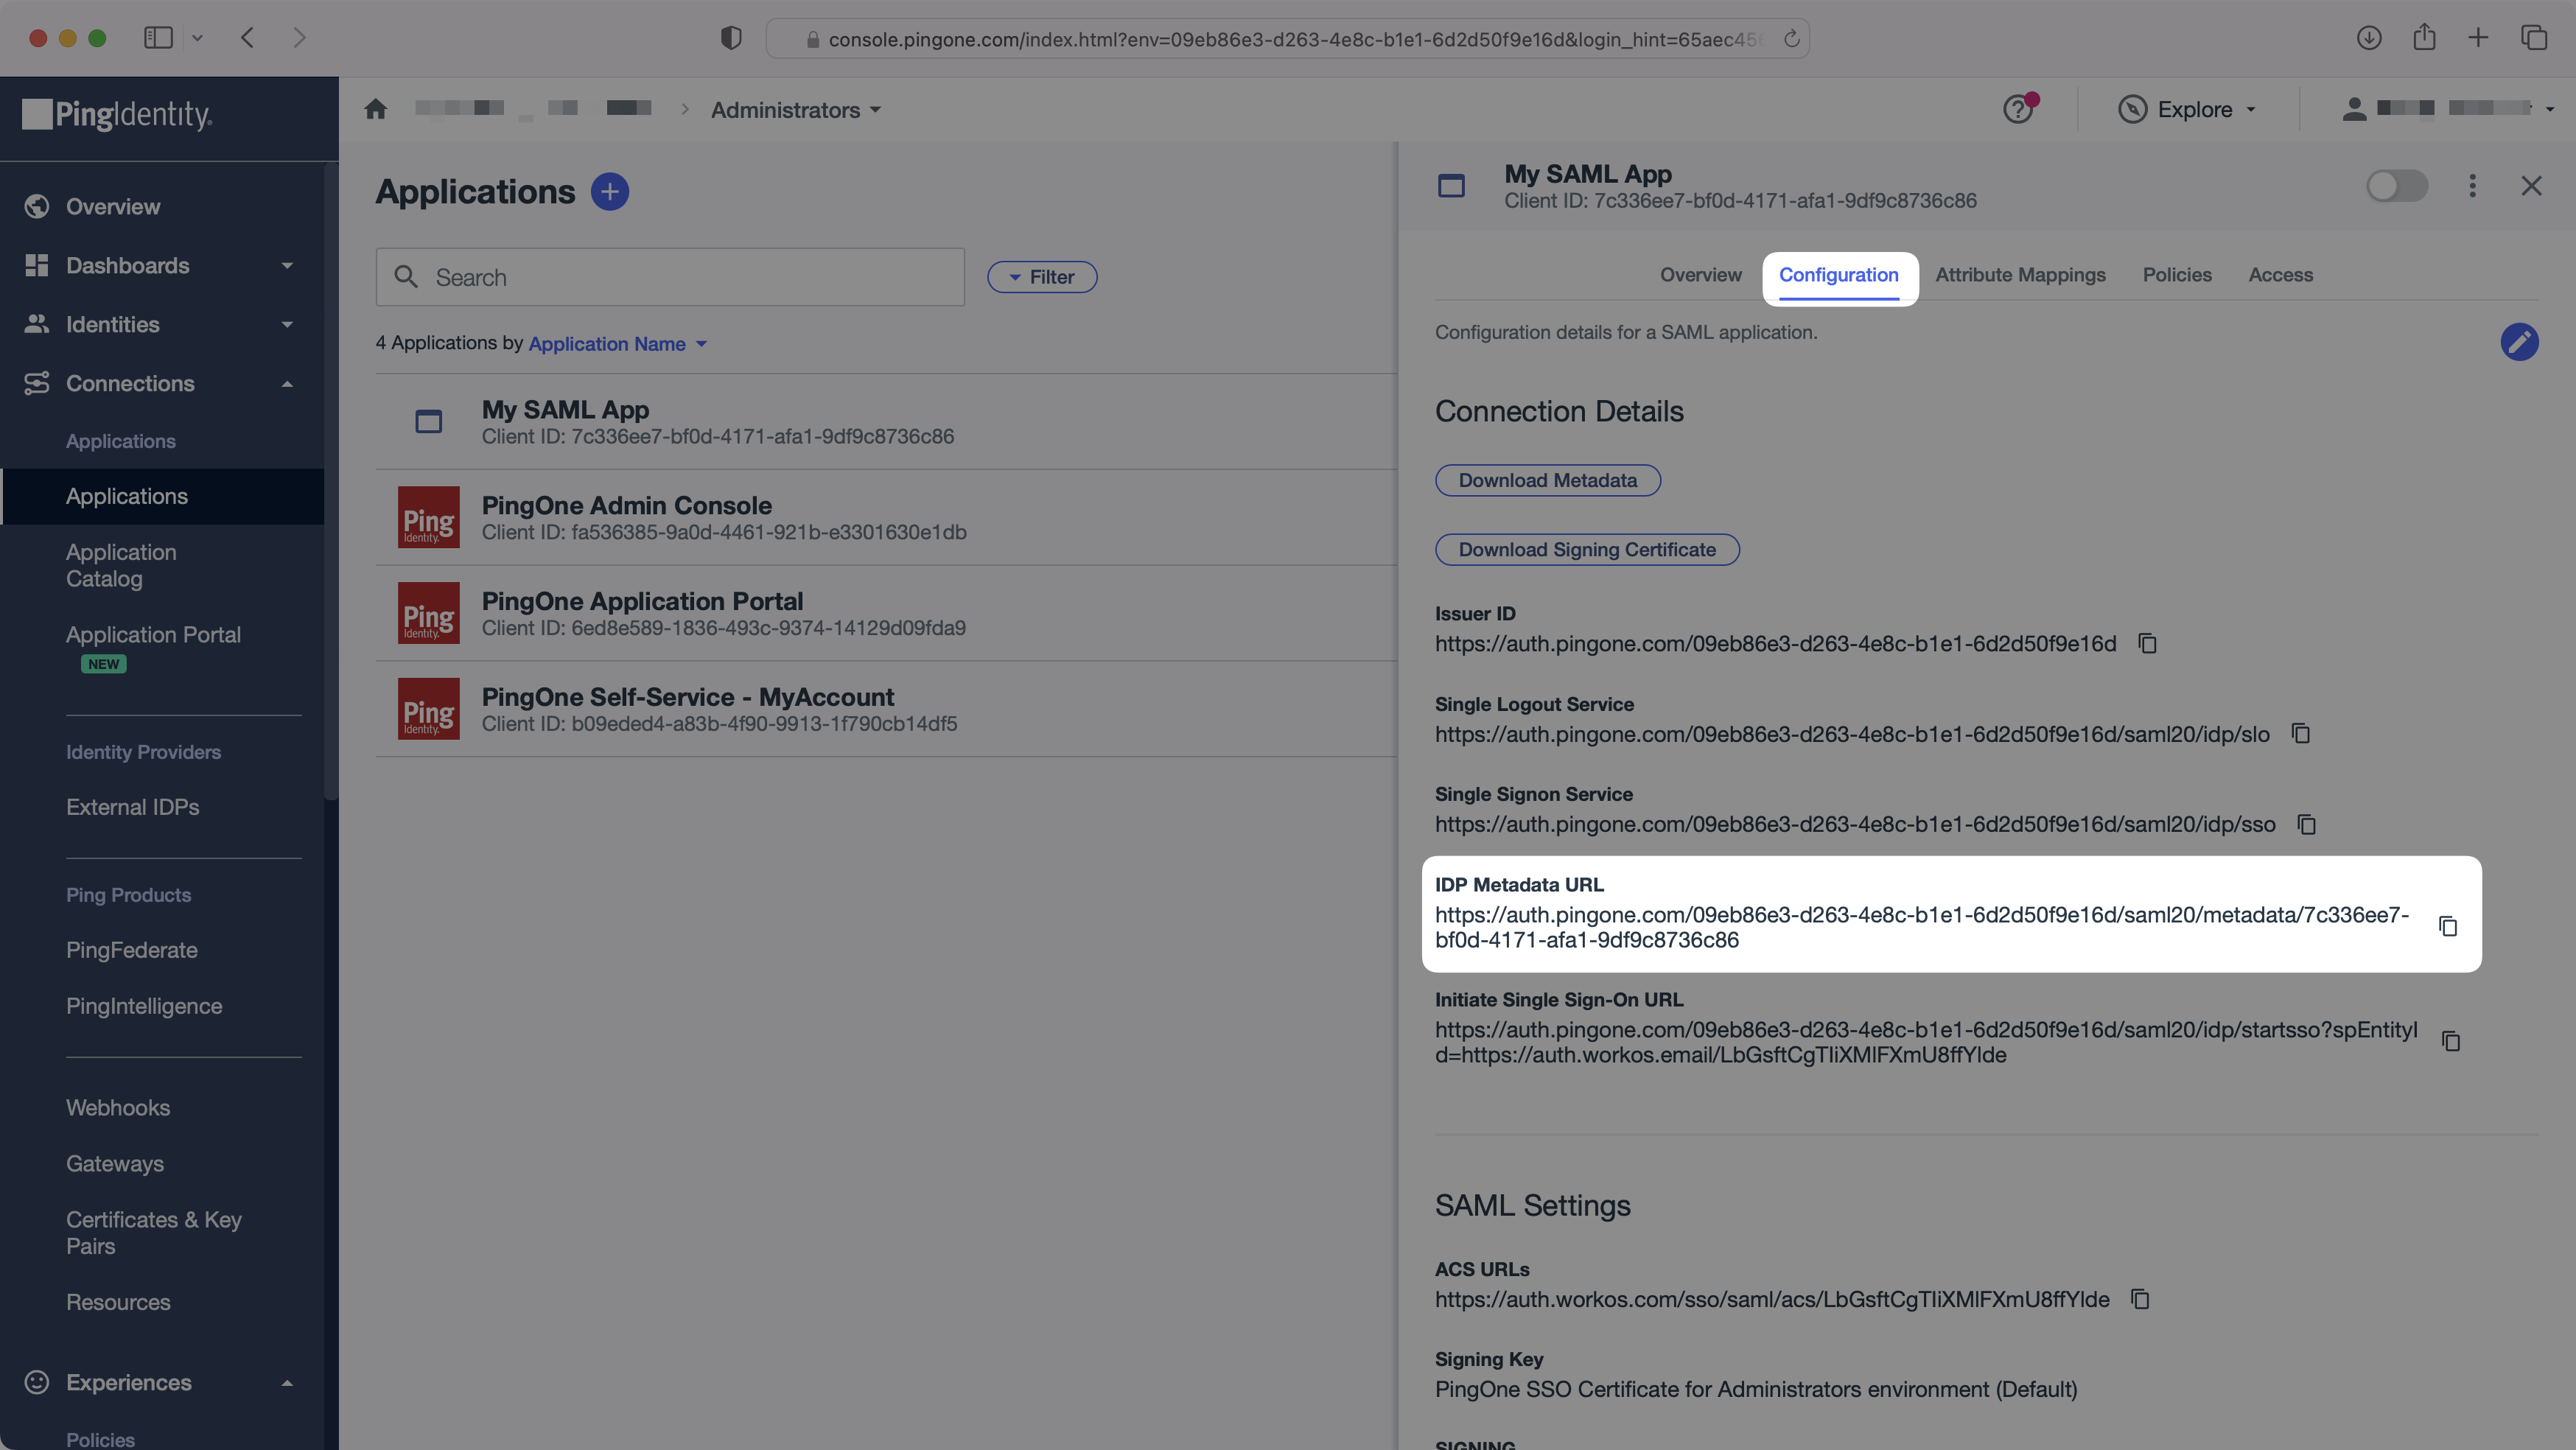
Next, provide the PingOne IdP Metadata URL.
Normally, this information will come from the organization’s IT Management team when they set up your application’s SAML 2.0 configuration in their PingOne admin dashboard. However, should that not be the case during your setup, here’s how to obtain them:
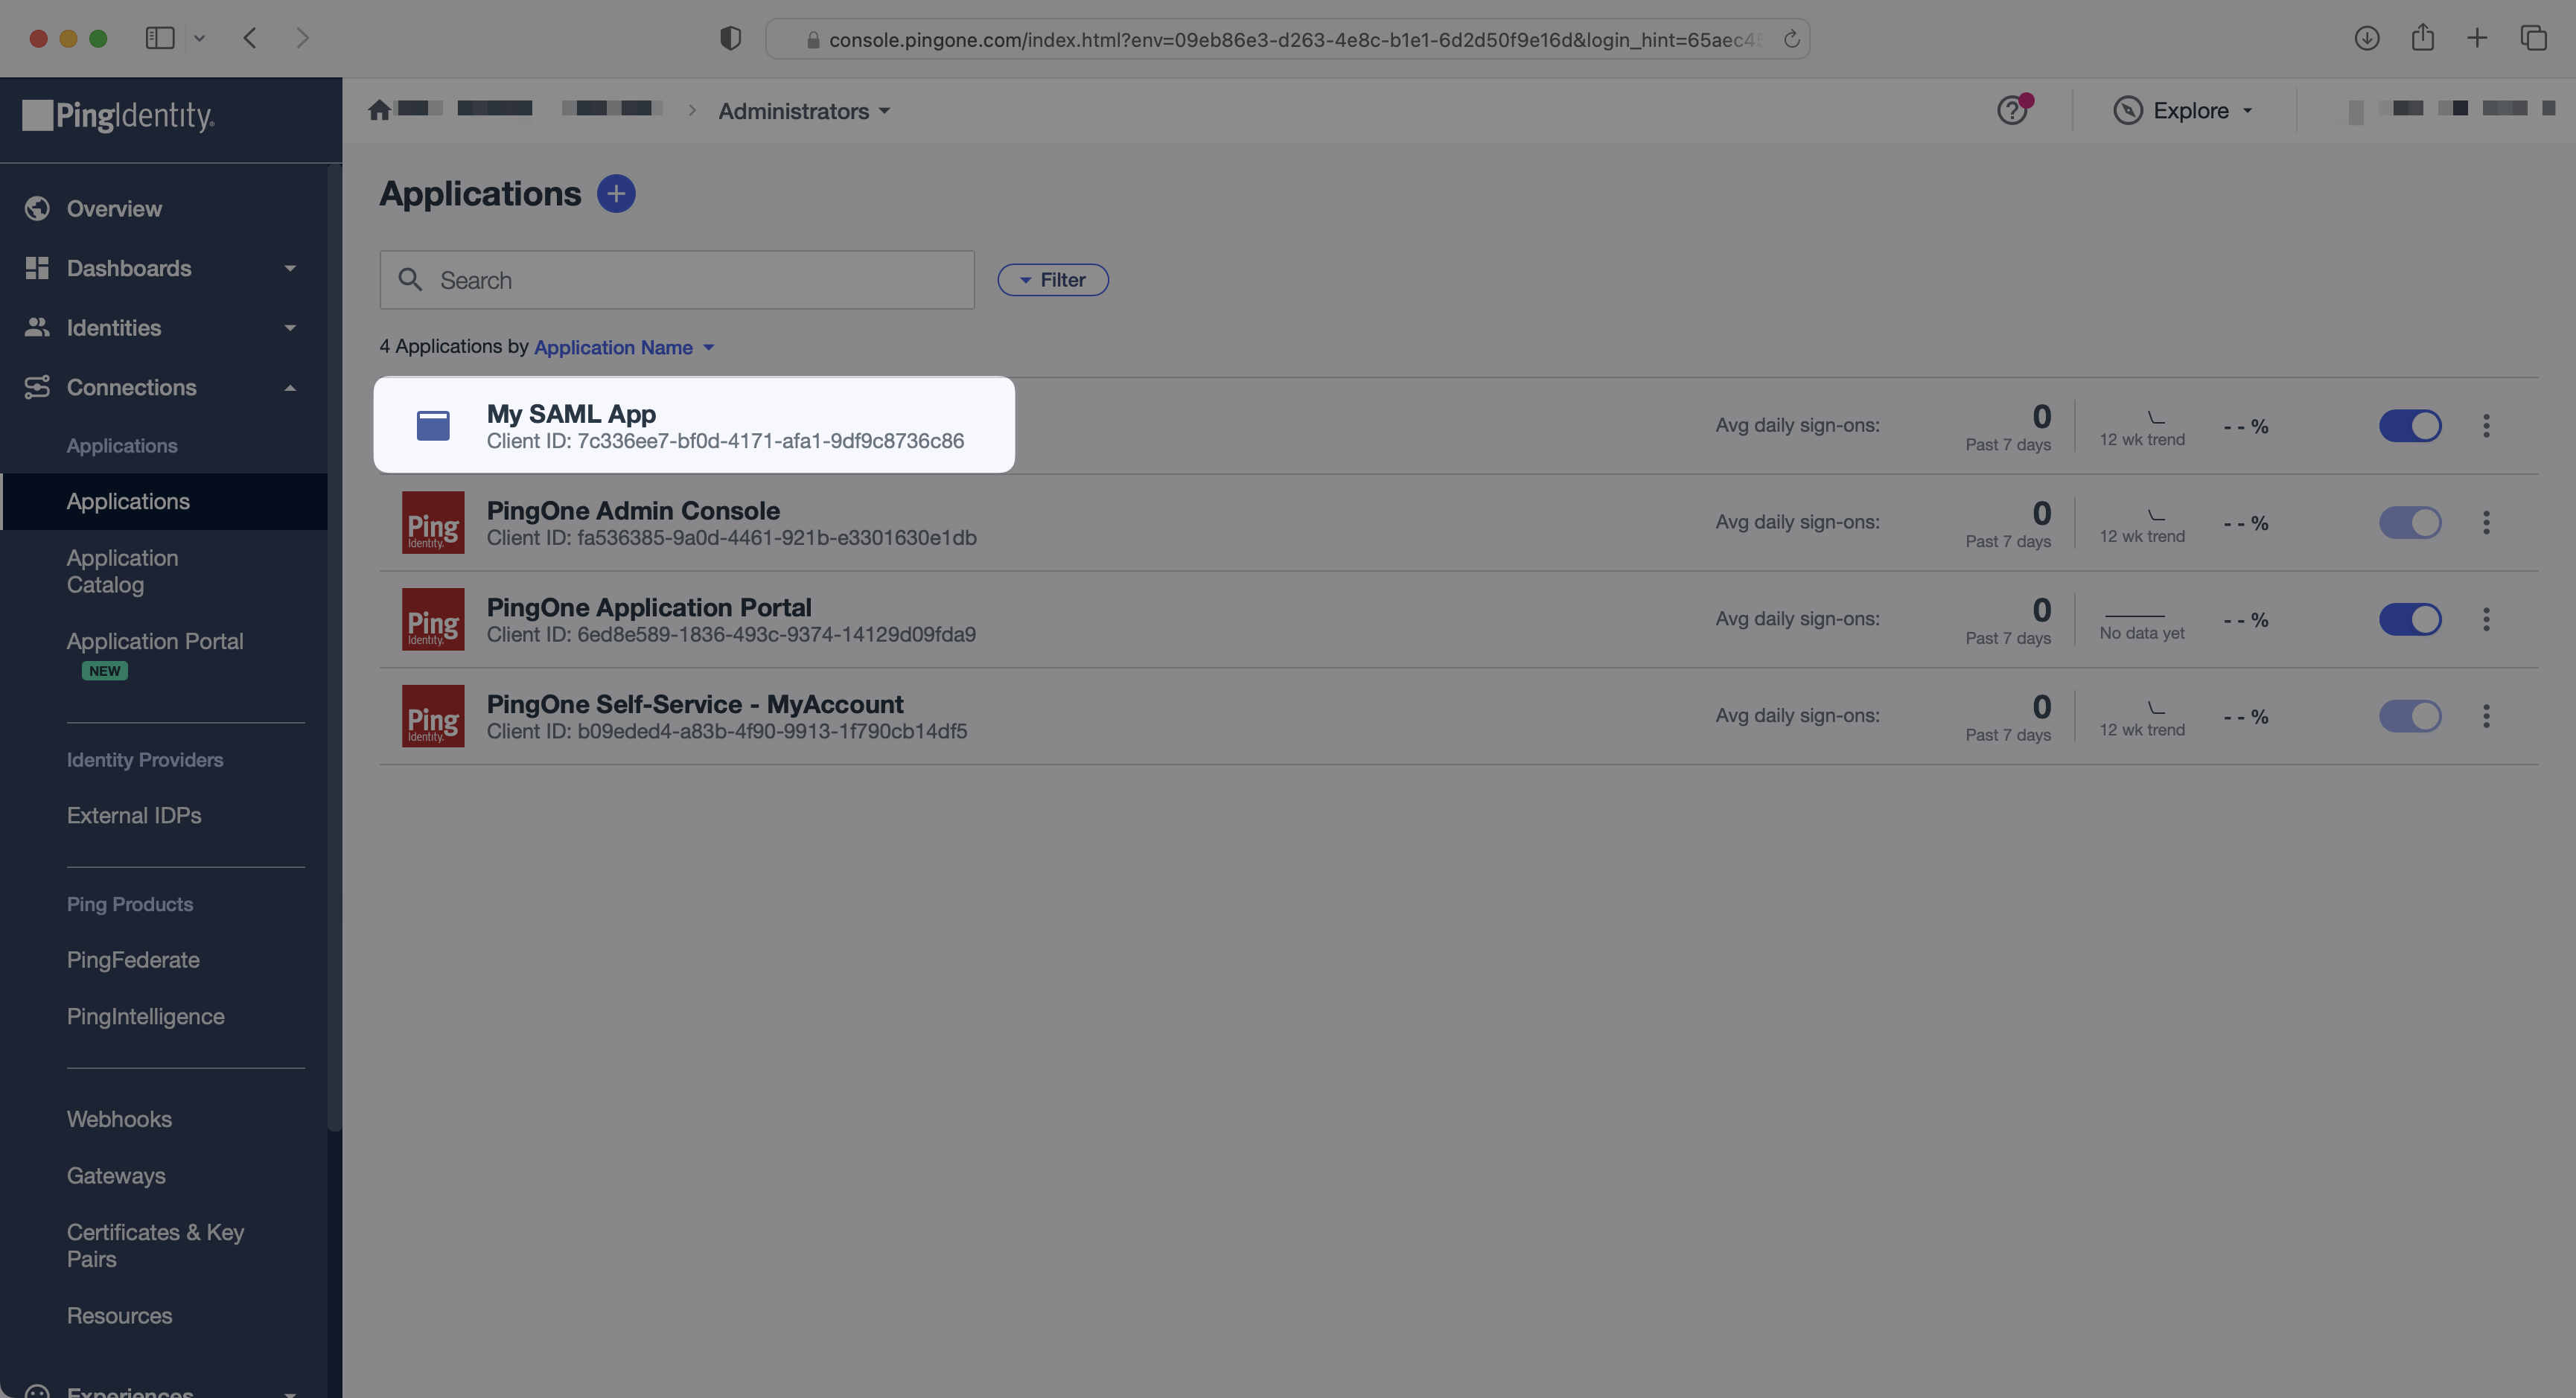
In the PingOne Admin Console, select “Applications” (under “Connections”) in the side menu. Then, select your application.
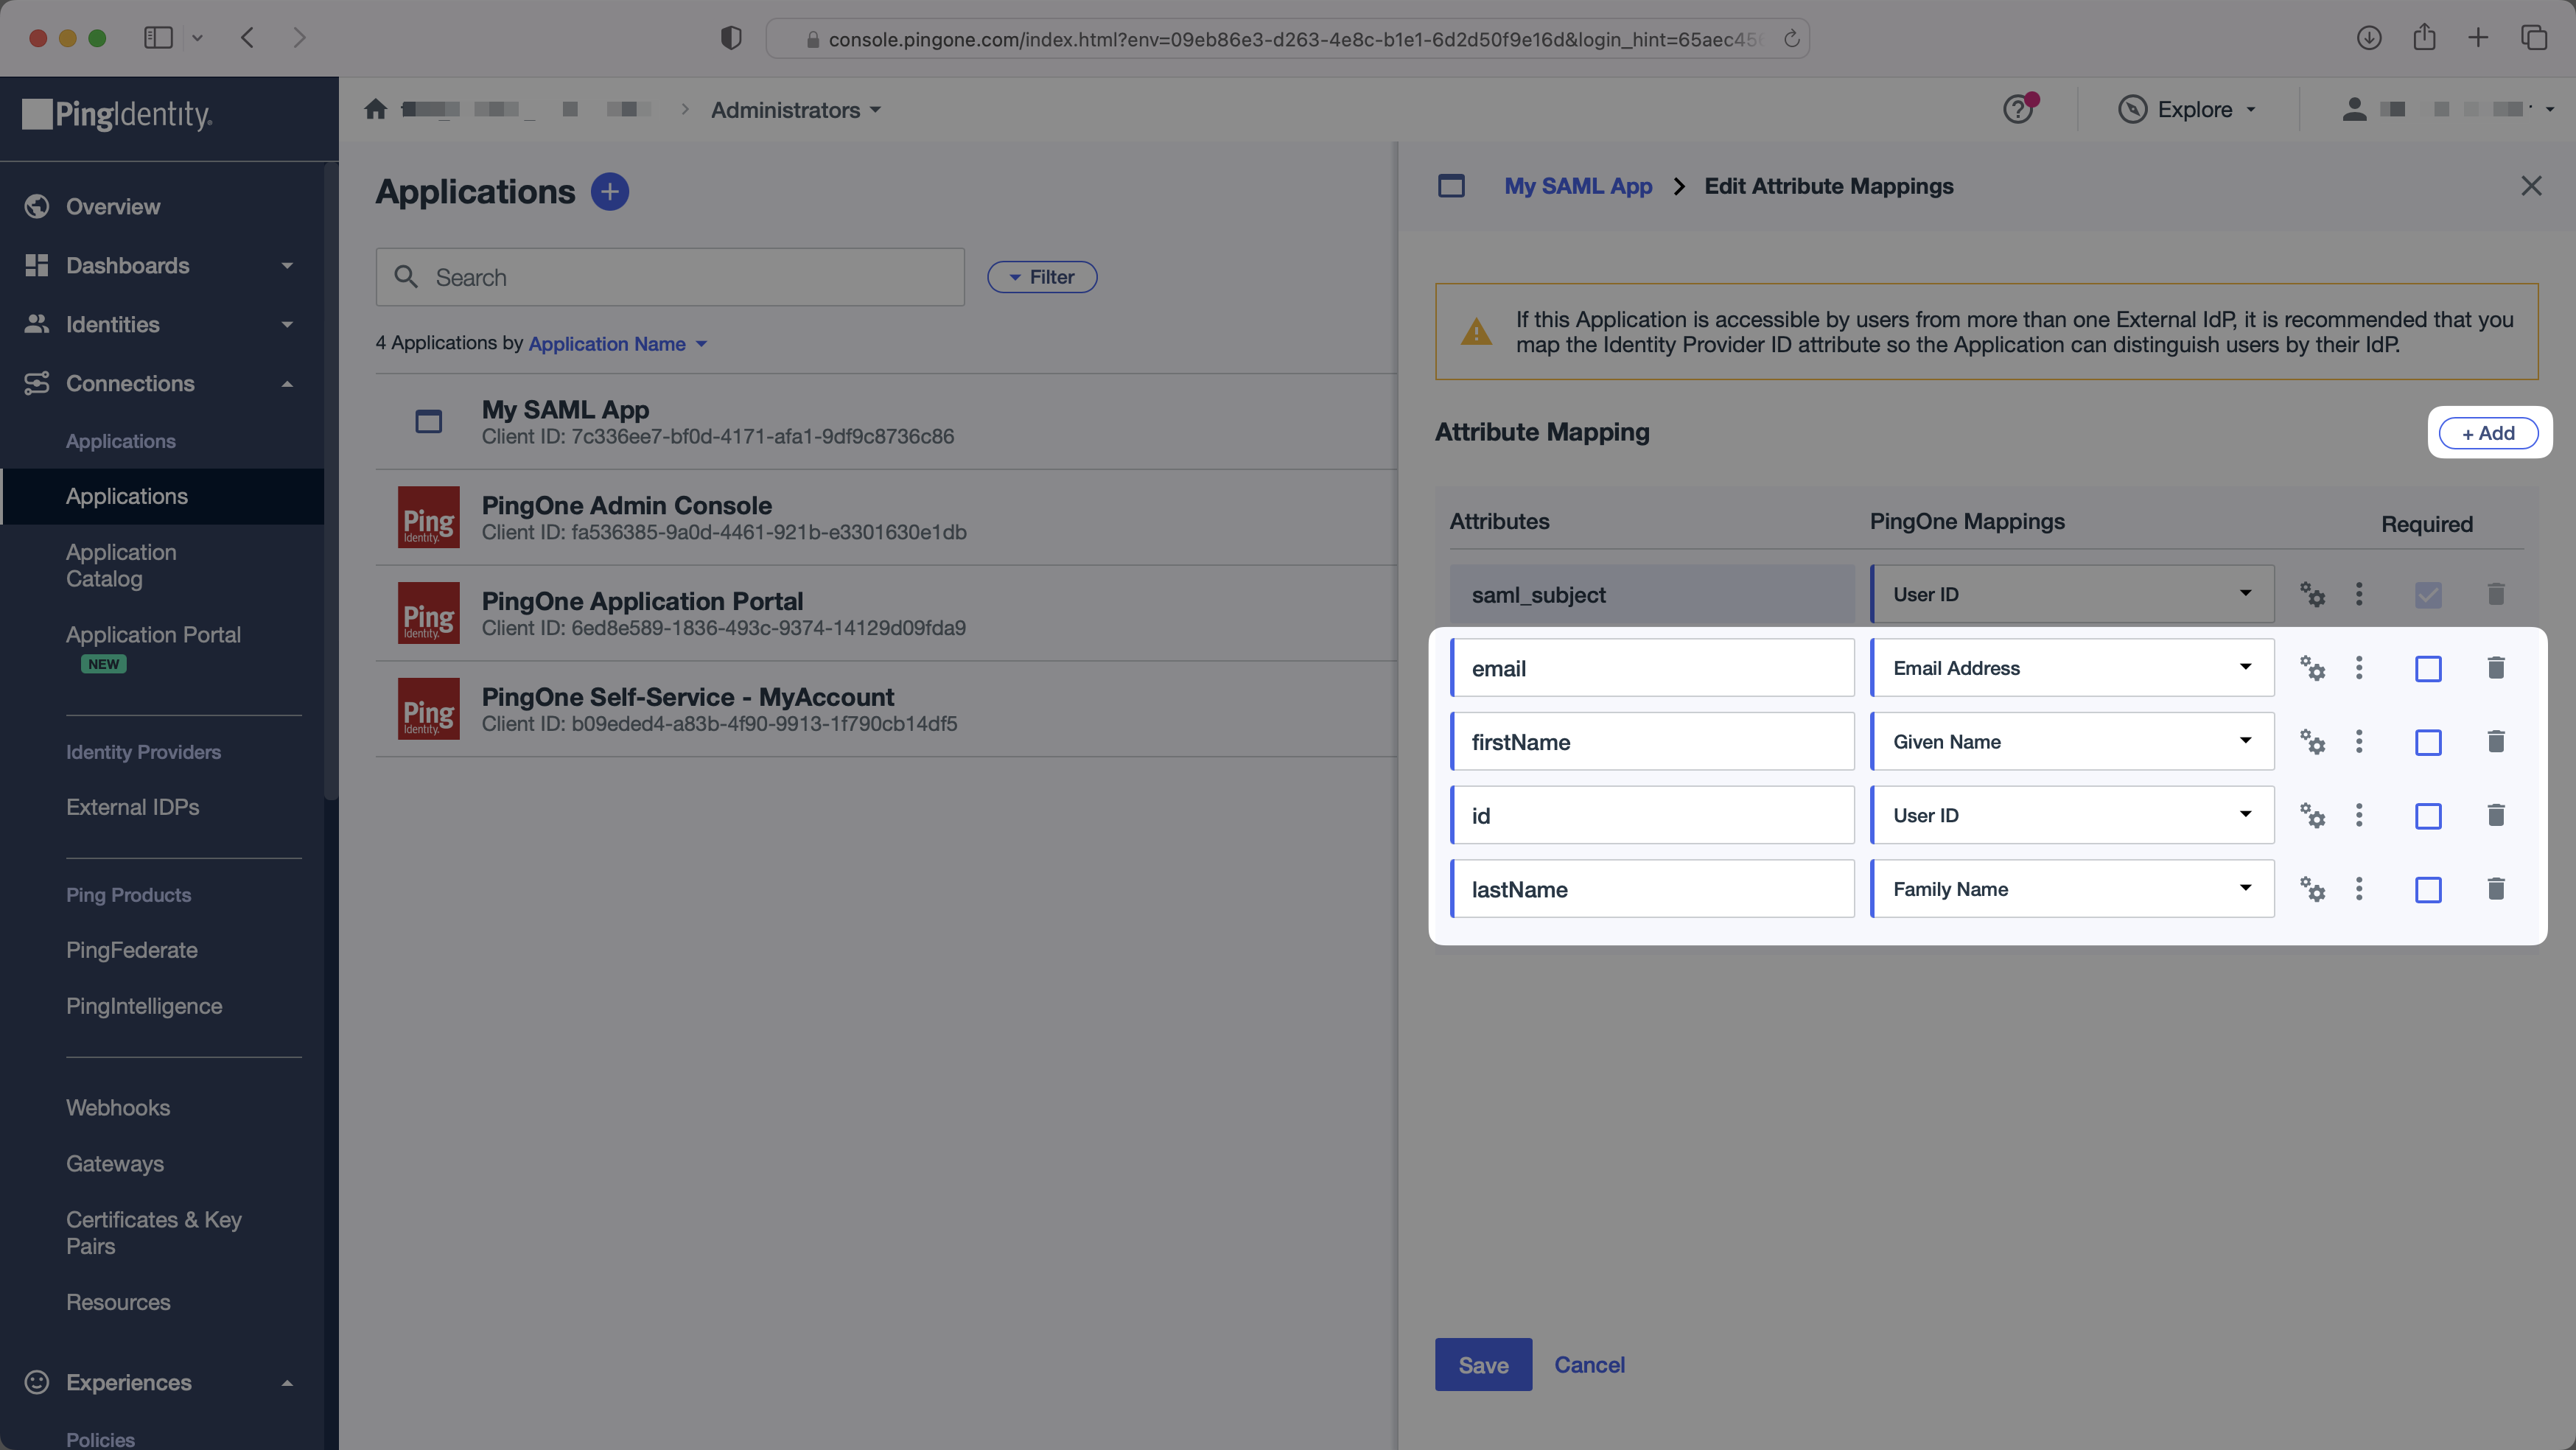
In the “Attribute Mapping” section of the PingOne SAML app, add the following field-value parameter pairs:
email→Email AddressfirstName→Given Nameid→User IDlastName→Family Name
With identity provider role assignment, users can receive roles within your application based on their group memberships. To return this information in the attribute statement, follow the guidance below.
Select the + Add button once. To return the names of all groups a user is a member of, add “groups” in the “Attributes” column mapped to the “Group Names” PingOne attribute. Click “Save”.
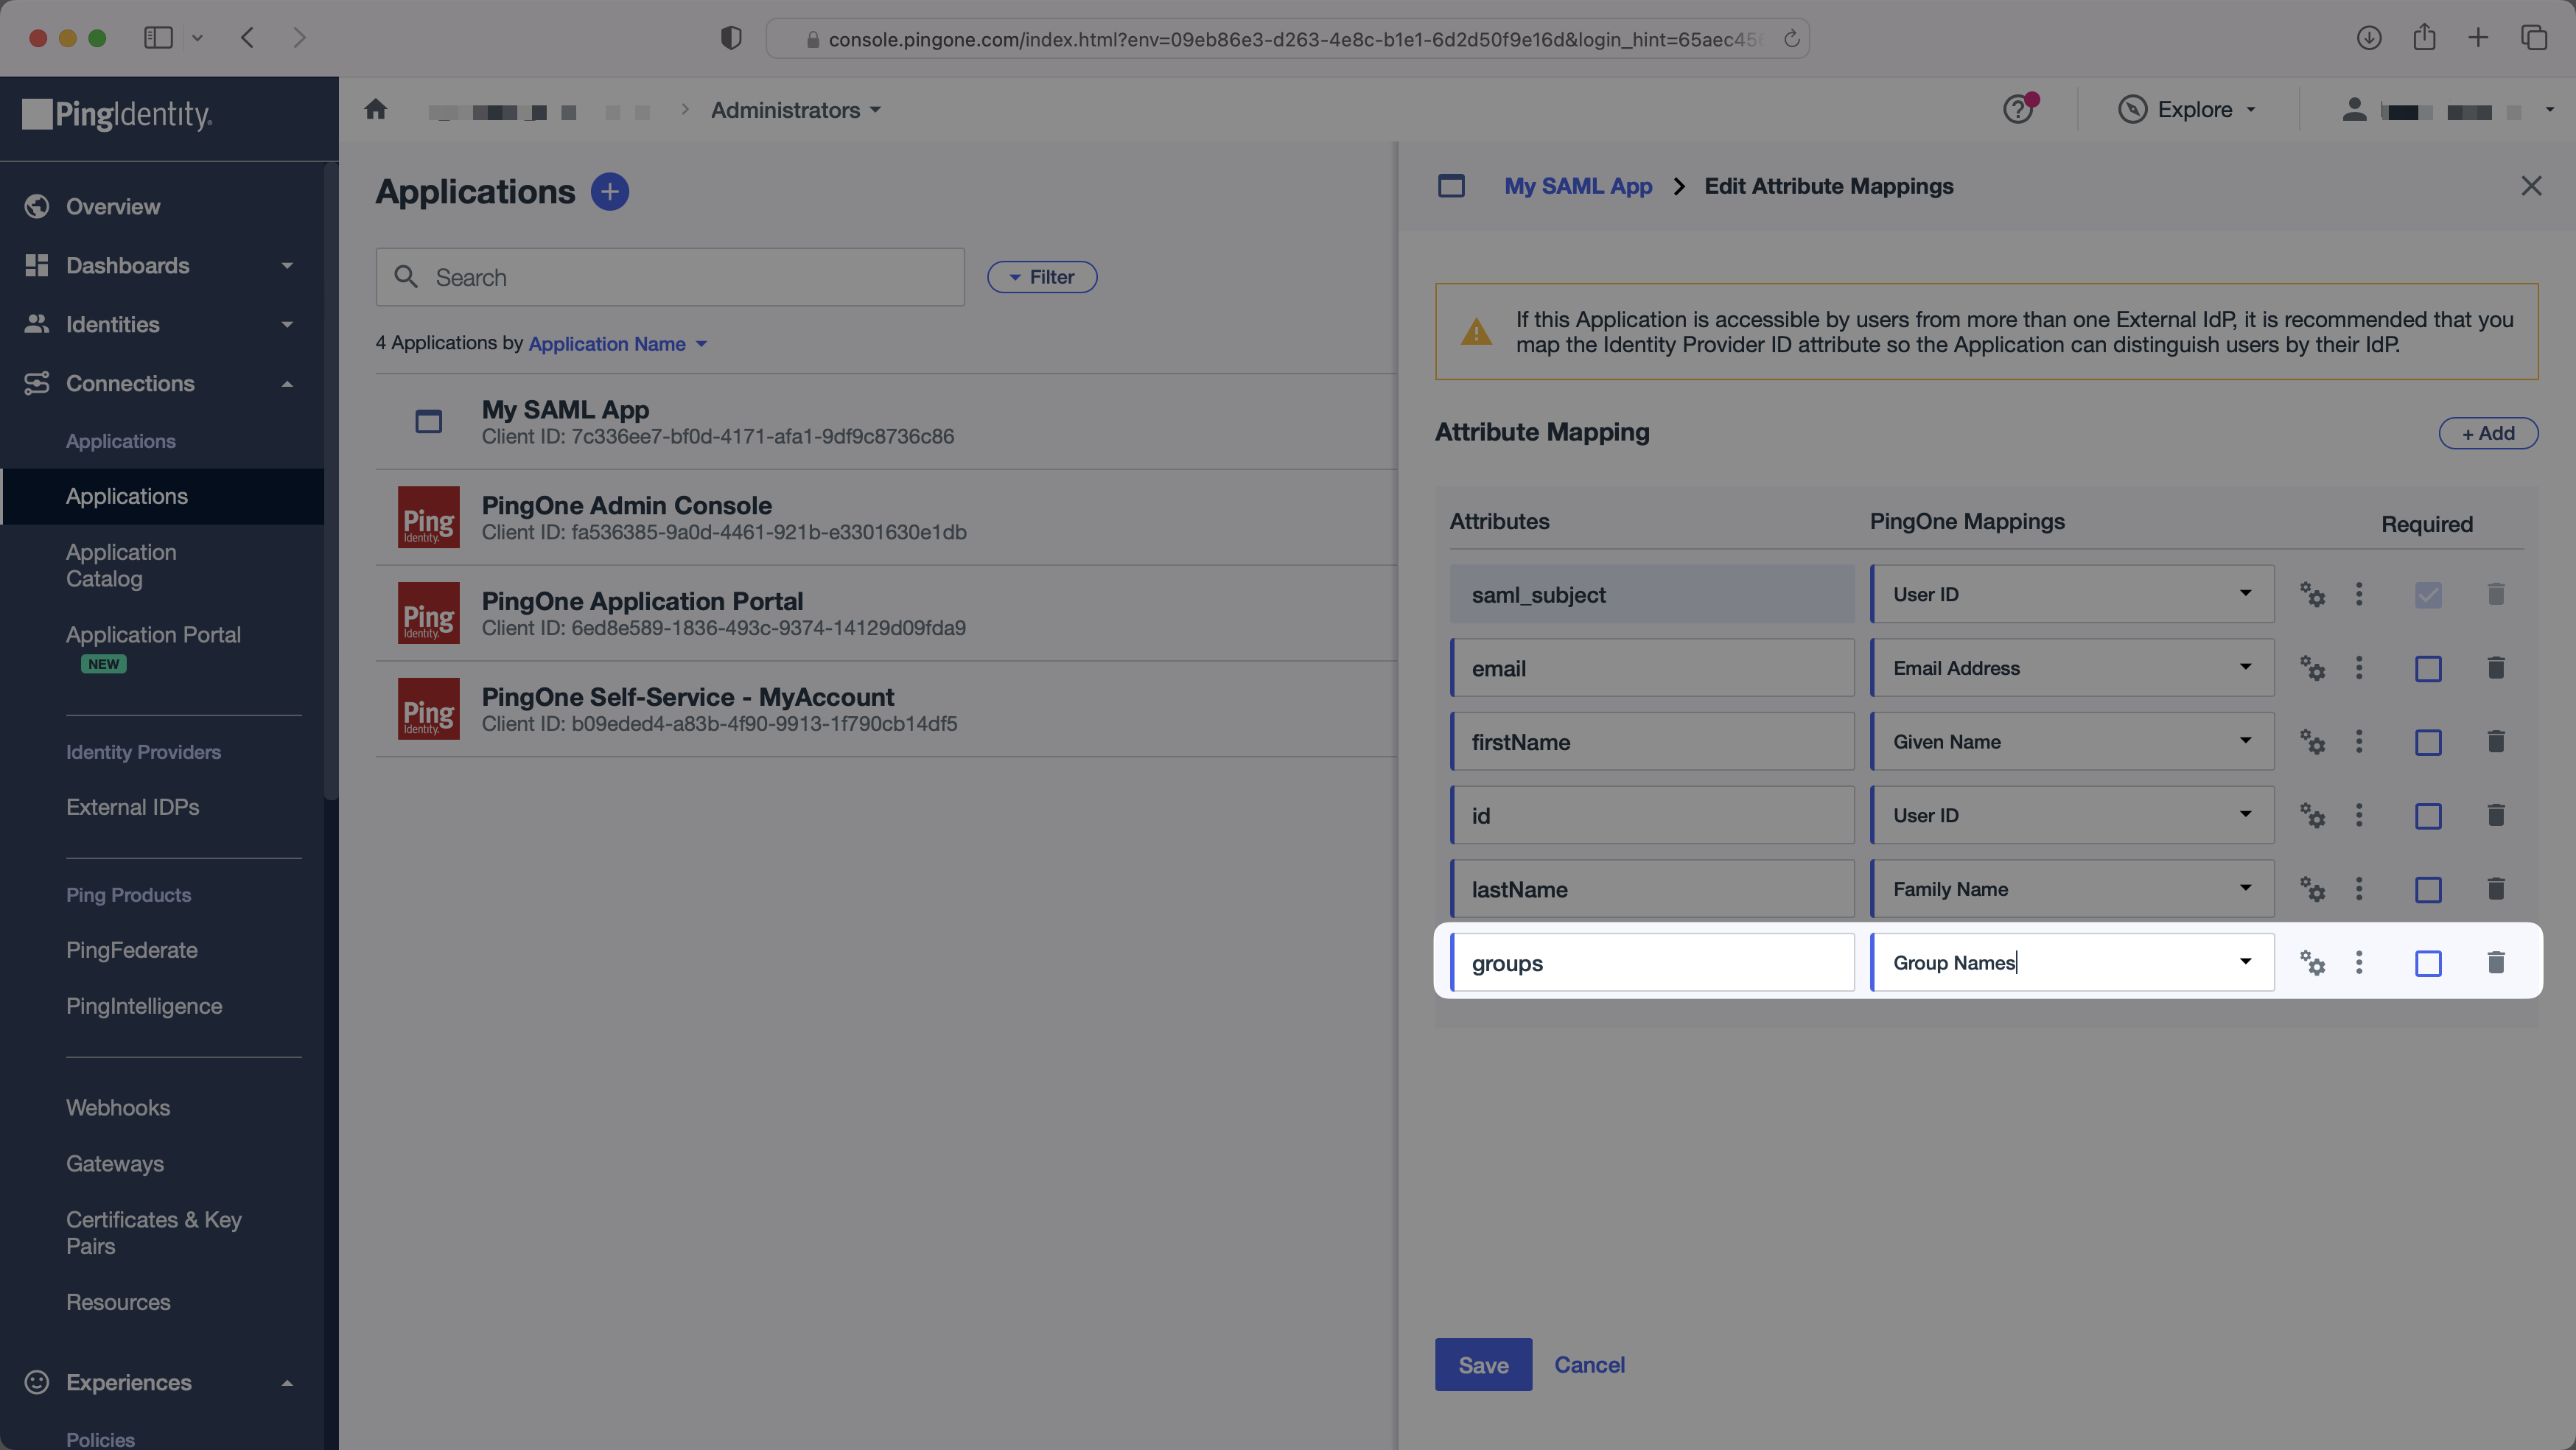
Add a new groups attribute mapped to the “Group Names” PingOne attribute.
Finish role assignment set-up by navigating to the SSO connection page in the Organization section of the WorkOS Dashboard. Create SSO groups by referencing the group IdP ID. Then, assign roles to these SSO groups so group members are automatically granted roles within your application.
In the “Configuration” tab, copy the “IdP Metadata URL”. You’ll need this in the next step. Enable the SAML app to allow users to authenticate.