VMware
Learn how to configure a connection to VMware via SAML.
Each SSO Identity Provider requires specific information to create and configure a new Connection. Often, the information required to create a Connection will differ by Identity Provider.
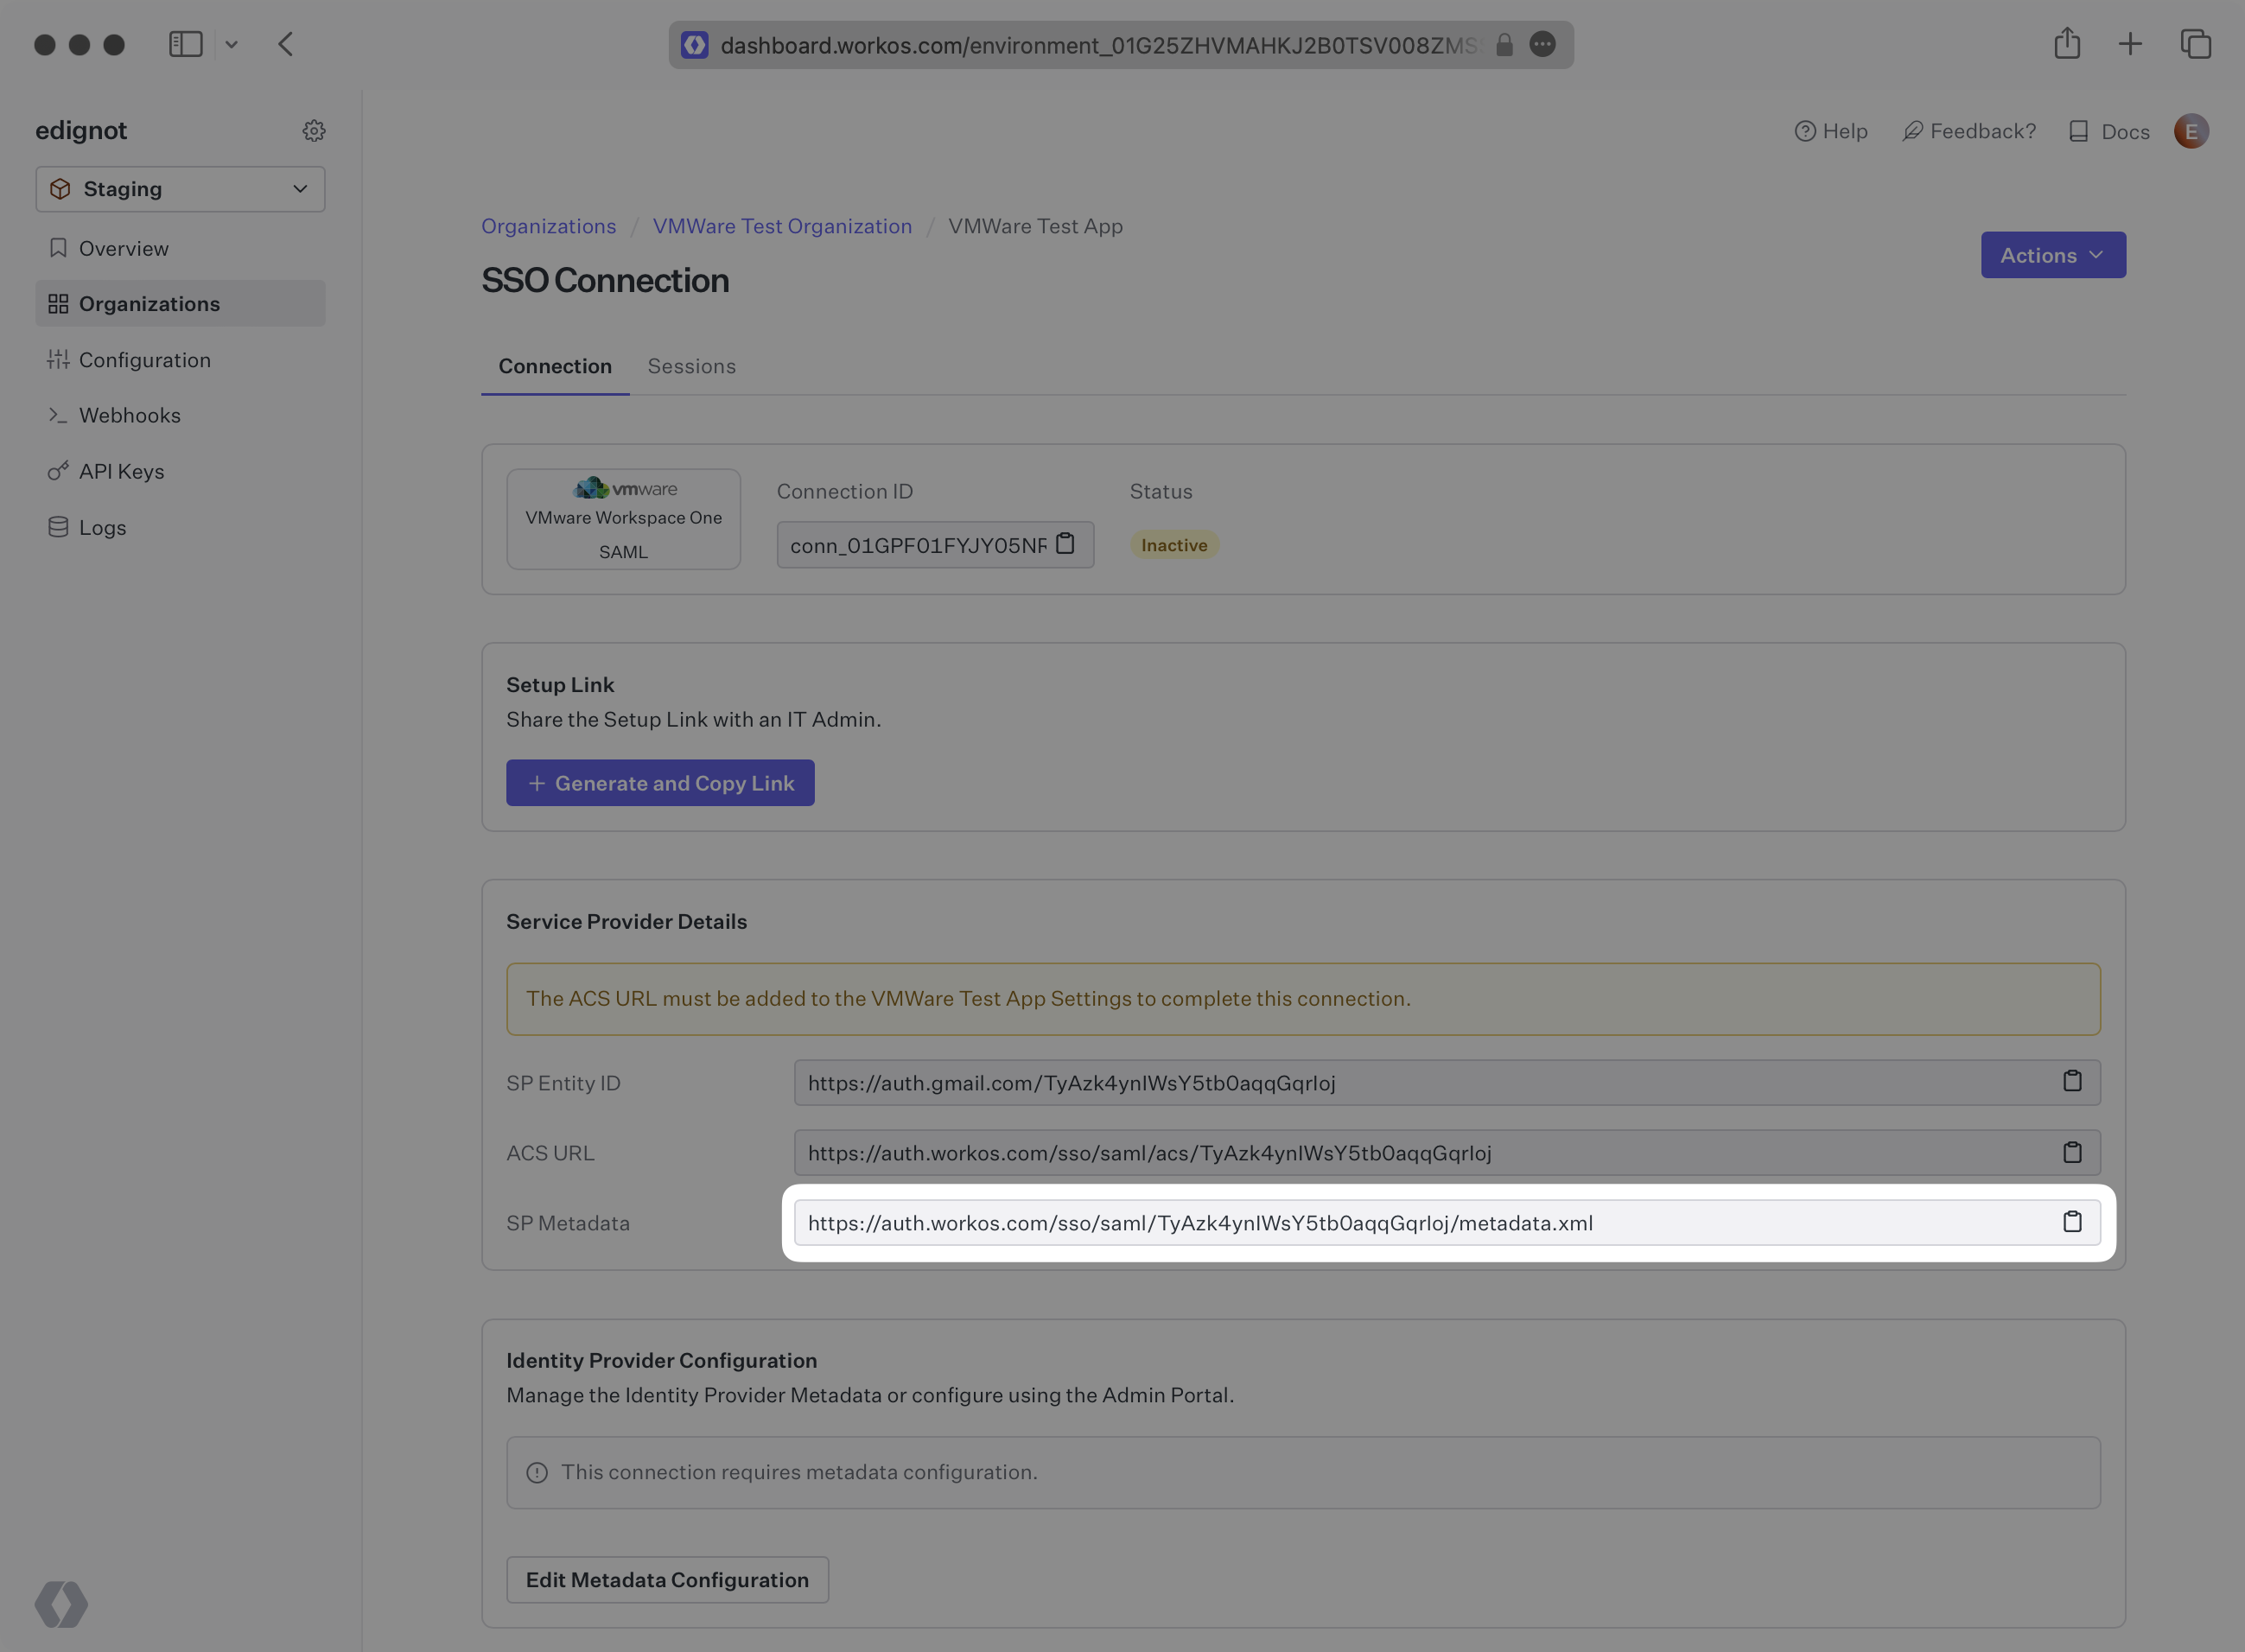
WorkOS provides the SP Metadata link. It’s readily available in your Connection Settings in the WorkOS Dashboard.
Next, you will provide the Metadata URL from VMware.
Normally, this information will come from the organization’s IT Management team when they set up your application’s SAML 2.0 configuration in their VMware admin dashboard. But, should that not be the case during your setup, here’s how to obtain it.
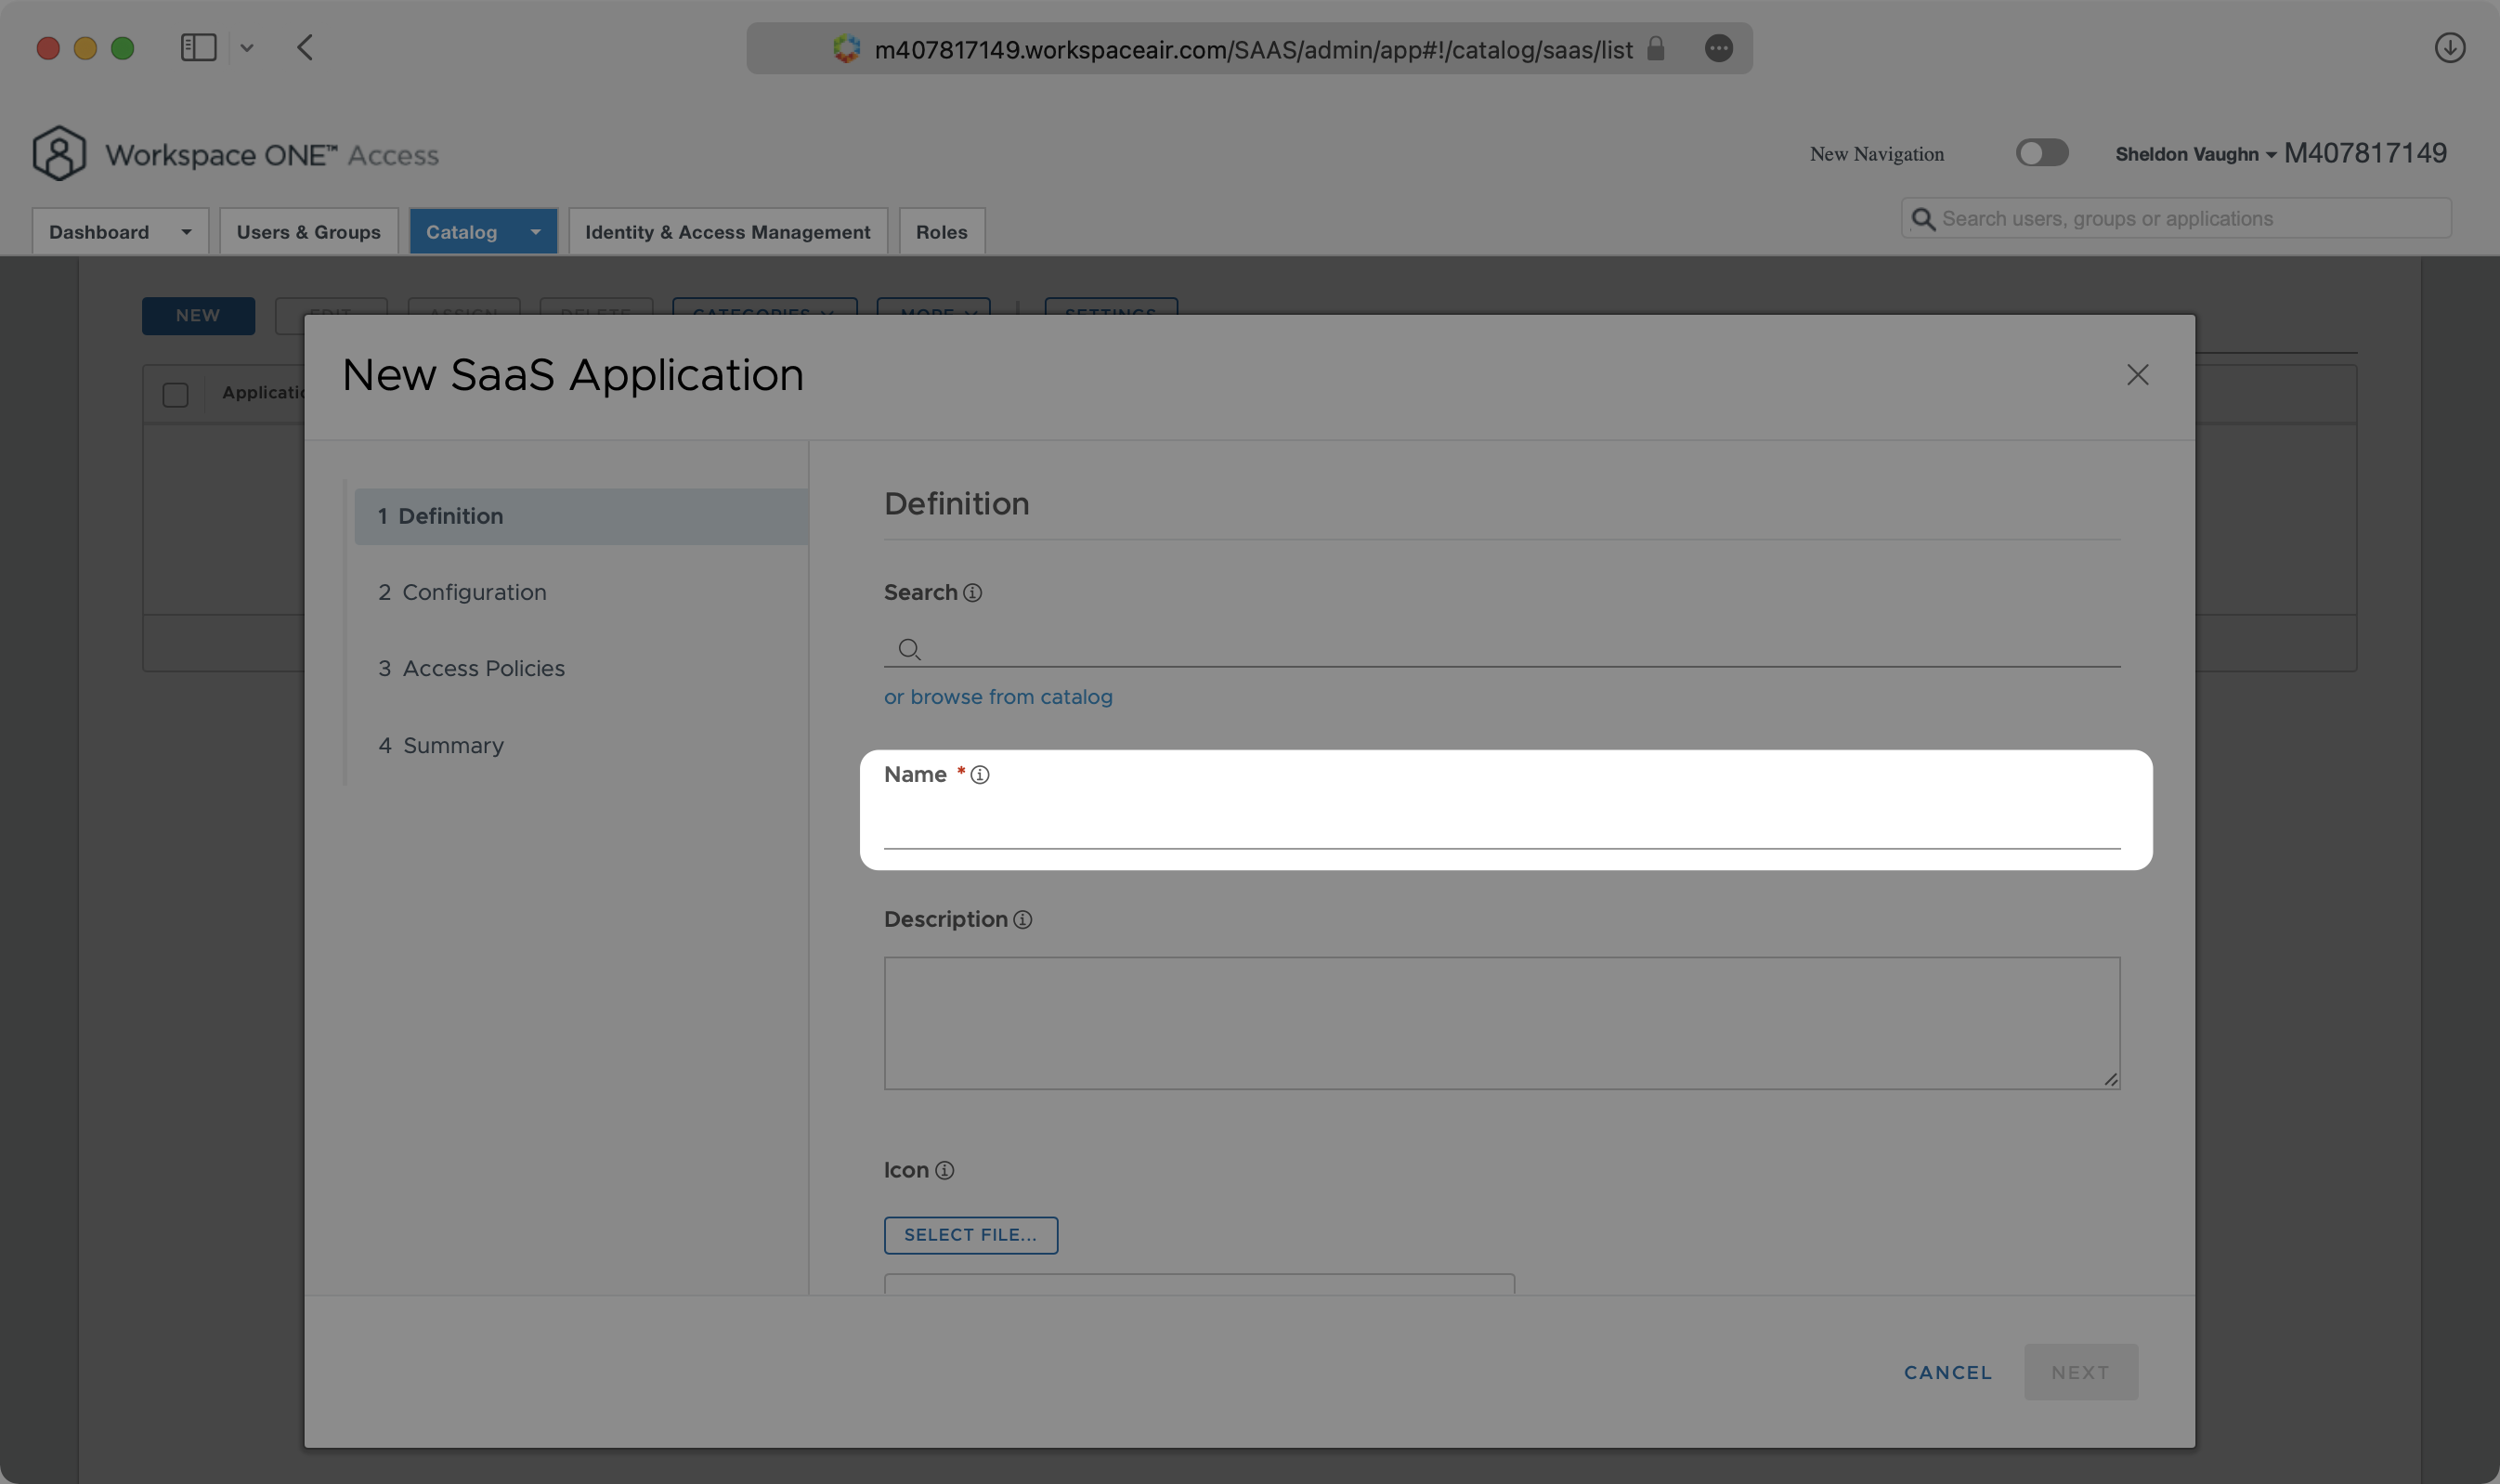
In your Workspace ONE Catalog, click “New”. Give your application a descriptive name.
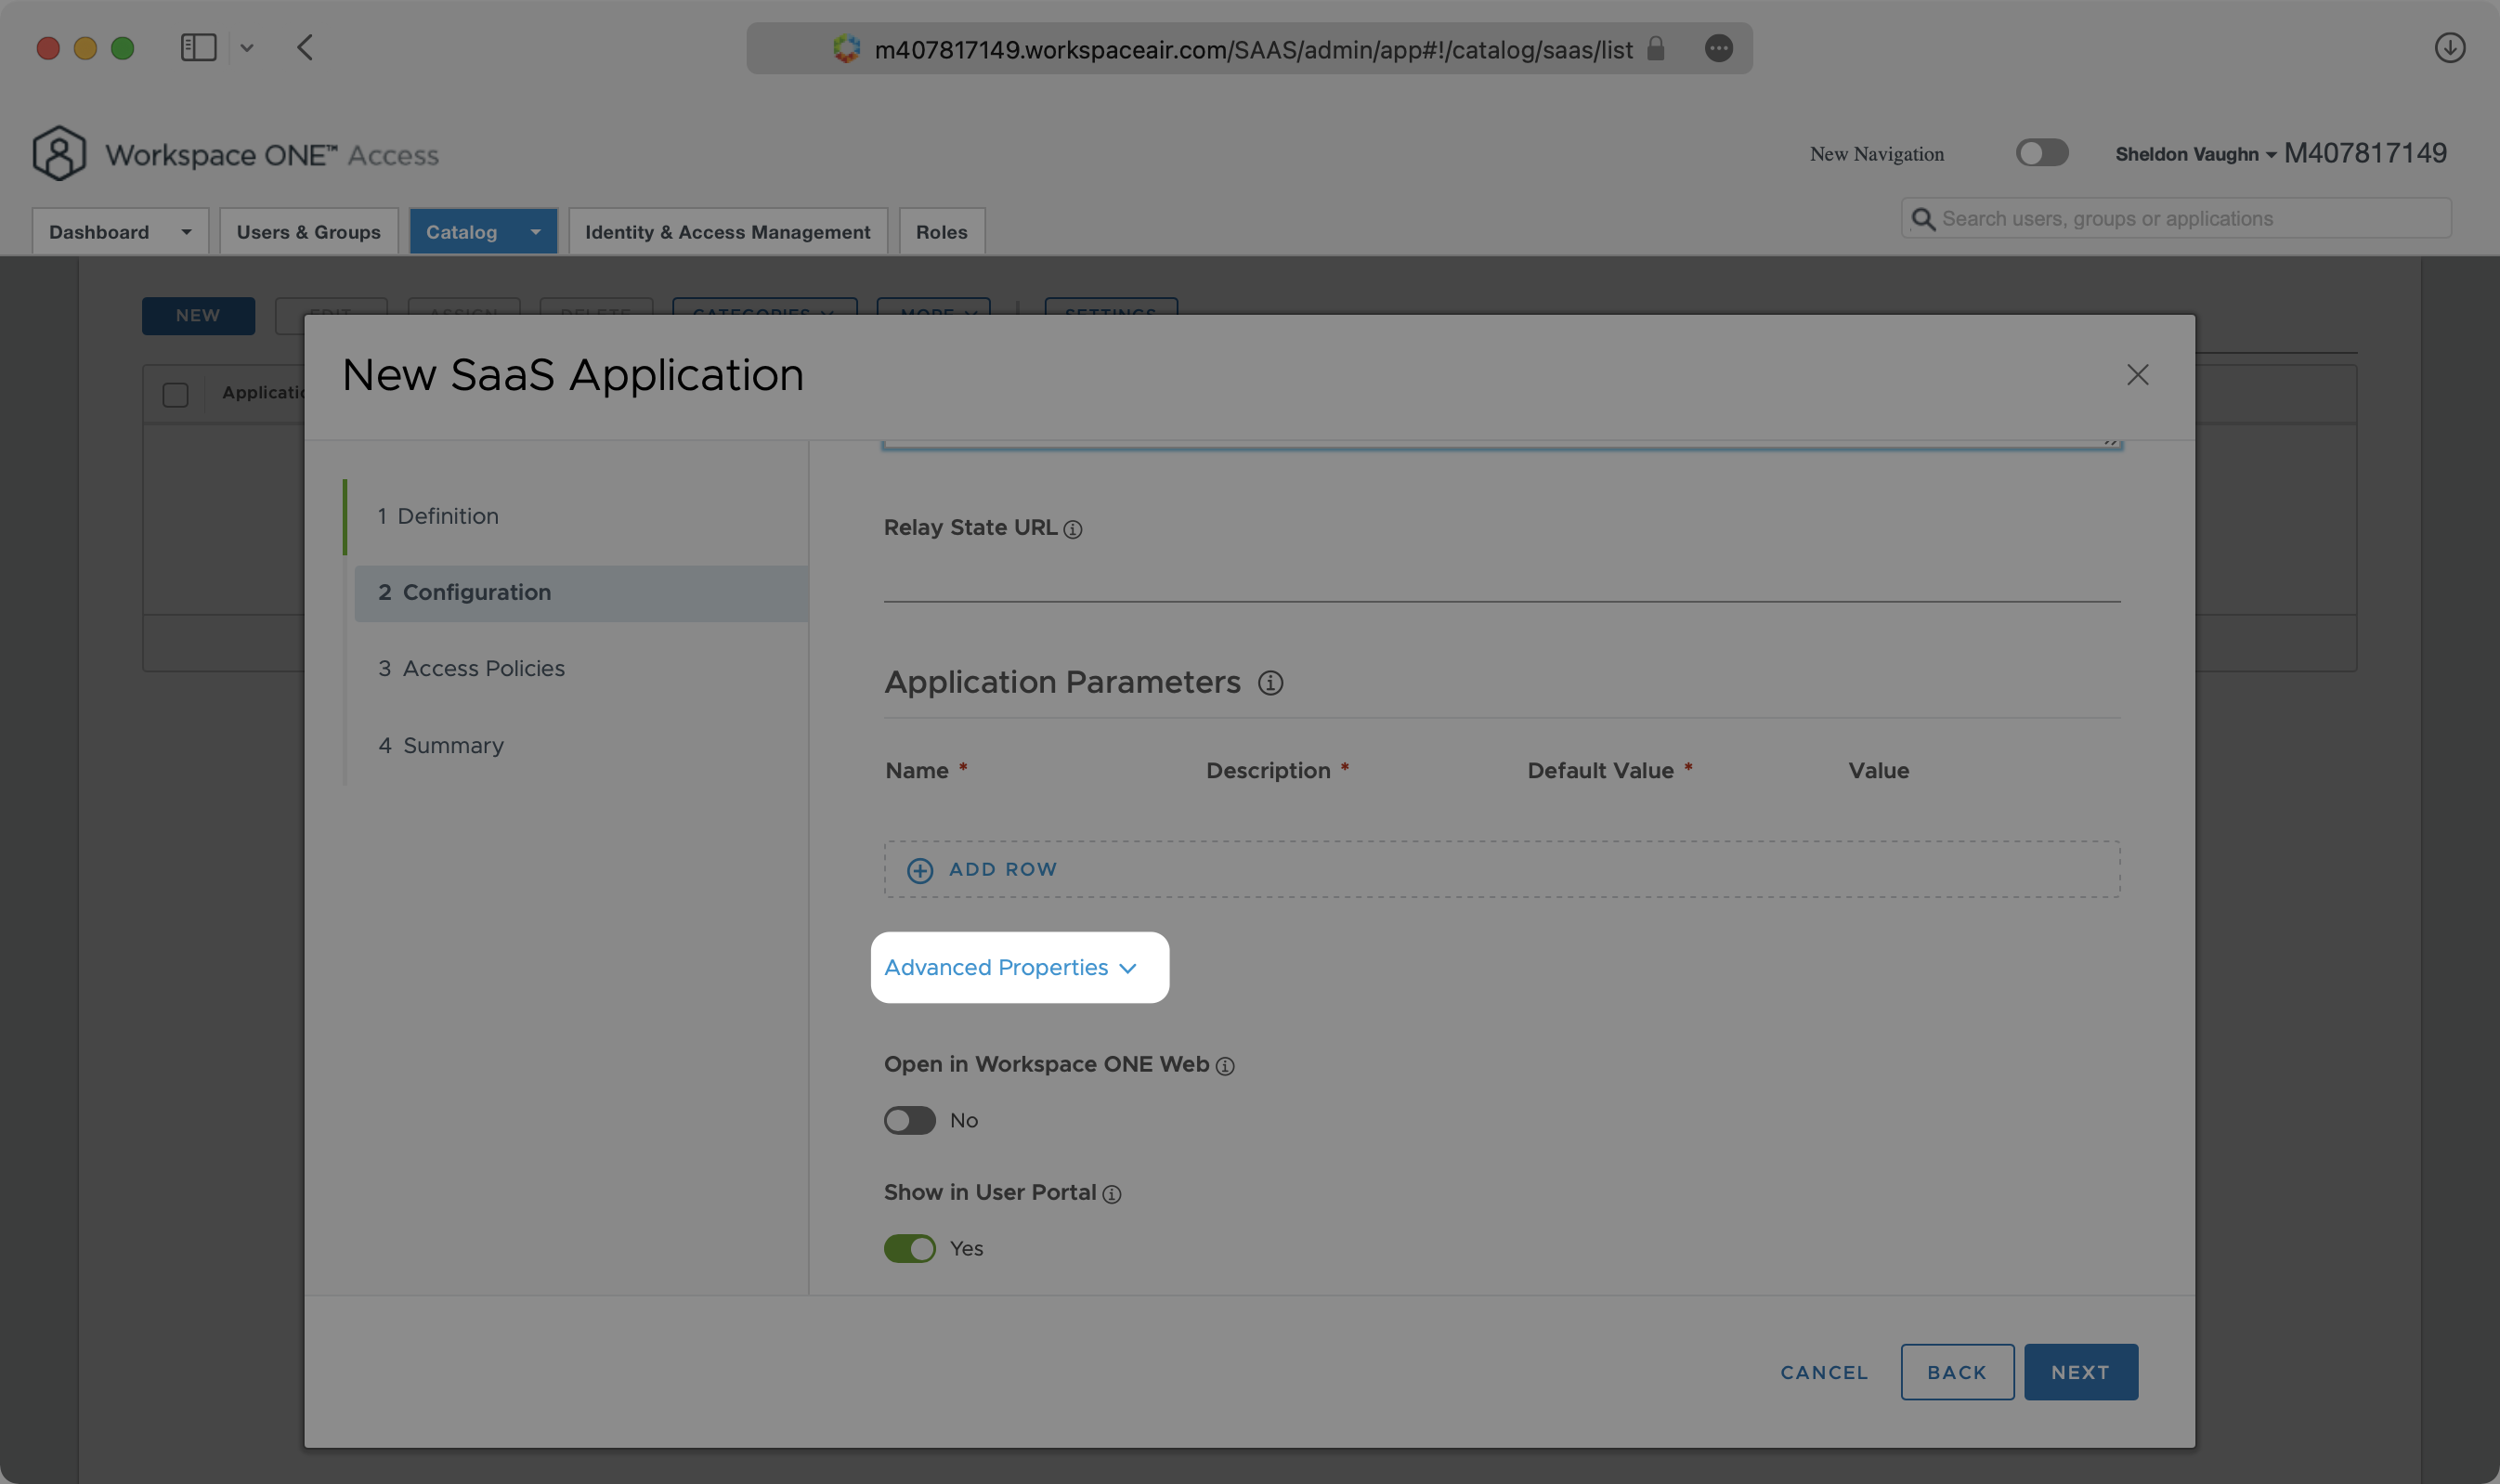
Click the “Configuration” tab from the left sidebar.
Copy the SP Metadata Link from your VMware connection in the WorkOS dashboard and paste it in the URL/XML field under Configuration in Workspace One.

Continue scrolling and expand “Advanced Properties”.
Enable “Sign Assertion” and “Include Assertion Signature”.

Continue scrolling until “Custom Attribute Mapping”.
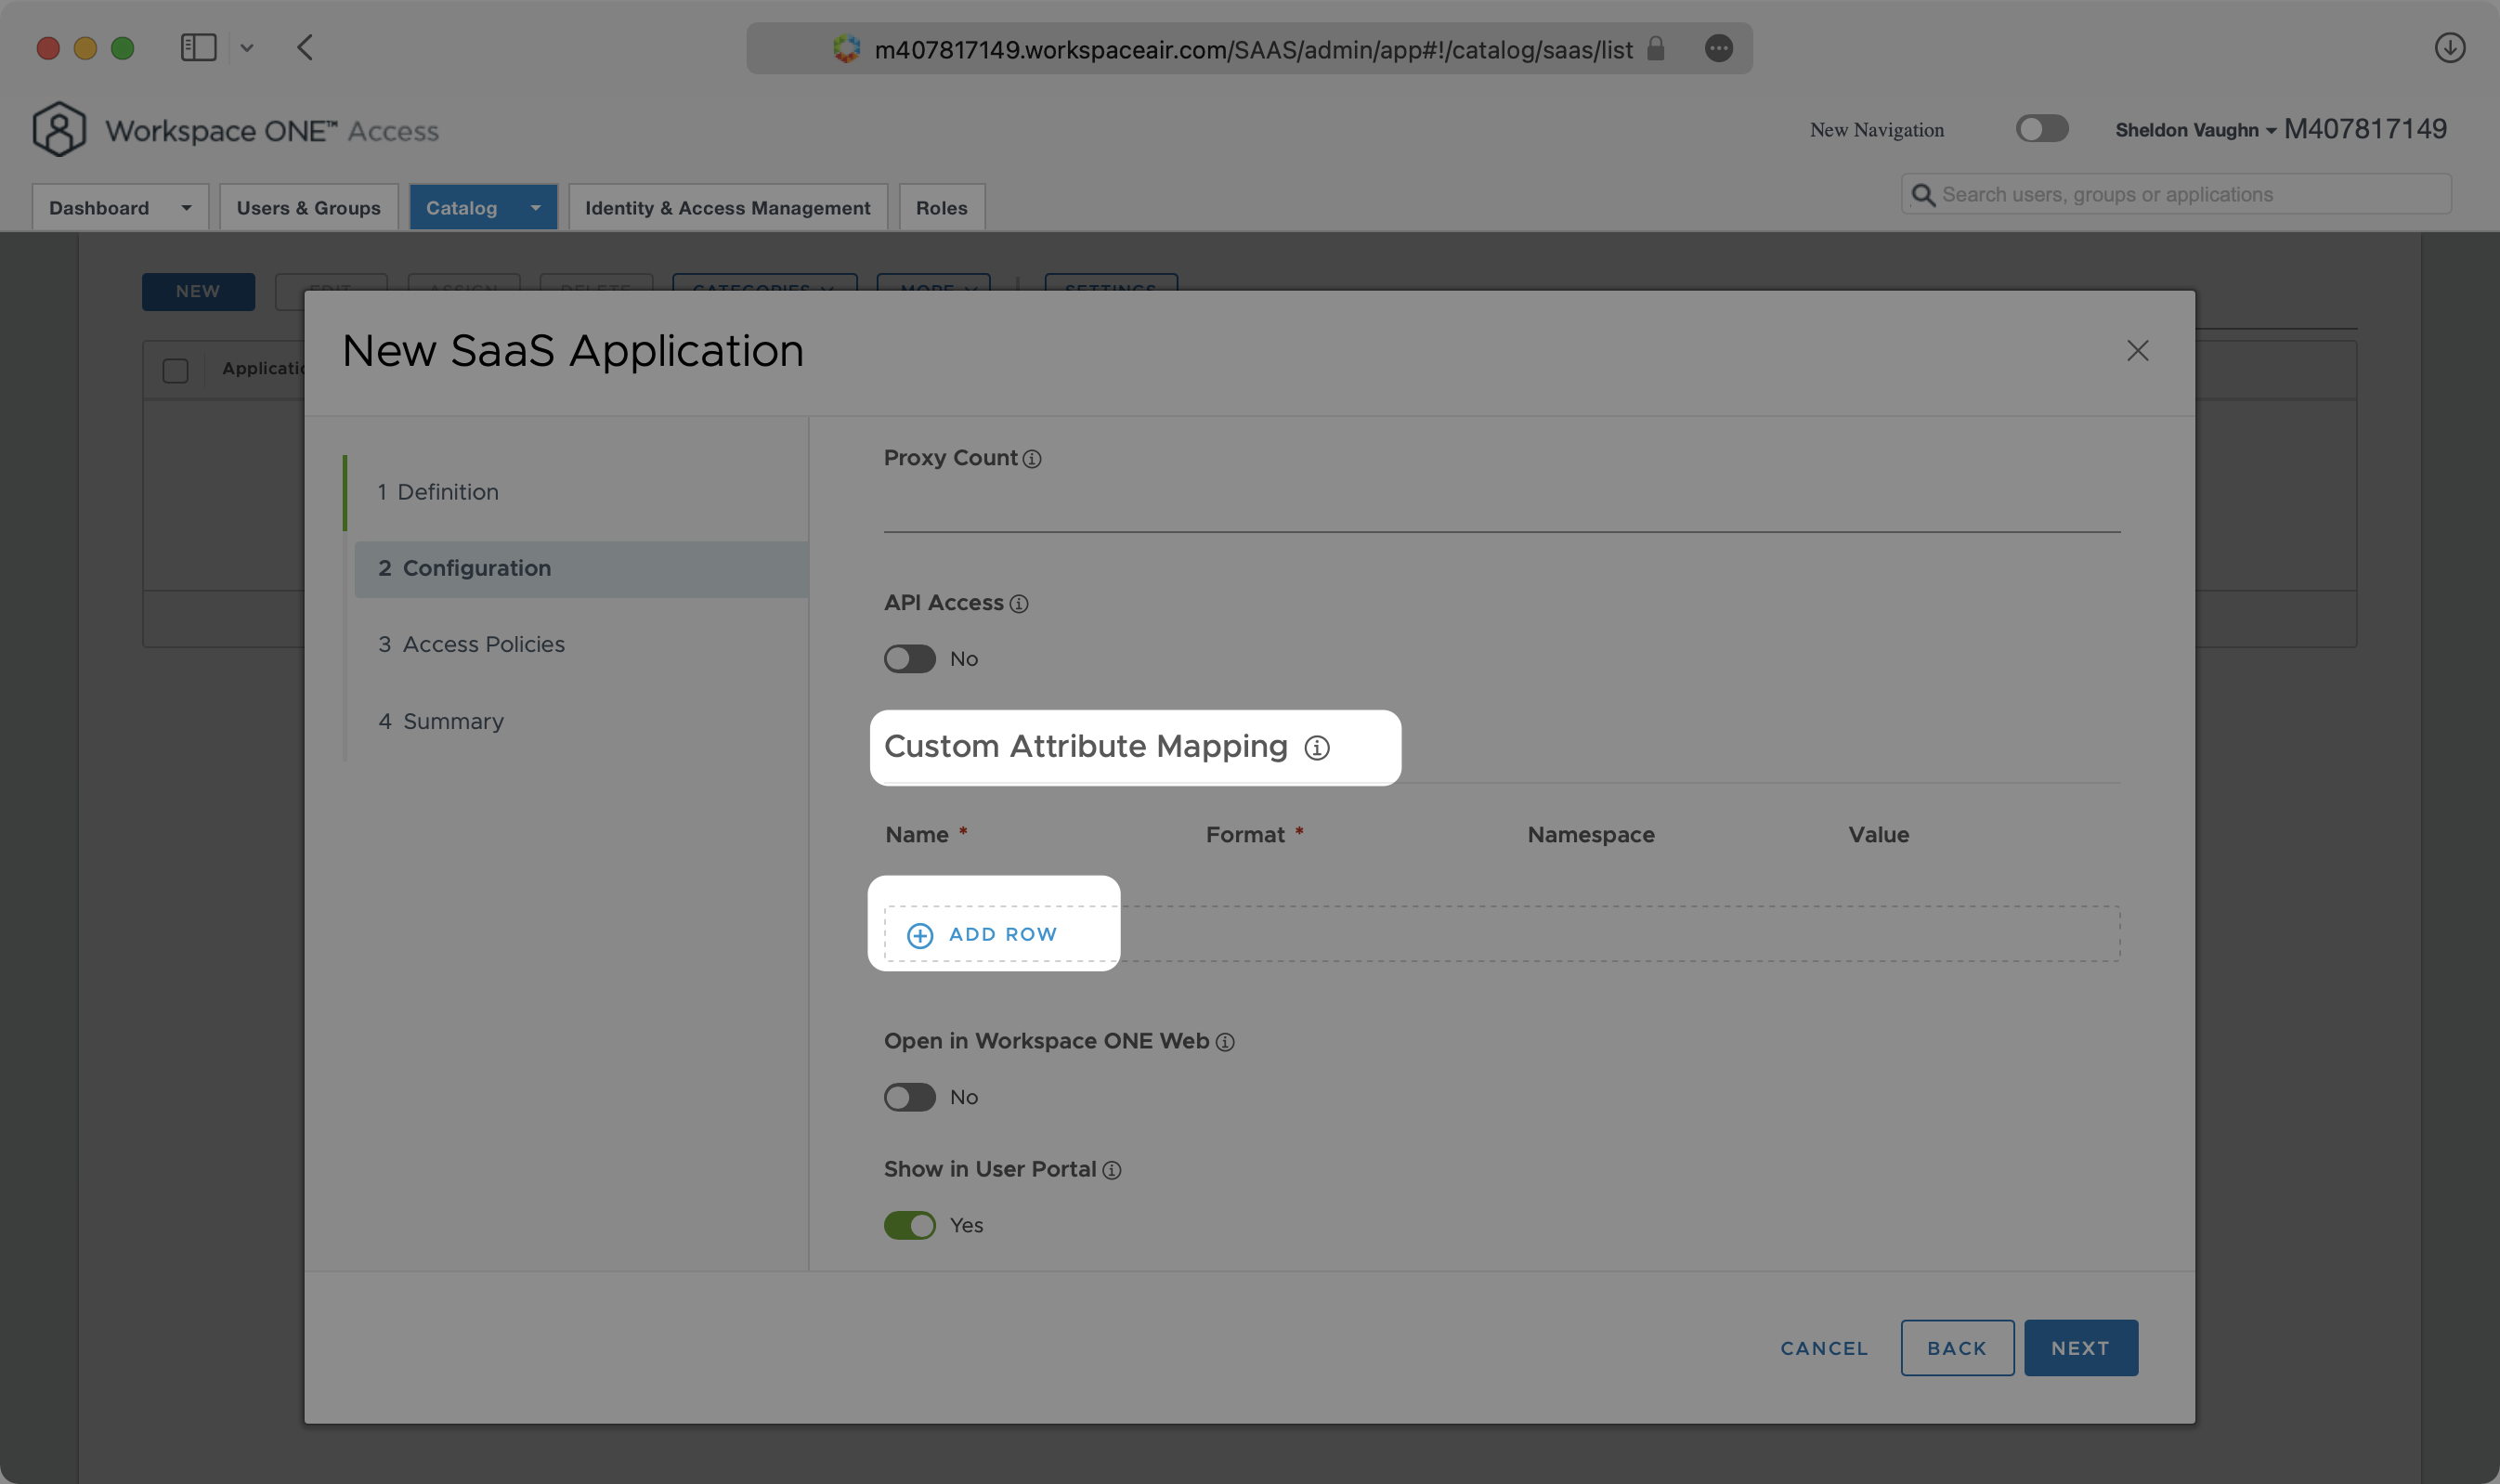
Fill in the following attribute mappings and select “Next” until you are prompted to “Save”.
id→${user.objectGUID}firstName→${user.firstName}lastName→${user.lastName}email→${user.email}

Some VMware configurations use user.ExternalId instead of user.objectGUID. In this case, you would map the id attribute to user.ExternalId.
With identity provider role assignment, users can receive roles within your application based on their group memberships. To return this information in the attribute statement, map the groups in your identity provider to a SAML attribute named groups.
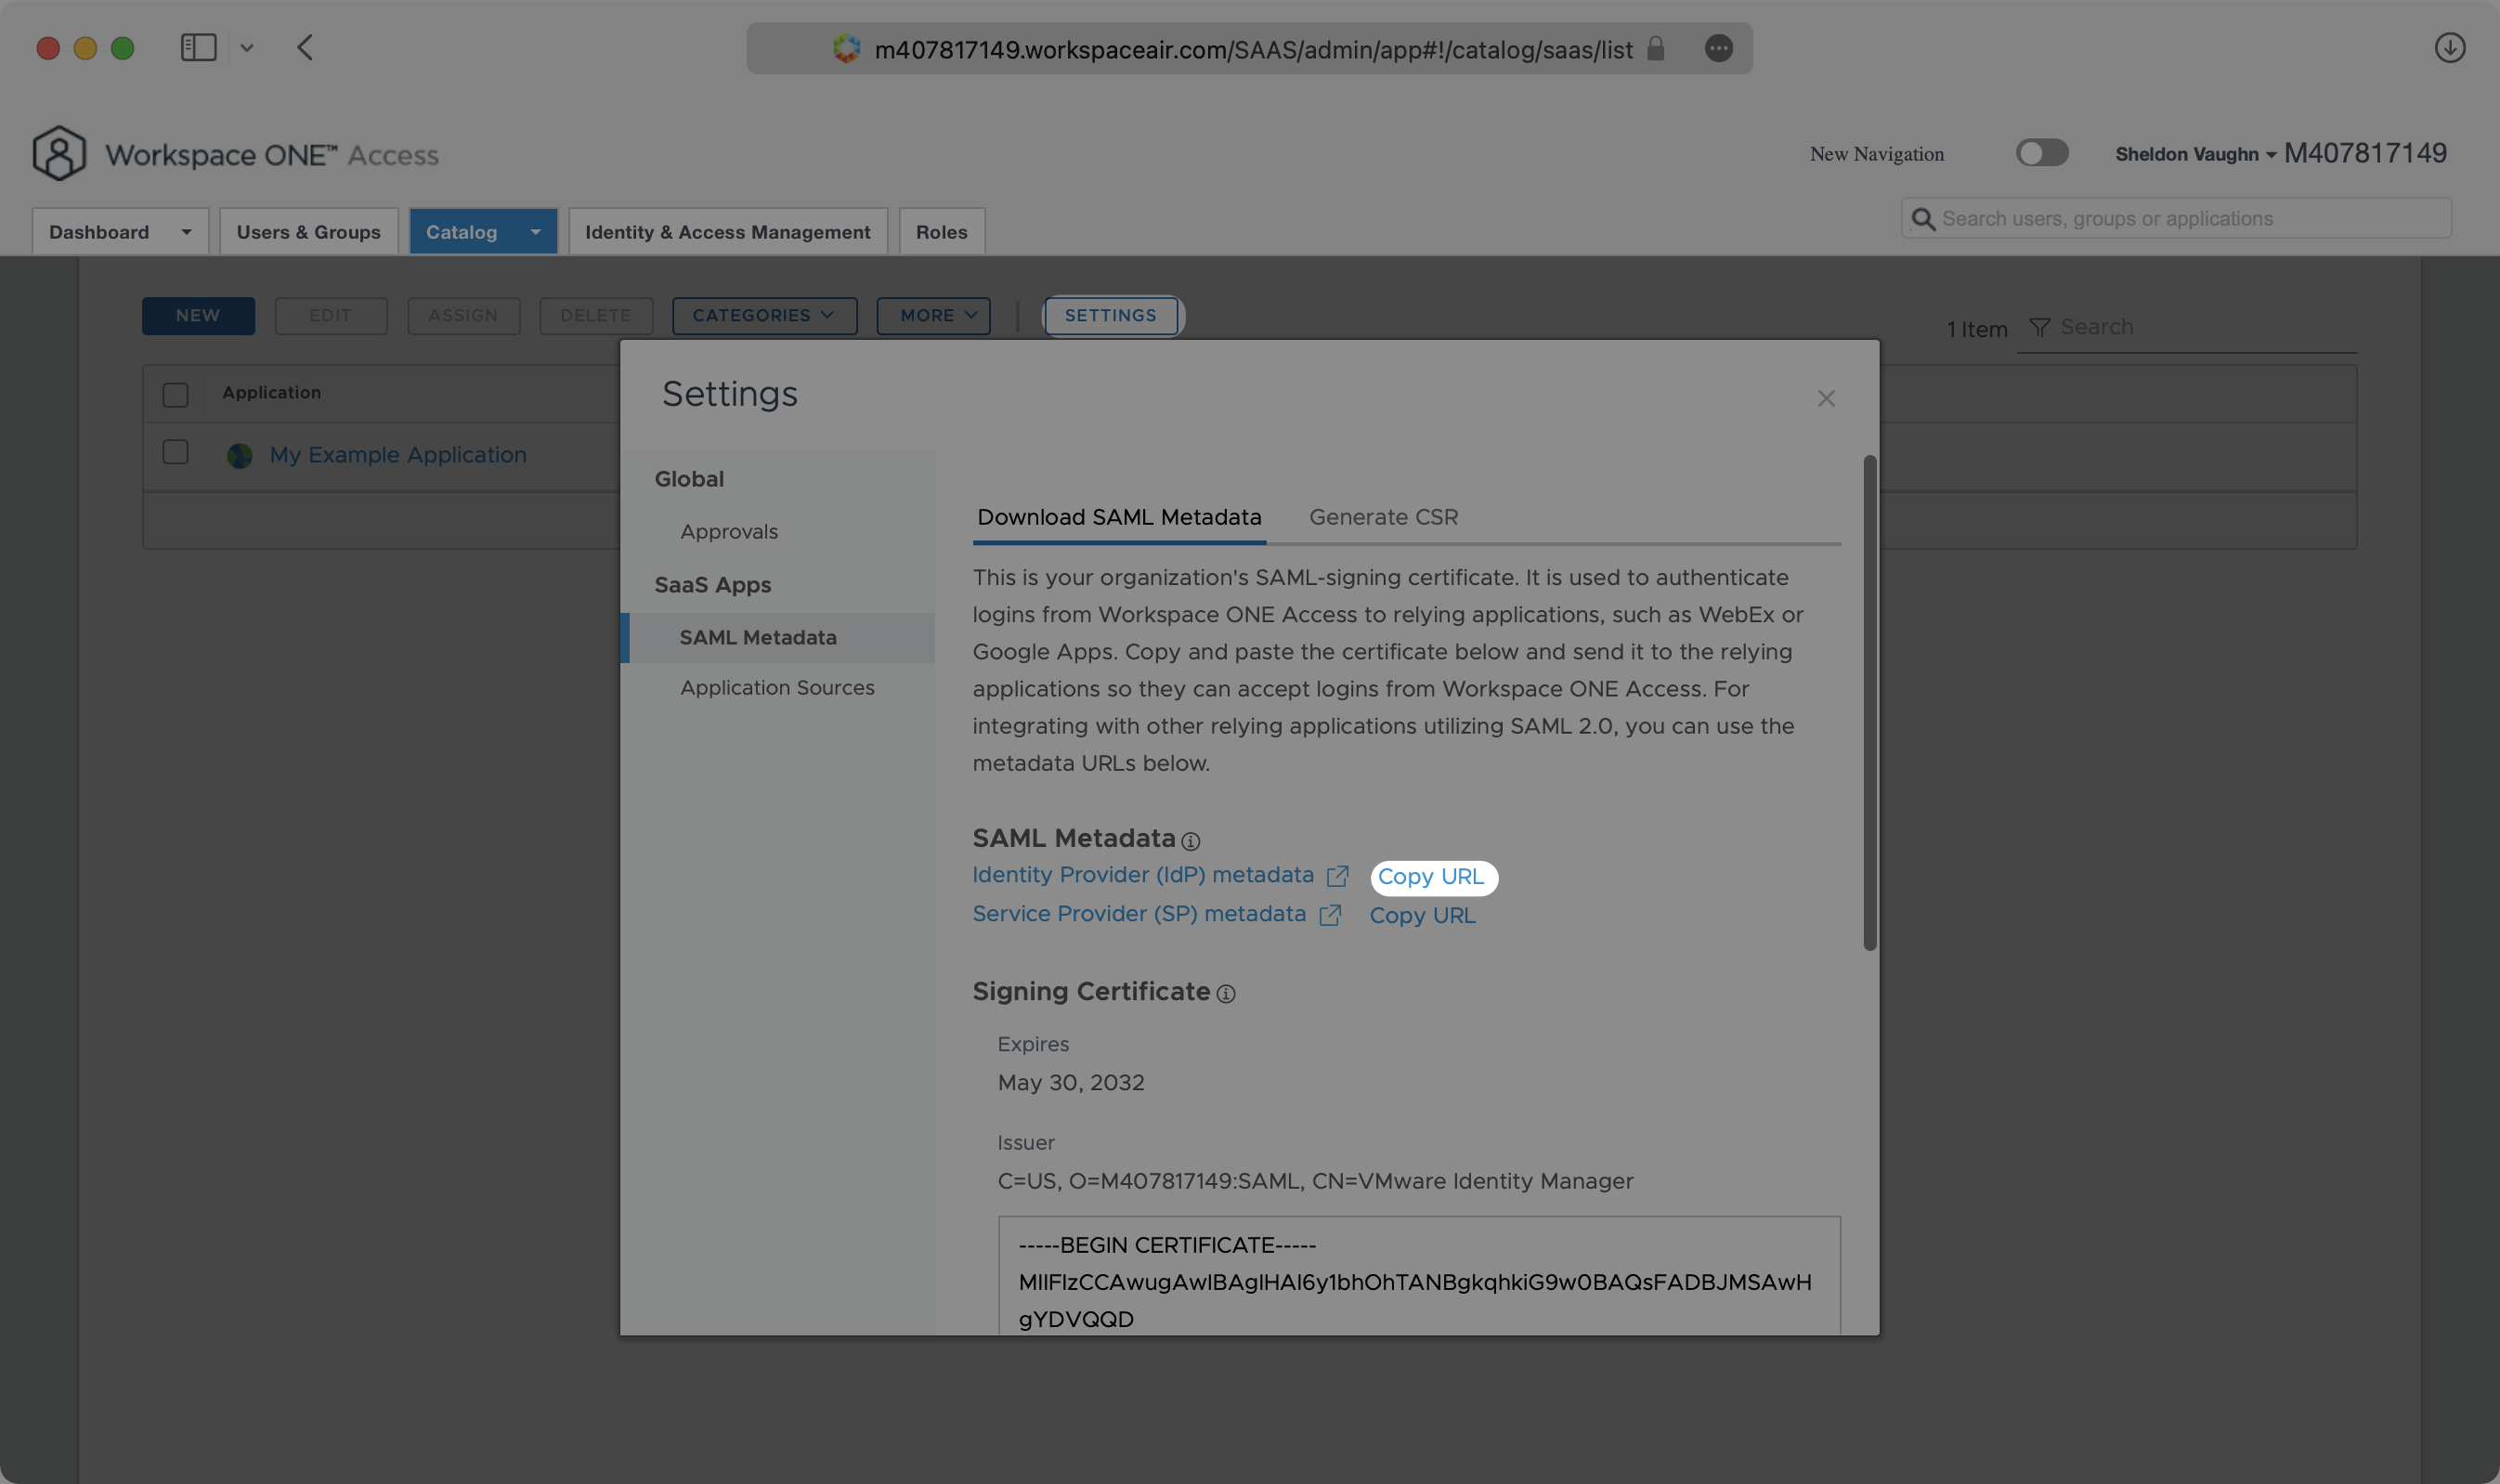
After saving your SaaS Application, click “Settings” then “SAML Metadata”. Click on “Copy URL” next to “Identity Provider (IdP) metadata”.
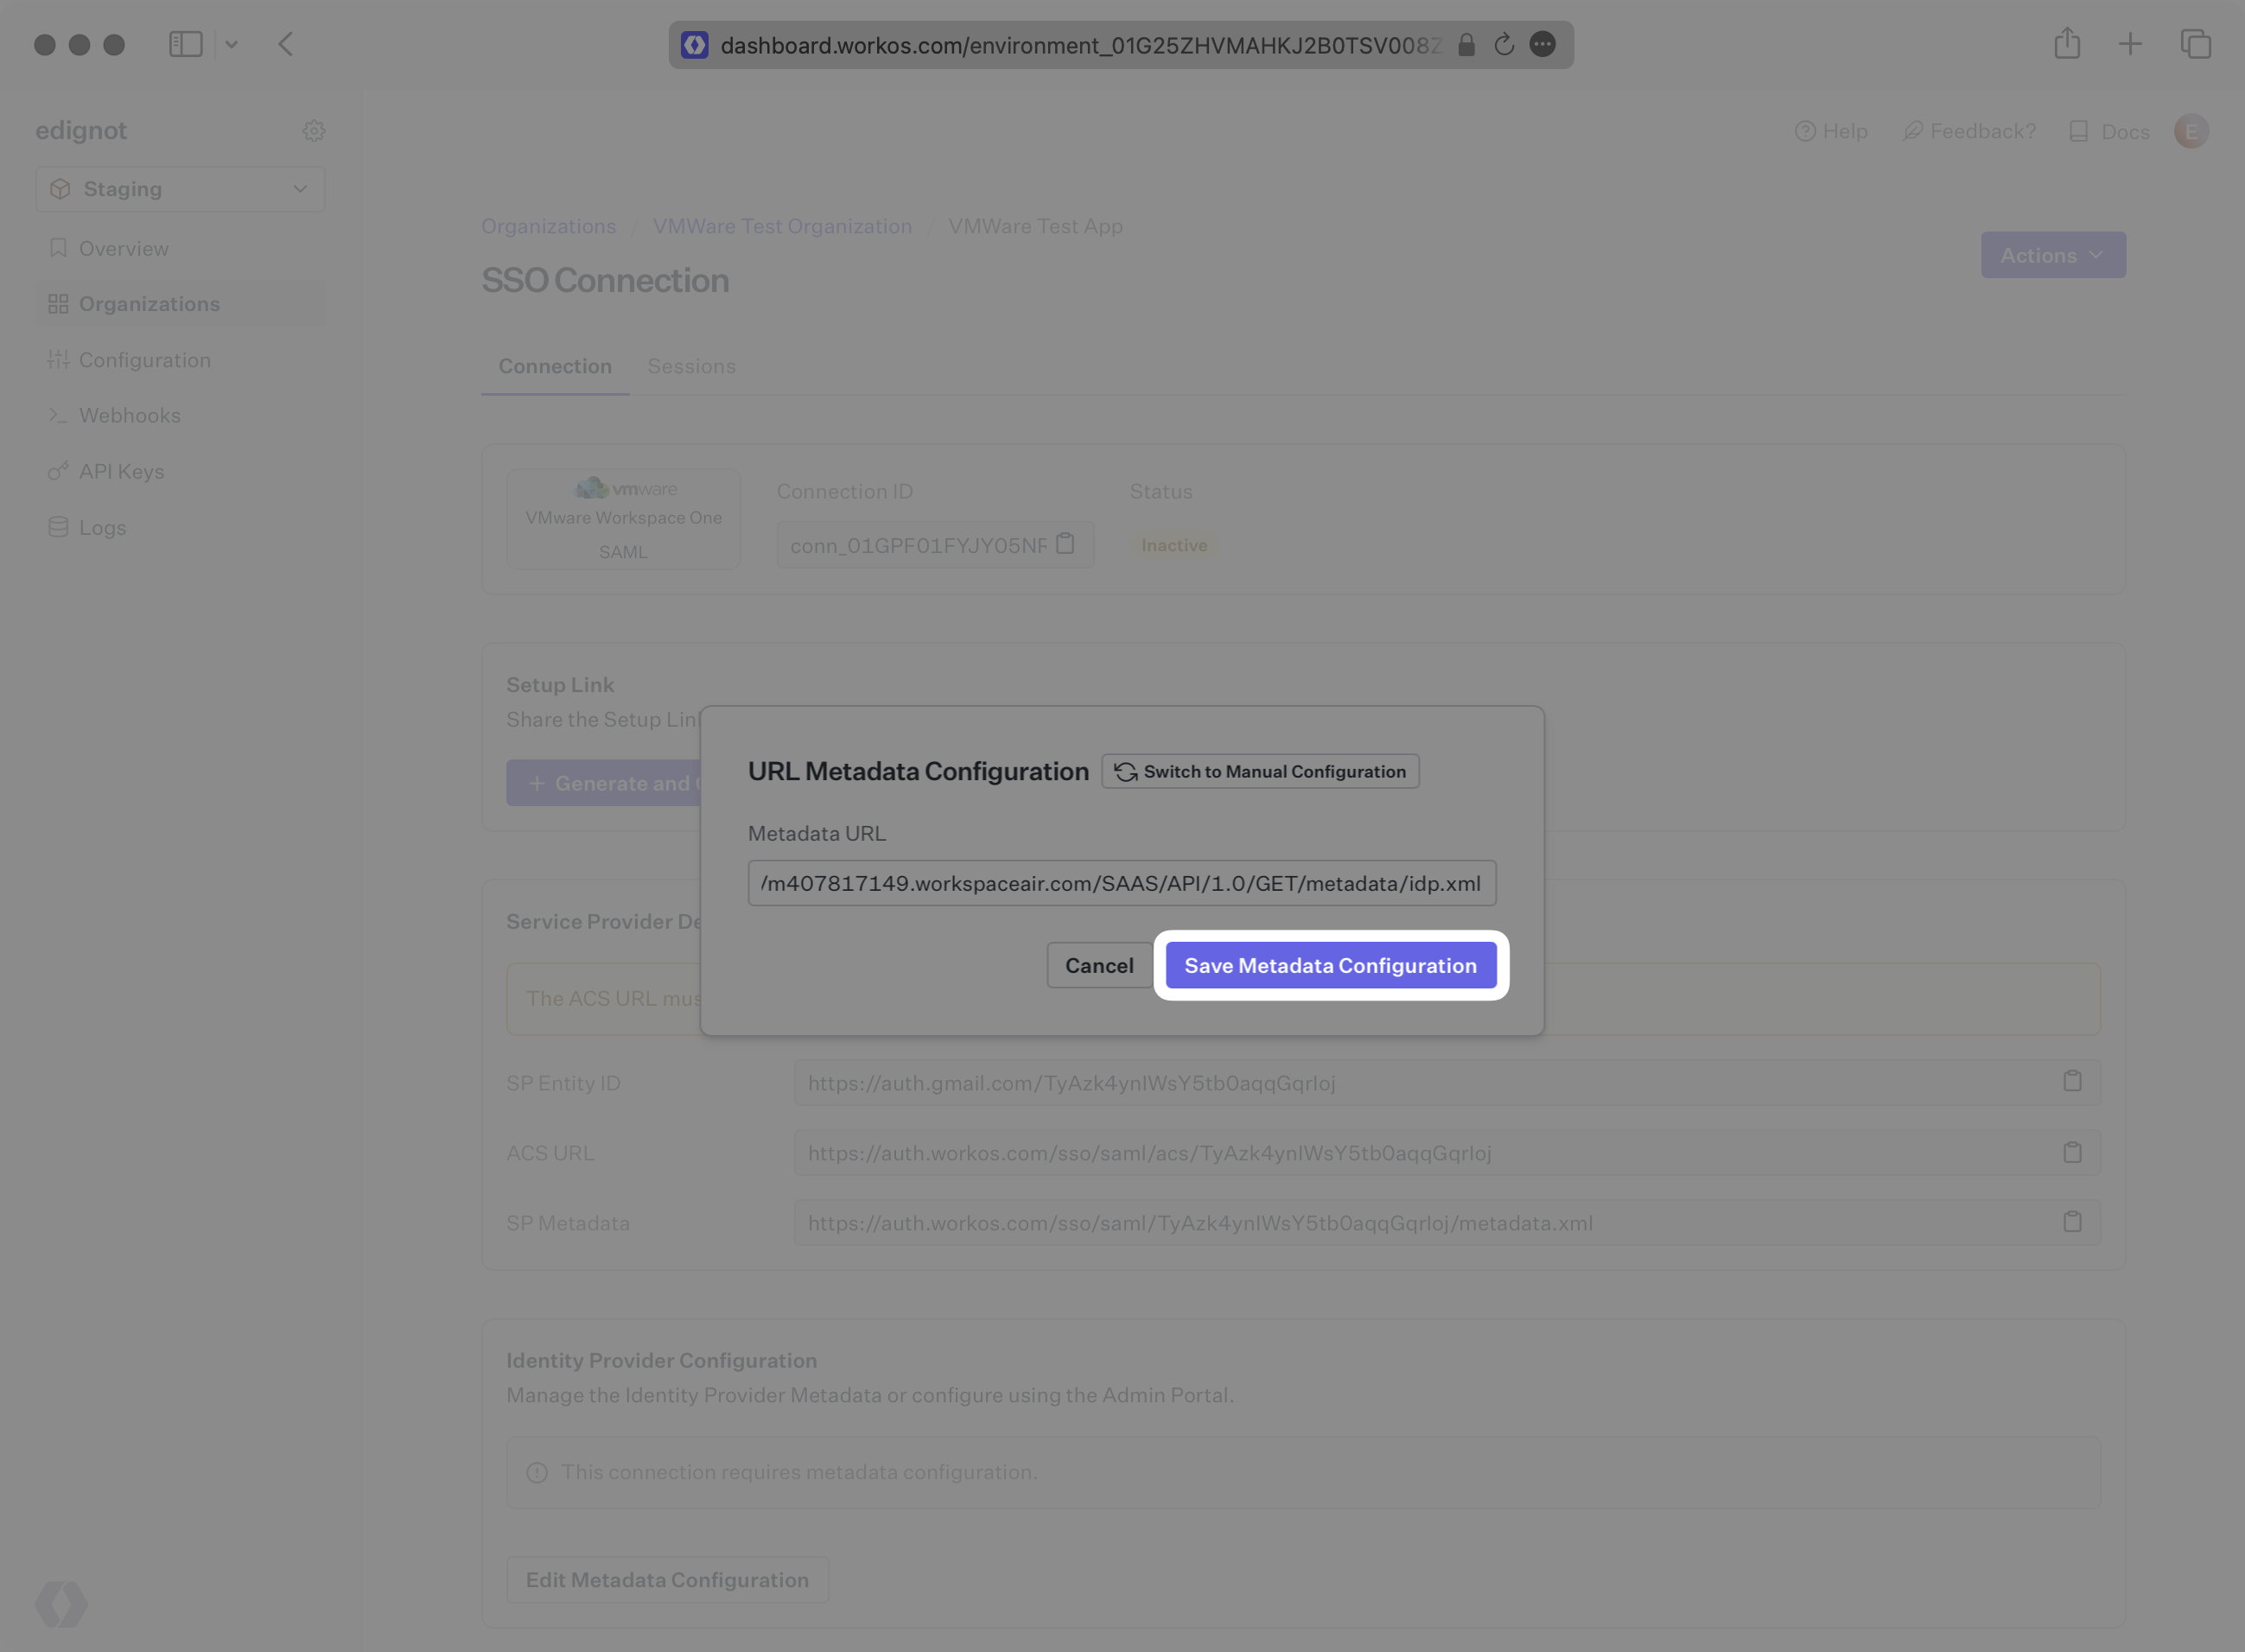
Back in the WorkOS Dashboard, click on “Edit Metadata Configuration” in the “Metadata Configuration” section of the Connection.
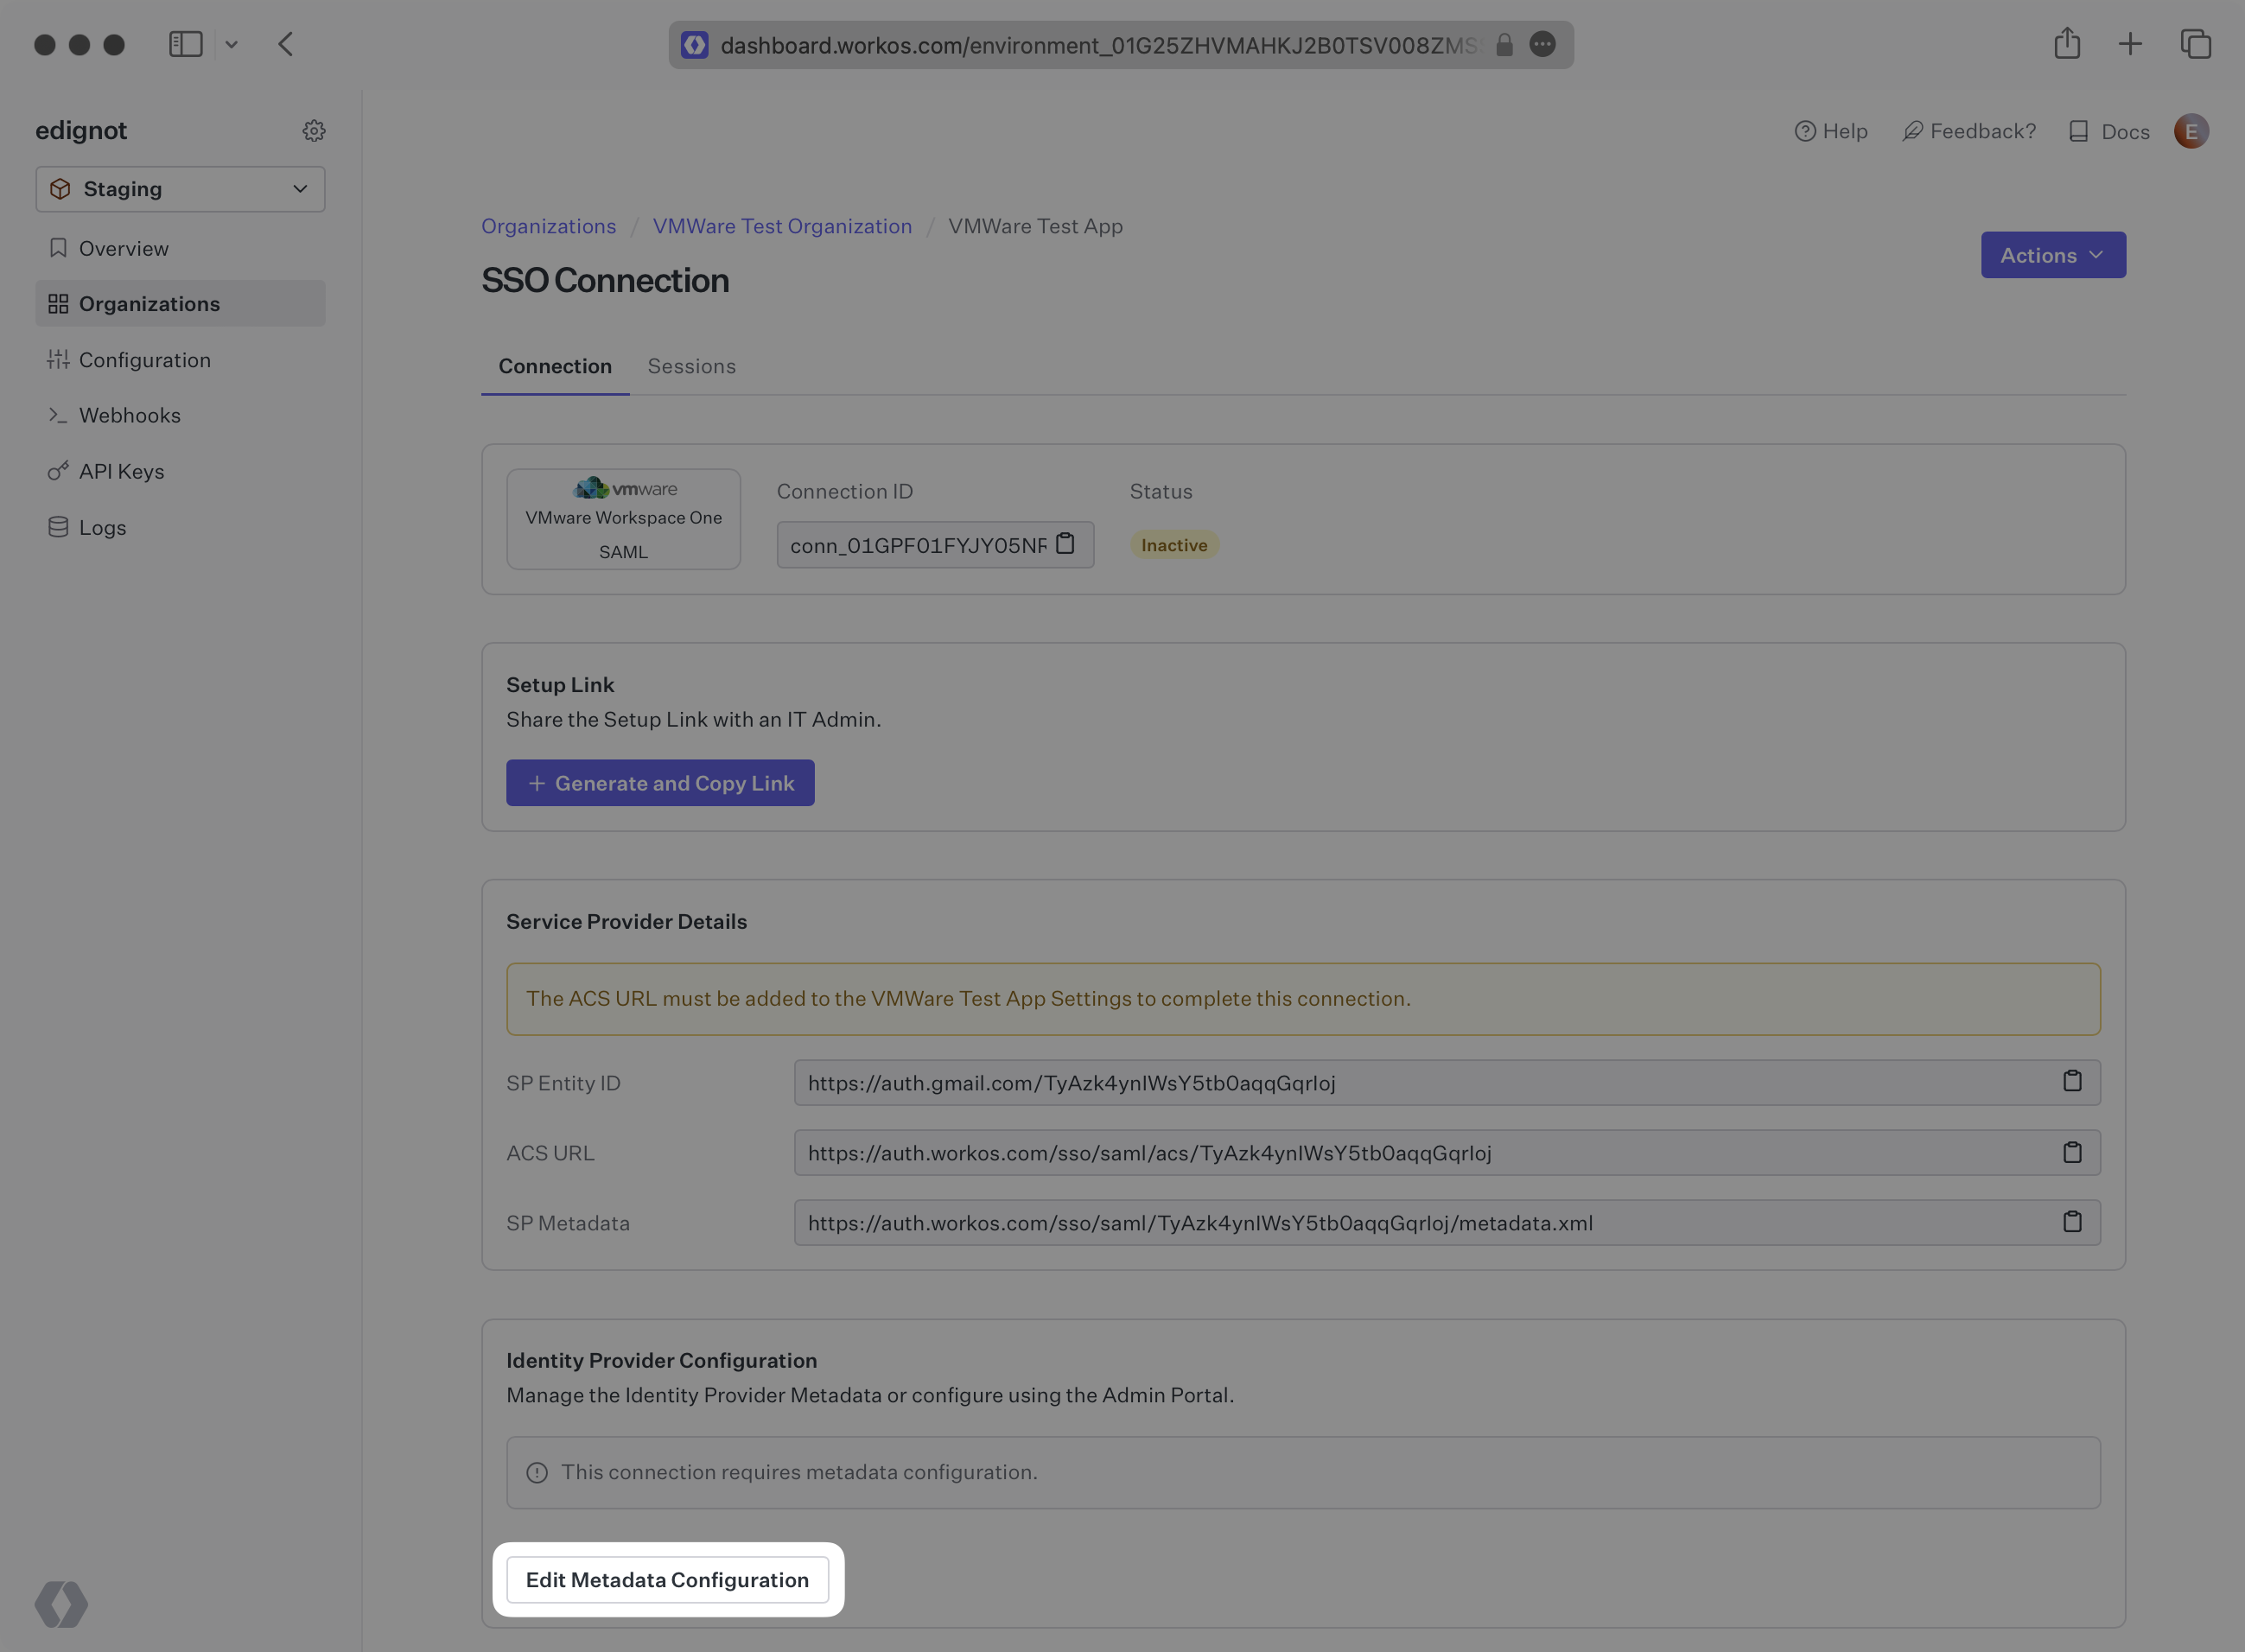
Finally, input the Metadata URL and click “Save Metadata Configuration”. Your Connection will then be linked and good to go!