Auth0 Enterprise Connection
Learn how to use WorkOS with your existing Auth0 applications.
Looking to migrate from Auth0 to WorkOS? Check out the full migration guide.
This guide outlines the steps to make WorkOS SSO connections available to Auth0 applications without requiring changes to your existing Auth0 application code.
The Auth0 Enterprise Connection integration is in feature preview. Reach out to WorkOS support if you want early access.
WorkOS uses Auth0 credentials you provide to manage the Auth0 Enterprise Connection automatically. The first step is authorizing an application in Auth0 to access the Management API.
In the Auth0 dashboard, navigate to Applications → APIs → Auth0 Management API:
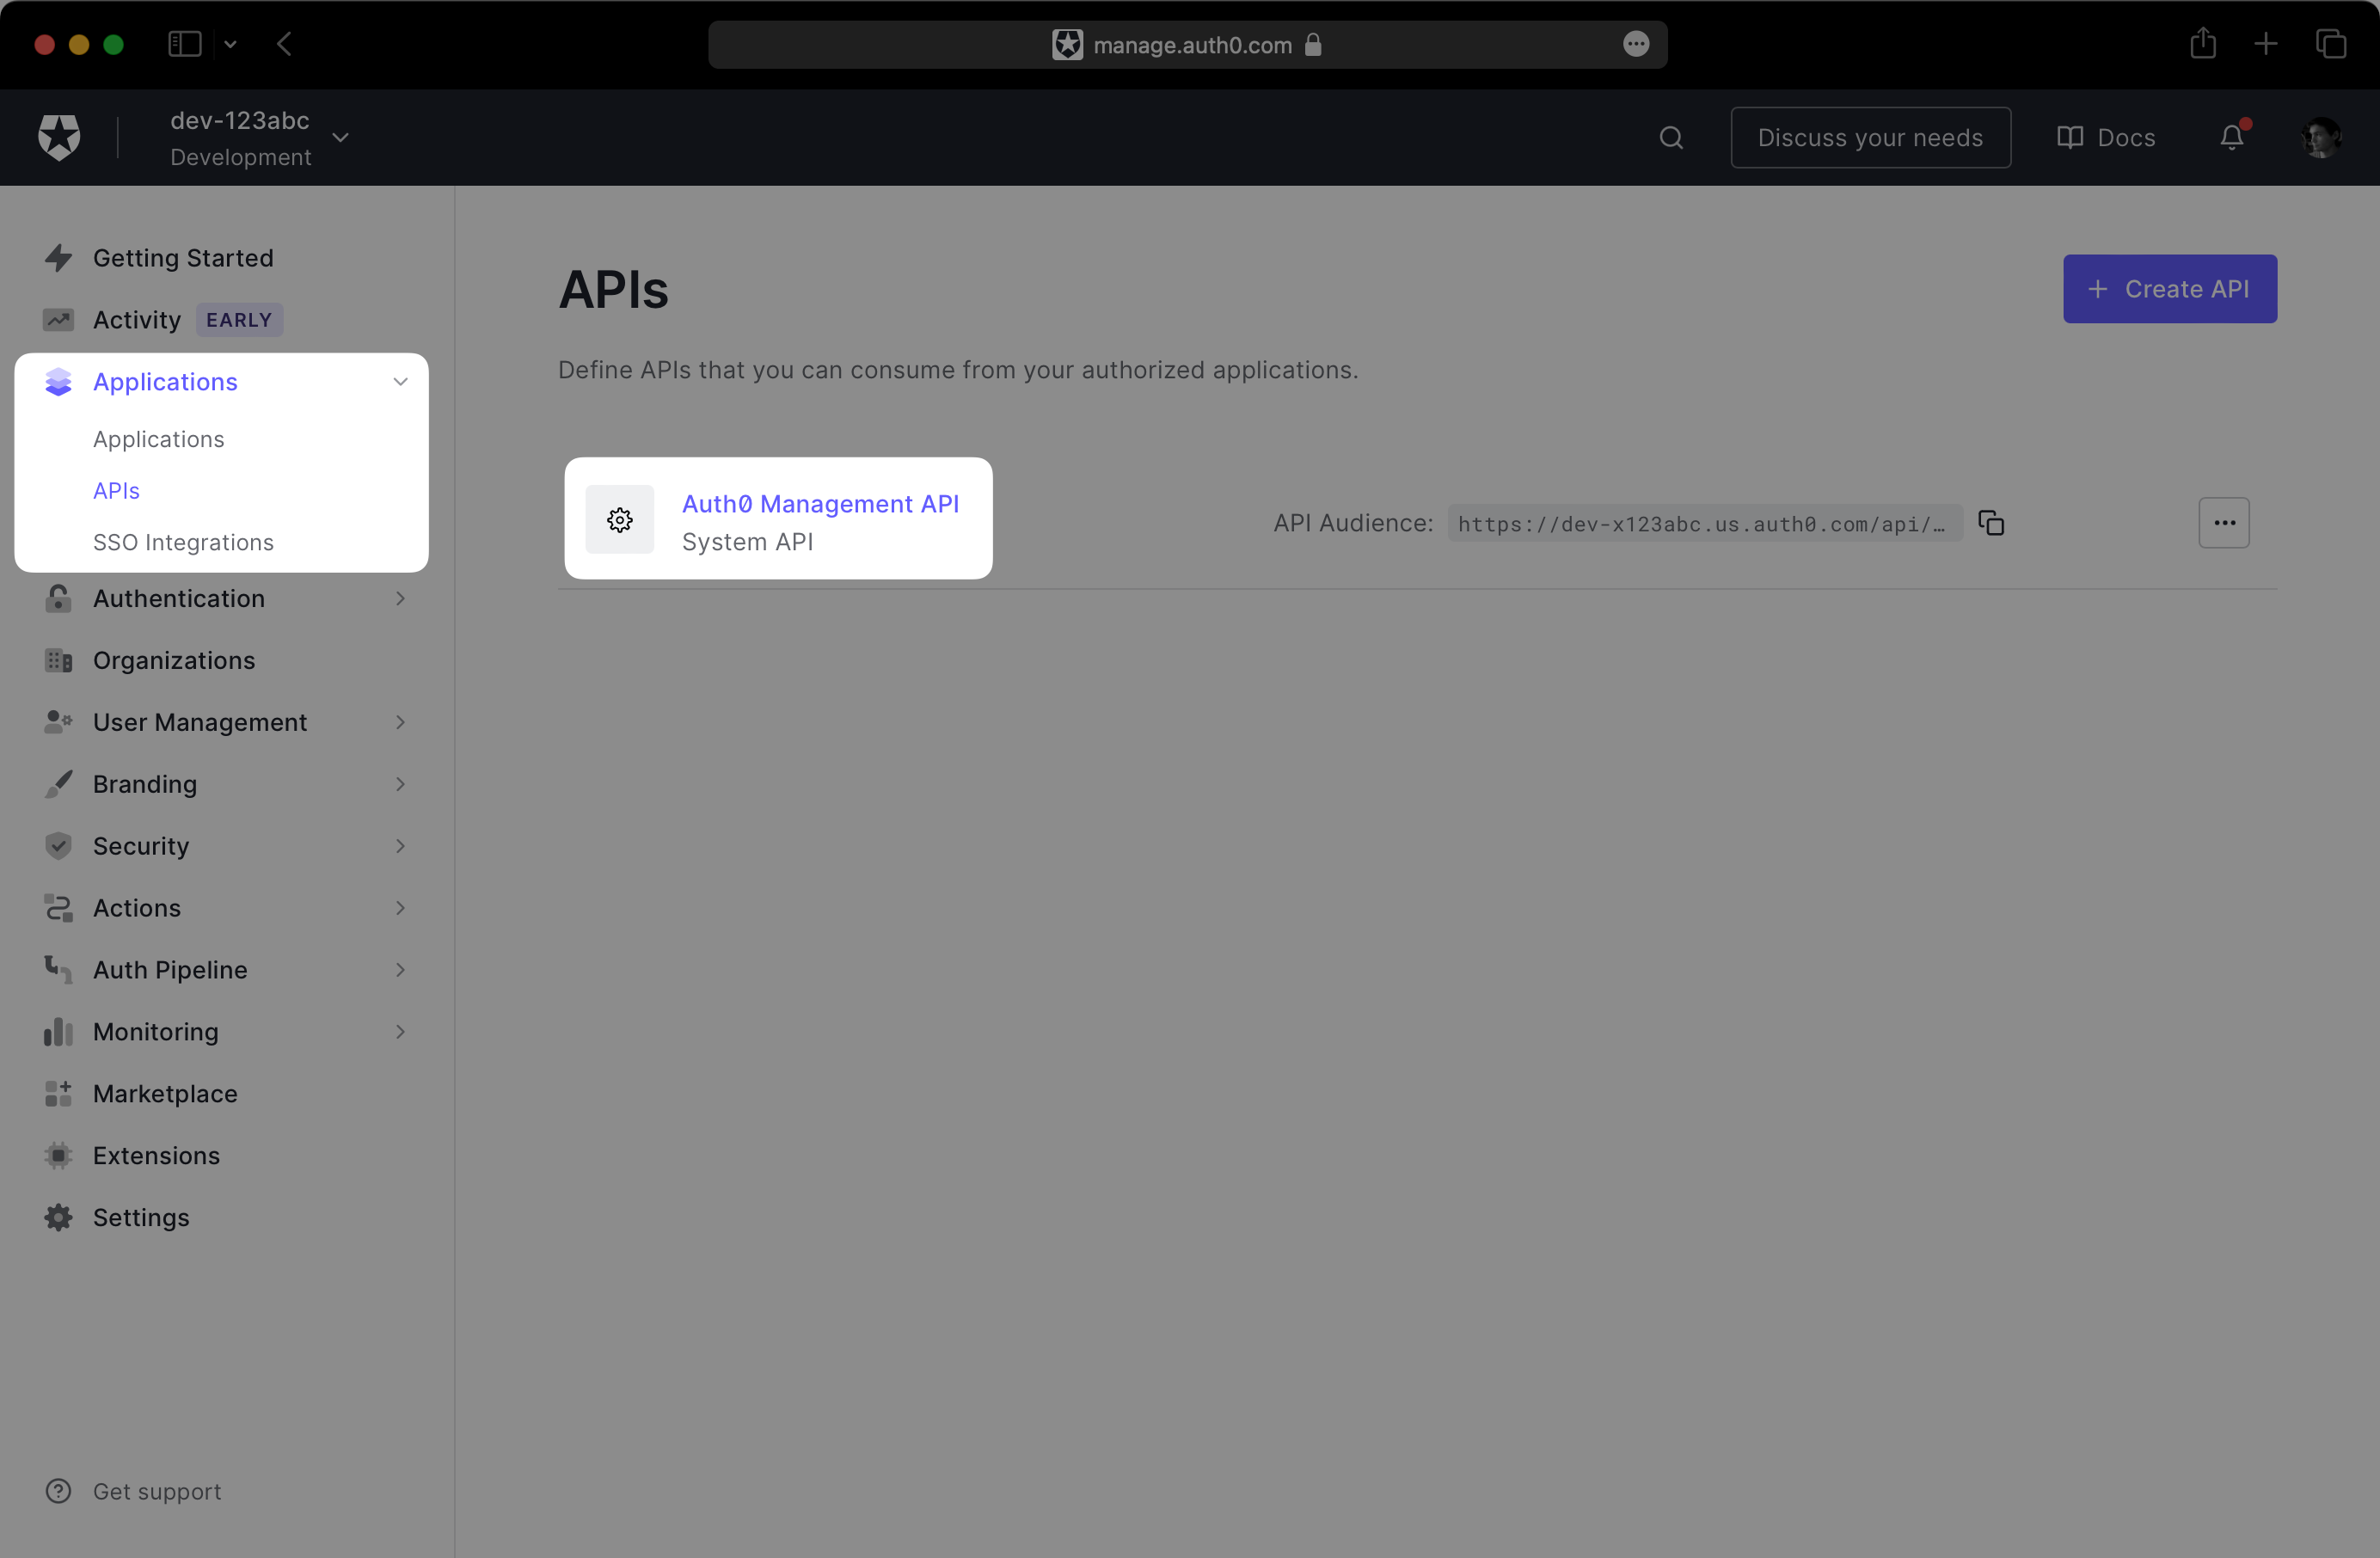
Click on the Machine To Machine Applications tab and expand the section for your Auth0 application. Then, toggle the Authorized switch to enable the API.
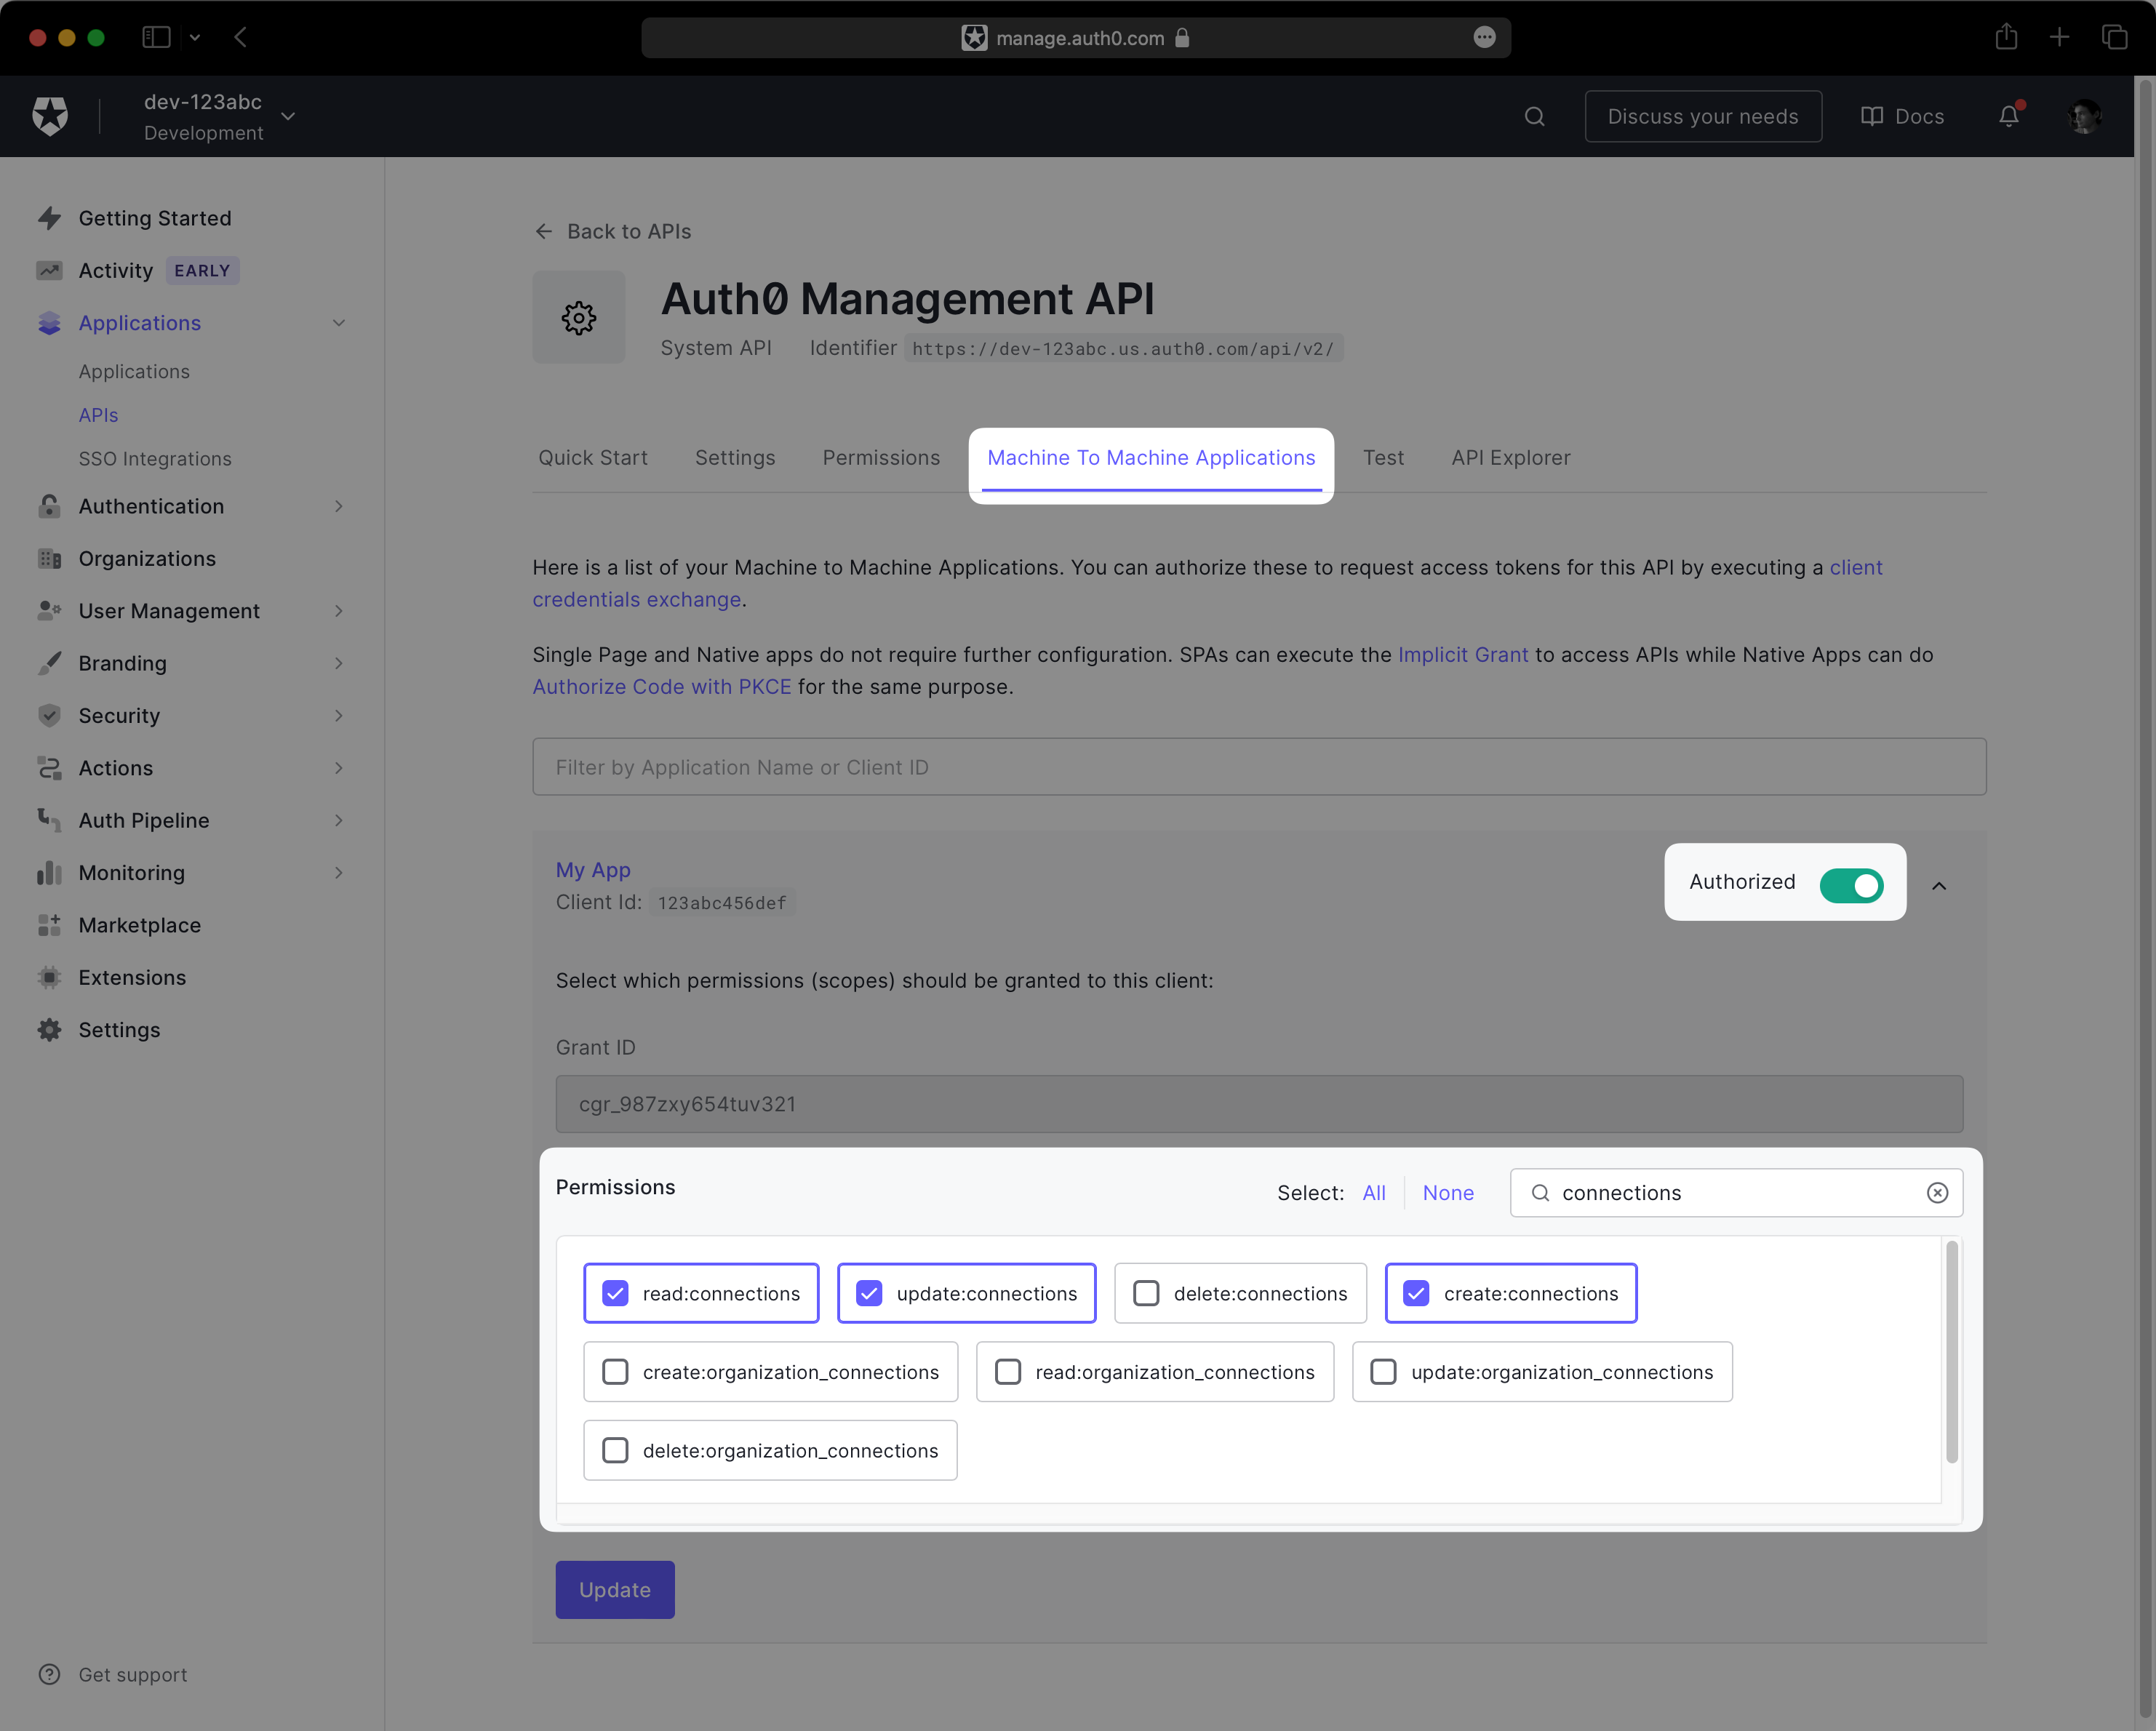
Under Permissions, ensure the following scopes are granted to the application:
create:connectionsread:connectionsupdate:connections
Your permissions configuration should match the following screenshot:
Next, navigate to Applications → Your App → Settings. You should see three fields under Basic Information: “Domain”, “Client ID”, and “Client Secret”.
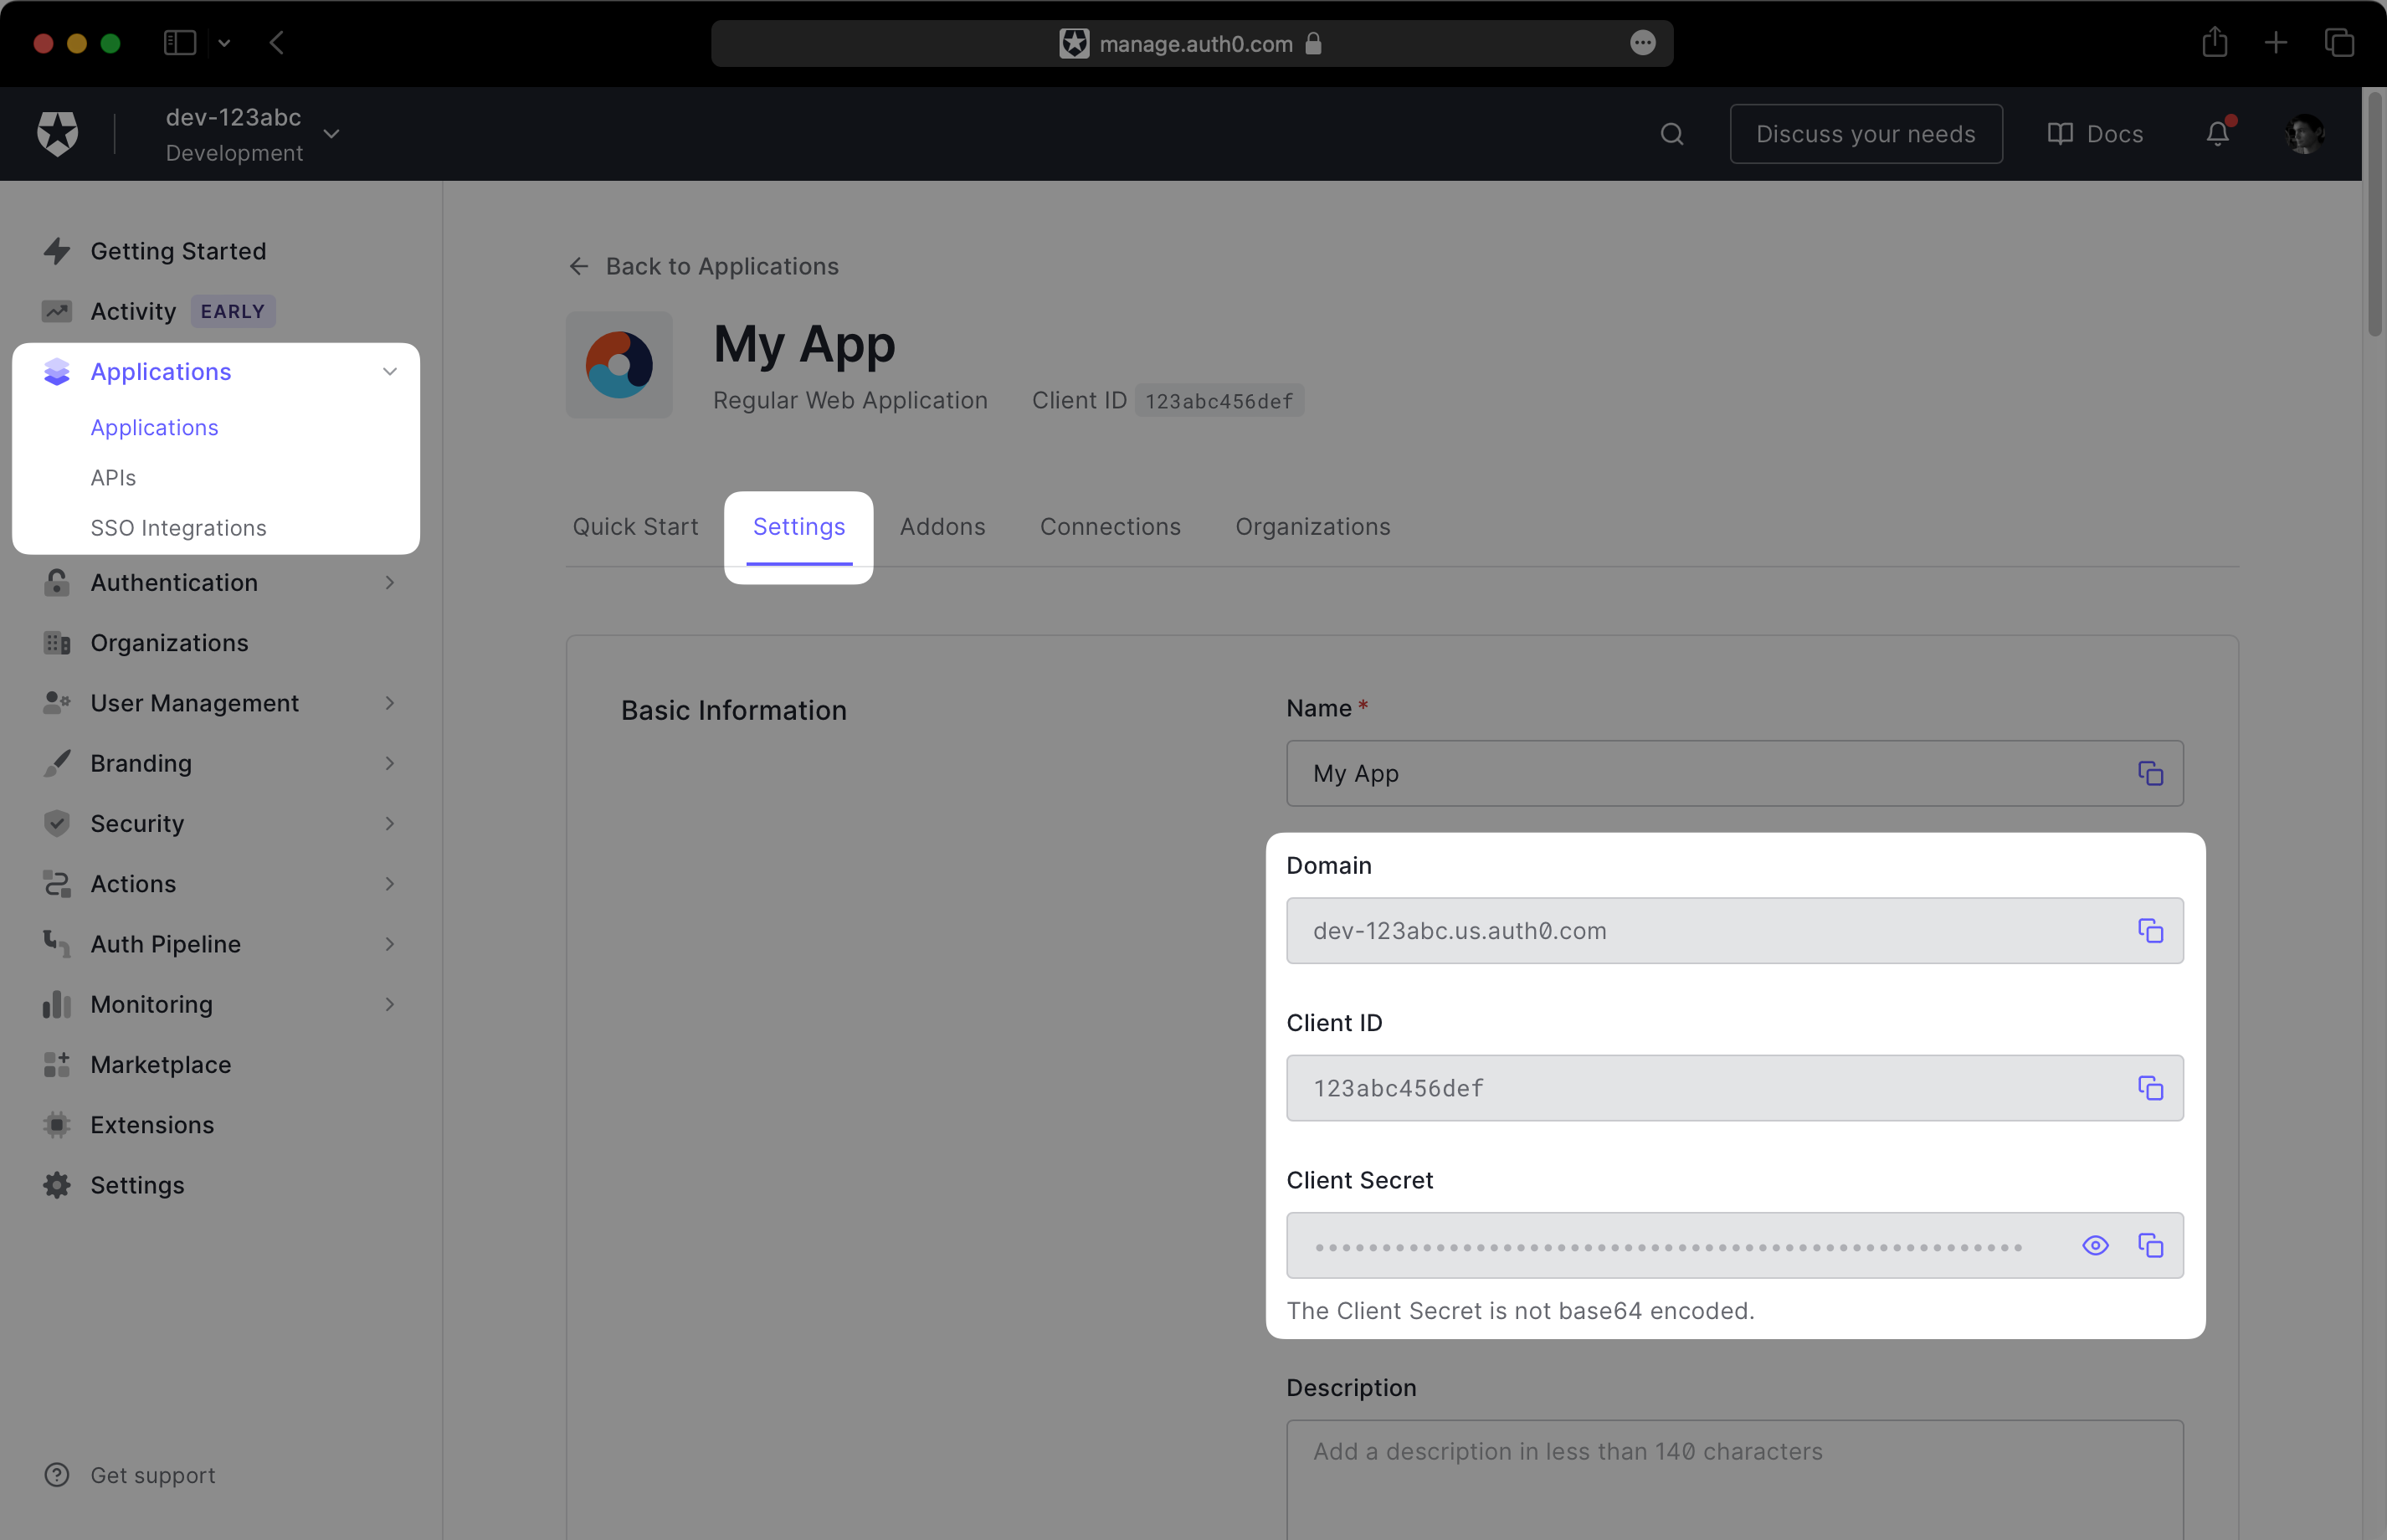
Record this information in a safe place, as you will provide it to the WorkOS dashboard in the next step.
In the WorkOS dashboard, navigate to Configuration → Settings and scroll to the Auth0 Credentials section. Click Set Auth0 Credentials:
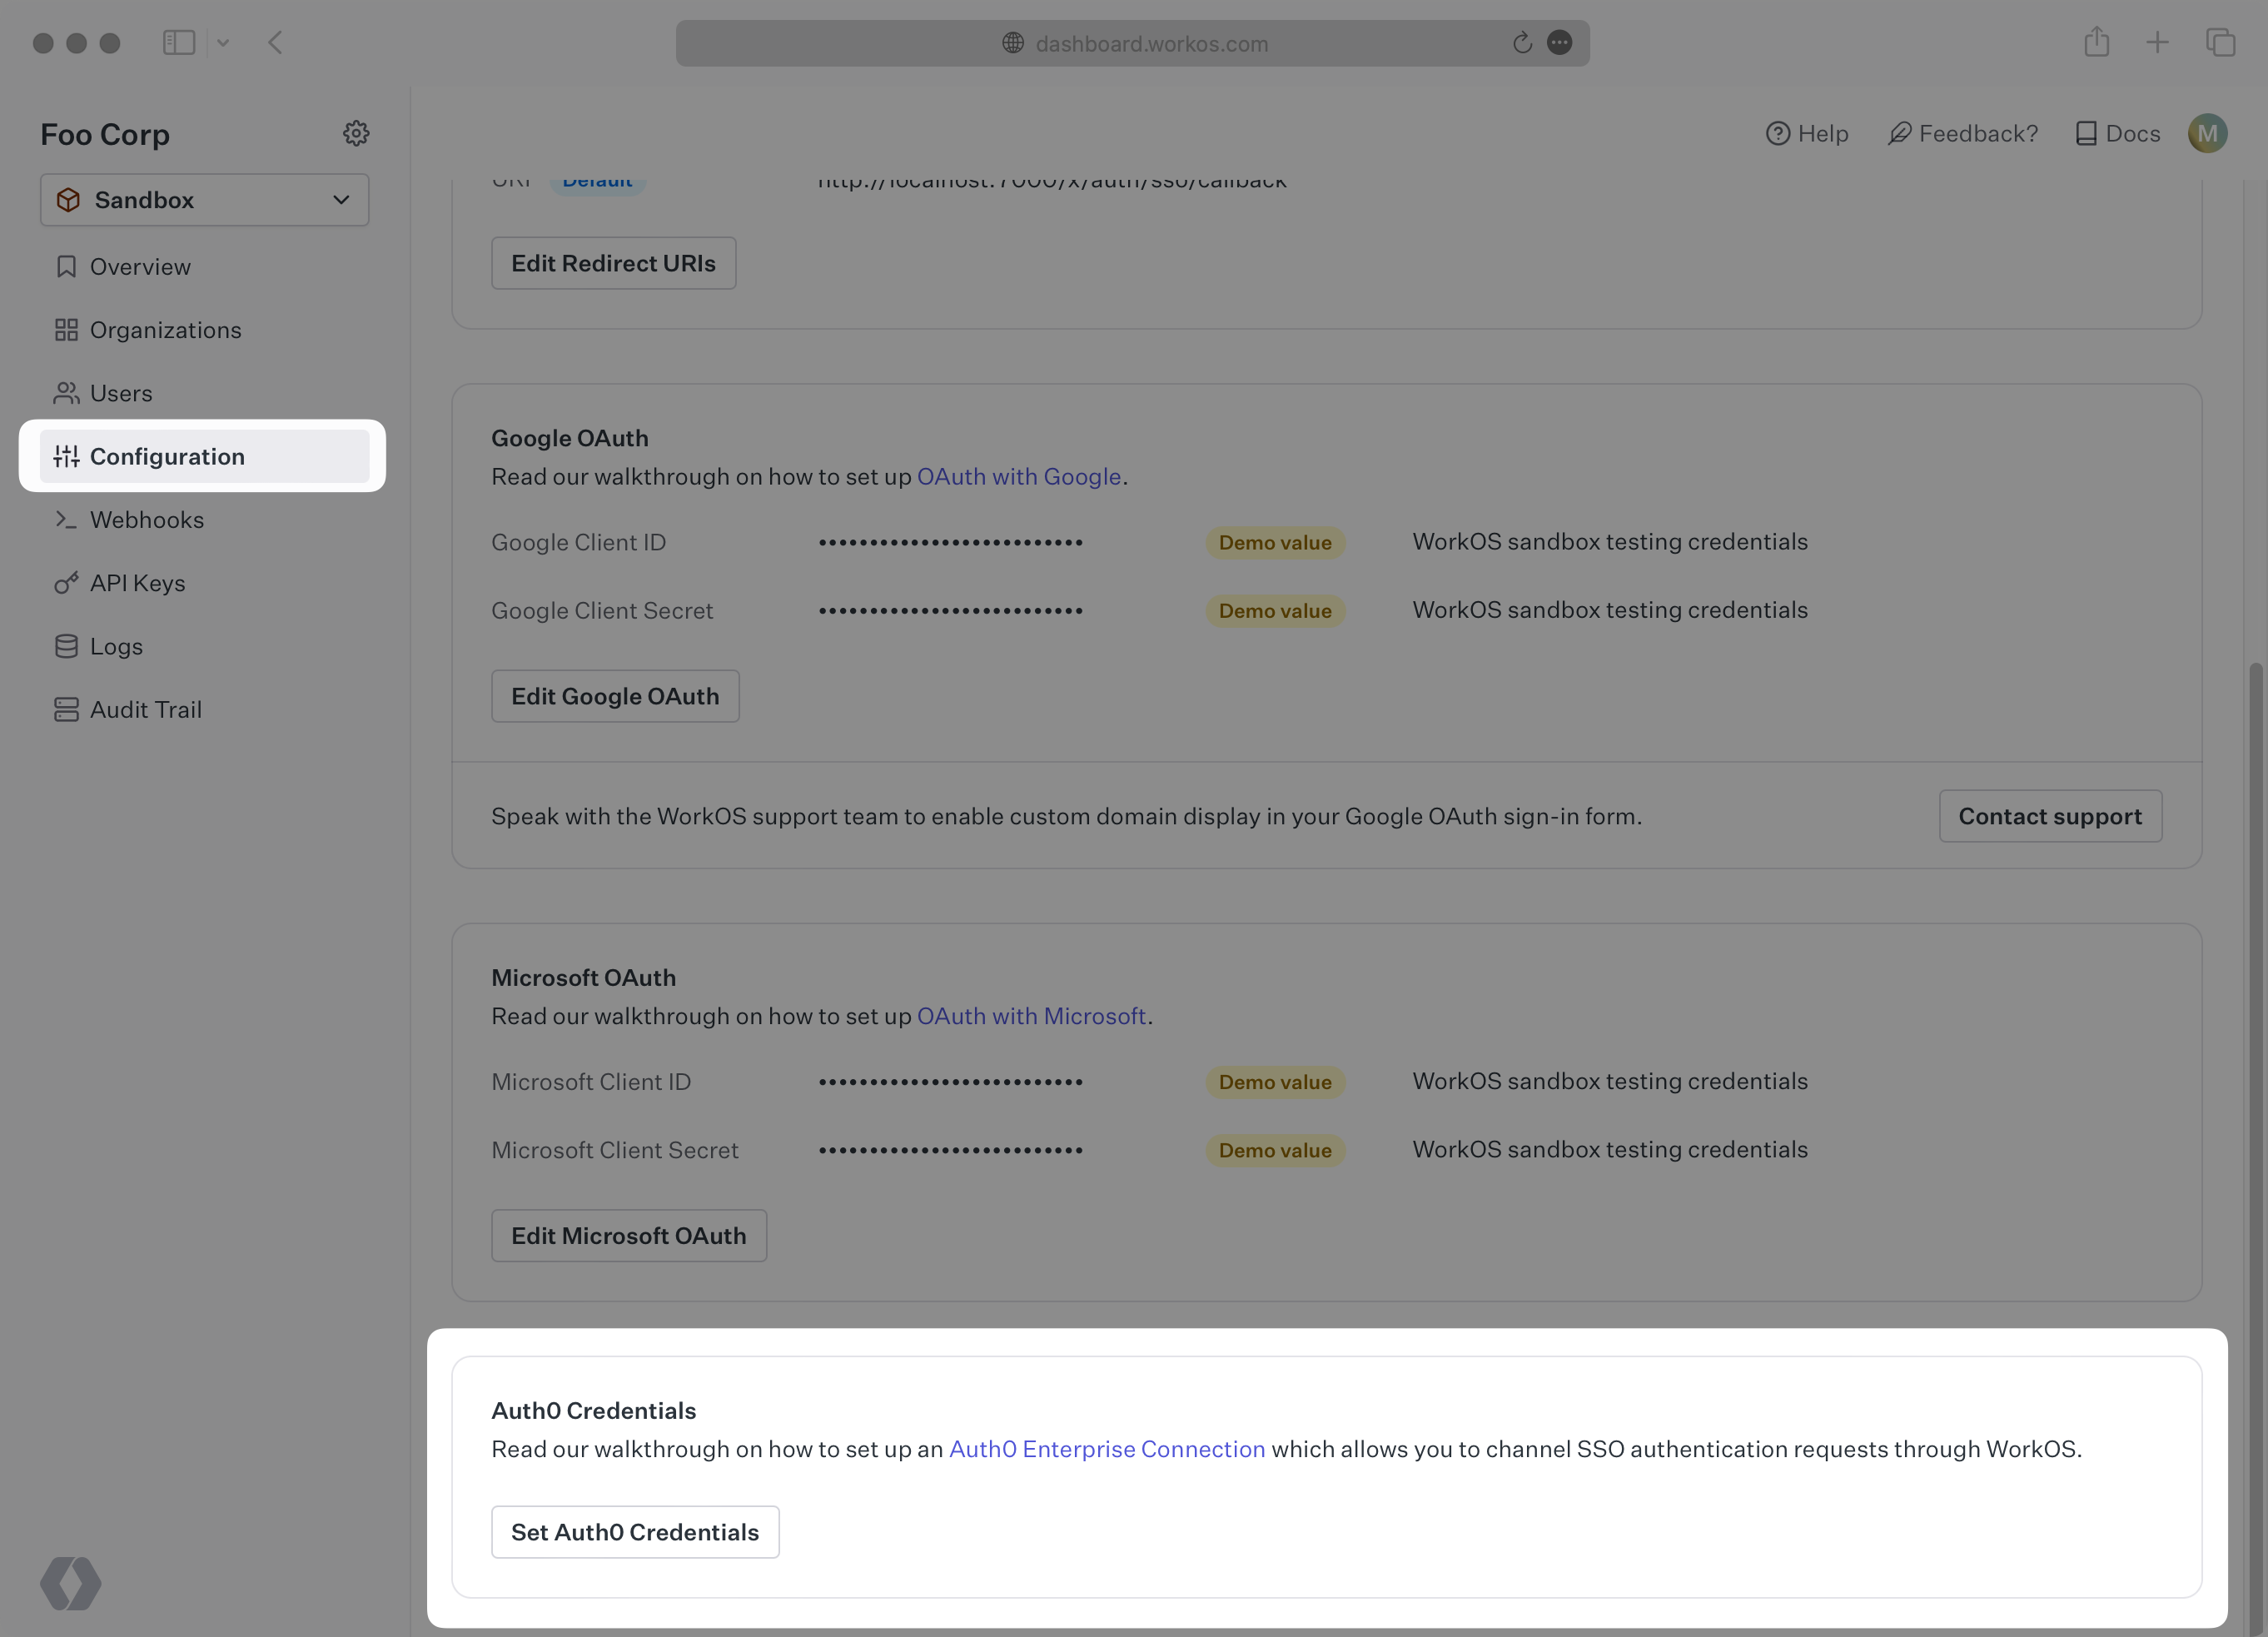
In the modal, enter the credentials you obtained in the previous step: “API Domain”, “Client ID”, and “Client Secret”.
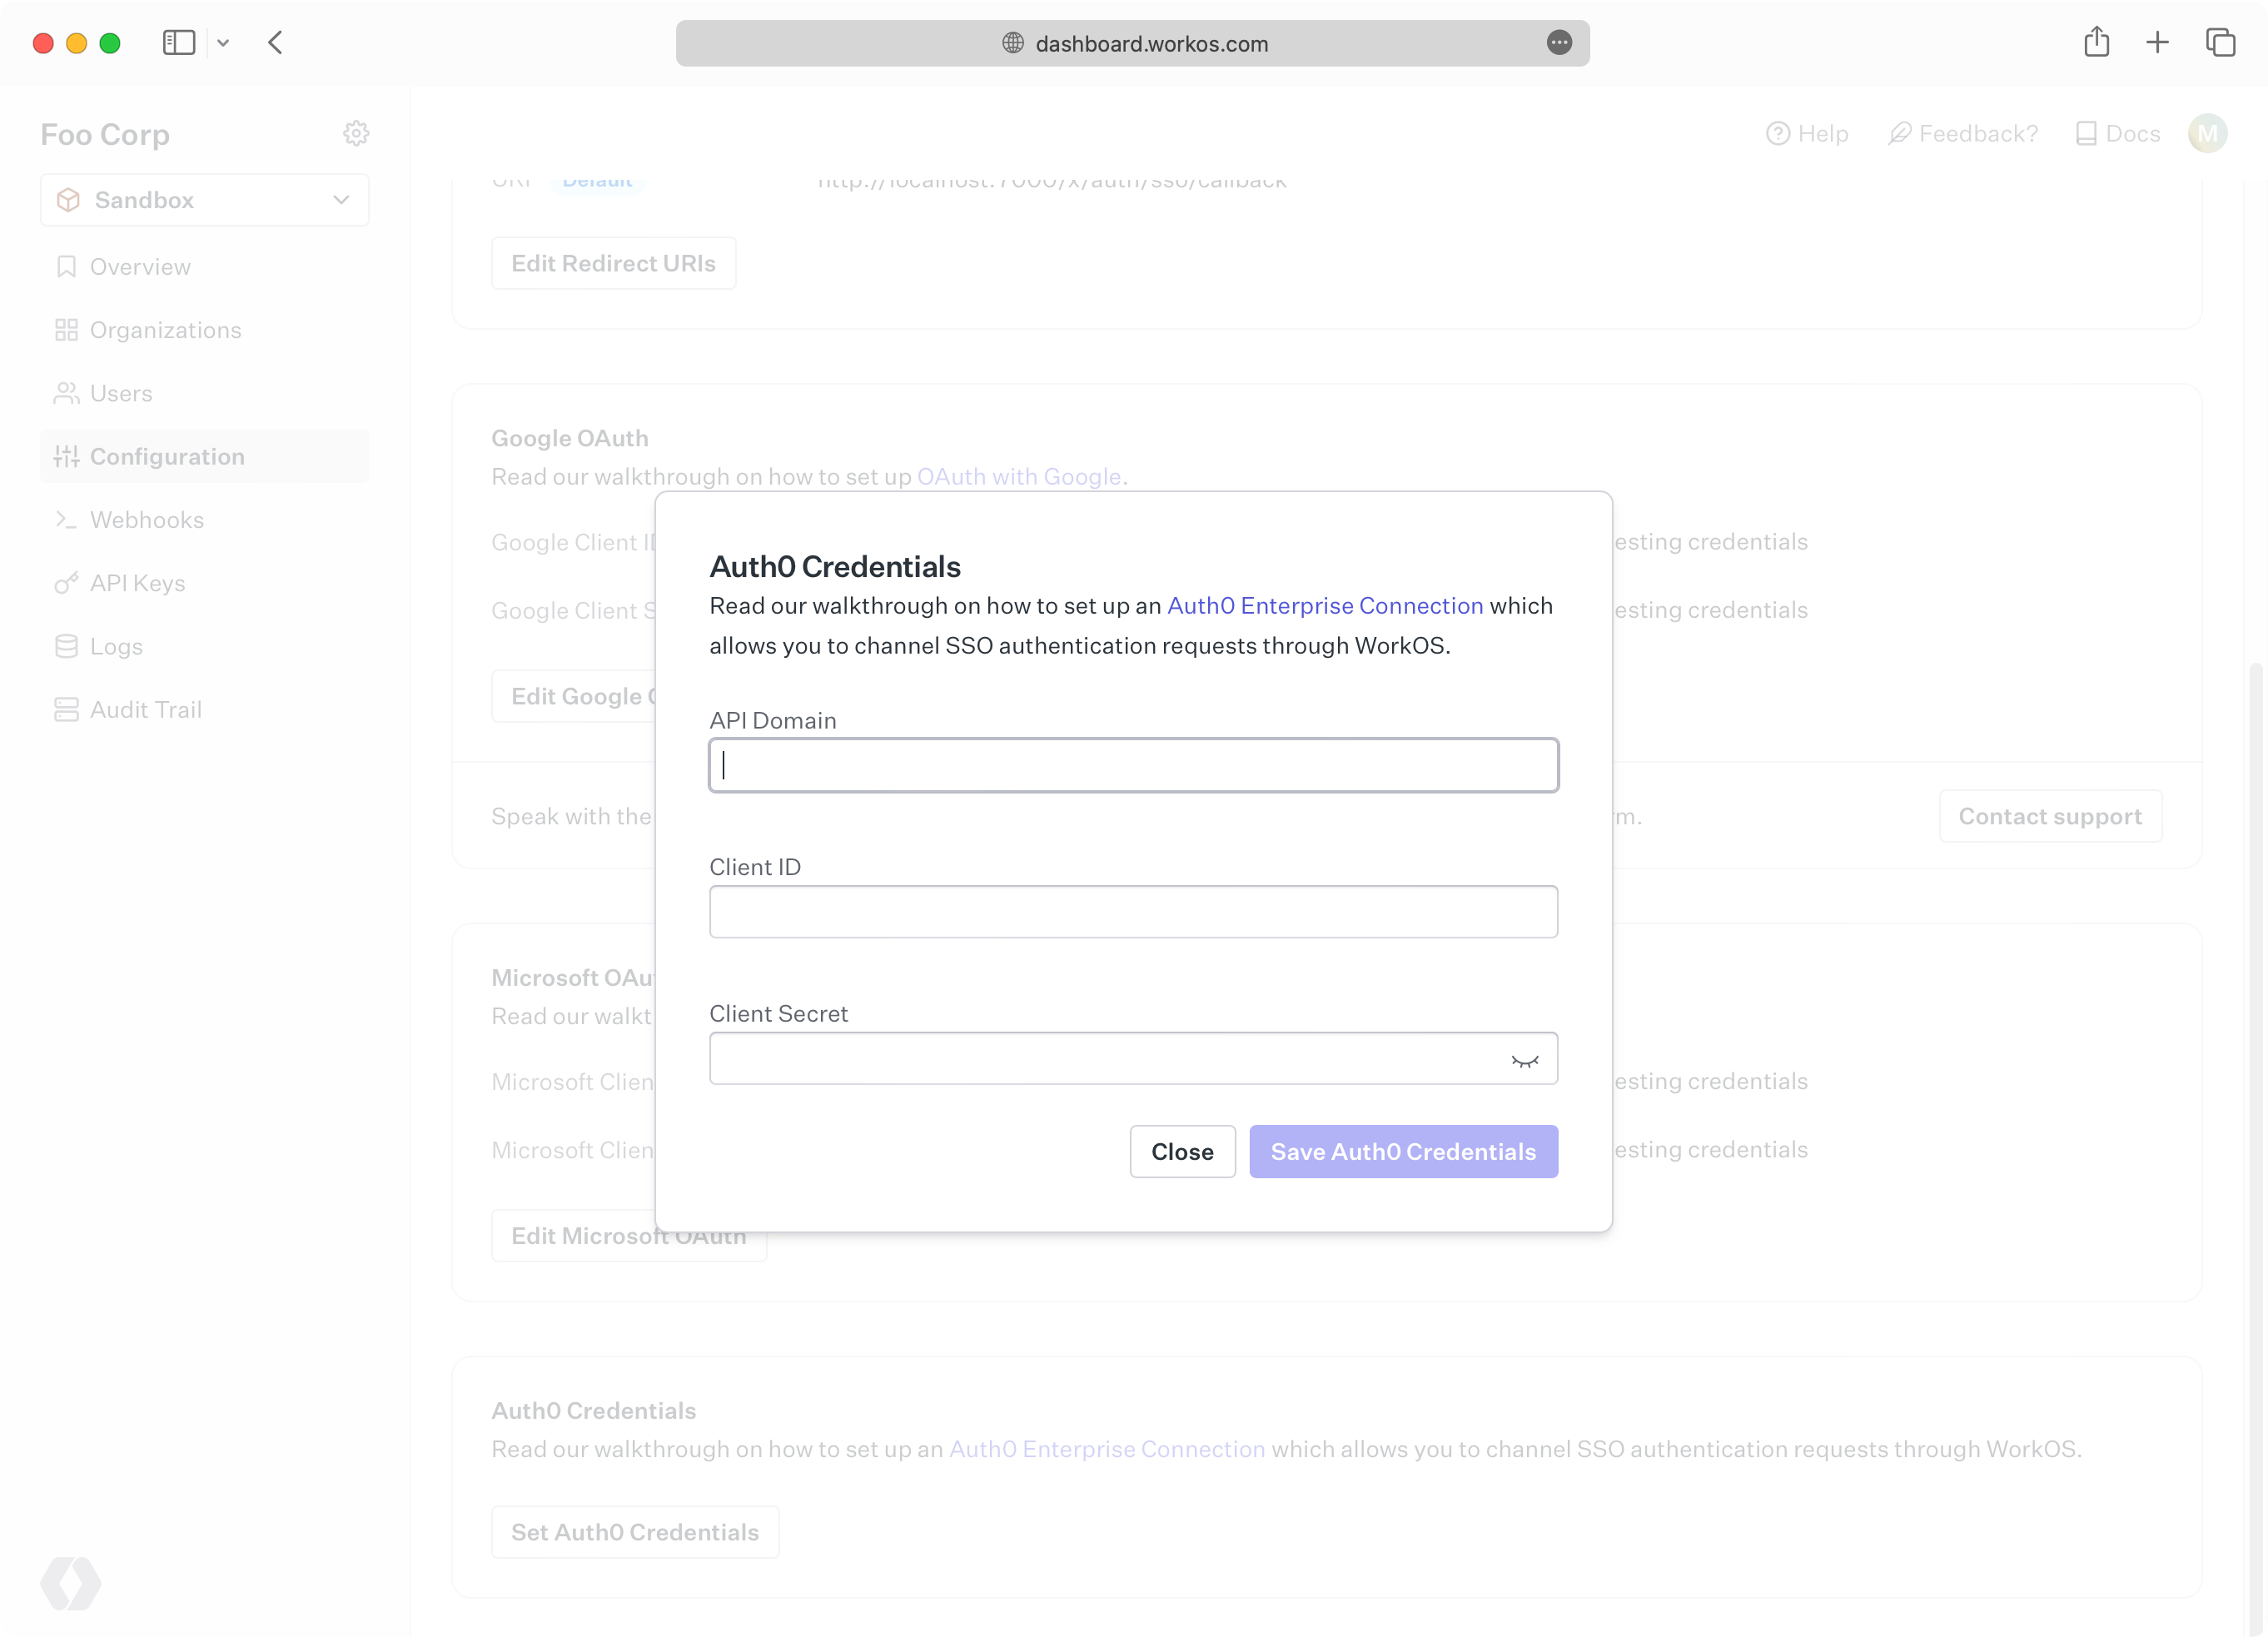
Click Save. In the final step, you will head back to the Auth0 dashboard one last time to complete the configuration.
After saving your credentials, WorkOS will create an Enterprise Connection in your Auth0 environment. This connection is the entry point into WorkOS SSO from Auth0. The next step is to enable the connection for your Auth0 application.
In the Auth0 dashboard, navigate to Applications → Your App → Connections. You should see a connection with a workos-sso- prefix in its name. Enable it for your application.
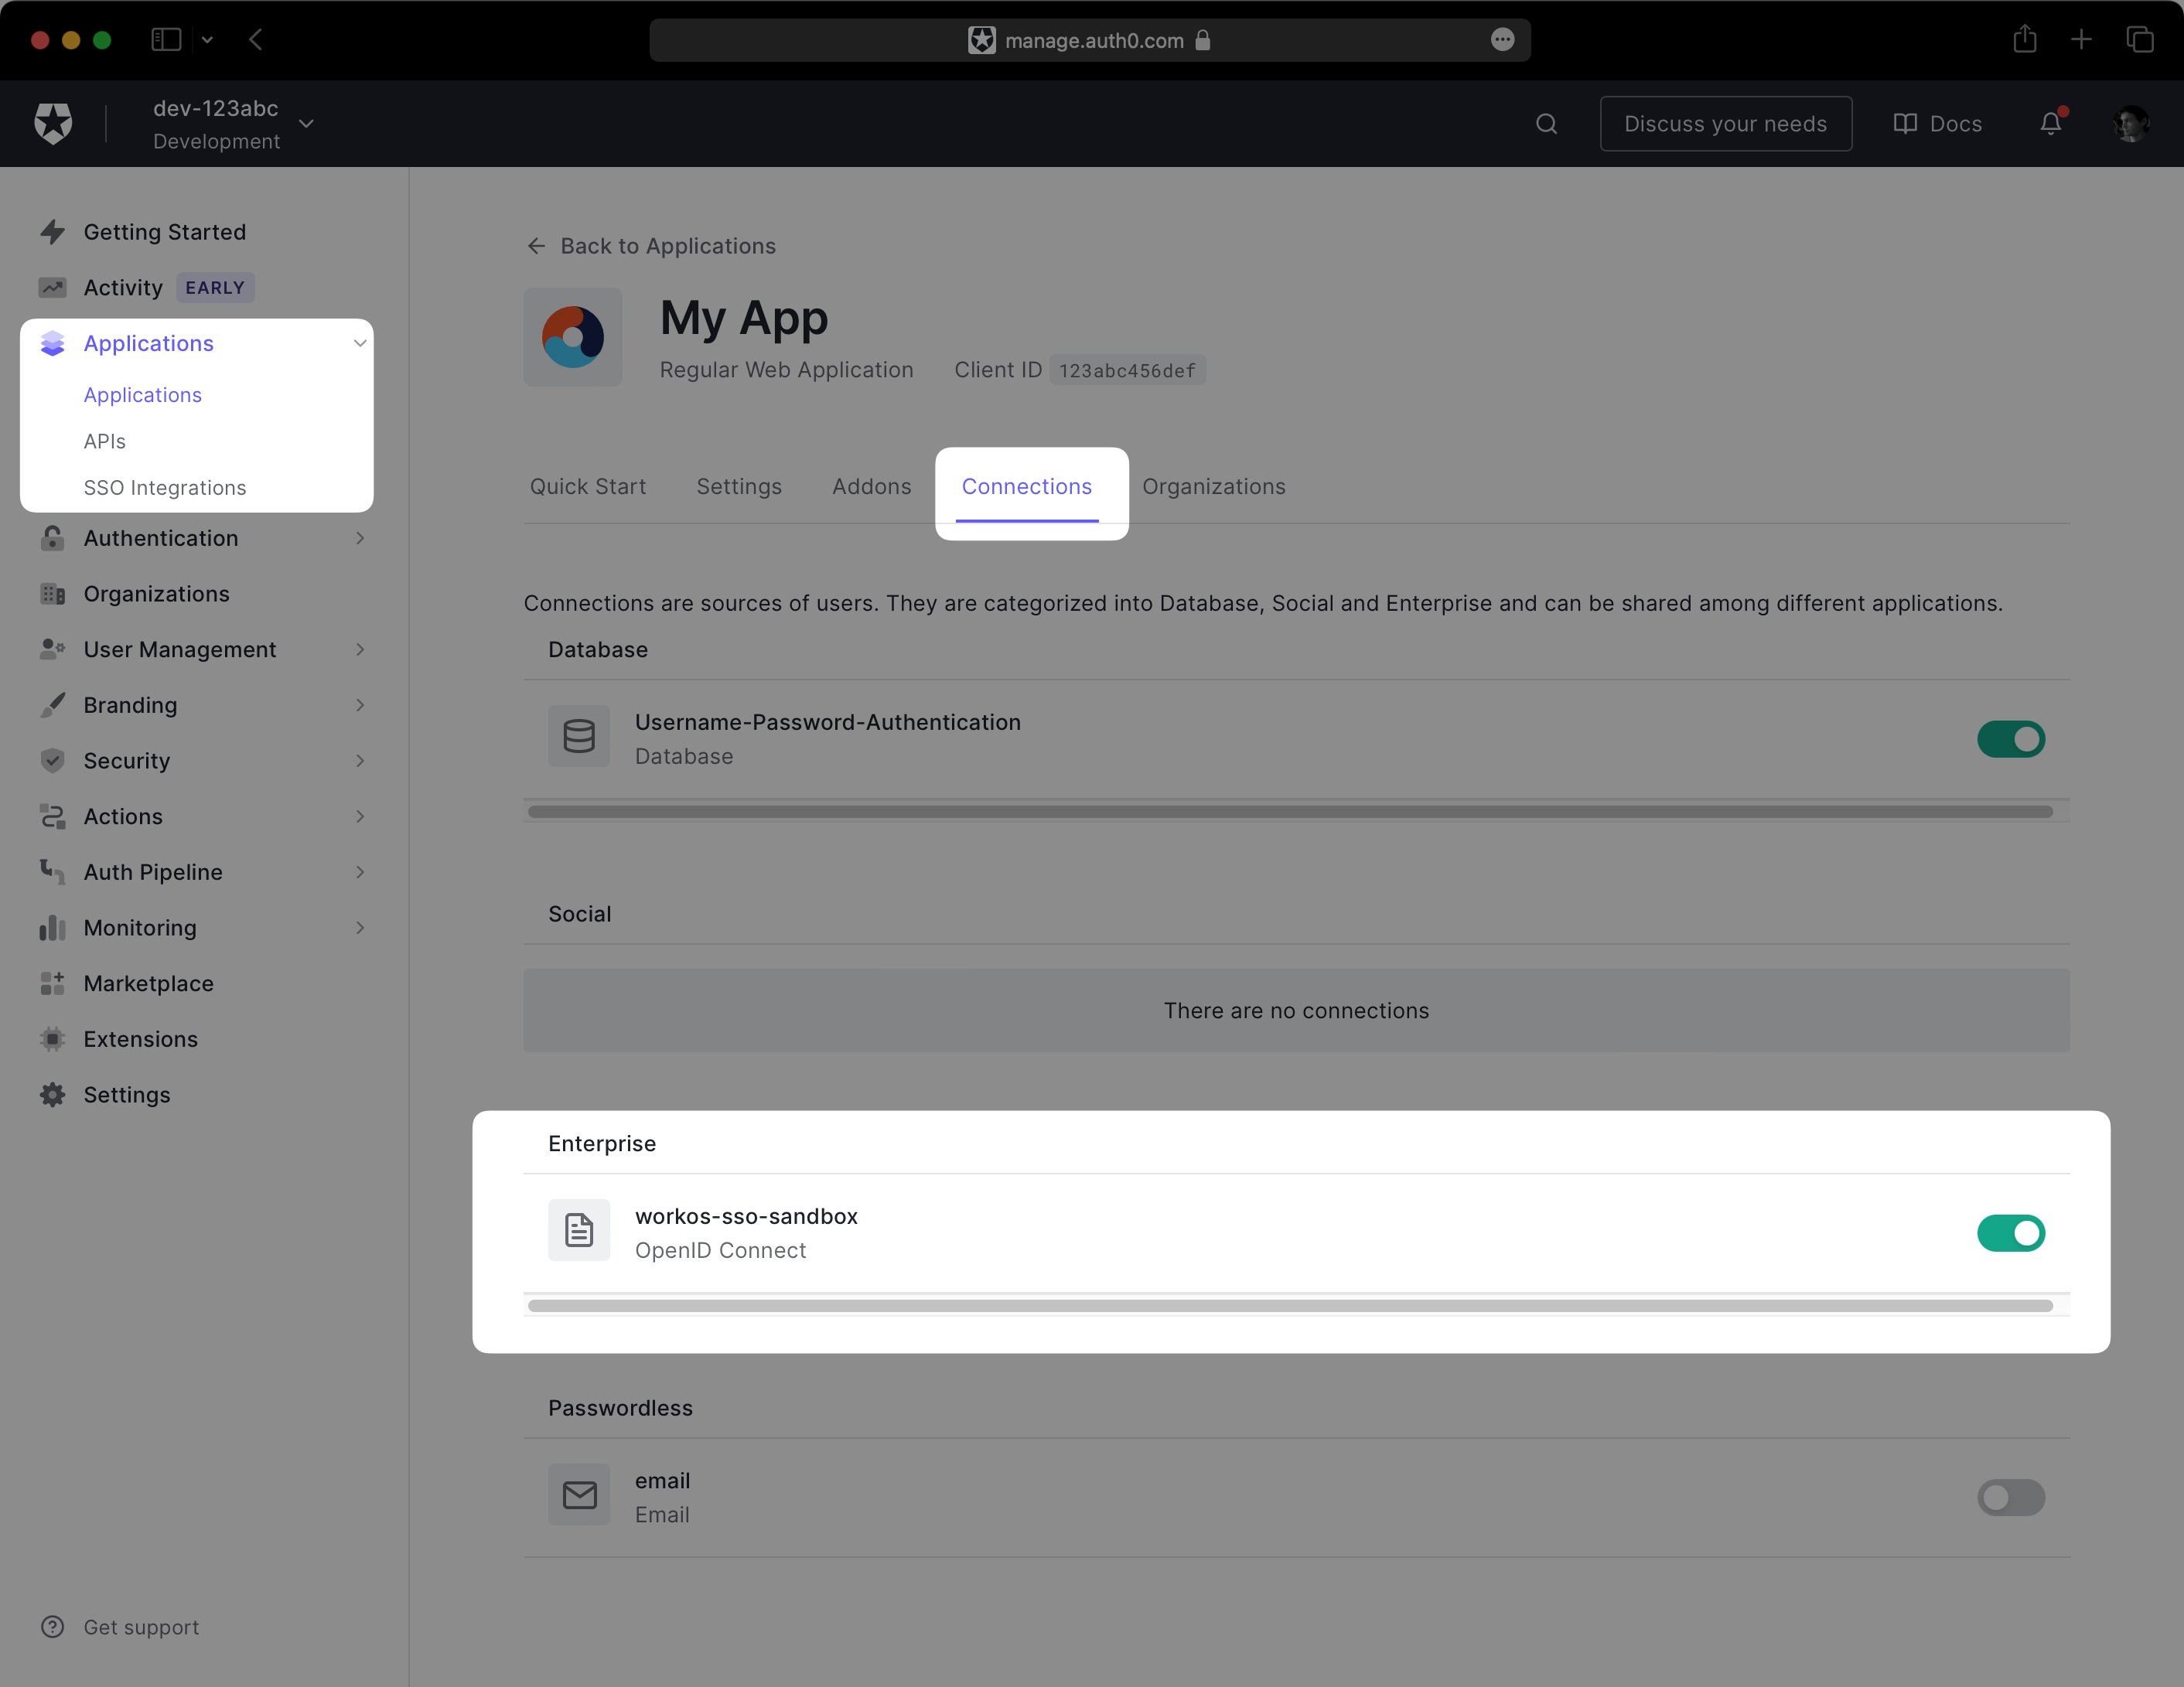
In the Auth0 dashboard, navigate to Authentication → Authentication Profile. You should see three options for configuring login flow. Select Identifier First.
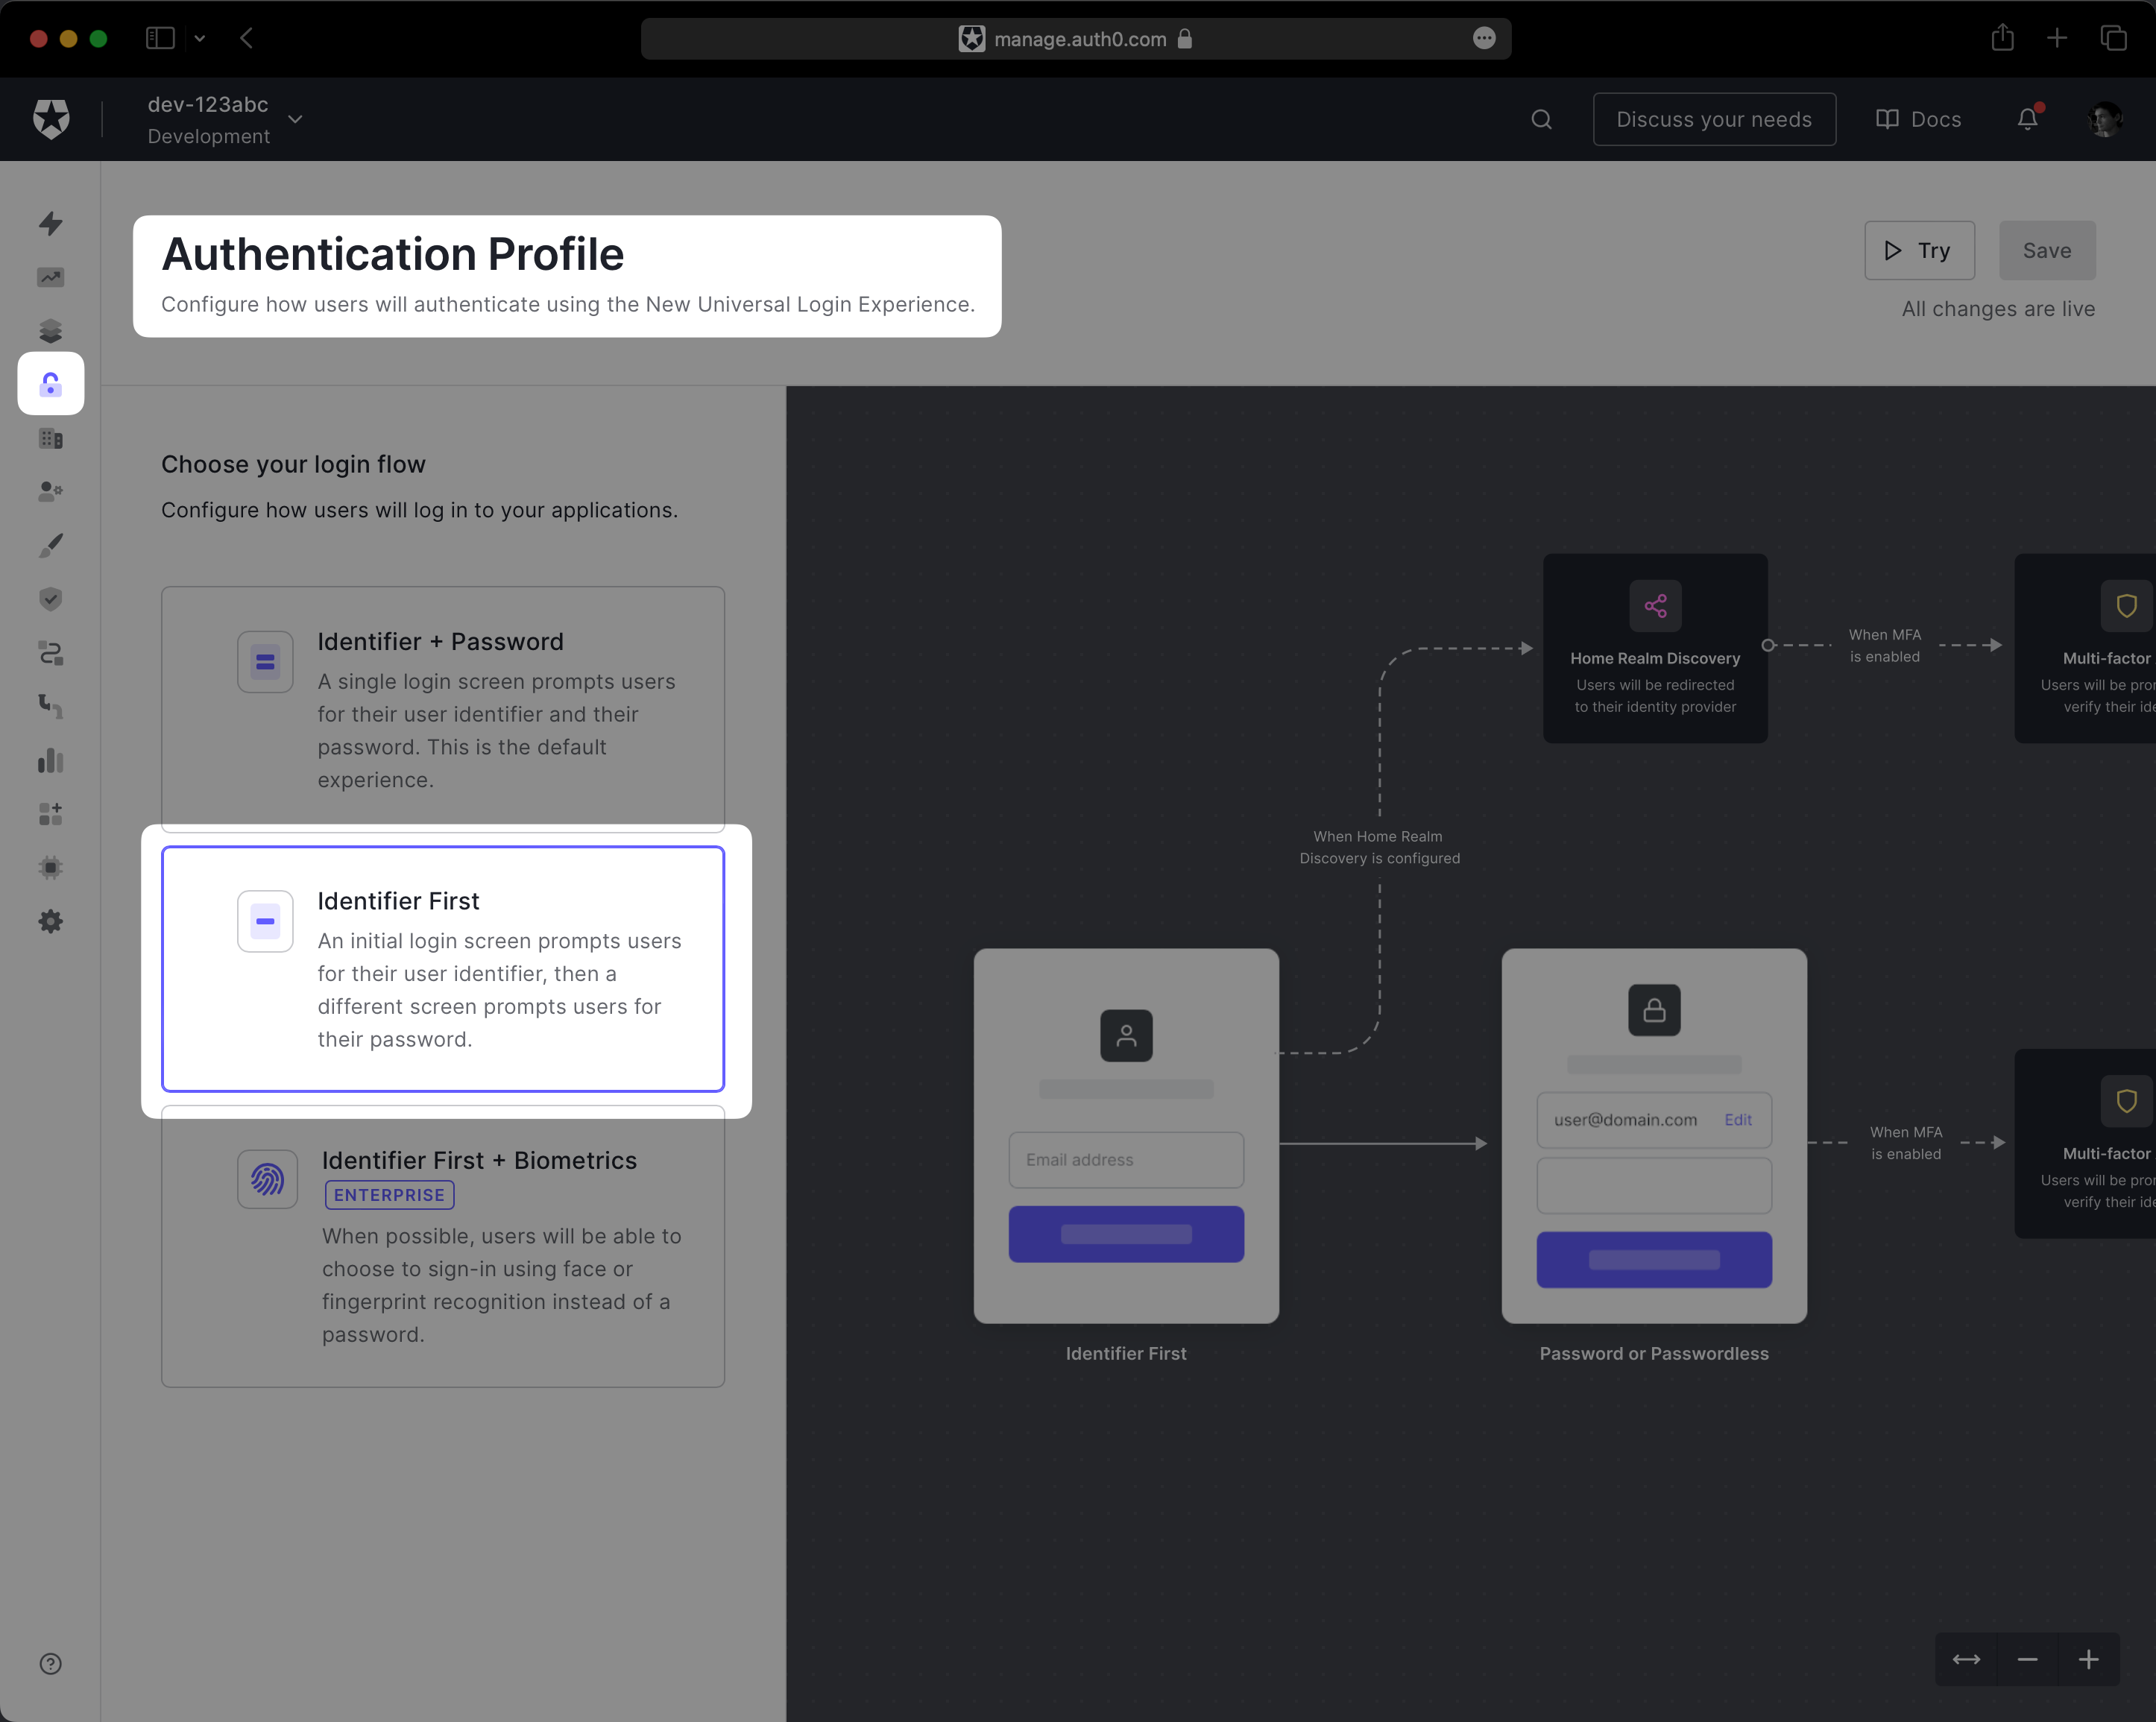
This configures the Auth0 Universal Login page to begin by prompting the user for their email address. This is necessary as it allows Auth0 to select the WorkOS SSO Enterprise Connection if the user’s email domain matches one of your WorkOS organizations. Non-enterprise users will still be prompted for their password.
IdP-initiated SSO is currently not supported when using the Auth0 Enterprise Connection integration.
Your WorkOS SSO connections are now available to your Auth0 application! You are ready to use WorkOS features like Admin Portal, allowing IT admins to configure their SSO setup for your application directly.
As you create organizations, WorkOS will keep the Auth0 Enterprise Connection’s Home Realm Discovery list updated with the organization’s domains – ensuring correct routing of enterprise users to WorkOS for authentication.
When users enter their email address into the Auth0 Universal Login, which matches a domain associated with a WorkOS organization, Auth0 redirects users to their WorkOS-enabled IdP sign-in page for their organization. Once the authentication process is complete with the IdP, WorkOS redirects to your Auth0 app callback URL.
Since email domains are used to route users to the correct IdP when using Auth0, WorkOS will enforce that organization domains are unique, and therefore a domain cannot be assigned to more than one organization.