HiBob
Learn about syncing your user list with HiBob.
This guide outlines how to synchronize your application’s HiBob directories.
To synchronize an organization’s users and groups provisioned for your application, you’ll need the enterprise IT contacts to provide you:
- A HiBob Service User ID.
- The HiBob Service User’s Token.
We will provide instructions below on the process in HiBob to create a Service User and collect those parameters.
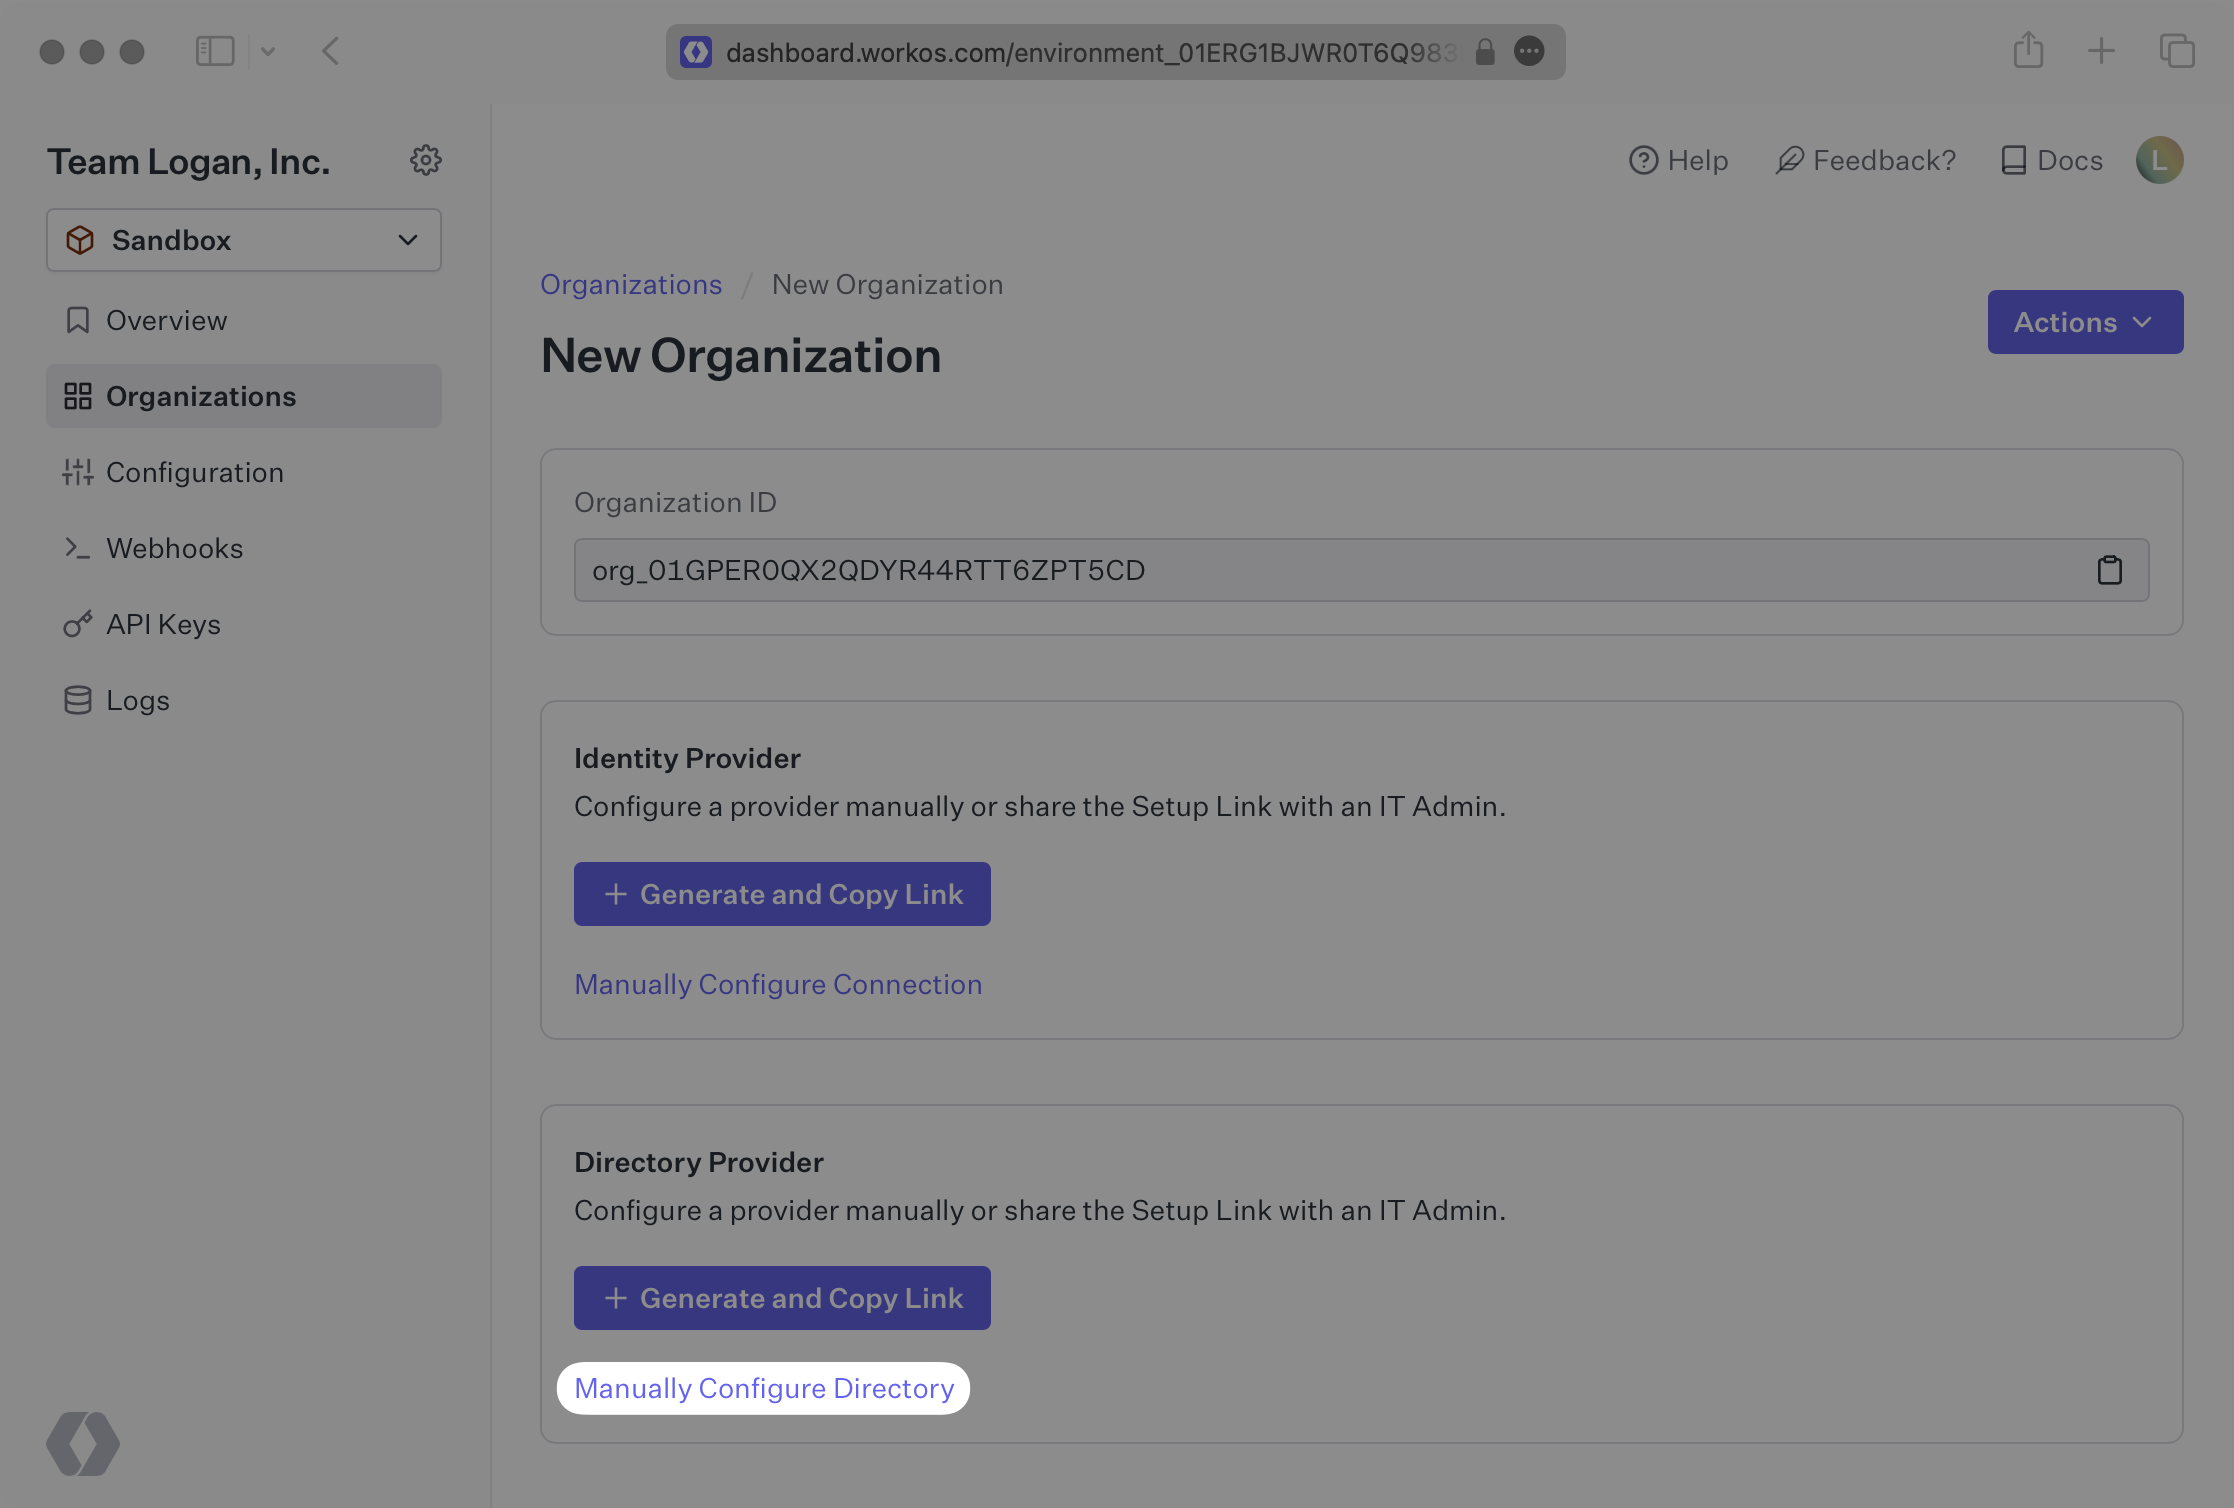
Login to your WorkOS dashboard and select “Organizations” from the left hand Navigation bar
Select the Organization you’d like to enable a HiBob Directory Sync connection for.
On the Organization’s page click “Manually Configure Directory”.
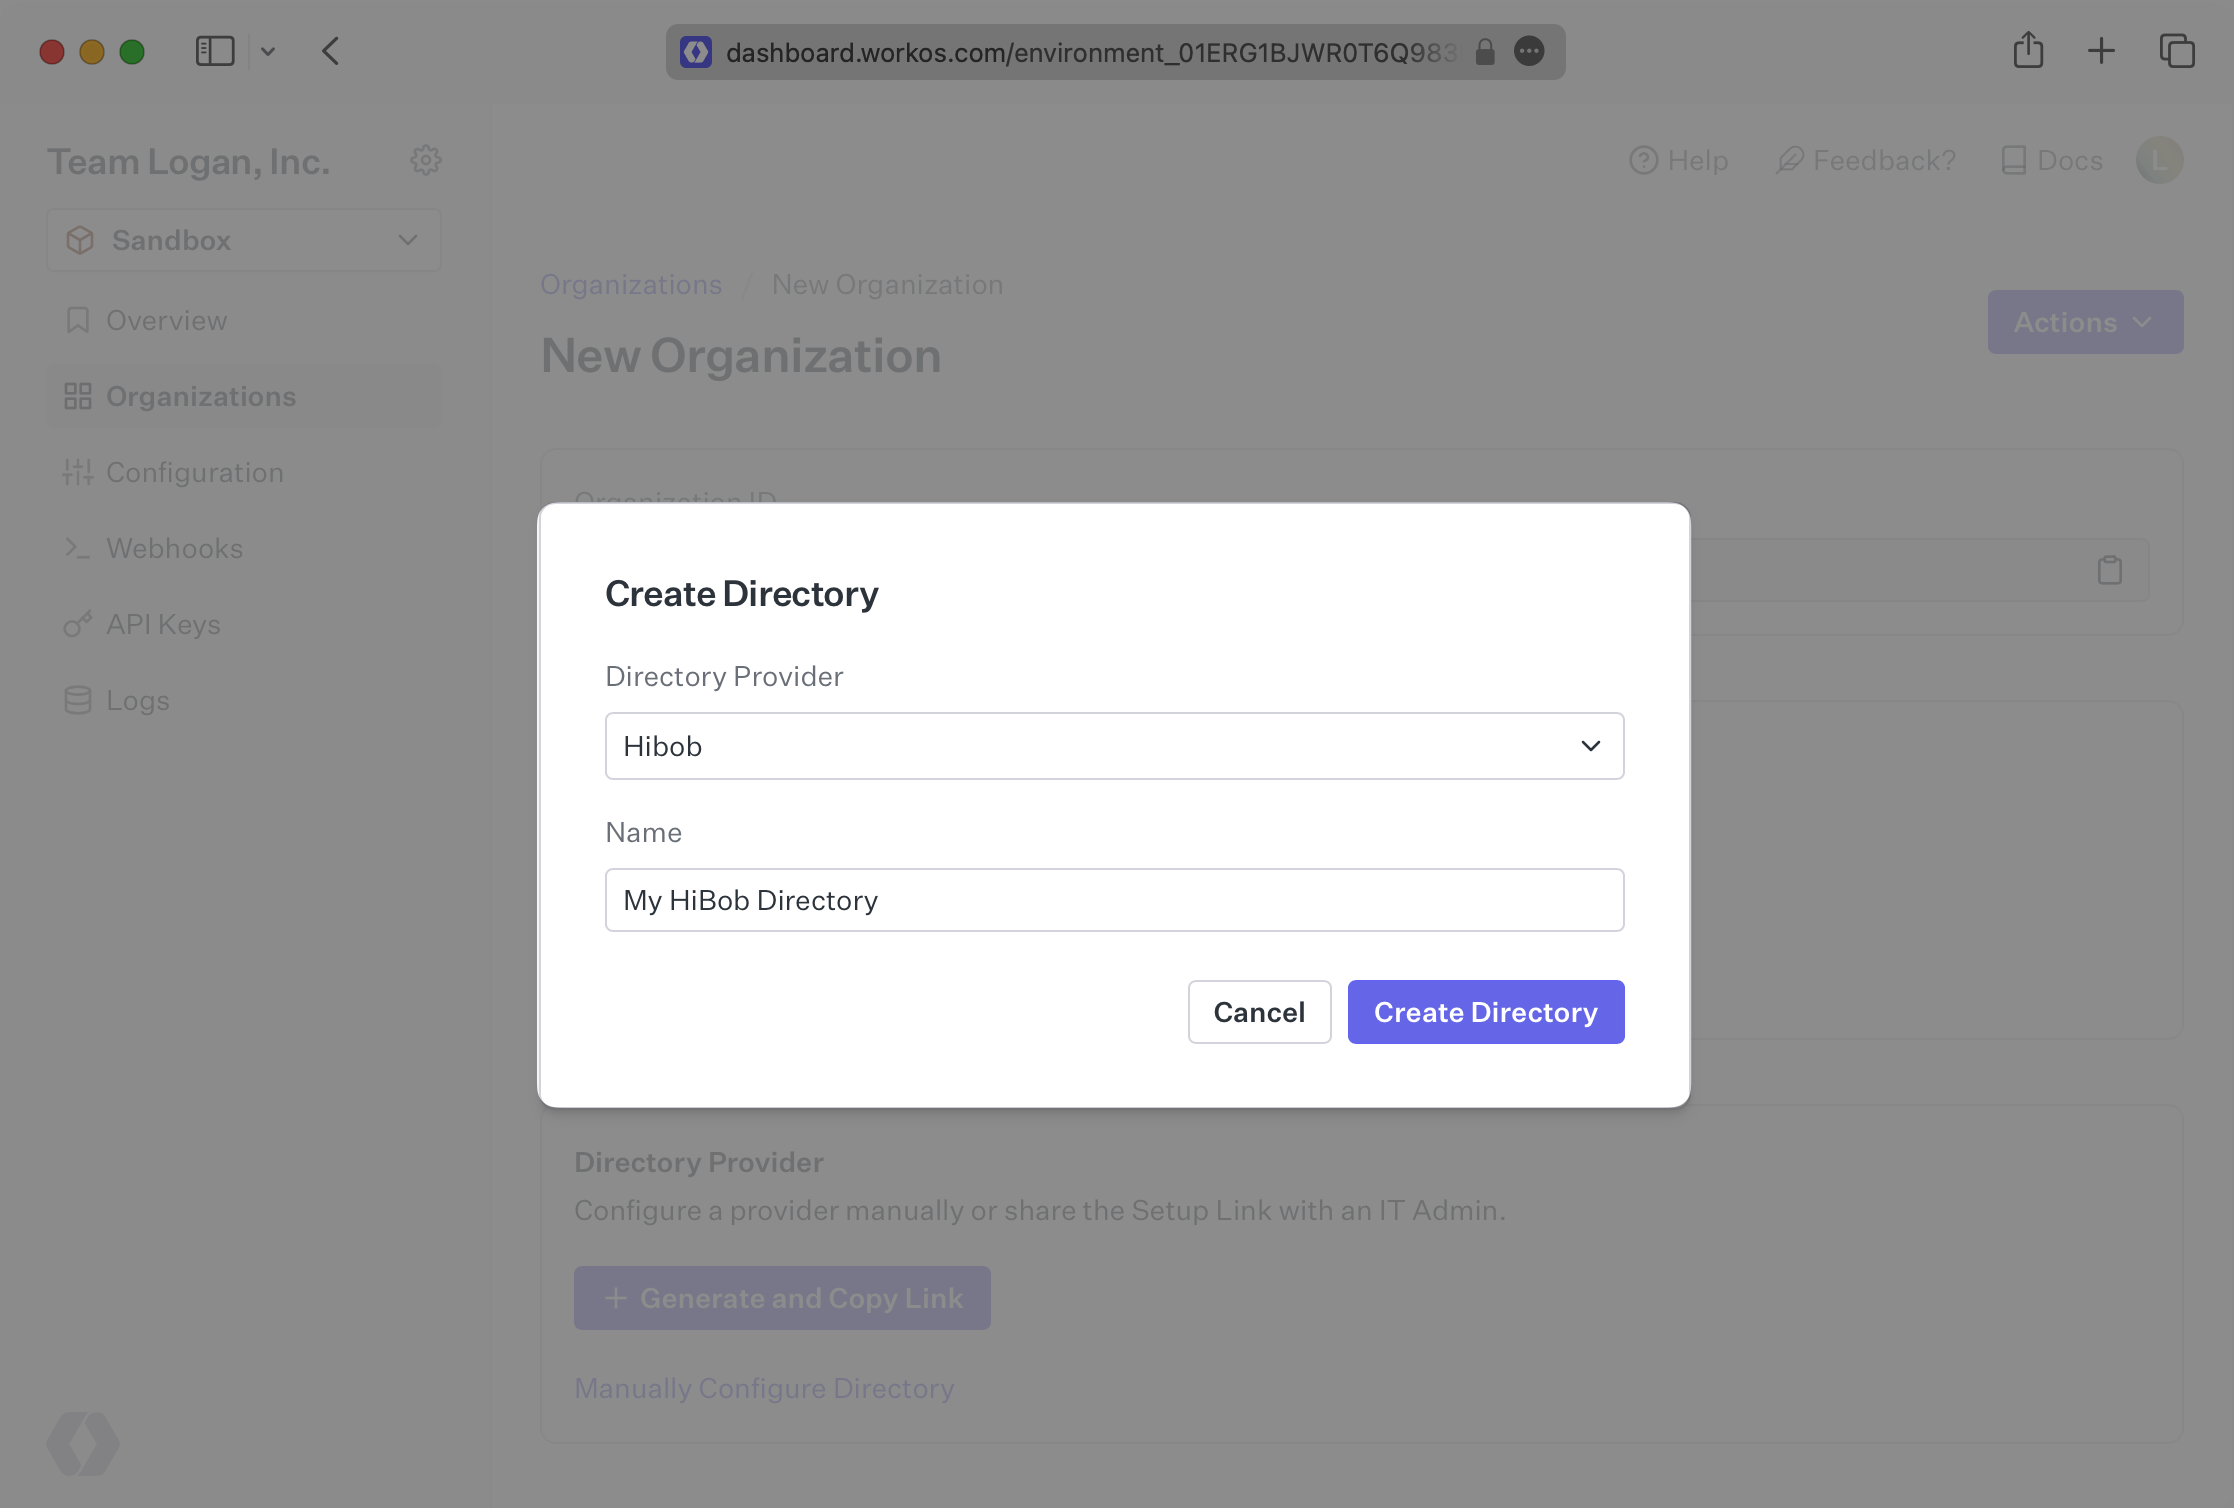
You’ll be prompted to select “HiBob” from the “Directory Type Dropdown”, as well as enter the name of the directory.
Then click “Create Directory”.
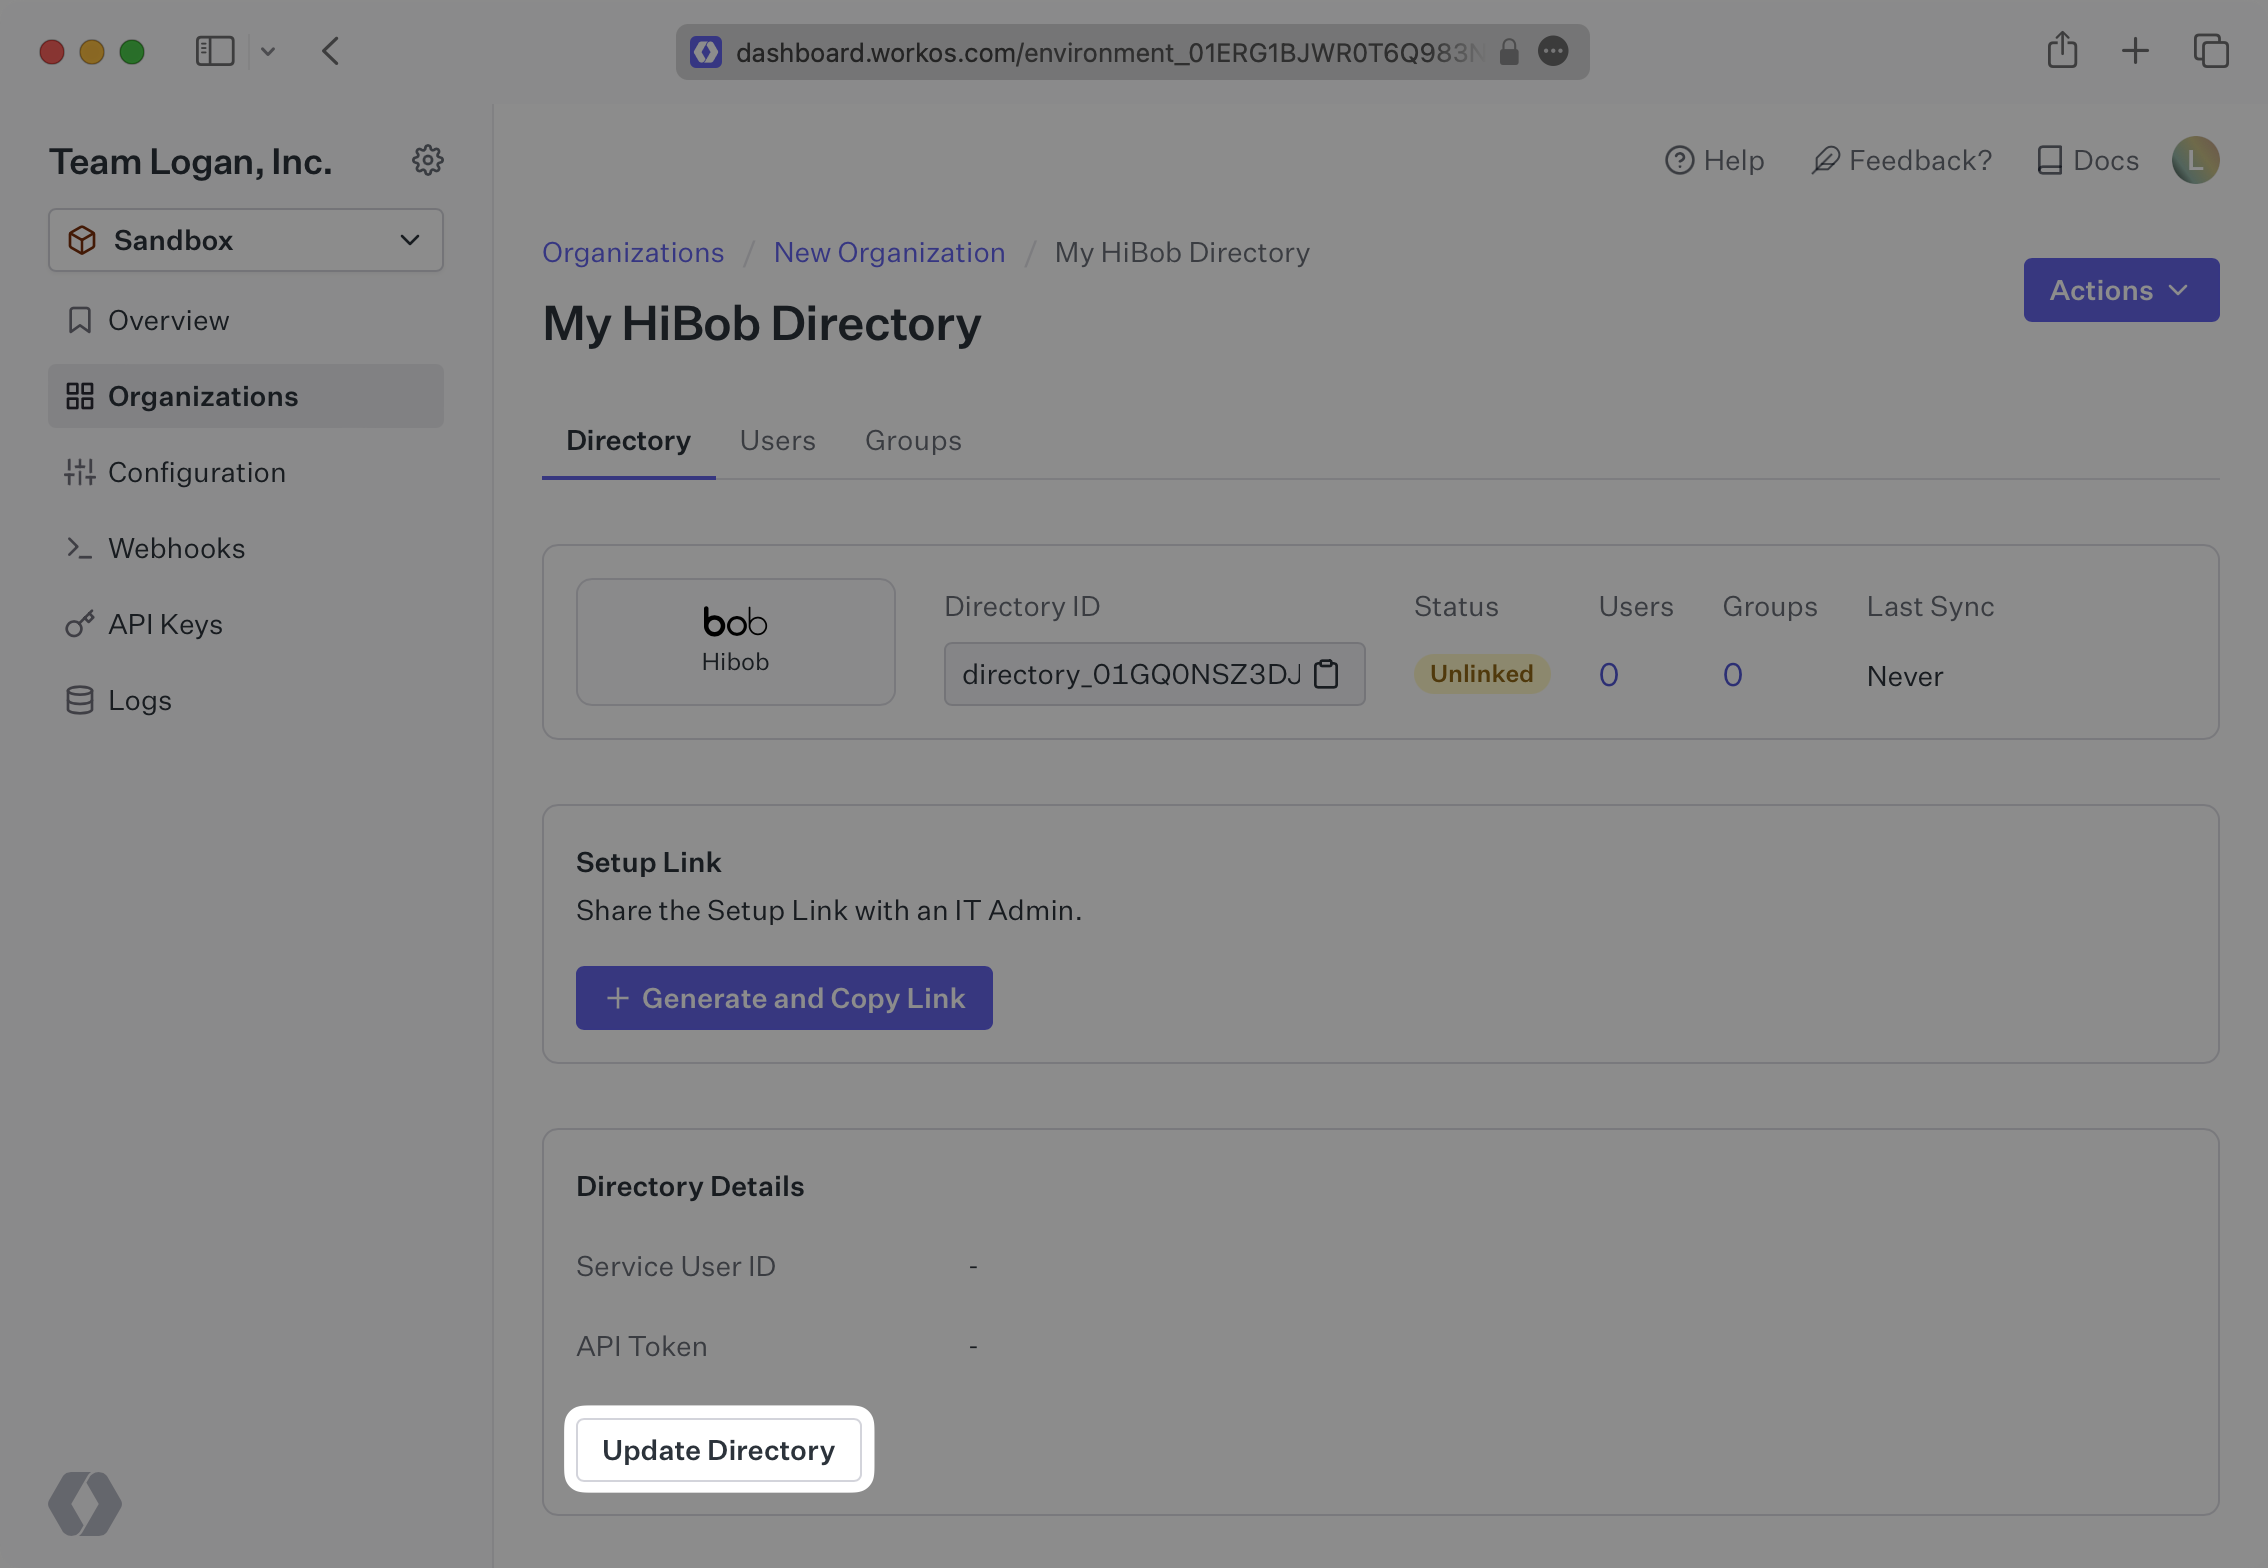
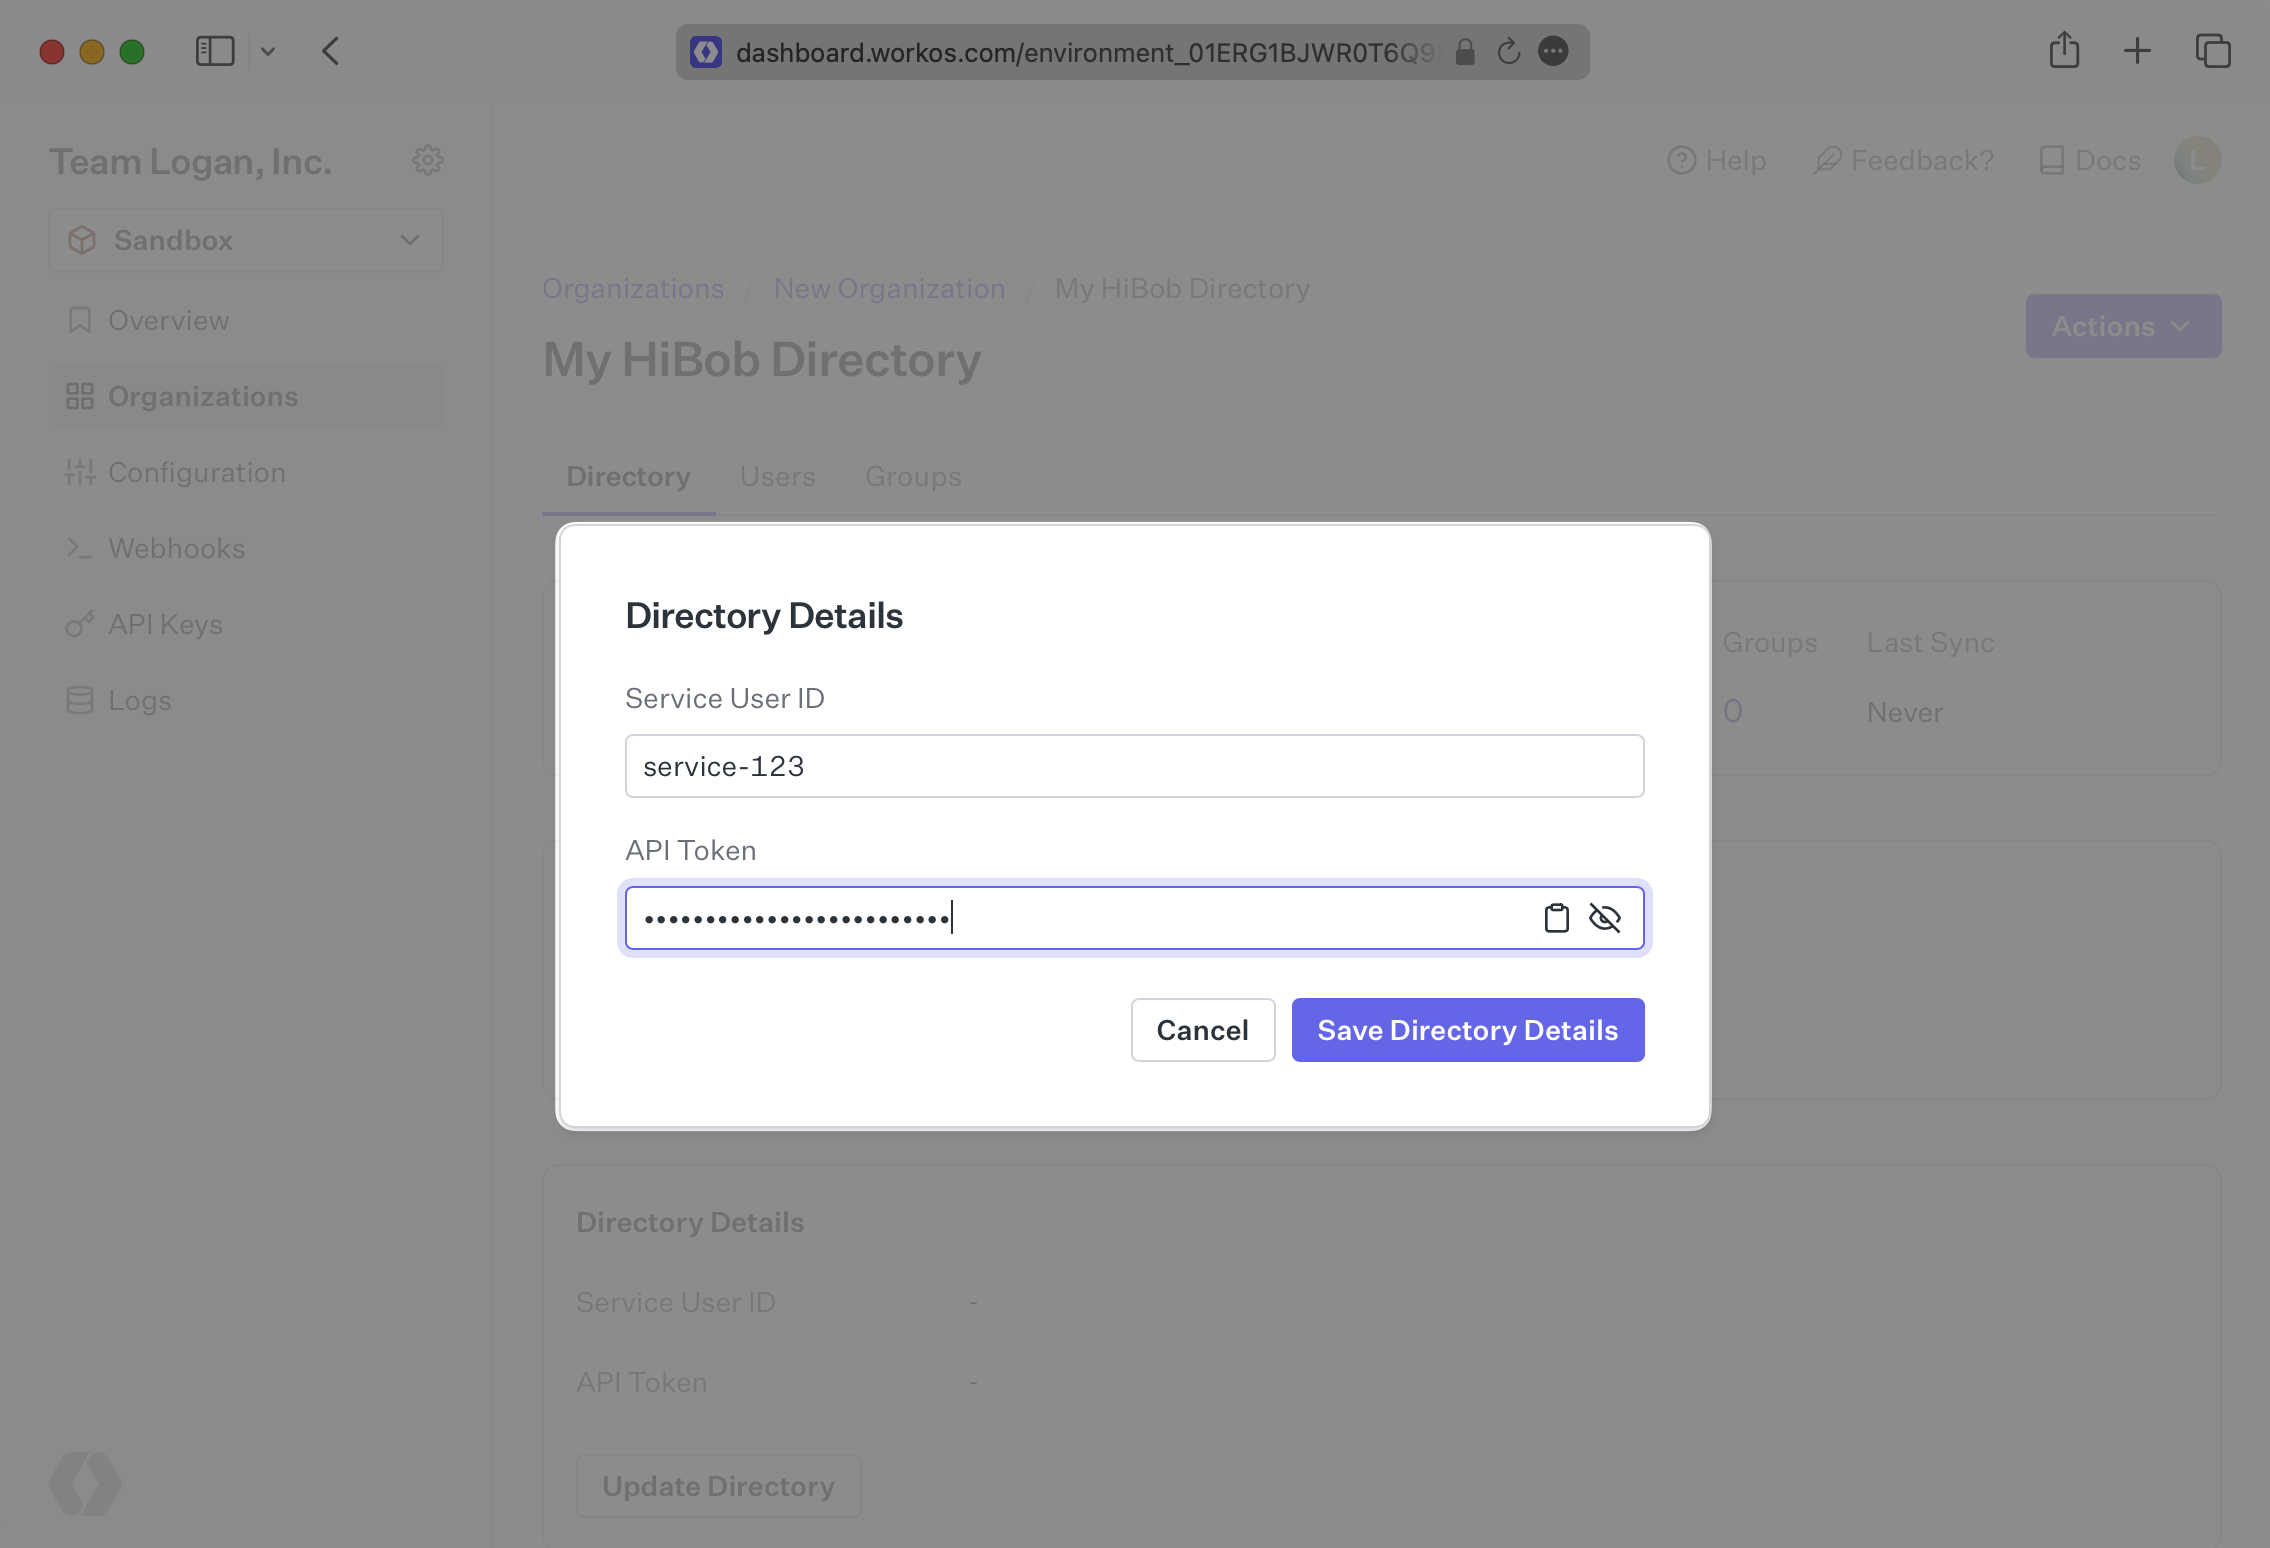
WorkOS will create a Directory Sync Connection where you will input a “Service User ID” and an “API Token”. The next step will walk you through how an organization’s IT contact can generate and gather these details.
HiBob uses a system called Service Users to utilize API actions. These steps walkthrough creating a Service User and obtaining the credentials needed by WorkOS to link with HiBob successfully.
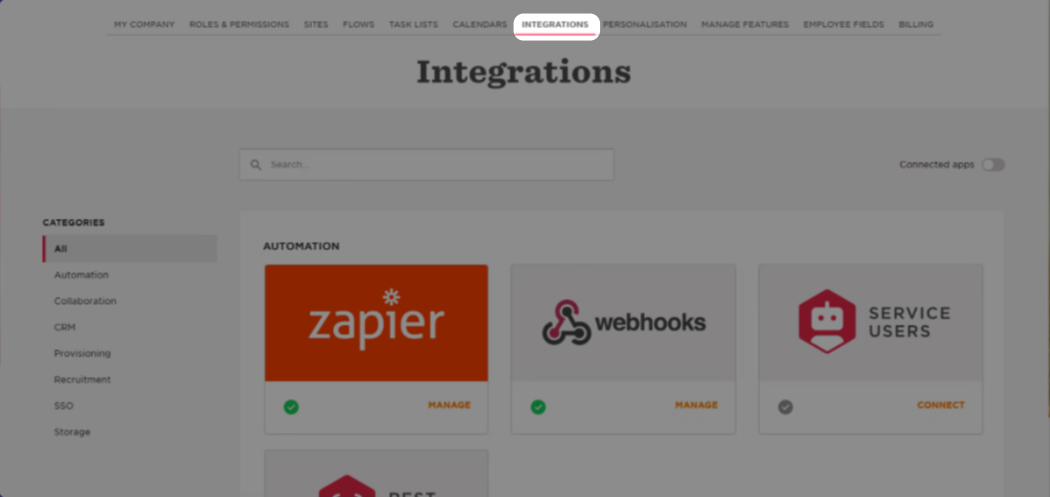
Login to HiBob and navigate to “Settings” and then selecting the “Integrations” tab.
There will be a tile called Service Users, click on that.
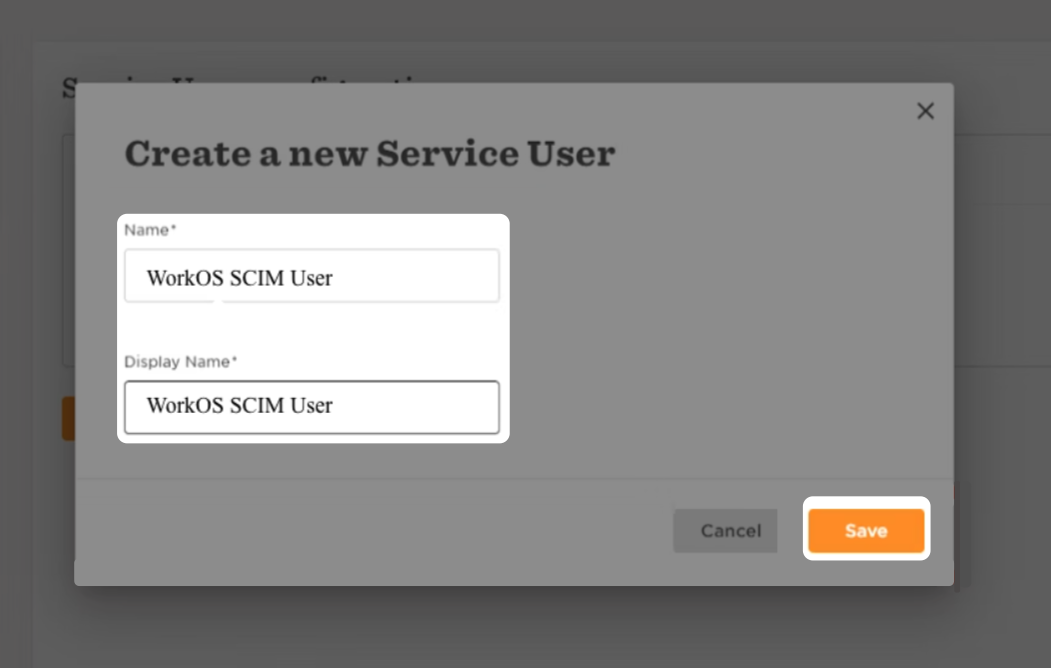
Press on the New Service user Button
The user will be prompted to enter a name (and display name, these can be the same) for the new service user, we recommend something like “WorkOS SCIM User”.
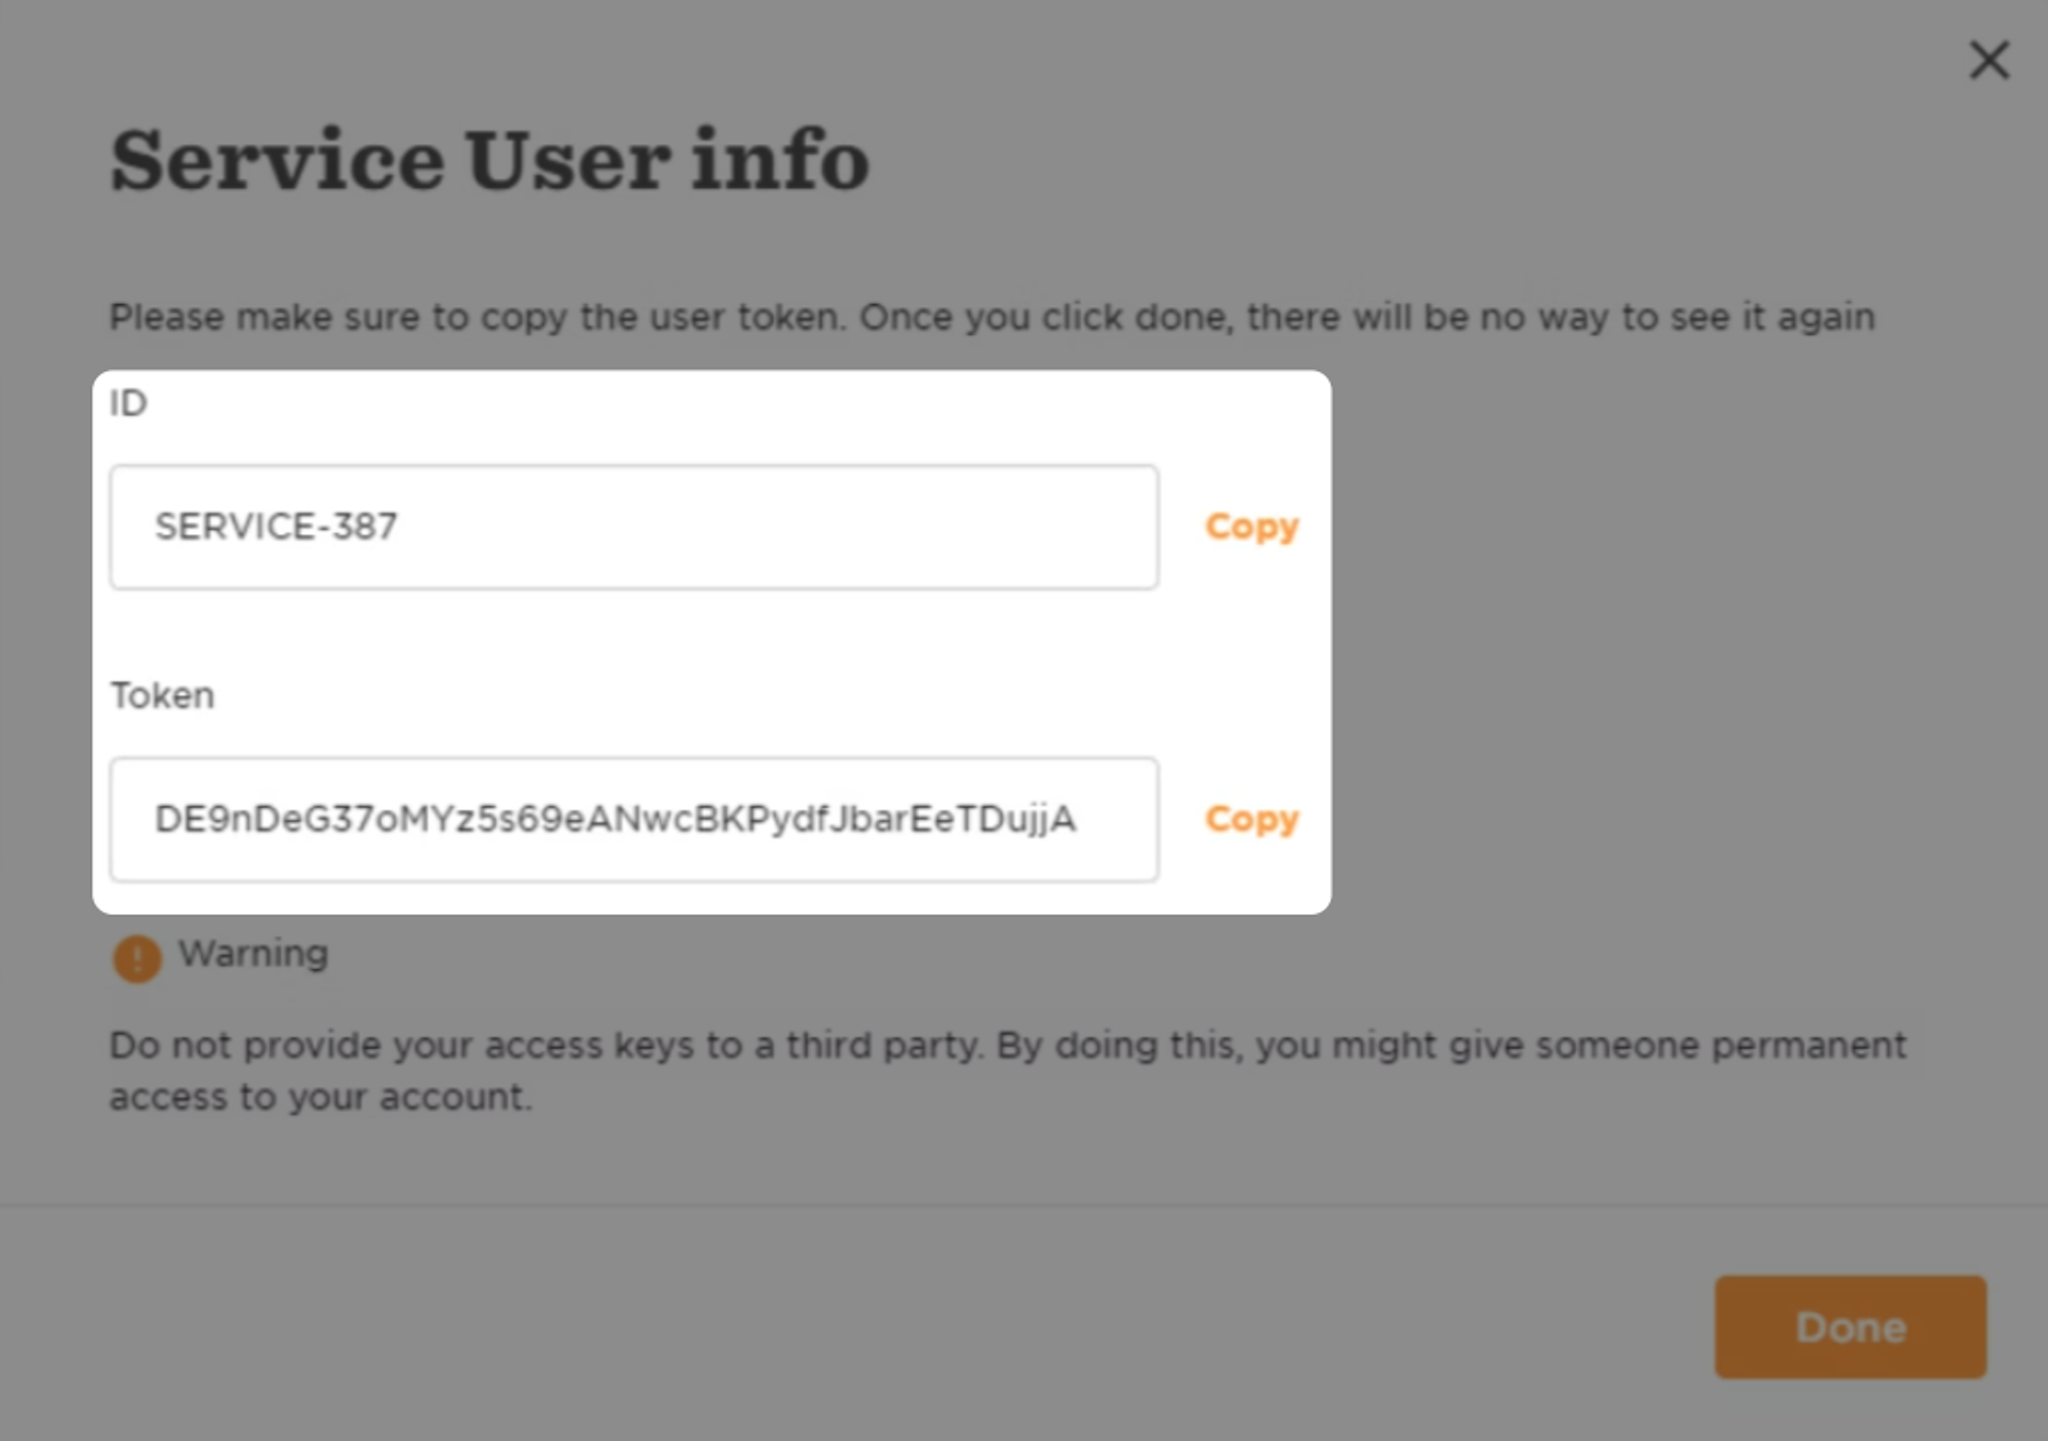
HiBob will then present you with an ID and a Token, which will be populated into WorkOS, so make sure to inform the customer to provide these.
To set up permissions for the service user:
- In HiBob, create a permission group for the service user (see HiBob’s guide on creating permission groups)
- Under the People’s data tab in the permission group, enable the following permissions:
- View all employees’ Root sections (required for basic employee data: id, email, first name, last name)
- View all employees’ Work sections (required for title, department, site, start date, manager information)
- View all employees’ About sections (standard employee information)
- View all employees’ Employment sections (employment details)
- Under Access Rights, set the permission group to “Everyone” to sync all active employees. To include inactive employees, use “Select by condition” and remove the “Lifecycle status equals Employed” filter
- Assign the service user to this permission group
For more details on setting permissions, see HiBob’s permission documentation.
Back in the connection that was created in your WorkOS dashboard, enter these two fields and press “Save Directory Details.”
You should see the connection now displays “Linked” in green.
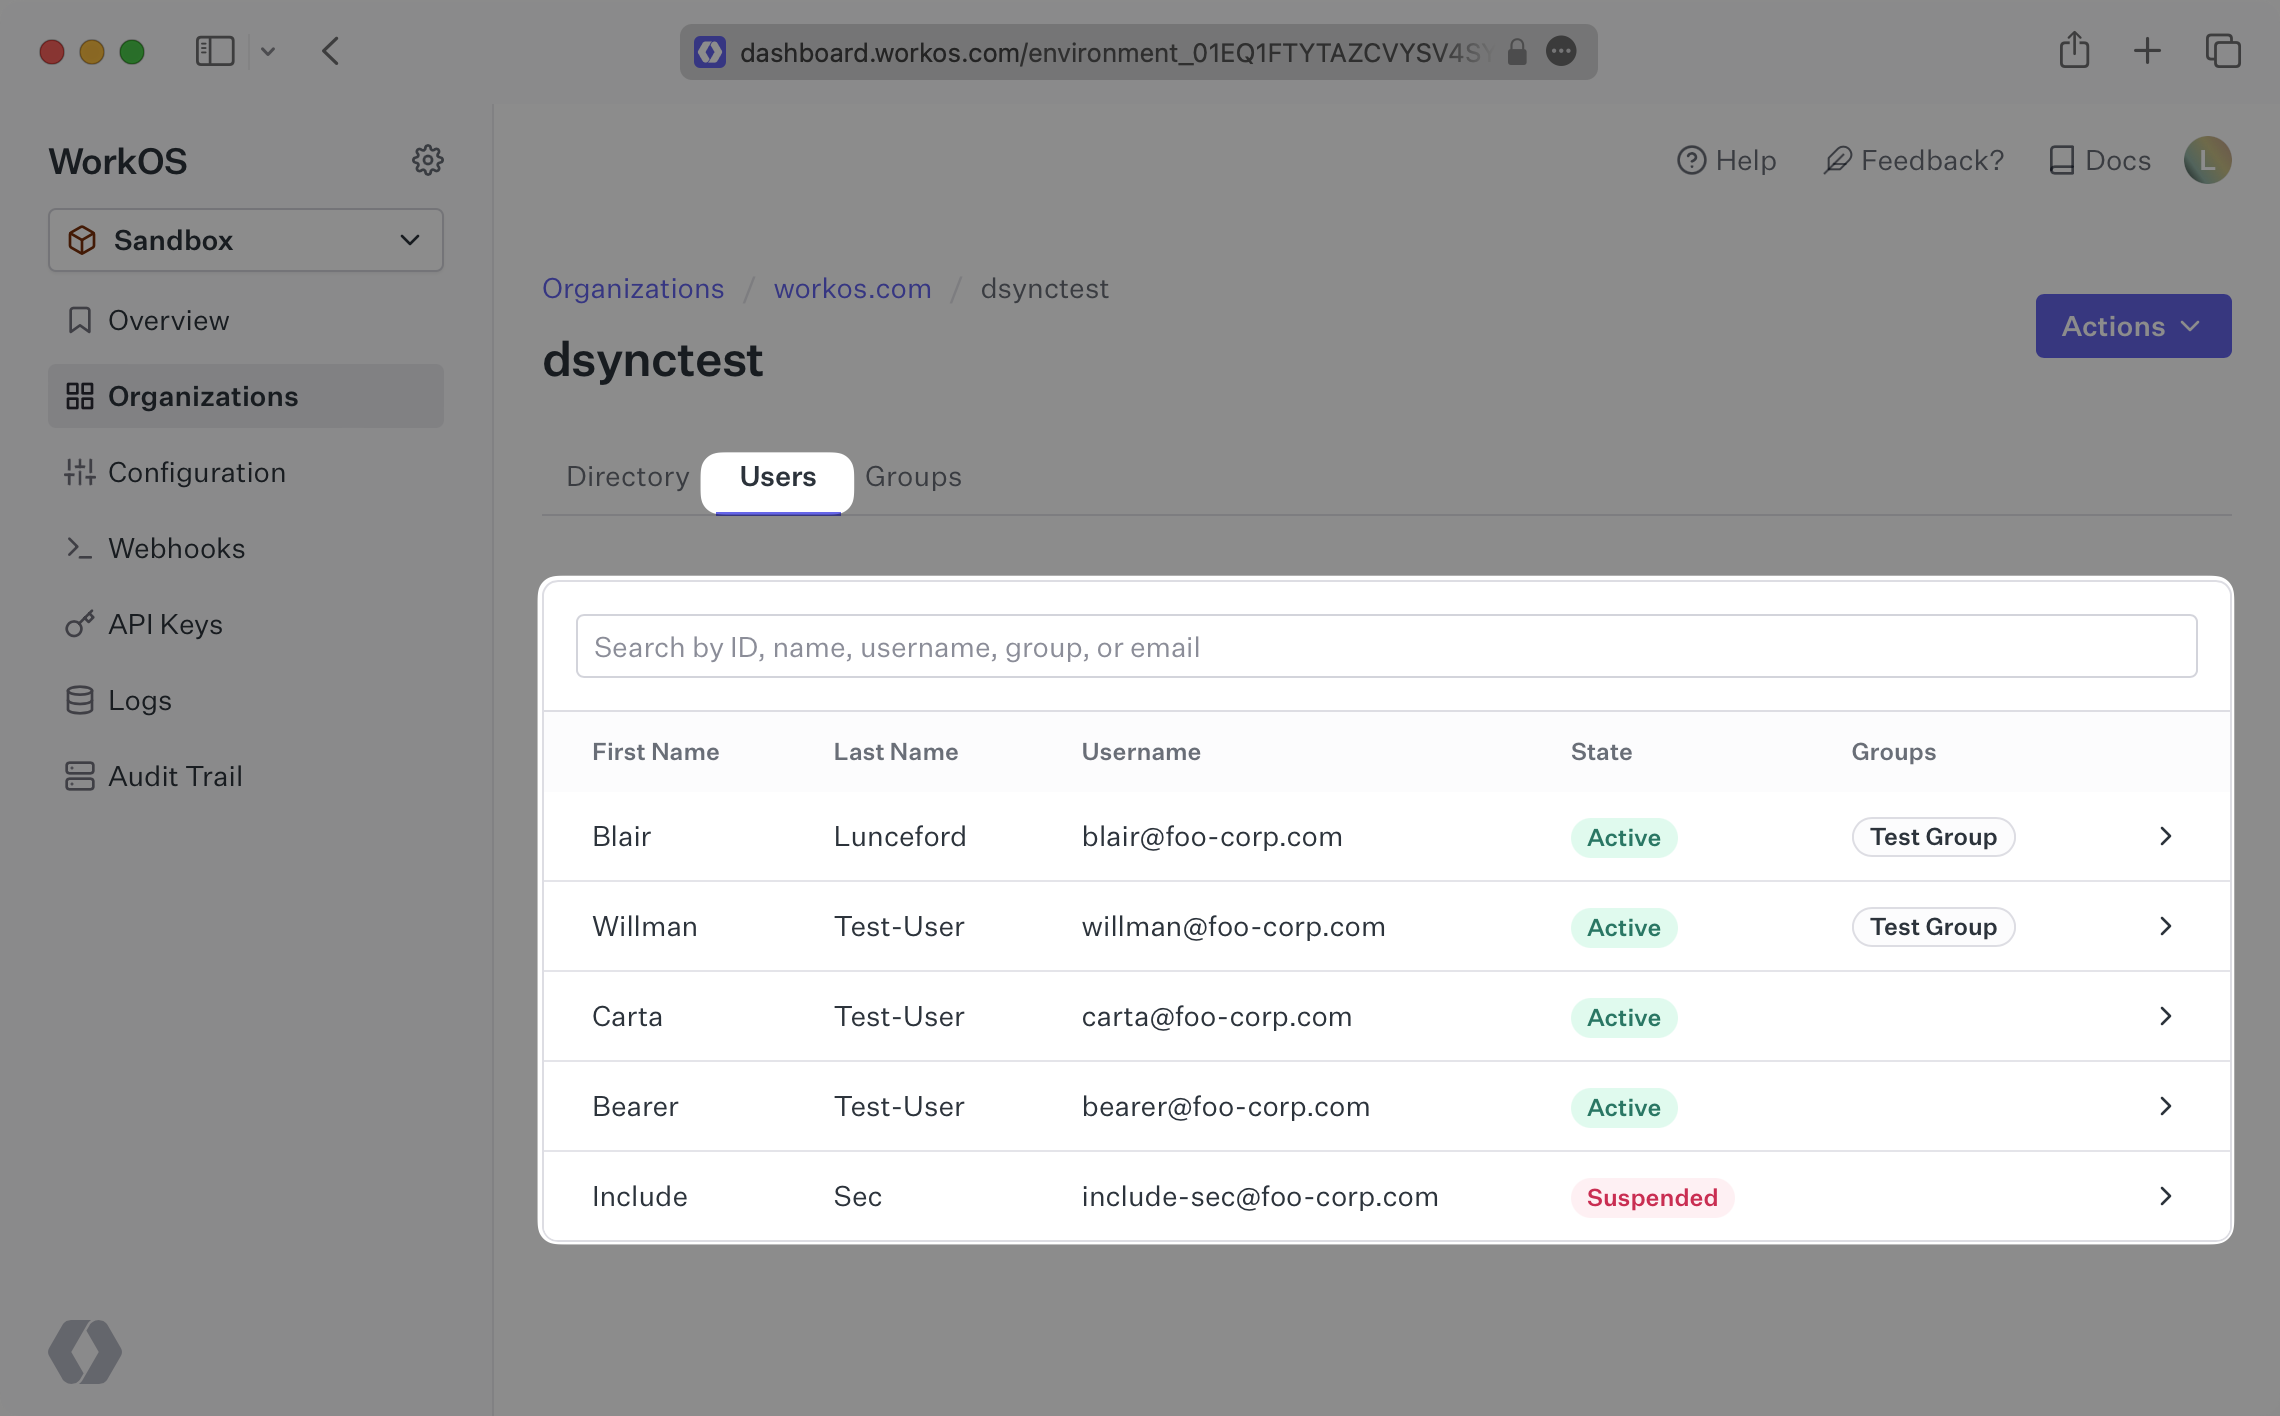
You will now see updates to the users in the directory under the “Users” tab in the HiBob Directory Sync page in WorkOS.
What if the directory user profiles from HiBob aren’t showing all of the expected user attributes, such as the user address?
If some user attributes are not being sent along in the profile, you’ll want to start by checking the permissions of the Service User you created in step 2. You can see more about accessing Service User permissions here and some relevant FAQs from HiBob here.
How often do HiBob directories perform a sync?
HiBob directories poll every 30 minutes starting from the time of the initial sync.