Xero OAuth
Learn how to set up OAuth with Xero
The Xero OAuth integration allows your users to authenticate using their Xero credentials through the “Sign in with Xero” flow.
The configuration process involves creating an OAuth application in Xero and configuring the client credentials in your WorkOS Dashboard.
When setting up Xero OAuth, WorkOS provides one key piece of information that needs to be configured in your Xero OAuth application:
- Redirect URI: The endpoint where Xero will send authentication responses after successful login
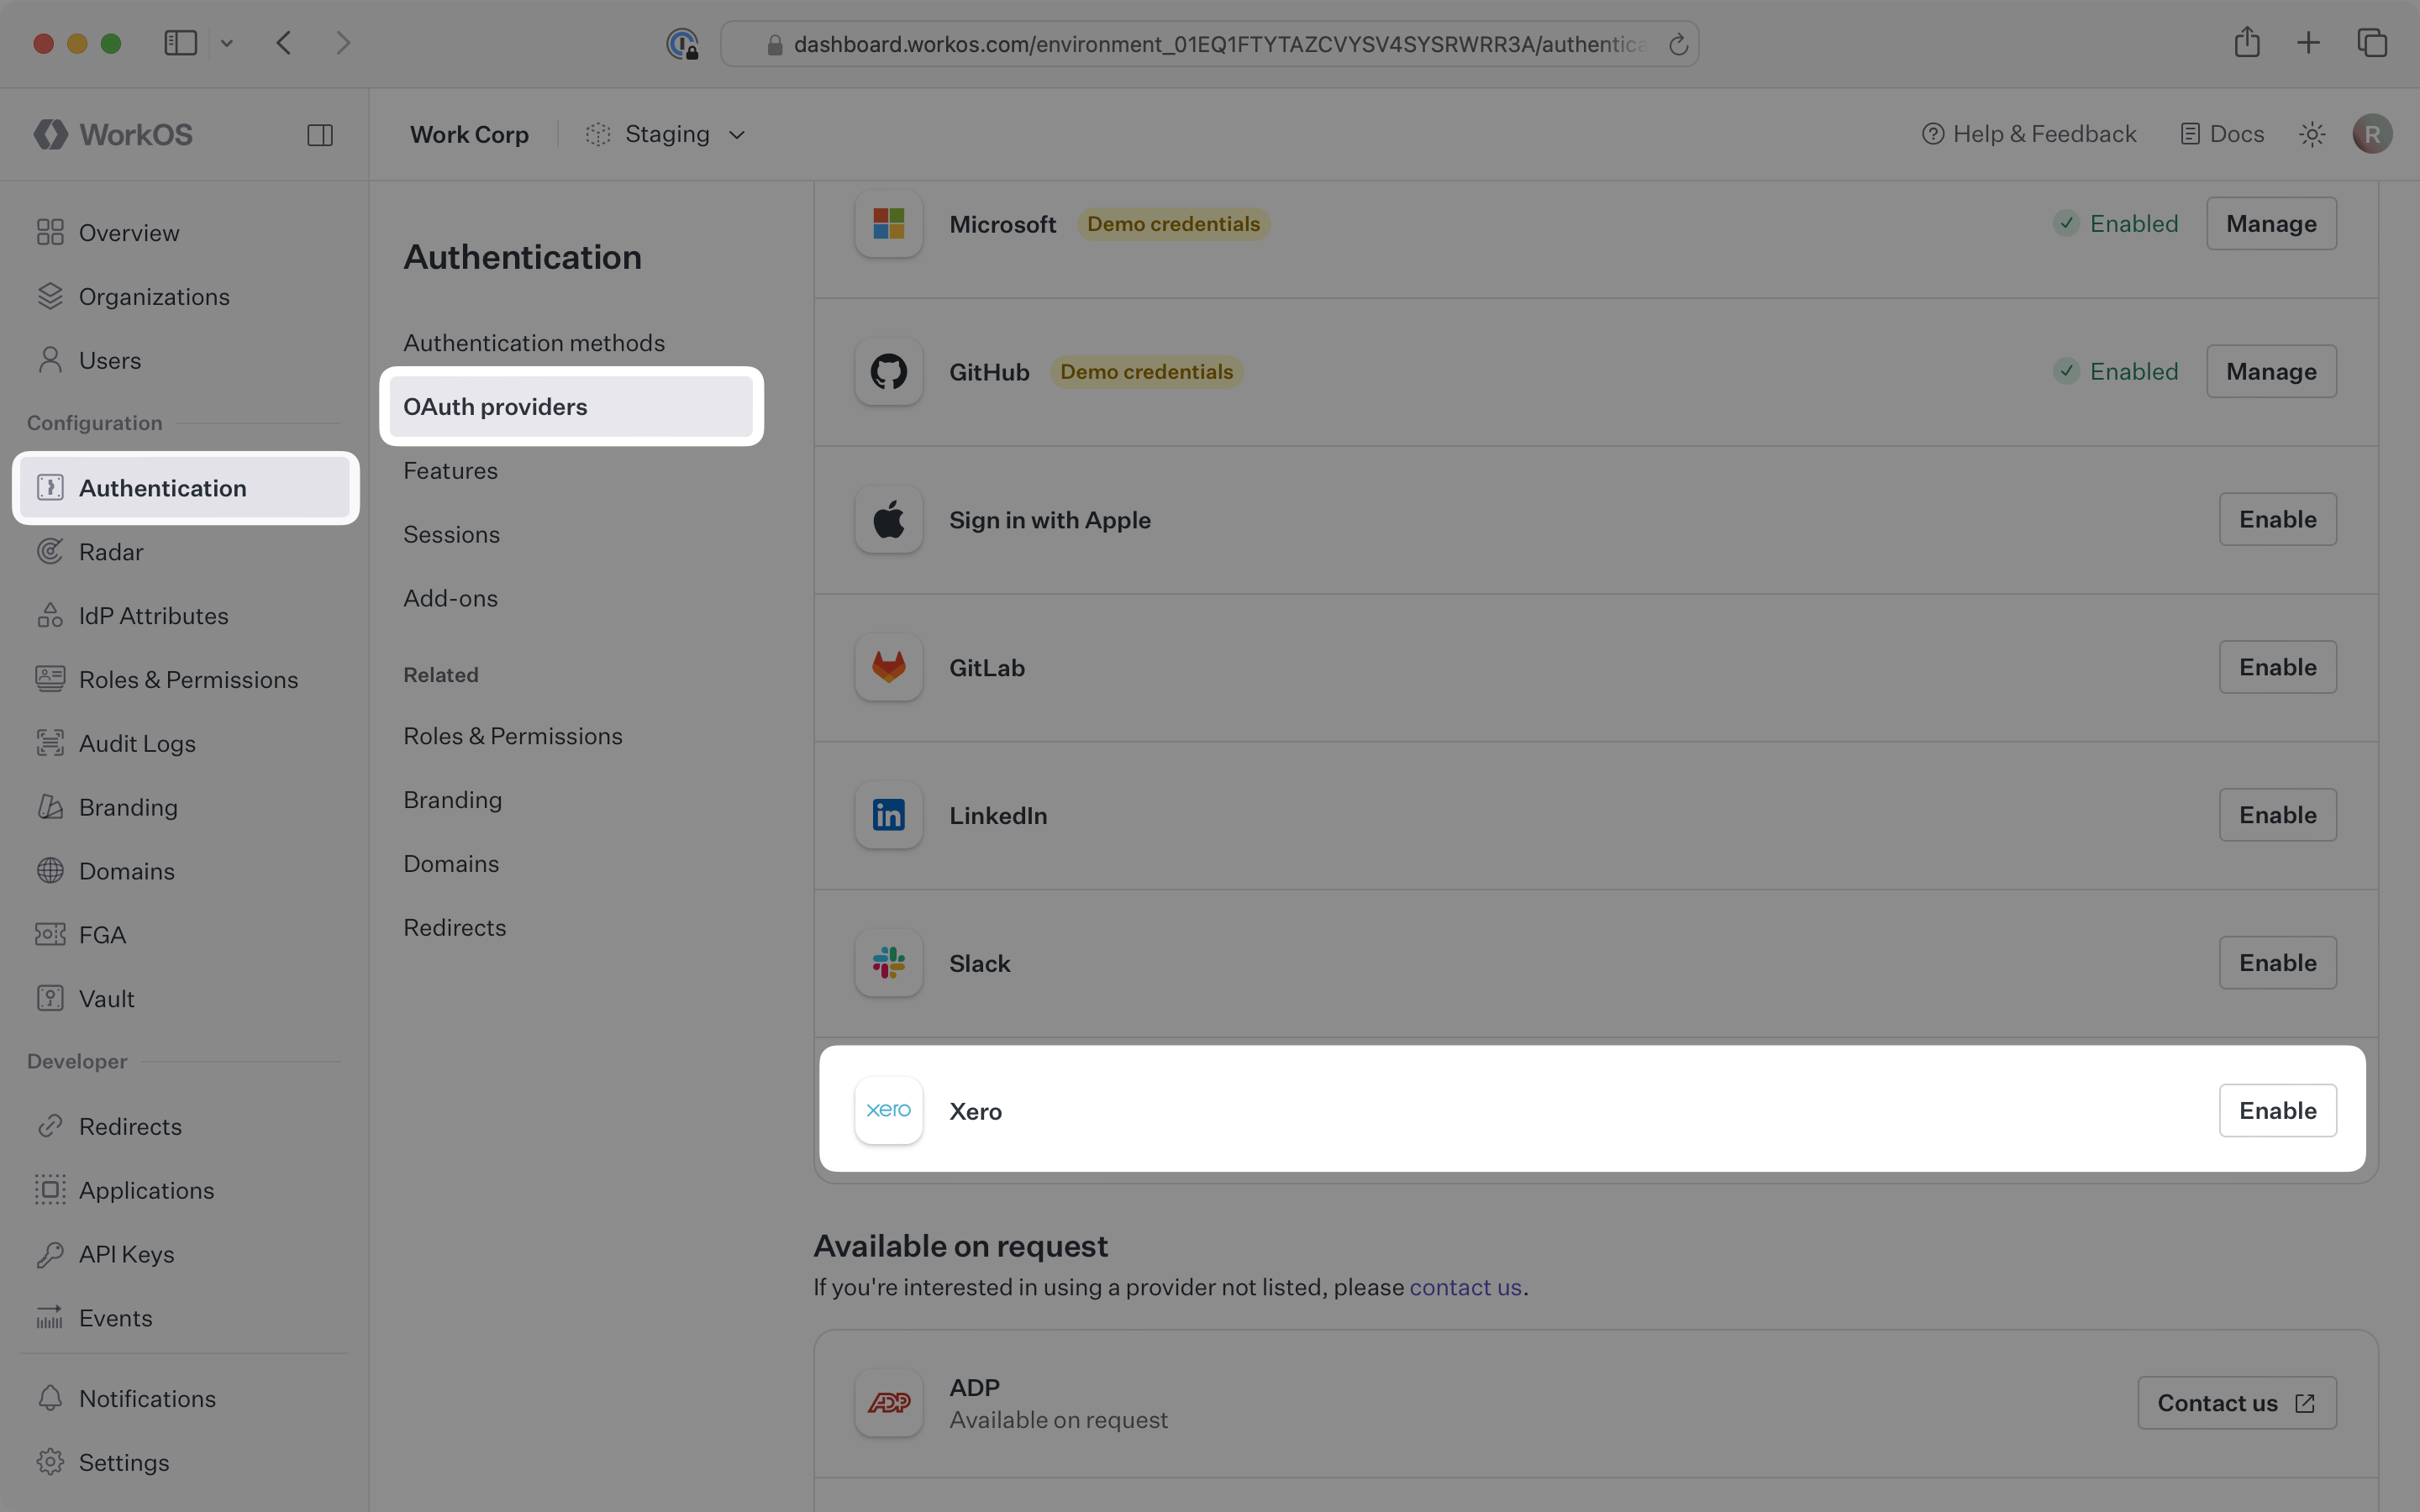
The Redirect URI is available in the WorkOS Dashboard. In the left navigation menu, select the Authentication tab and the OAuth providers sub-tab. Locate the Xero section.
Click Enable. The Xero OAuth configuration dialog will open. Locate the Redirect URI.
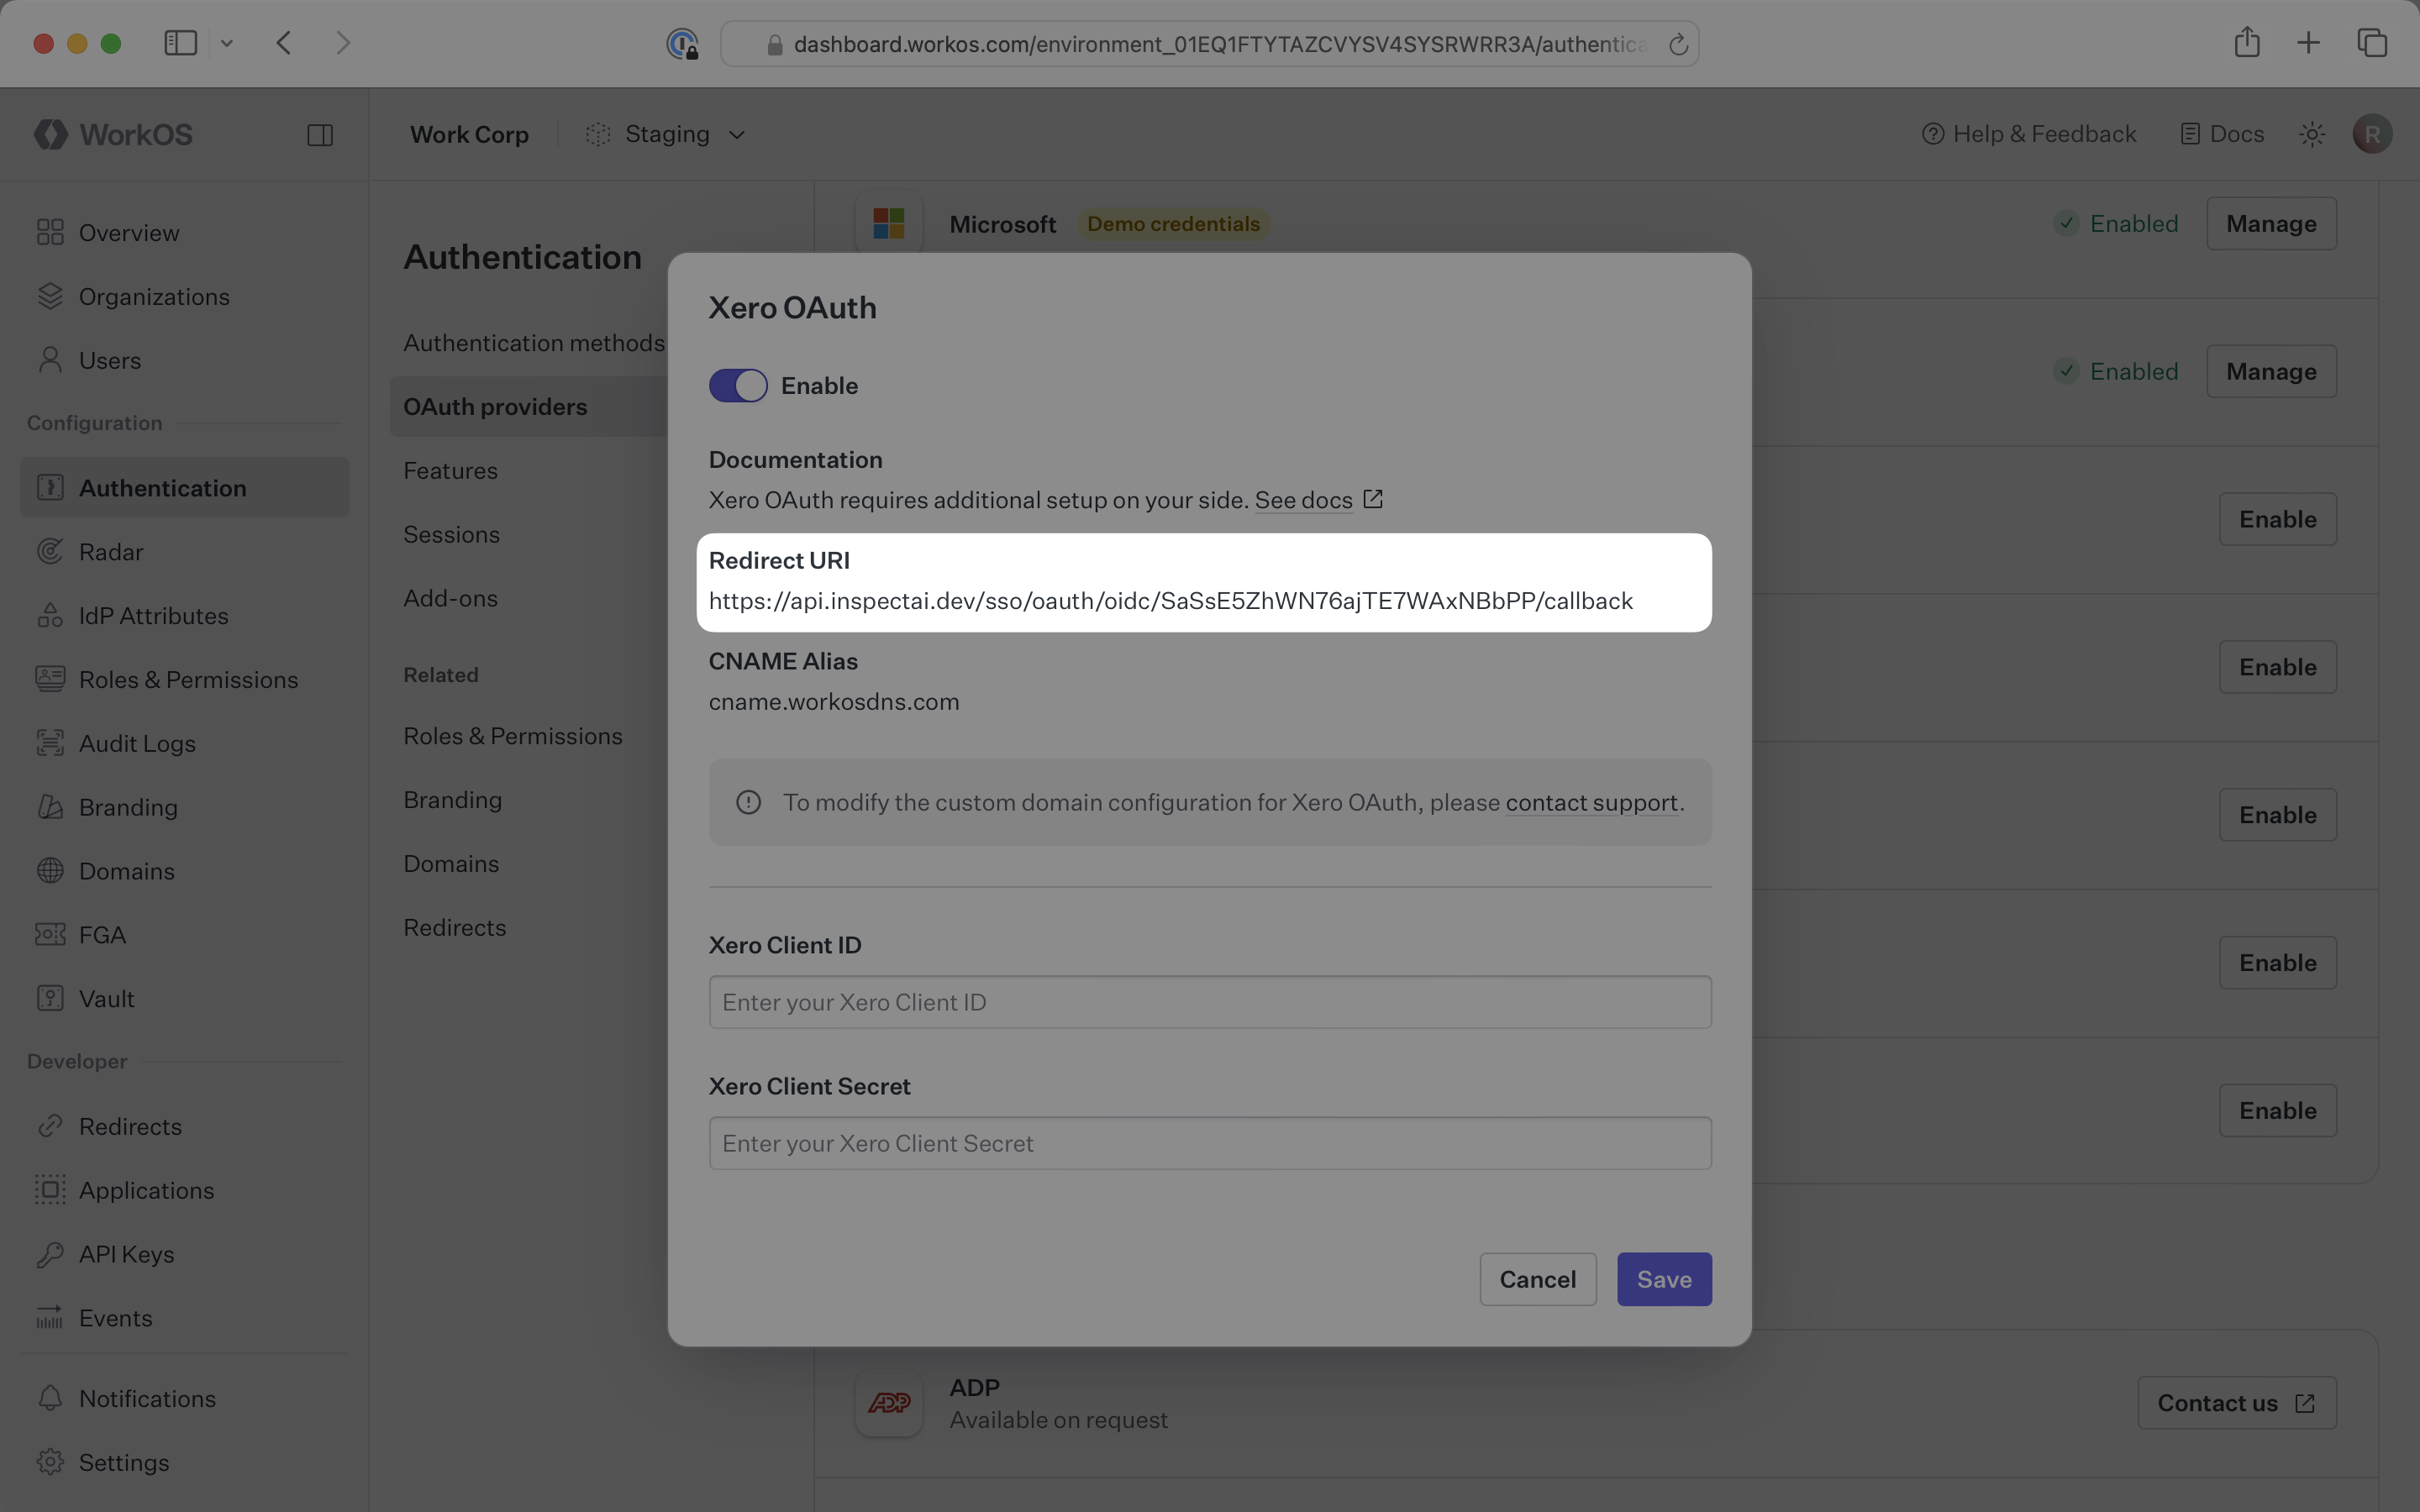
The Redirect URI serves as the destination for authentication responses and must be configured in your Xero application’s OAuth settings.
You will need to obtain two pieces of information from a Xero Developer application:
- Xero Client ID: Application identifier from Xero
- Xero Client Secret: Authentication secret for the application
The following sections will guide you through creating an OAuth application in your Xero Developer account and generating these credentials.
Log in to your Xero developer account and create a new application.
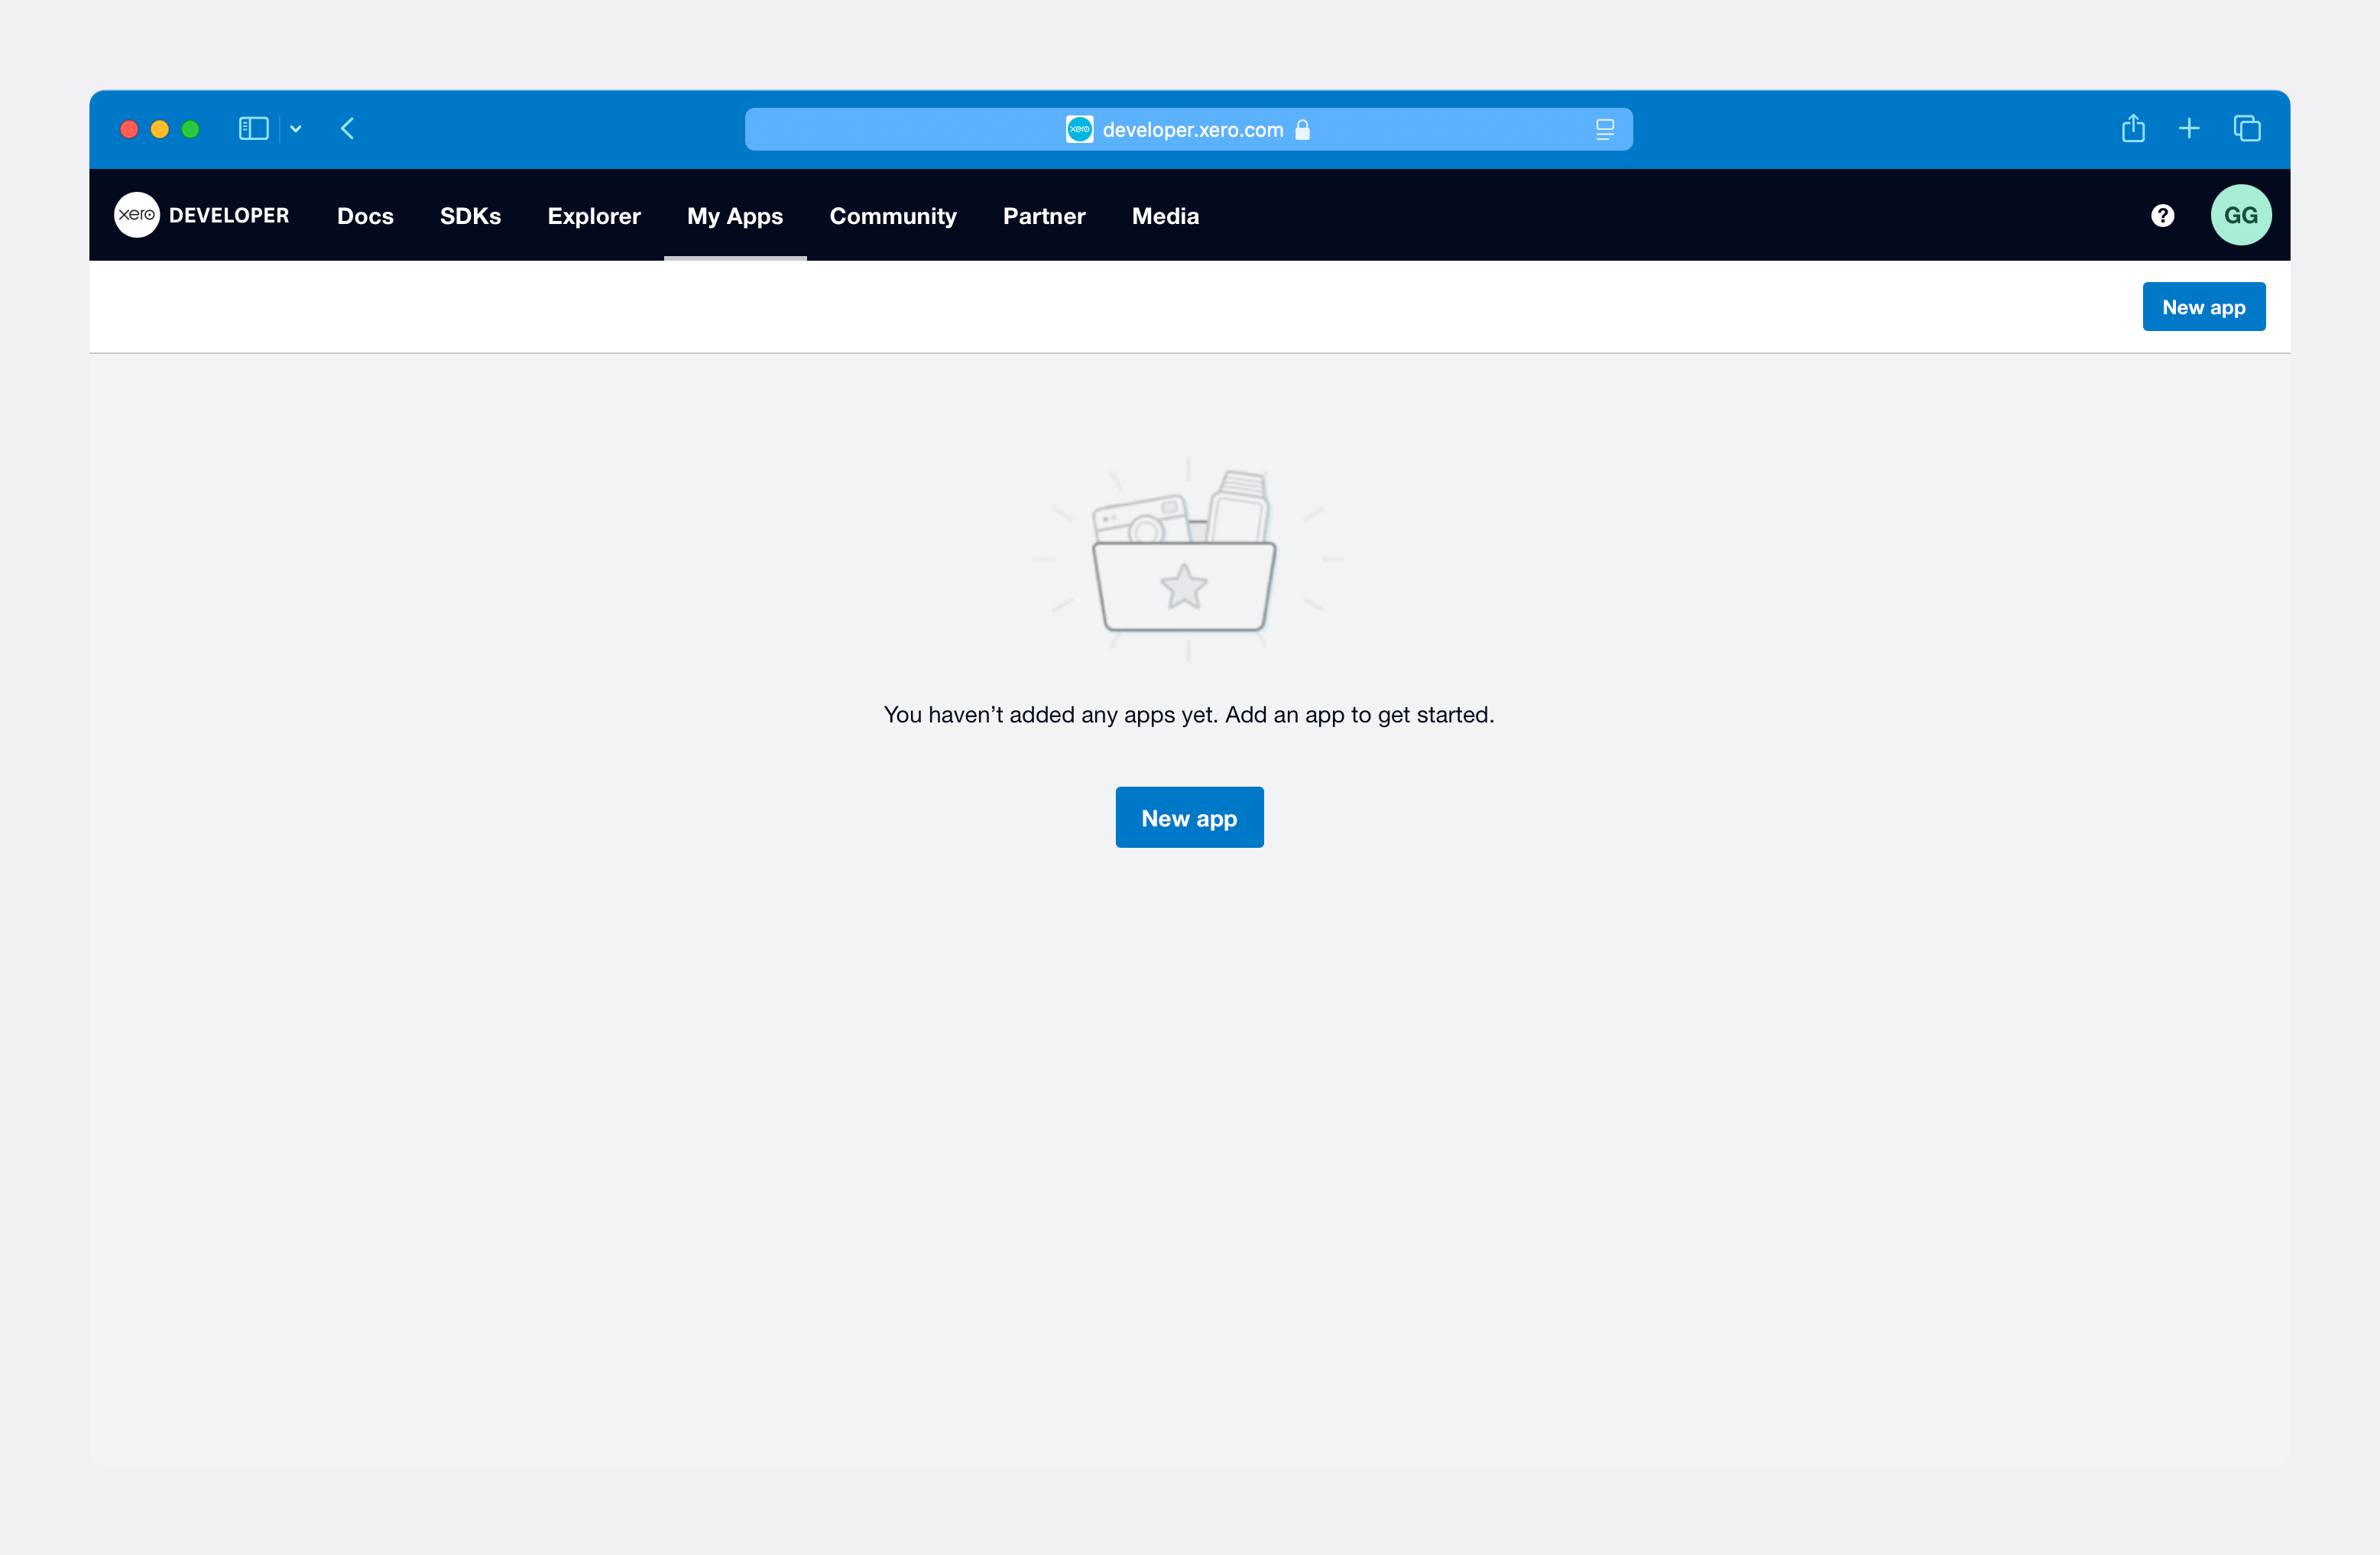
In the top right corner, select New app. Fill out the form starting with the application name.
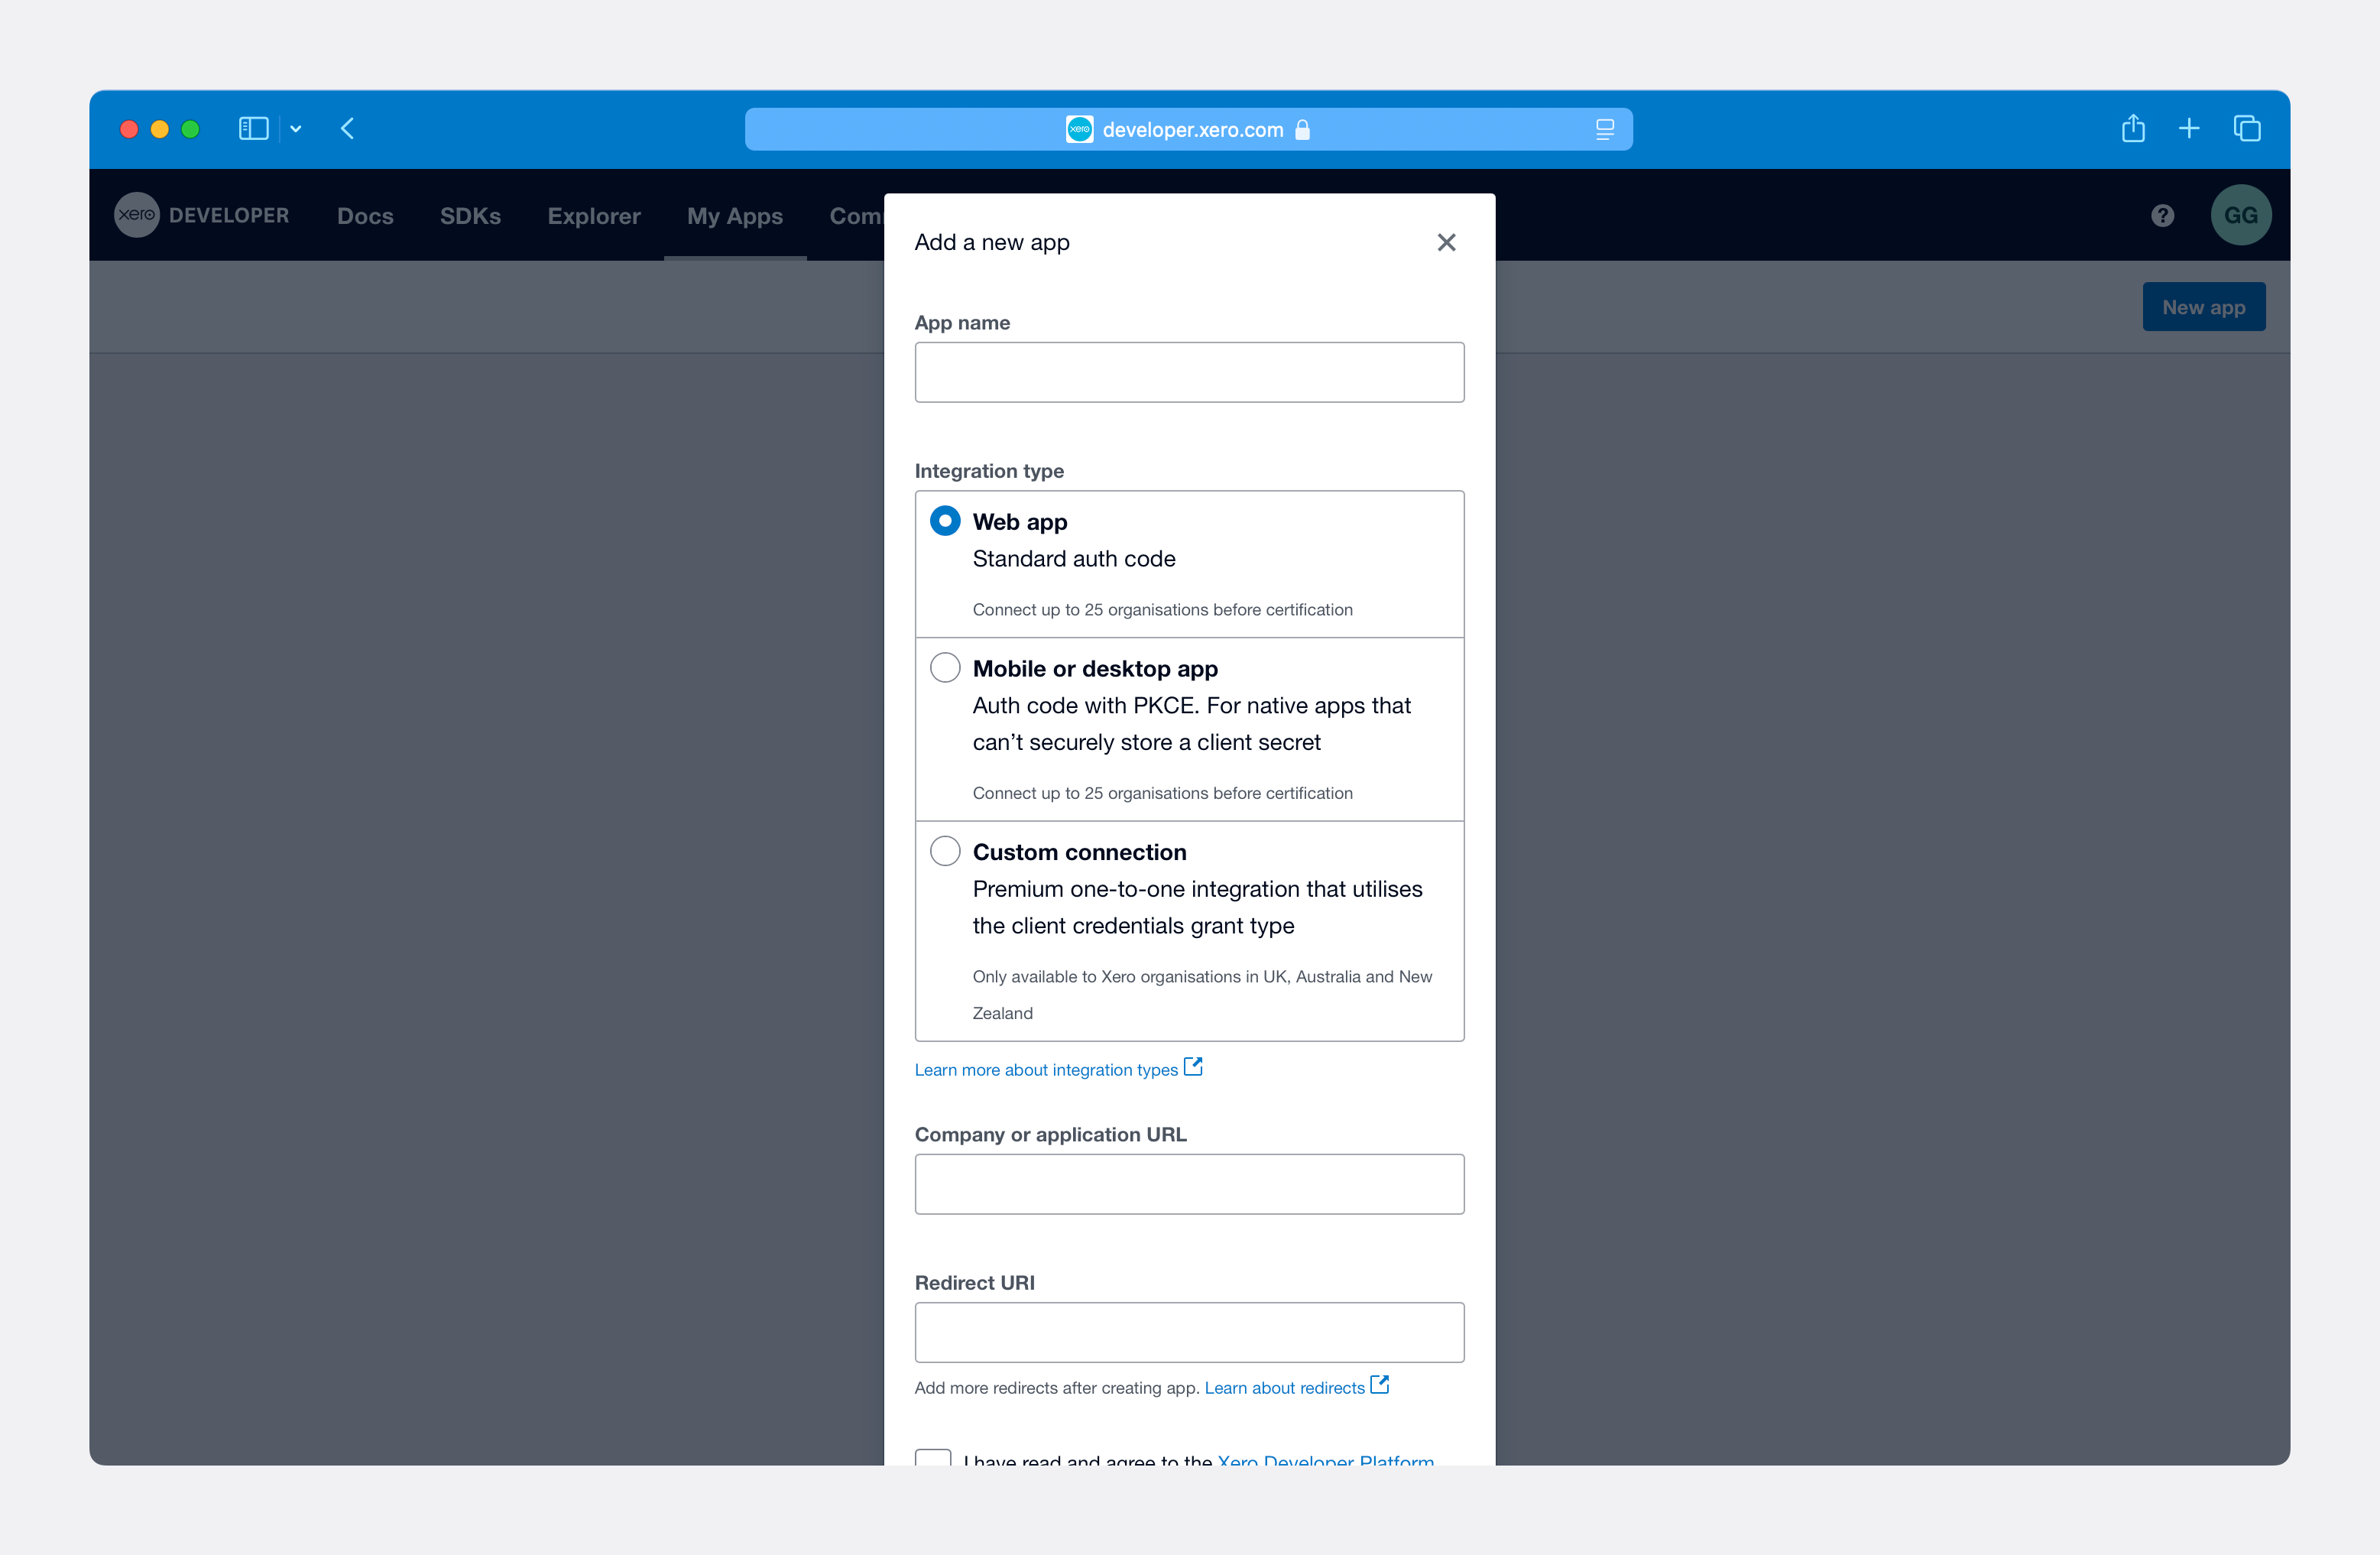
For the Integration type, select Web app.
For Company or application URI, use your application’s homepage URI.
For Redirect URI, use the Redirect URI from the Xero OAuth configuration in the WorkOS Dashboard.
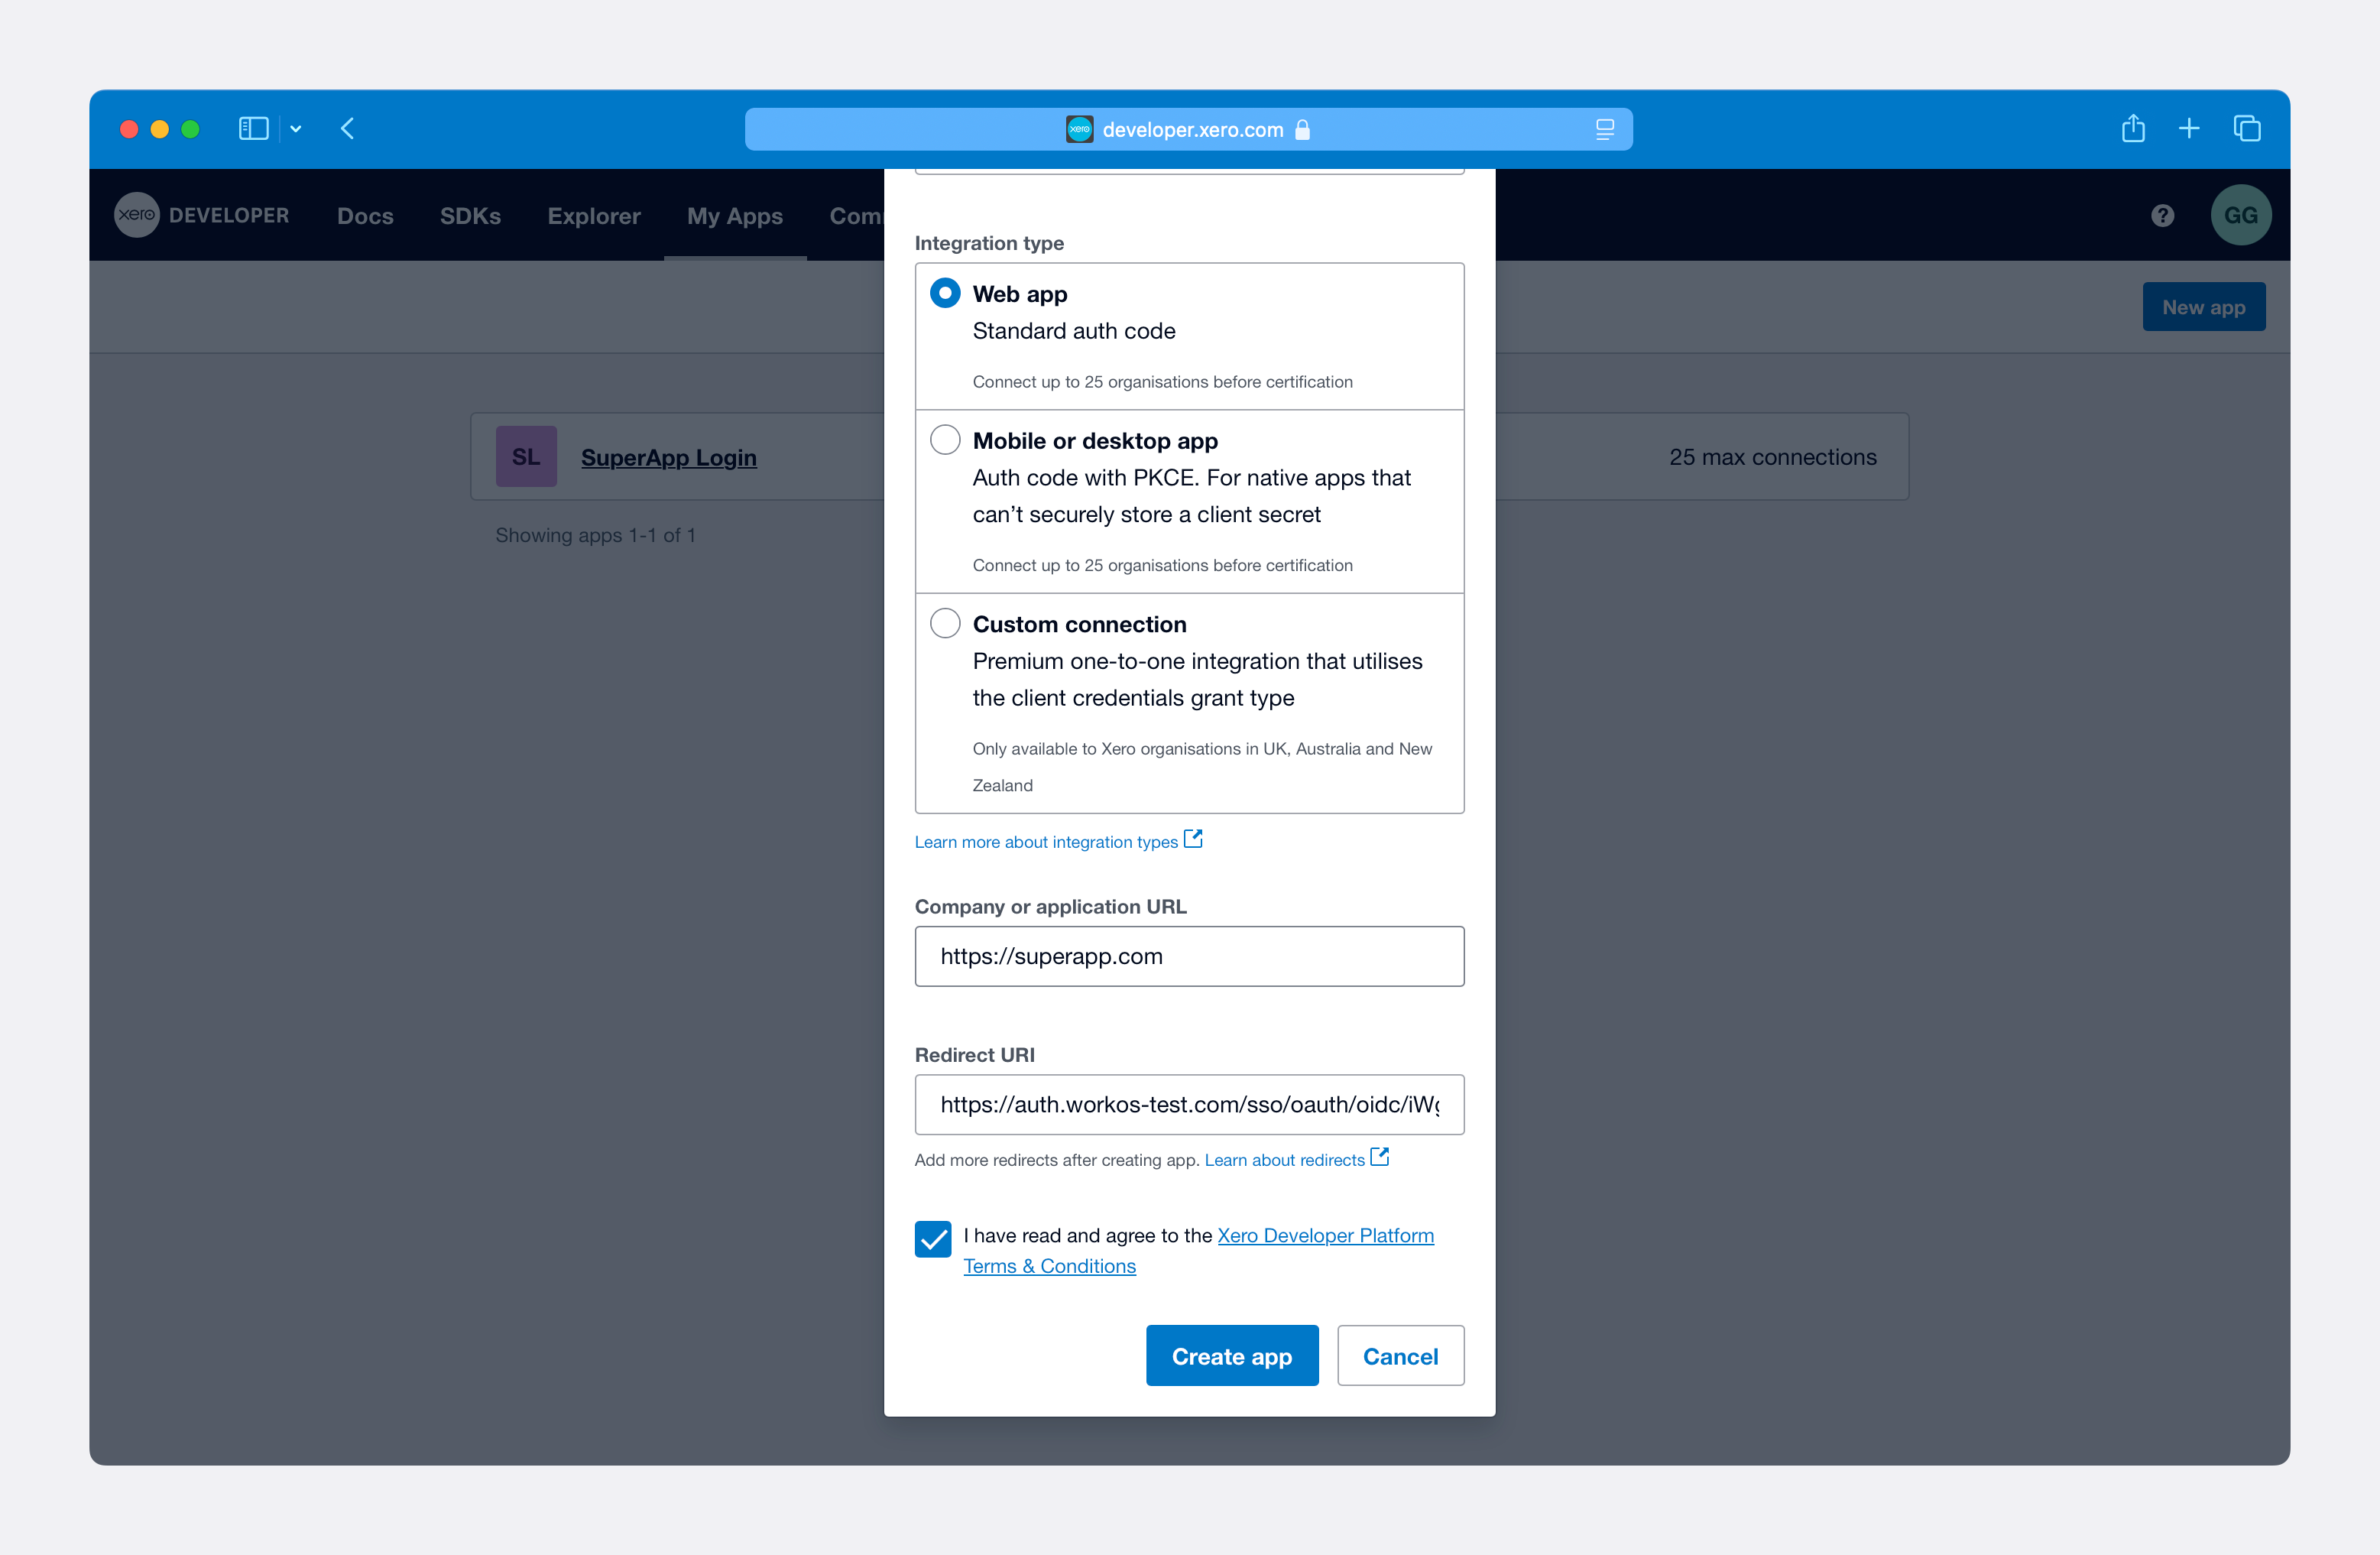
Agree to Xero’s Developer Platform Terms & Conditions and click Create app.
On the next page, you will see the Xero App details for your new OAuth application. From the left navigation menu, navigate to the Configuration page.
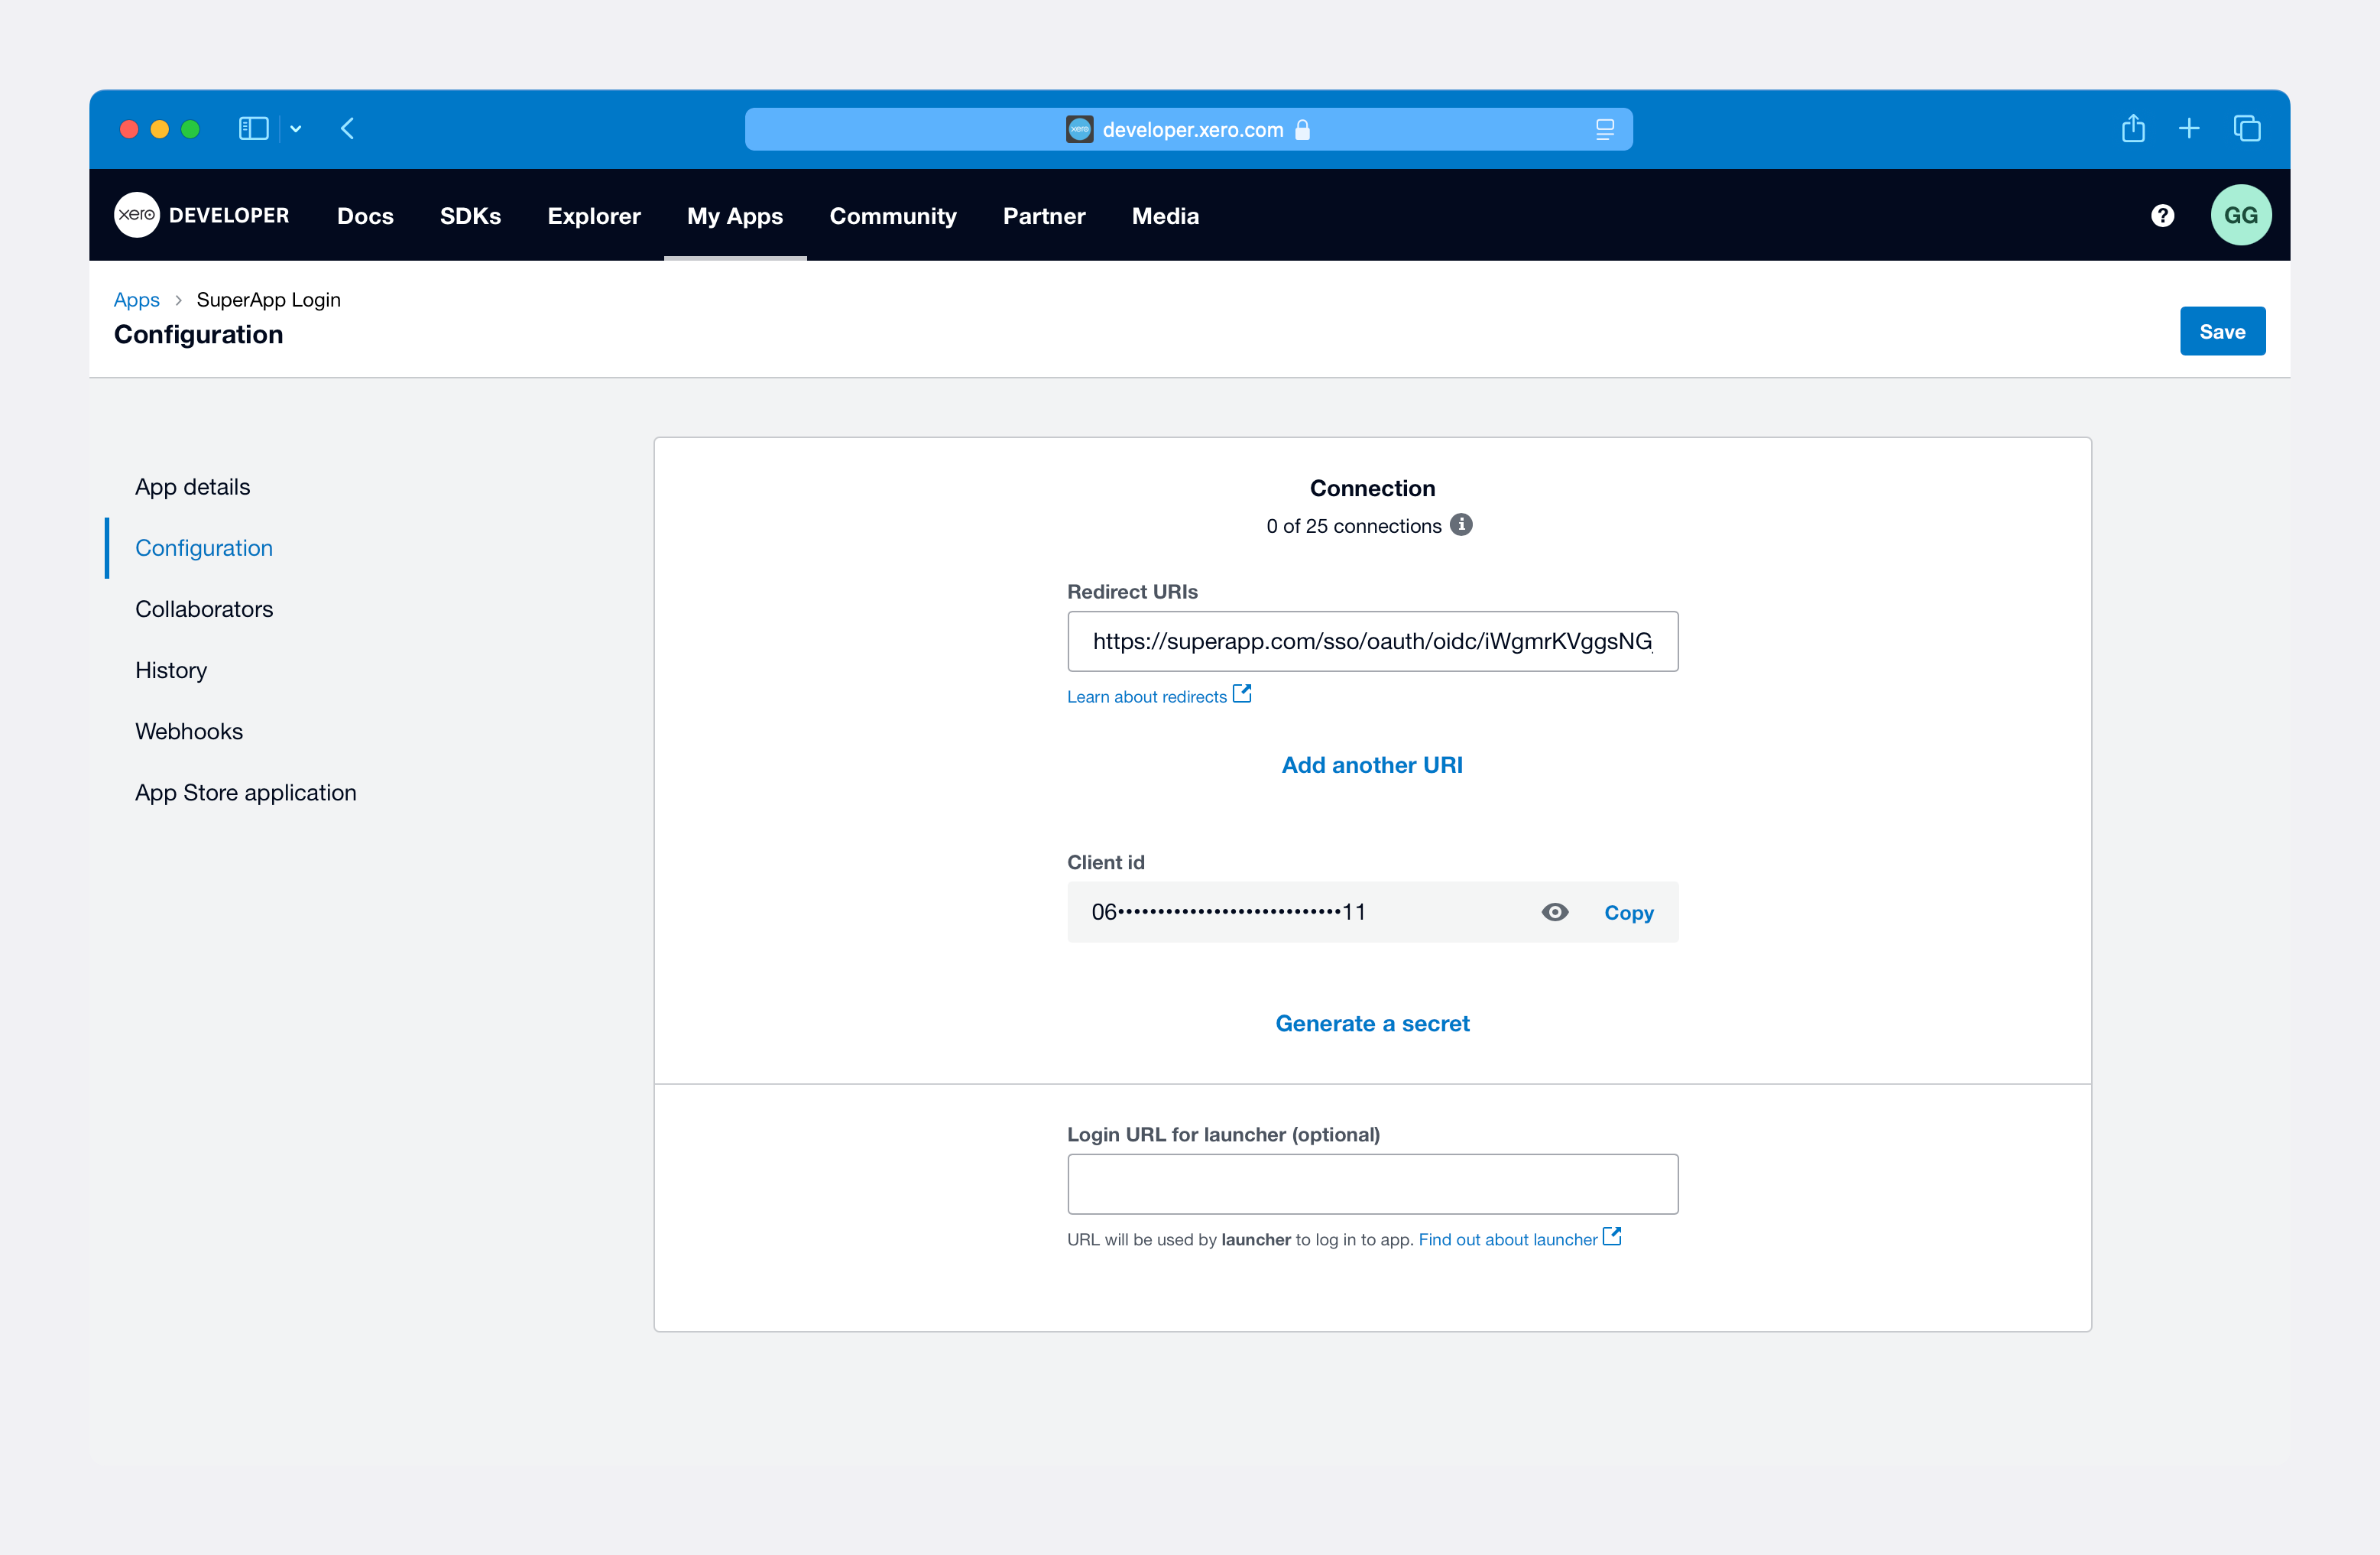
Select Generate a secret to create a client secret.
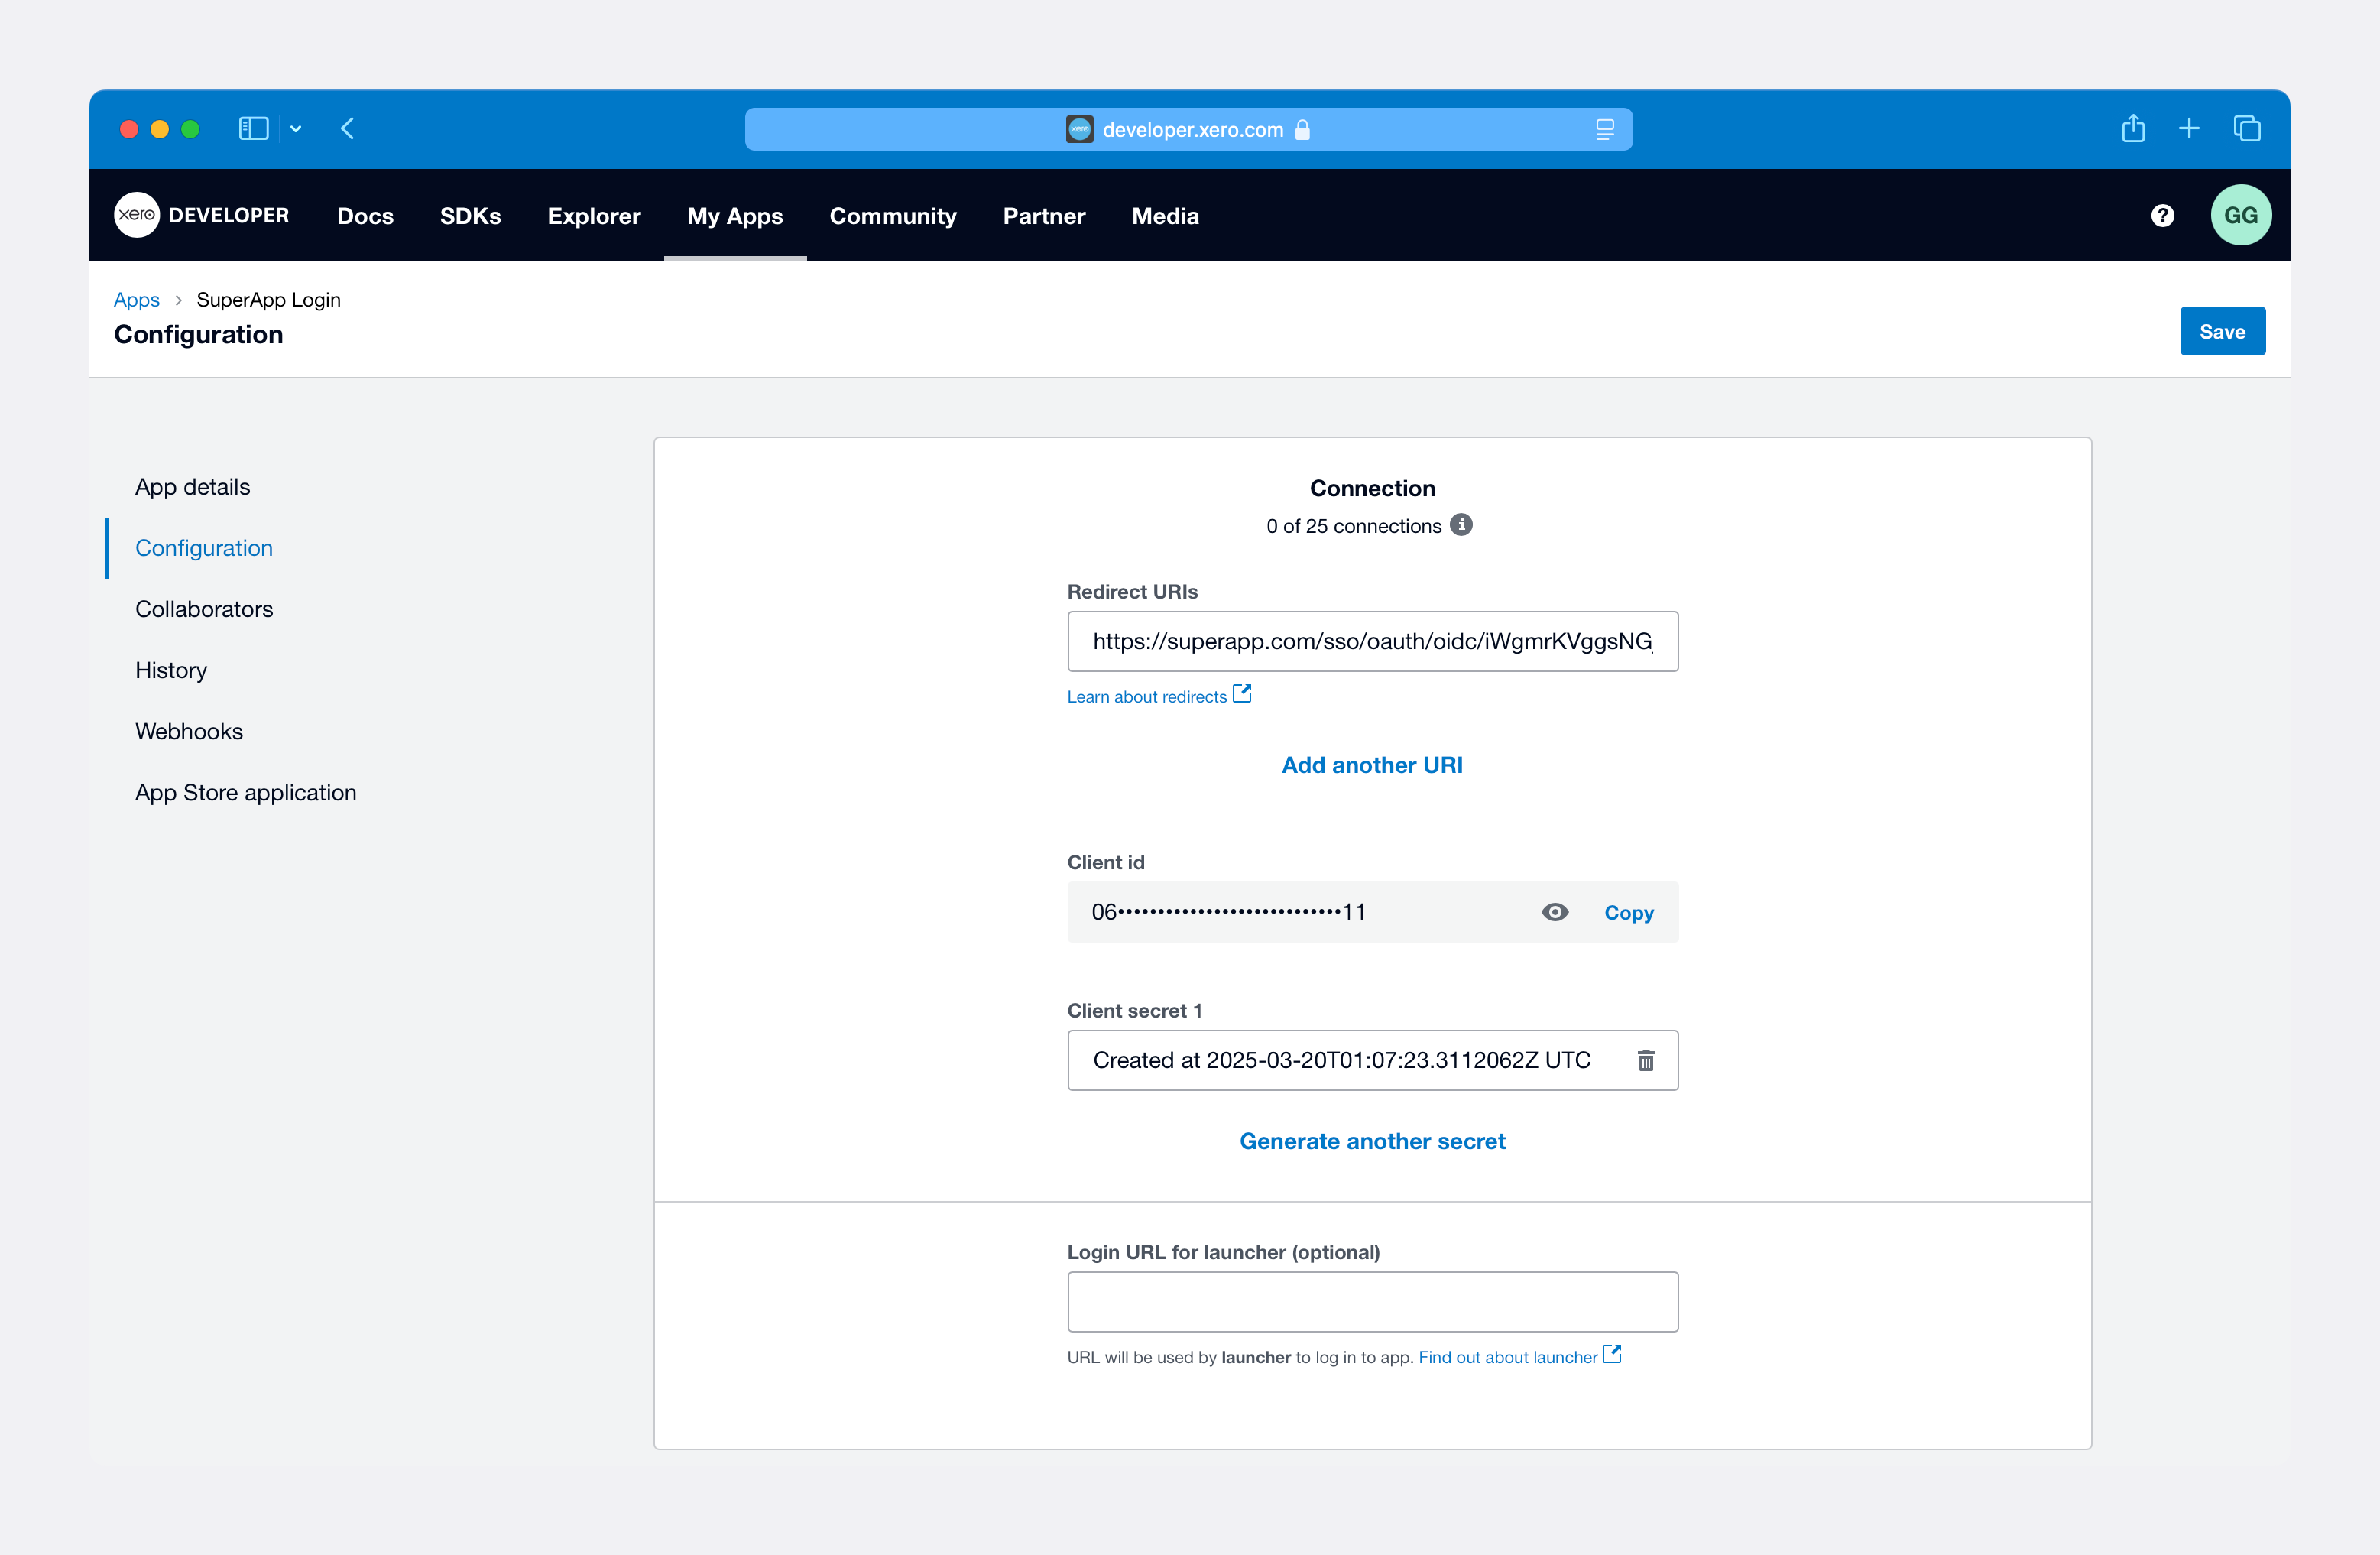
Copy the Client ID and Client secret 1 as you’ll need them for the WorkOS configuration.
Now that you have the Xero Client ID and Xero Client Secret from the previous steps, return to the WorkOS Dashboard.
In the Xero OAuth configuration dialog, enable the integration. Paste the credentials from Xero into their respective fields in the WorkOS Dashboard.
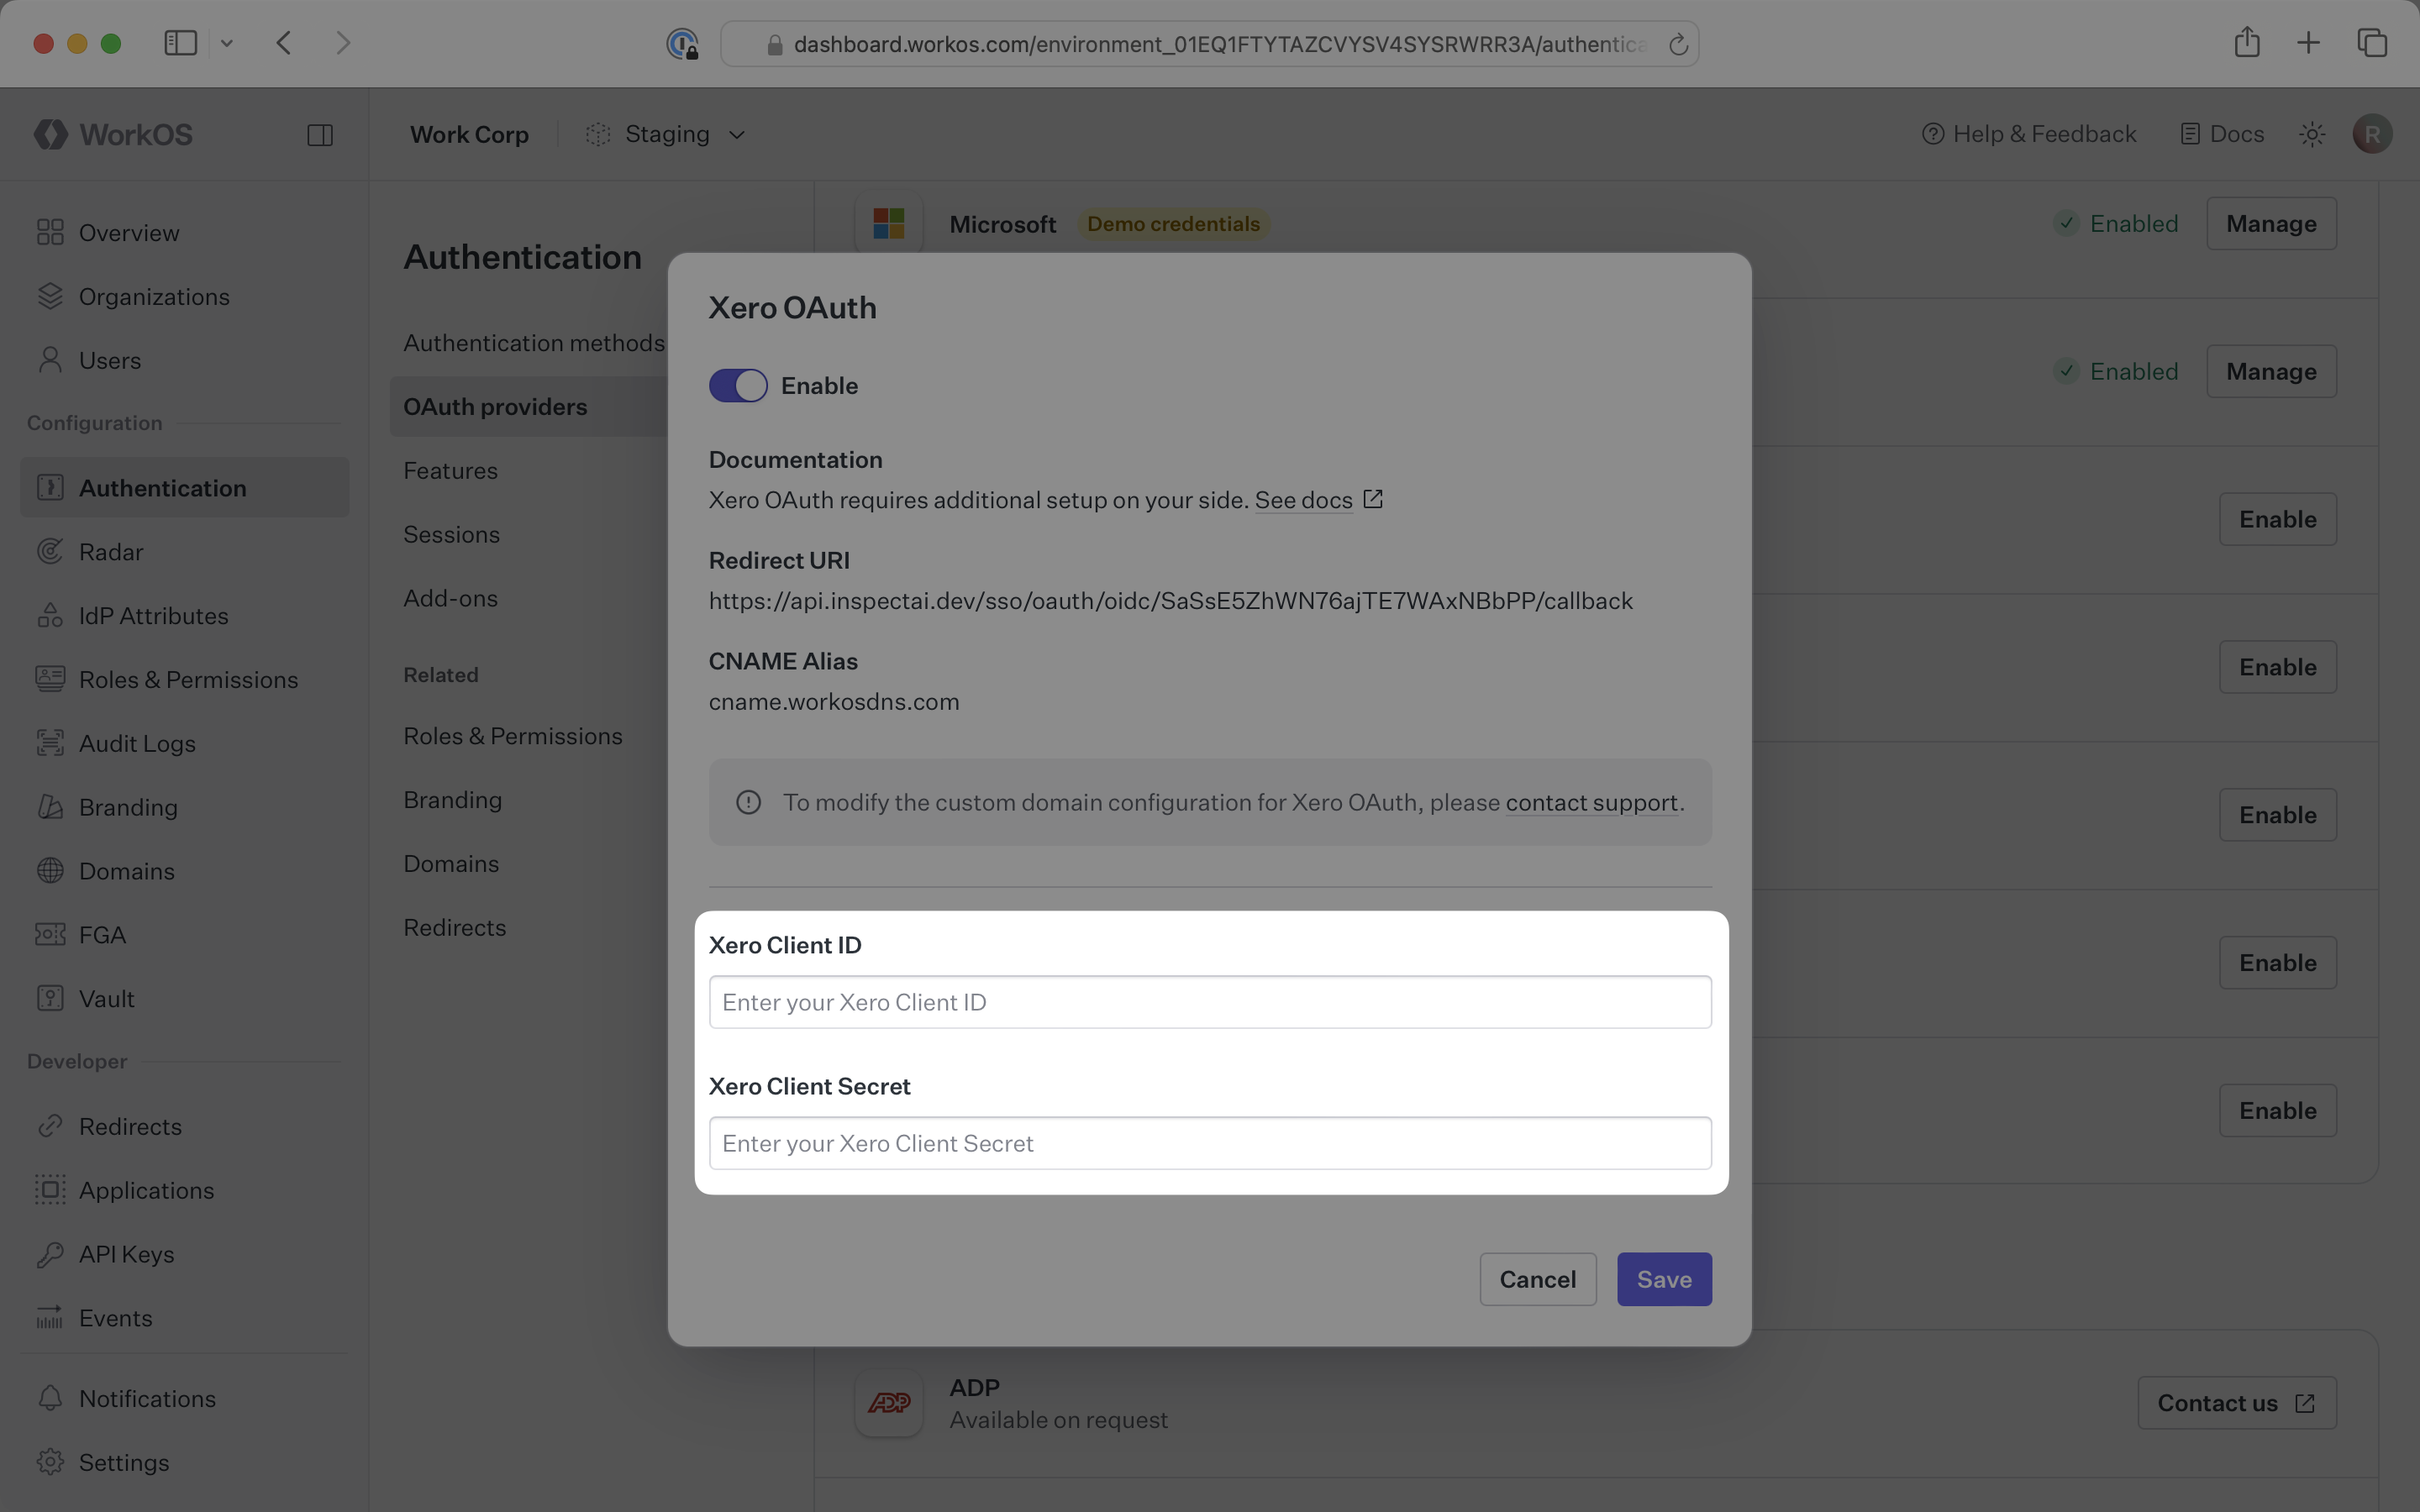
Click Save to complete the configuration.
You are now ready to start authenticating with Xero OAuth. You will use the provider query parameter in the Get Authorization URL API endpoint to support global Xero OAuth for any domain. The provider query parameter should be set to XeroOAuth.
WorkOS will request the OAuth scopes that are required for authentication by default. You can optionally configure your integration to request additional OAuth scopes as needed.
When the Return Xero OAuth tokens option is selected, the access token and refresh token from Xero will be included in the response from the Authenticate with code API.
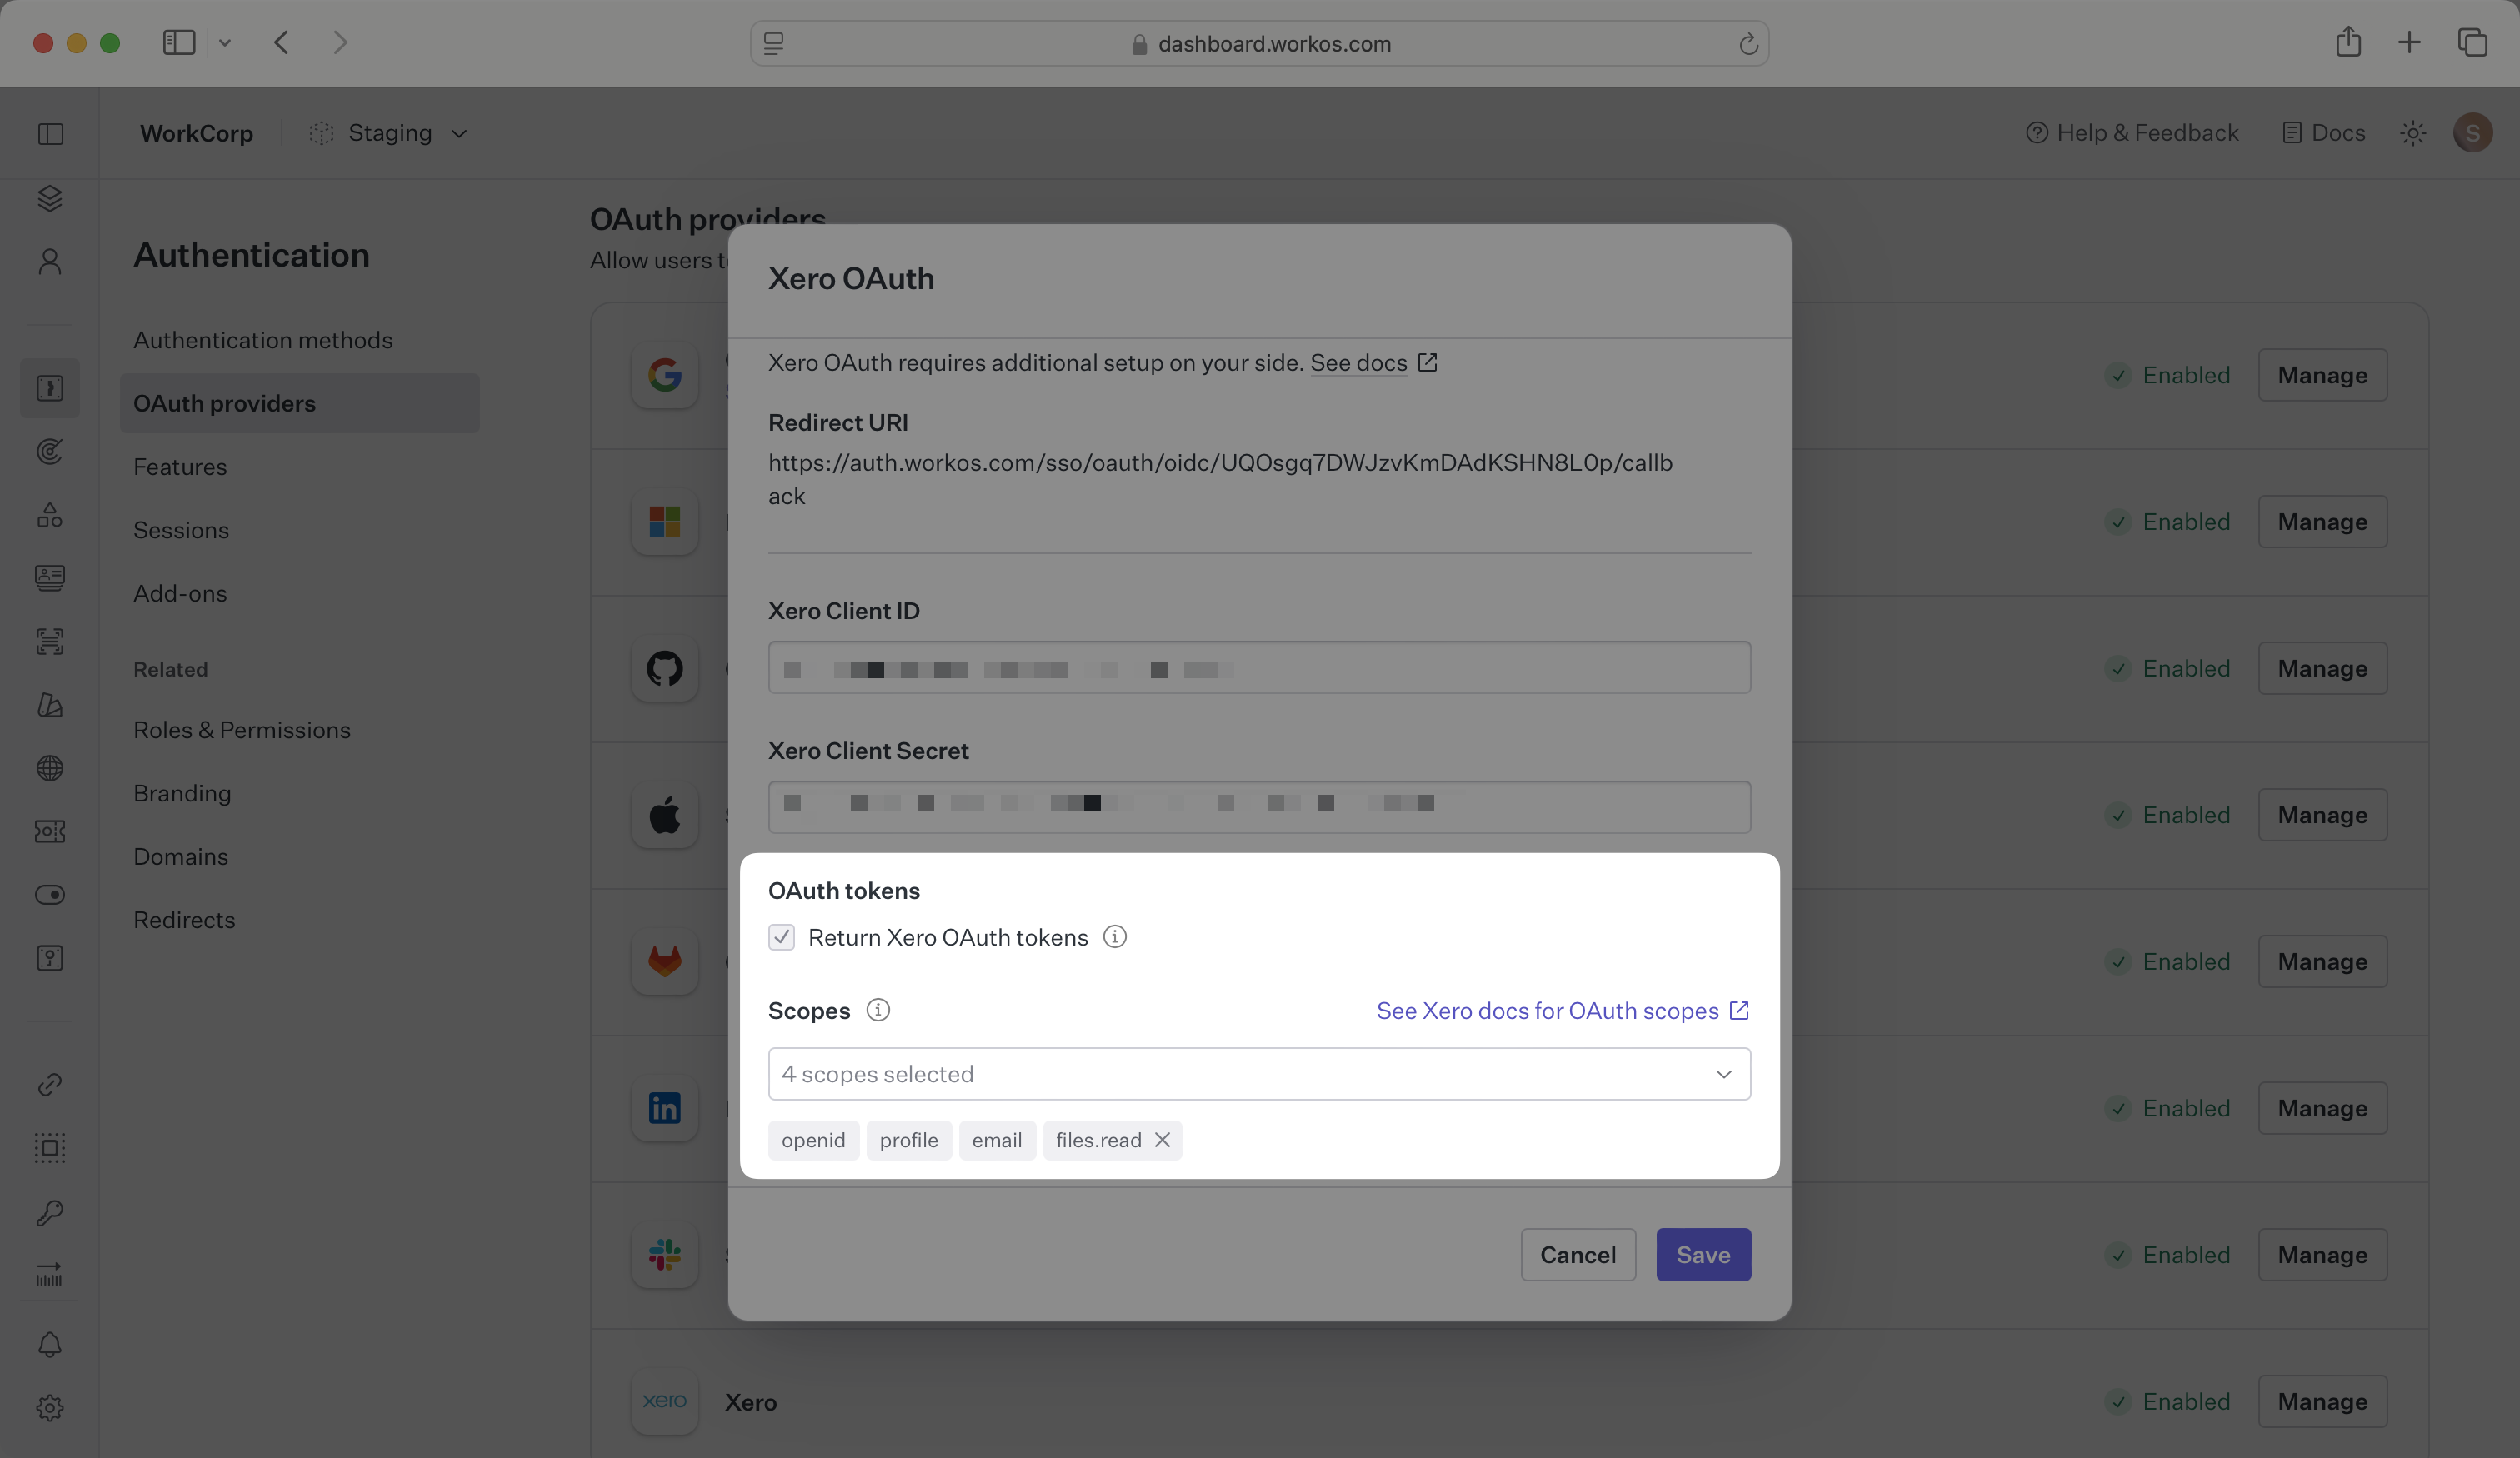
Any scopes configured here will be included on every Xero OAuth request. To specify additional scopes dynamically, use the provider_scopes query parameter on the Get Authorization URL API endpoint.
For more information, see Xero’s OAuth scopes documentation.
How is the WorkOS Xero OAuth integration different from implementing regular Xero OAuth flow?
It’s the same Xero OAuth flow as you could build yourself, but it’s encapsulated within WorkOS SSO. This means you don’t need to build it yourself. In addition to Xero OAuth, you can use WorkOS SSO to support other identity providers, all with a single integration.
What is the provider query parameter and how is it used in the Xero OAuth integration?
You can use the provider query parameter in the Get Authorization URL API endpoint to support global Xero OAuth for any domain. The provider query parameter should be set to XeroOAuth.
What type of Xero integration should I select?
You should select Web app as the integration type when creating your Xero OAuth application. This is the correct type for OAuth integrations that will work with WorkOS.
Where can I find my Xero application after creation?
After creating your Xero application, you can find it in your Xero Developer Portal under your apps list. From there, you can access the Configuration page to manage your OAuth settings and regenerate credentials if needed.