ADP OpenID Connect
Learn how to configure a connection to ADP via OIDC.
Each SSO Identity Provider requires specific information to create and configure a new Connection. Often, the information required to create a connection will differ by Identity Provider.
ADP is unique in that it authenticates using the Open ID Connect (OIDC) protocol instead of SAML. This means that instead of providing an ACS URL and SP Entity ID into the IdP, The IdP will provide a client ID and secret. ADP also provides an SSL Certificate and Private RSA Key file to authenticate. These four pieces of information will all need to be uploaded into the WorkOS dashboard in the steps below.
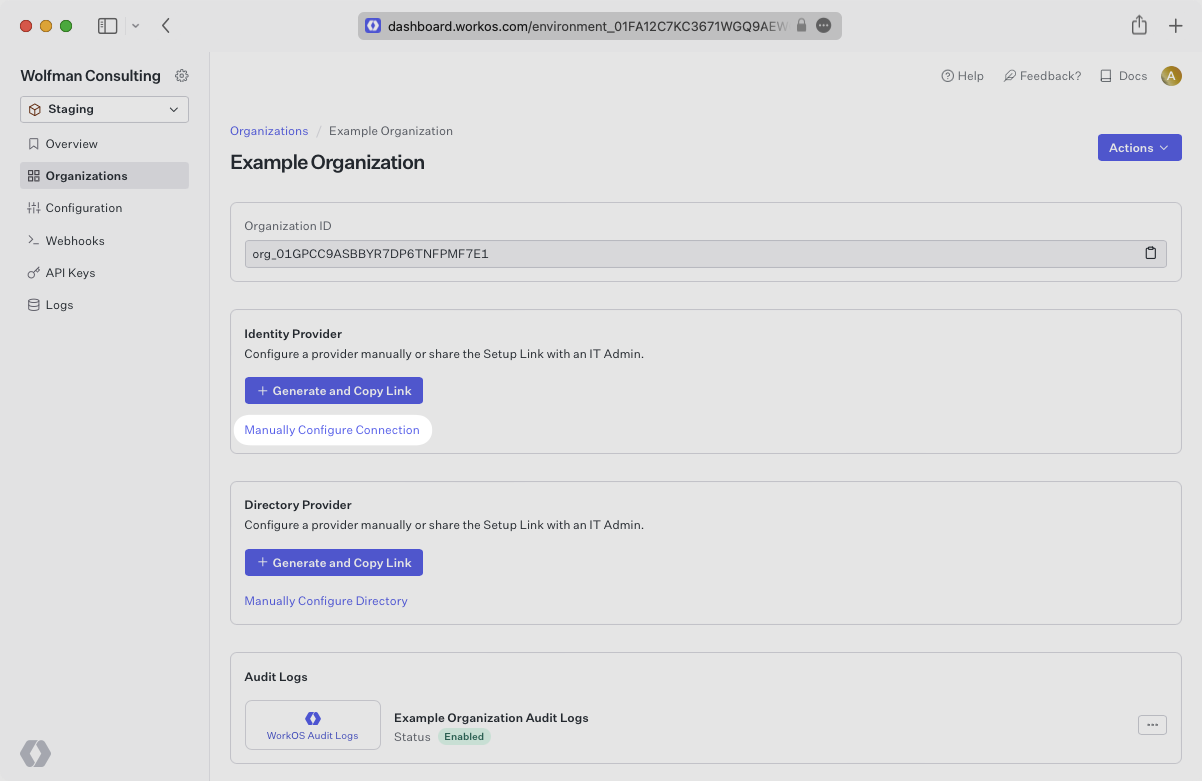
Navigate to the Organization in your WorkOS Dashboard under which you would like to set up this new SSO connection. Click on the “Manually Configure Connection” button.
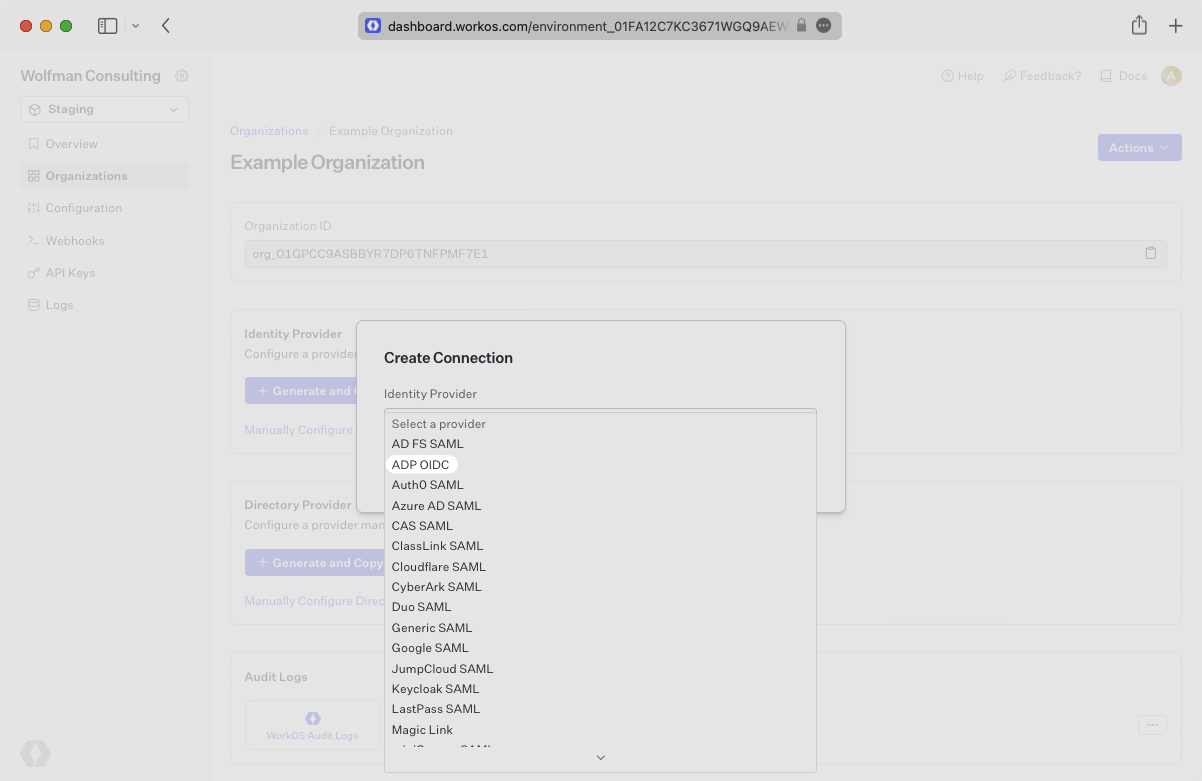
Select ADP OIDC as the Identity Provider and select “Create Connection”.
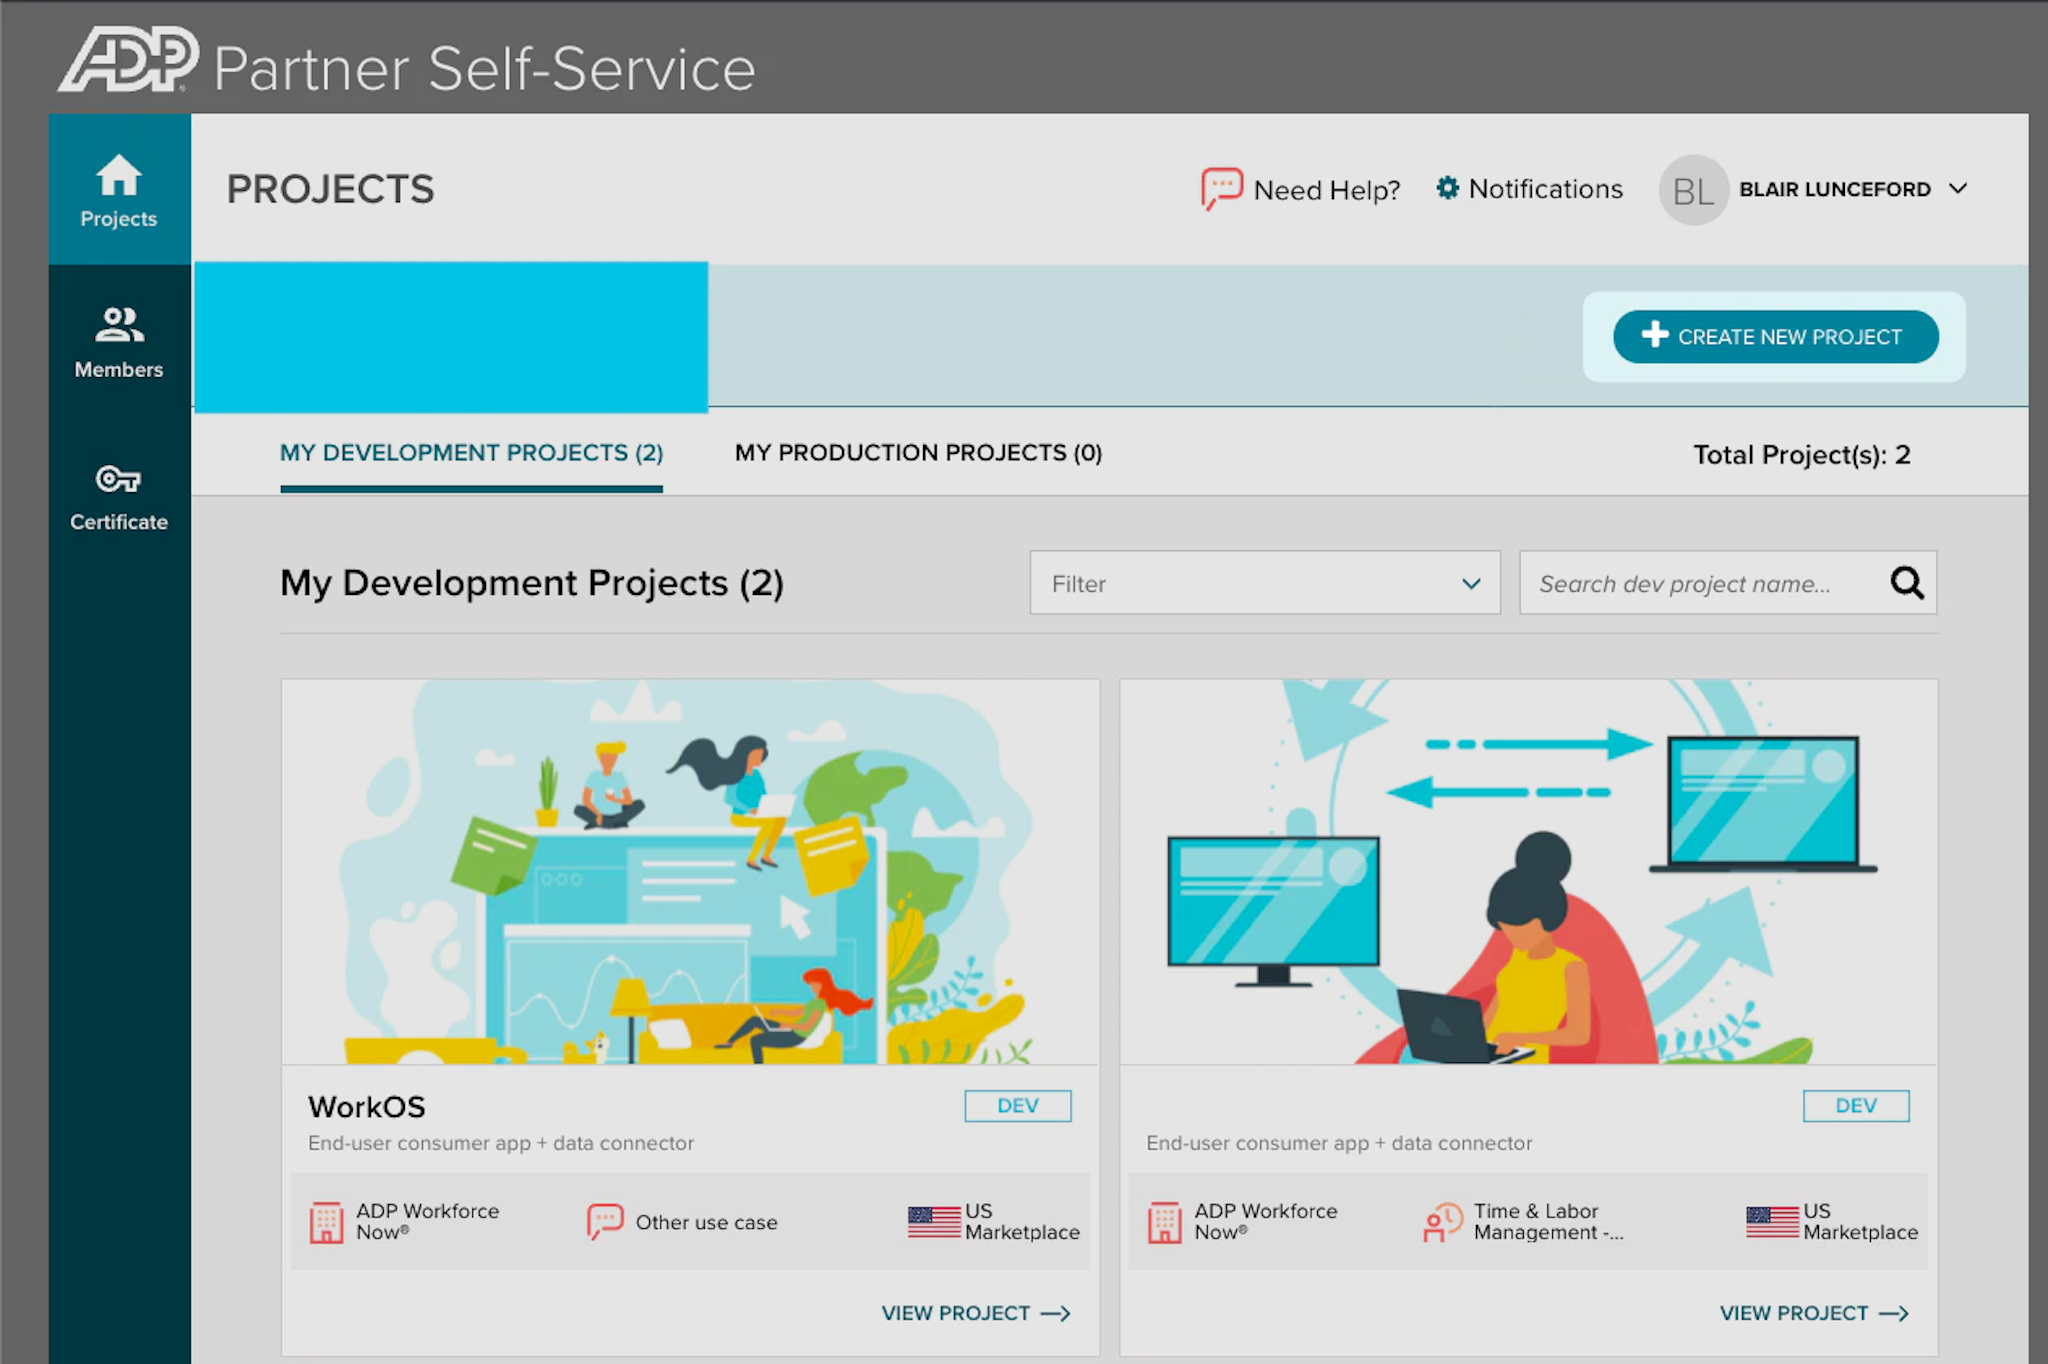
Login to the ADP Partner Self Service Portal.
From this page there are two environments to select from, Development and Production. Please use the environment that best suits your use-case for this SSO connection.
In the selected environment select “Create New Project”.
Give the project a meaningful name to designate the SSO connection, there is no need to add a description.
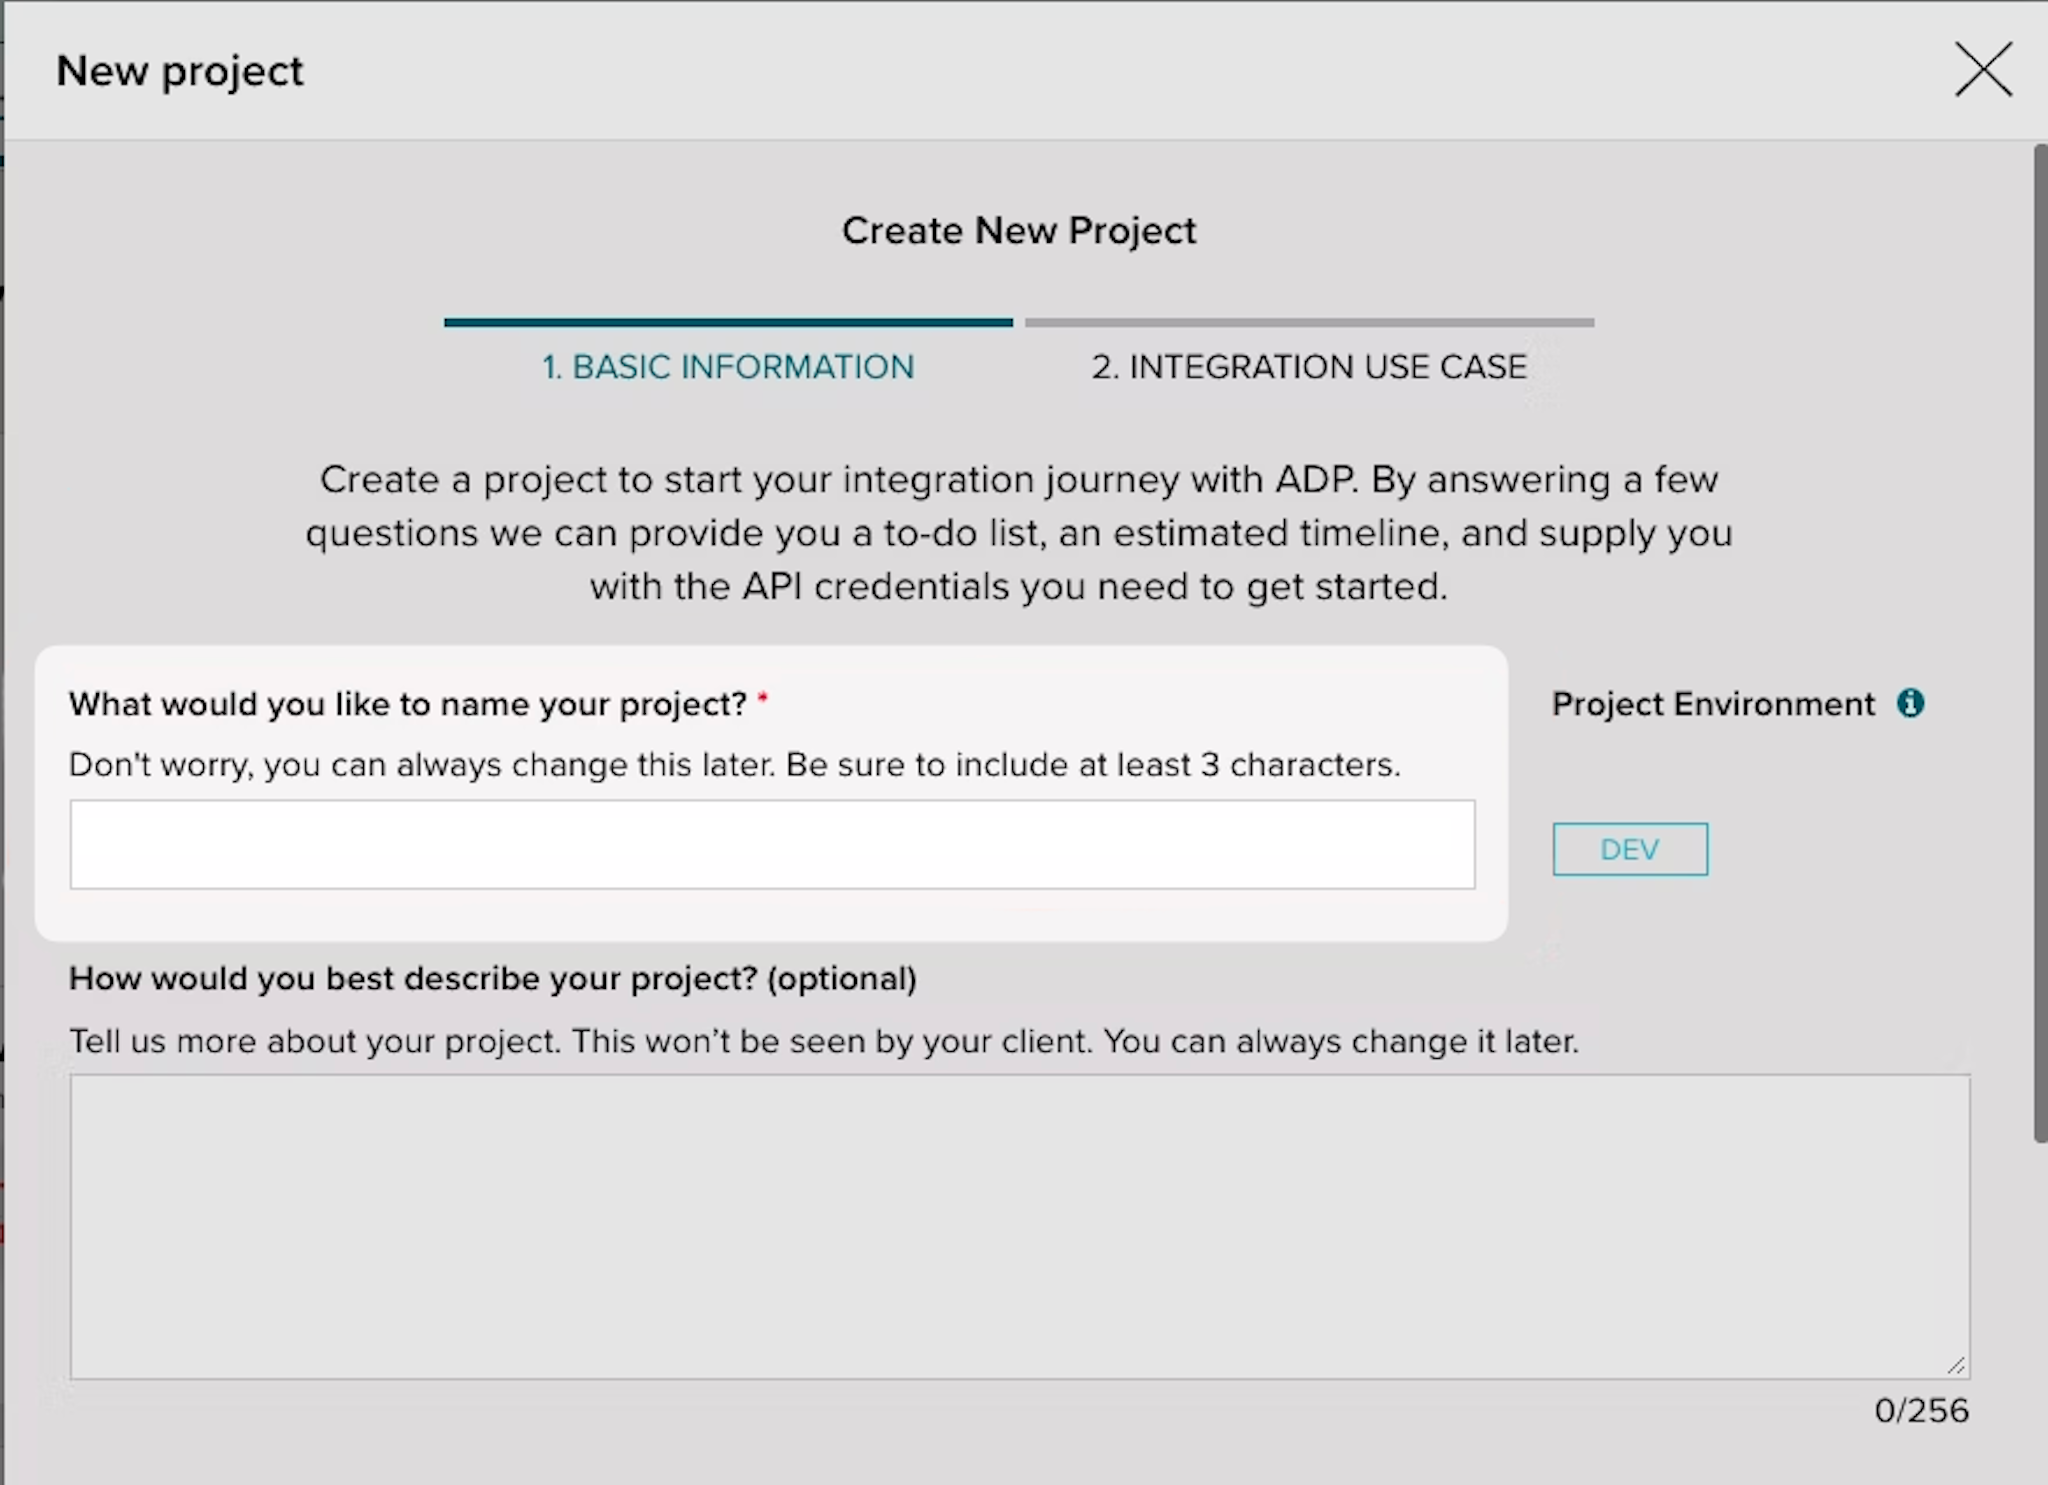
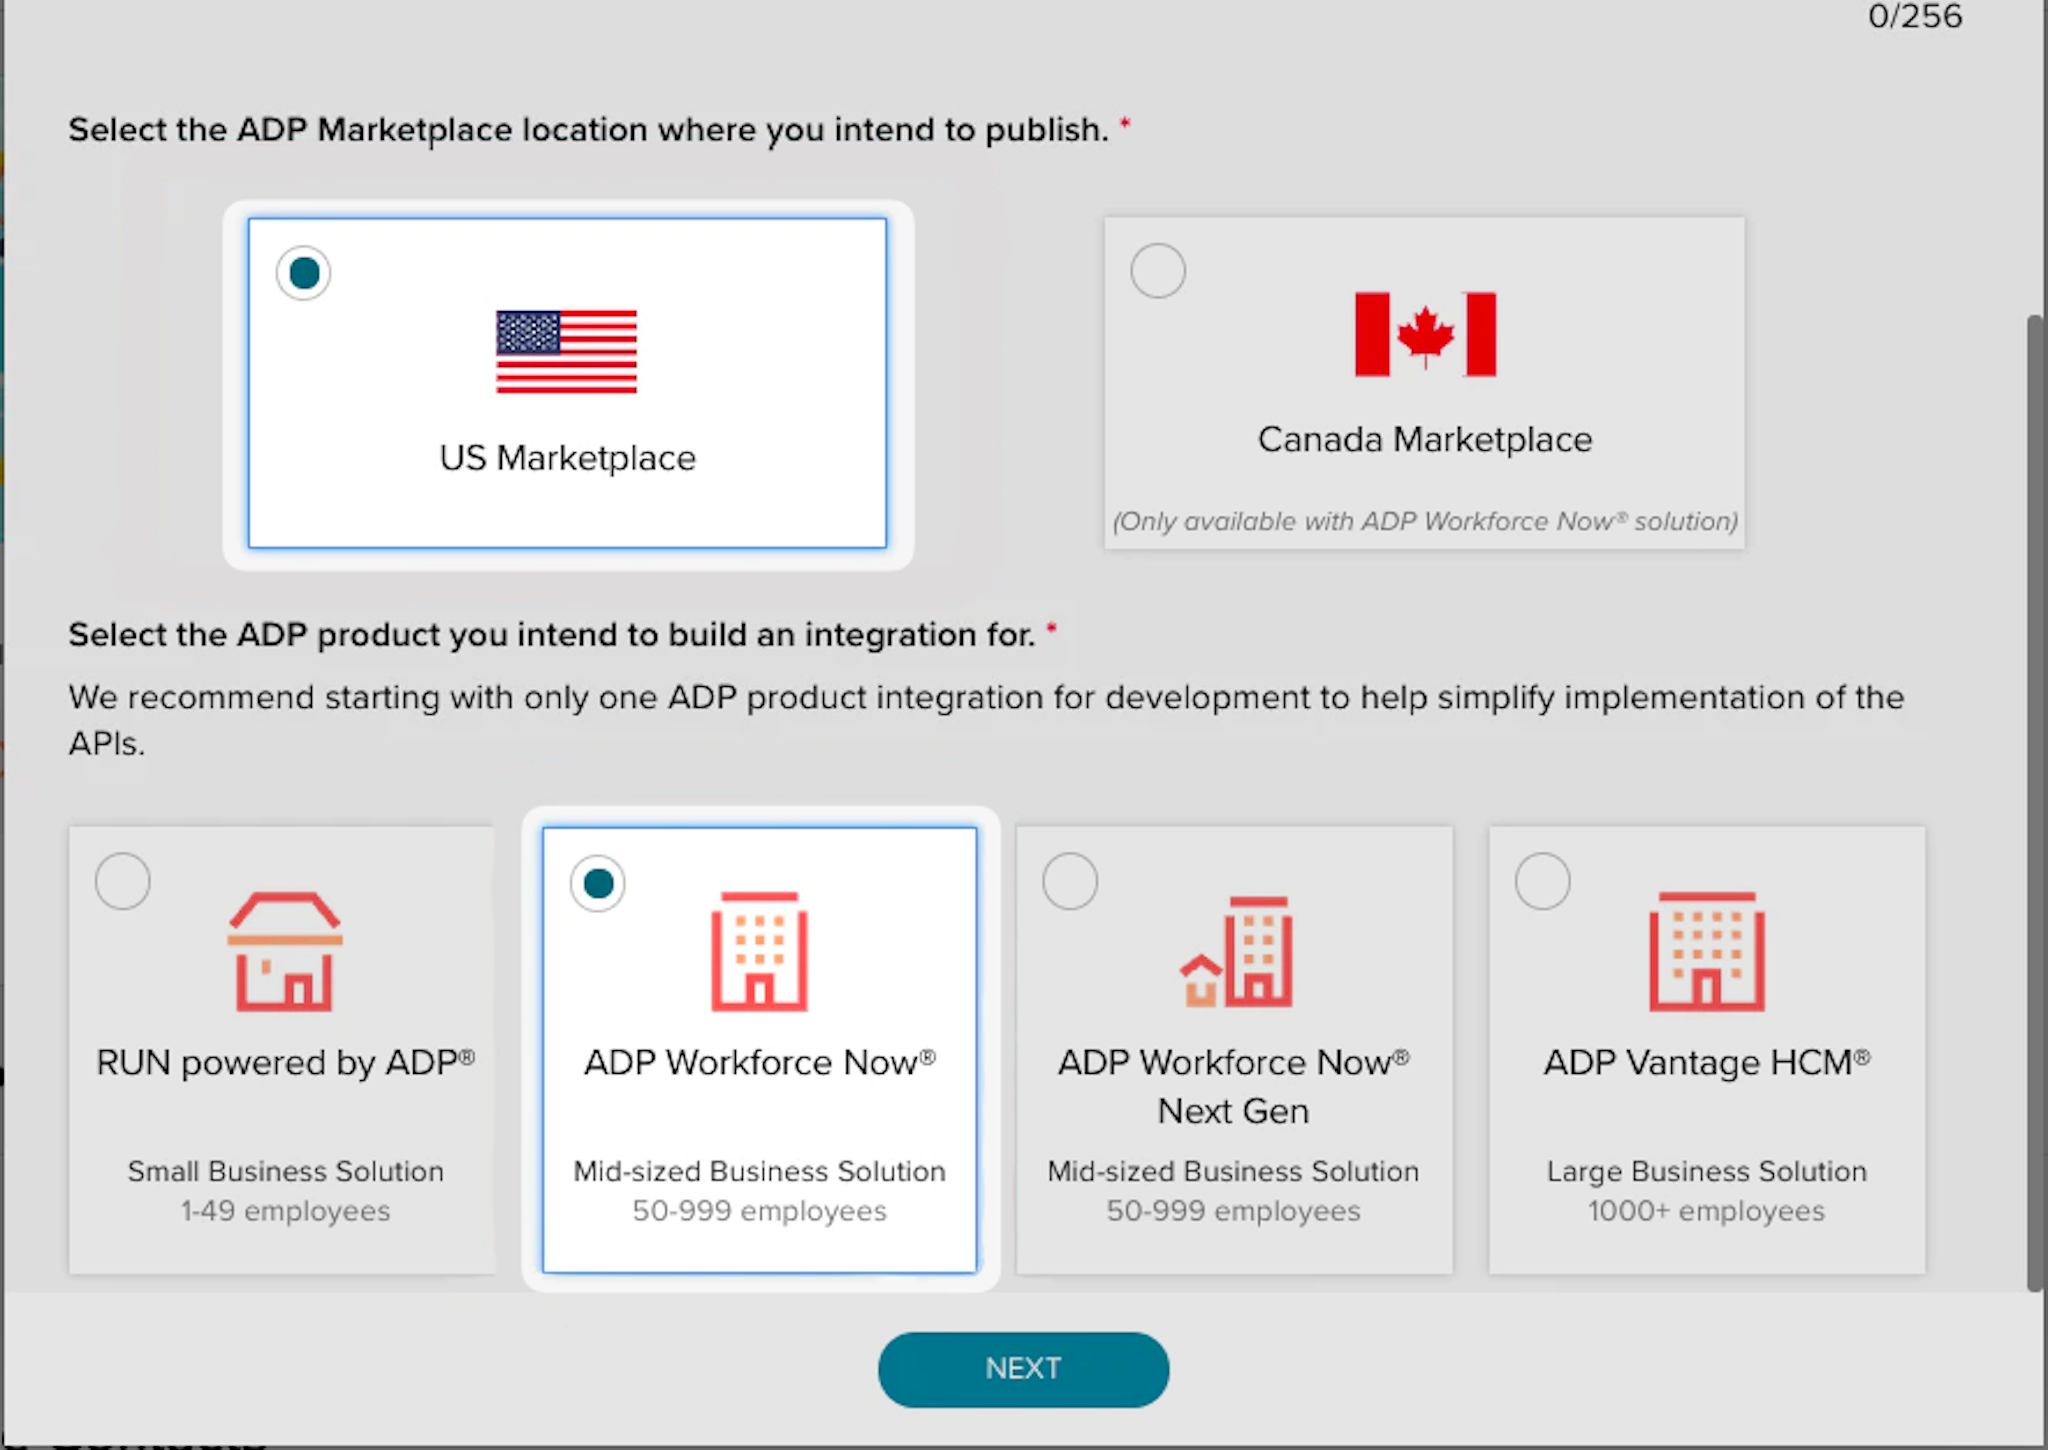
Make the selections “US Marketplace” and “ADP Workforce Now” respectively for the next selections and then click “Next”.
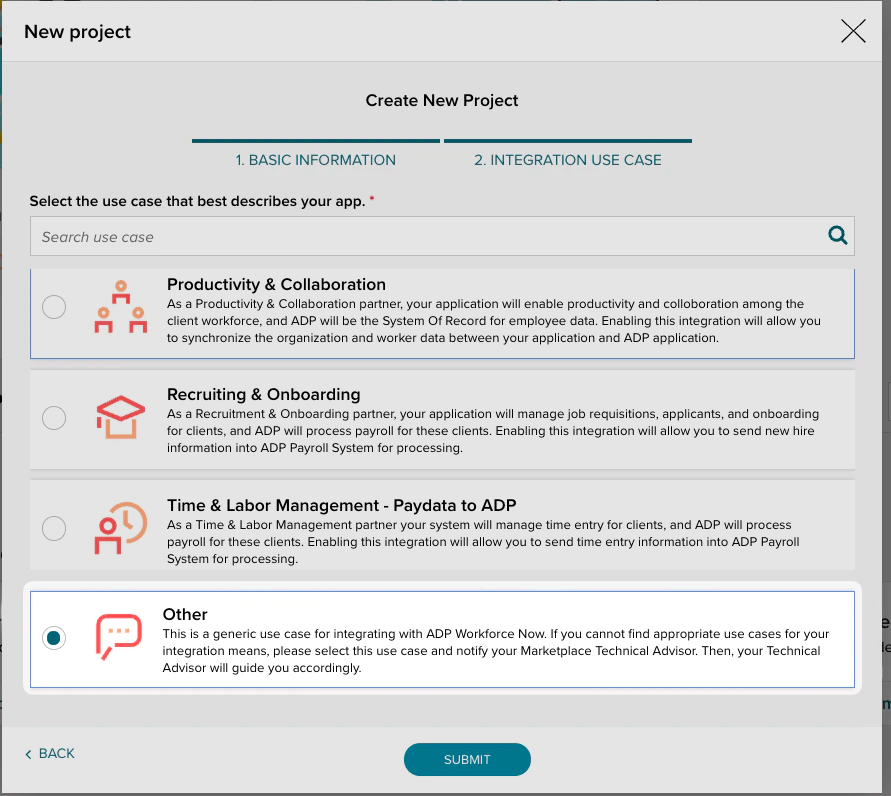
Finally, select “Other” for the use case that best describes your application and click “Submit”.
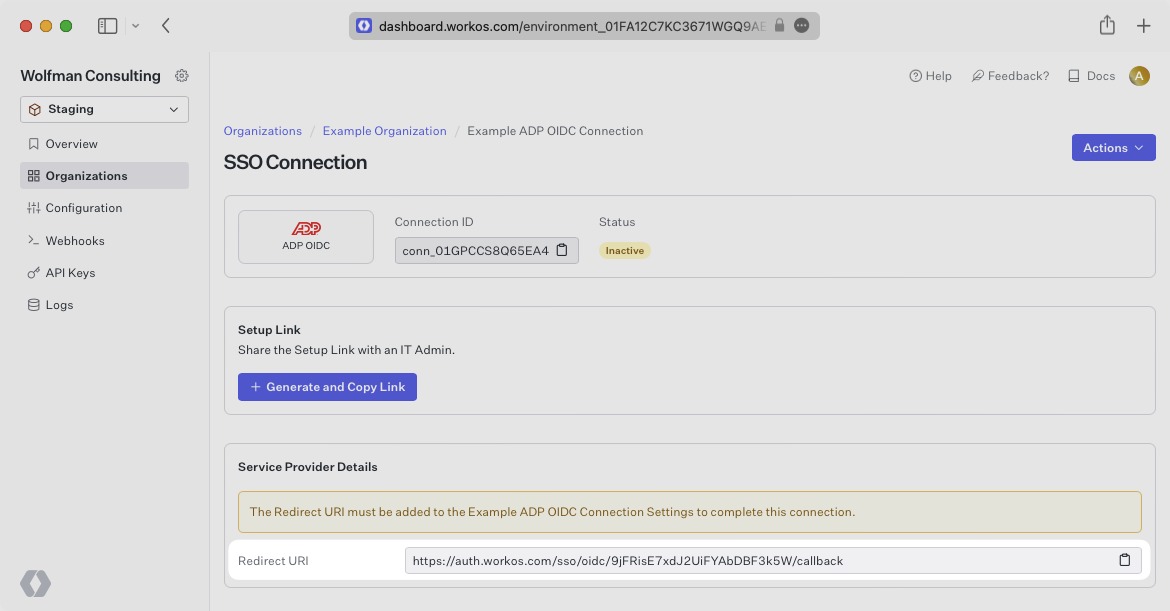
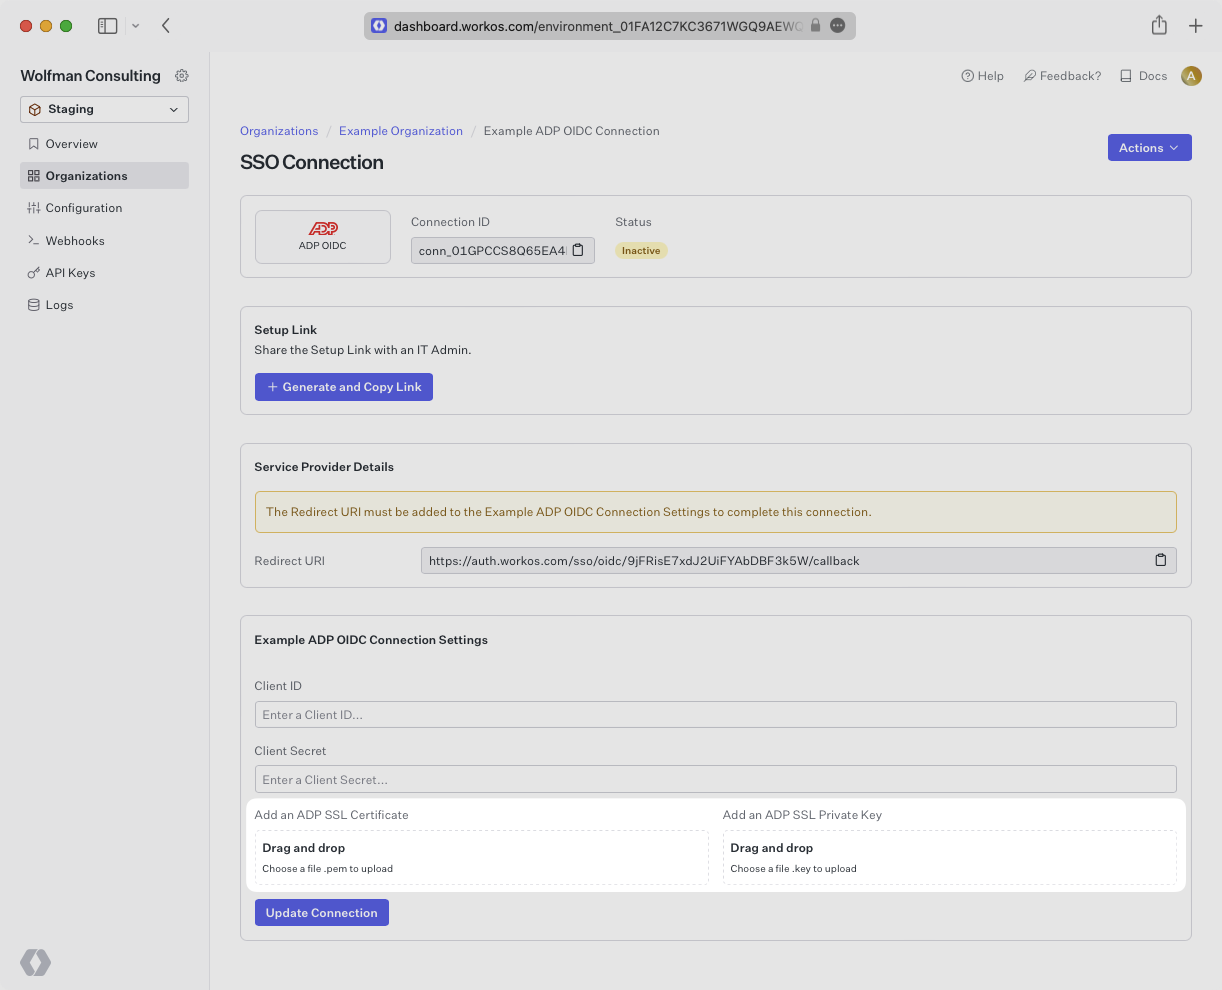
After configuring the ADP project, the next step is to provide ADP with the redirect URI generated by WorkOS.
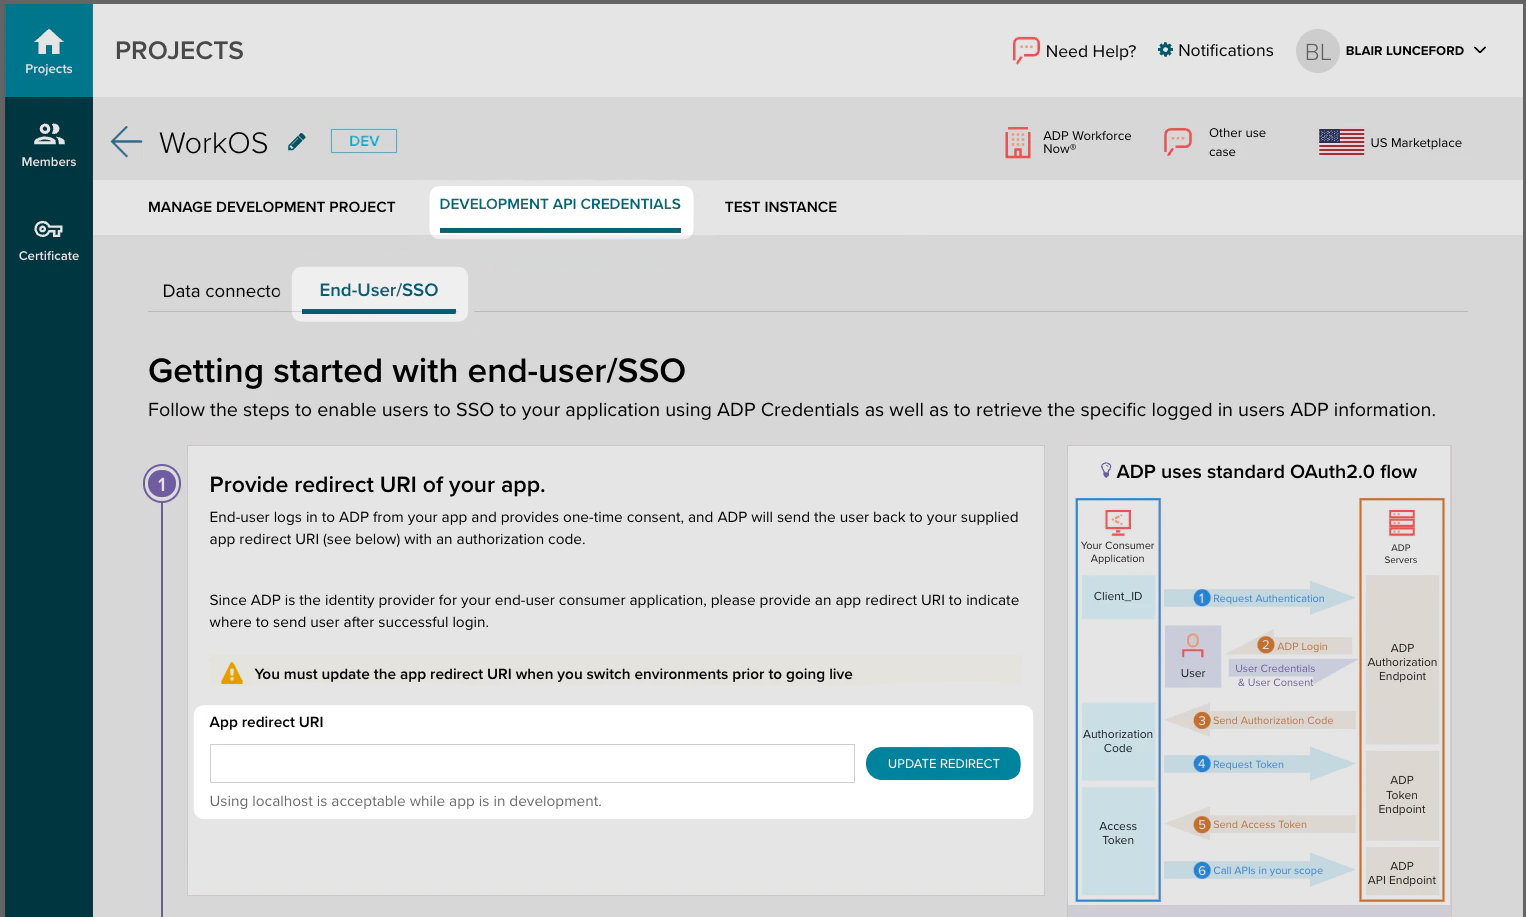
Now that a new project has been created browse to the “Development API Credentials” Tab within the project.
Click on the “End-User/SSO sub-tab” from this view.
Paste the Redirect URI into the App redirect URI field and click “Update Redirect”.
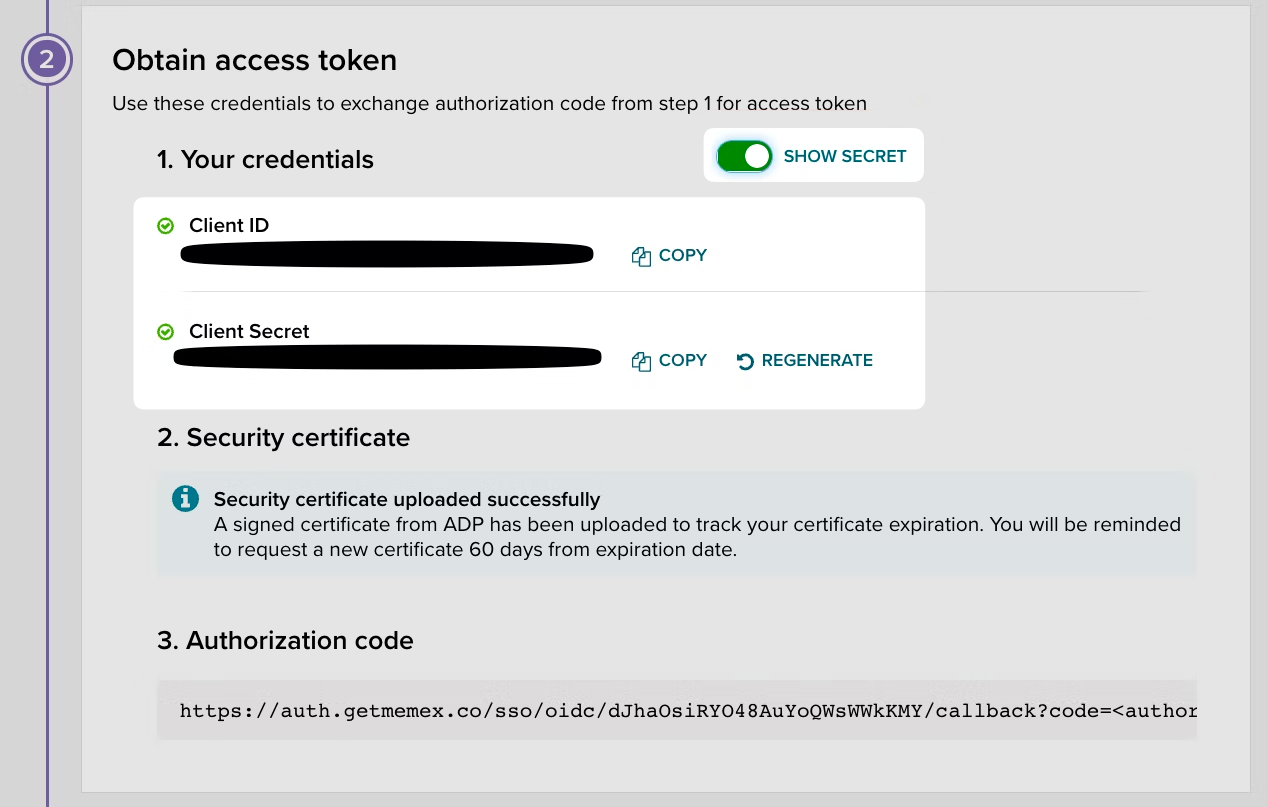
Now that the redirect URI has been provided, the next step is to gather the Client ID and Client Secret from ADP and add it into the WorkOS Dashboard.
Under the same tab used in the previous step, you’ll provide the Client ID and Client Secret from ADP. Click to reveal the secret and copy and paste both the client ID and client secret into the WorkOS dashboard.
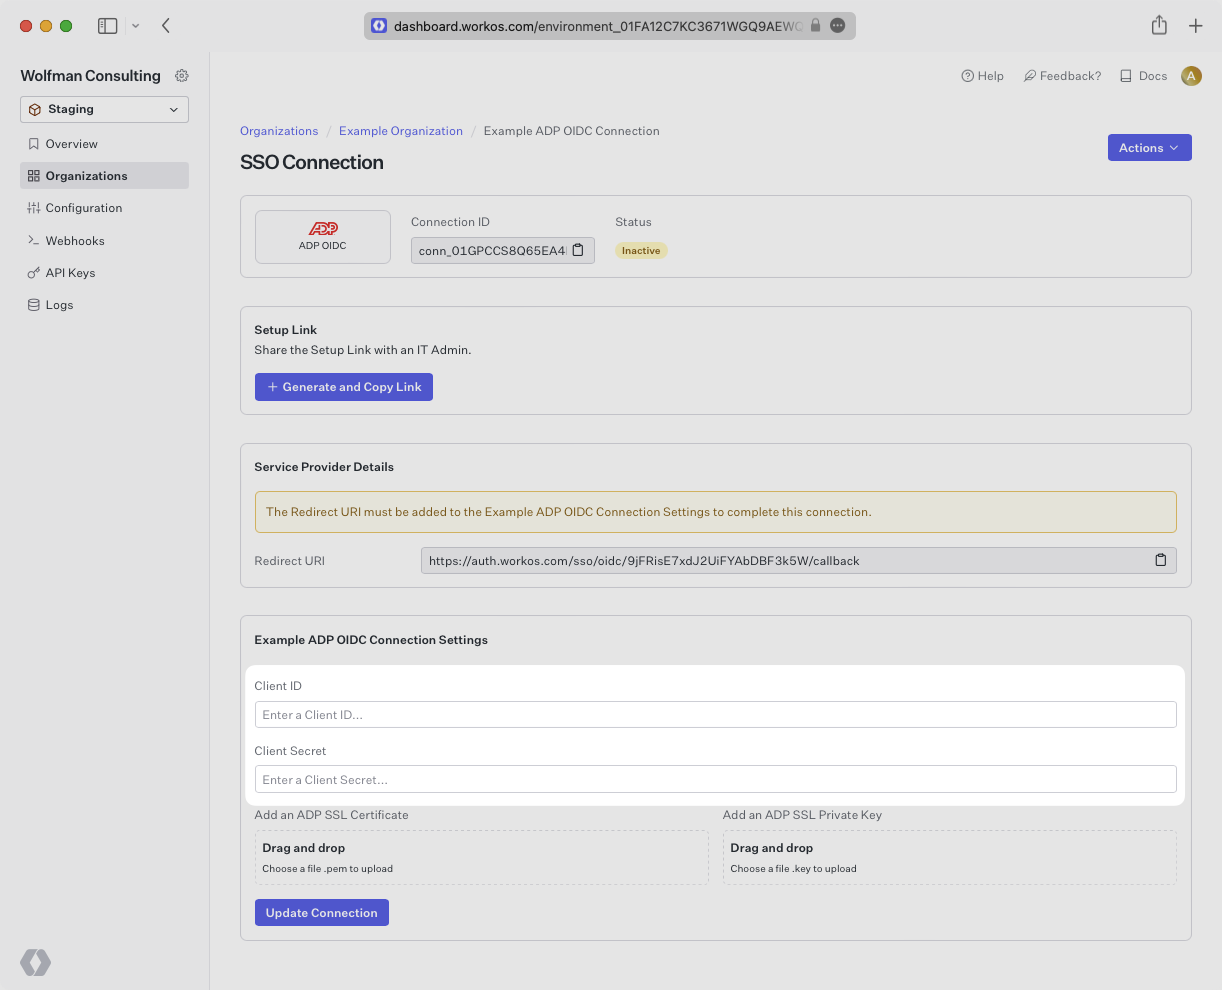
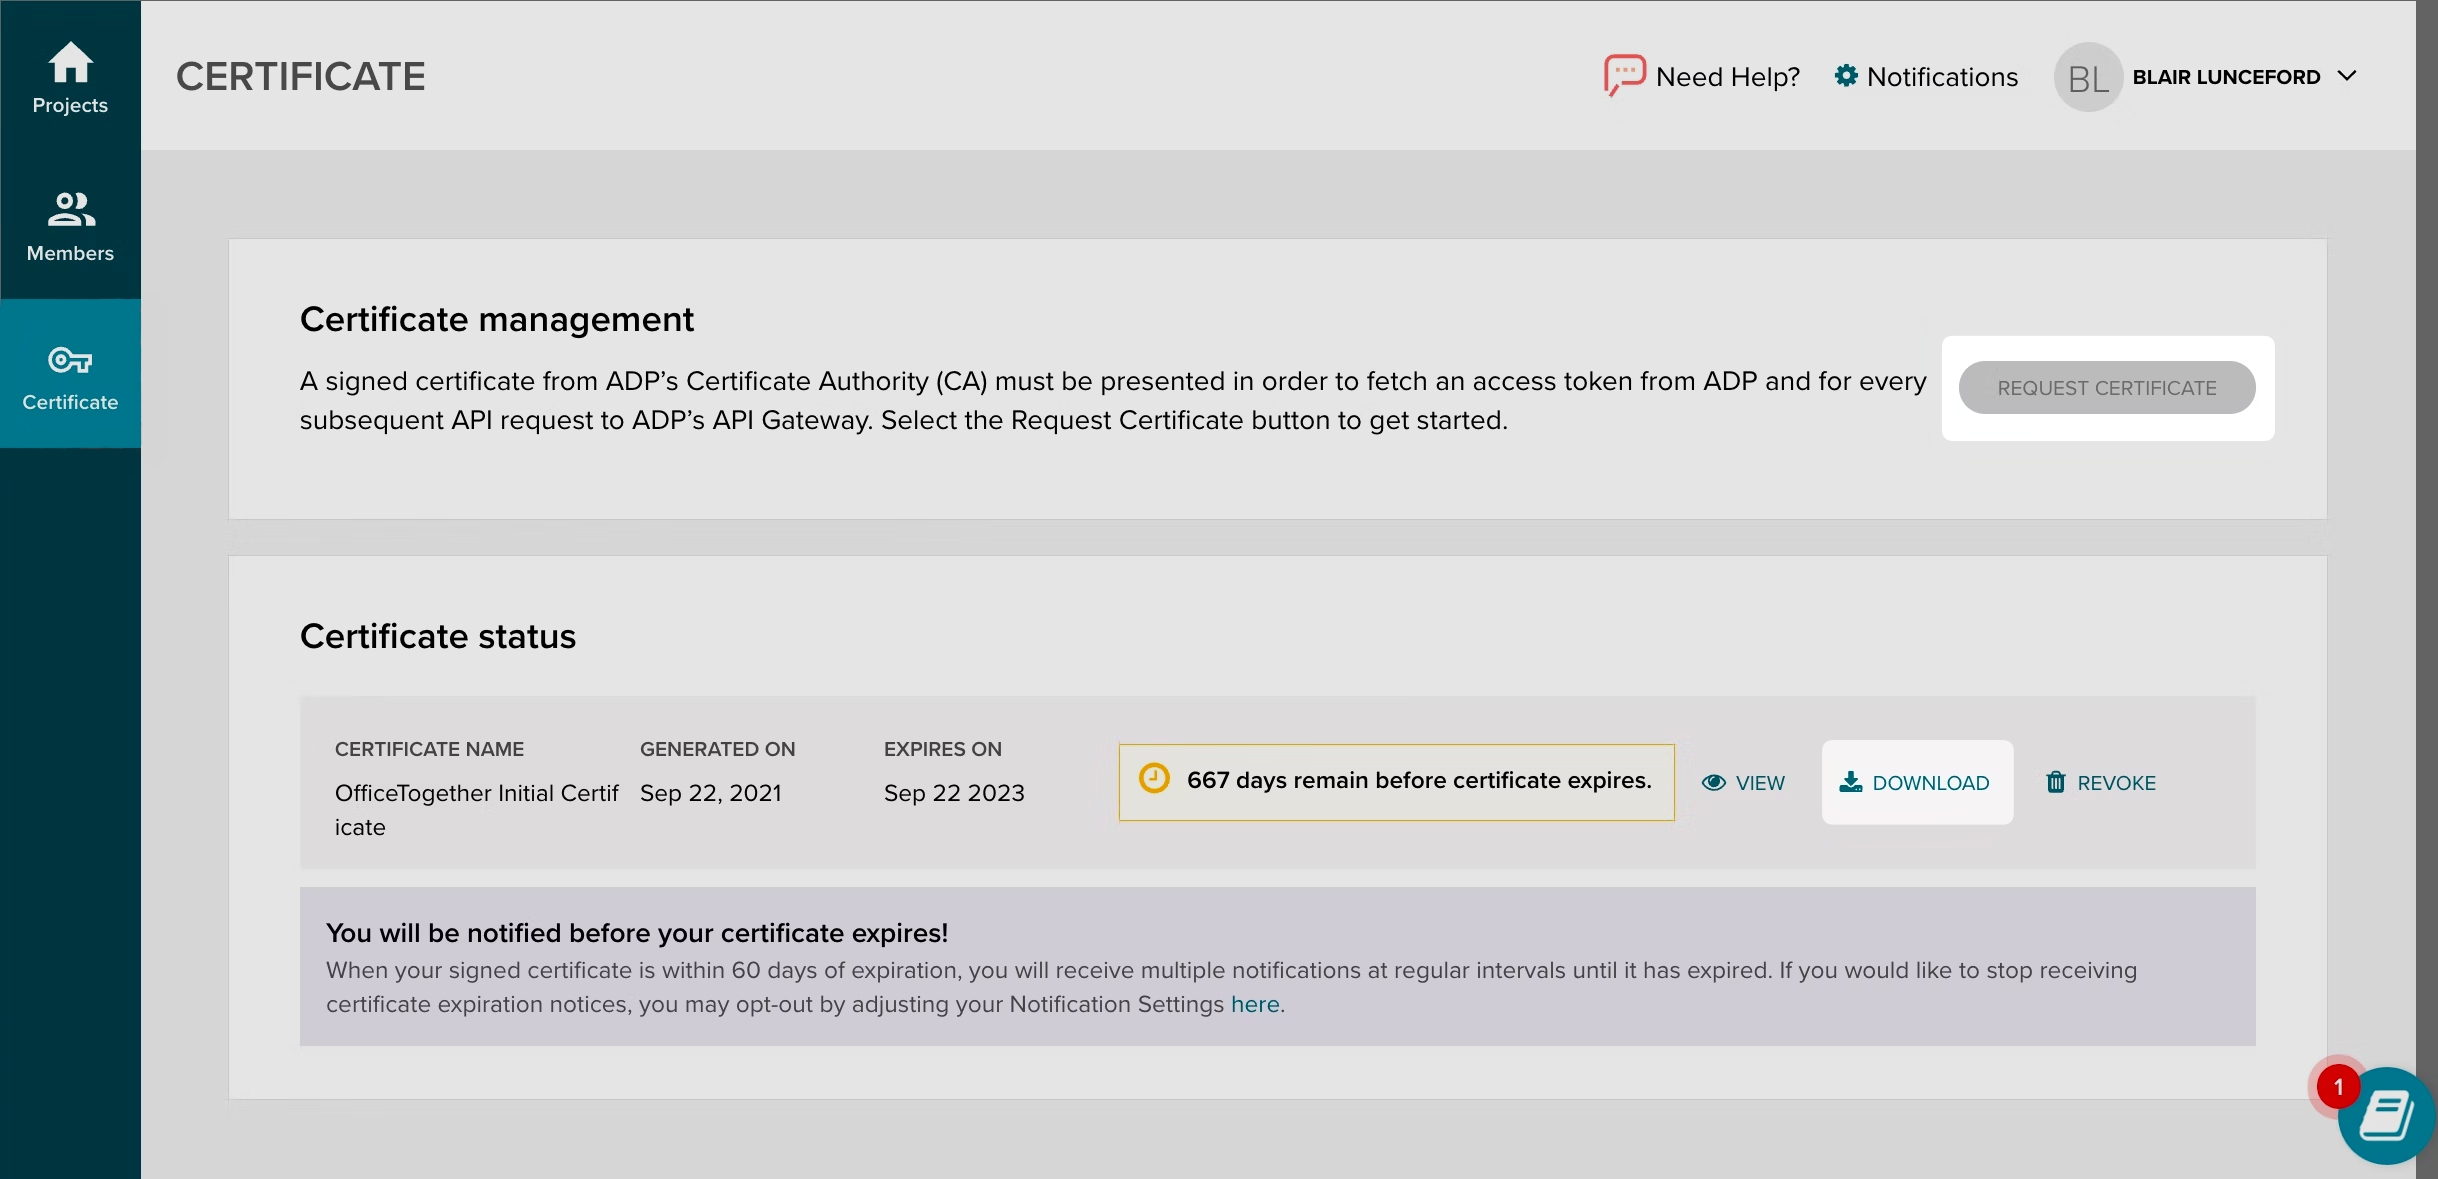
Now that the Client ID and Secret have been provided, the next step is to gather the SSL Certificate and Private Key from ADP and add it into the WorkOS Dashboard.
ADP uses a two-fold certificate method with an SSL certificate and an SSL private key. The SSL private key is displayed only once when the certificate is generated. If the certificate has already been generated, the IT contact who generated it should also have received the private key; otherwise, generate a new certificate and key from the Certificates tab in the left-hand navigation.
The SSL Certificate can be found in ADP by browsing to “Certificate” on the left hand nav bar. You can also create a new SSL Certificate and Private Key pair if necessary.
Upload the two files into your WorkOS dashboard in their respective portals on the connection page and click “Update Connection”.
Navigate back to the connection in your WorkOS dashboard. After a minute or two you should see the connection become Active as indicated by the green badge next to the connection name.
All that’s left to do now is test out the connection. You can use your own application if it’s connected to WorkOS already, or feel free to use one of our example applications like this Python Flask SSO app to get up and running with a PoC quickly