Auth0
Learn how to configure a connection to Auth0 via SAML.
Each SSO Identity Provider requires specific information to create and configure a new Connection. Often, the information required to create a Connection will differ by Identity Provider.
To create a Auth0 SAML Connection, you’ll need the Identity Provider metadata that is available from the organization’s Auth0 instance.
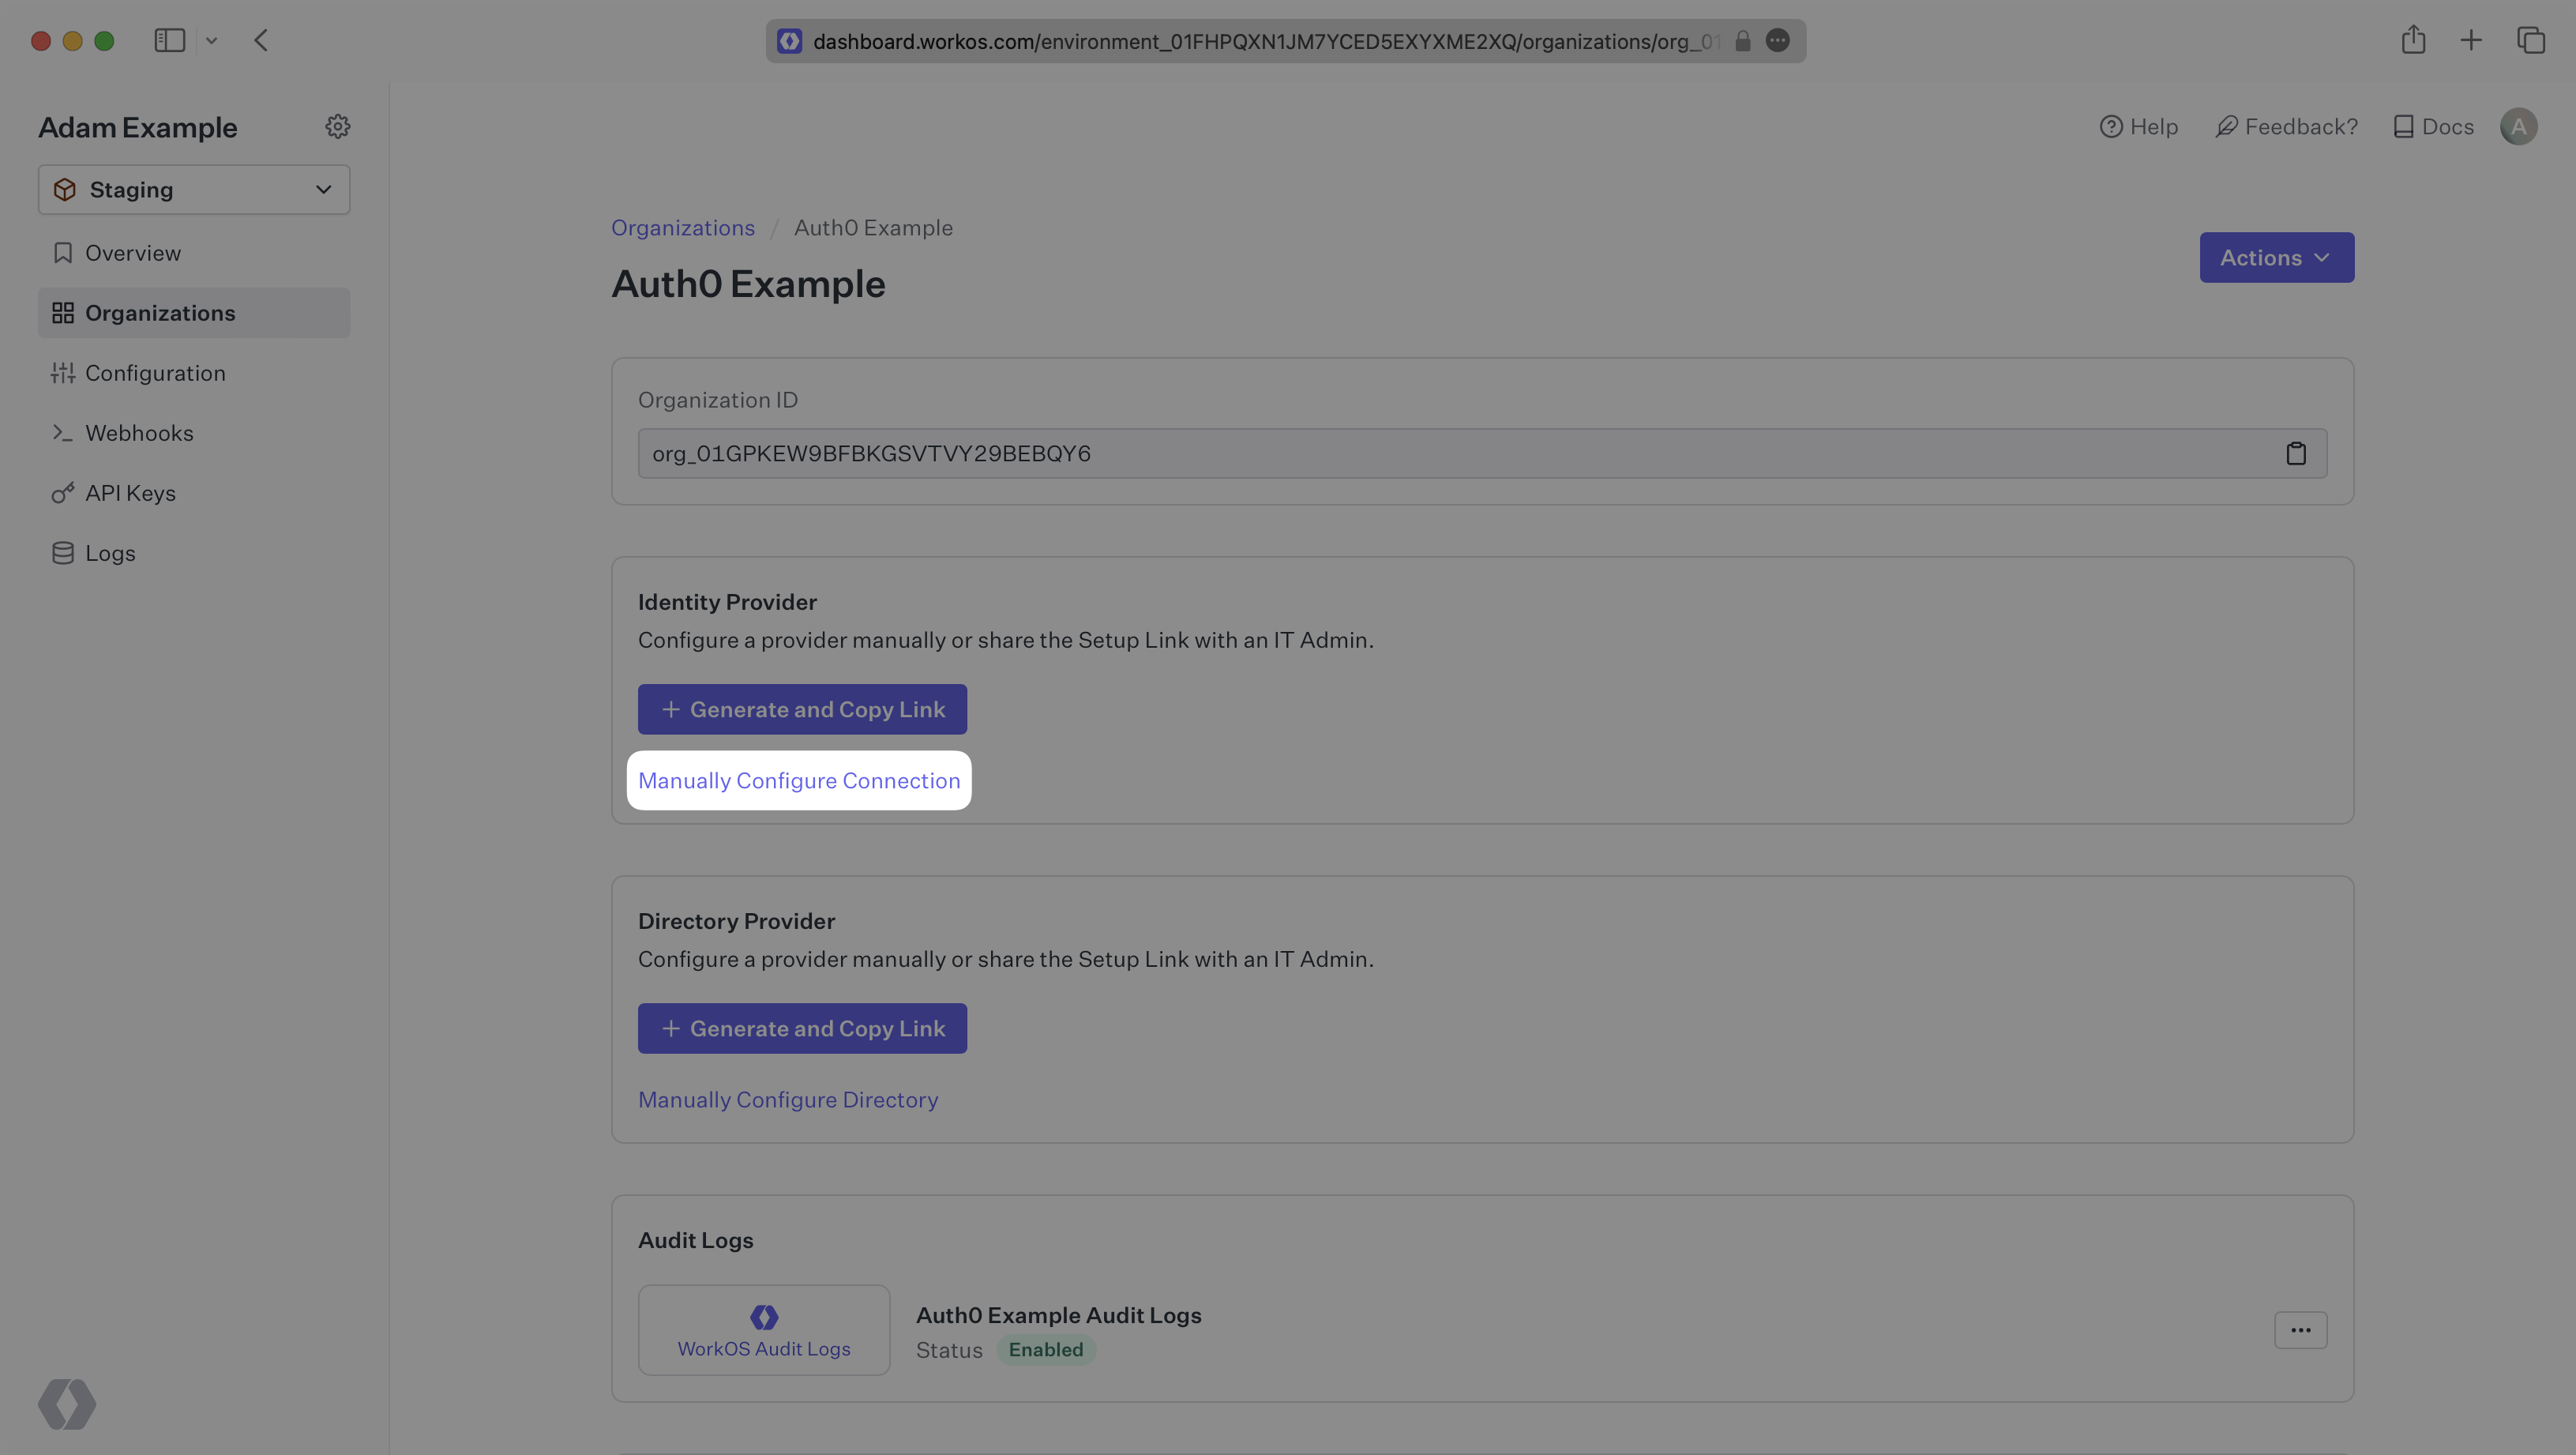
Start by logging in to your WorkOS dashboard and browse to the “Organizations” tab on the left hand navigation bar.
Select the organization you’d like to configure an Auth0 SAML Connection for, and select “Manually Configure Connection” under “Identity Provider”.
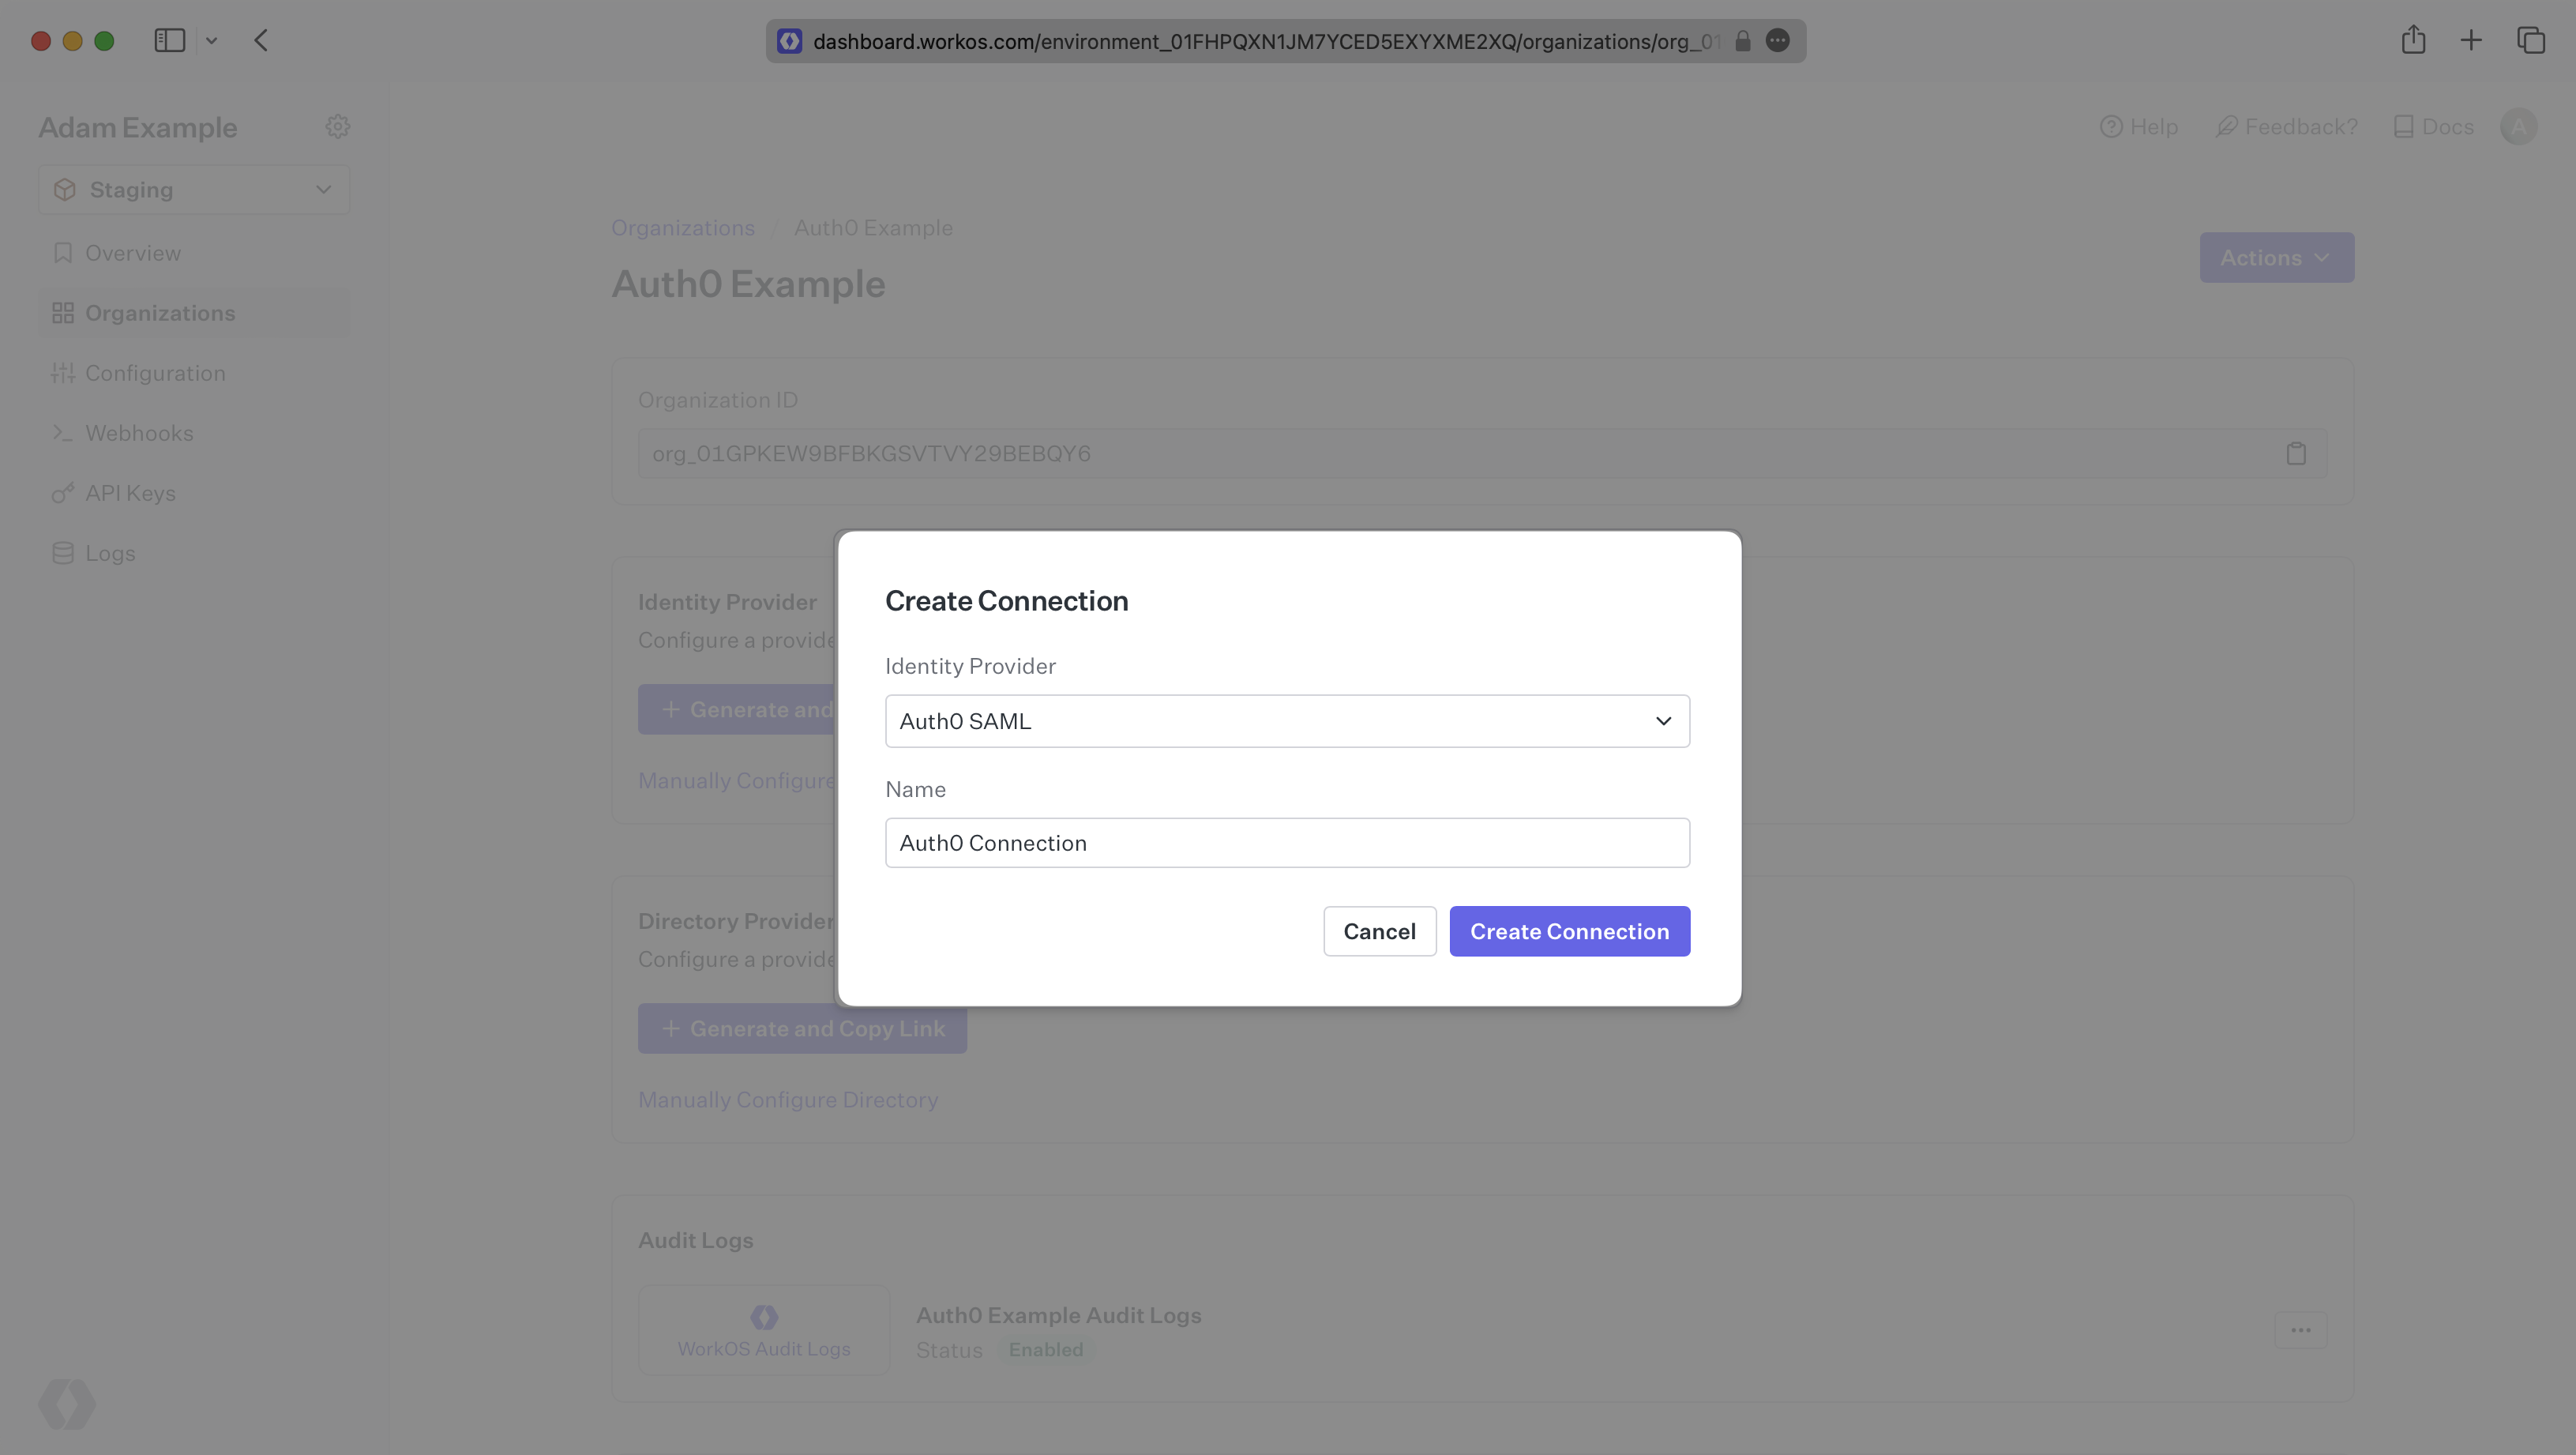
Select “Auth0 SAML” from the Identity Provider dropdown, enter a descriptive name for the connection, and then select the “Create Connection” button.
WorkOS provides the ACS URL and SP Entity ID, which are readily available in your Connection Settings in the WorkOS Dashboard.
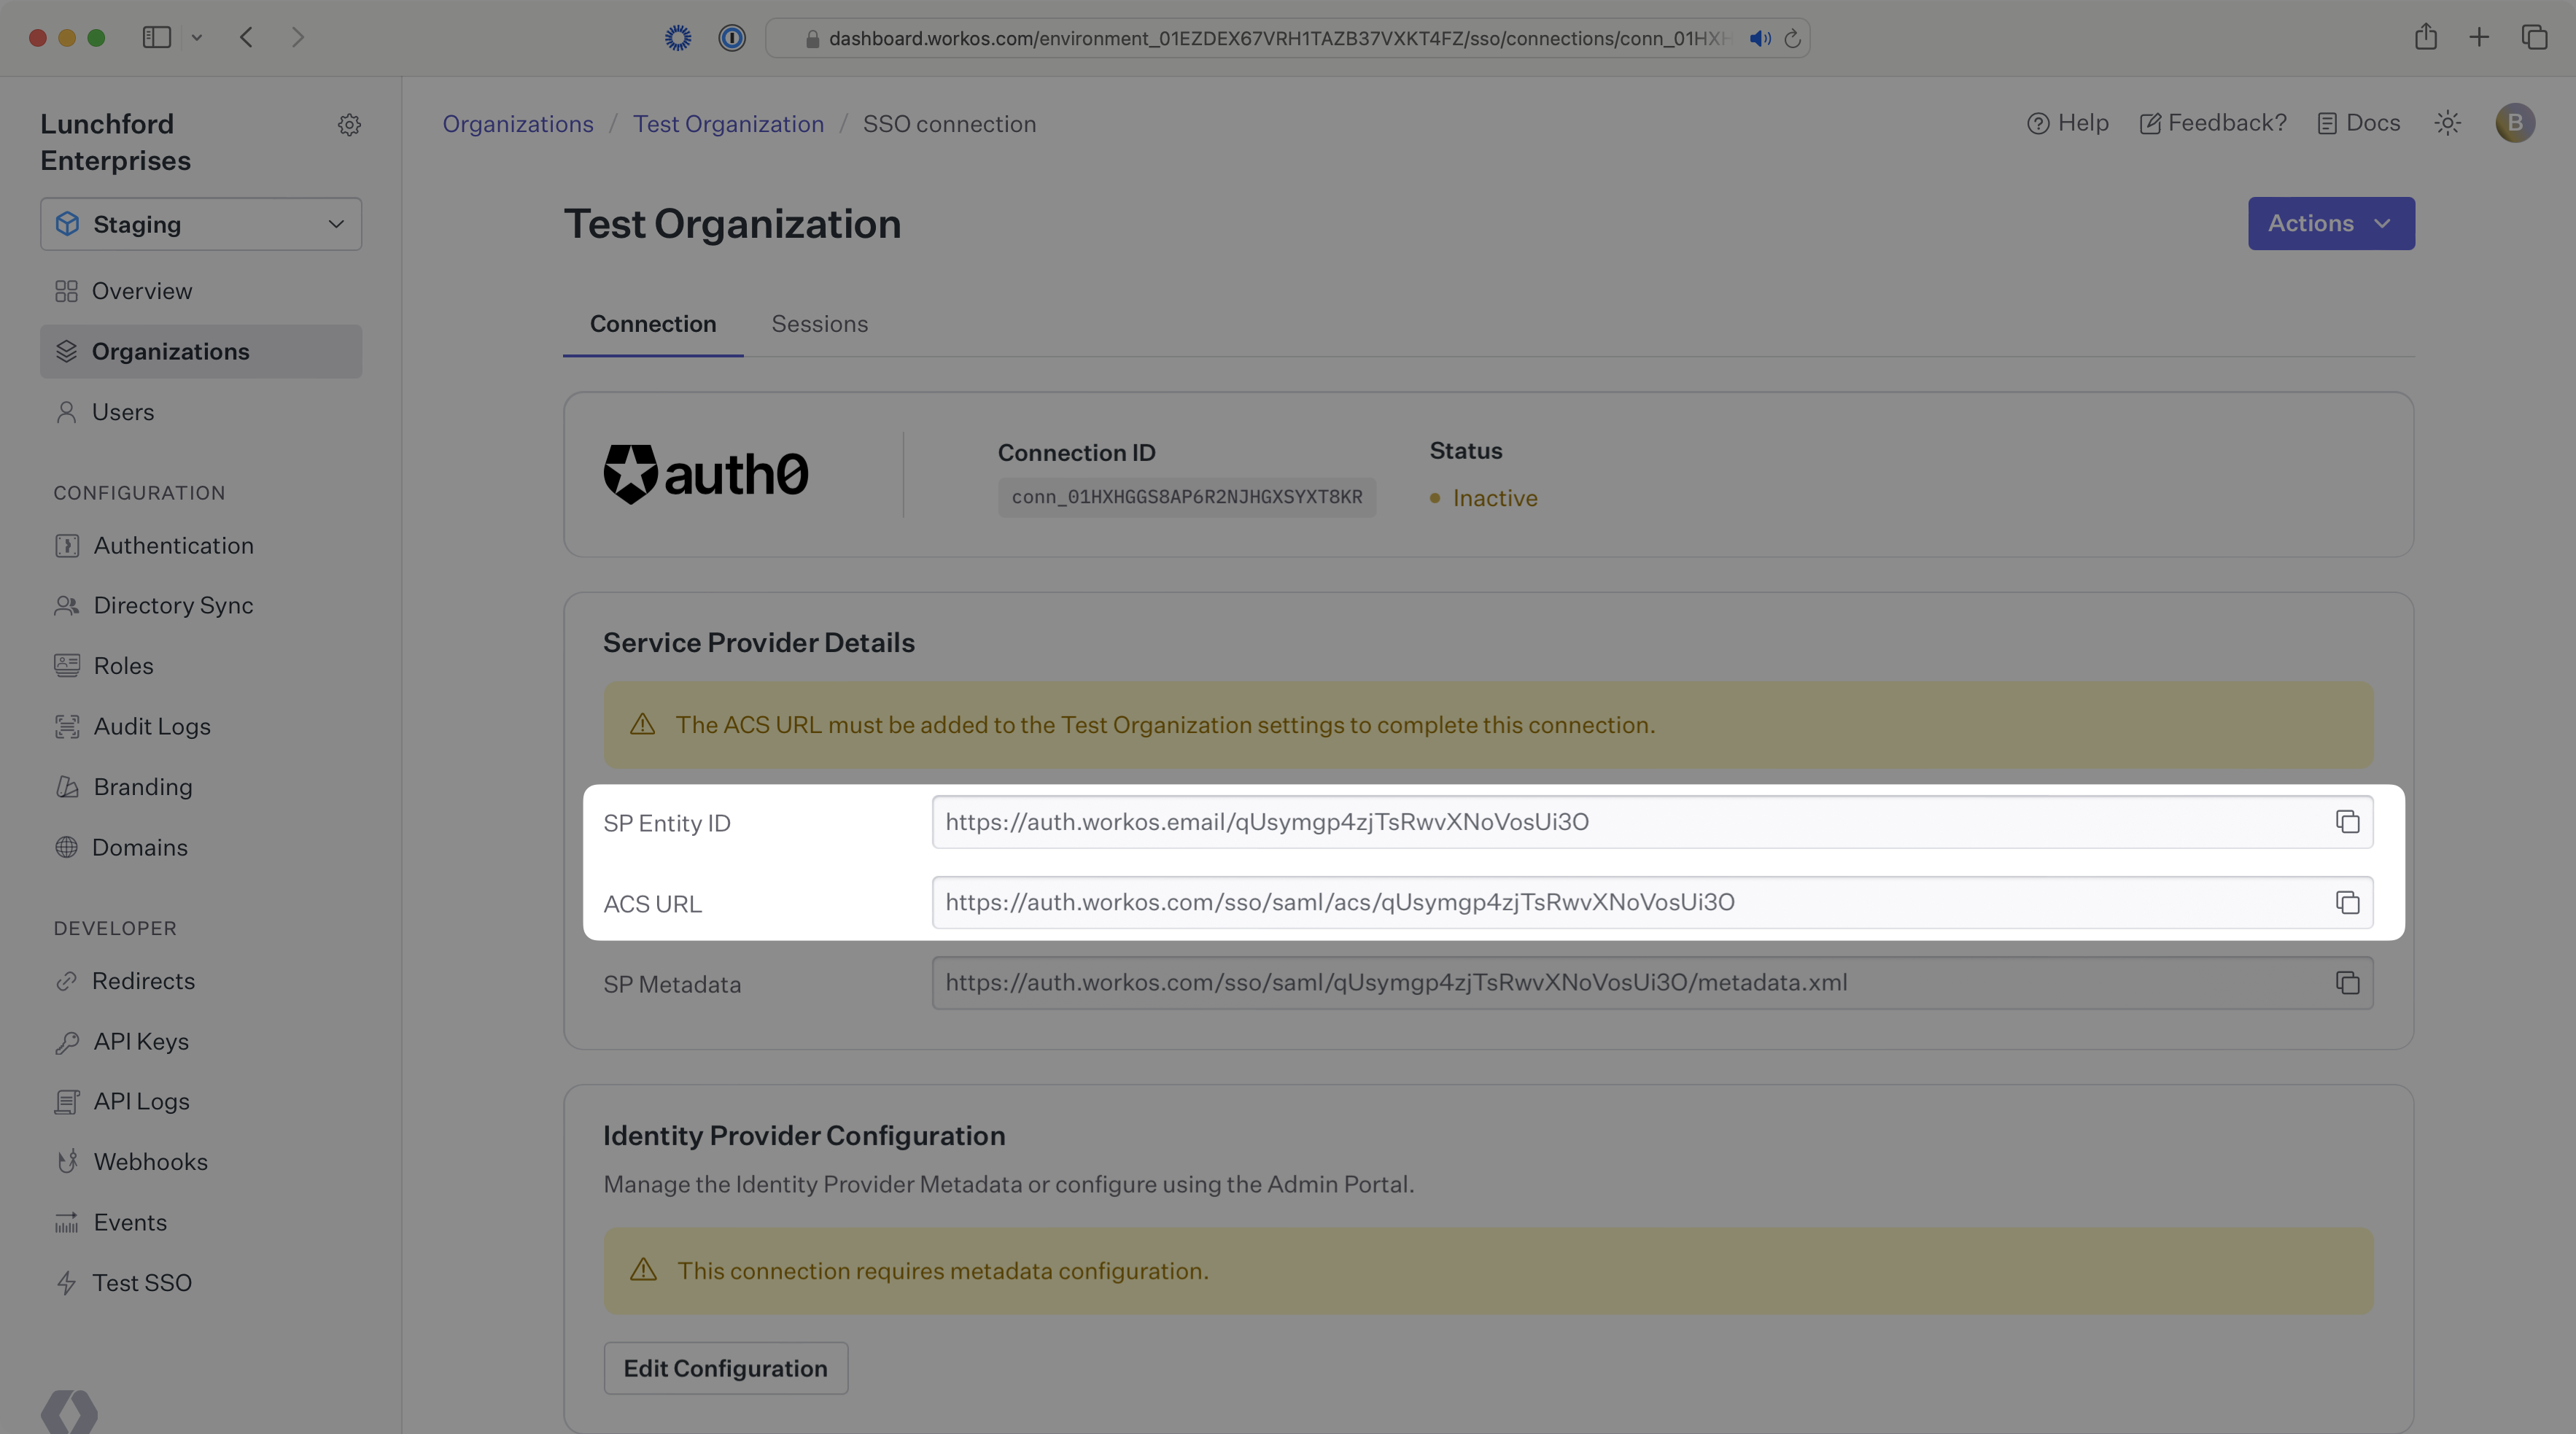
The ACS URL is the location an Identity Provider redirects its authentication response to. In Auth0’s case, the ACS URL needs to be set by the organization when configuring your application in their Auth0 instance.
The SP Entity ID is a URI used to identify the issuer of a SAML request and the audience of a SAML response. In this case, the SP Entity ID is used to communicate that WorkOS will be the party performing SAML requests to the organization’s Auth0 instance, and that WorkOS is the intended audience of the SAML responses from the Auth0 instance.
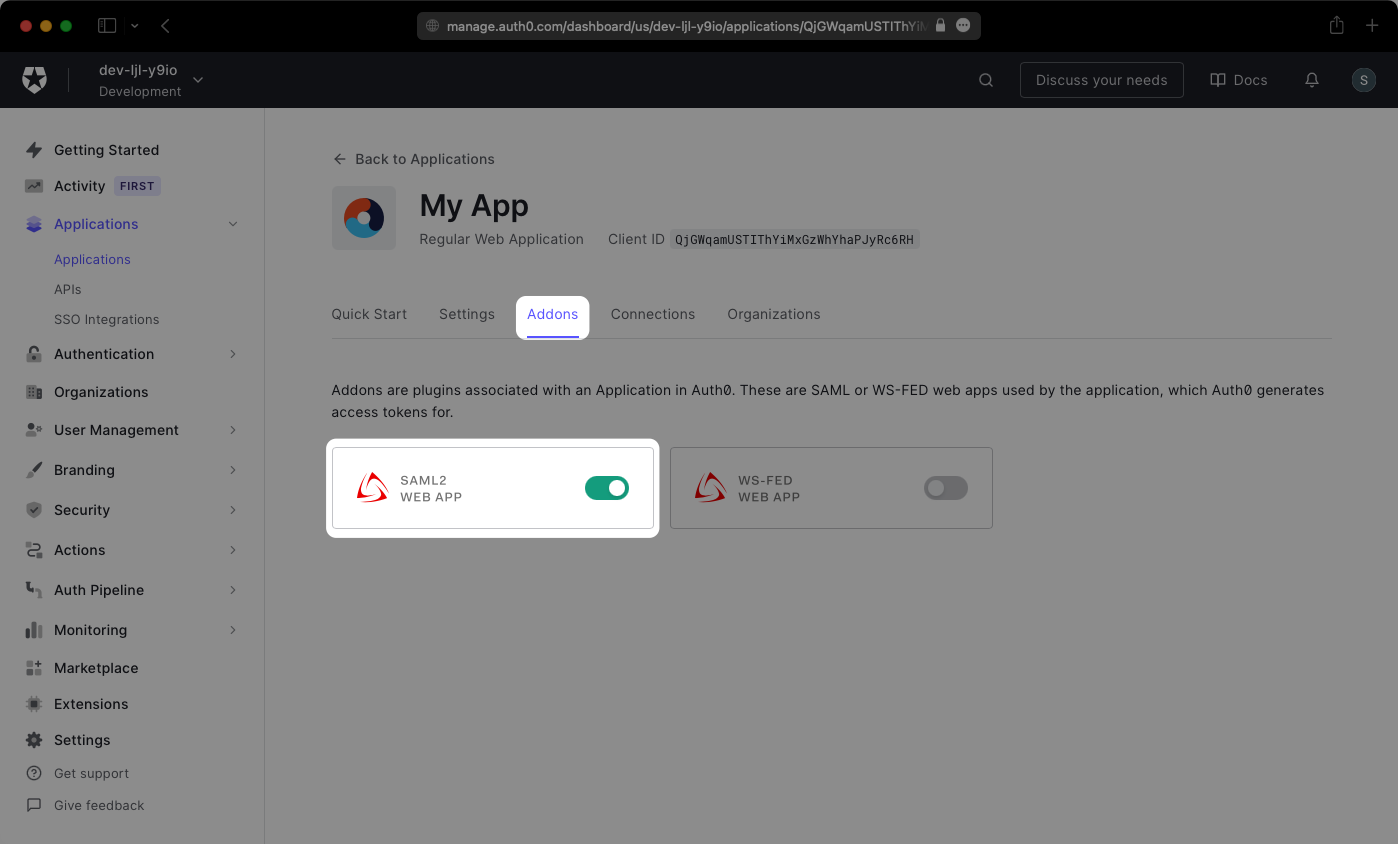
Specifically, the ACS URL will need to be set as the “Application Callback URL” on the SAML2 Web App Settings page found under the “Addons” tab in an Auth0 application. You will need to toggle on the SAML2 Web App for the settings modal to appear where you can add the ACS URL under the Application Callback URL input.
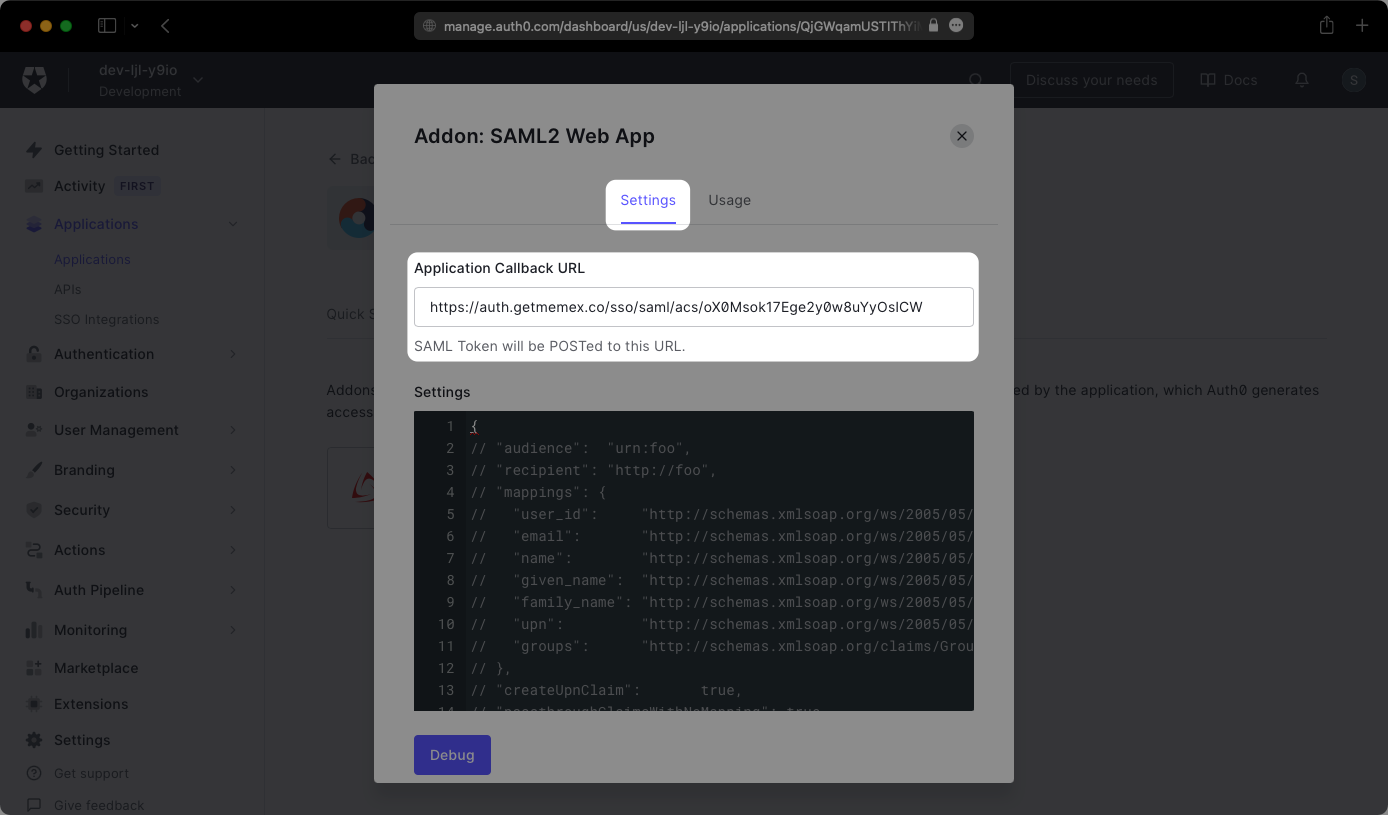
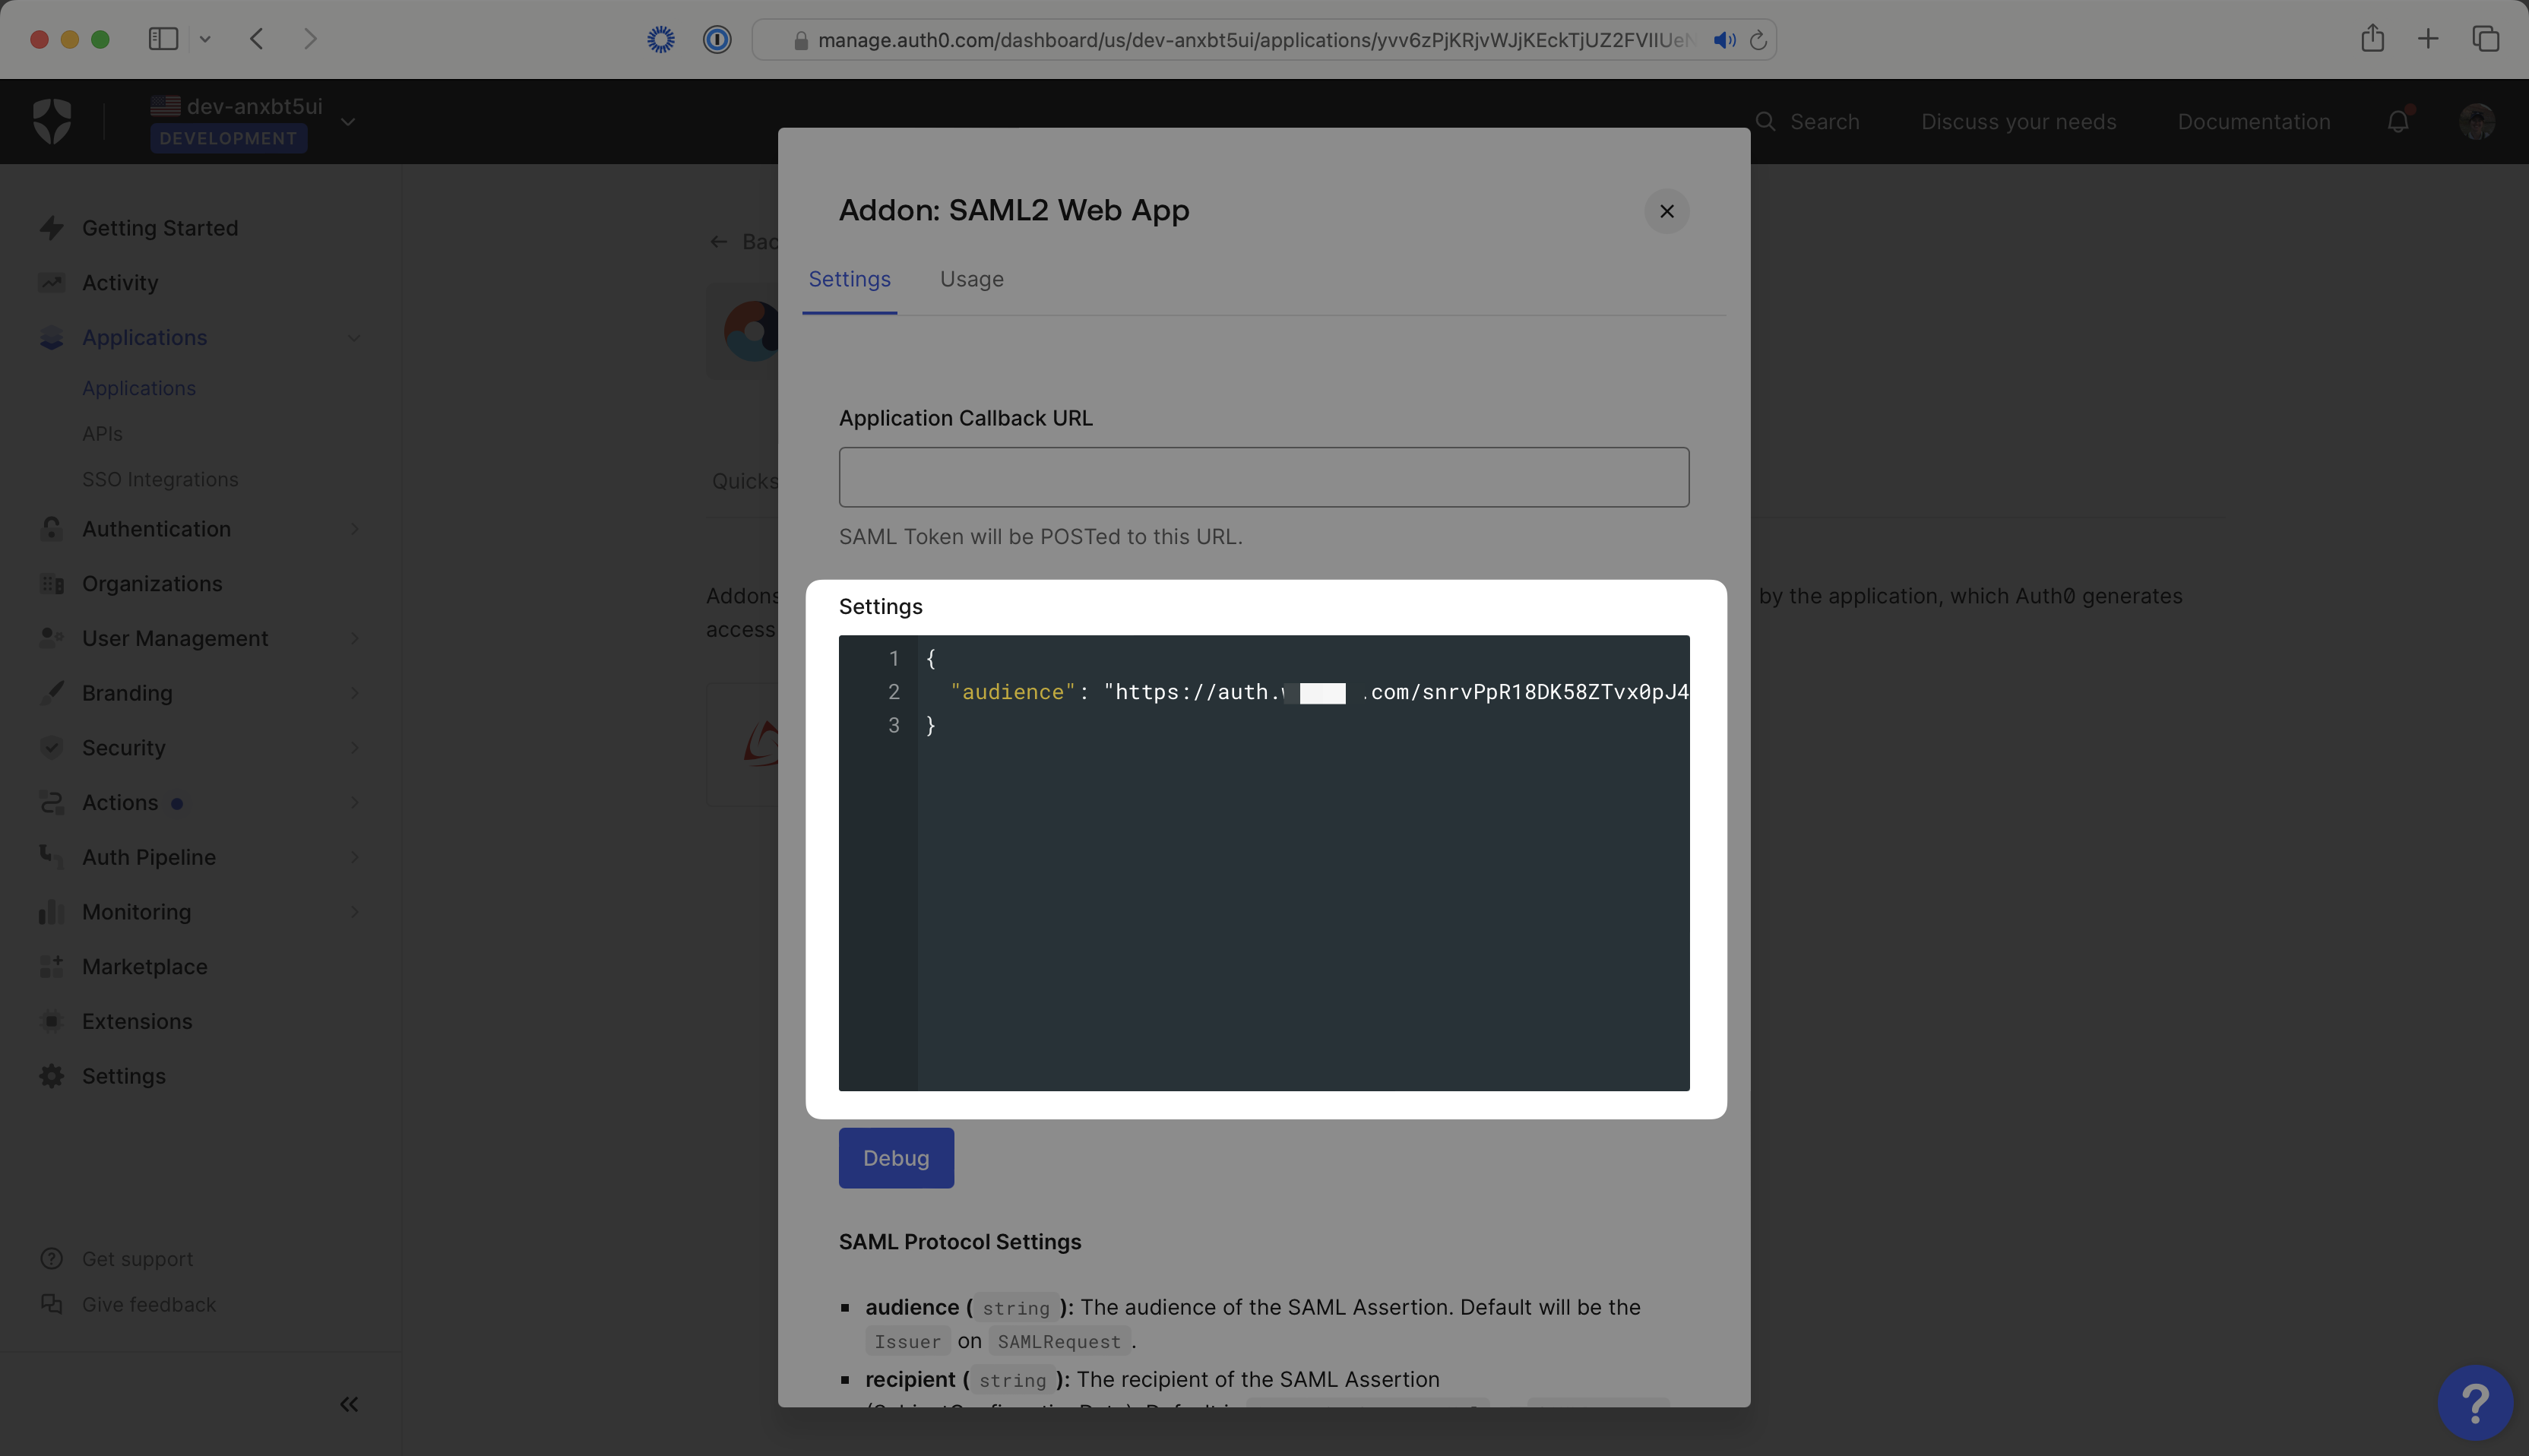
The SP Entity ID will need to be set as the “audience” value in the Settings JSON object on the SAML2 Web App Settings page.
After the Application Callback URL and Audience have been added, scroll to the bottom and click “Enable”.
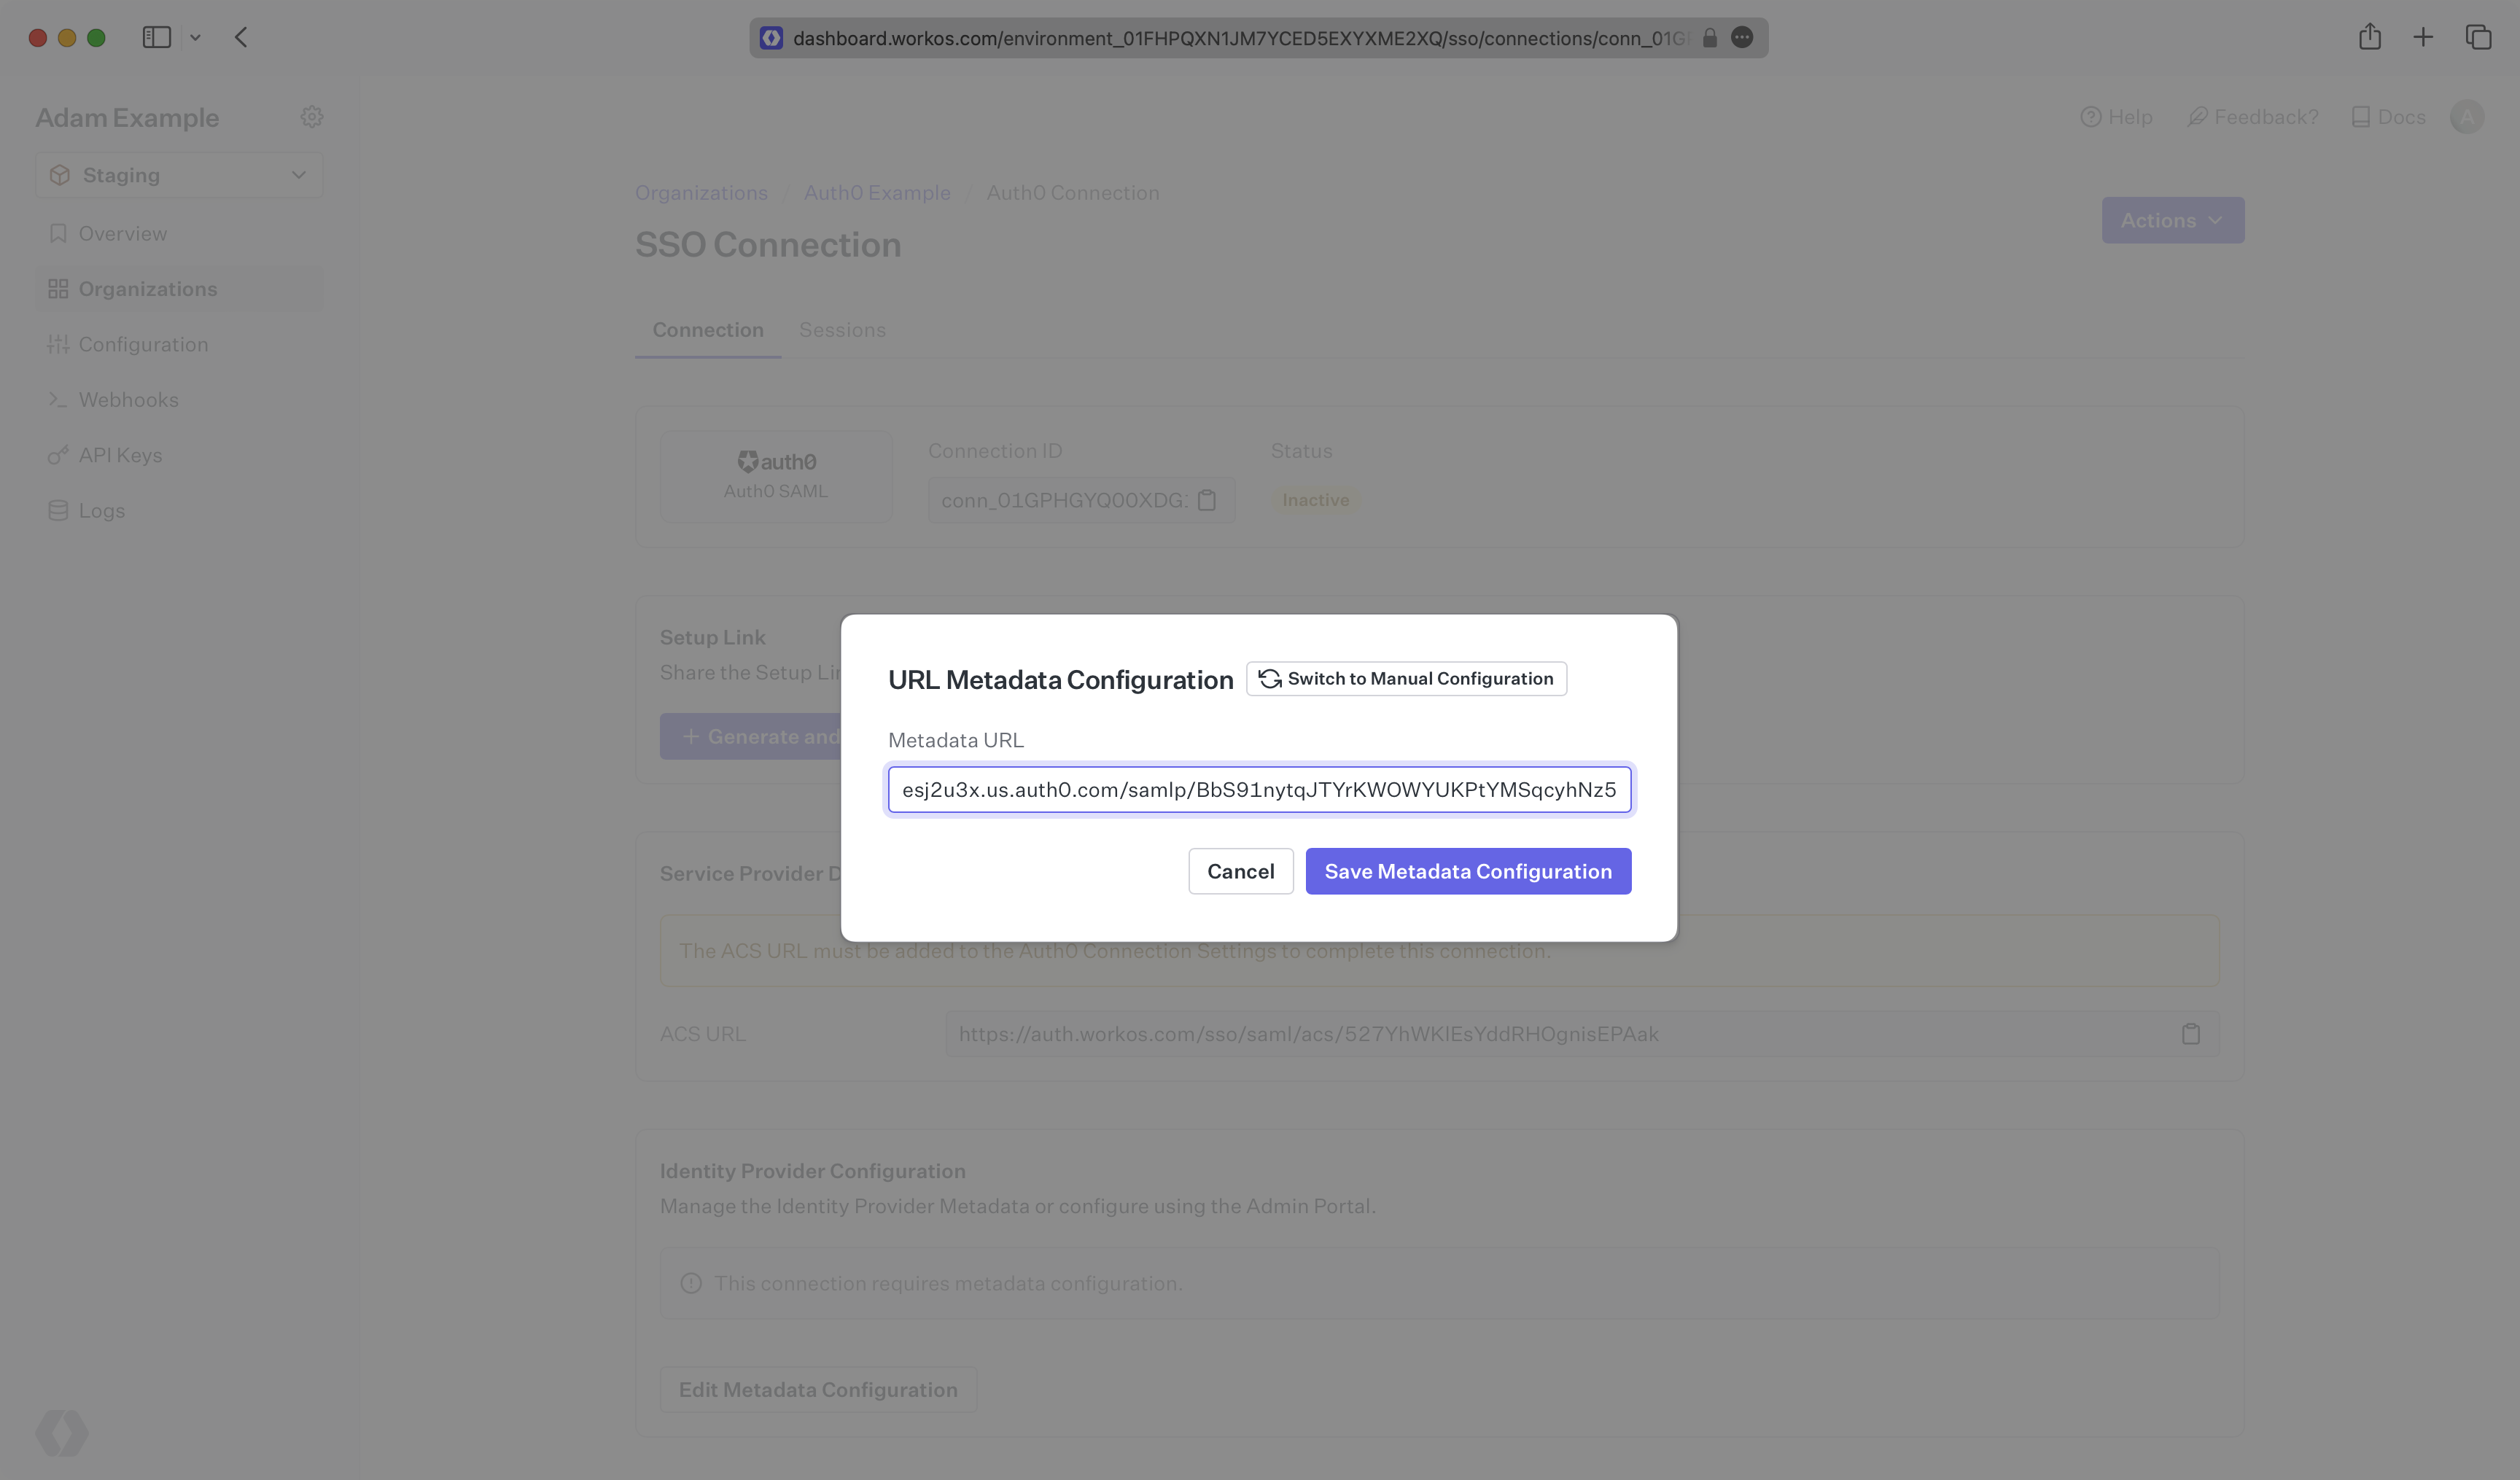
In order to integrate you’ll need the Auth0 IdP Metadata URL.
Normally, this information will come from the organization’s IT Management team when they set up your application’s SAML 2.0 configuration in their Auth0 admin dashboard. Here’s how to obtain them:
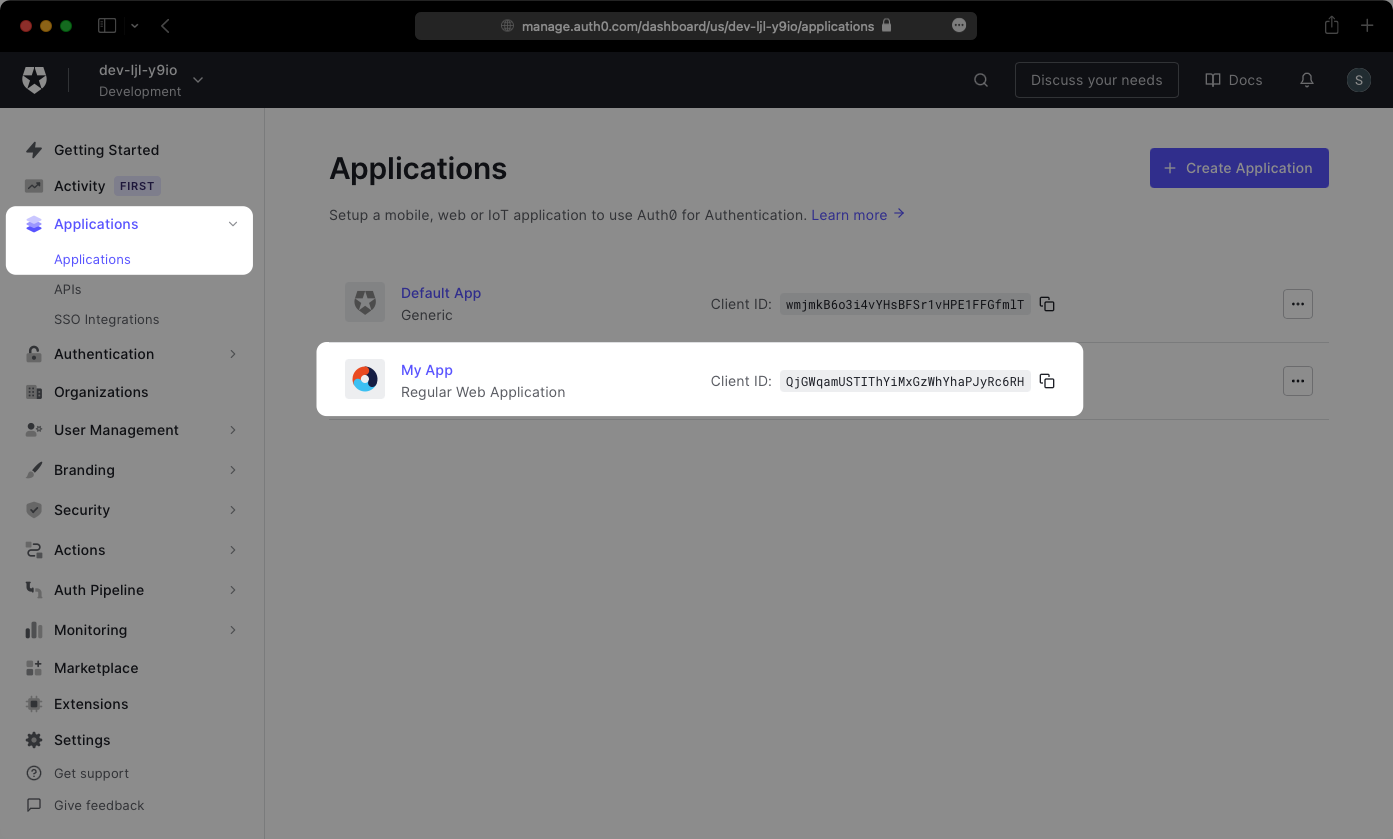
Log in to Auth0, go to the admin dashboard, select “Applications” in the sidebar, and then select the “Applications” menu option. Next, select your application from the list of applications.
On the application’s Settings page, scroll down to the bottom and expand the “Advanced Settings” section. Select the “Endpoints” tab and copy the SAML Metadata URL. You’ll need this in the next step.