Entra ID SCIM (formerly Azure AD)
Learn about syncing your user list with Entra ID SCIM.
This guide outlines how to synchronize your application’s Entra ID directories using SCIM.
To synchronize an organization’s users and groups provisioned for your application, you’ll need to provide the organization with two pieces of information:
- An Endpoint that Entra ID will make requests to.
- A Bearer Token for Entra ID to authenticate its endpoint requests.
Both of these are available in your Endpoint’s Settings in the WorkOS Dashboard.
Steps 2, 3, and 4 below will need to be carried out by the organization admin when configuring your application in their Entra ID instance.
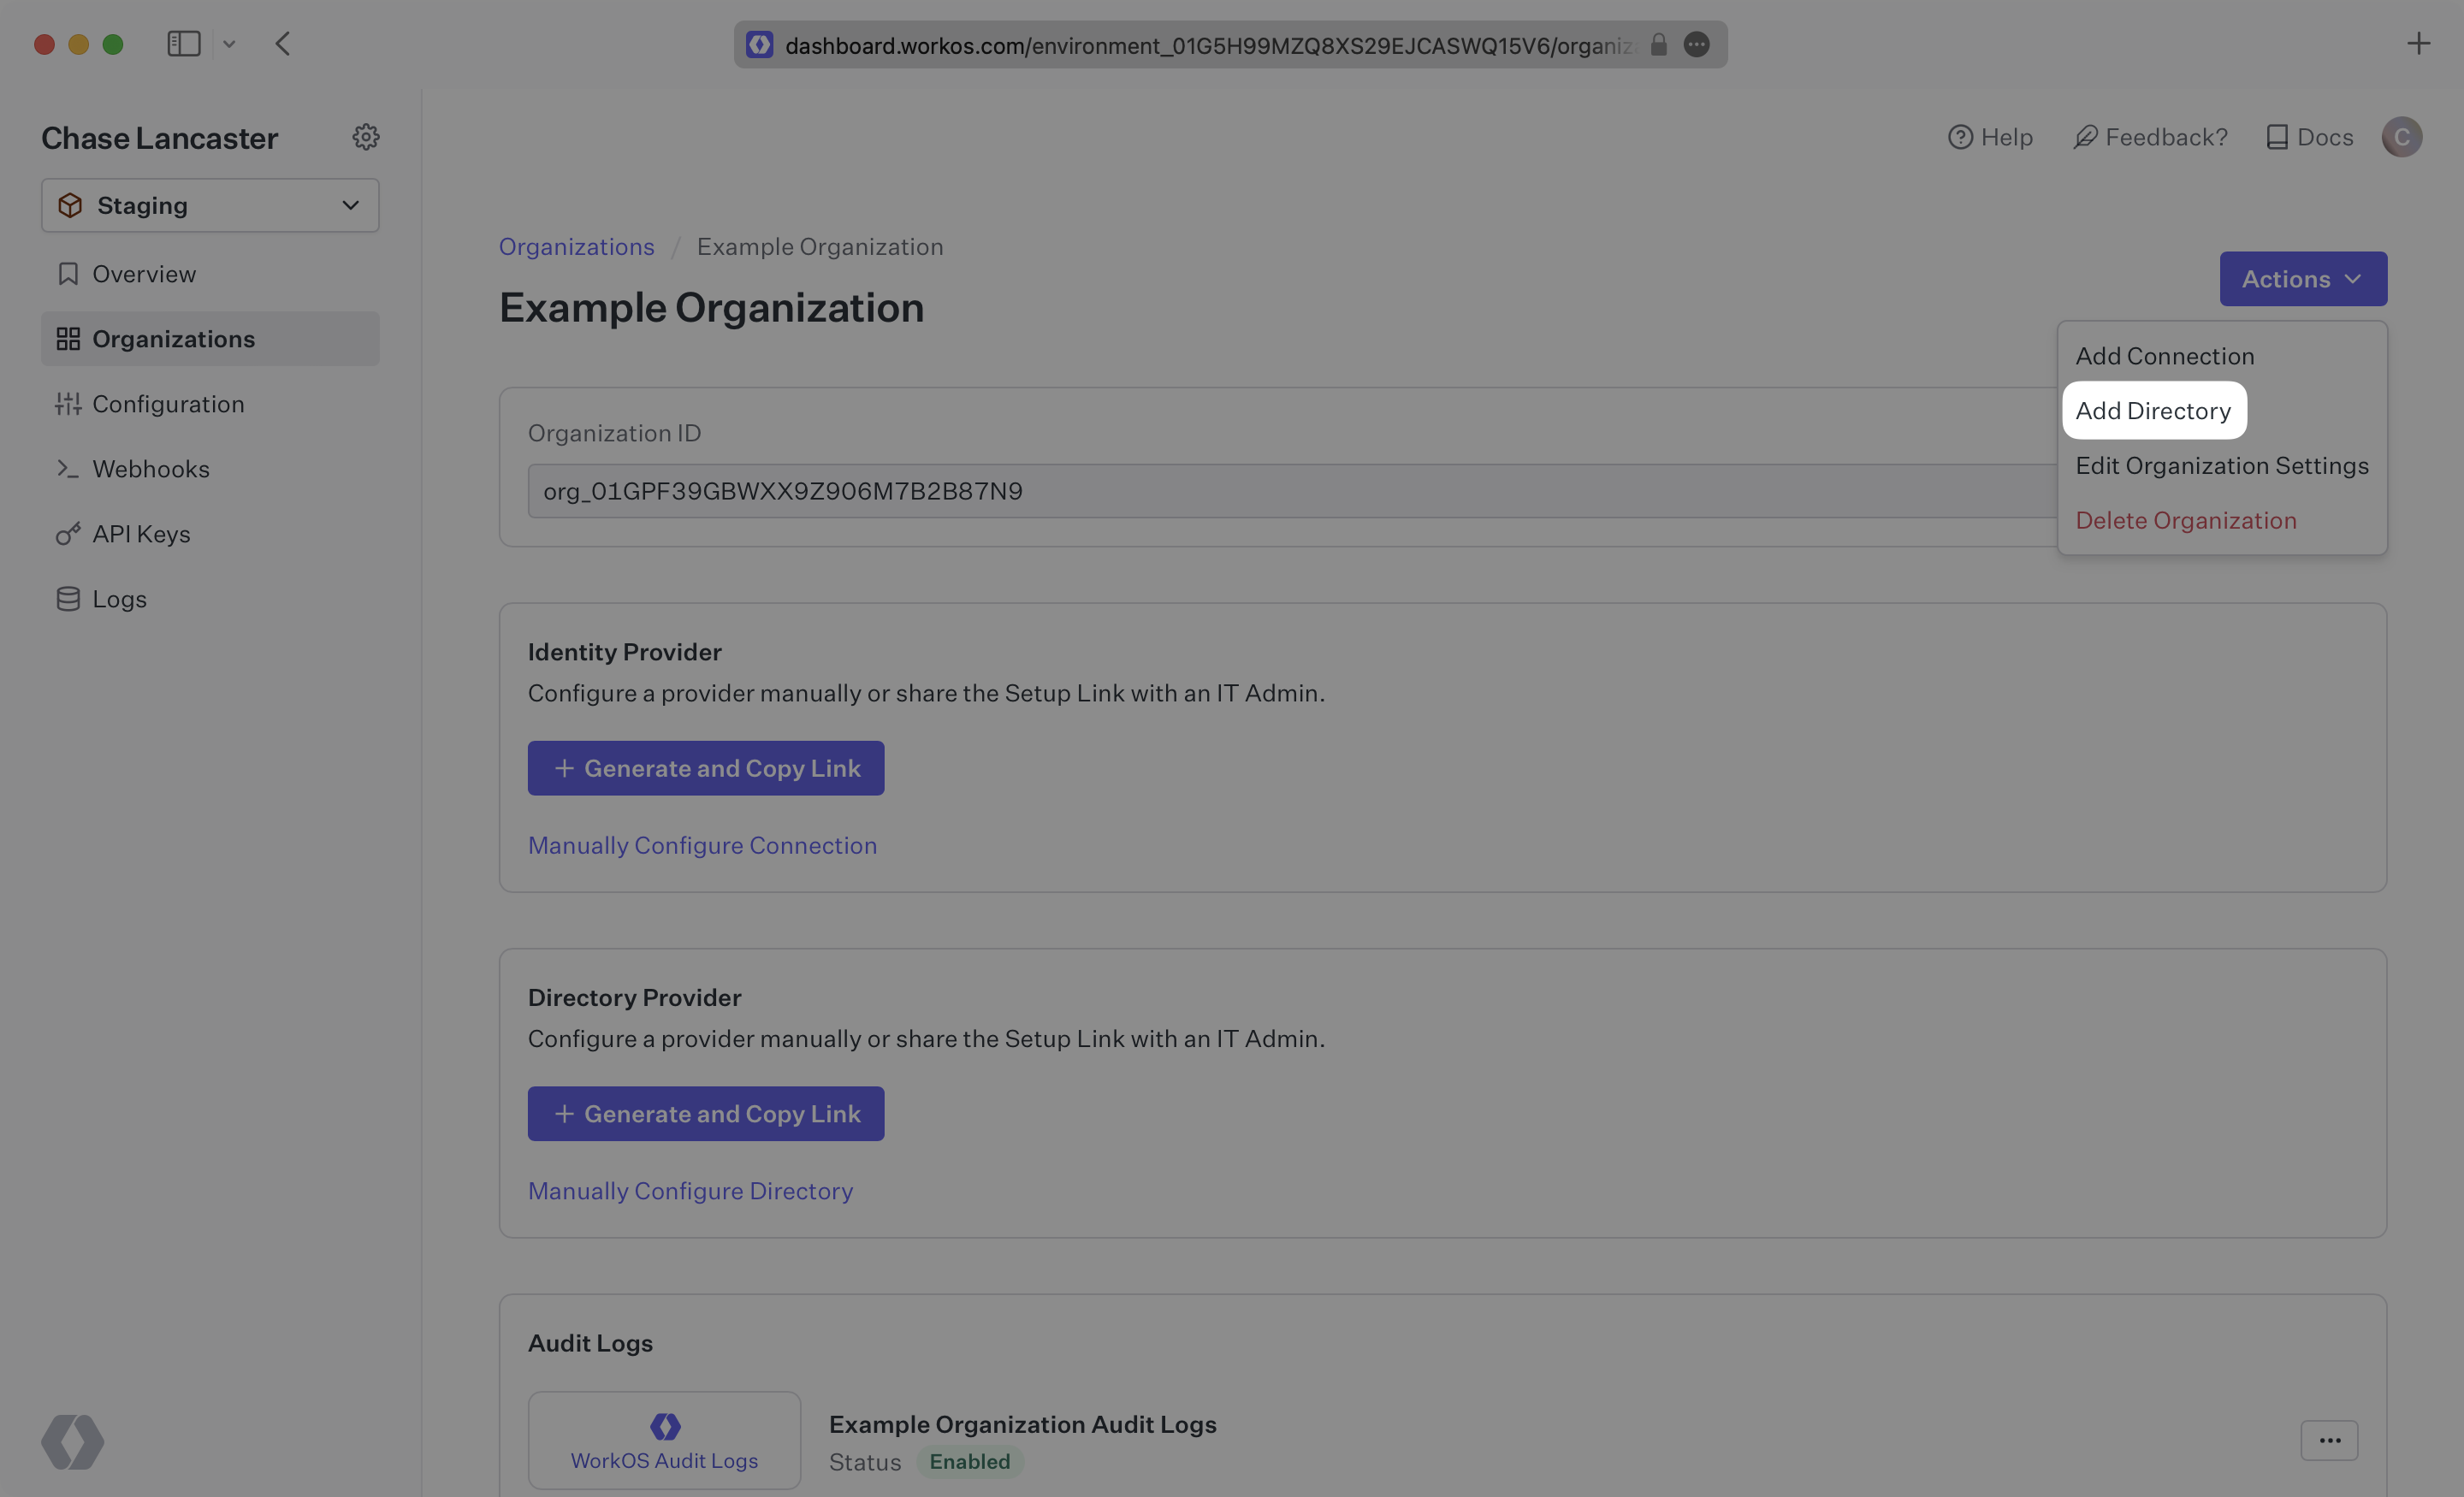
Sign in to your WorkOS Dashboard and select “Organizations” from the left hand navigation bar.
Select the organization you’ll be configuring a new Directory Sync for.
Click “Add Directory”.
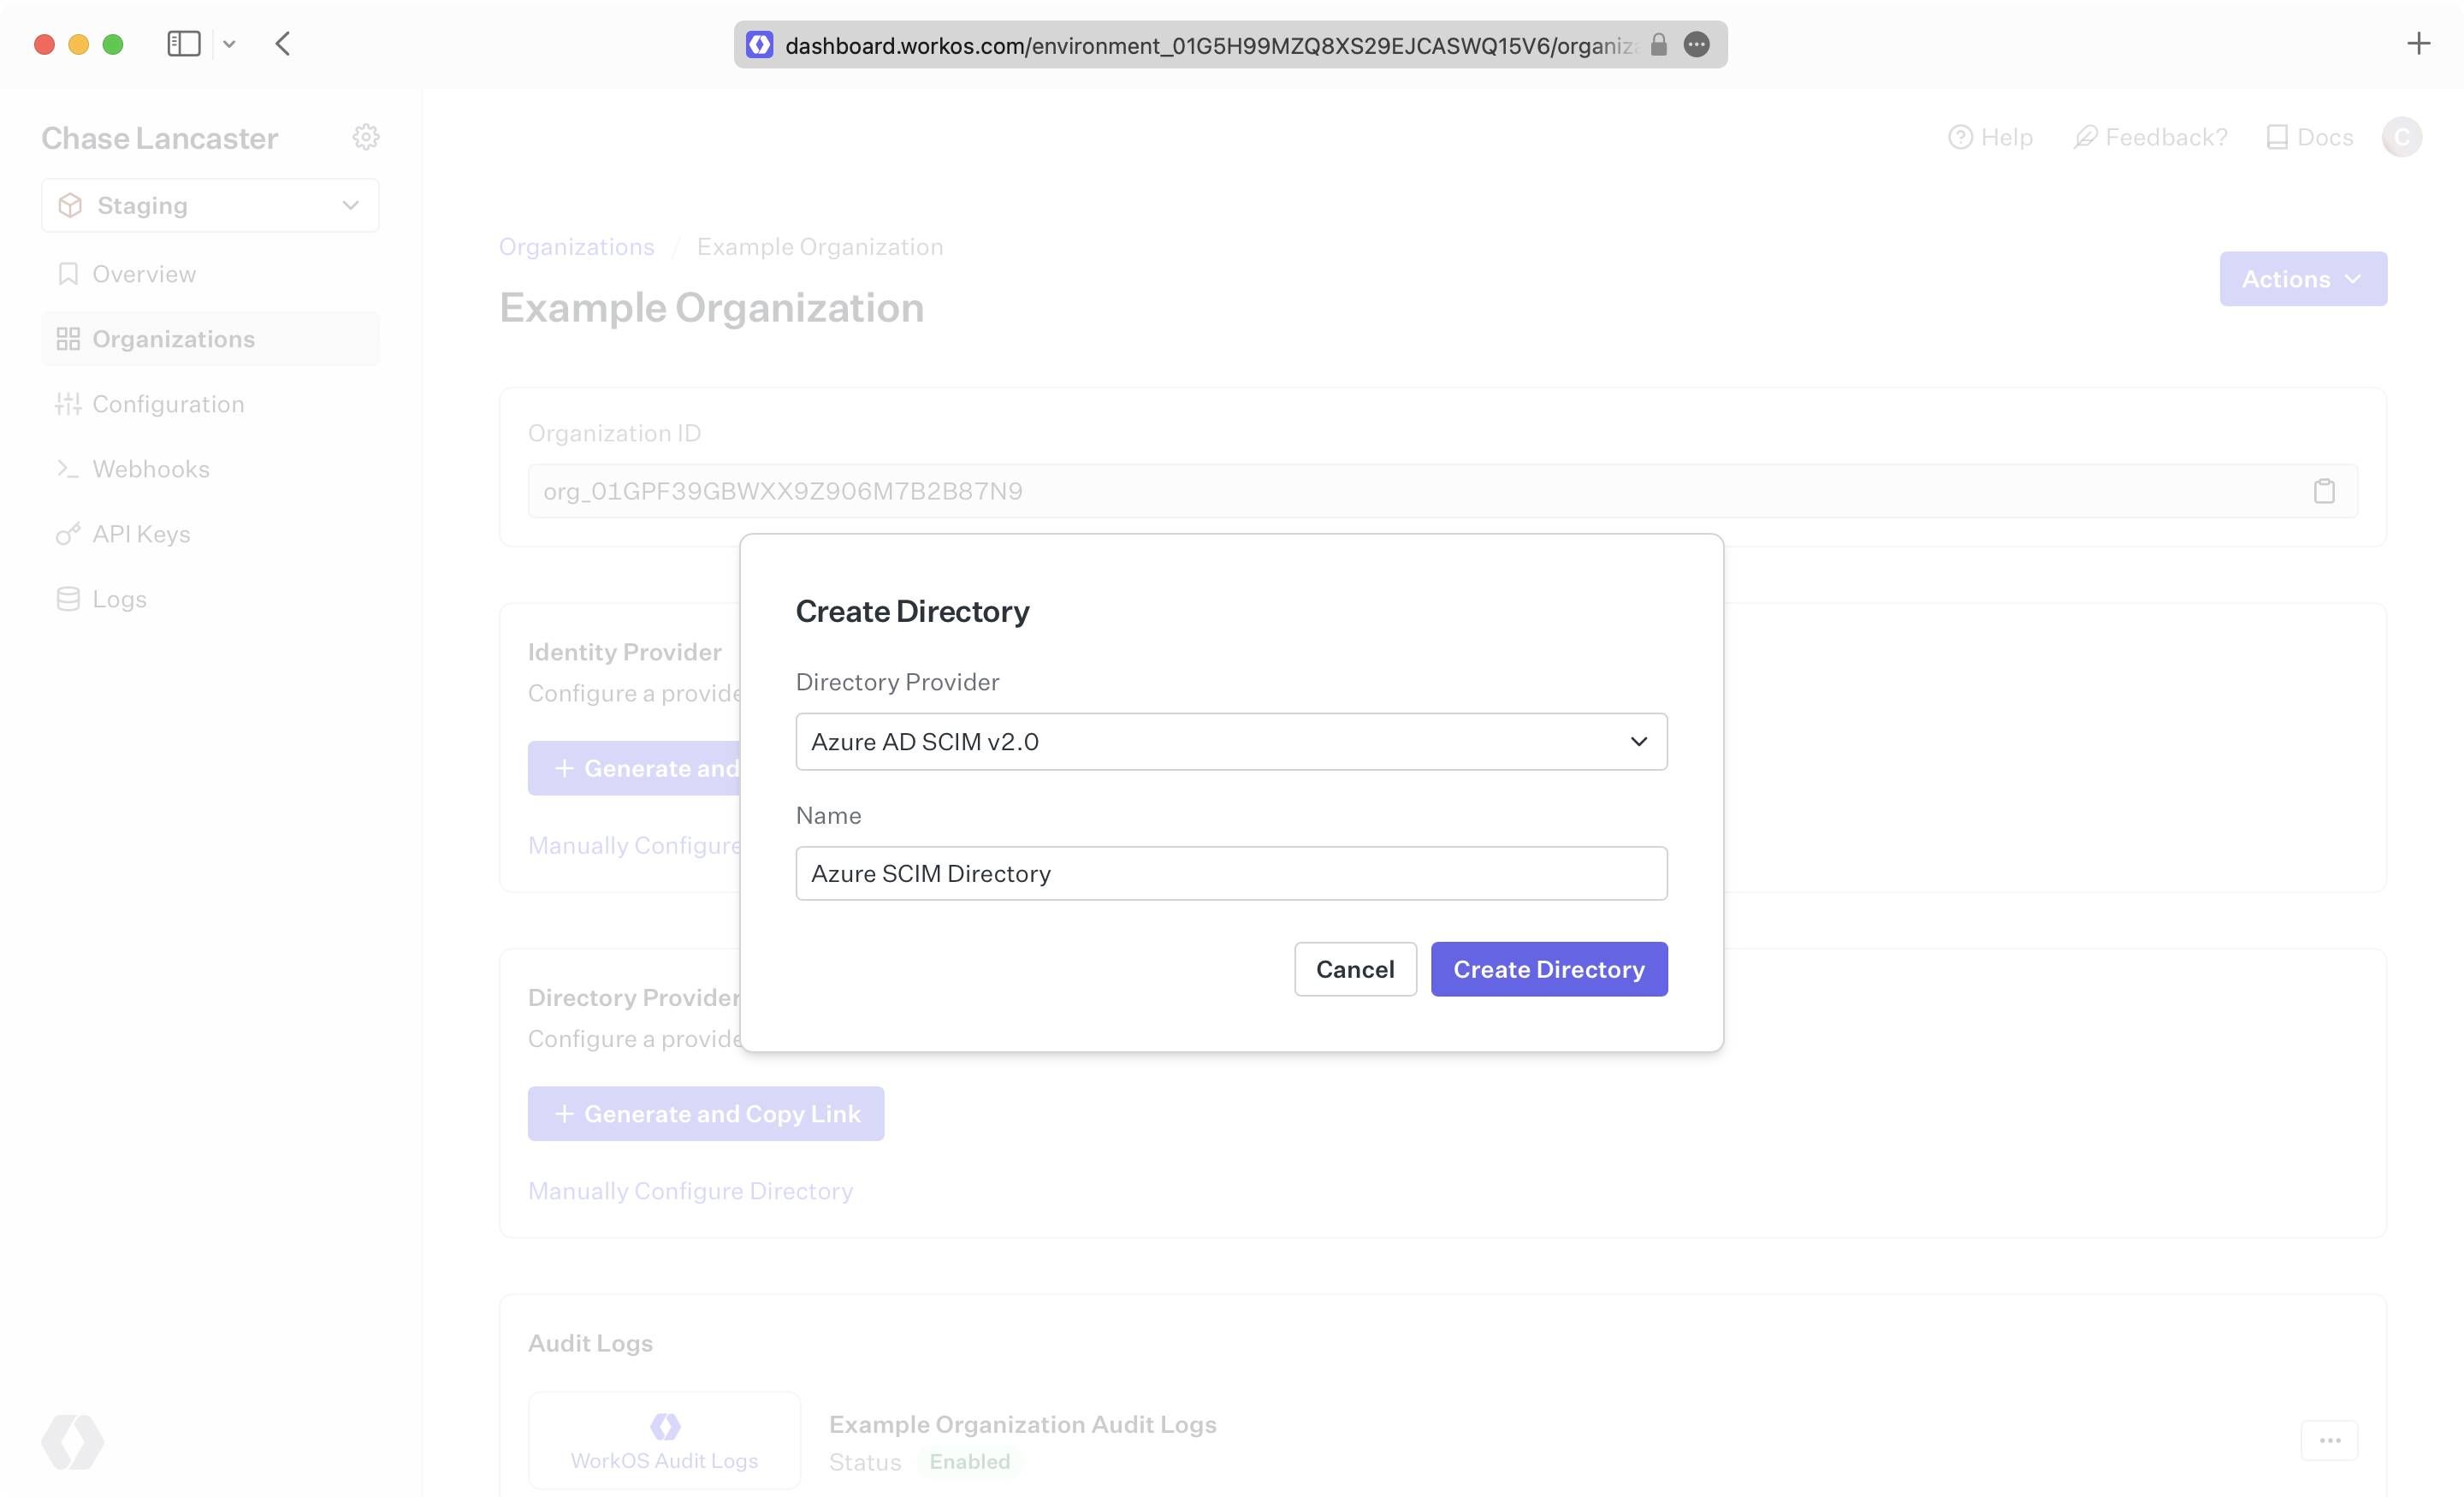
Select “Entra ID” from the dropdown, and enter the organization name.
Then, click “Create Directory.”
We have support for whitelabeled URLs for Directory Sync endpoints. Contact us for more info!
Your Entra ID directory sync has now been created successfully with an Endpoint and Bearer Token.

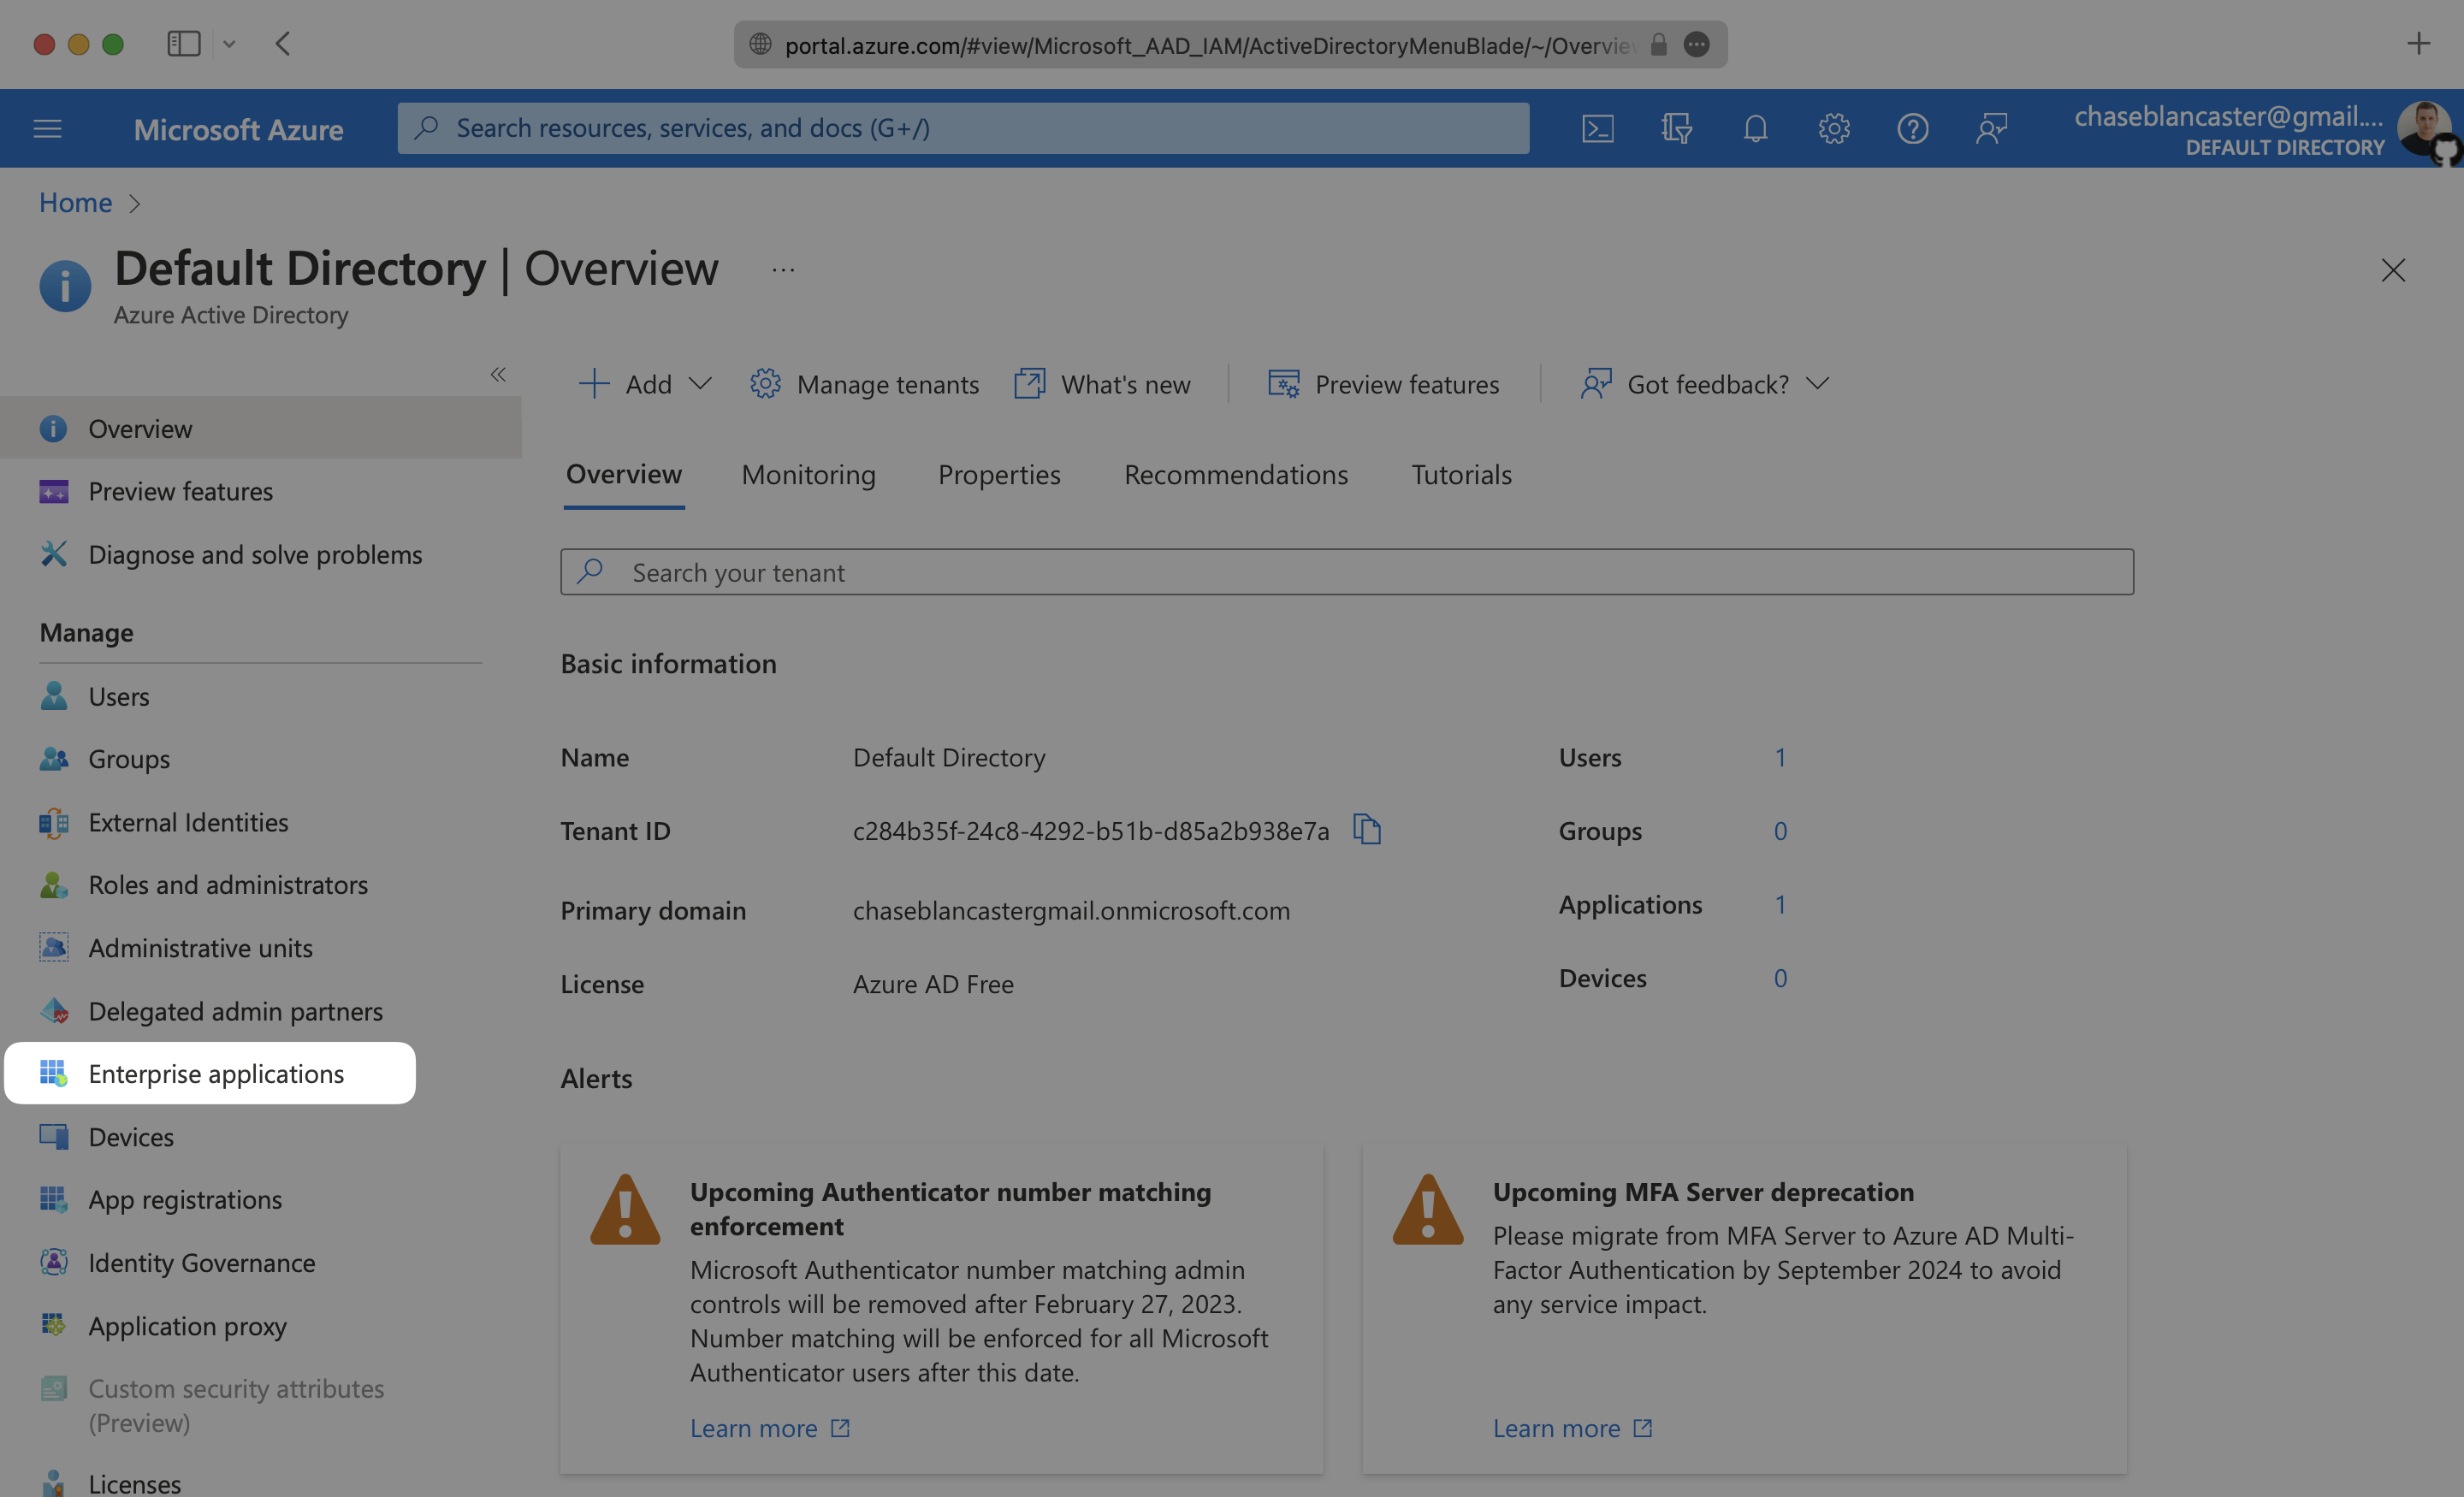
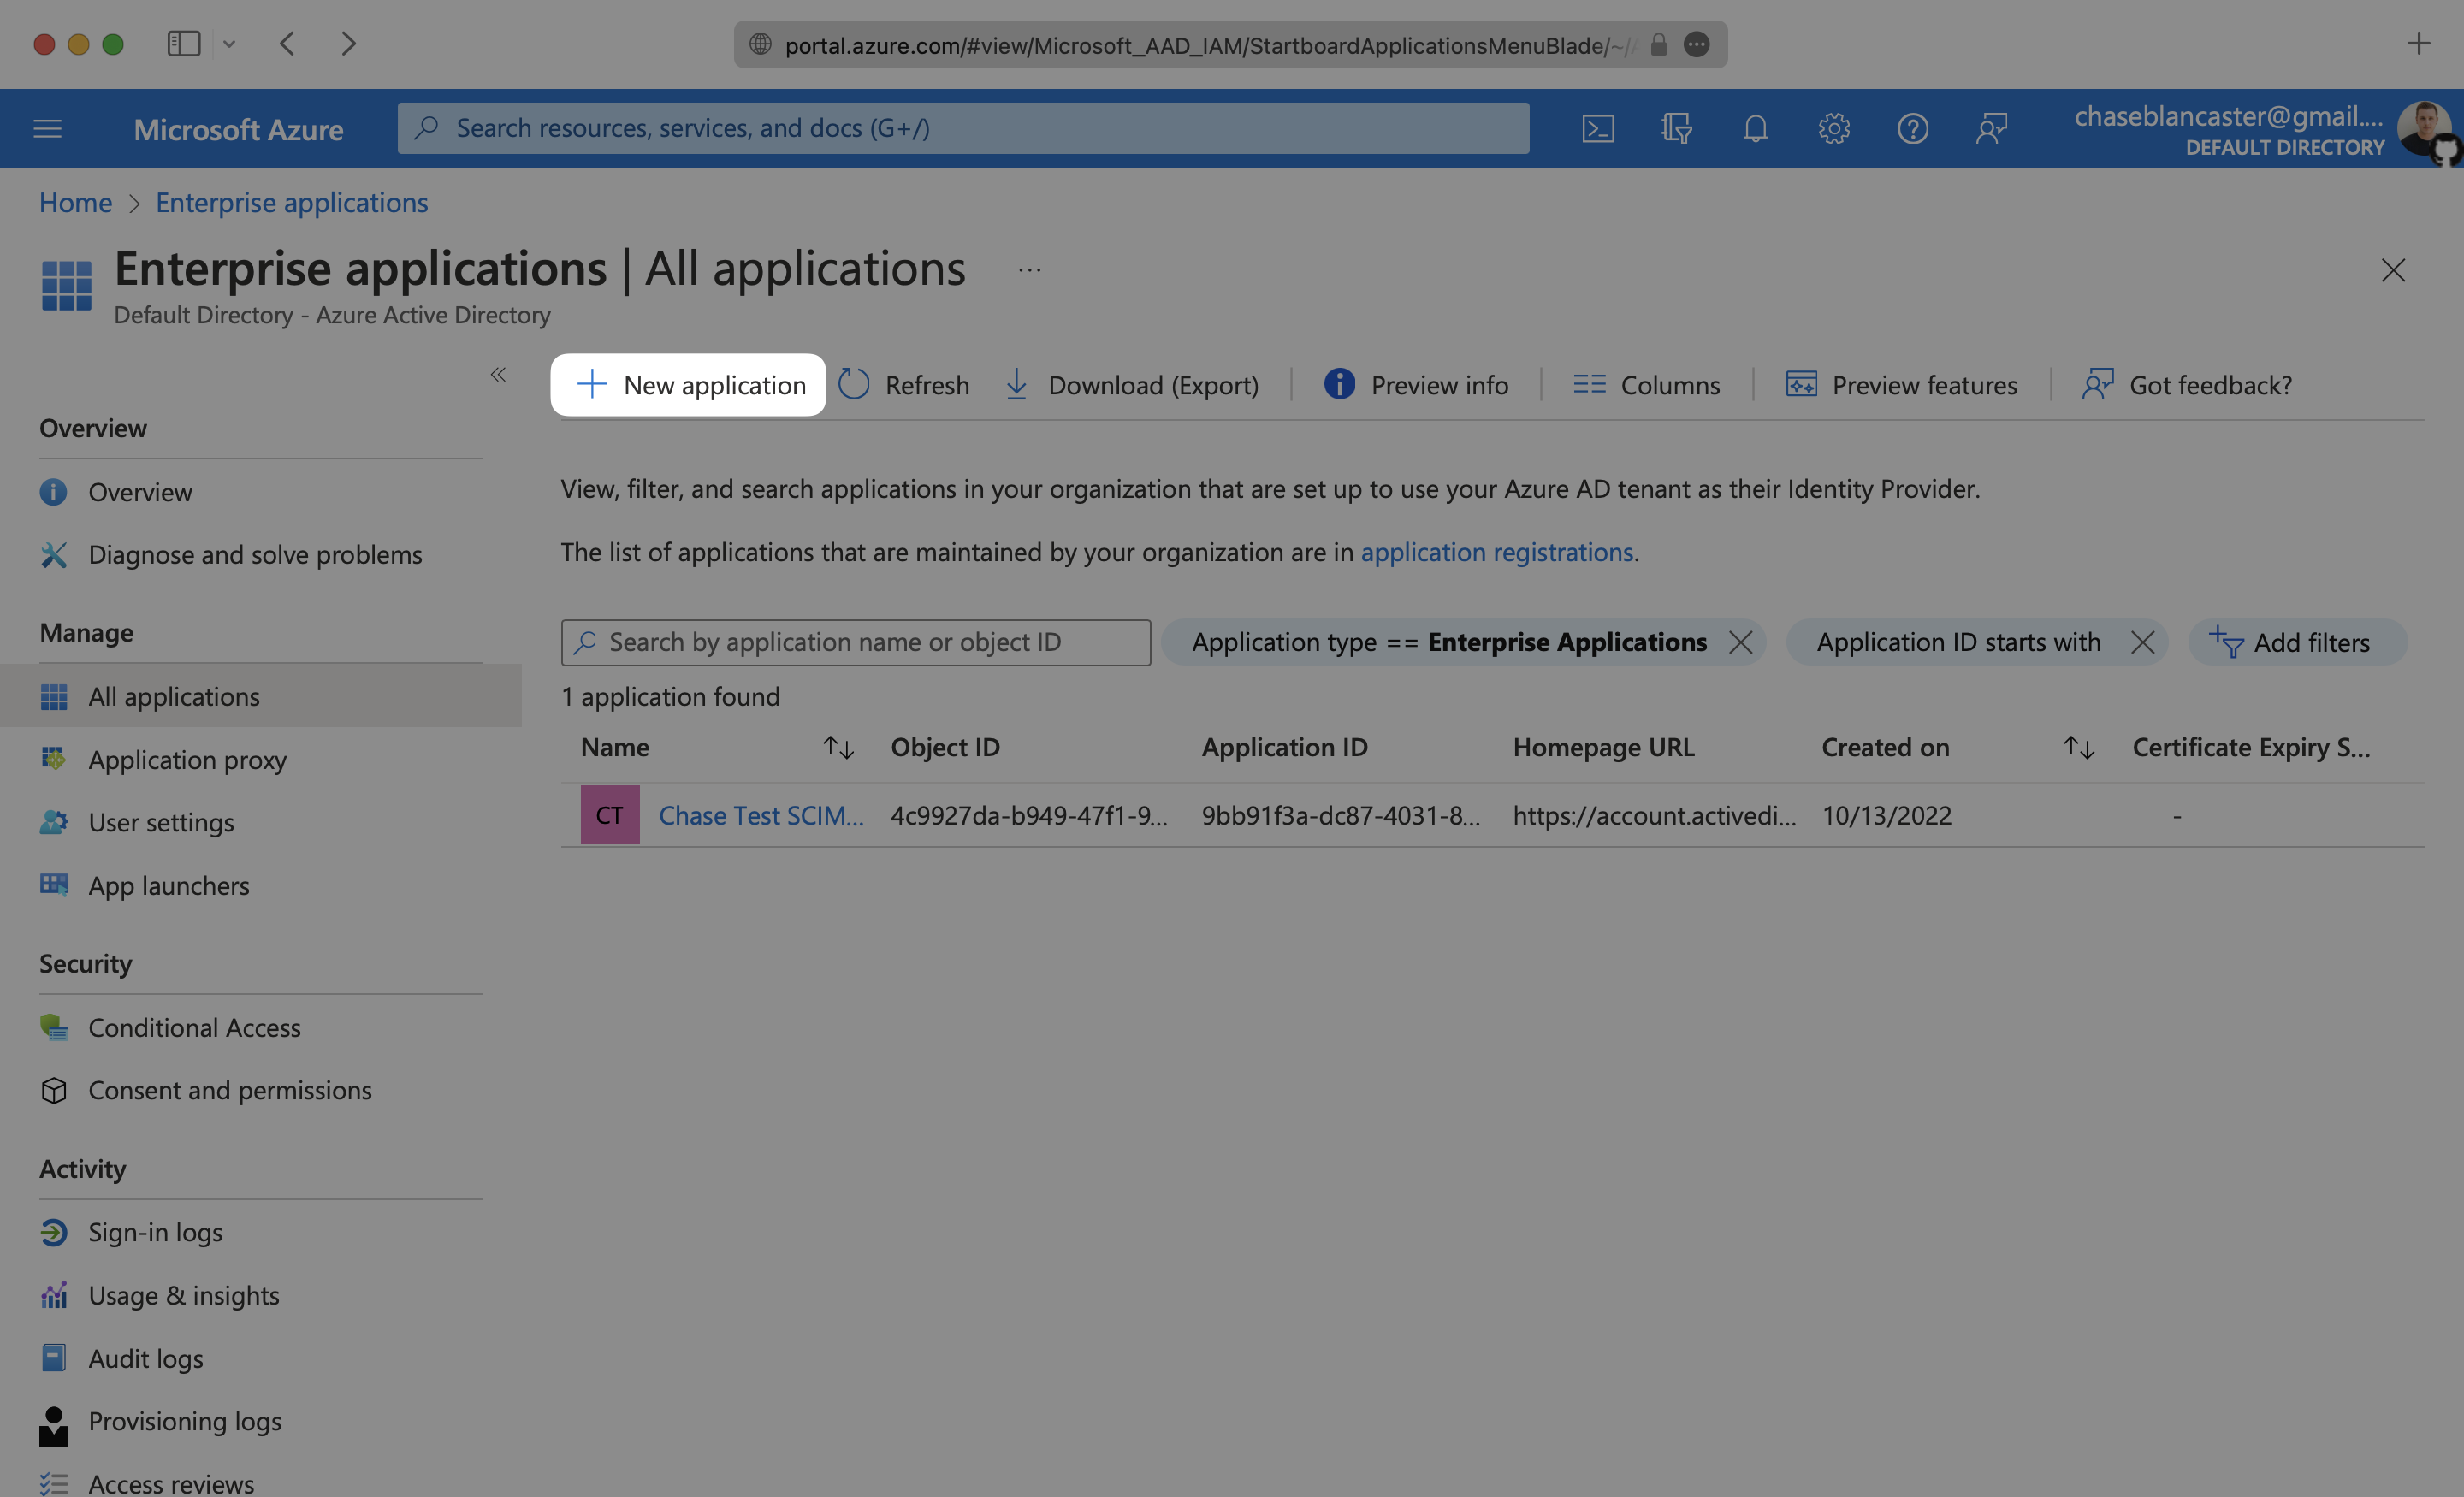
Sign in to the Entra ID Admin Center Dashboard. Select “Enterprise applications” from the list of Azure services.
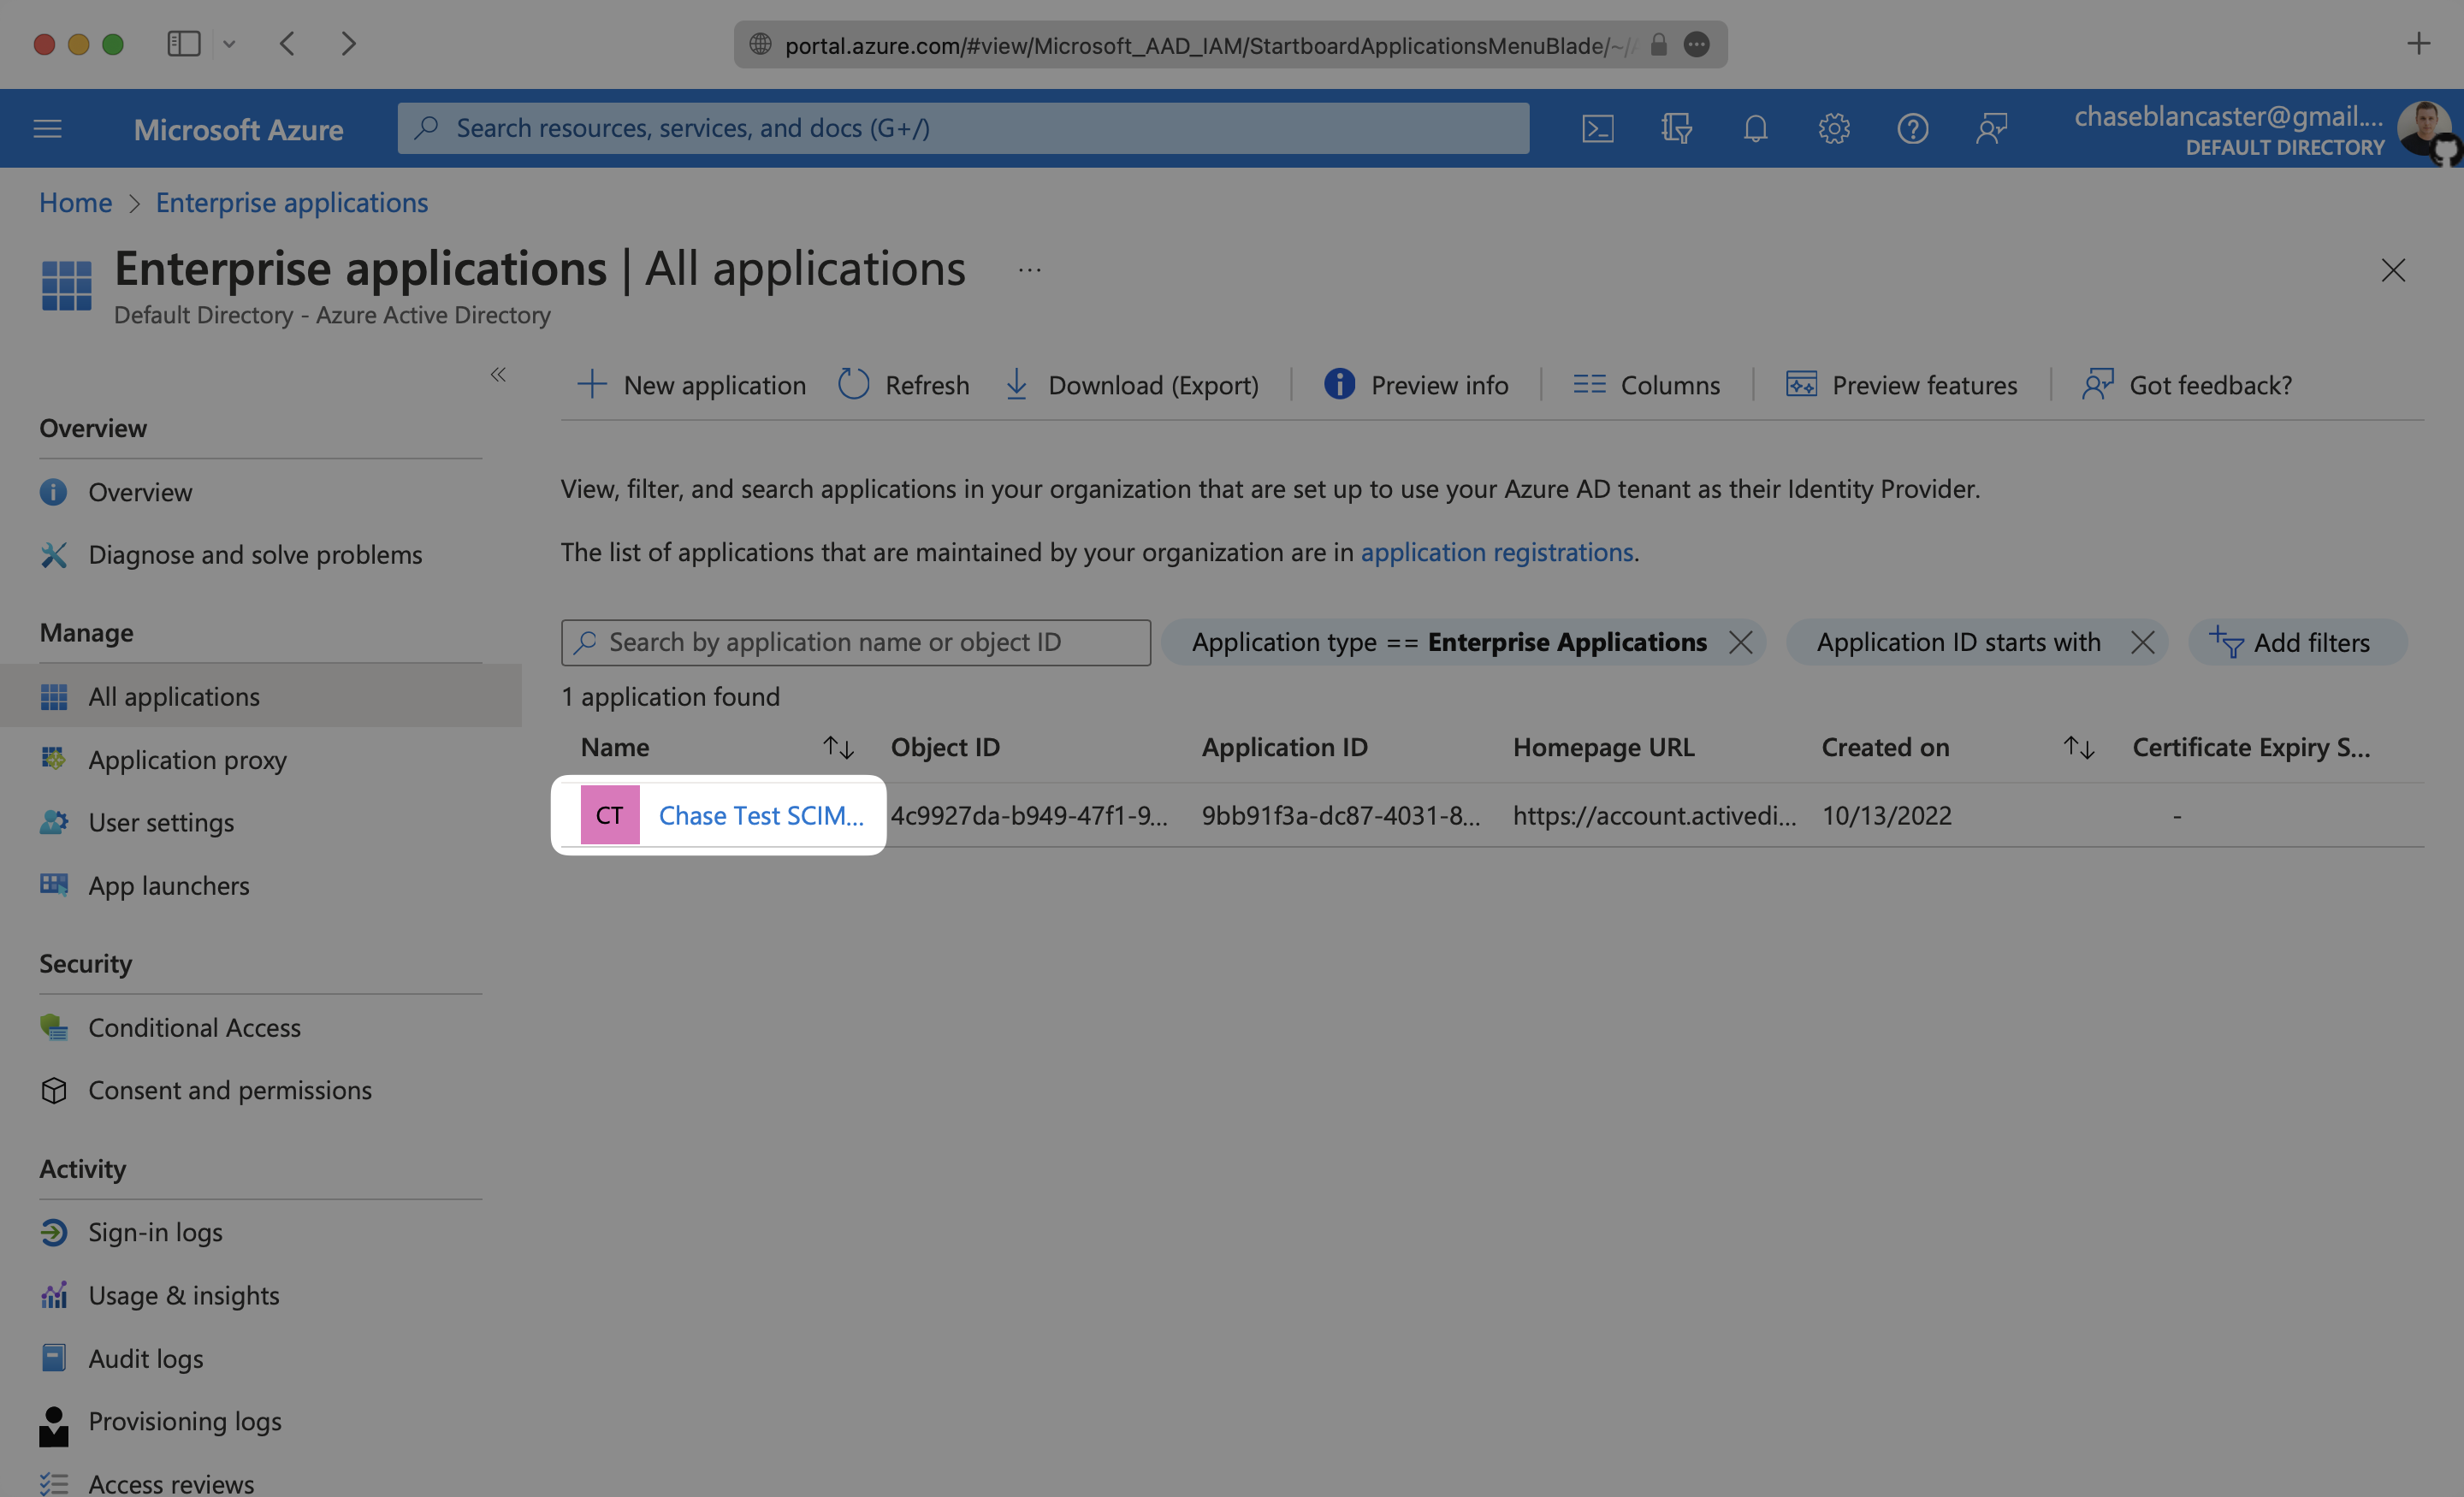
If your application is already created, select it from the list of applications and move to Step 3.
If you haven’t created a SCIM application in Azure, select “New Application”.
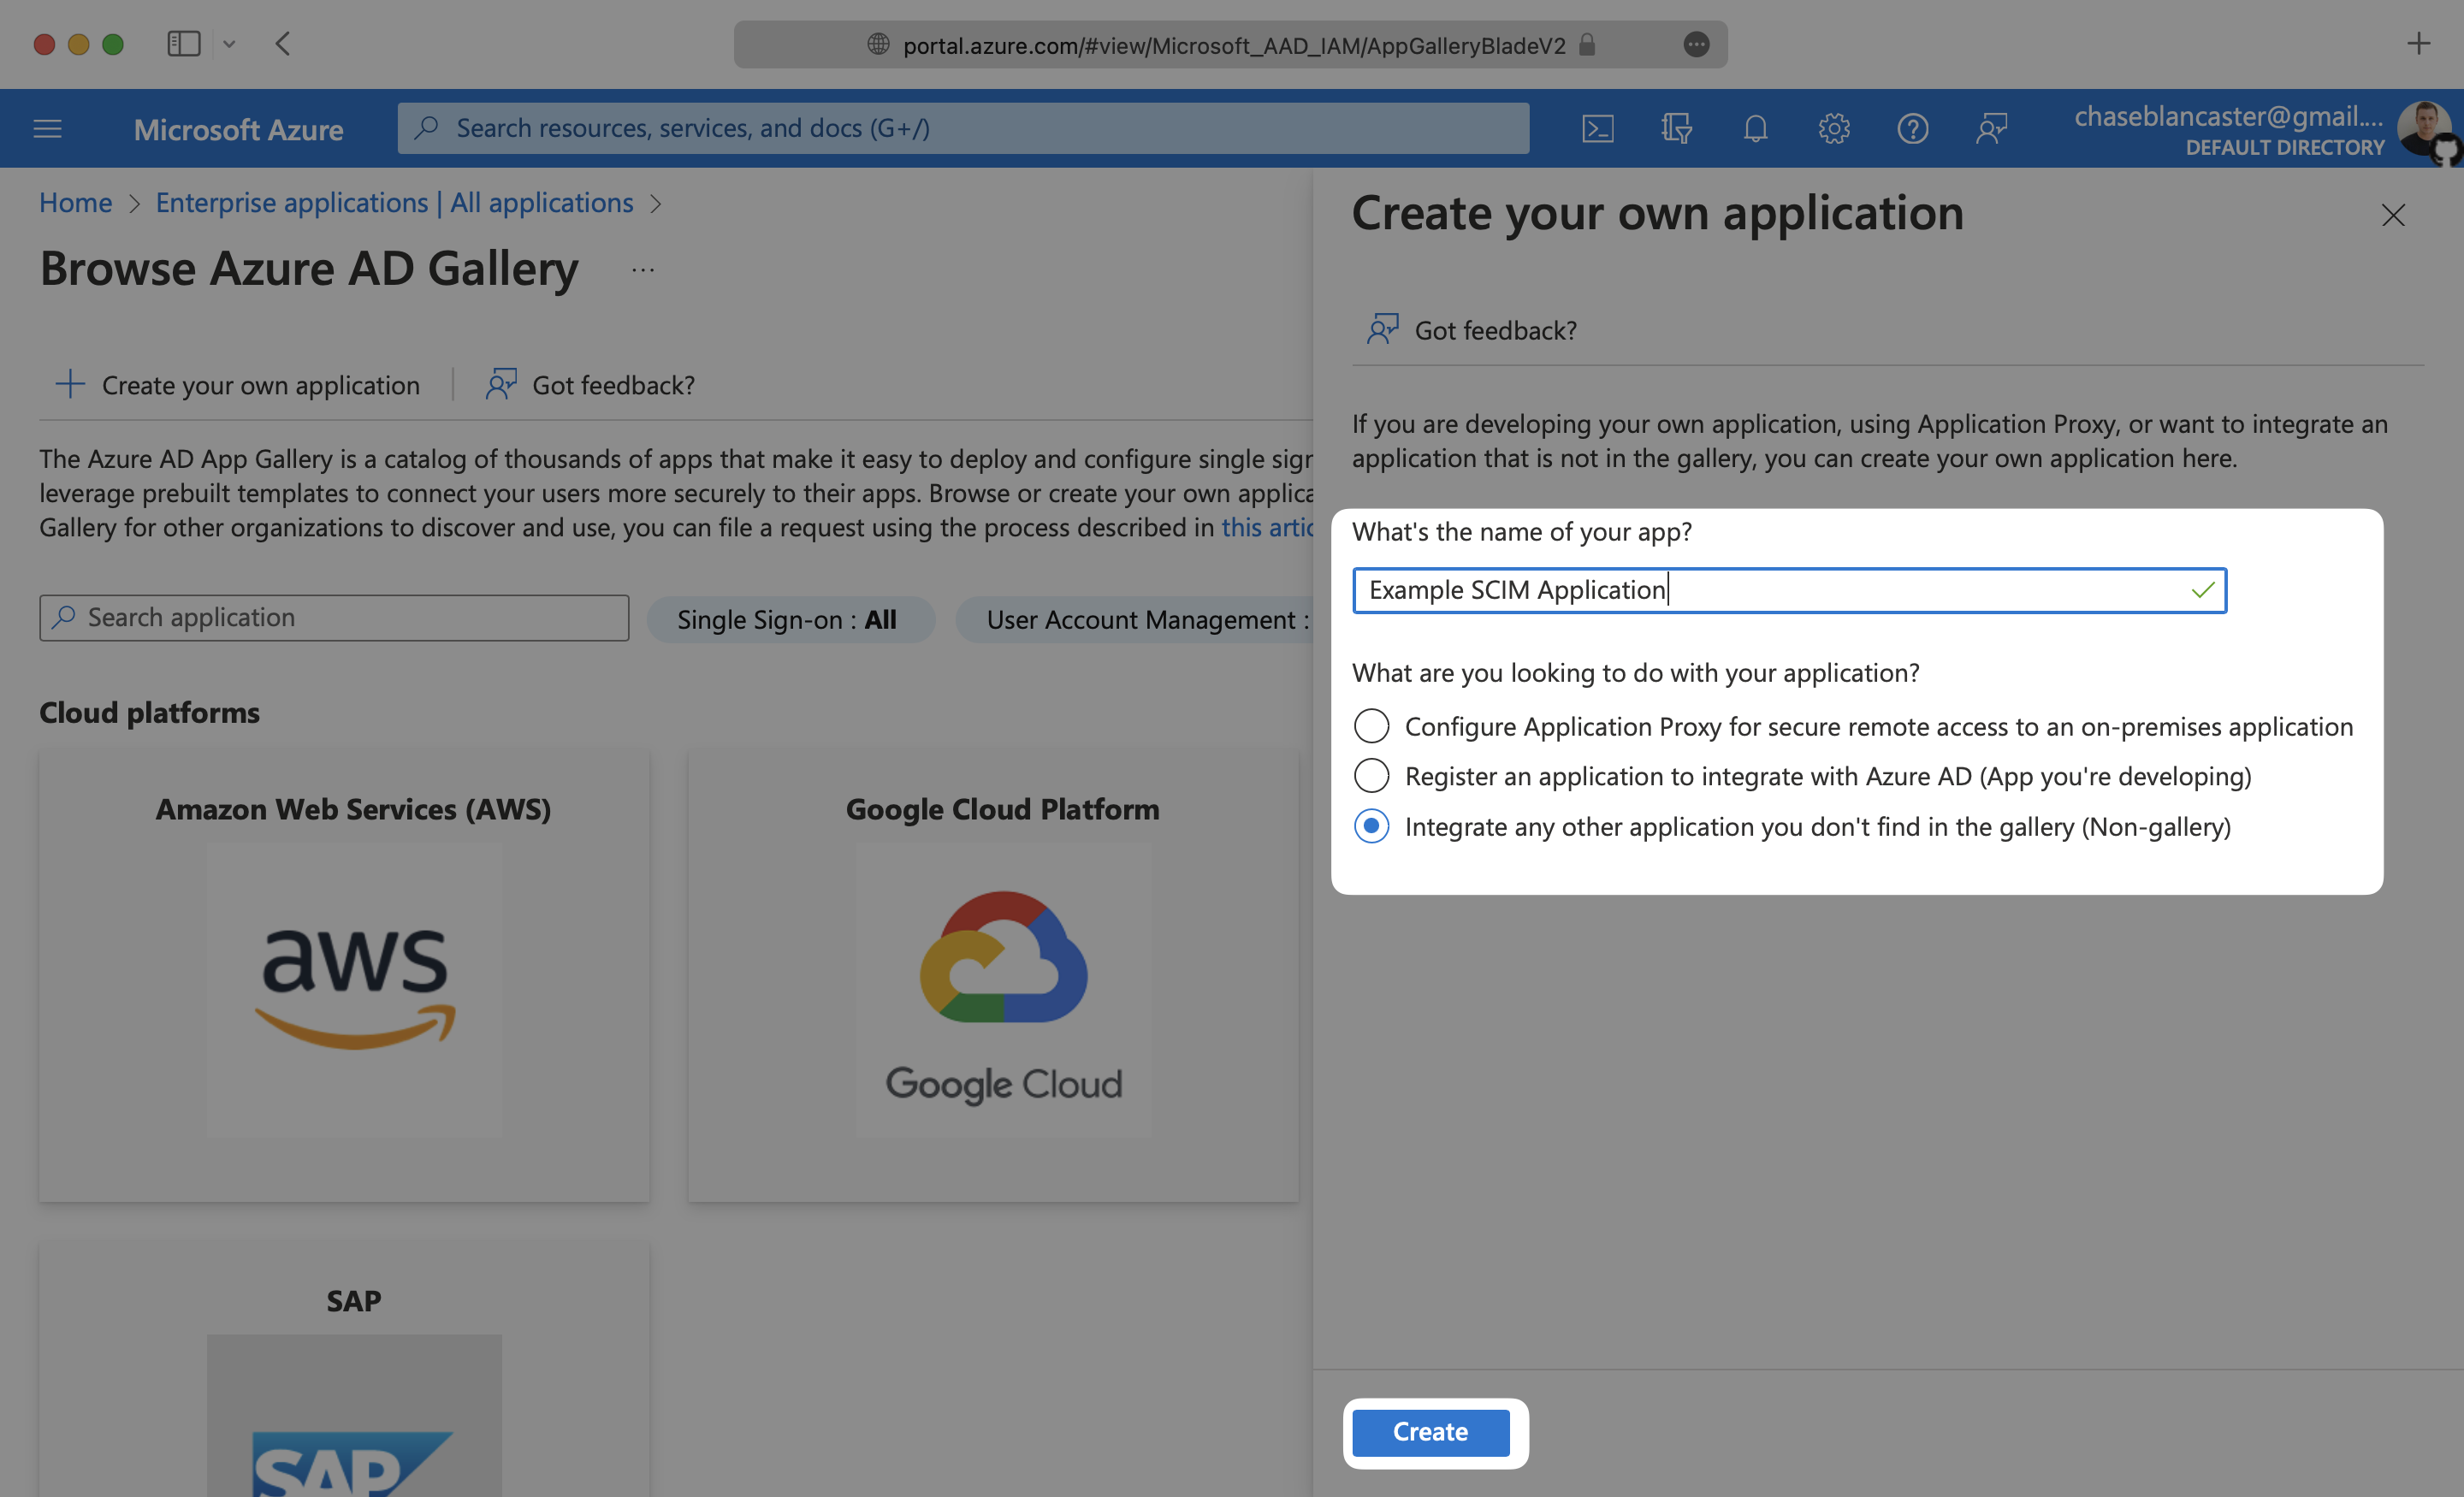
Select “Create your own application” and continue.

Give your application a descriptive name, and select the “Integrate any other application you don’t find in the gallery (Non-gallery)” option, then click “Create”.
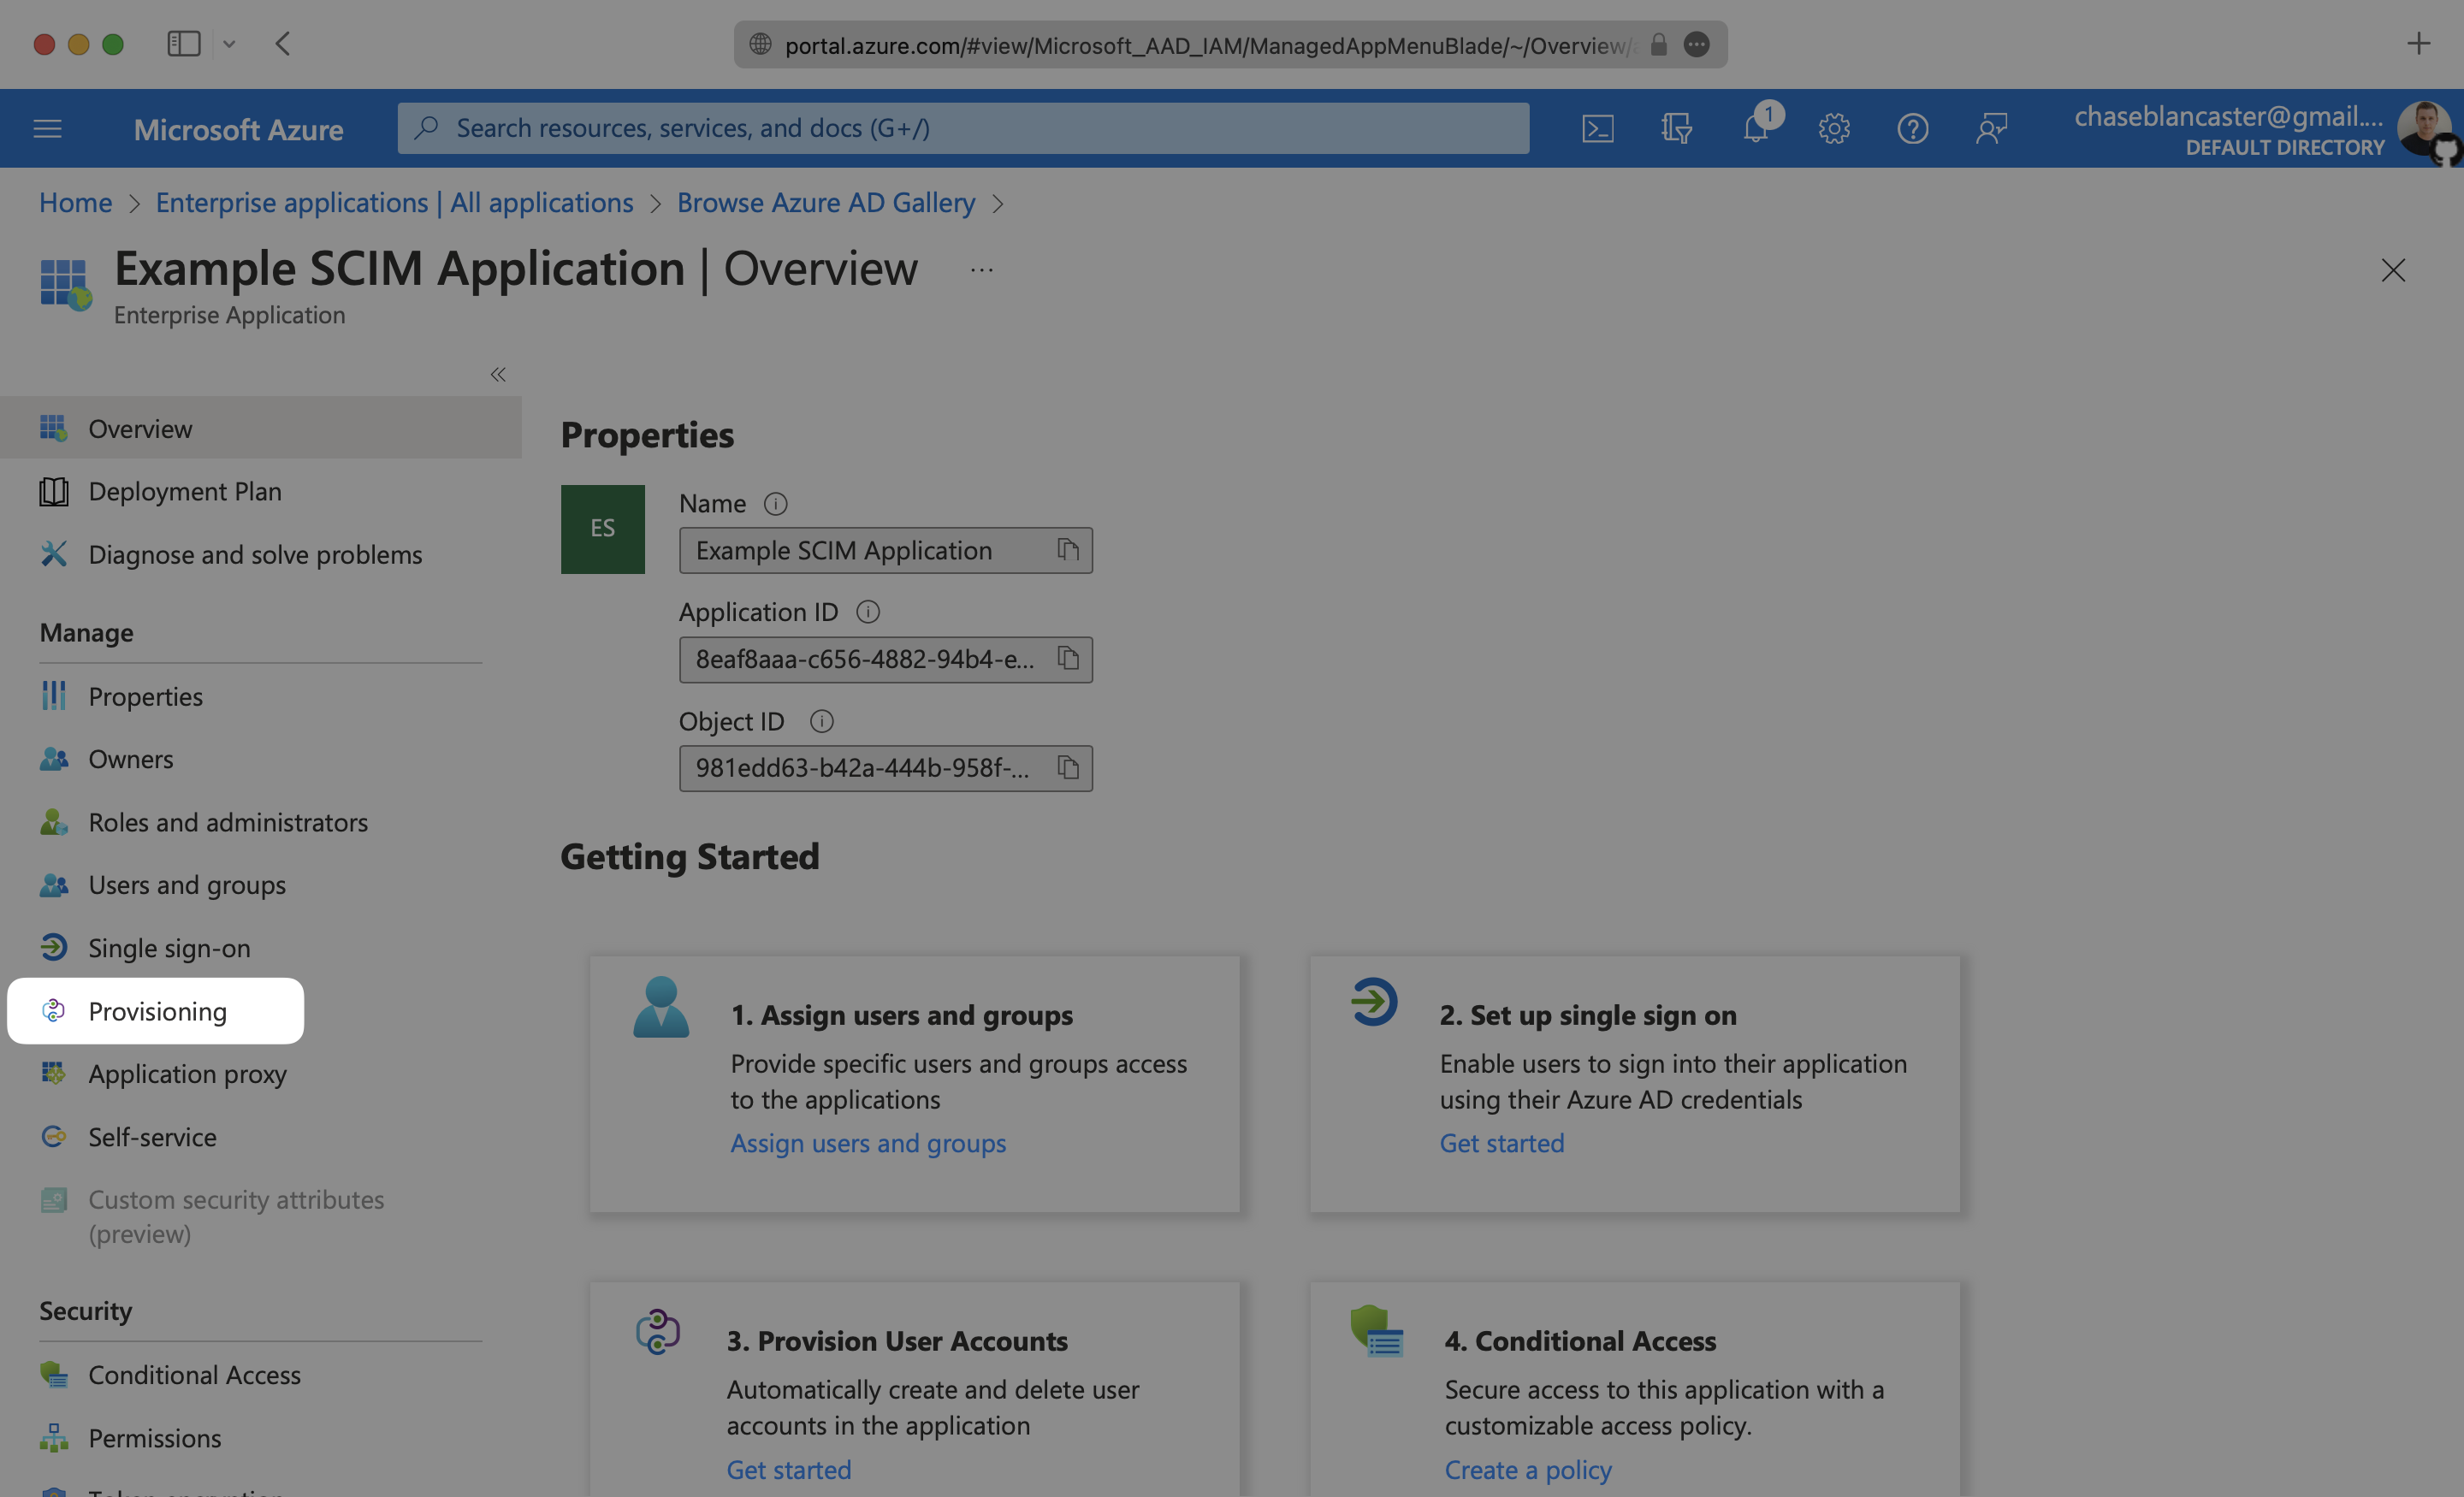
Select “Provisioning” from the “Manage” section found in the navigation menu.
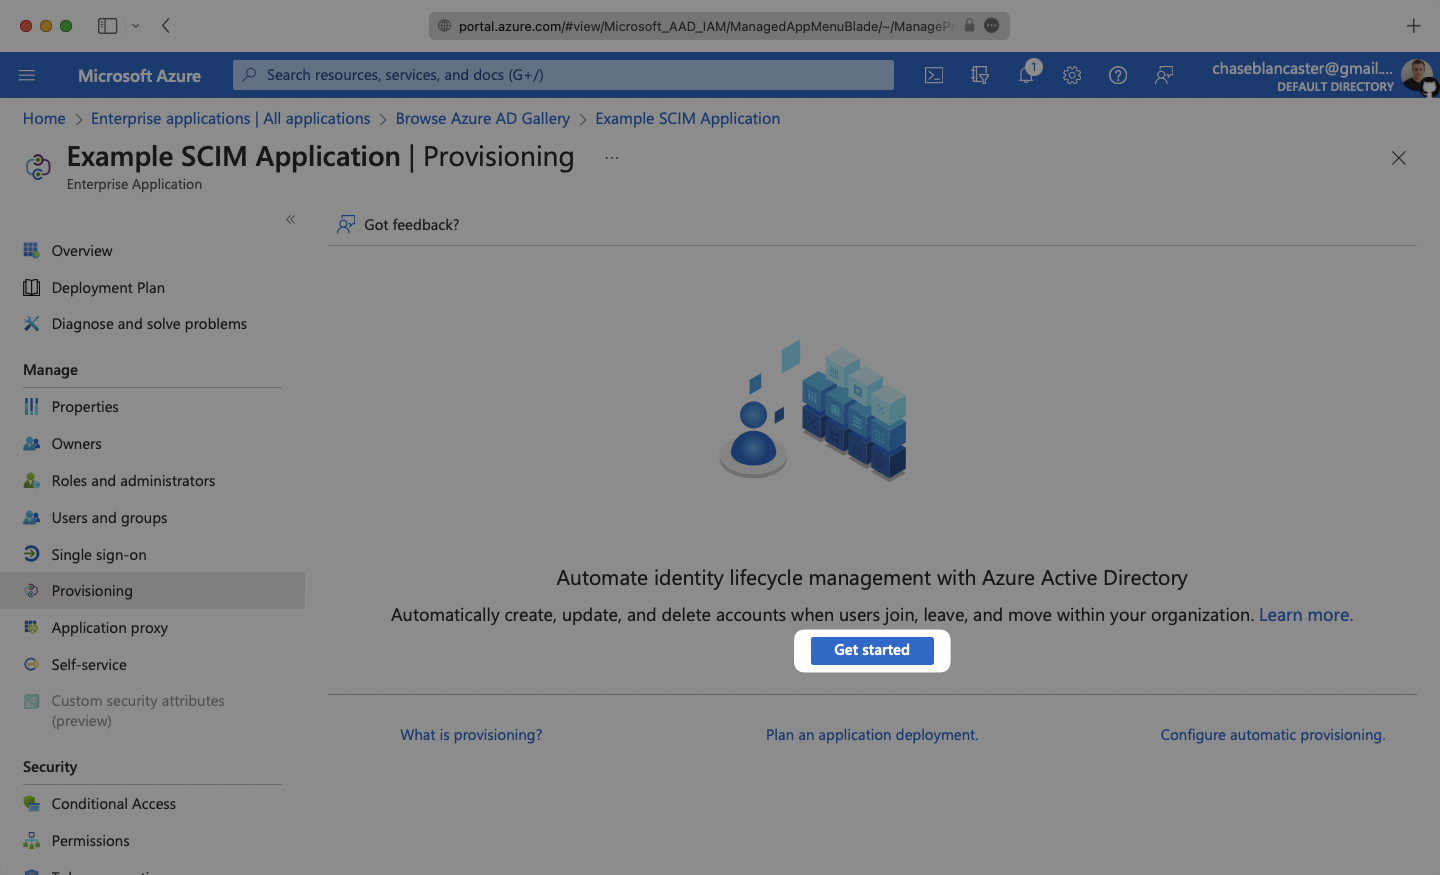
Click the “Get Started” button.
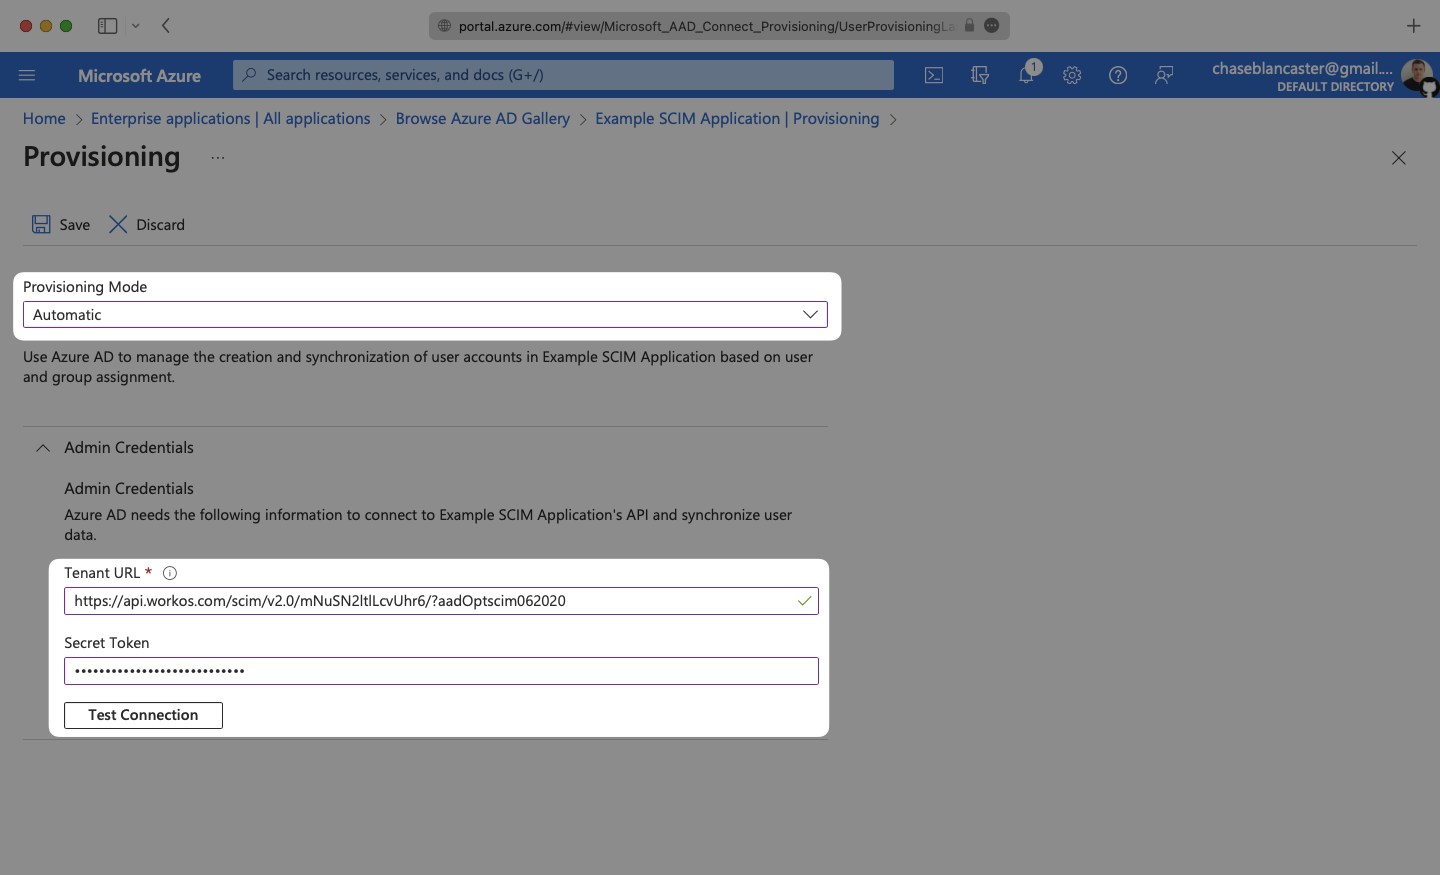
Select the “Automatic” Provisioning Mode from the dropdown menu.
In the “Admin Credentials” section, copy and paste the Endpoint from your WorkOS Dashboard in the “Tenant URL” field.
Then, copy and paste the Bearer Token from your WorkOS Dashboard into the Secret Token field.
Click “Test Connection” to receive confirmation that your connection has been set up correctly. Then, select “Save” to persist the credentials.
Expand the “Mappings” section.
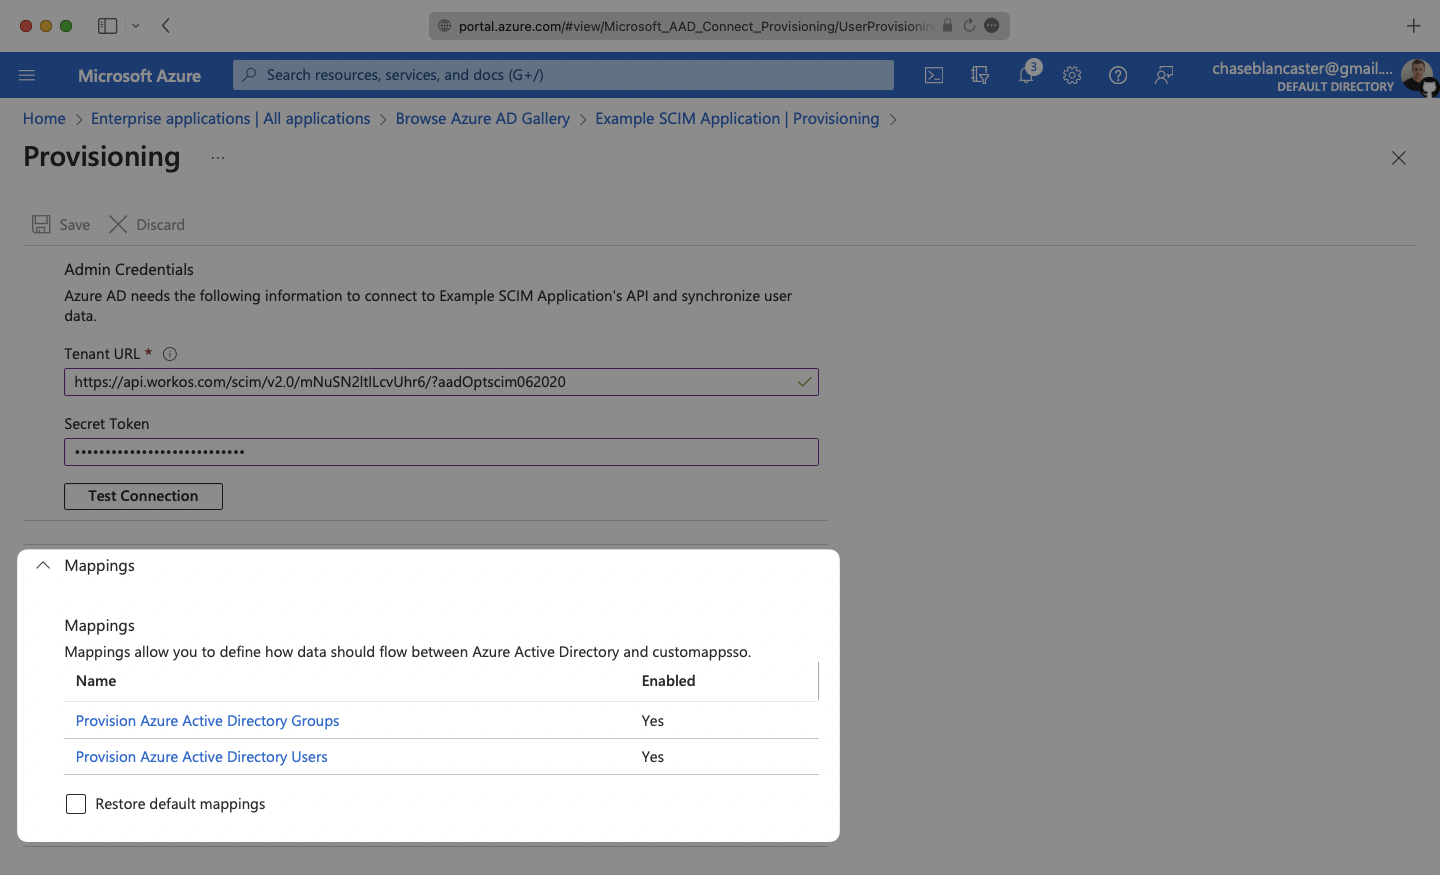
Make sure the group and user attribute mappings are enabled, and are mapping the correct fields. The default mapping should work, but your specific Azure setup may require you to add a custom mapping.
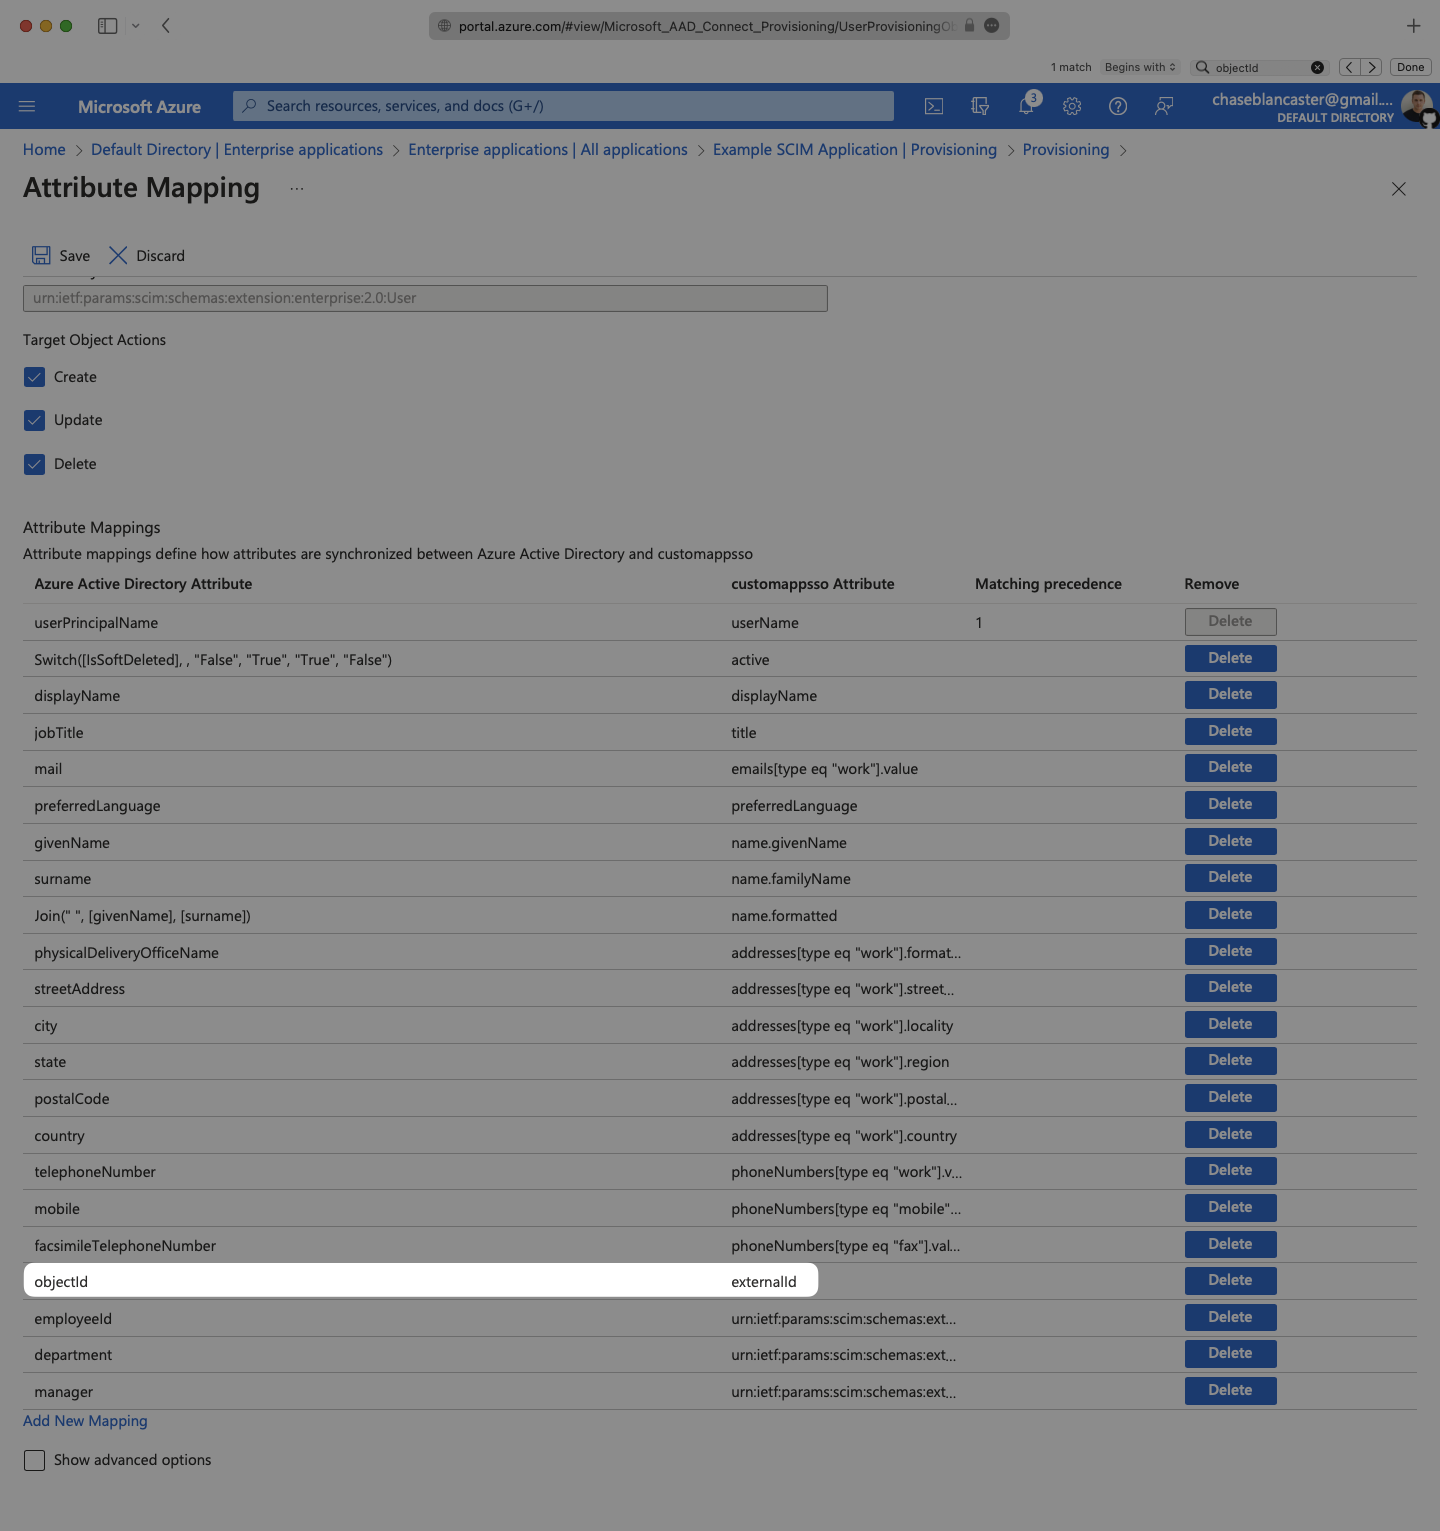
Make sure that you are mapping objectId to externalId within the Attribute Mapping section.
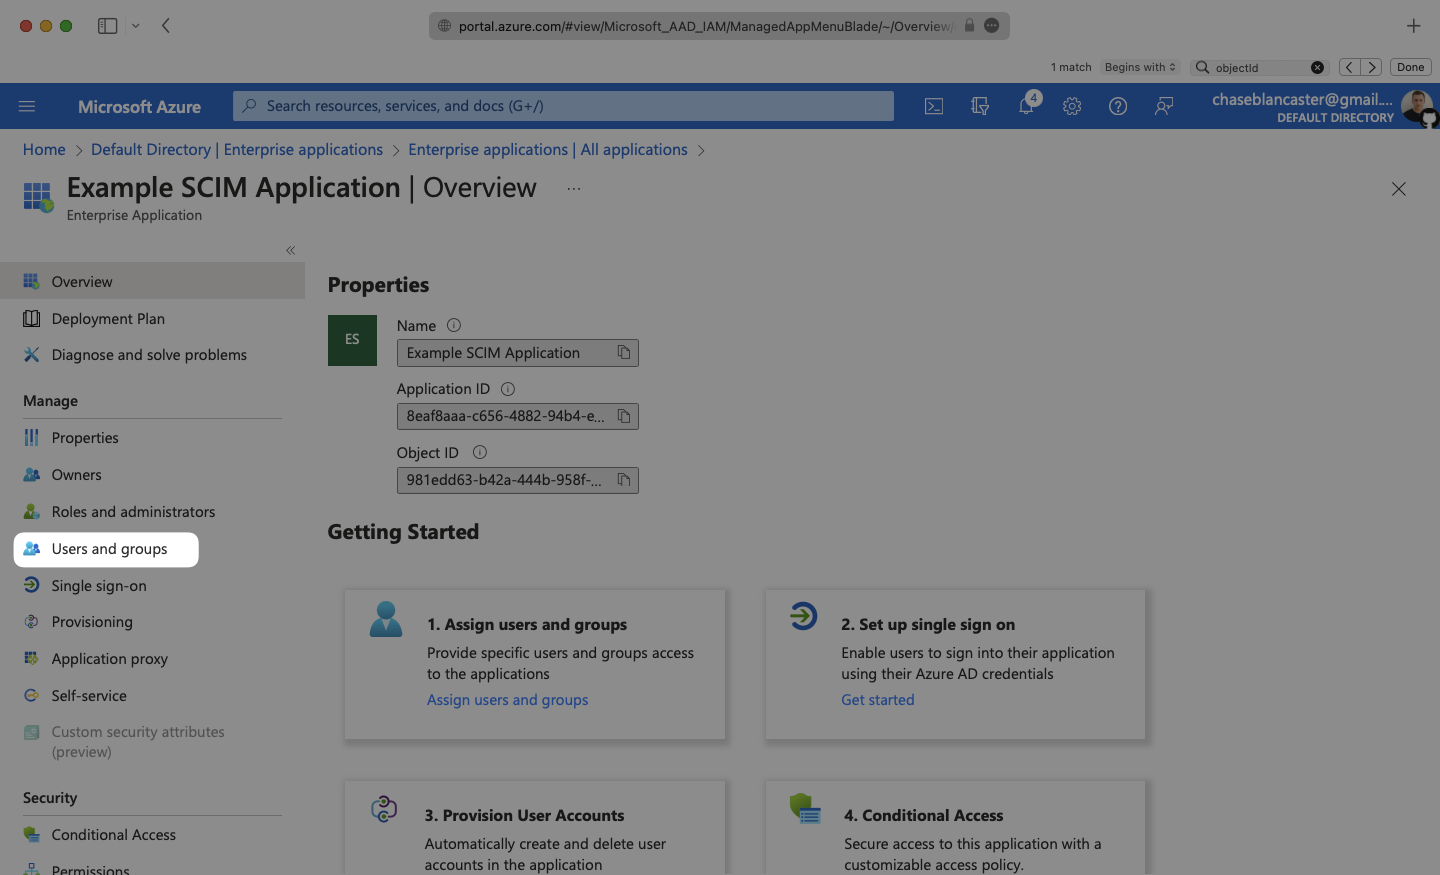
In order for your users and groups to be synced, you will need to assign them to your Entra ID SCIM Application. Select “Users and groups” from the “Manage” section of the navigation menu.
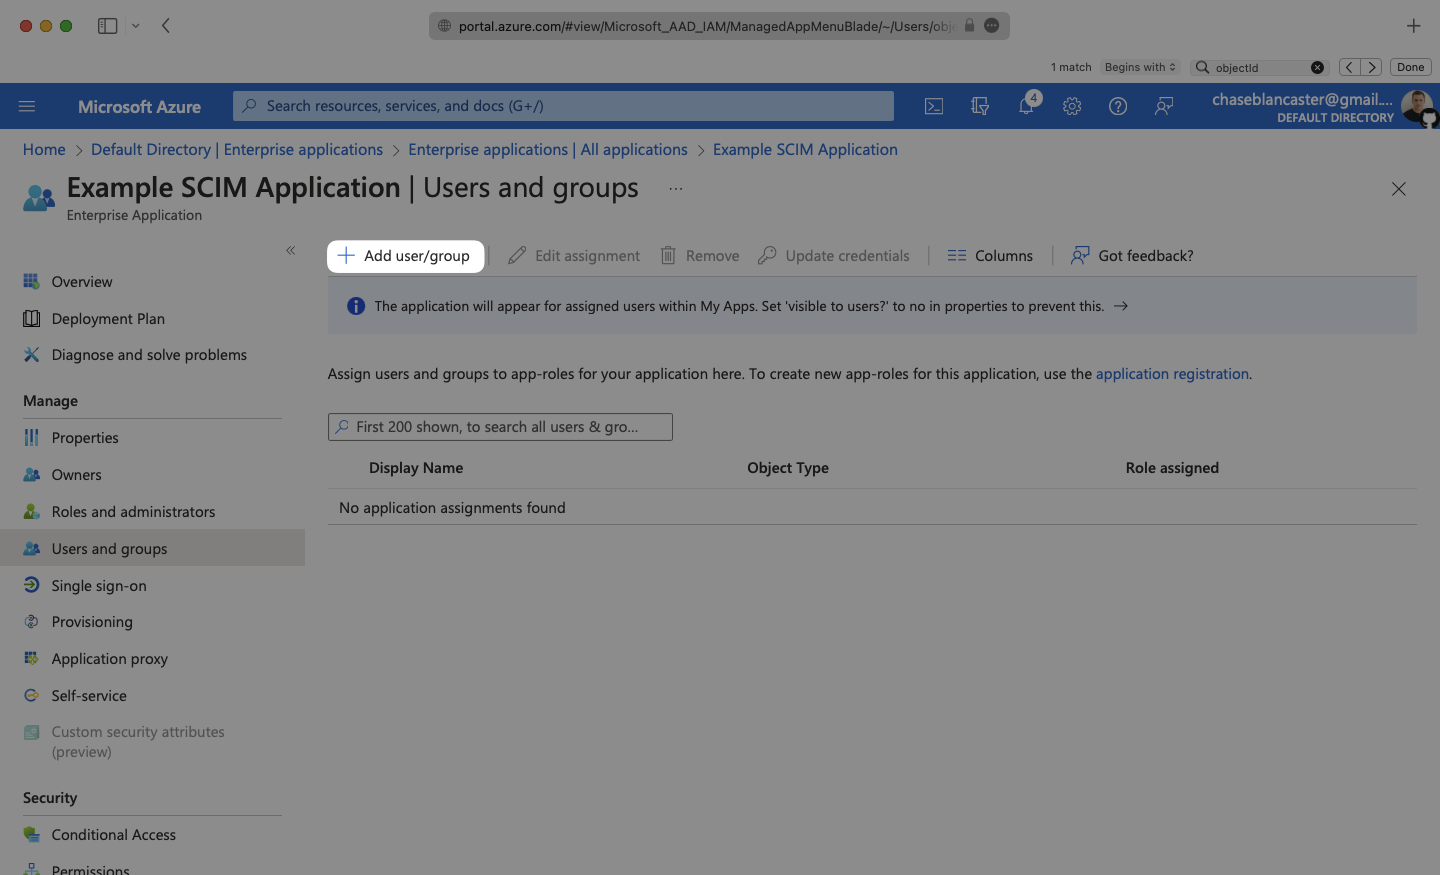
Select “Add user/group” from the top menu.
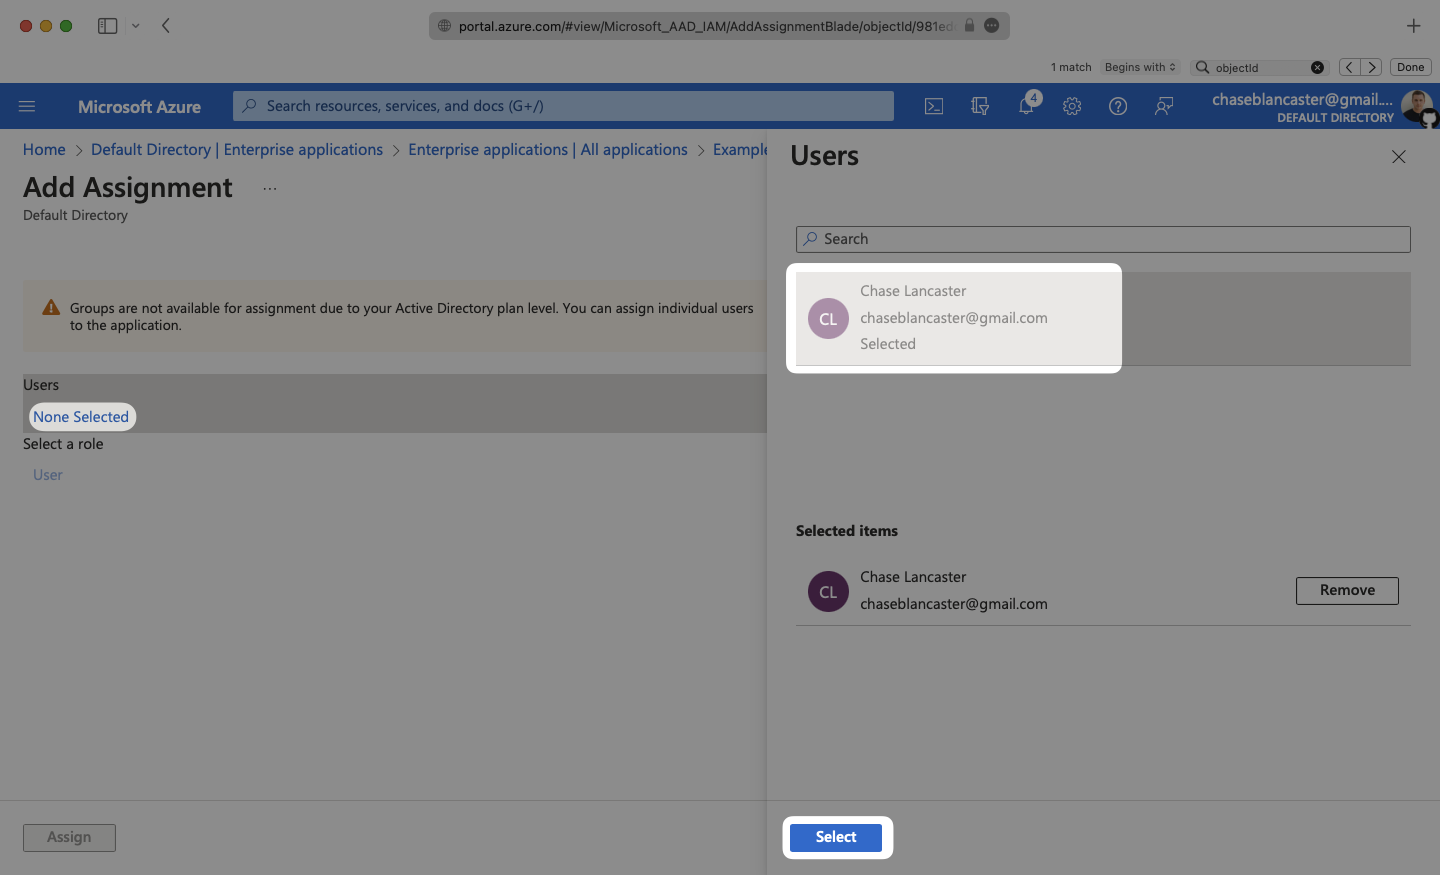
Select “None selected” under the “Users and Groups”. In the menu, select the users and groups that you want to add to the SCIM application, and click “Select”.
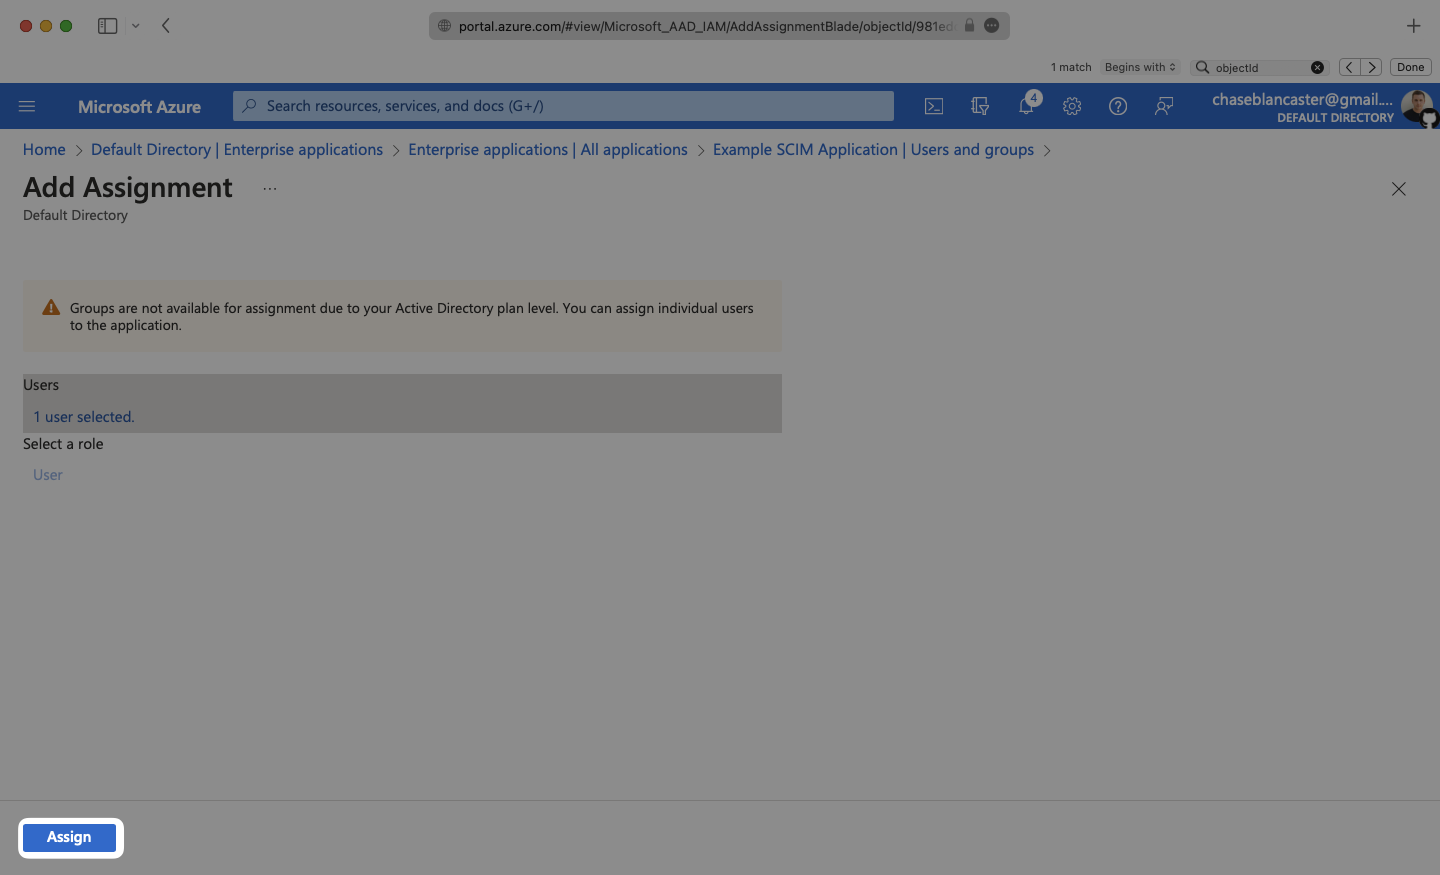
Select “Assign” to add the selected users and groups to your SCIM application.
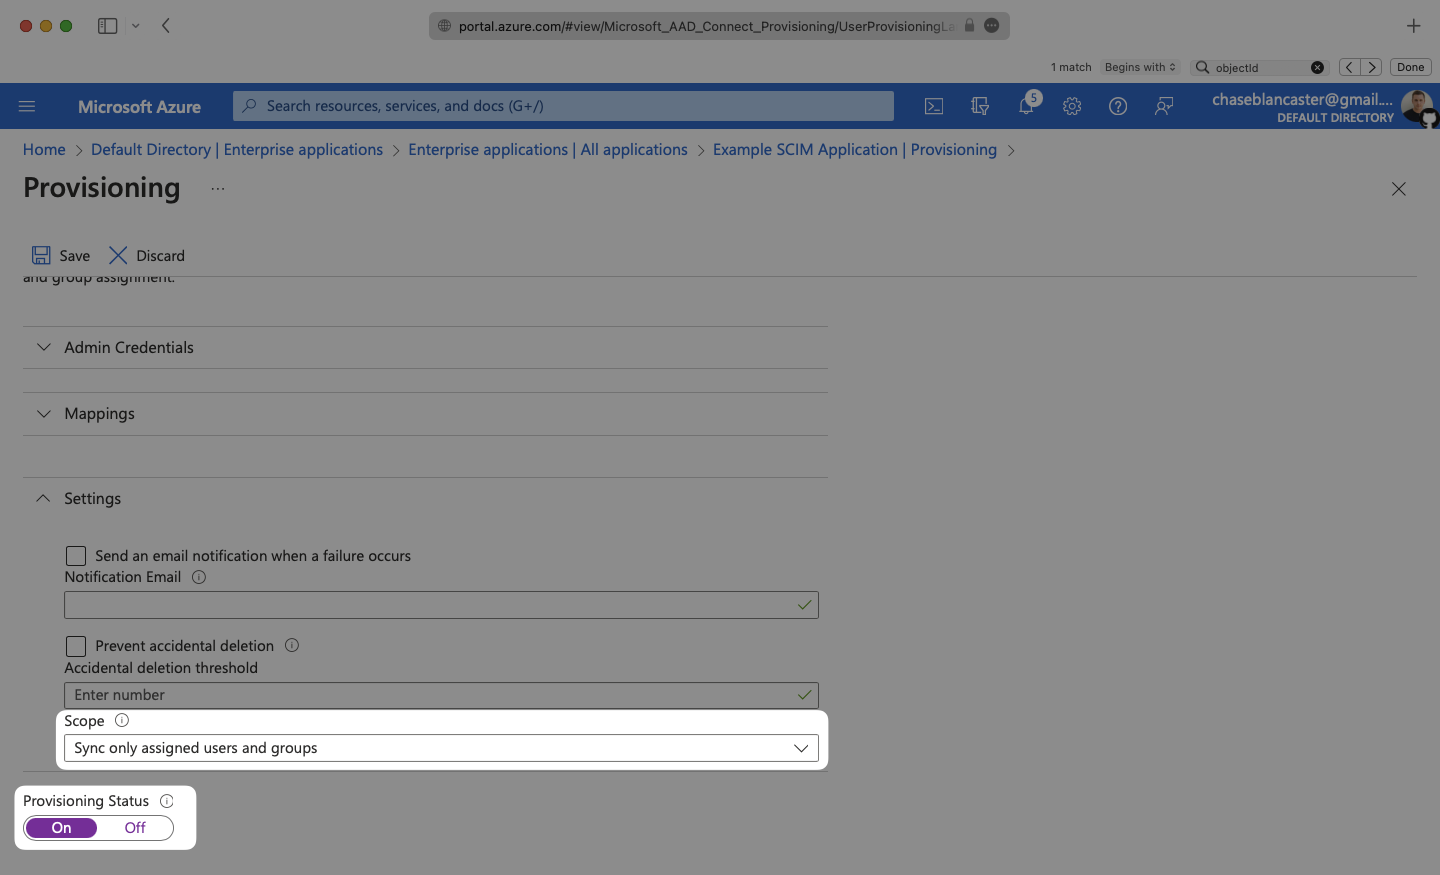
In the Provisioning menu, confirm the “Provisioning Status” is set to “On” and that the “Scope” is set to “Sync only assigned users and groups”.
Begin provisioning users and groups and witness realtime changes in your WorkOS Dashboard.
A detailed guide to integrate the WorkOS API with your application can be found here
For any non-standard attributes used by the application, some configuration may be required in Microsoft Entra. Below is a guide on configuring user attribute mappings, so they propagate via SCIM.
From your Microsoft Entra SCIM application, navigate to the Manage → Provisioning page. Expand the Mappings section and click “Provision Microsoft Entra ID Users”.
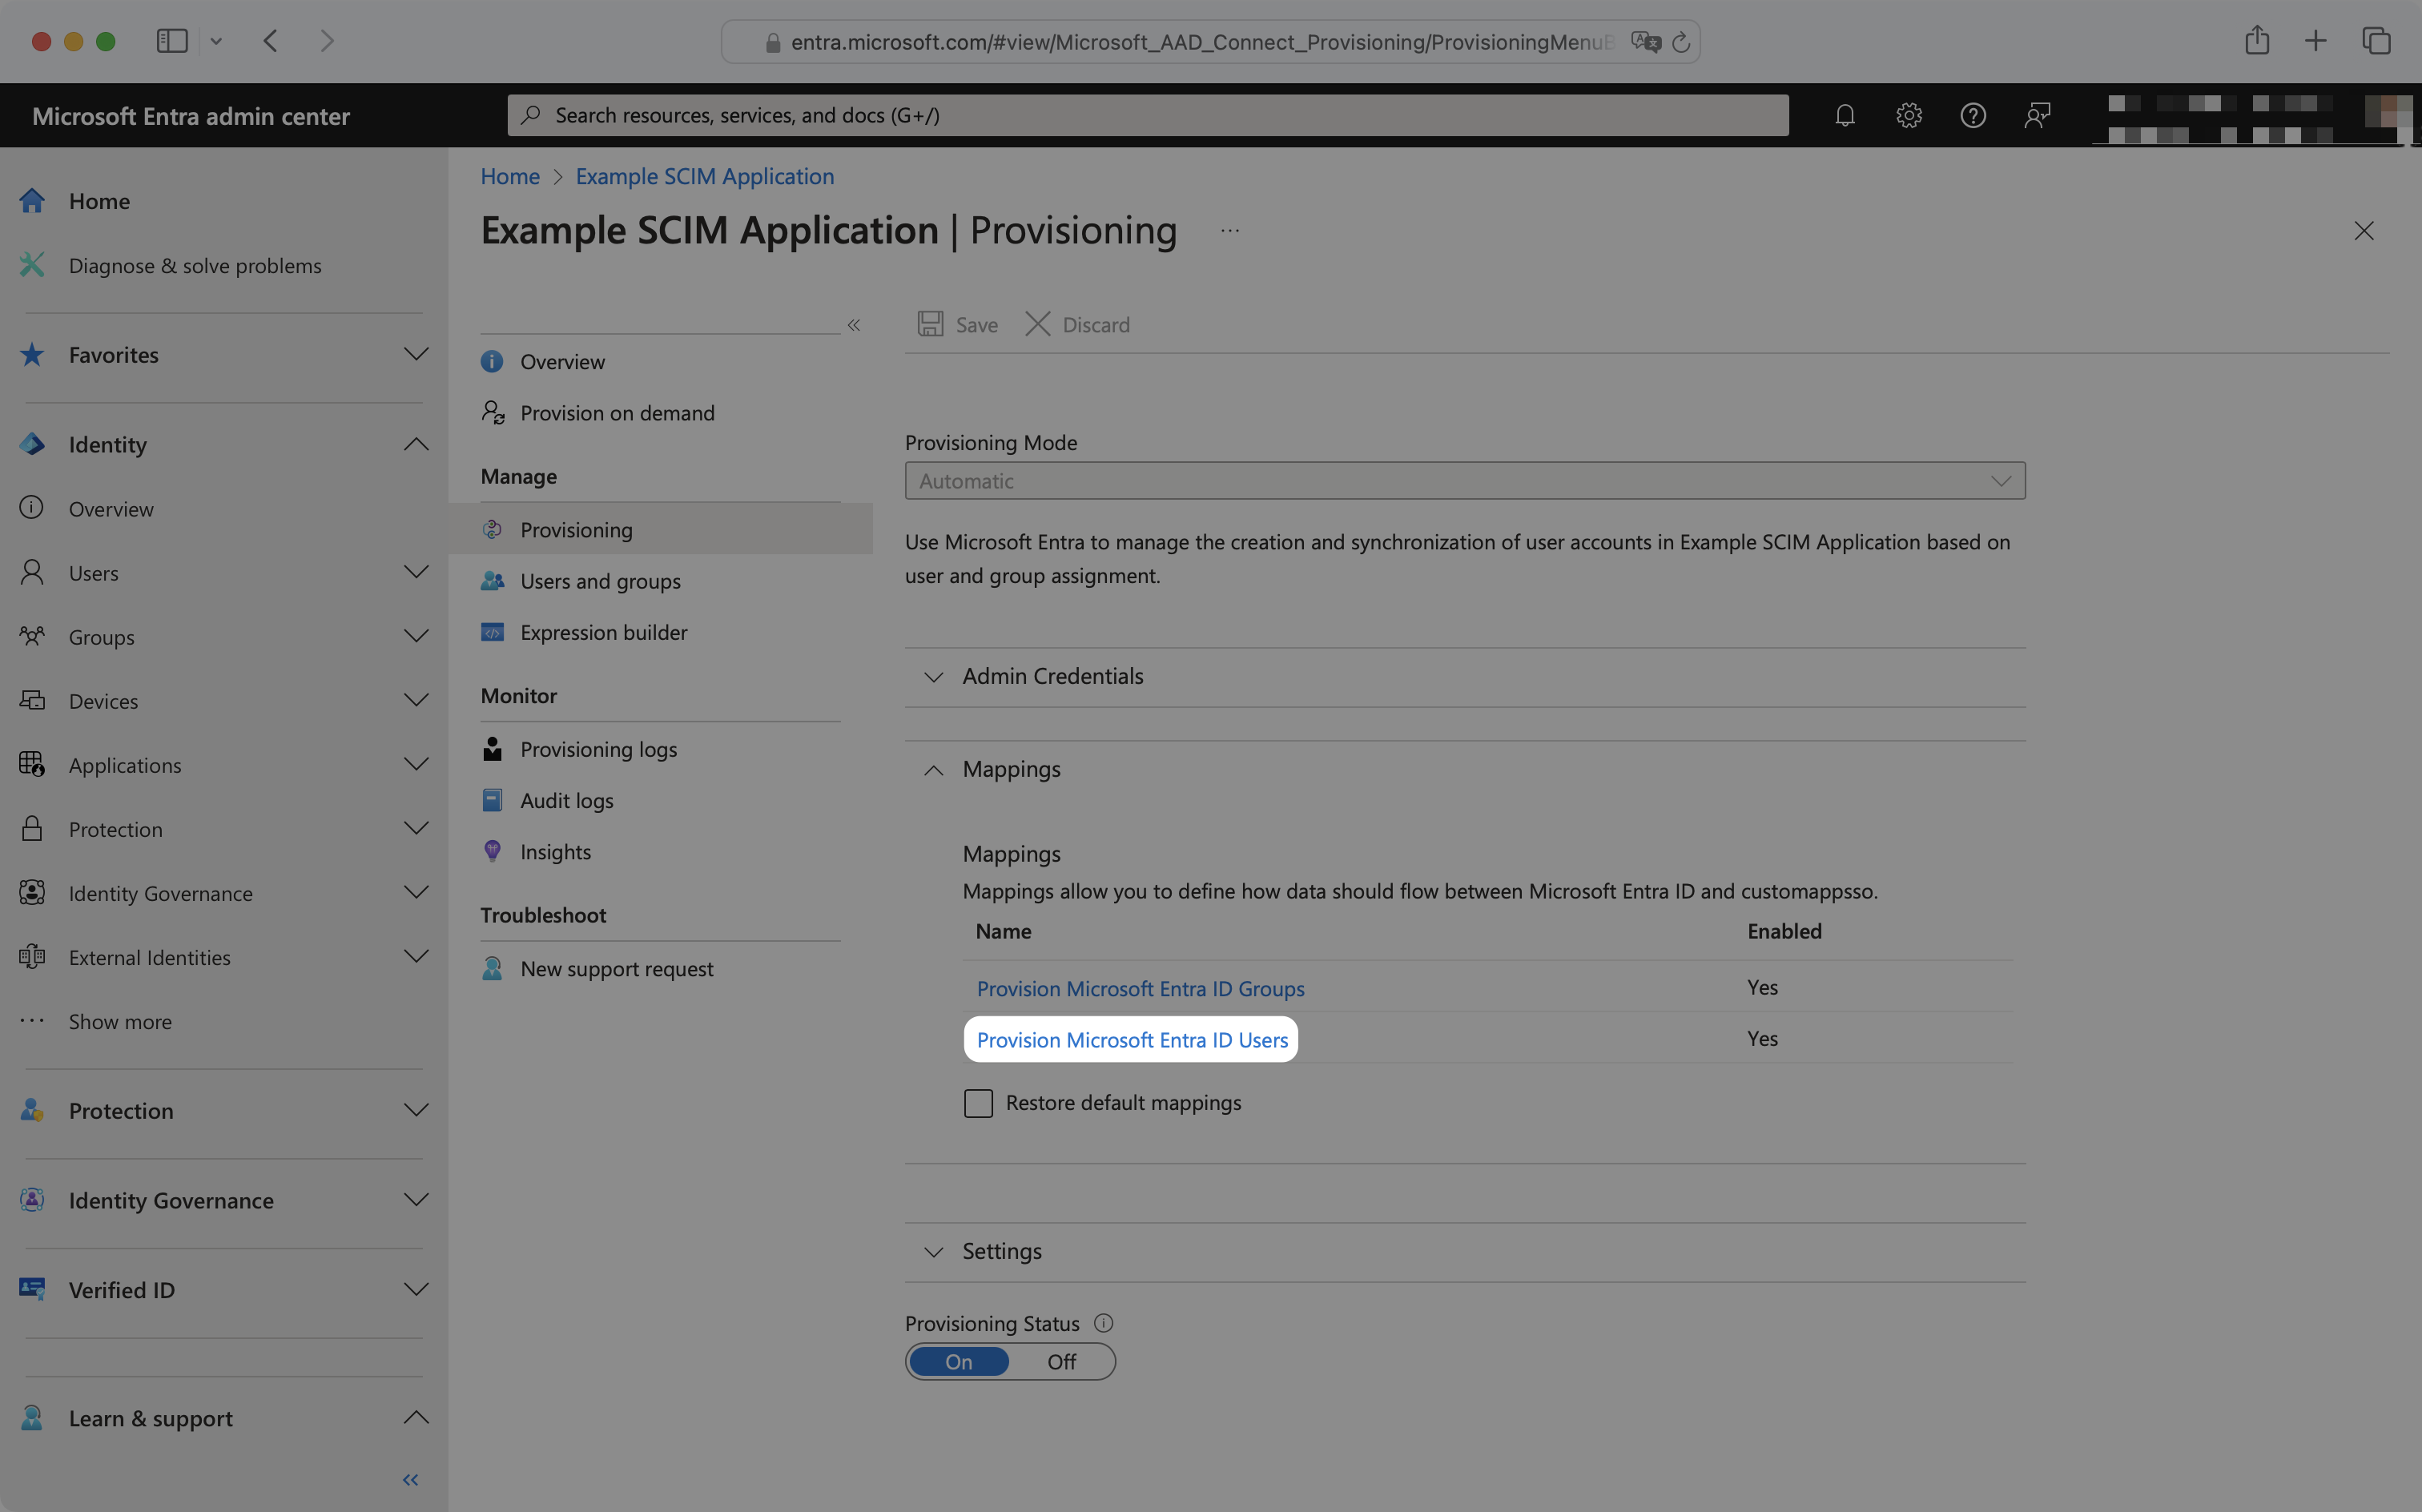
This will display a list of attribute mappings and settings:
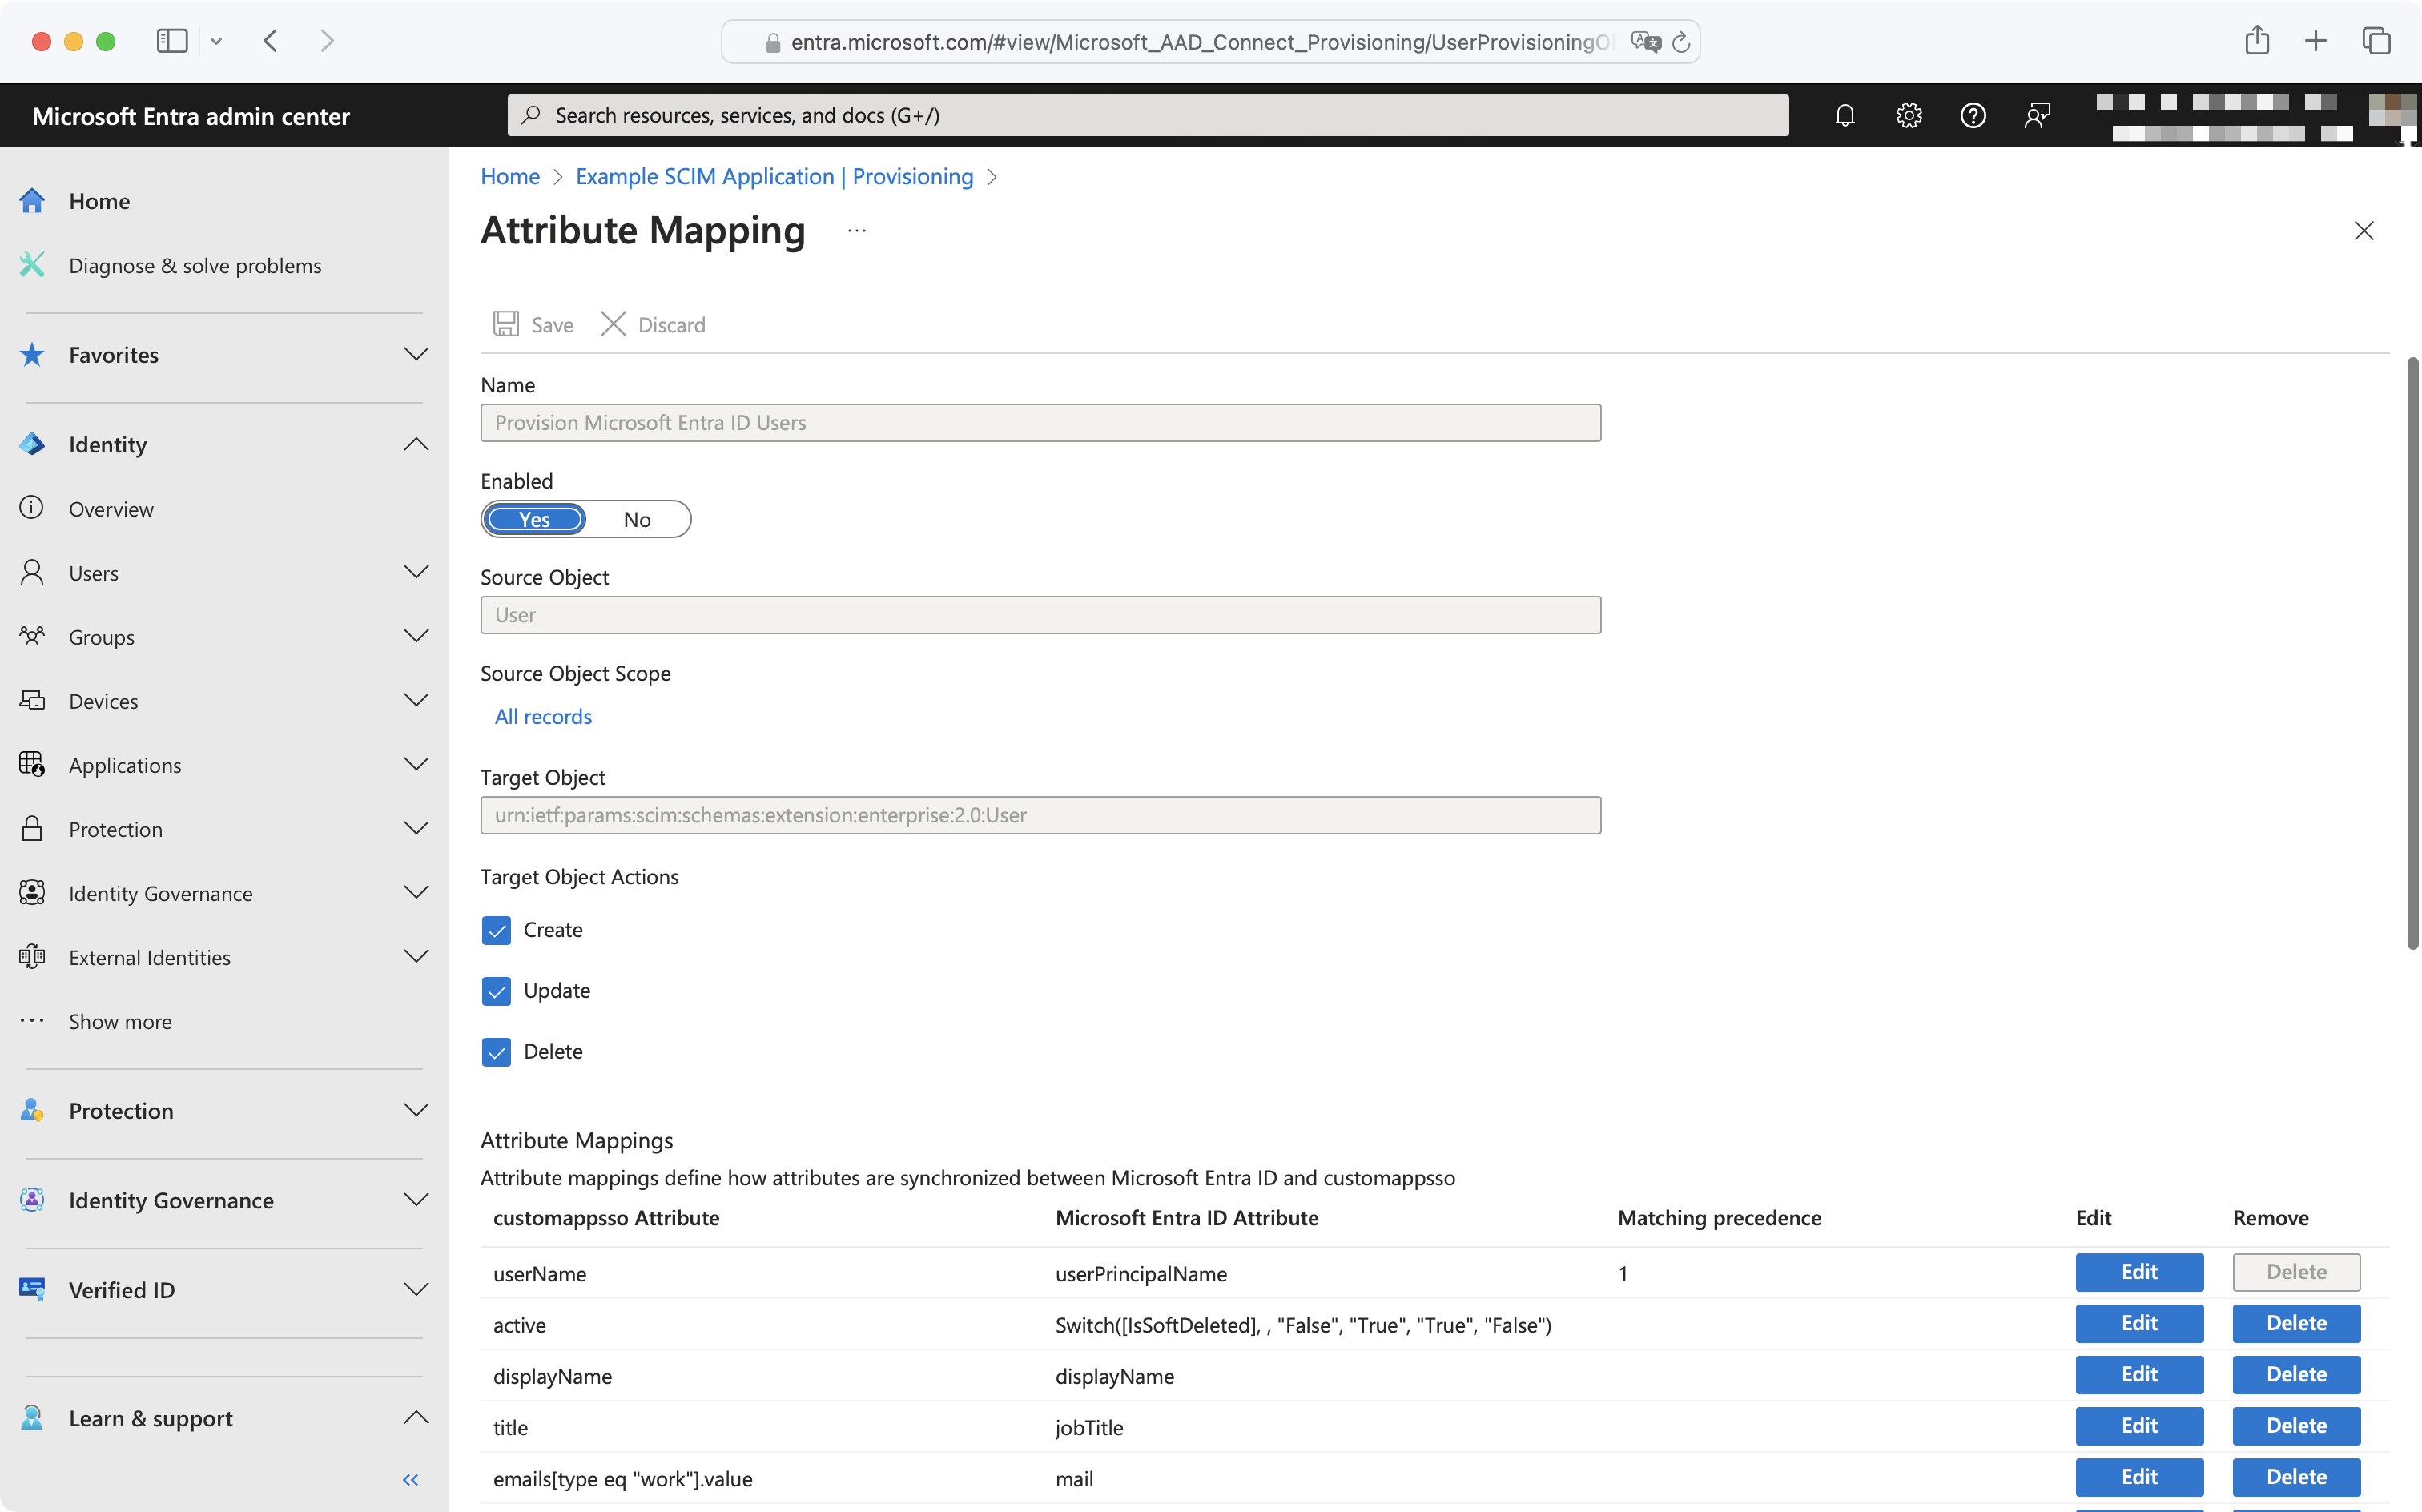
To add a missing attribute, click the “Add New Mapping” button at the bottom left of the mappings list. To edit an existing attribute, click the “Edit” button next to the existing attribute you’d like to edit.

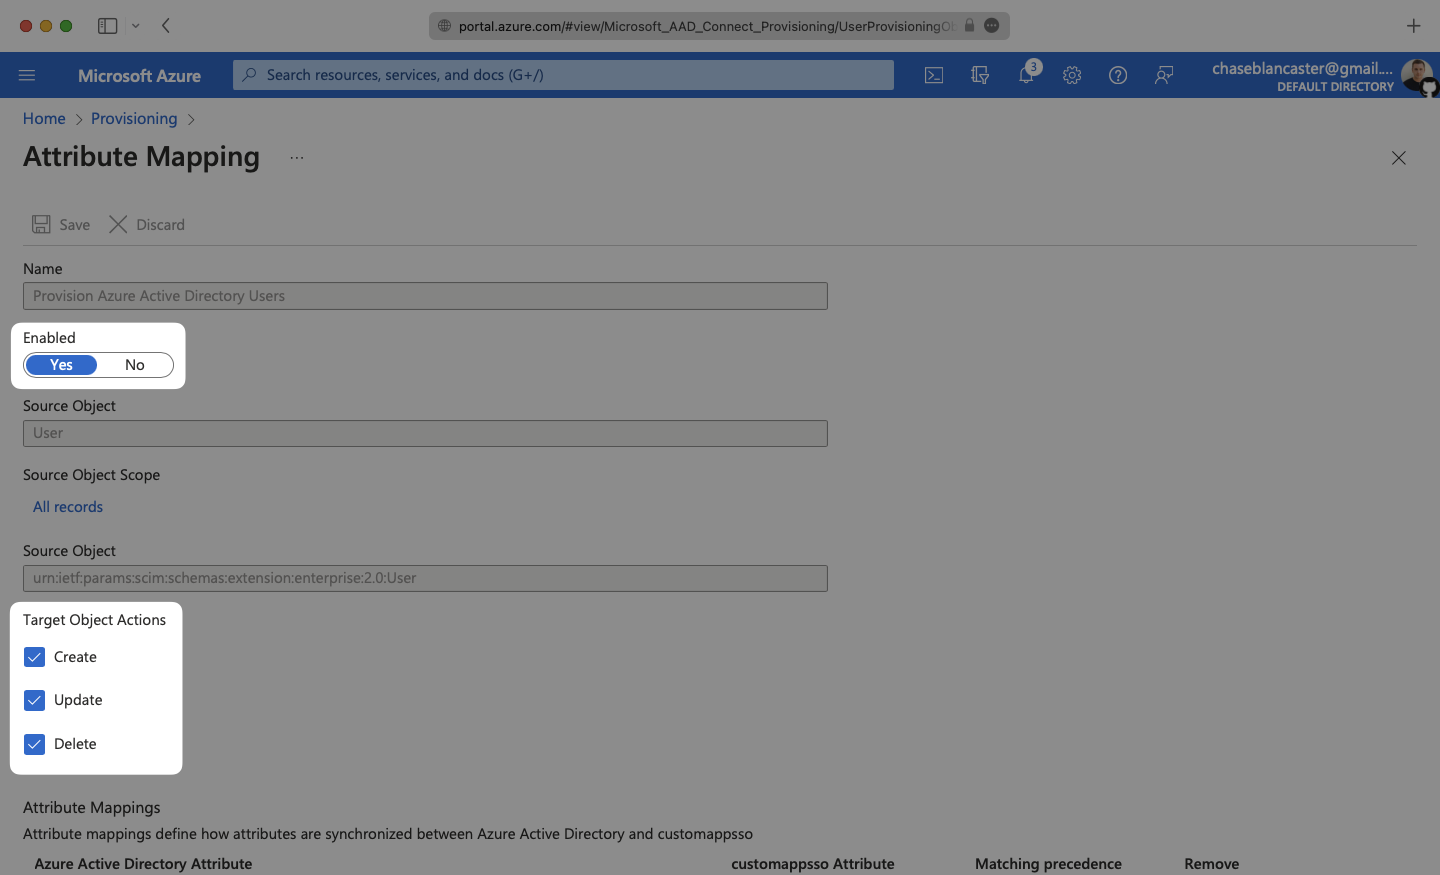
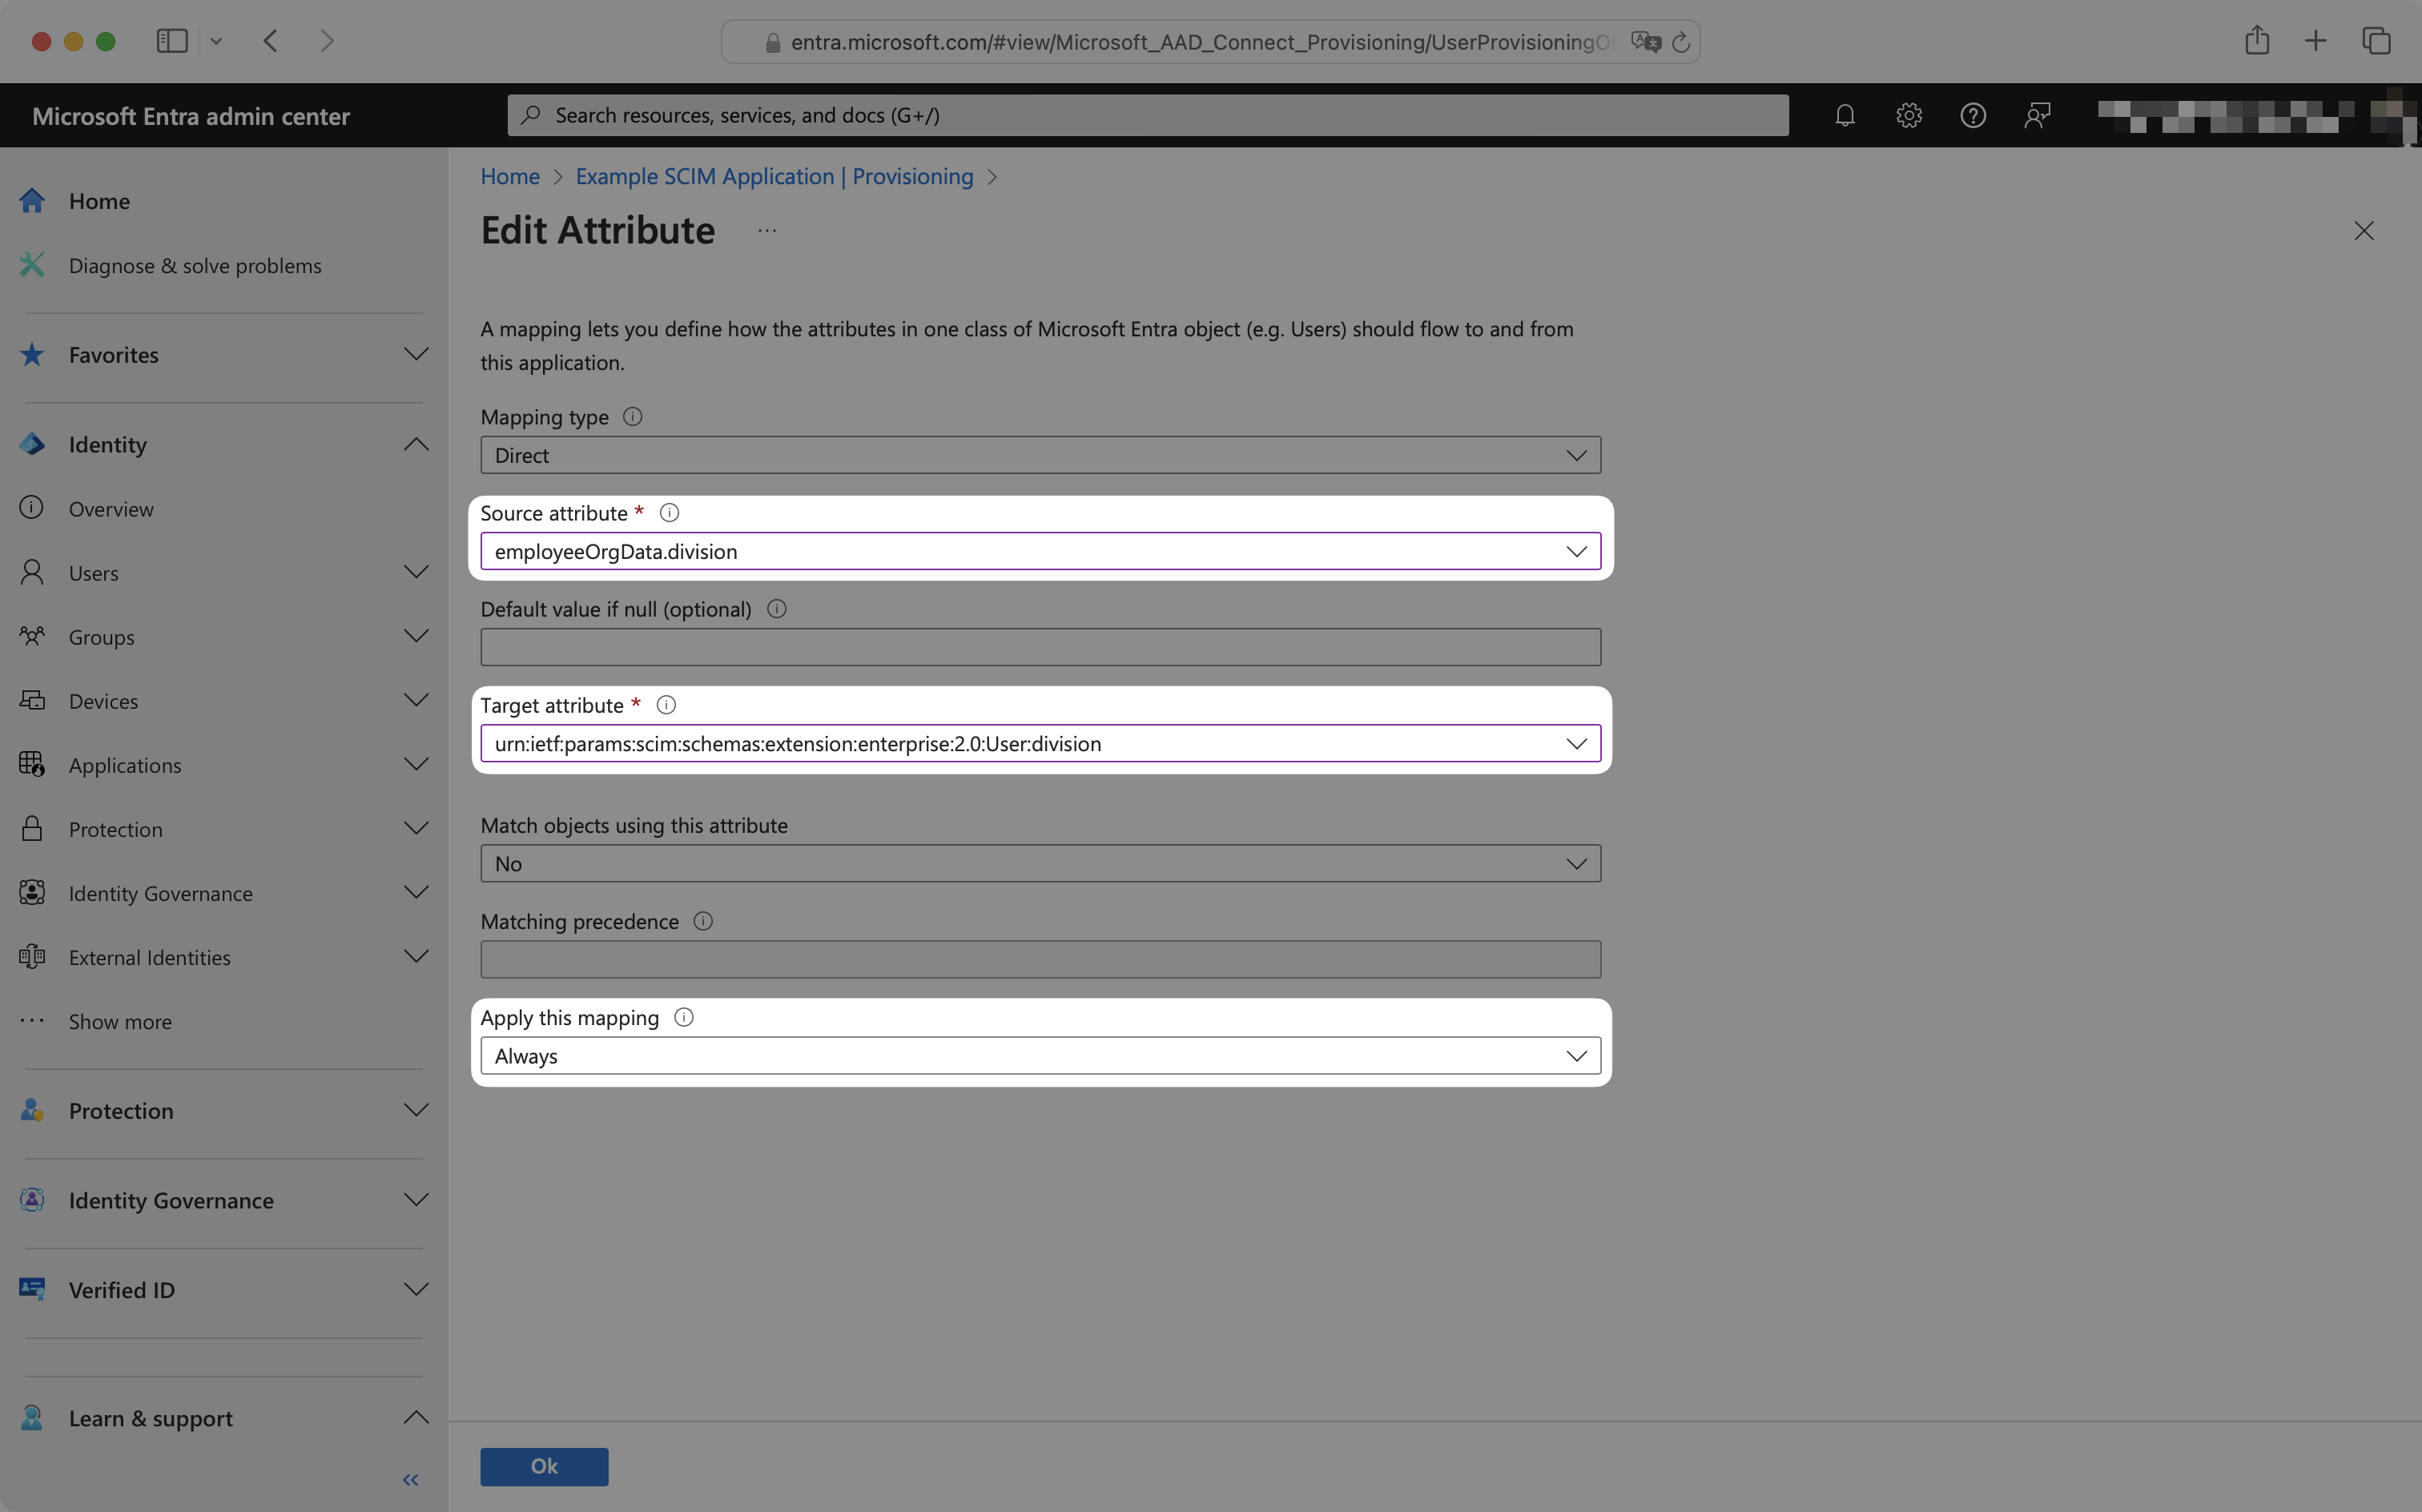
To configure the mapping, select the source and target attribute from the dropdowns, and ensure “Apply this mapping” is set to “Always”.
For example, to map division, the source attribute has been selected as employeeOrgData.division and the target attribute has been selected as urn:ietf:params:scim:schemas:extension:enterprise:2.0:User:division.
These new attribute mappings will now propagate to your application when the next SCIM push occurs.
By default, Entra ID SCIM 2.0 directories sync changes on a scheduled time interval, typically every 40 minutes. For use cases where more immediate provisioning or deprovisioning of users, groups, or group memberships is needed, Entra ID provides provisioning on demand.
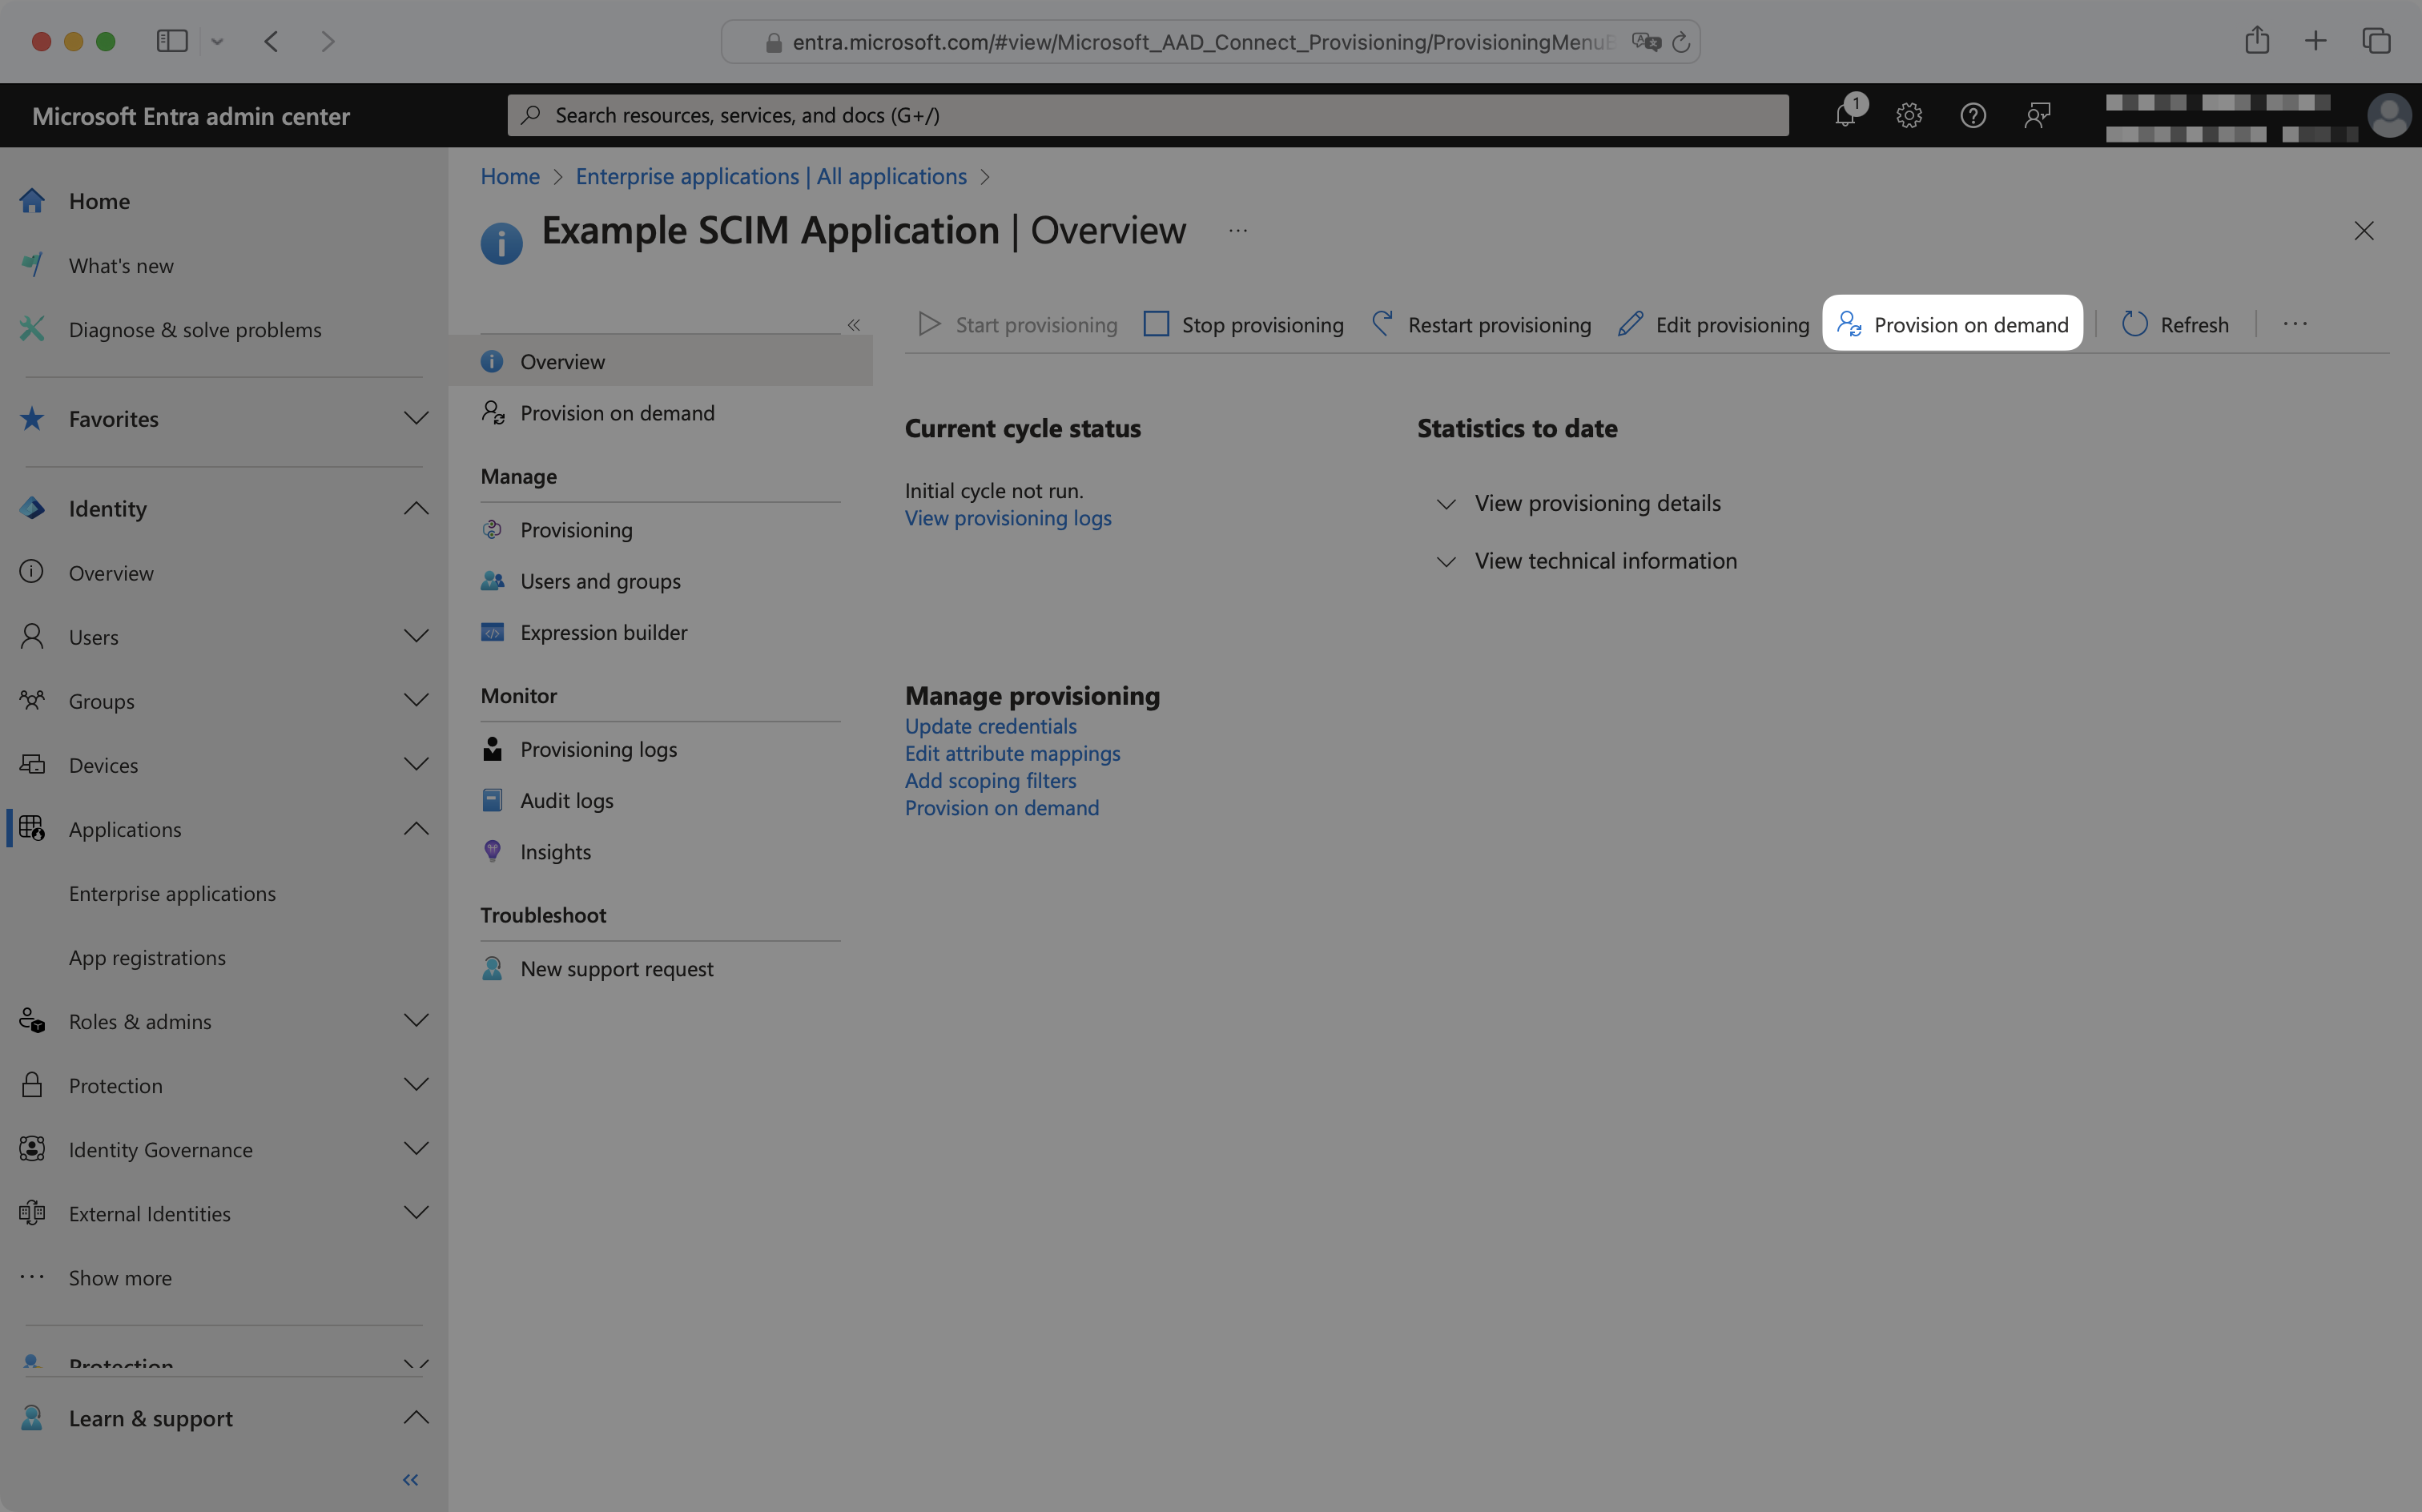
To provision on demand, from the enterprise application navigate to the “Provisioning” tab and click “Provision on demand”.
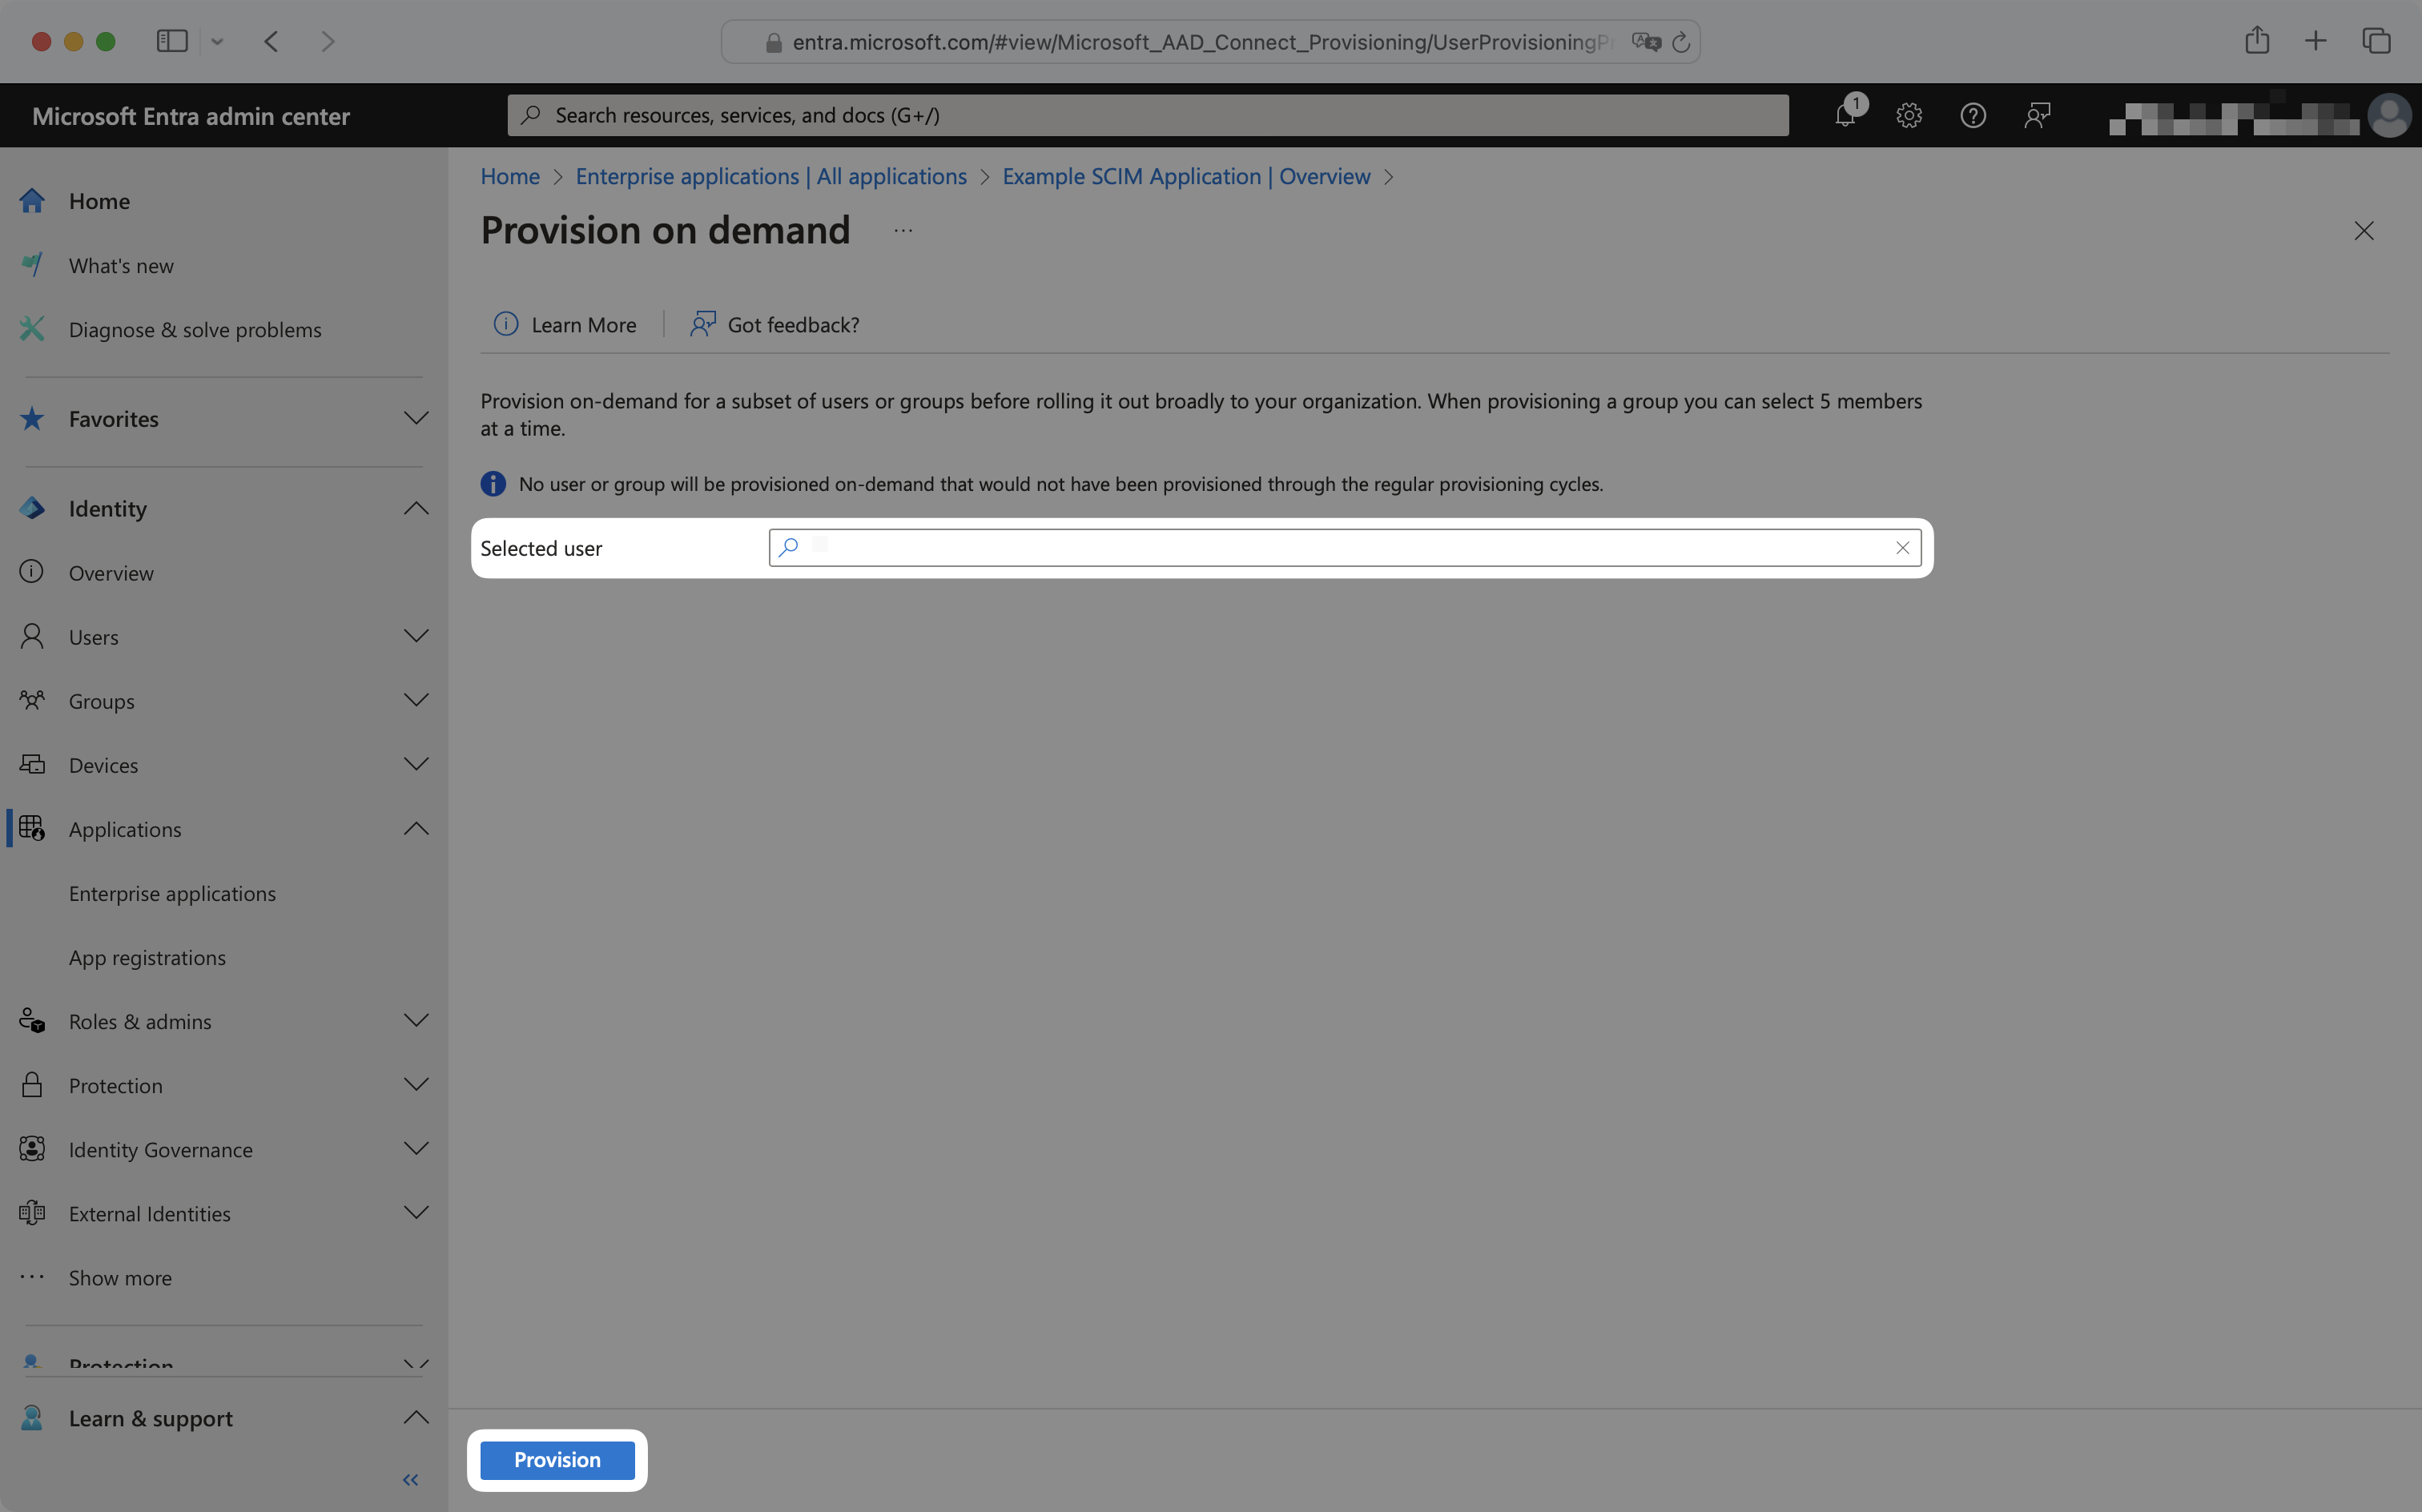
To provision a user, select the user from the dropdown and click “Provision”.
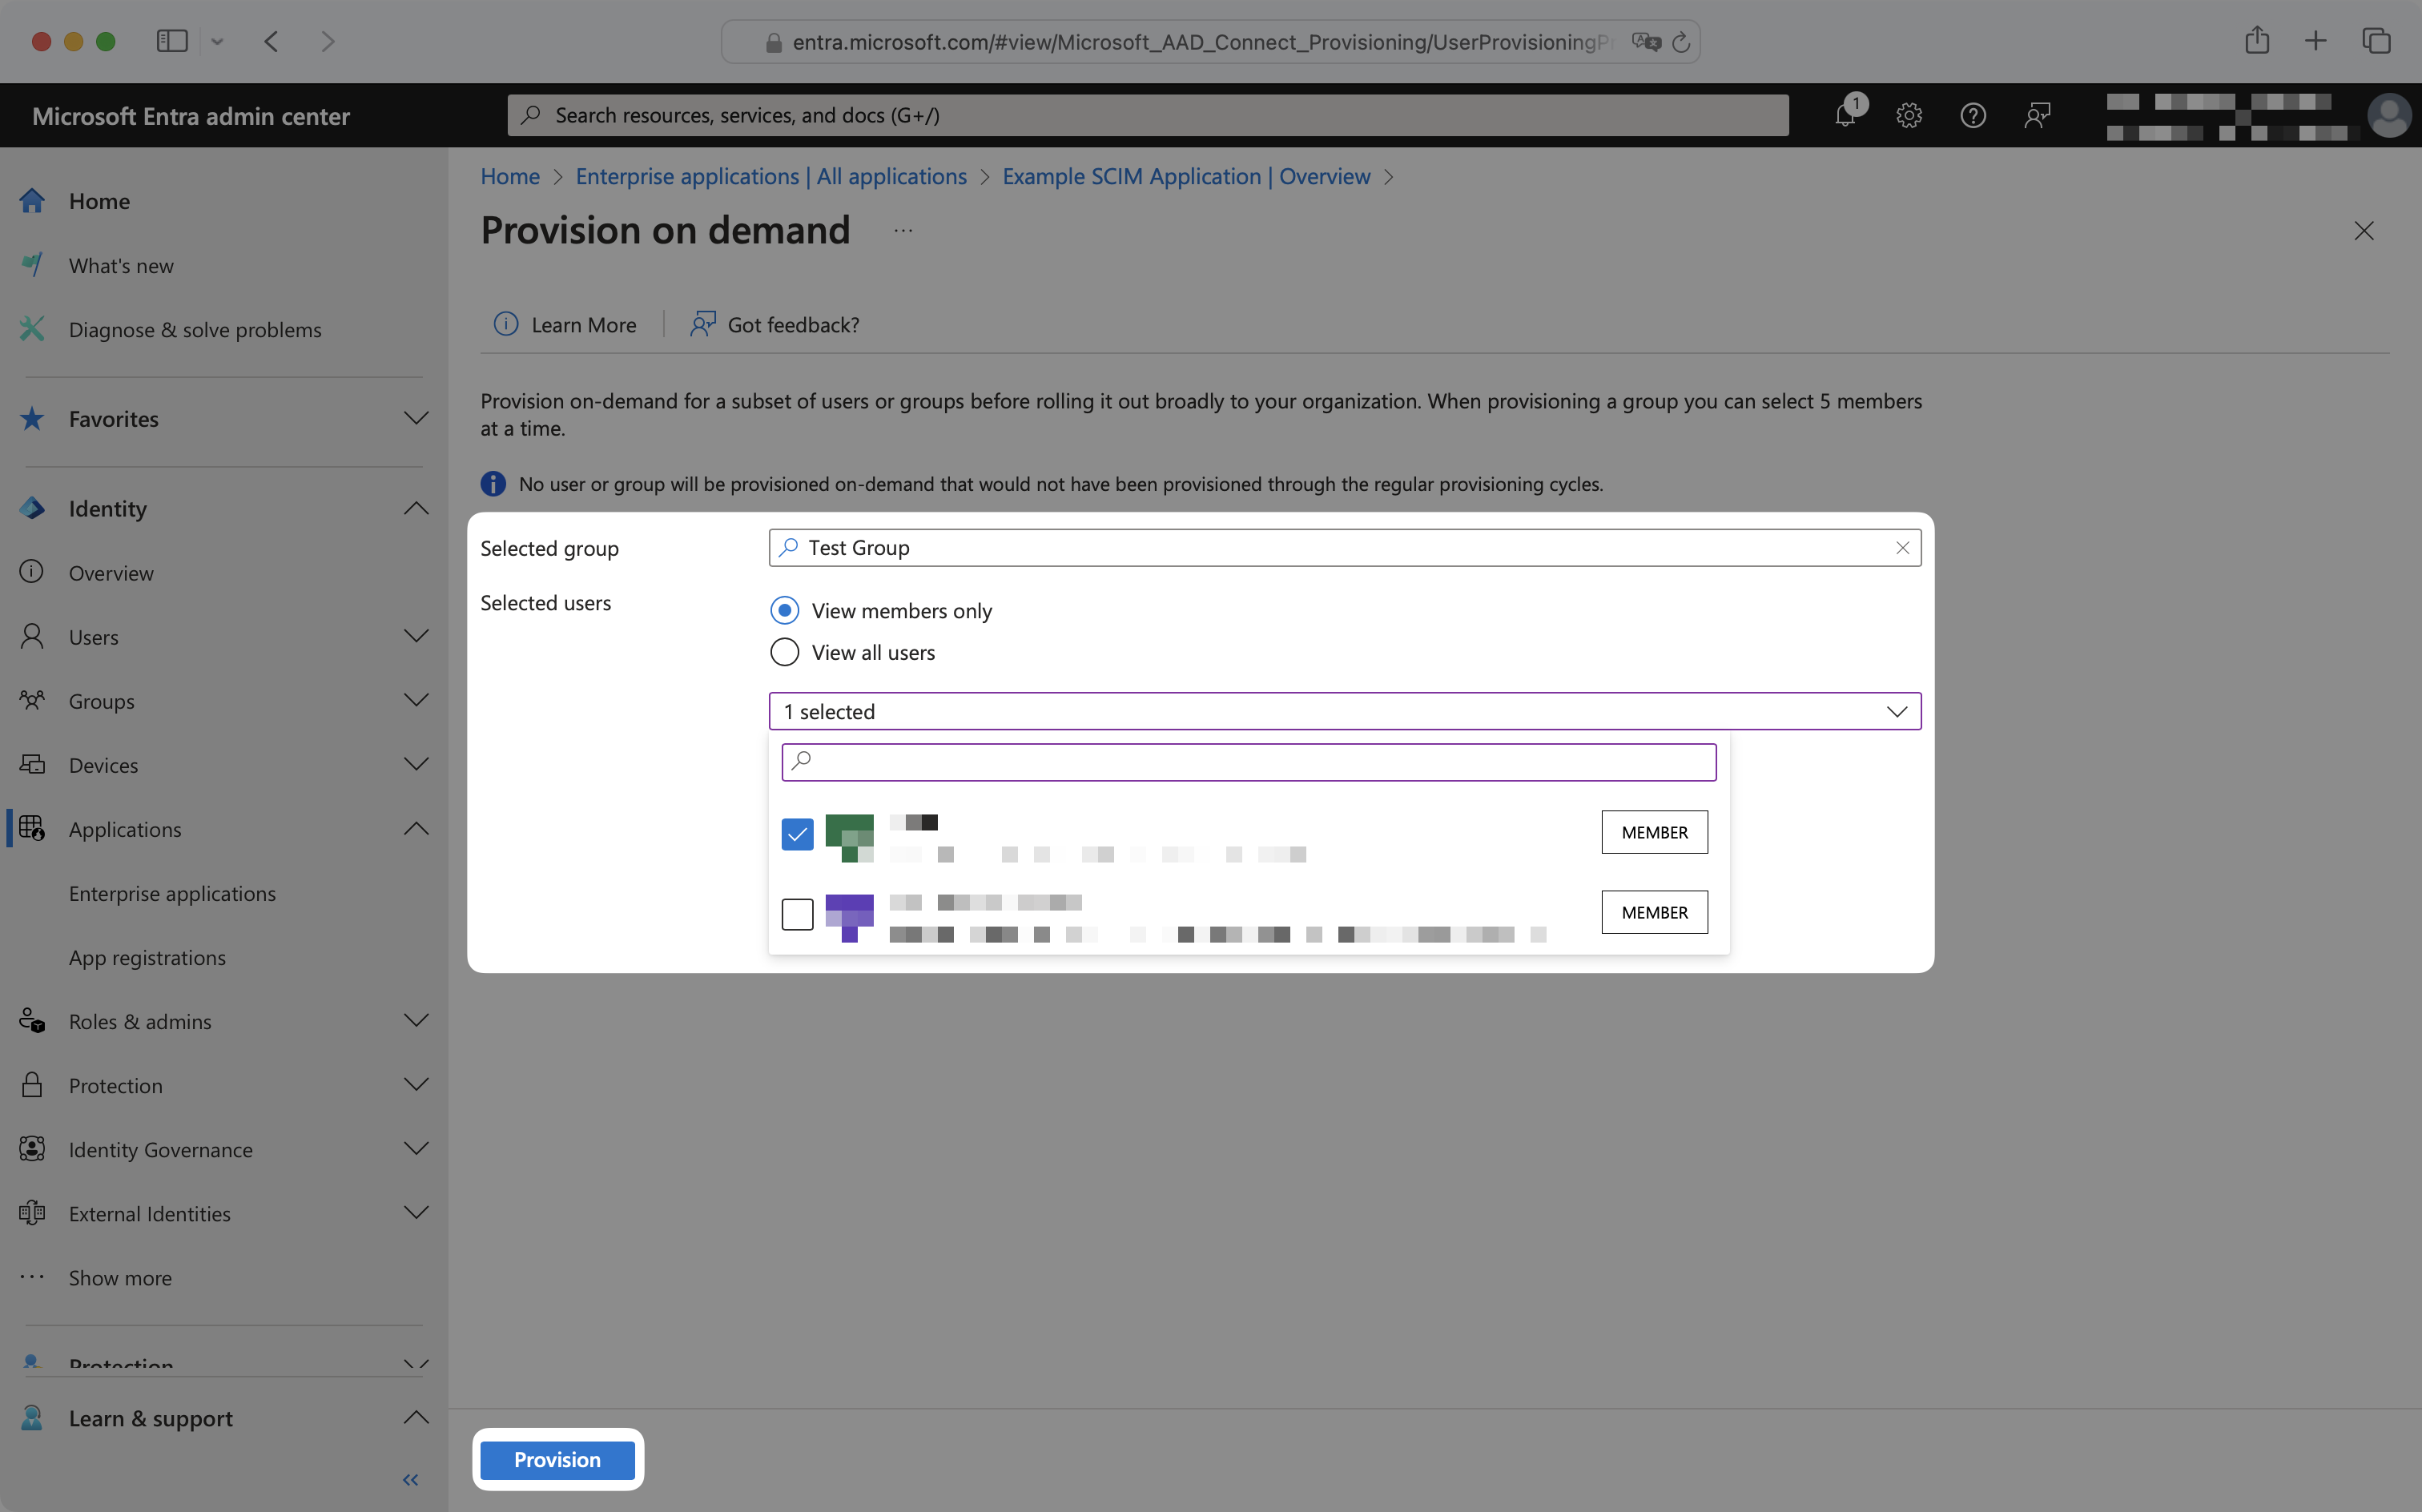
To provision a group or group membership, select the group from the dropdown, and select “View members only”. Then select the group memberships to provision and click “Provision”.
Upon clicking “Provision”, SCIM requests will immediately be sent to the application. To deprovision a user, group, or group membership, remove it from the Entra application and follow the above provisioning on demand steps.
No email addresses are coming through for users from Entra. How do I get emails for my Entra users?
For cloud-managed users, Entra ID pulls the email from the mail attribute in Exchange. If your customer doesn’t have this set up, they will need to configure attribute mapping in their SCIM app in Entra in order to provision users with WorkOS. They can use this tutorial from Microsoft. They’ll want to map a known email attribute, such as UPN, to the emails[type eq “work”].value SCIM attribute. For directories with synchronized-users, they will need to map the userPrincipalName attribute into the emails[type eq “work”].value SCIM attribute.
Sometimes, reactivating “suspended” users does not re-add them to their Entra groups. Why is that and how can I fix it?
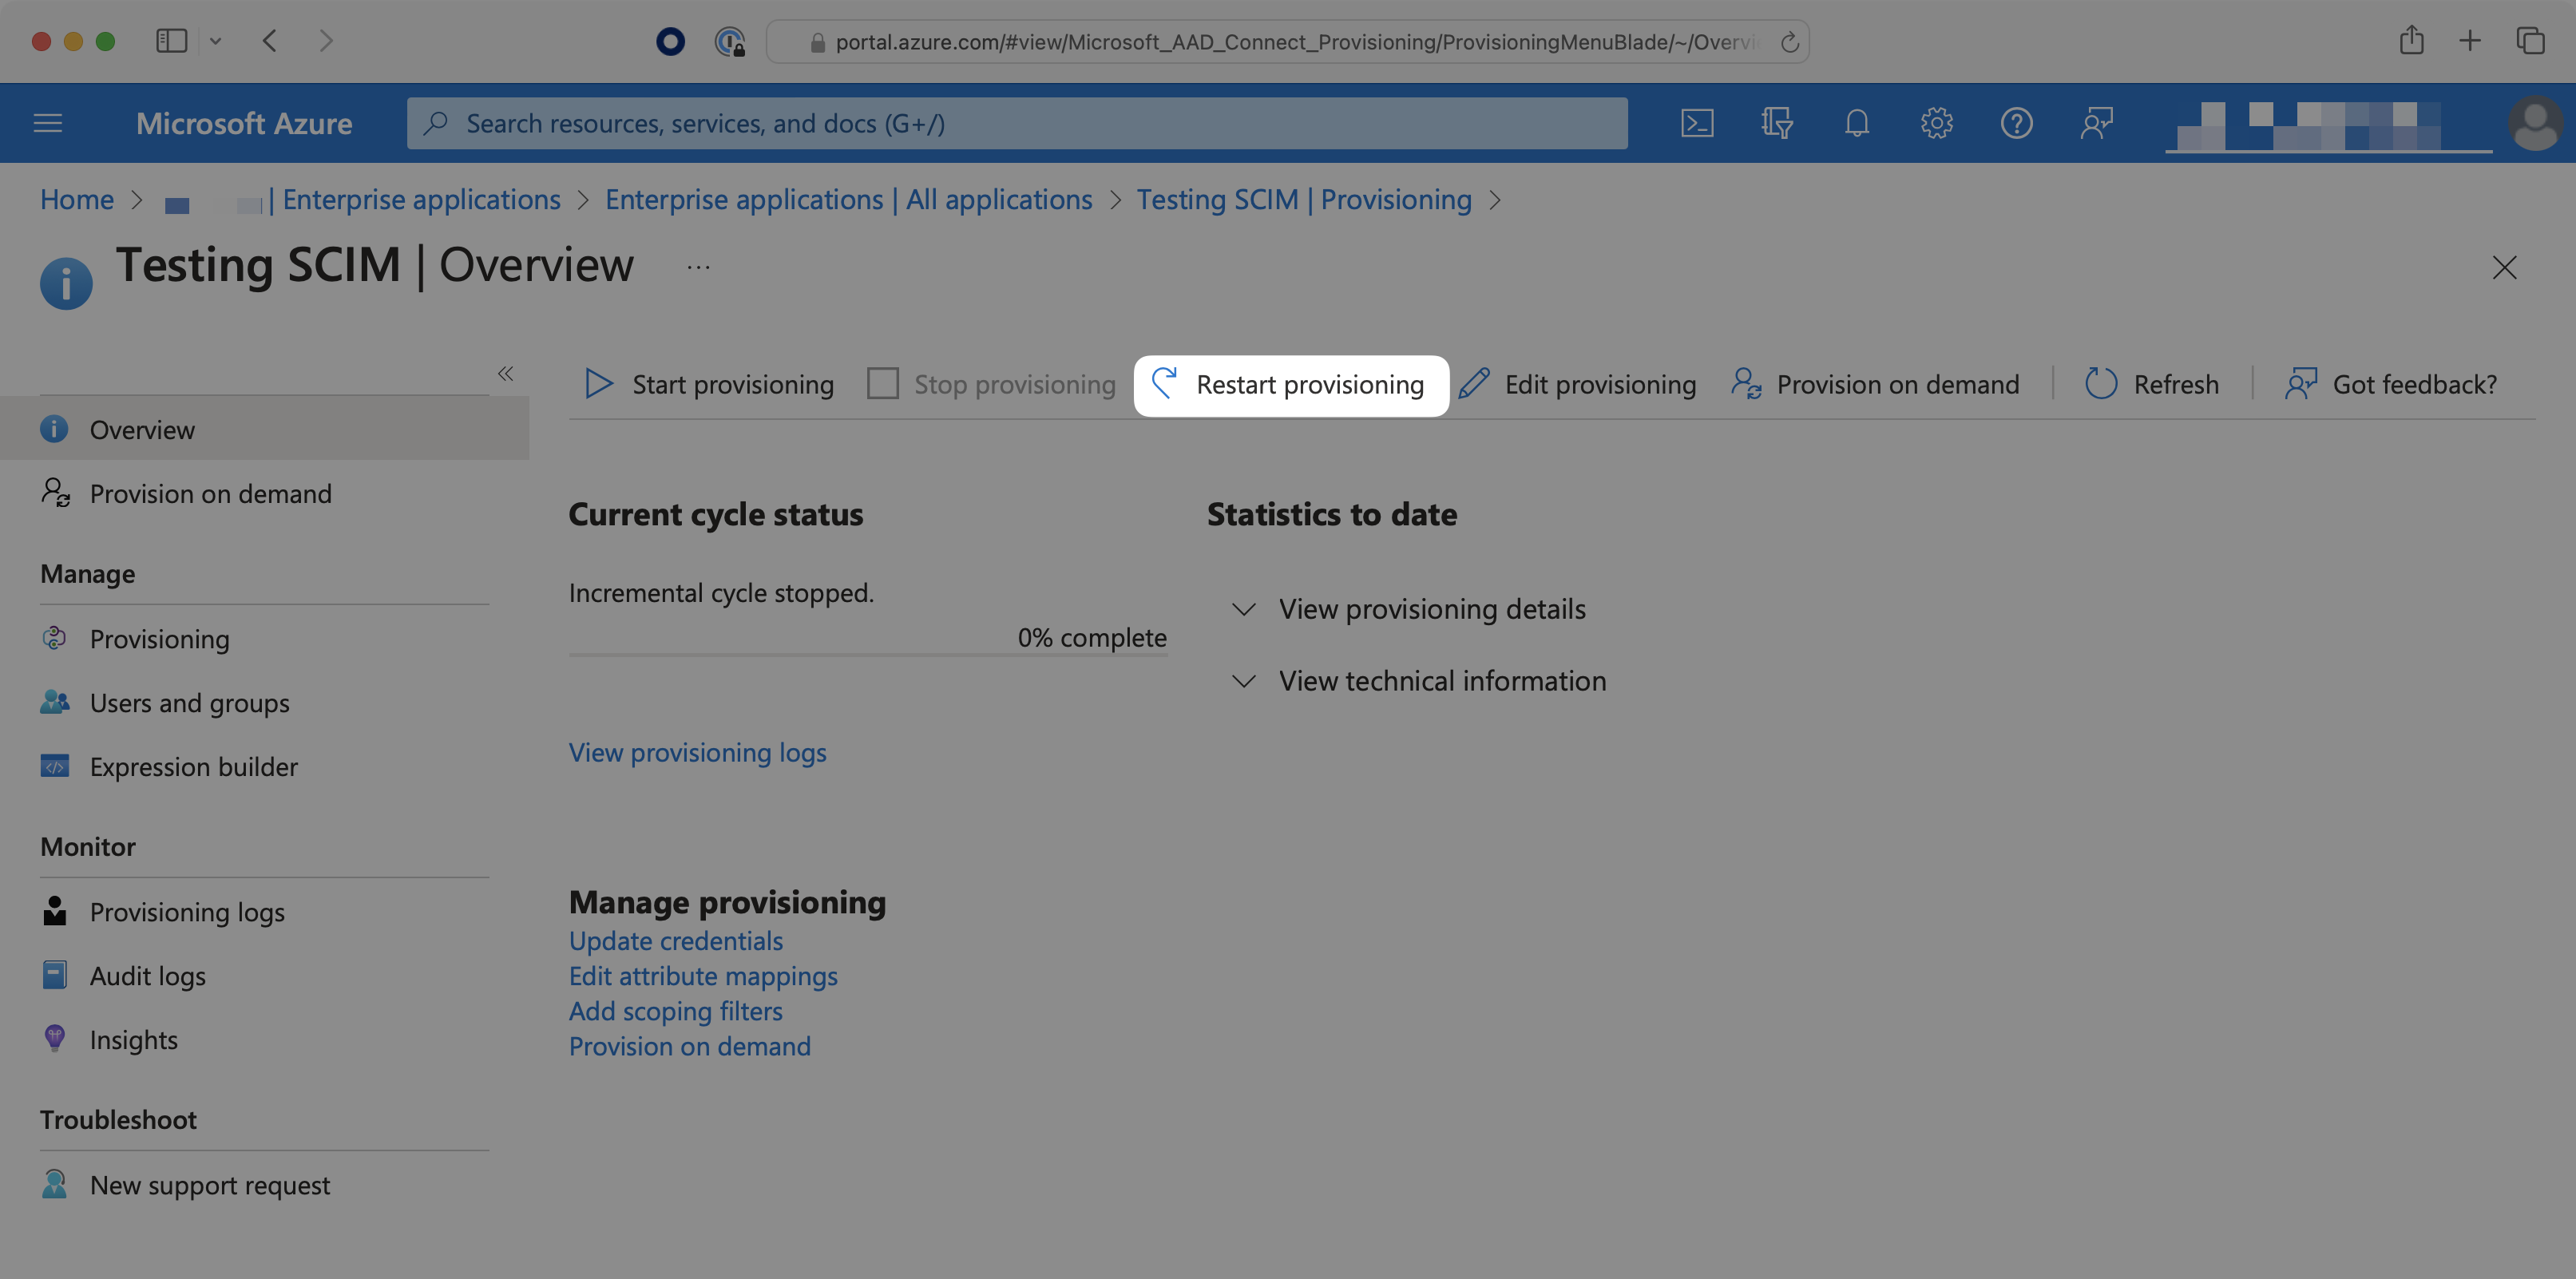
When a user is deleted from the entire directory, instead of only being deprovisioned from the SCIM app, the user may be soft-deleted (their state is set as “suspended”). Reactivating these suspended users will not send SCIM requests to re-add the user to the groups. To do so, the IT admin will need to select the “Restart Provisioning” button for the SCIM app in Azure.
Can profile images be accessed with Entra ID SCIM?
Entra ID’s SCIM provisioning does not support transmitting image.
Why do I receive a dsync.user.updated event after dsync.user.created?
Entra ID sends a newly provisioned user over to WorkOS in two separate actions. WorkOS will then send these actions as two individual events to your app. This is expected behavior.
How often do Entra ID SCIM 2.0 directories perform a sync?
By default, Entra ID SCIM 2.0 directories sync changes on a scheduled time interval, typically every 40 minutes. For more details, please refer to Entra ID’s official documentation.
Provisioning on demand is also available, which can sync select users, groups, or group memberships in real-time.