Bubble Plugin
Add WorkOS features to your Bubble application.
The Bubble plugin for WorkOS allows you to easily integrate WorkOS API endpoints in your application’s workflows. This plugin includes actions for SSO, Directory Sync, Admin Portal, and webhook validation.
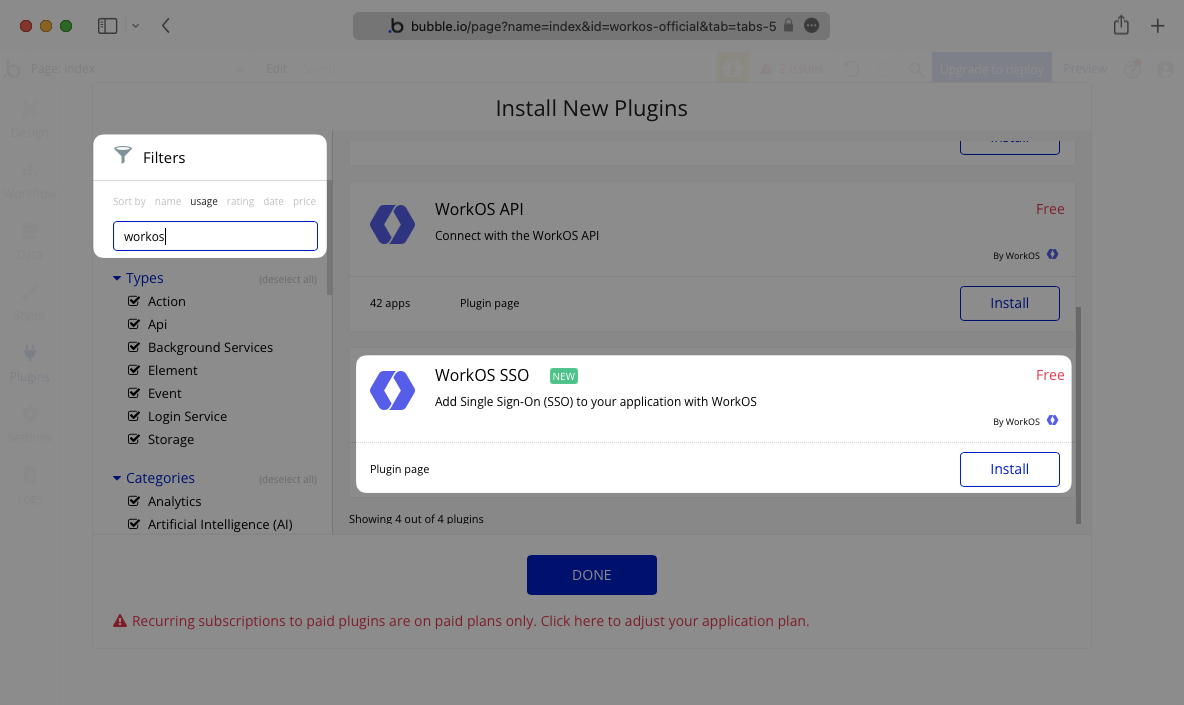
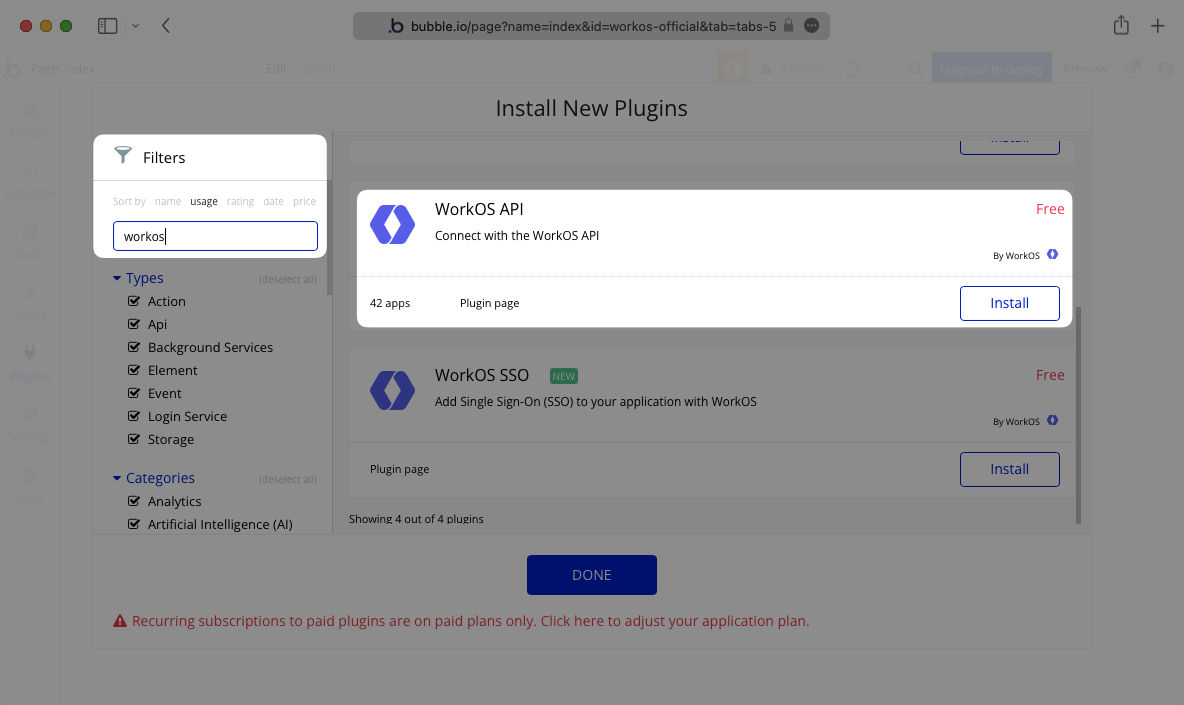
In the Plugins tab of your app editor in Bubble, click Add Plugins, then search for WorkOS. Install the plugins for both WorkOS SSO and WorkOS API and then click Done.
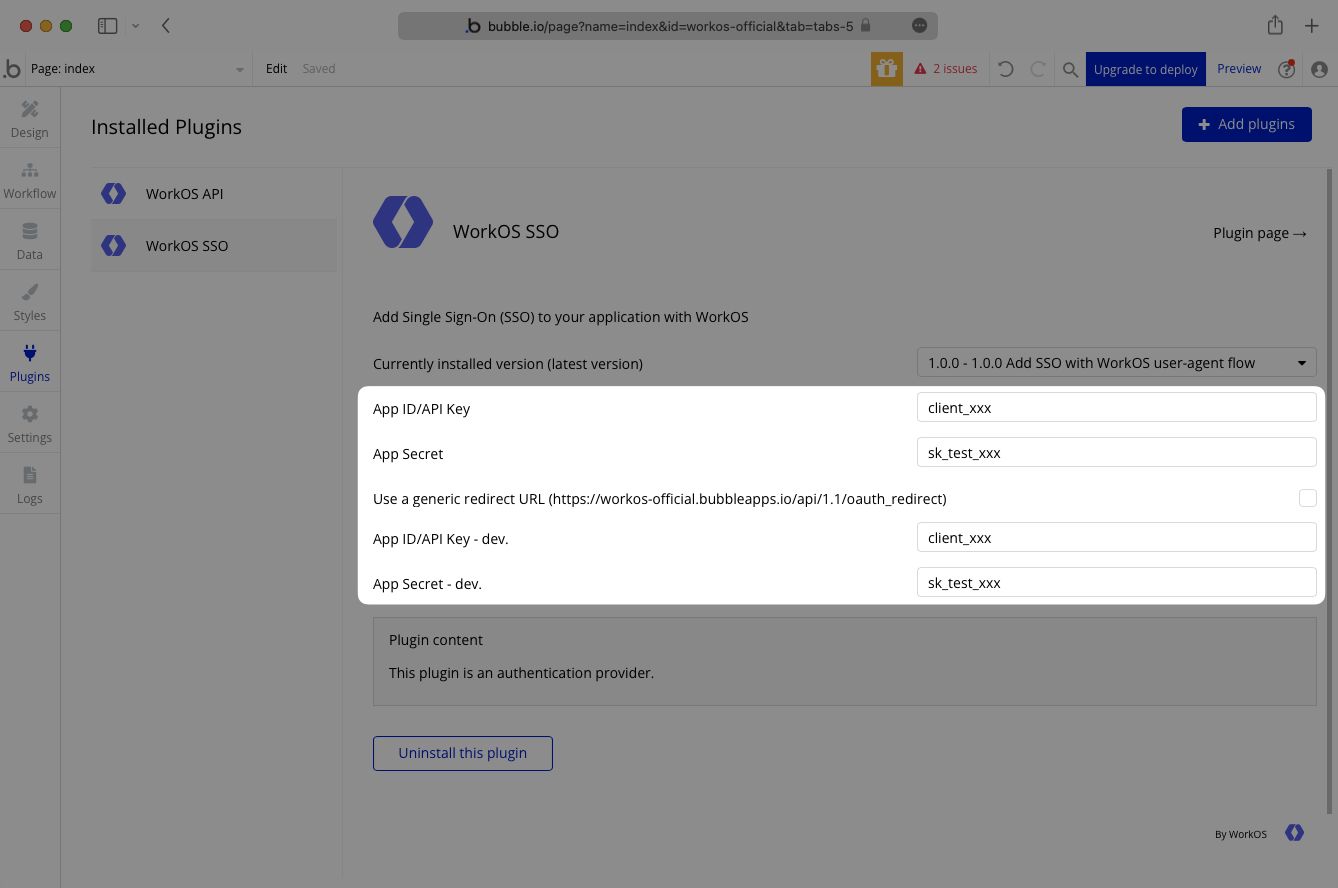
The next step is to enter your secret keys/parameters on the Plugins settings page as seen below. The API key can be found in your WorkOS dashboard under API Keys.
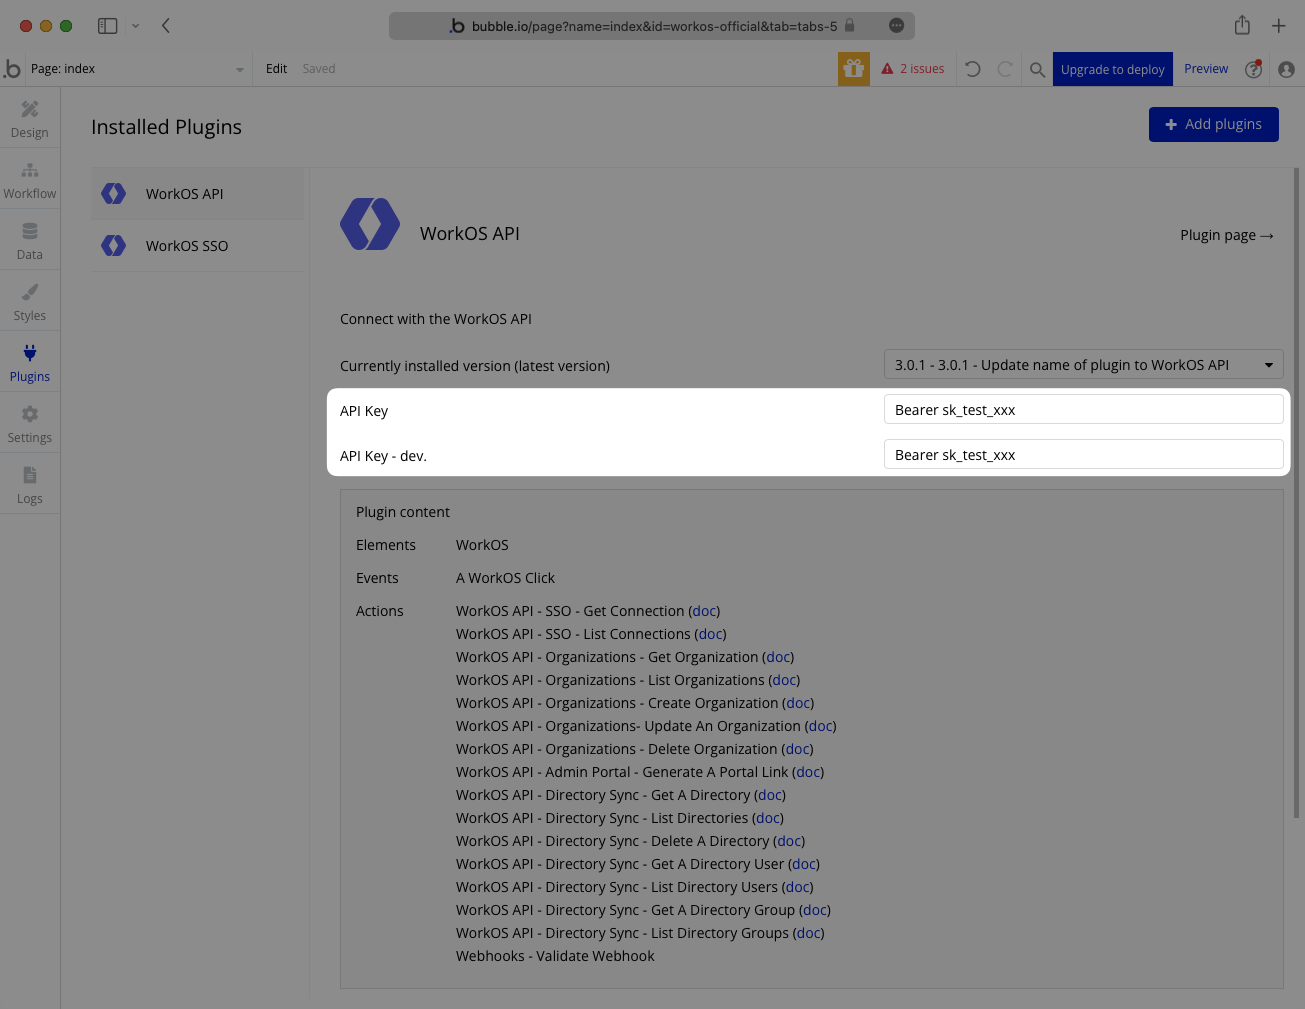
Now you’re set up to use the plugin directly in your workflows.
Whether you are implementing a Single Sign-On authorization flow for your application using a no-code platform or building your app from the ground up, the steps that you need to take on a high level are the same. You can find more information in our SSO Quickstart Guide.
To configure SSO, you will need:
- An active SSO connection, which can be configured manually or by using the Admin Portal.
- A connection ID or organization ID associated with the user logging in. If WorkOS does not handle user management on your application’s behalf, it is necessary to keep track of the association between your users and their WorkOS connection or organization IDs in your database.
- Redirect URI, which is the URL to redirect the user to when they are authorized. This is provided by Bubble in the Plugins tab.
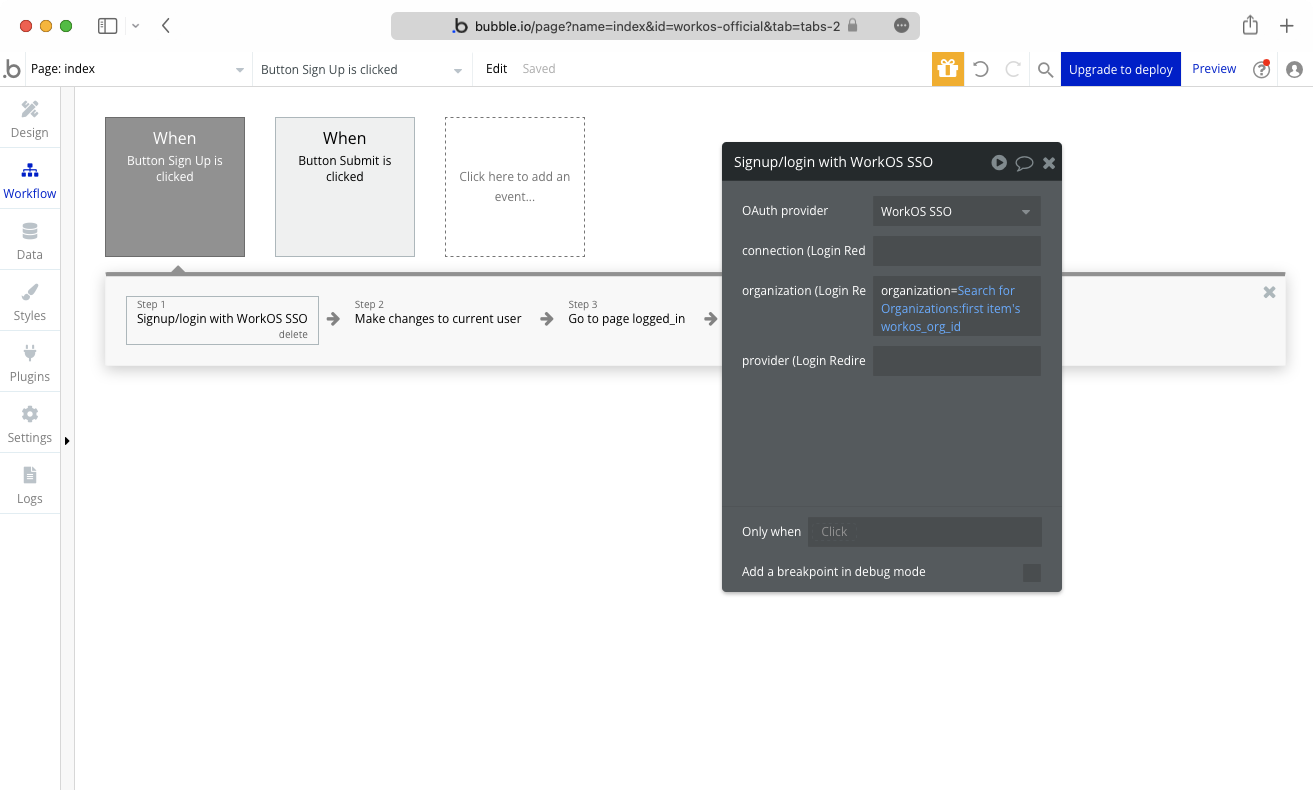
Navigate to the Workflow page in your application and add a new event. Select the action that will trigger the workflow to start. In this case, the workflow is triggered when the submit button is clicked.
Under the Account menu option, select Signup/login with a social network, then select WorkOS SSO from the OAuth provider dropdown menu. Enter either the connection ID, organization ID, or provider.
organization=<organization_id> format.
When a user launches this workflow, they will be prompted to log in through the associated WorkOS SSO connection.
Upon a successful login, if the user does not exist in the application database, a new user will be created and logged in as the current user. If the user already exists, that user will be logged in as the current user.
To start using Directory Sync, you will need to configure a new directory connection between your customer’s directory provider and WorkOS. This can be completed manually or by using the Admin Portal.
Once a directory connection is activated in WorkOS, you can configure webhooks to send events to your Bubble application using the WorkOS plugin through a backend workflow.
To enable backend workflows, navigate to the Settings page of your Bubble app under the API tab, and select Enable Workflow API and backend workflows. You are now able to configure backend workflows in the Workflow section.

To create a new workflow that subscribes to WorkOS webhooks, navigate to the Workflows section of your app in Bubble and select backend workflows from the page selection dropdown.
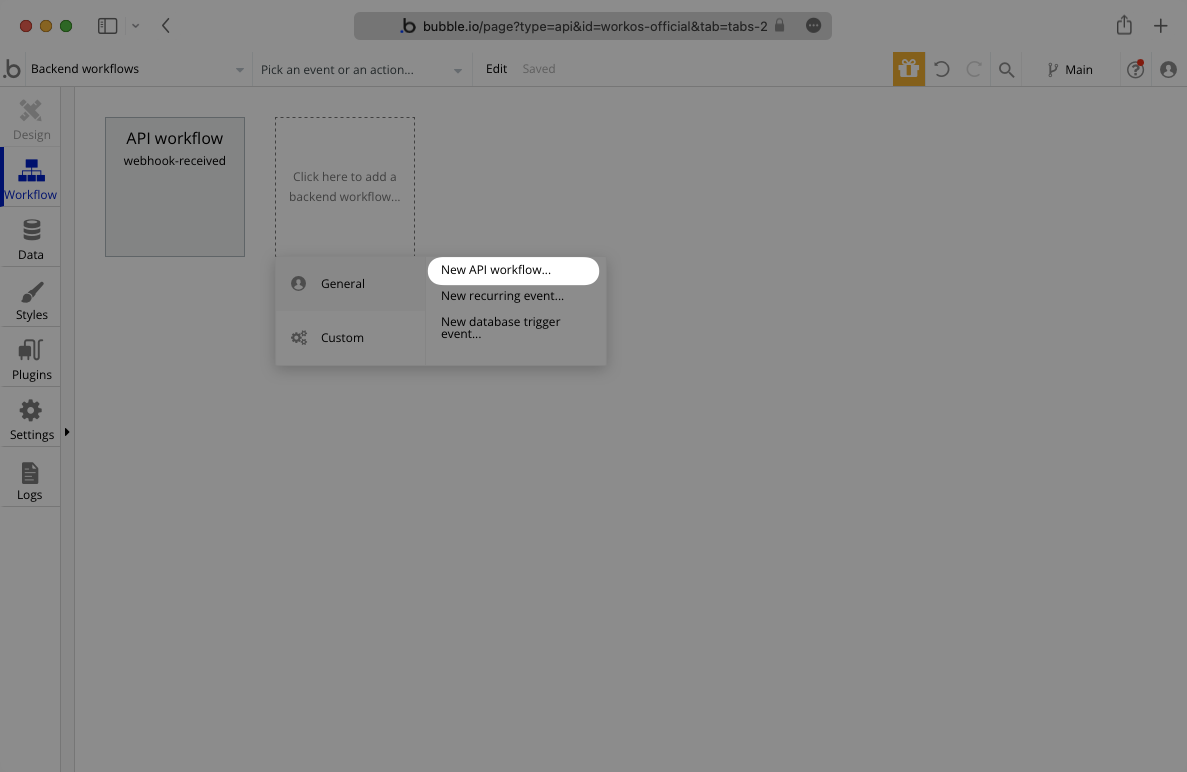
Create a new API Workflow. In the detected data option ensure that include headers is selected before clicking Detect data.
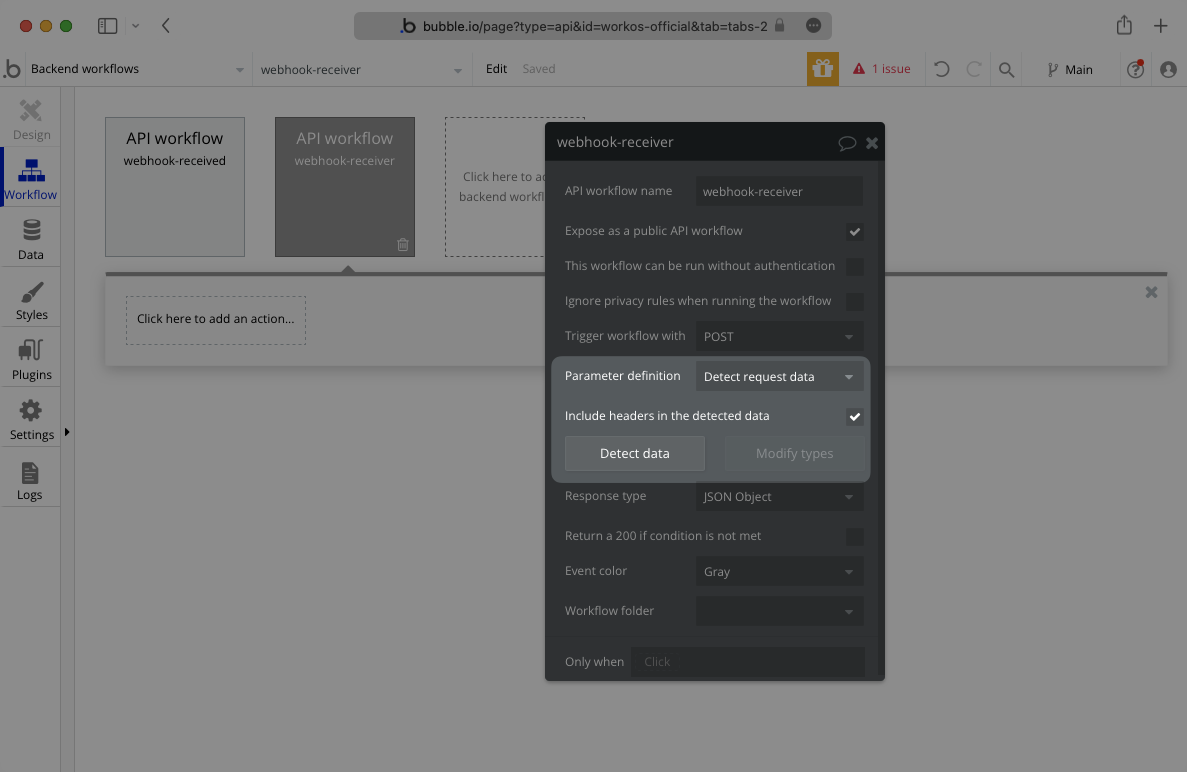
A pop-up window will show a test URL to validate the webhook body.
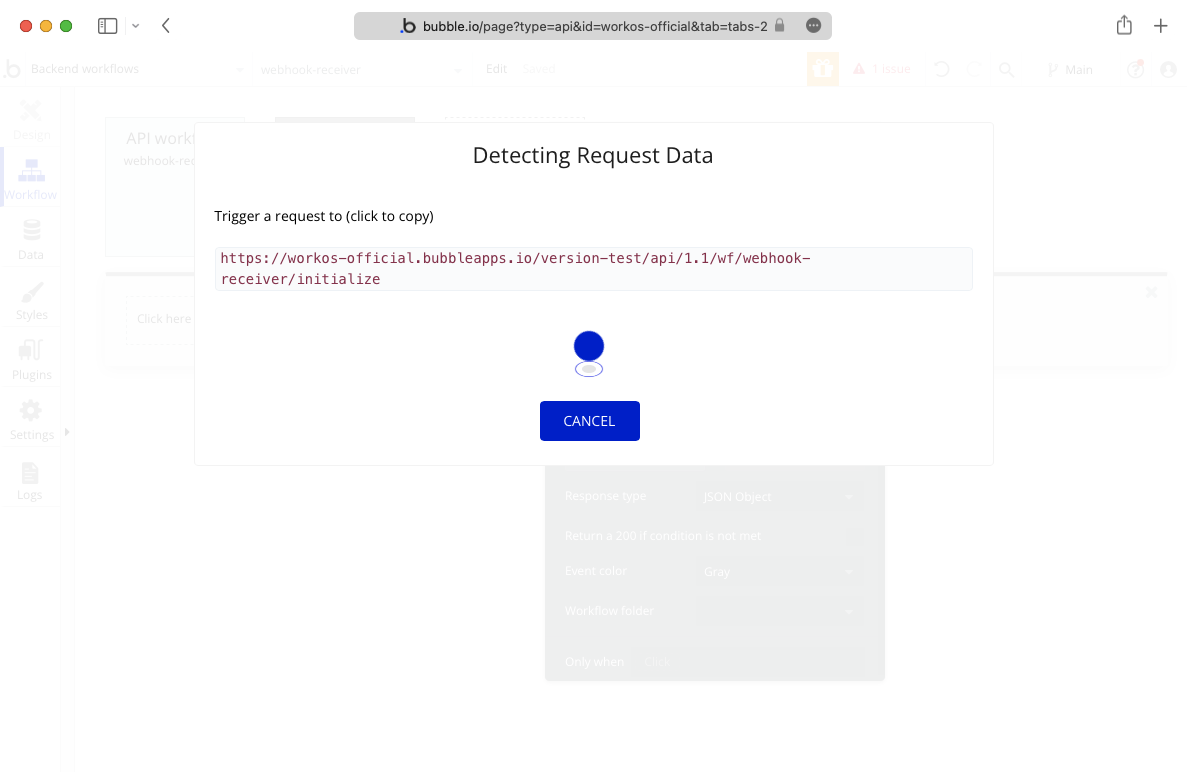
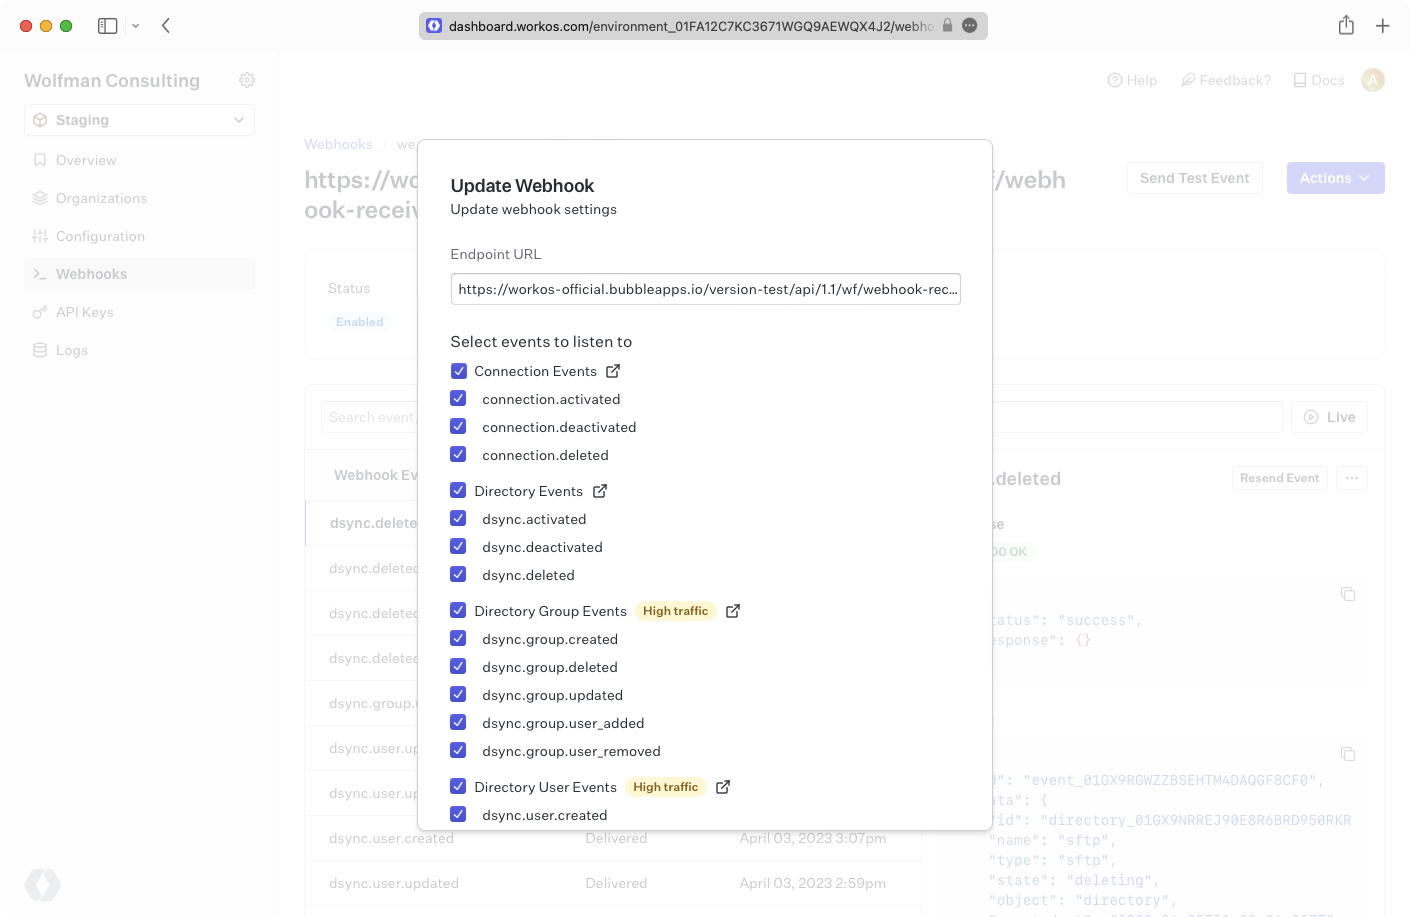
Navigate to the Webhooks tab in your WorkOS dashboard and enter this test URL as your webhook endpoint.
Then, click the Send Test Event button to send a test event.
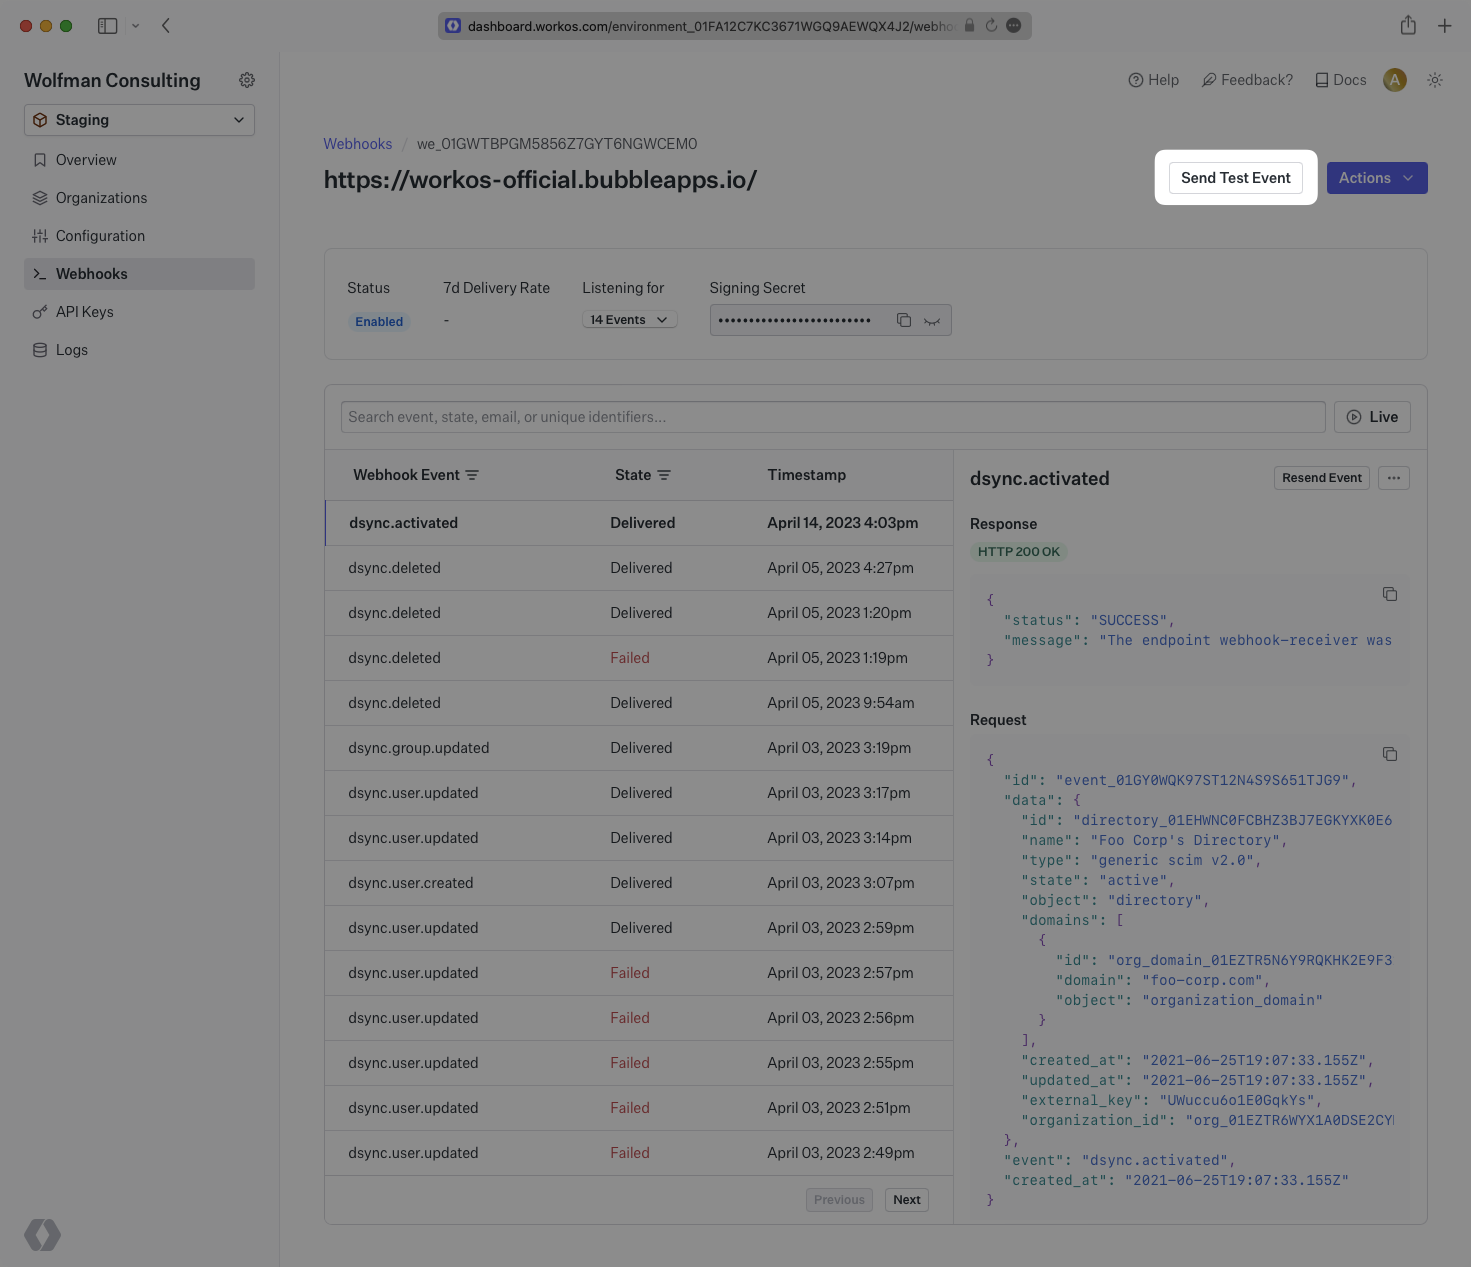
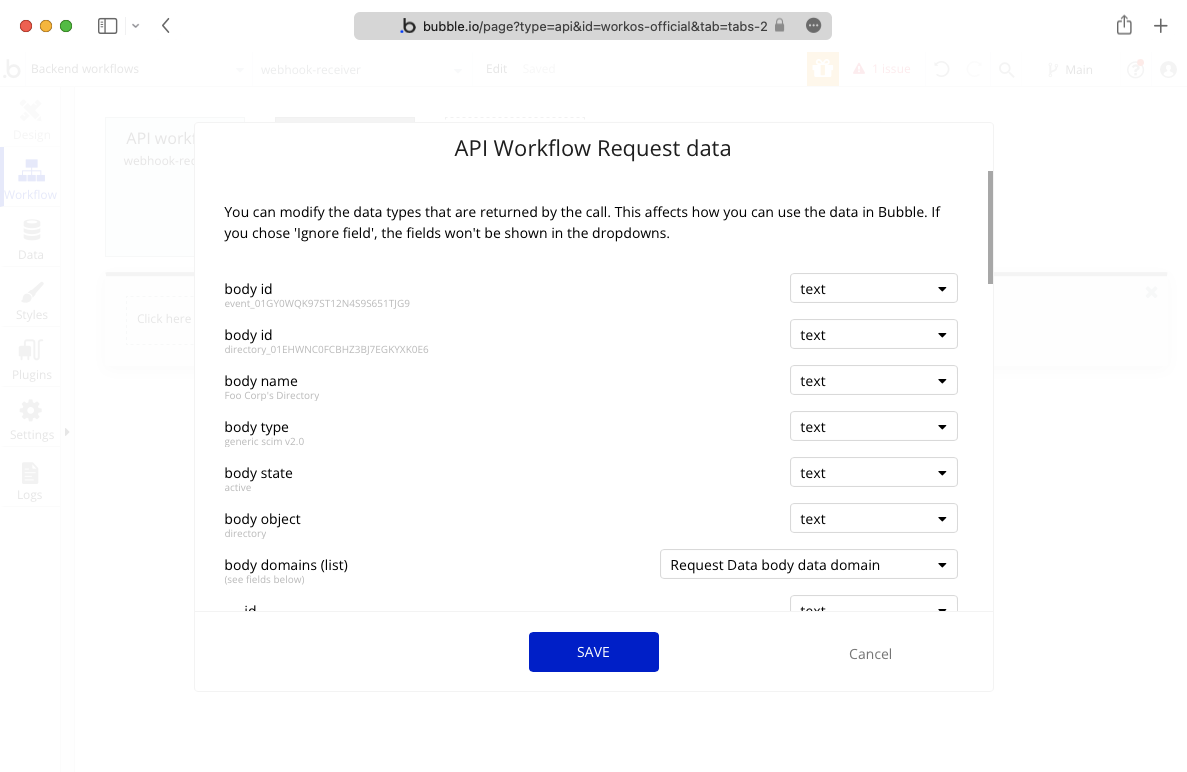
Bubble will recognize the event and validate the endpoint. Click save to complete the subscription to WorkOS webhook events for this workflow.
After the new workflow is set up to listen for new events, it is recommended that you use the webhook validation action to verify that the webhooks being received are from WorkOS.
This action verifies the request is valid by using the webhook body, signature, and secret that you provide from your WorkOS dashboard. To properly define the webhook parameter, you should use the raw body text of the request data. Similarly, the webhook_signature should be defined using the workos-signature in the request data headers.
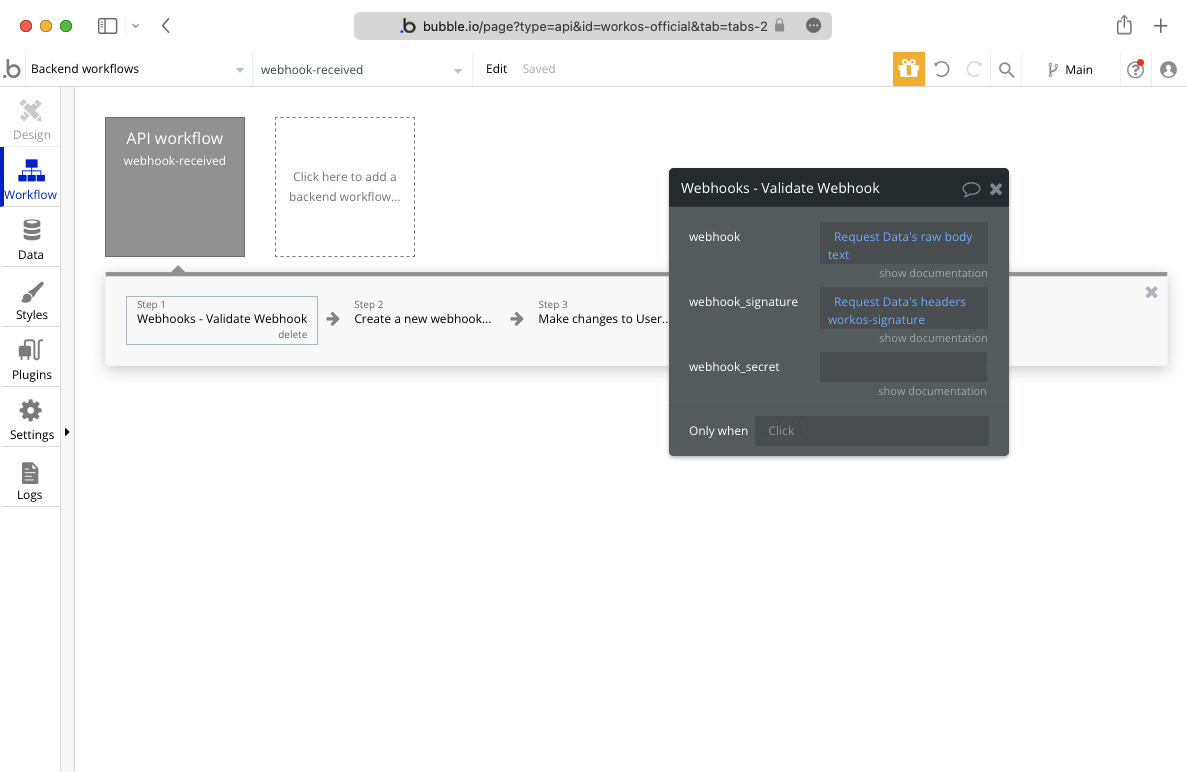
After the event is validated, you can use the data from the body to log the webhook and make changes to users.
The plugin also includes endpoints, documented under the directory sync section of the API Reference, that can be used to reconcile users.
Periodically calling the List Directory Users endpoint and verifying that the returned date matches what you have stored in your user table helps ensure your application has up-to-date information about your users, so you can use it with confidence.
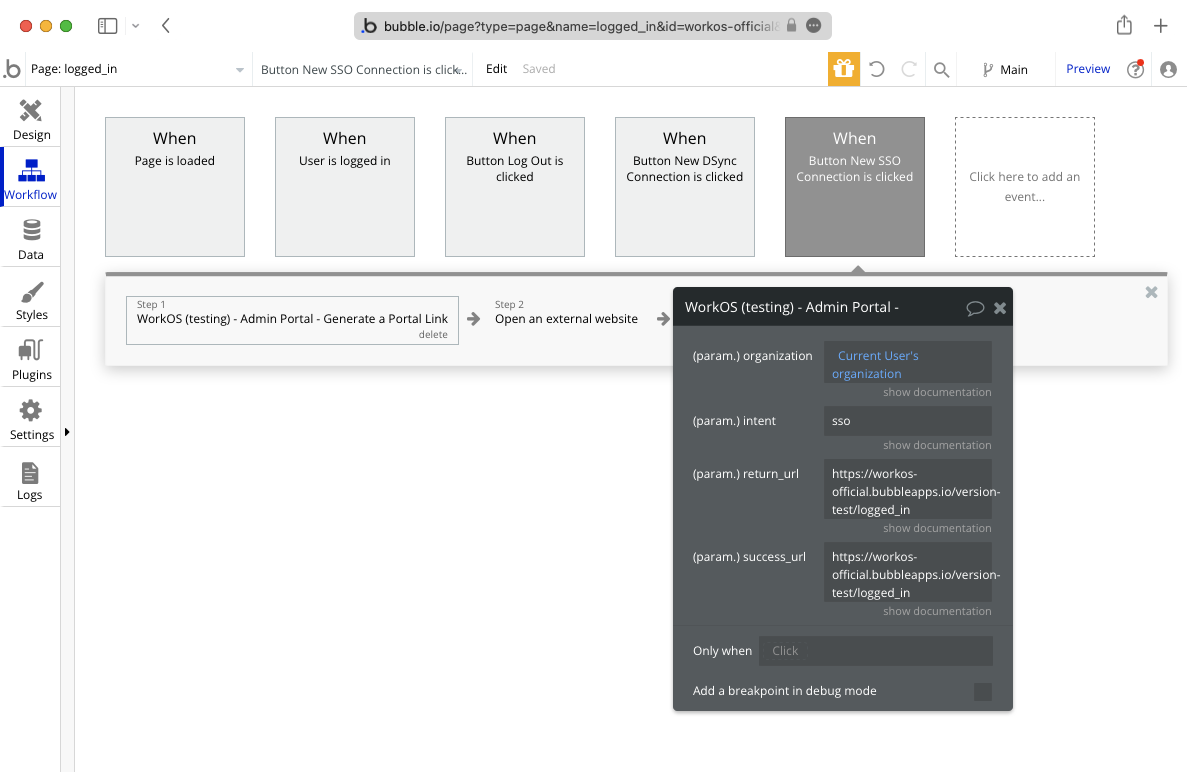
The Admin Portal provides an out-of-the-box UI for IT contacts to configure SSO and Directory Sync connections.
The WorkOS API plugin provides an API call that launches the Admin Portal if you would like to display it on the settings page of your application. You can also copy and paste these links directly from the WorkOS dashboard in the connection settings.
Upon completing the setup flow with the Admin Portal, IT contacts will be able to test the new connection and validate that it has been configured correctly.