Clever OIDC
Learn how to configure a connection to Clever via OIDC.
Each SSO identity provider requires specific information to create and configure a new SSO connection. Often, the information required to create an SSO connection will differ by identity provider.
To create a Clever OIDC SSO connection, you’ll need three pieces of information: a redirect URI, client ID, and client secret.
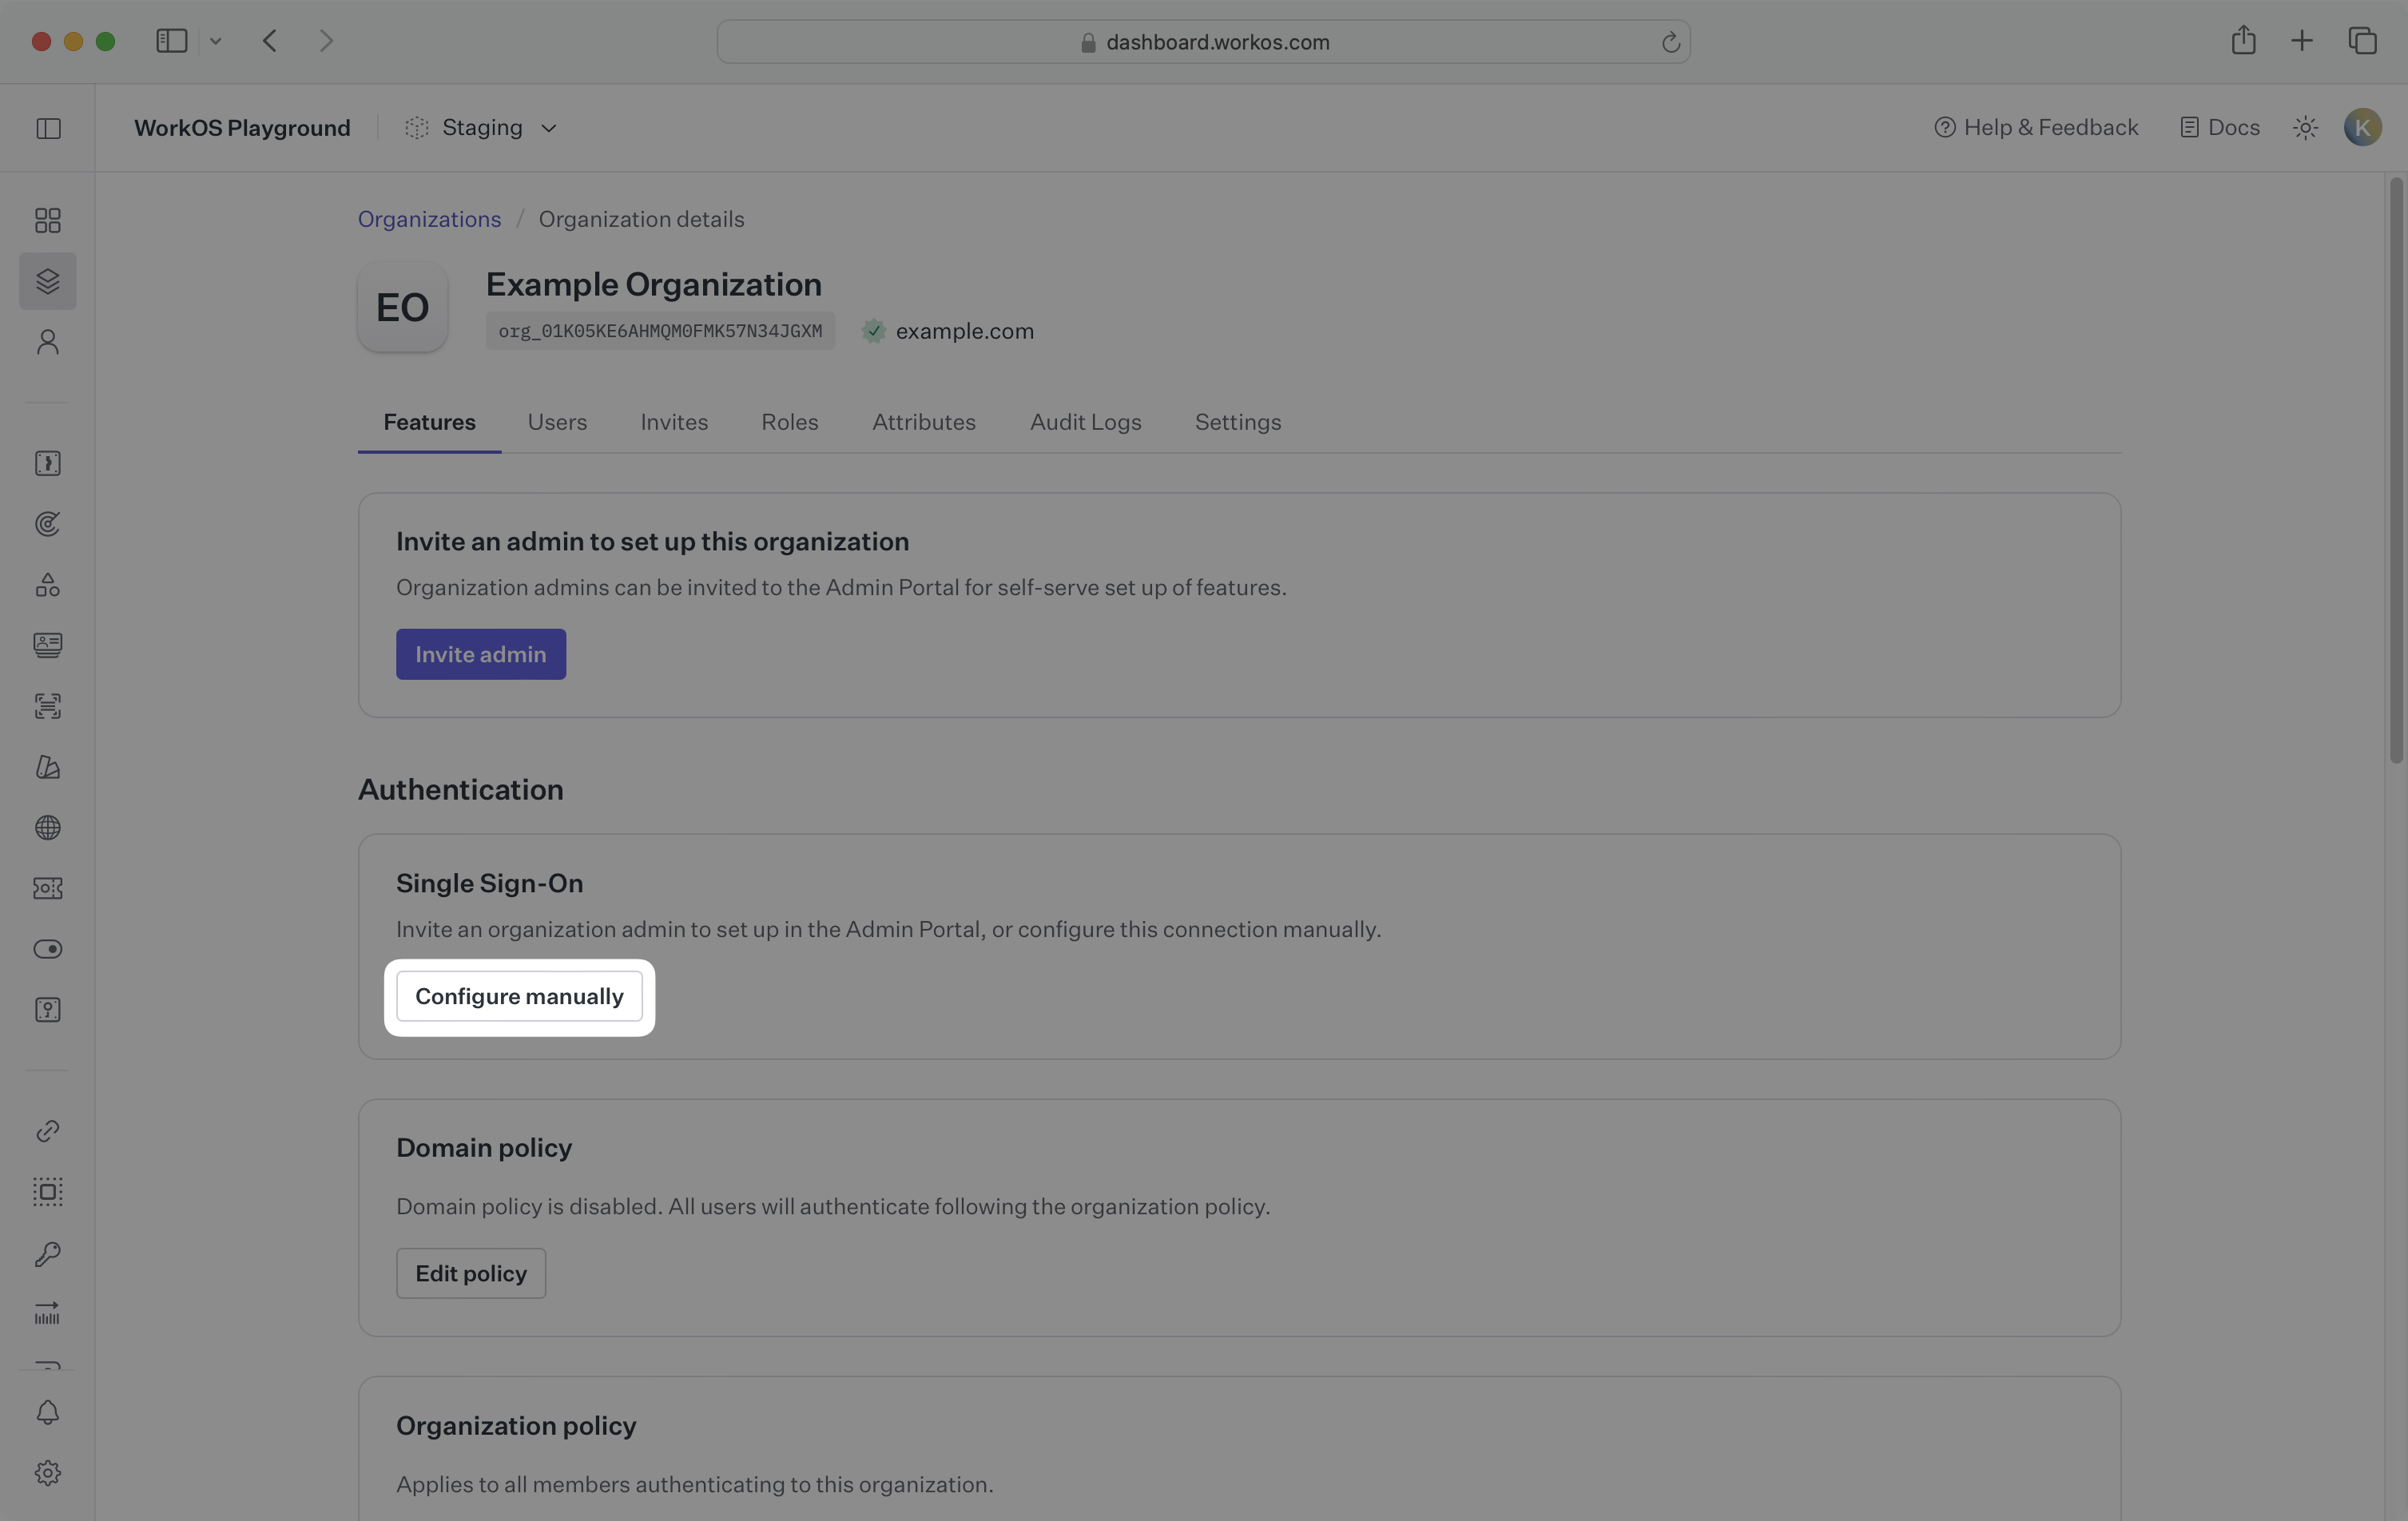
Start by logging into your WorkOS dashboard and navigate to the Organizations page from the left-hand navigation bar.
Select the organization you’d like to configure a Clever OIDC SSO connection for, and select Configure manually under Single Sign-On.
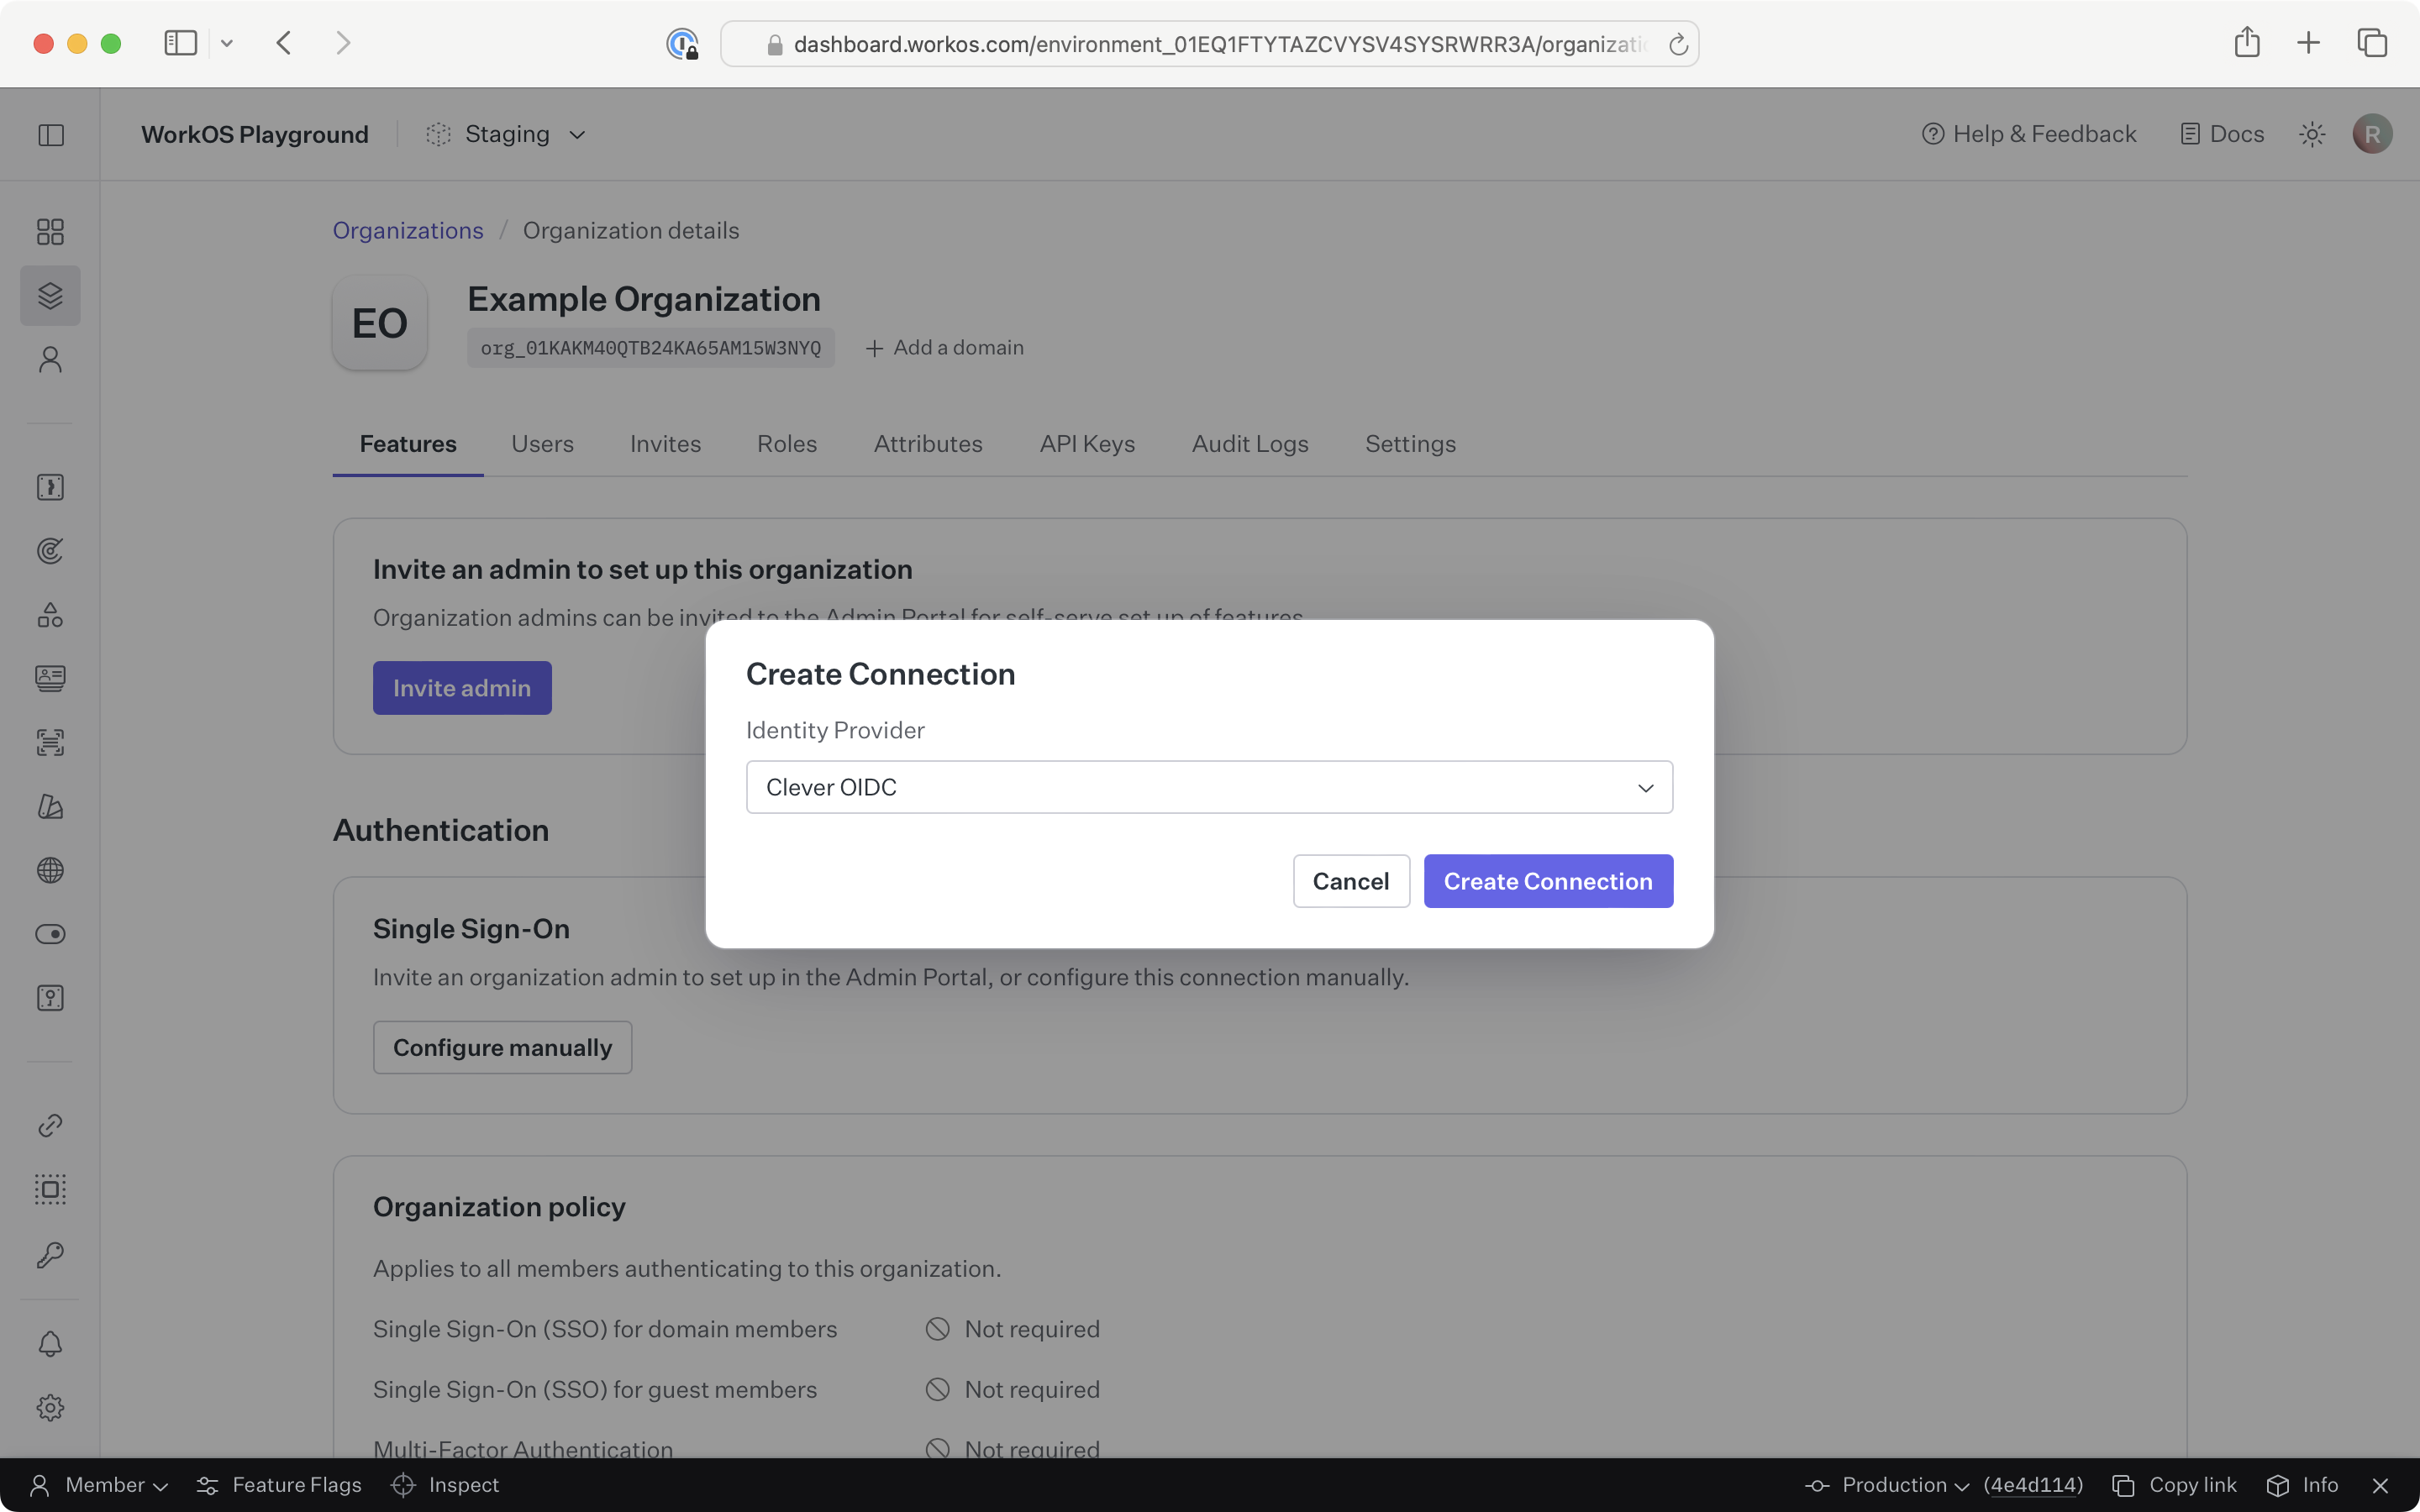
Select Clever OIDC from the identity provider dropdown. Click Create Connection.
WorkOS provides the Redirect URI, which can be found in the Service Provider Details section on the SSO connection page in the WorkOS Dashboard.
- Redirect URI: The endpoint where identity providers send authentication responses after successful login

The Redirect URI is the location an identity provider redirects its authentication response to. In Clever’s case, it needs to be added to the OAuth settings in the Clever admin as outlined in step 1.
You will need to obtain two pieces of information from the organization:
- Client ID: Application identifier from the OIDC provider
- Client secret: Authentication secret for the application
Typically, this information comes from the organization’s IT team when they set up your application’s OIDC configuration in their Clever admin dashboard. However, if that’s not the case during your setup, the next steps will show you how to obtain it.
Sign in to Clever.
In the left navigation bar, select the Settings tab. In the horizontal menu, select the Integration tab.
Locate the OAuth Settings section and click Edit.
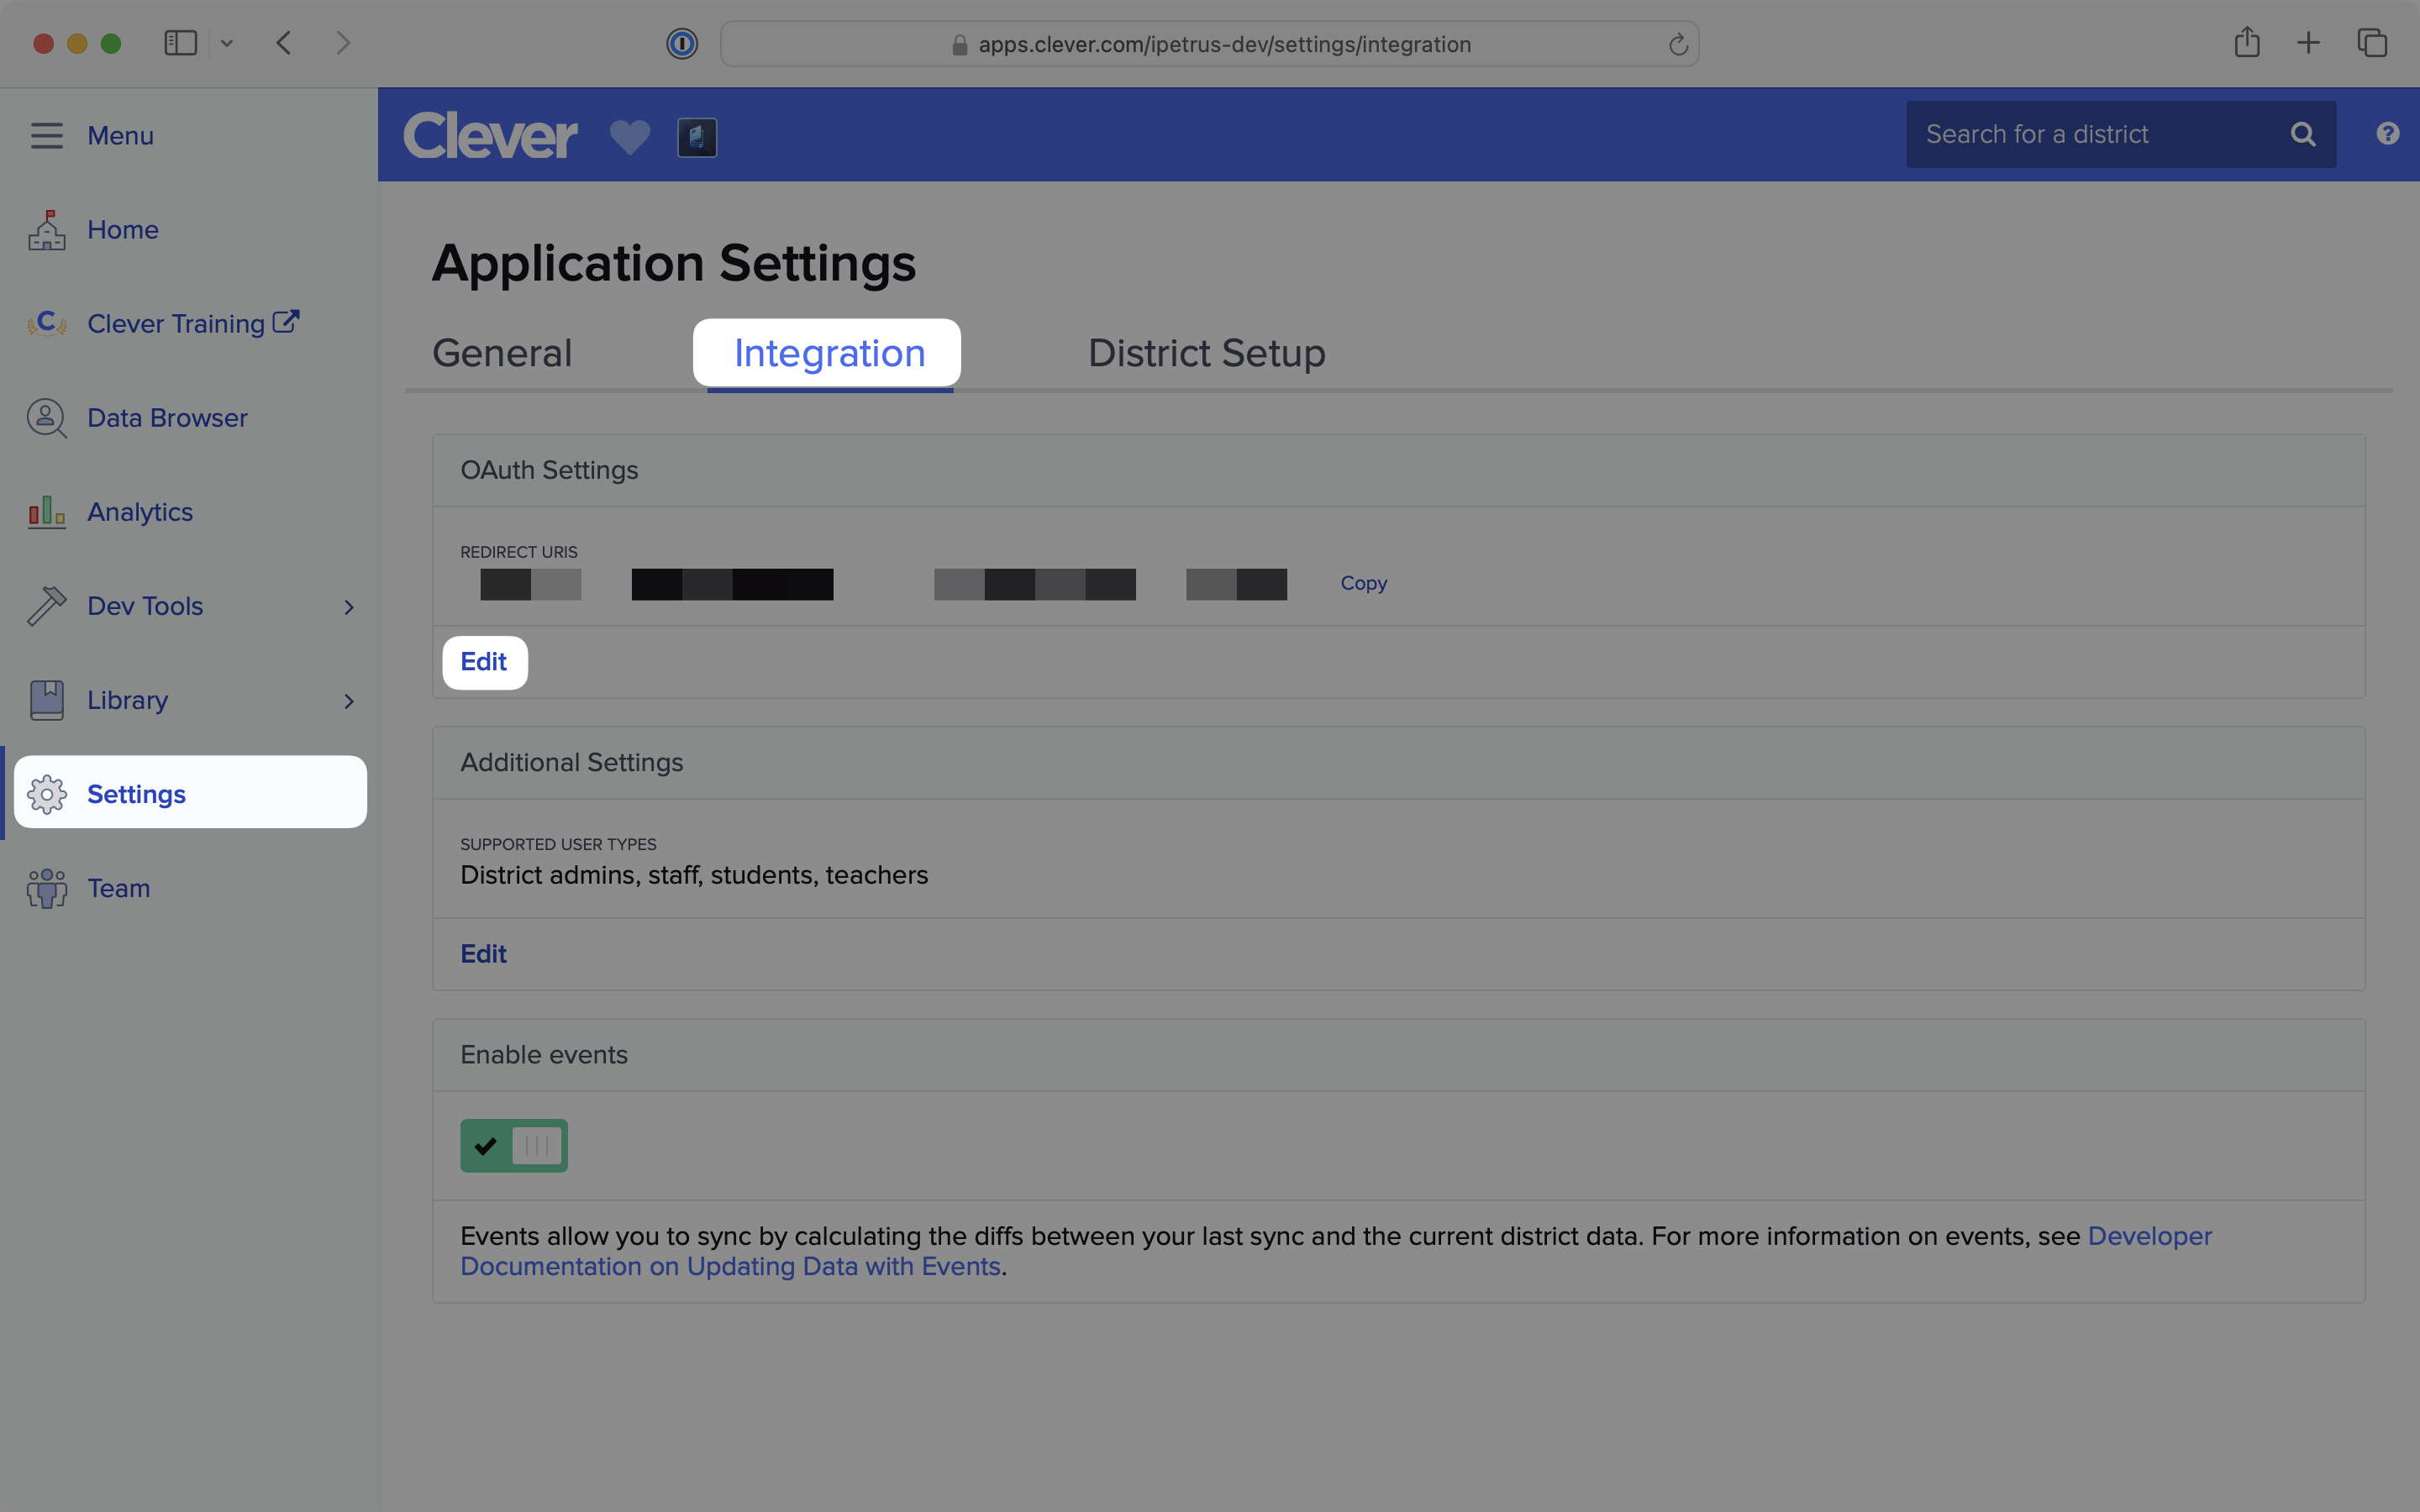
The Update OAuth Settings dialog will open. Copy the Redirect URI from the SSO connection page in the WorkOS Dashboard into the REDIRECT URIS field. Click Save.
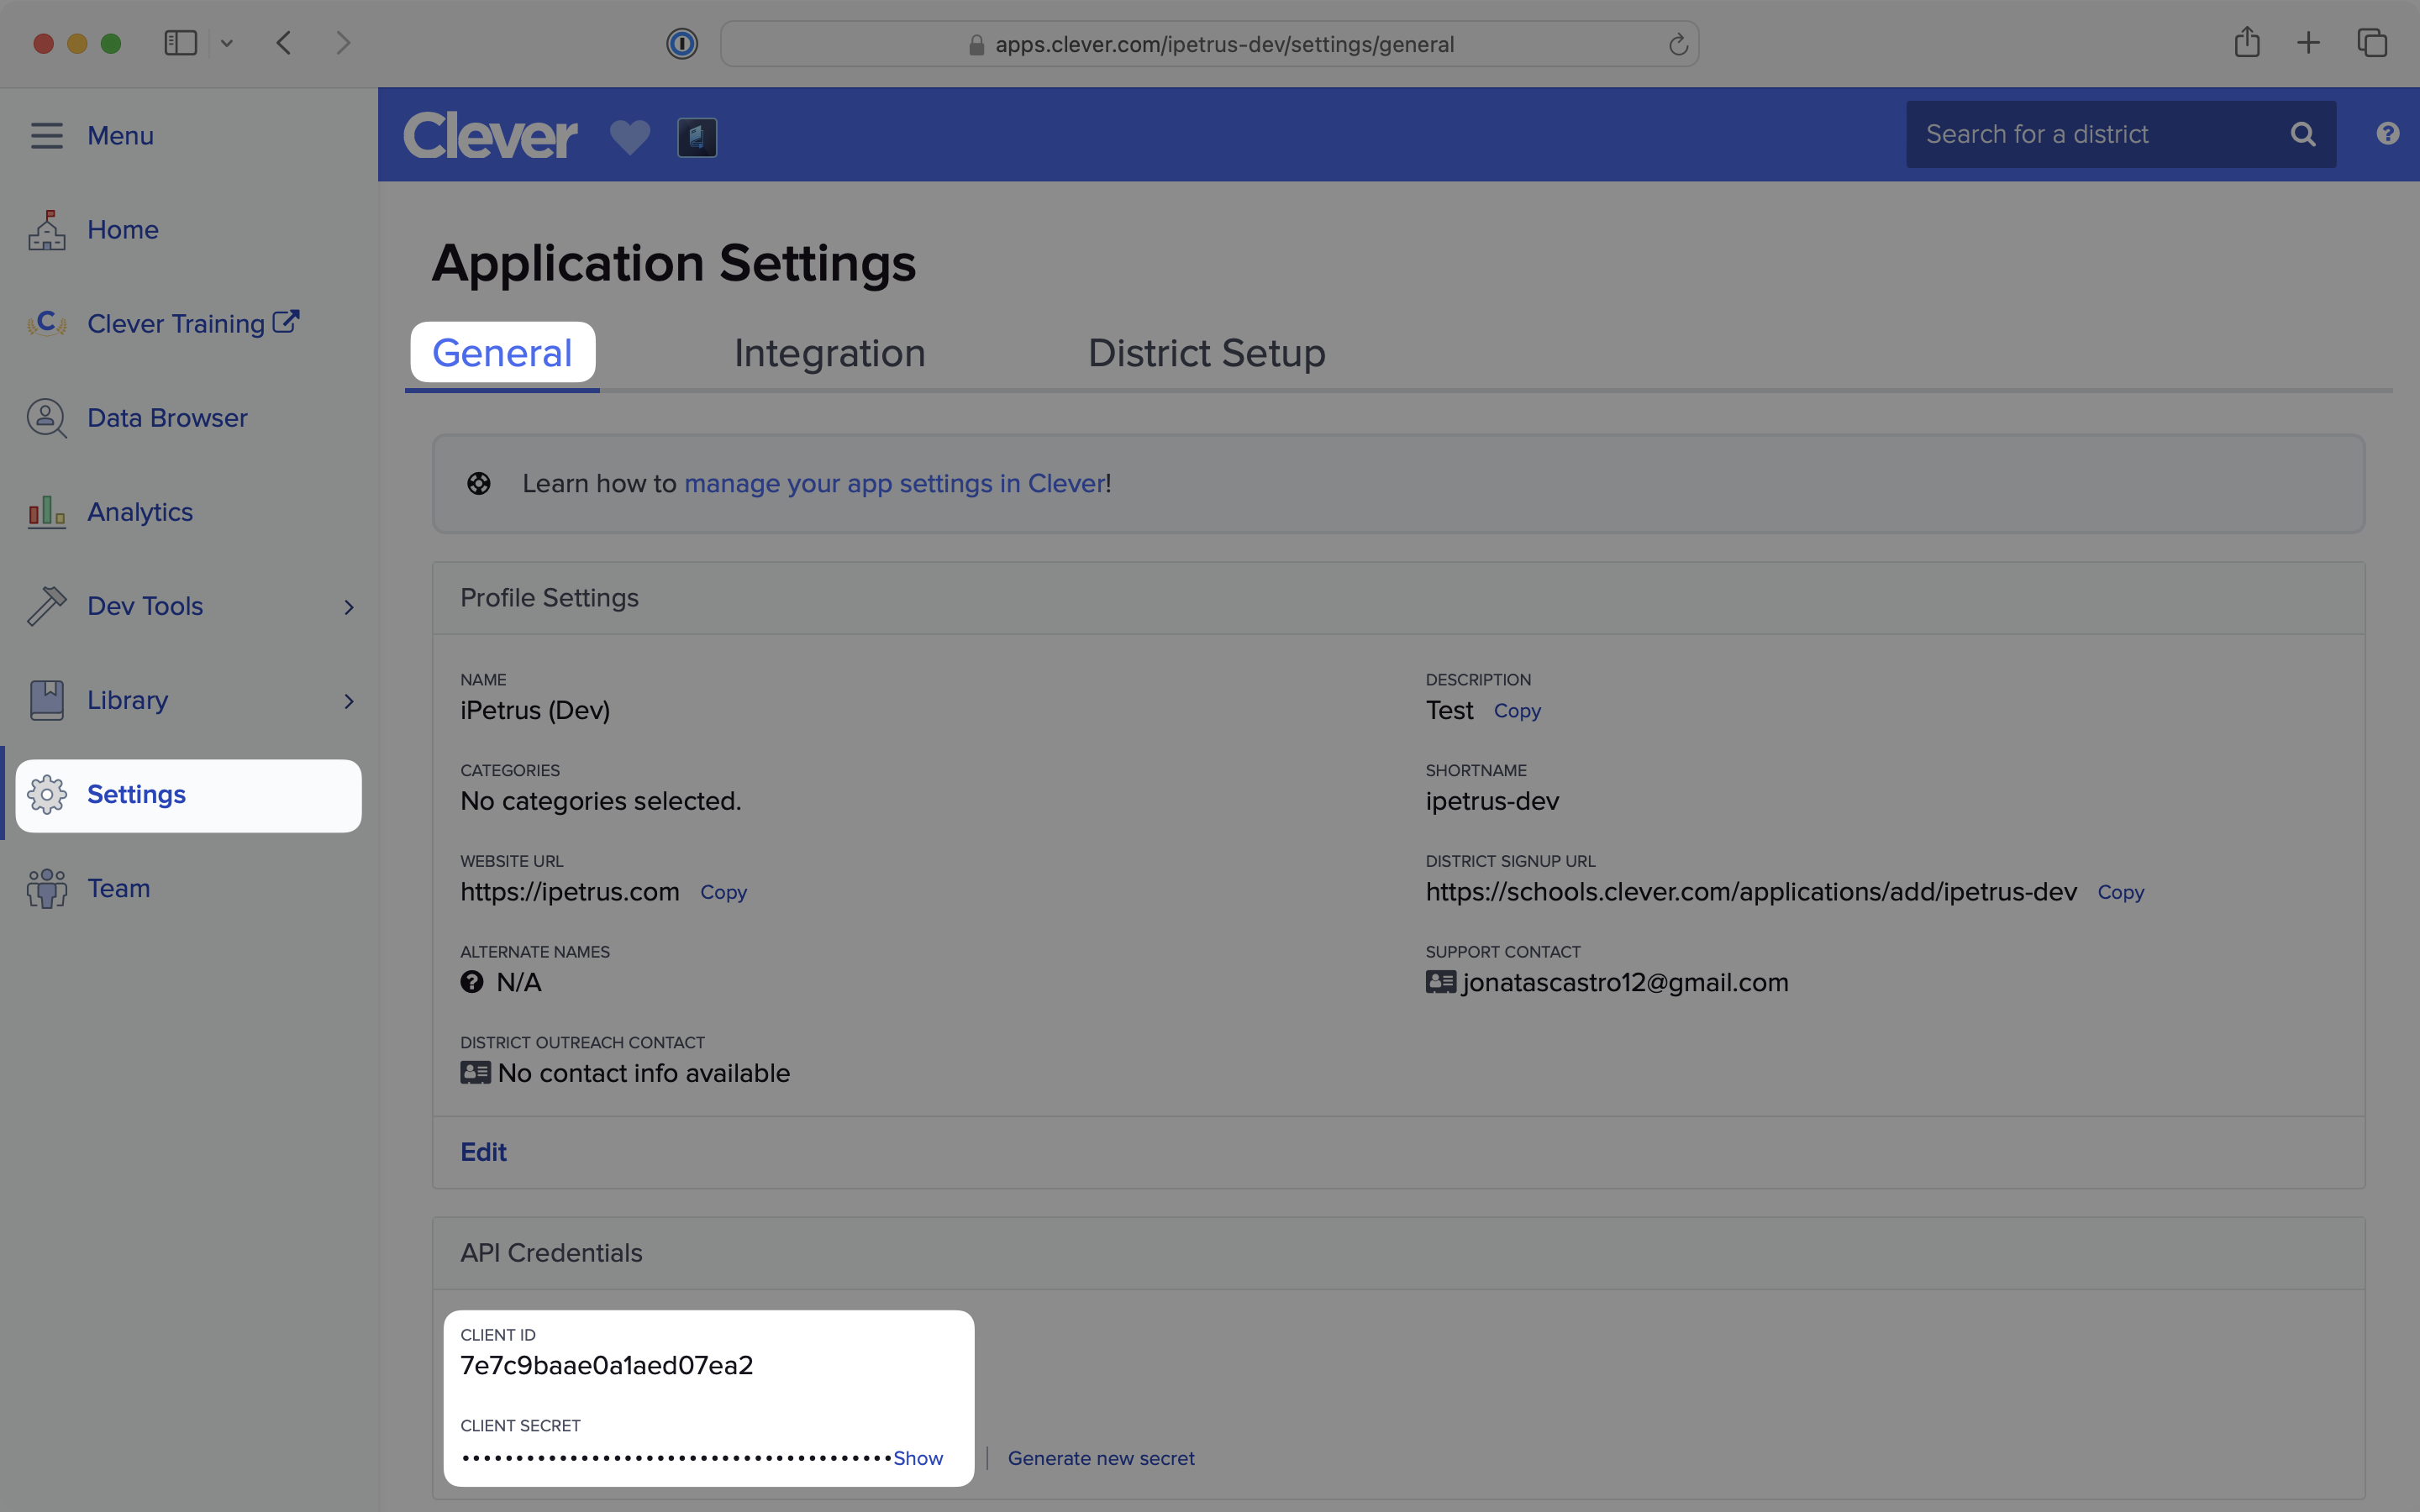
While on the Settings tab in Clever, select the General tab in the horizontal menu.
After creating an application, a client ID and client secret are provisioned. Locate the CLIENT ID and CLIENT SECRET fields and copy the values.
Back in the WorkOS Dashboard on the SSO connection page, enter the client ID and client secret you obtained from Clever into the respective fields in the Settings section.
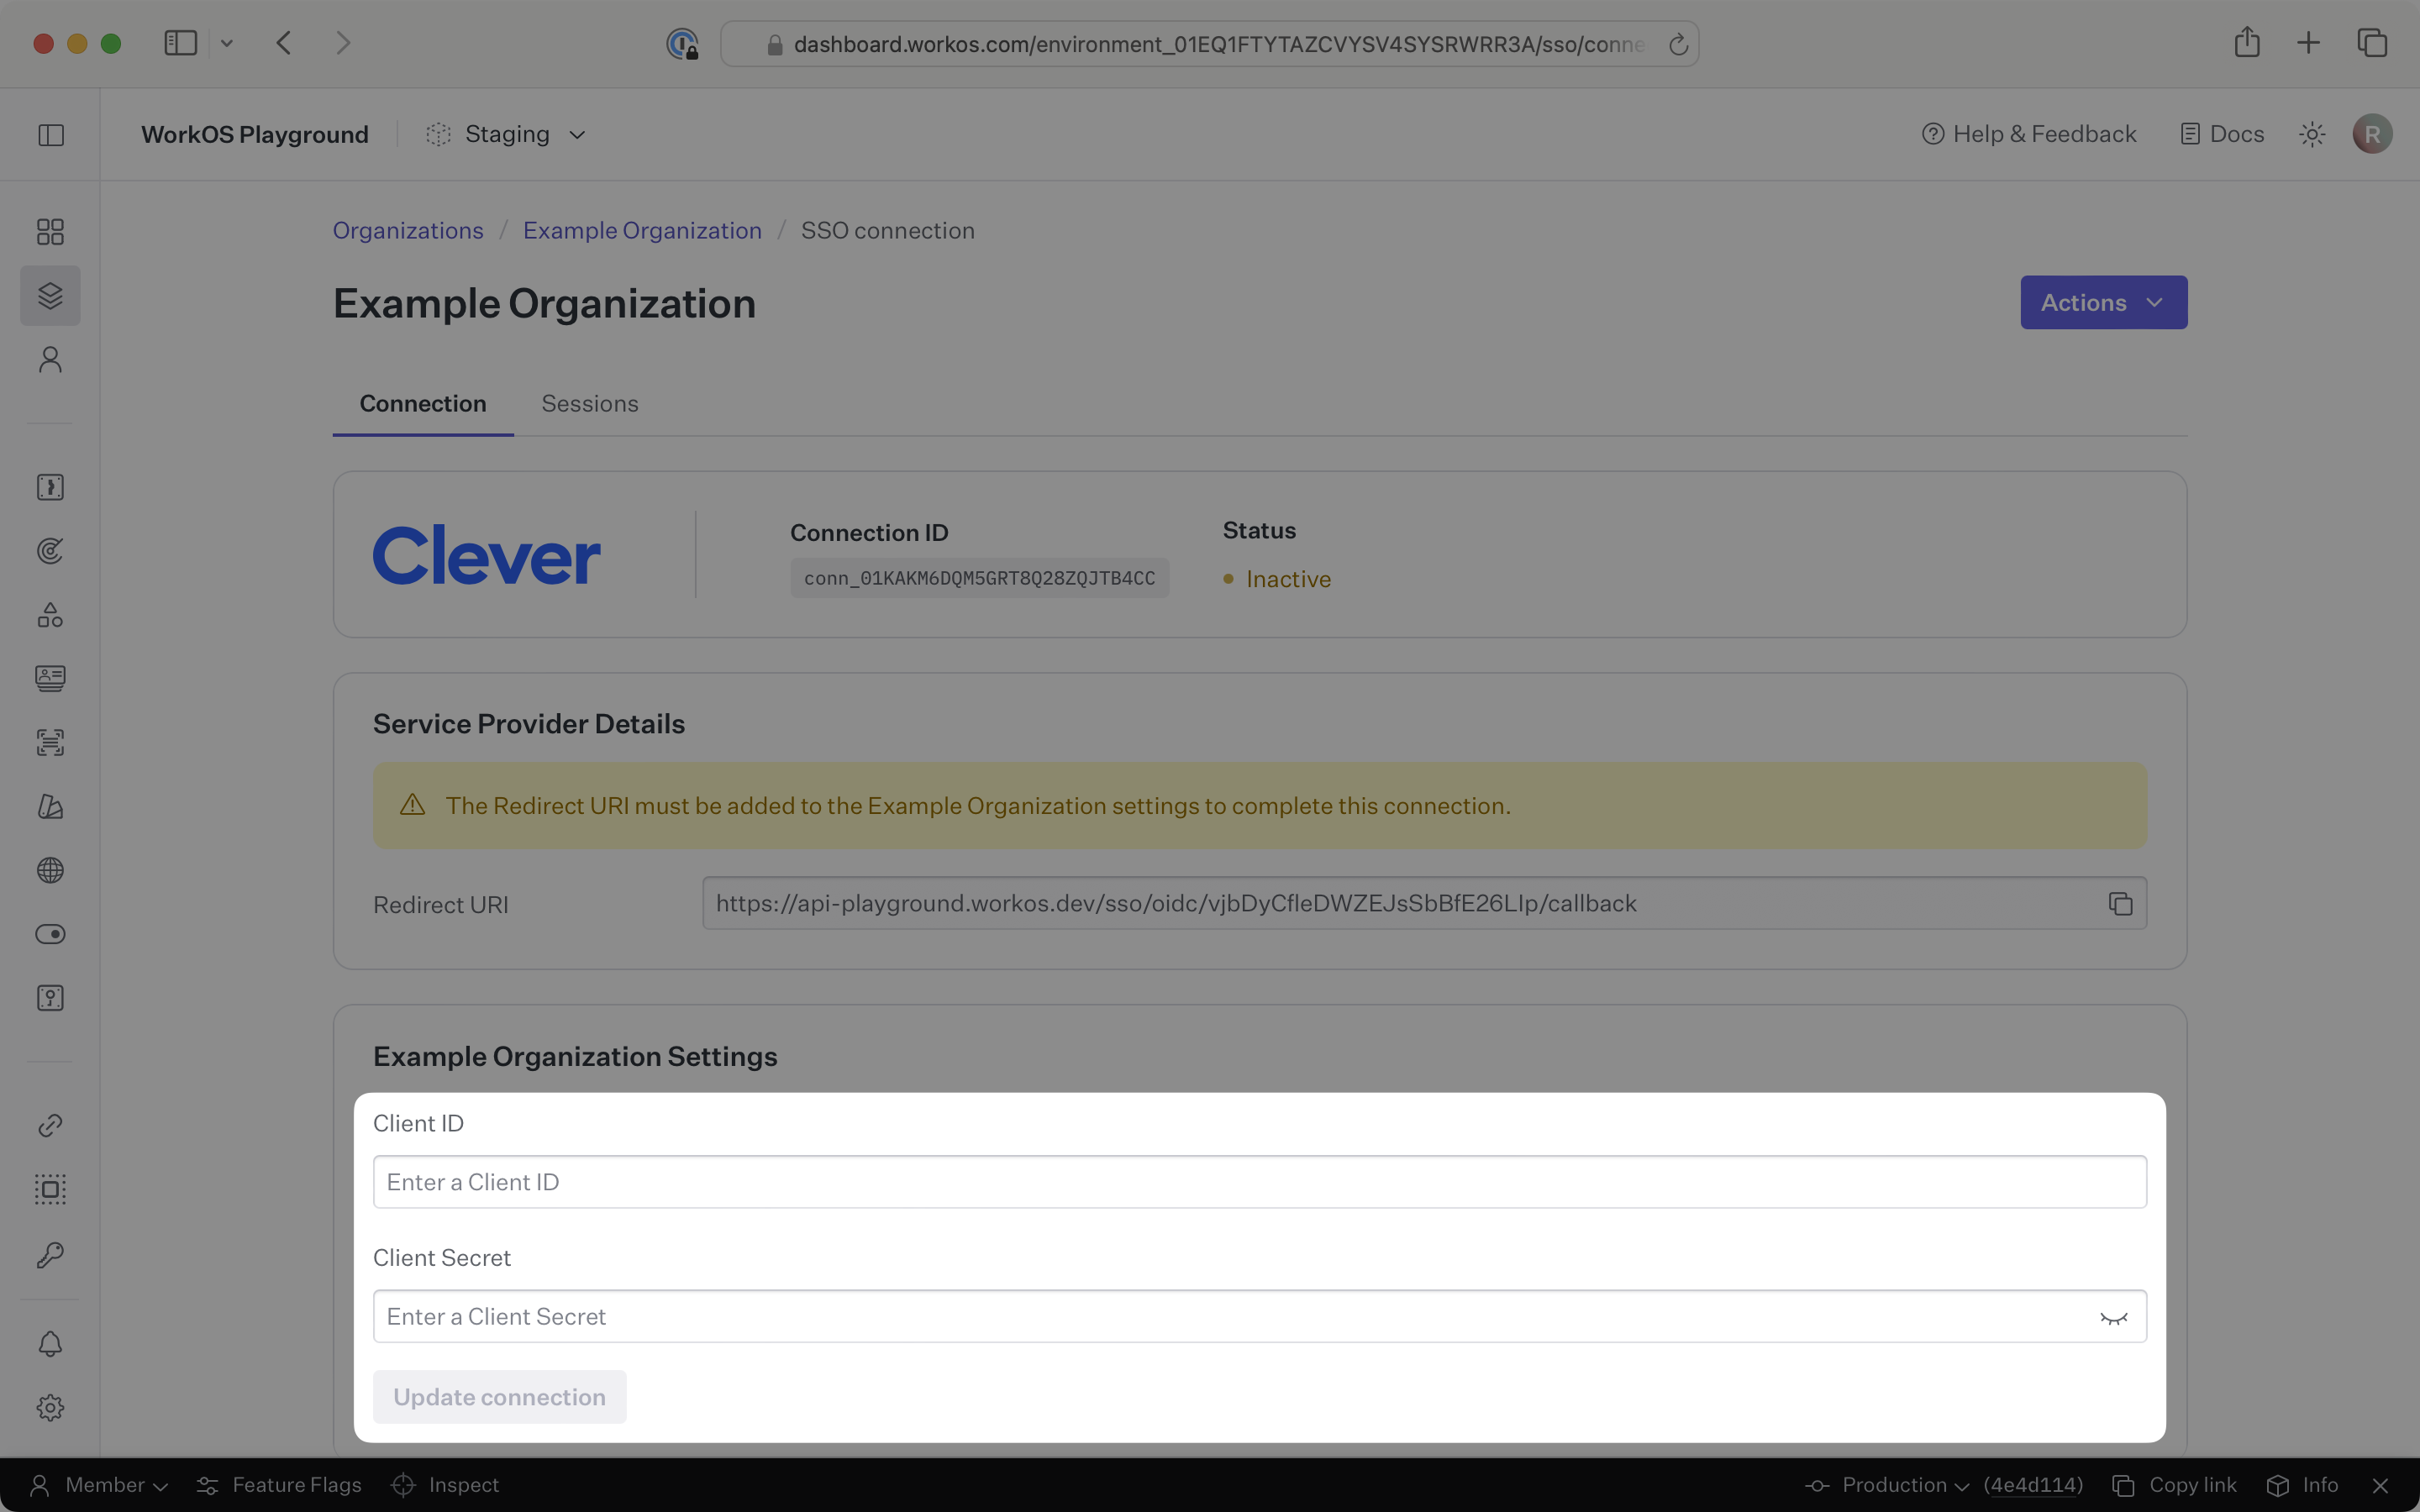
Click Update connection to save.
Test signing in to verify that the single sign-on connection was configured correctly.
From the SSO connection page in the WorkOS Dashboard, click Test SSO to initiate a test authentication flow.
Your Clever OIDC connection is now configured and ready to use. Users assigned to the application in Clever will be able to authenticate through WorkOS using their Clever credentials.
To start using this connection in your application, refer to the SSO guide for implementation details.