Entra ID OIDC (formerly Azure AD)
Learn how to configure a connection to Entra ID via OIDC.
Each SSO identity provider requires specific information to create and configure a new SSO connection. Often, the information required to create an SSO connection will differ by identity provider.
To create an Entra ID OIDC SSO connection, you’ll need four pieces of information: a redirect URI, application (client) ID, client secret and discovery endpoint.
Start by logging in to your WorkOS dashboard and navigate to the Organizations page from the left-hand navigation bar.
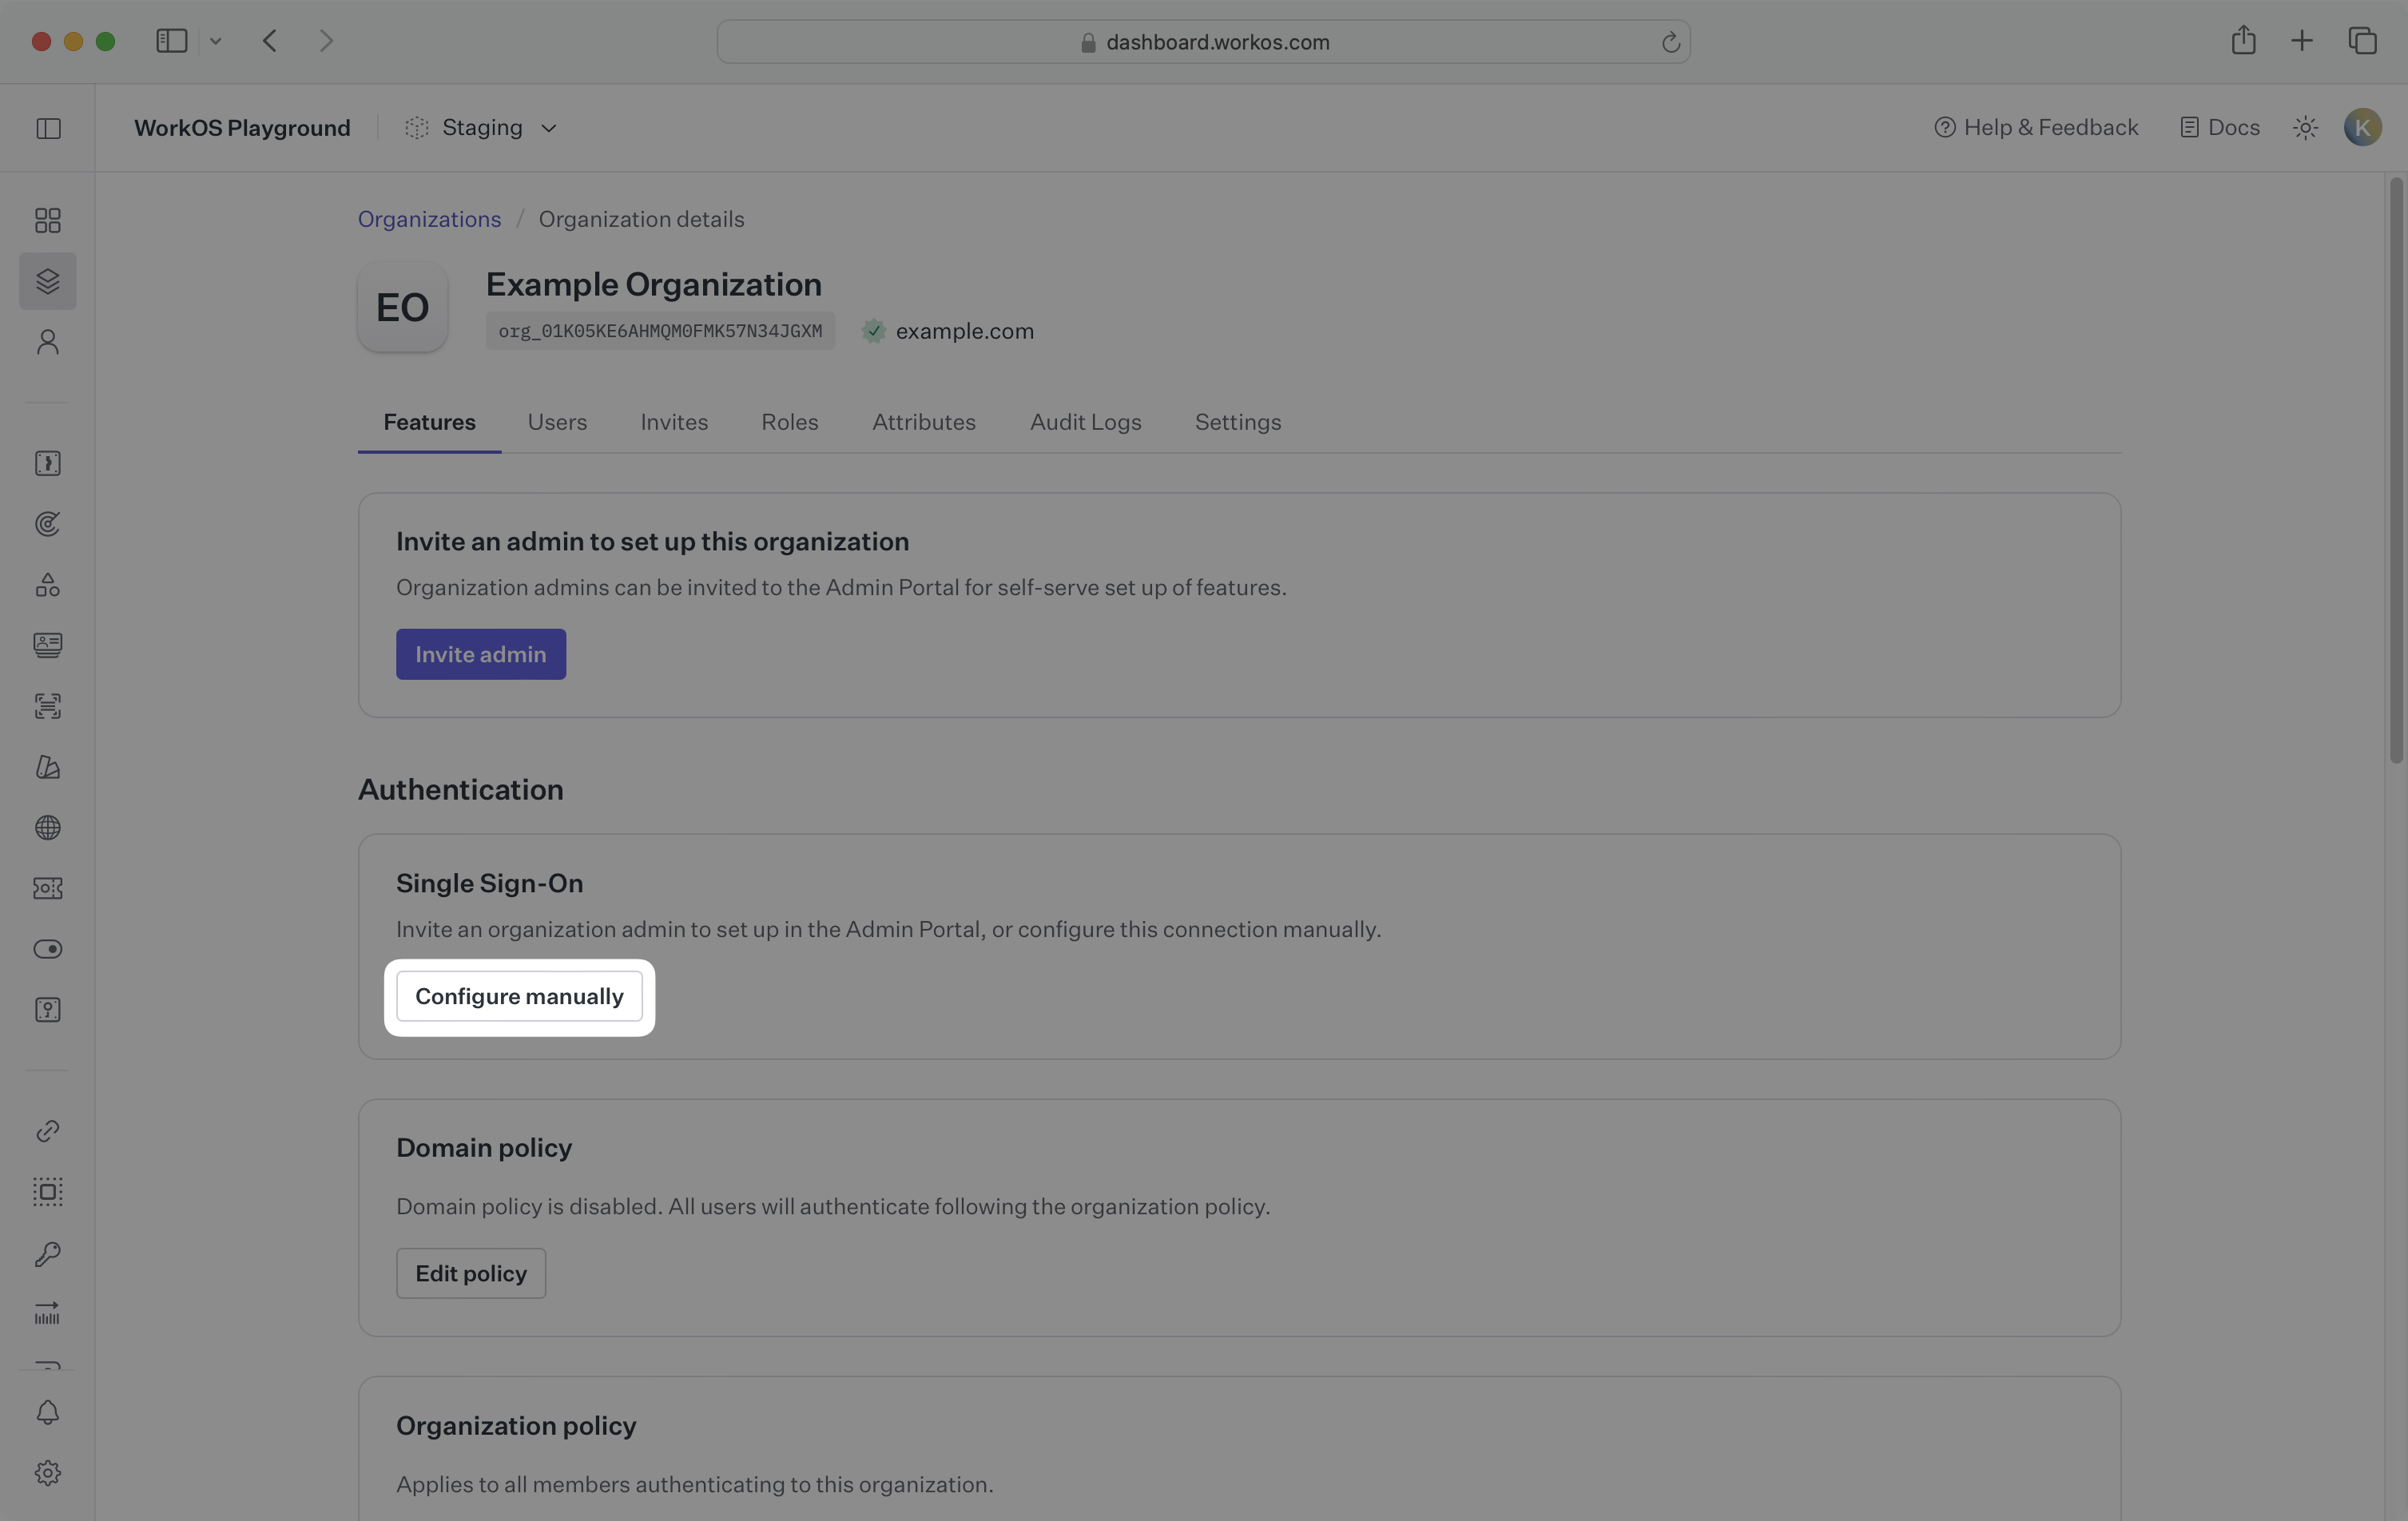
Select the organization you’d like to configure an Entra ID OIDC SSO connection for, and select Configure manually under Single Sign-On.
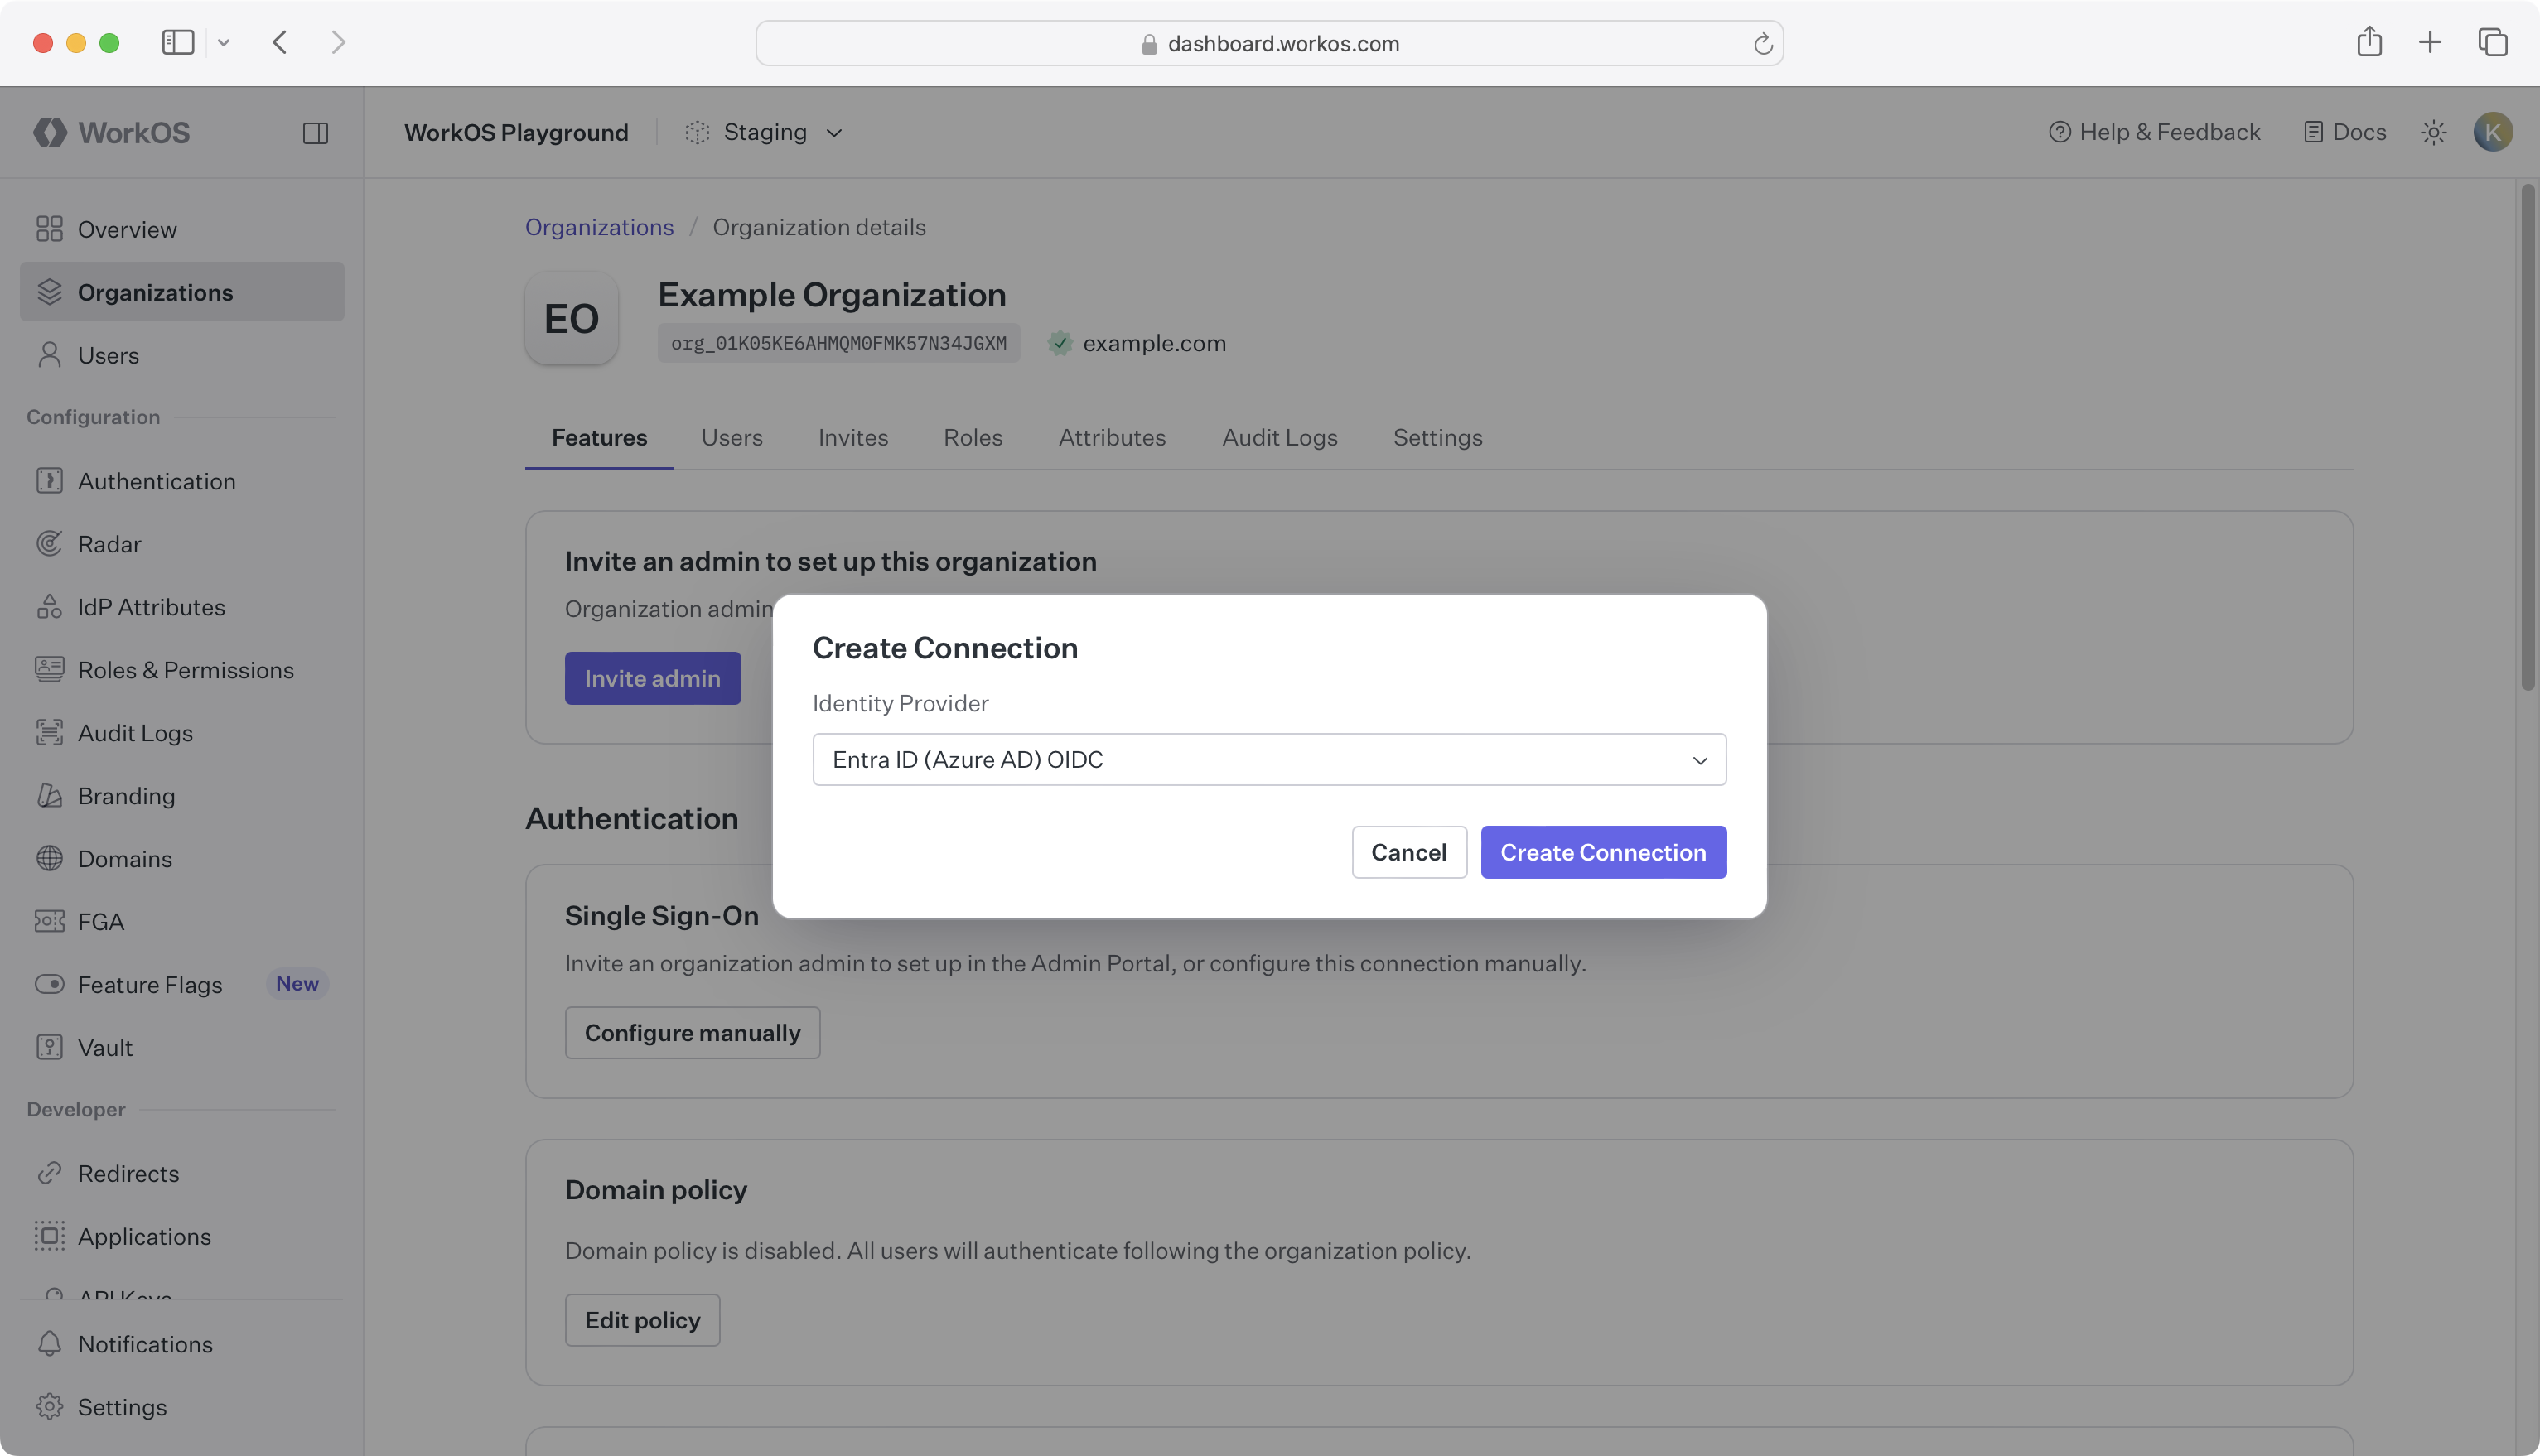
Select Entra ID (Azure AD) OIDC from the identity provider dropdown, enter a descriptive name for the connection, click Create Connection.
WorkOS provides the Redirect URI, which can be found in the Service Provider Details section on the SSO connection page in the WorkOS Dashboard.
- Redirect URI: The endpoint where identity providers send authentication responses after successful login
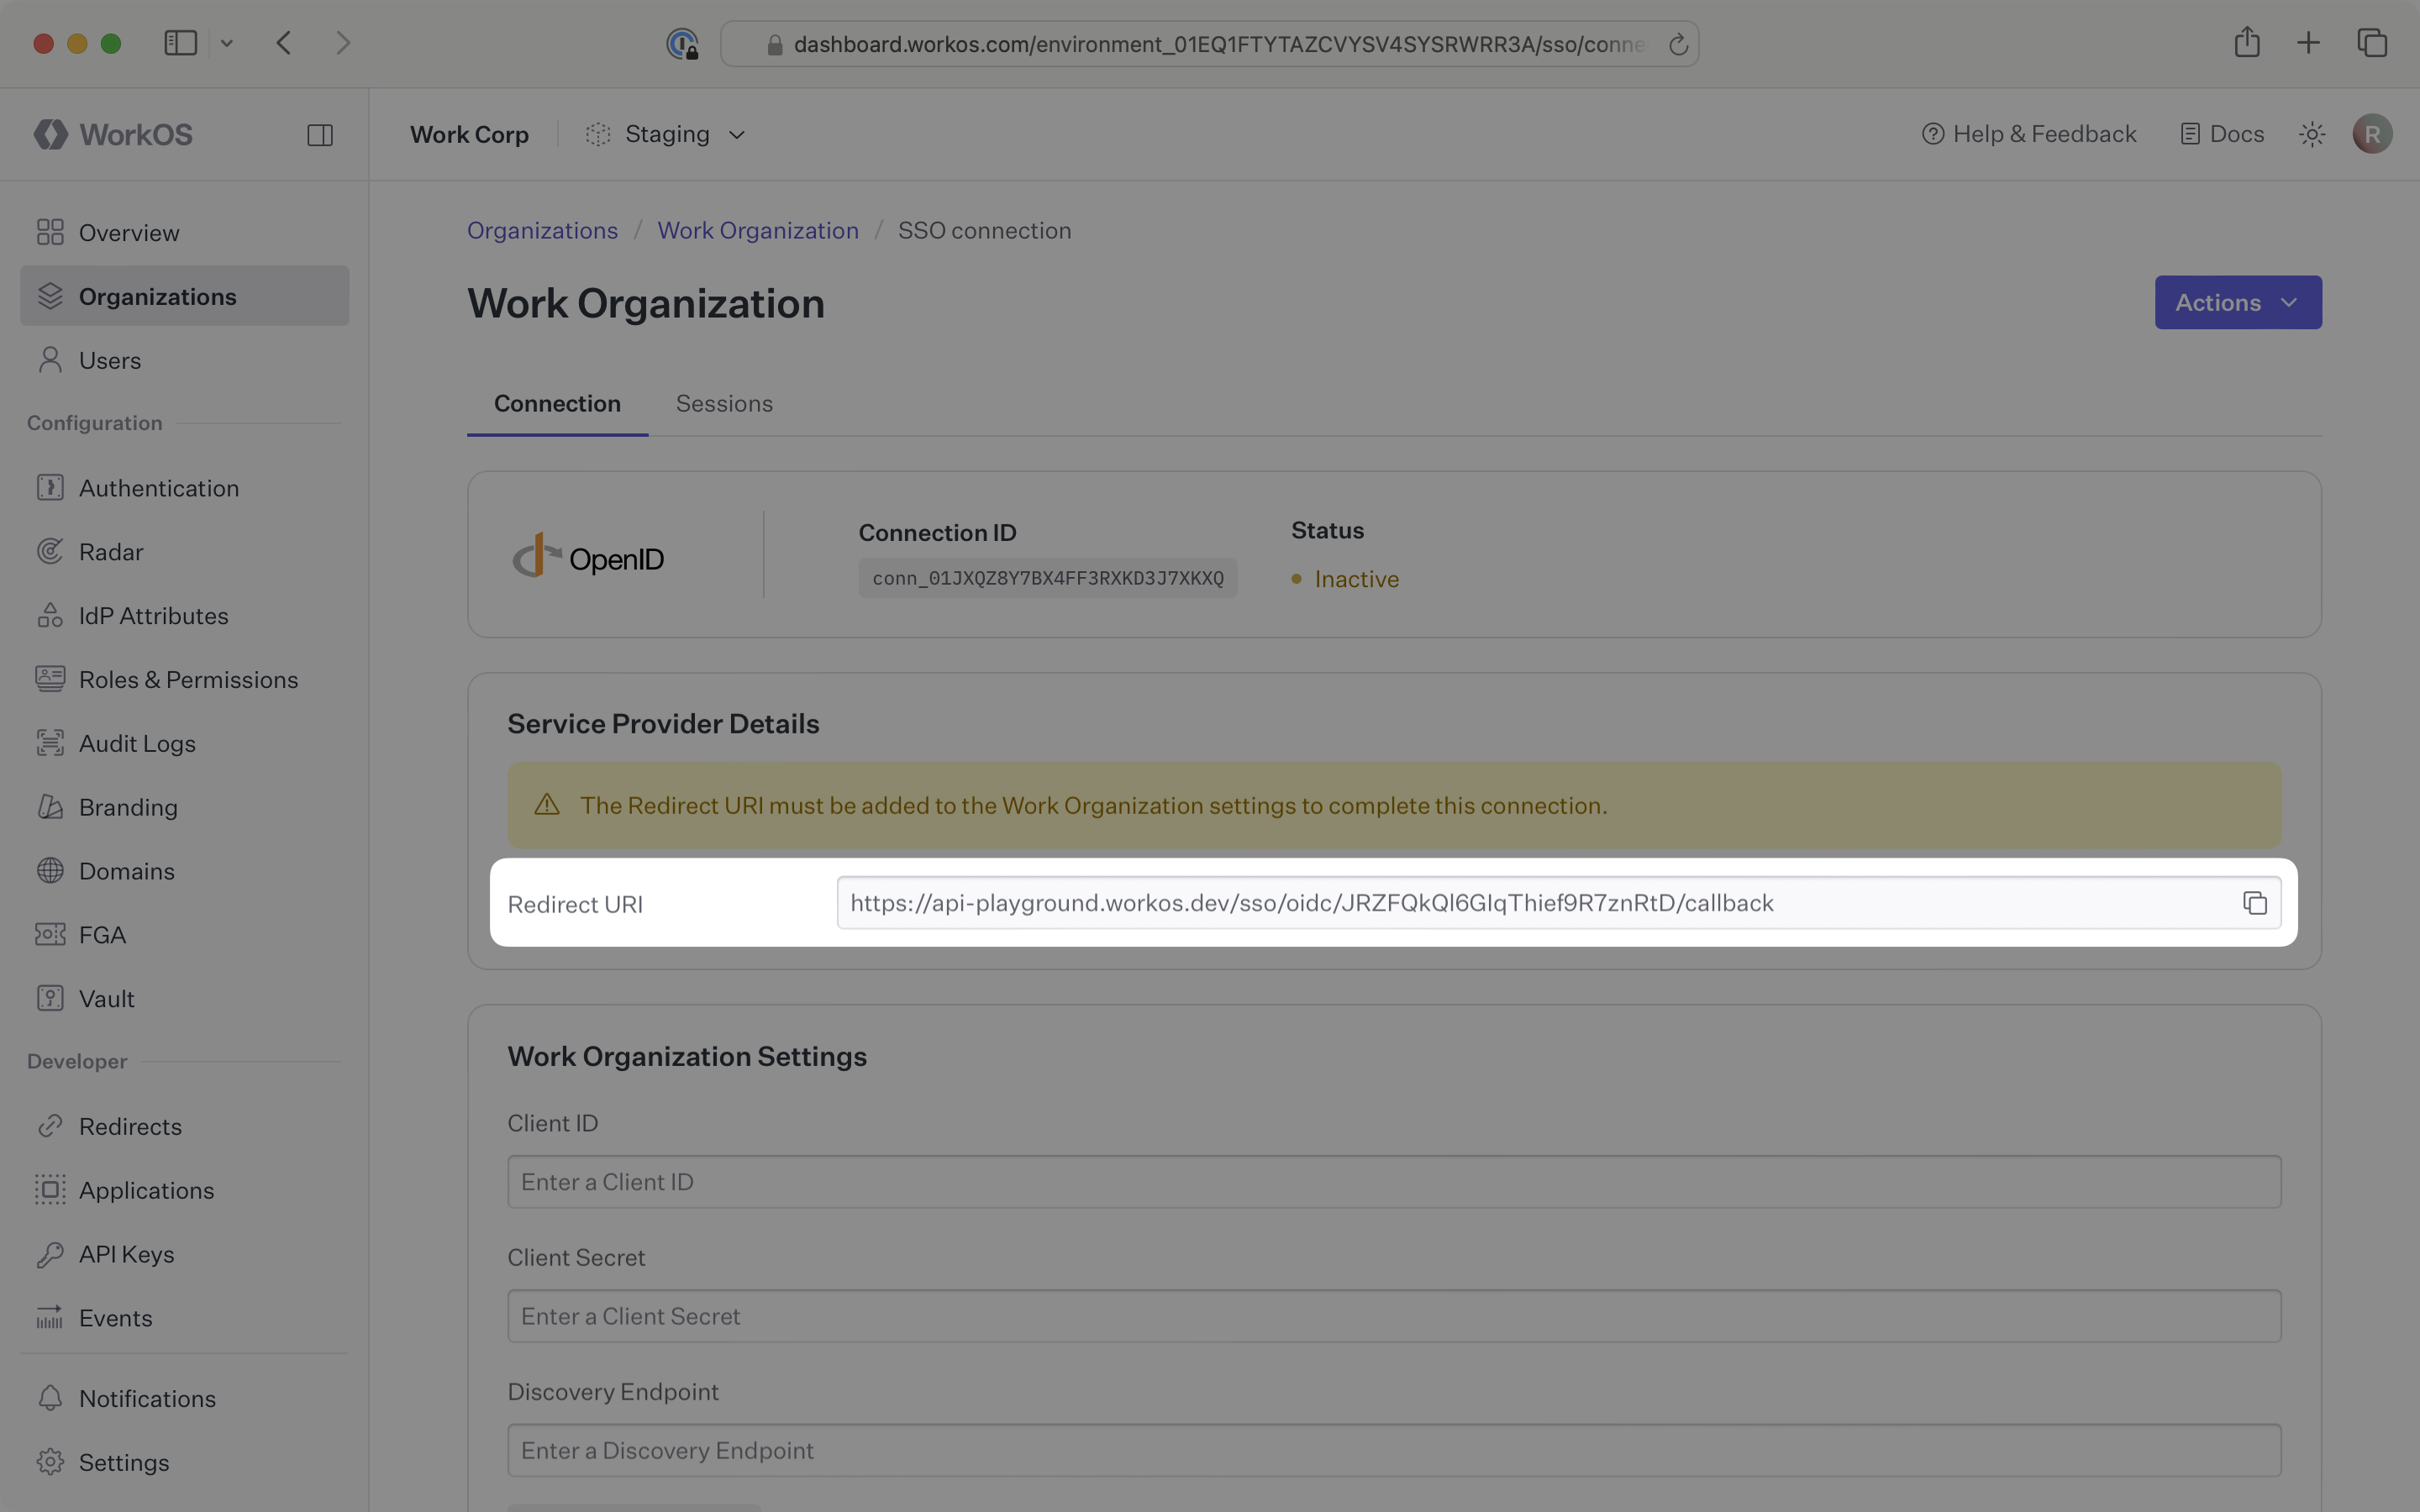
The Redirect URI is the location an identity provider redirects its authentication response to. In Entra ID’s case, it needs to be set during application registration when configuring your OIDC application, which is outlined in step 1 below.
You will need to obtain three pieces of information from the organization:
- Application (Client) ID: Application identifier from the OIDC provider
- Client Secret: Authentication secret for the application
- Discovery endpoint: Configuration URL containing OIDC metadata
Normally, this information will come from the organization’s IT Management team when they set up your application’s OIDC configuration in their Entra ID admin center. But, should that not be the case during your setup, the next steps will show you how to obtain it.
Sign in to the Microsoft Entra admin center.
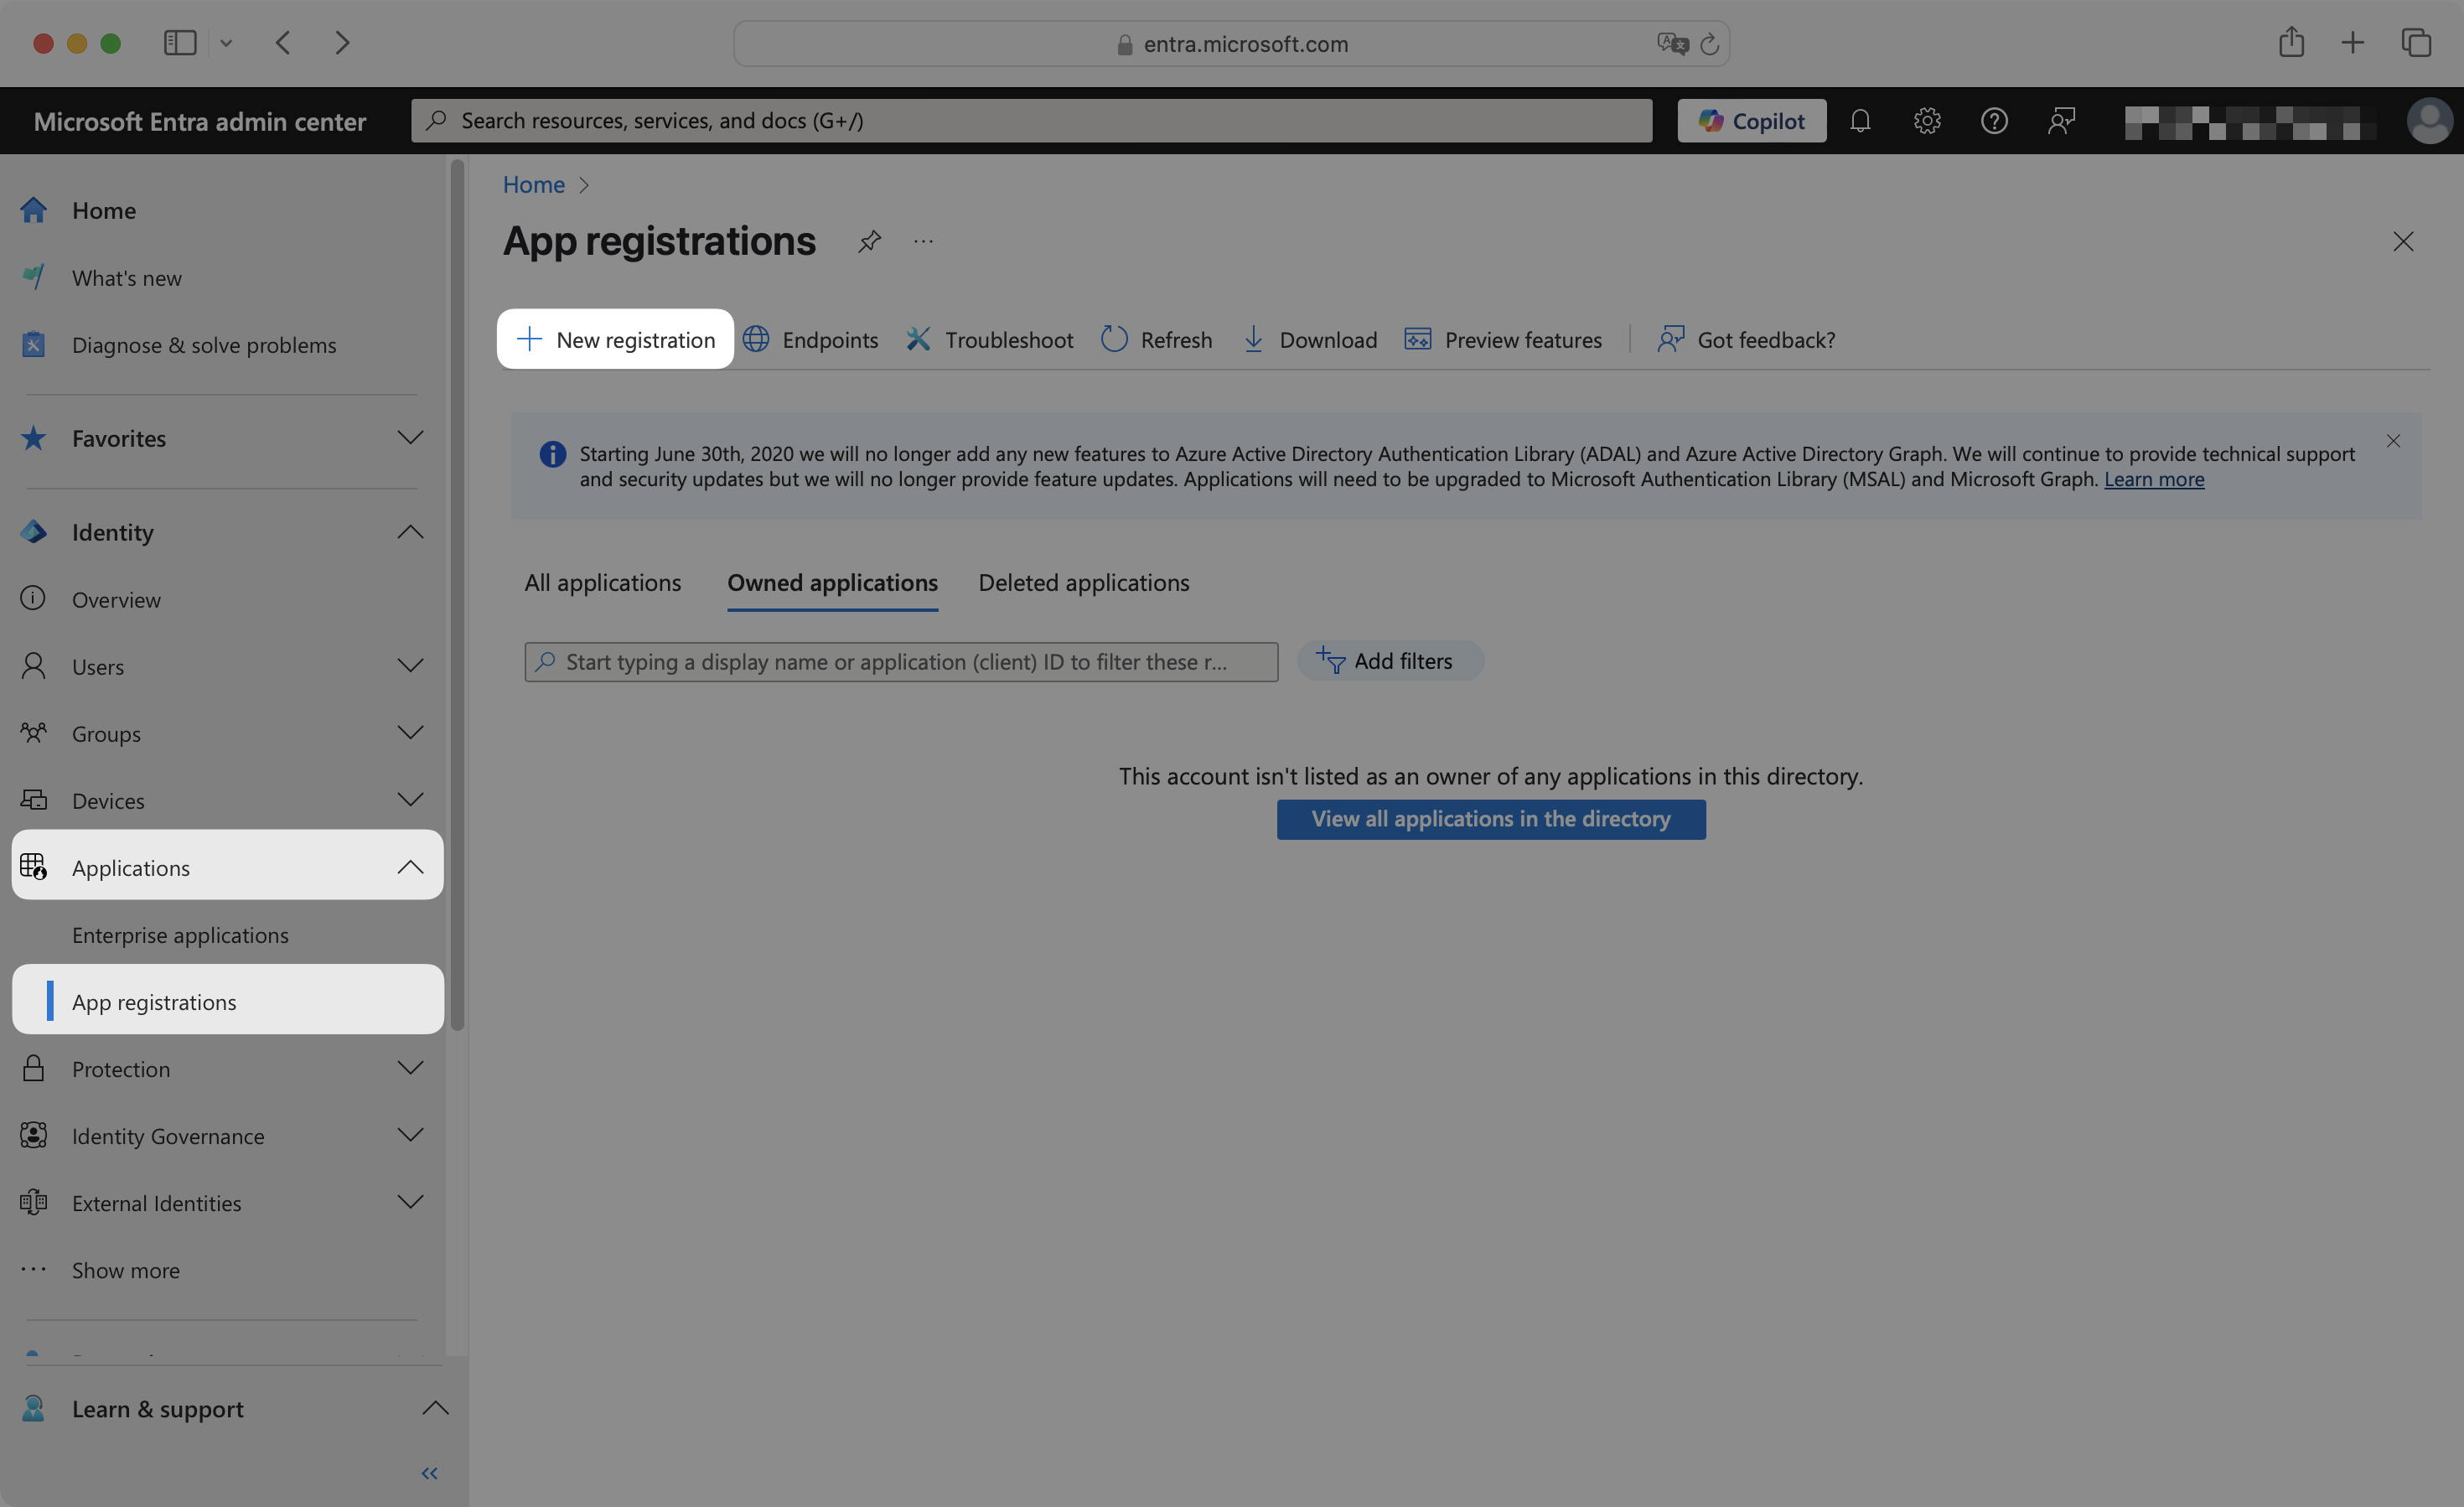
In the left navigation menu, expand the Identity section. Expand the Applications sub-section. Select the App registrations tab. Click New registration.
Enter an appropriate app name, such as your organization or application name.
Select one of these Supported account types:
- Accounts in this organizational directory only (Default Directory only – Single tenant) (Default)
- Accounts in any organizational directory (Any Microsoft Entra ID tenant – Multitenant)
In the Redirect URI field, select the Web option from the dropdown menu. Copy the Redirect URI from the SSO connection page in the WorkOS Dashboard and paste it into the input field.
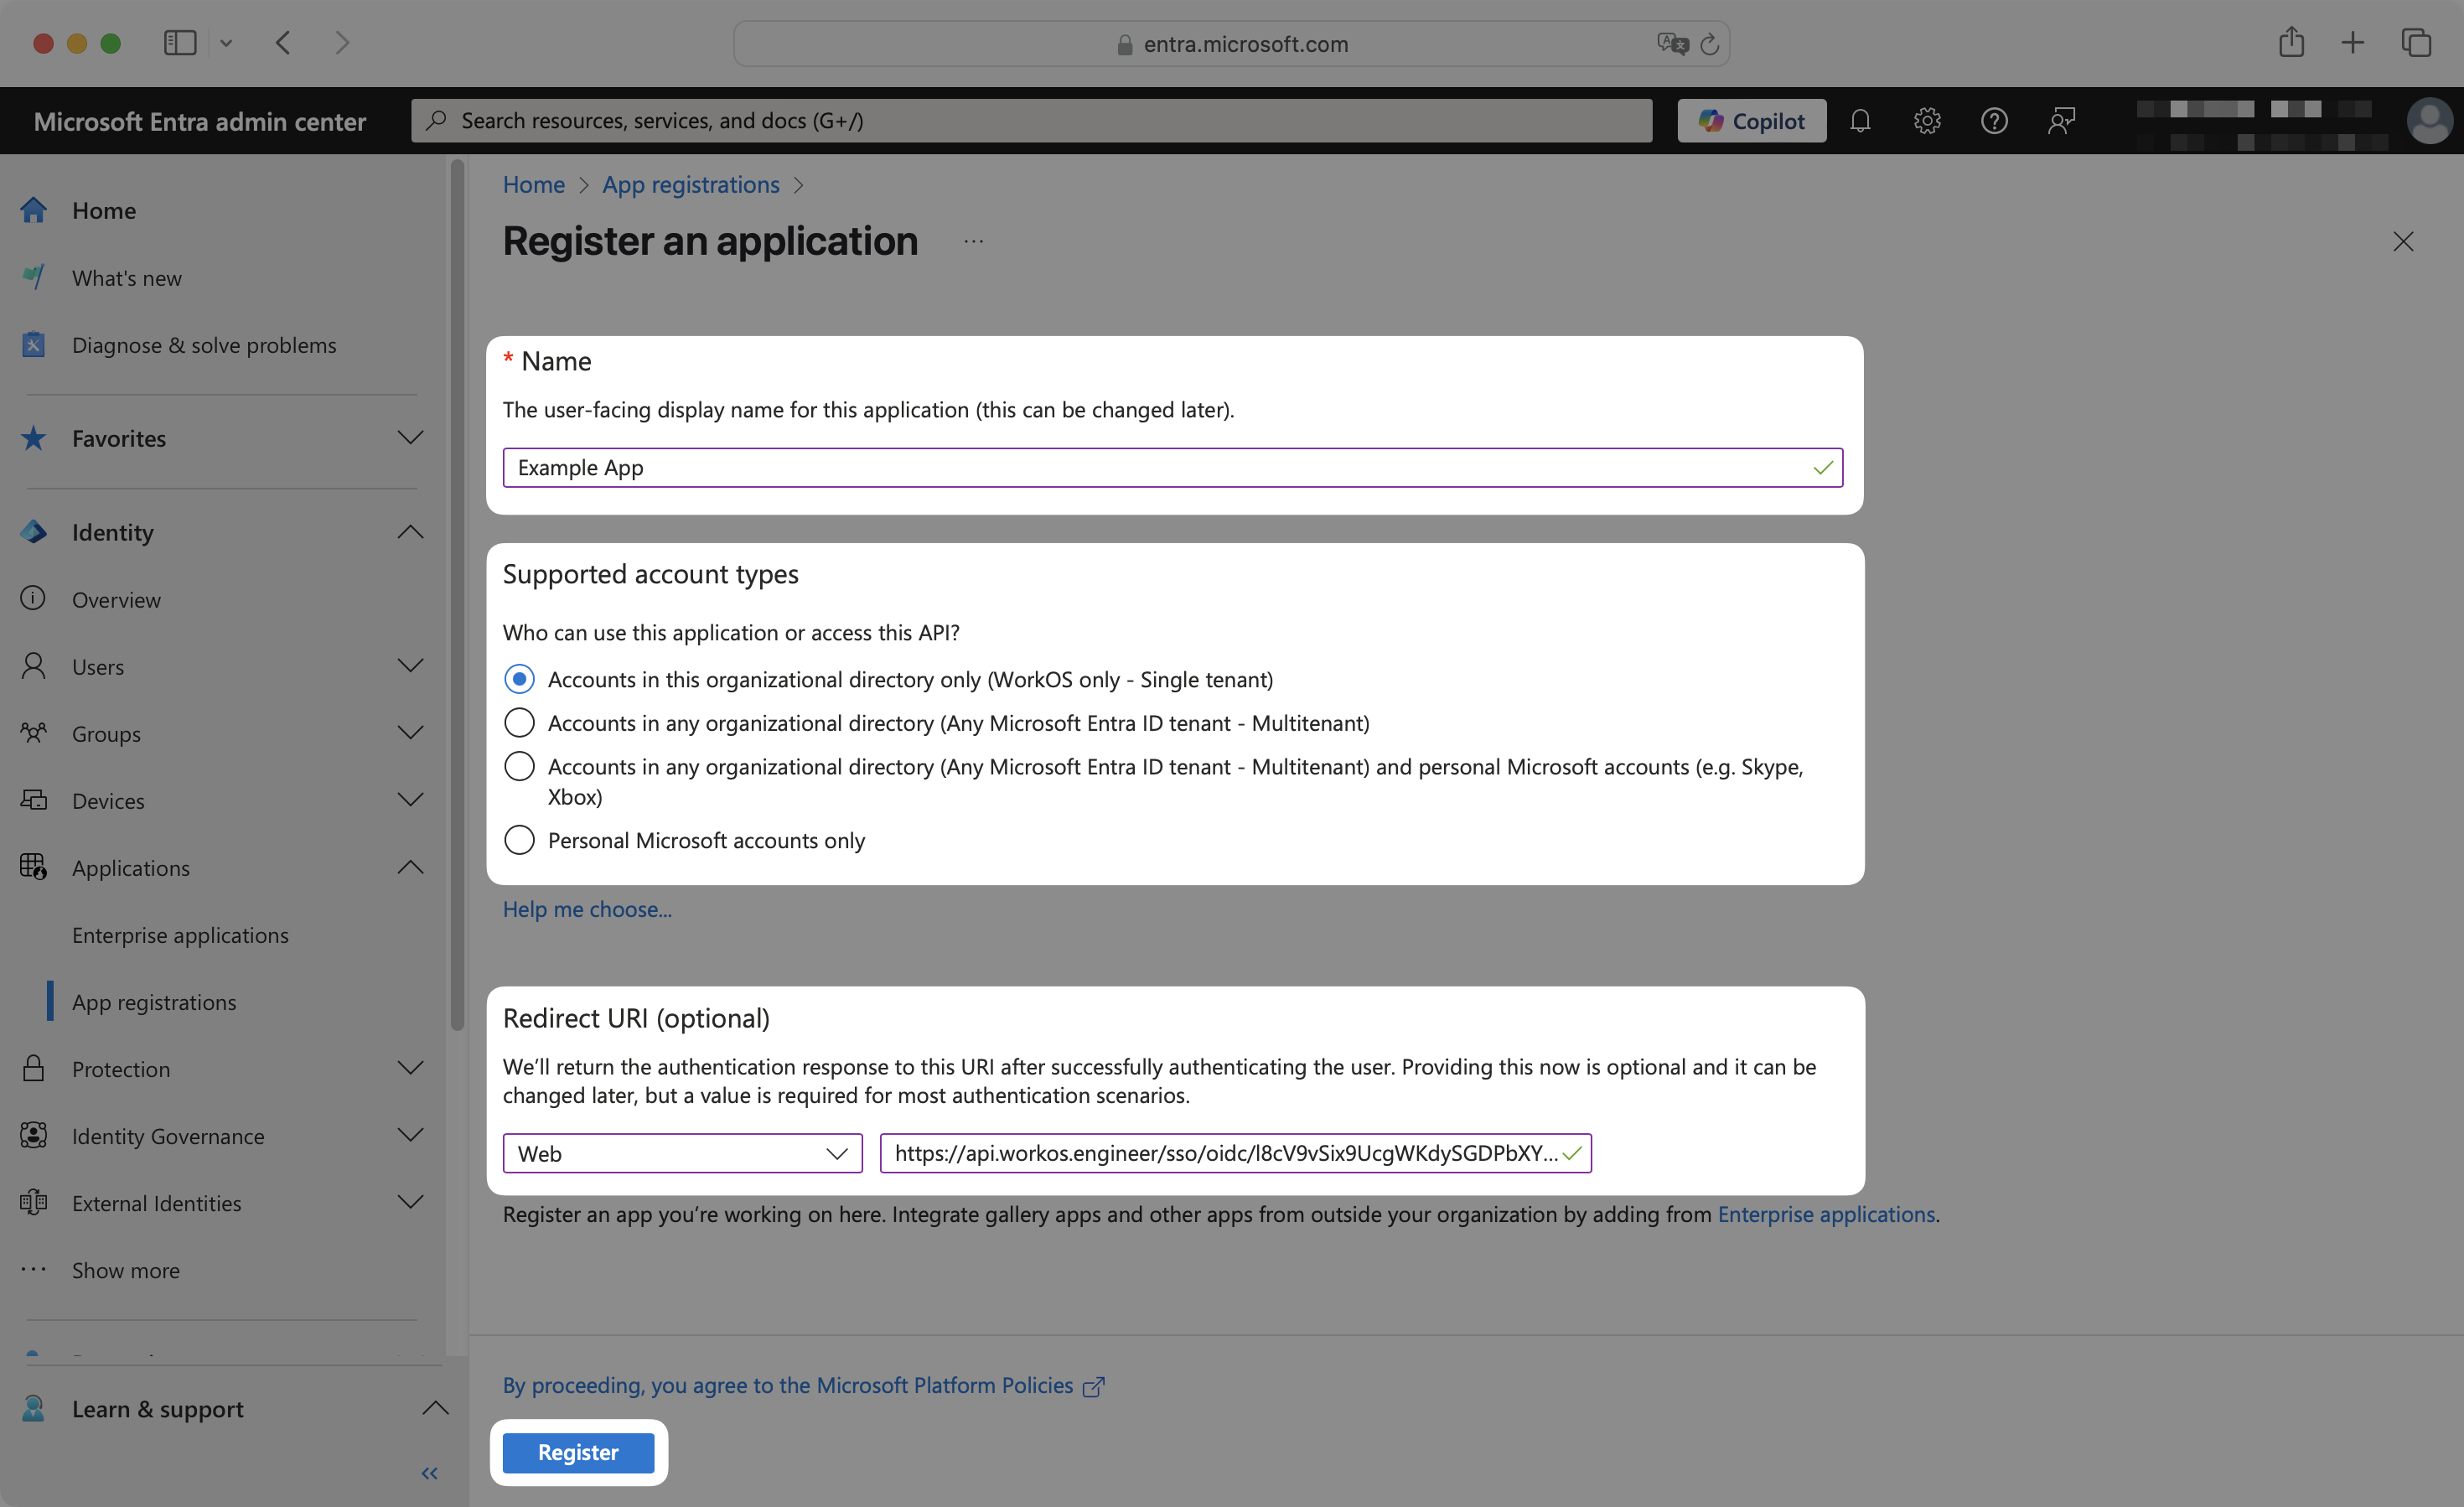
Click Register.
Now you’ll need to gather three pieces of information from your Entra ID application that will be configured in your WorkOS dashboard: the client ID, client secret, and discovery endpoint. Keep these values handy to input into the WorkOS Dashboard.
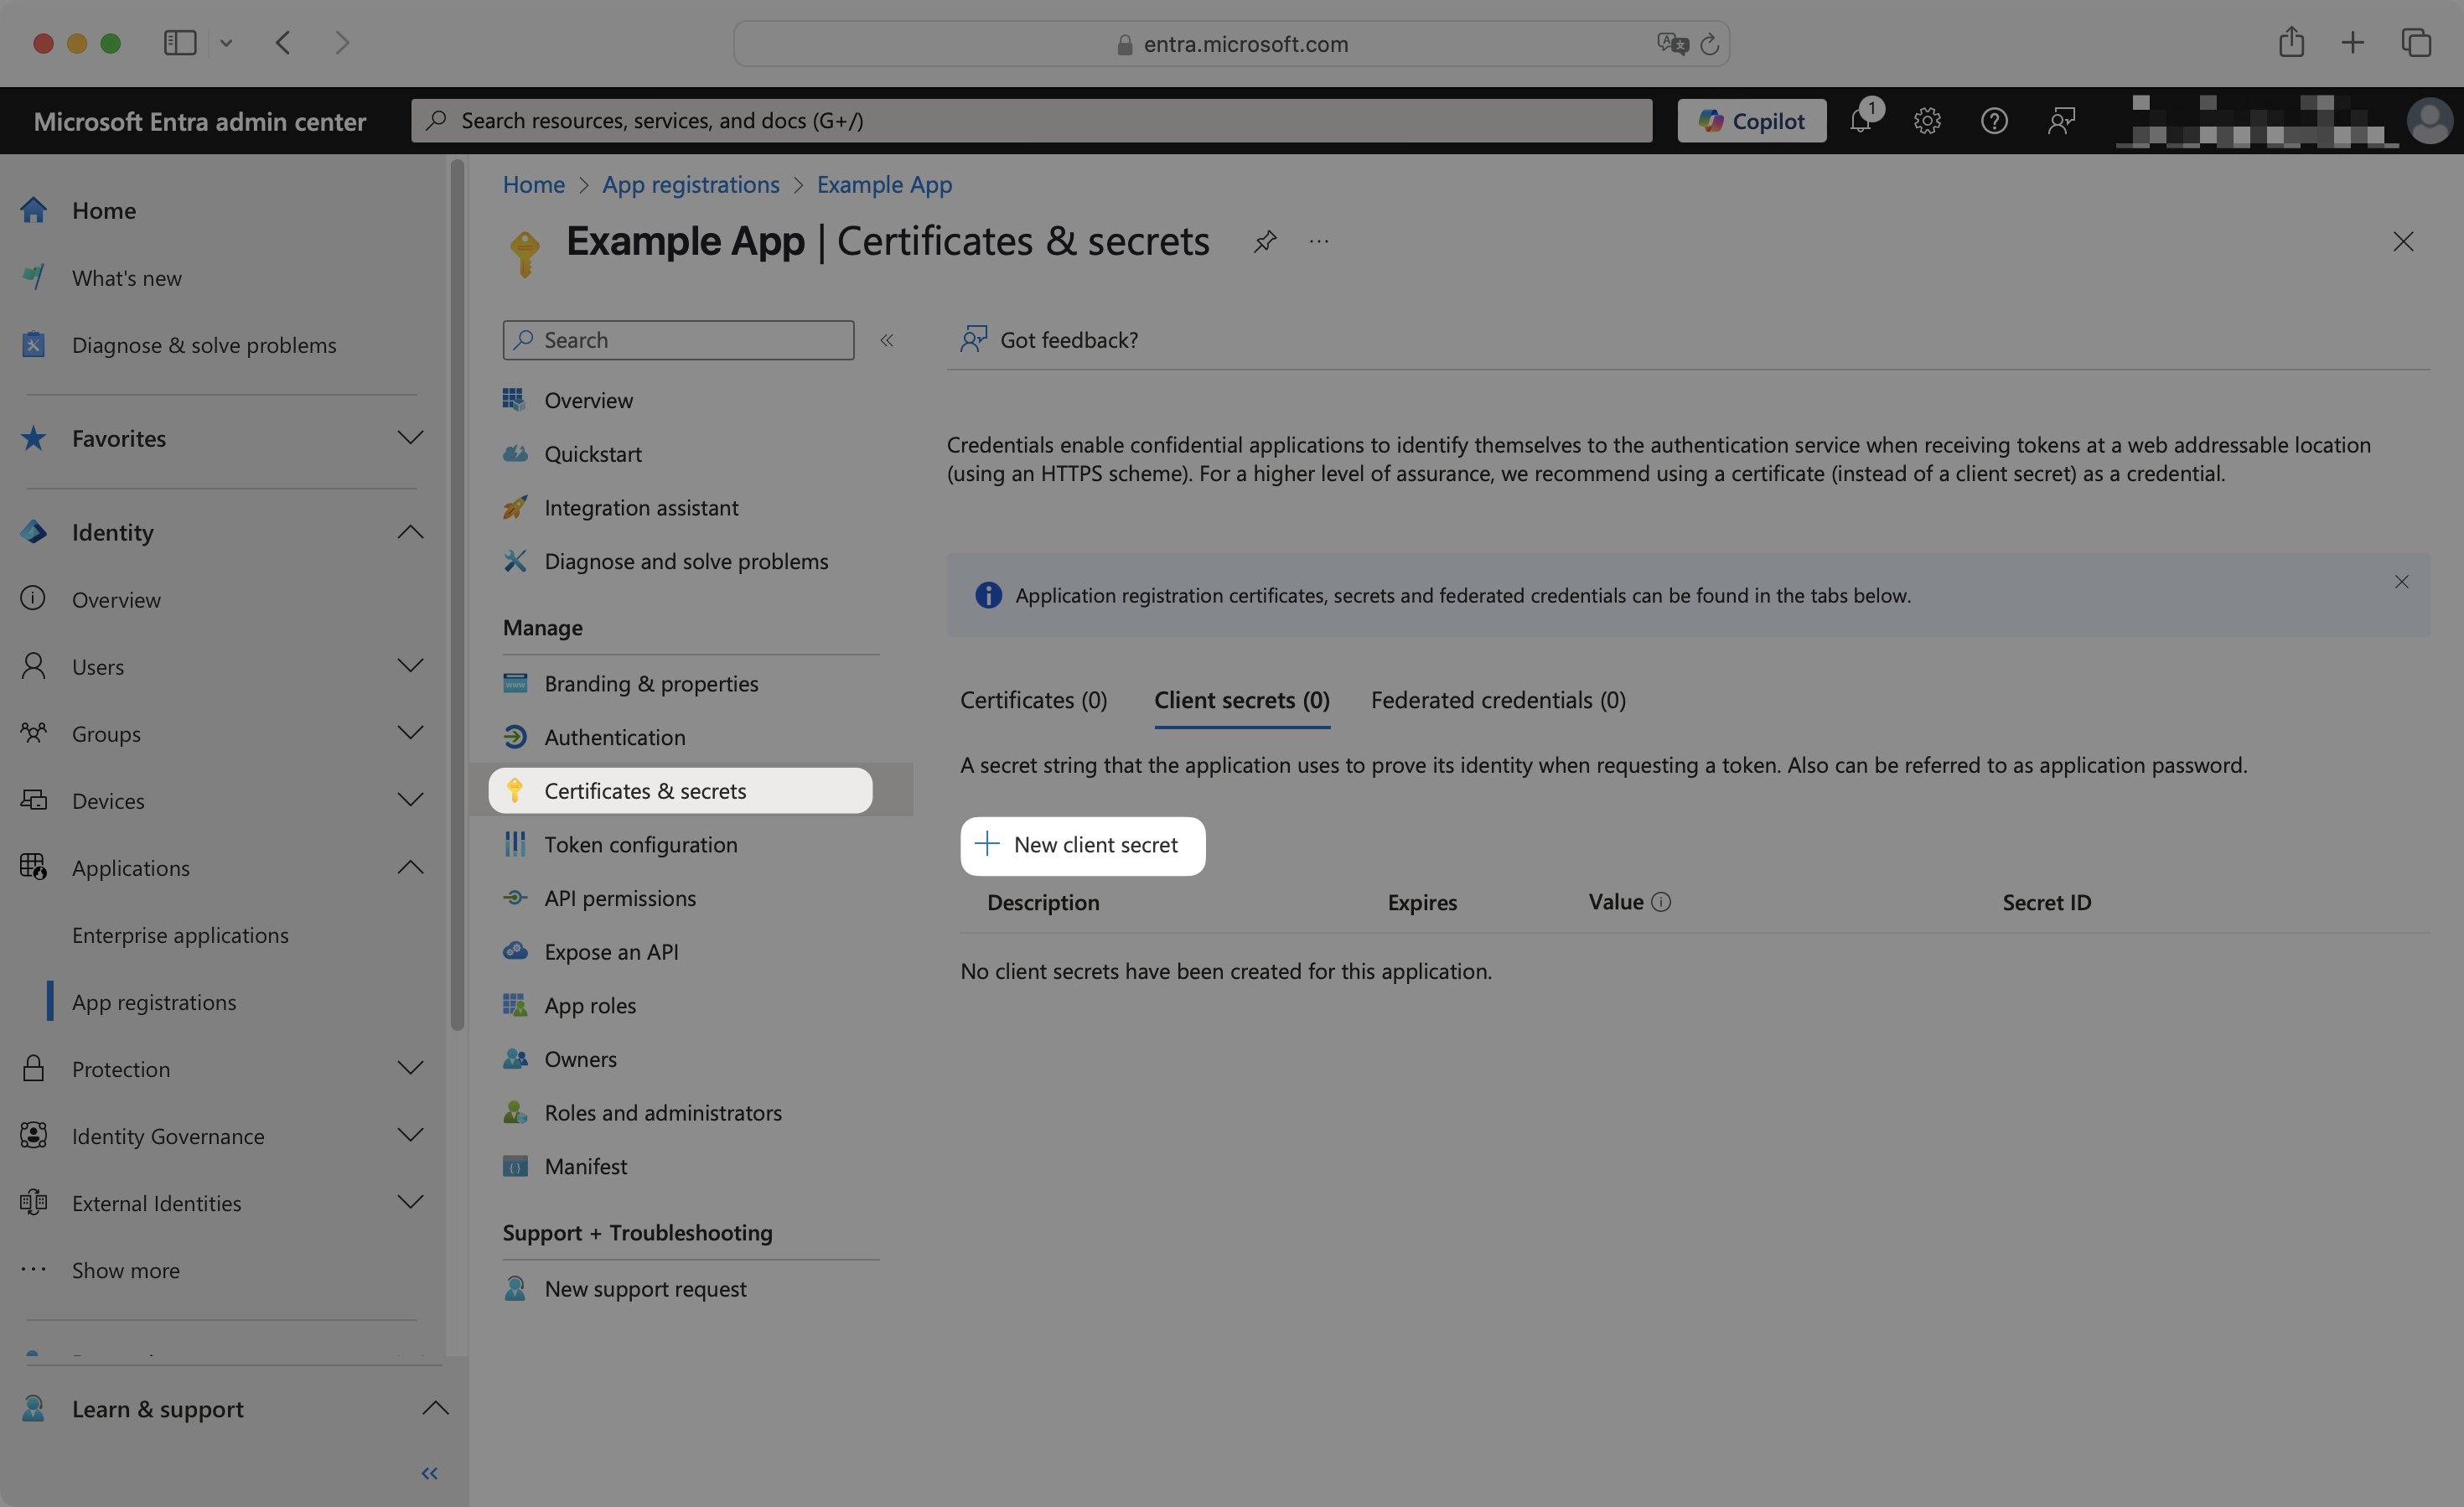
Navigate to the Certificates & secrets page. Click New client secret.
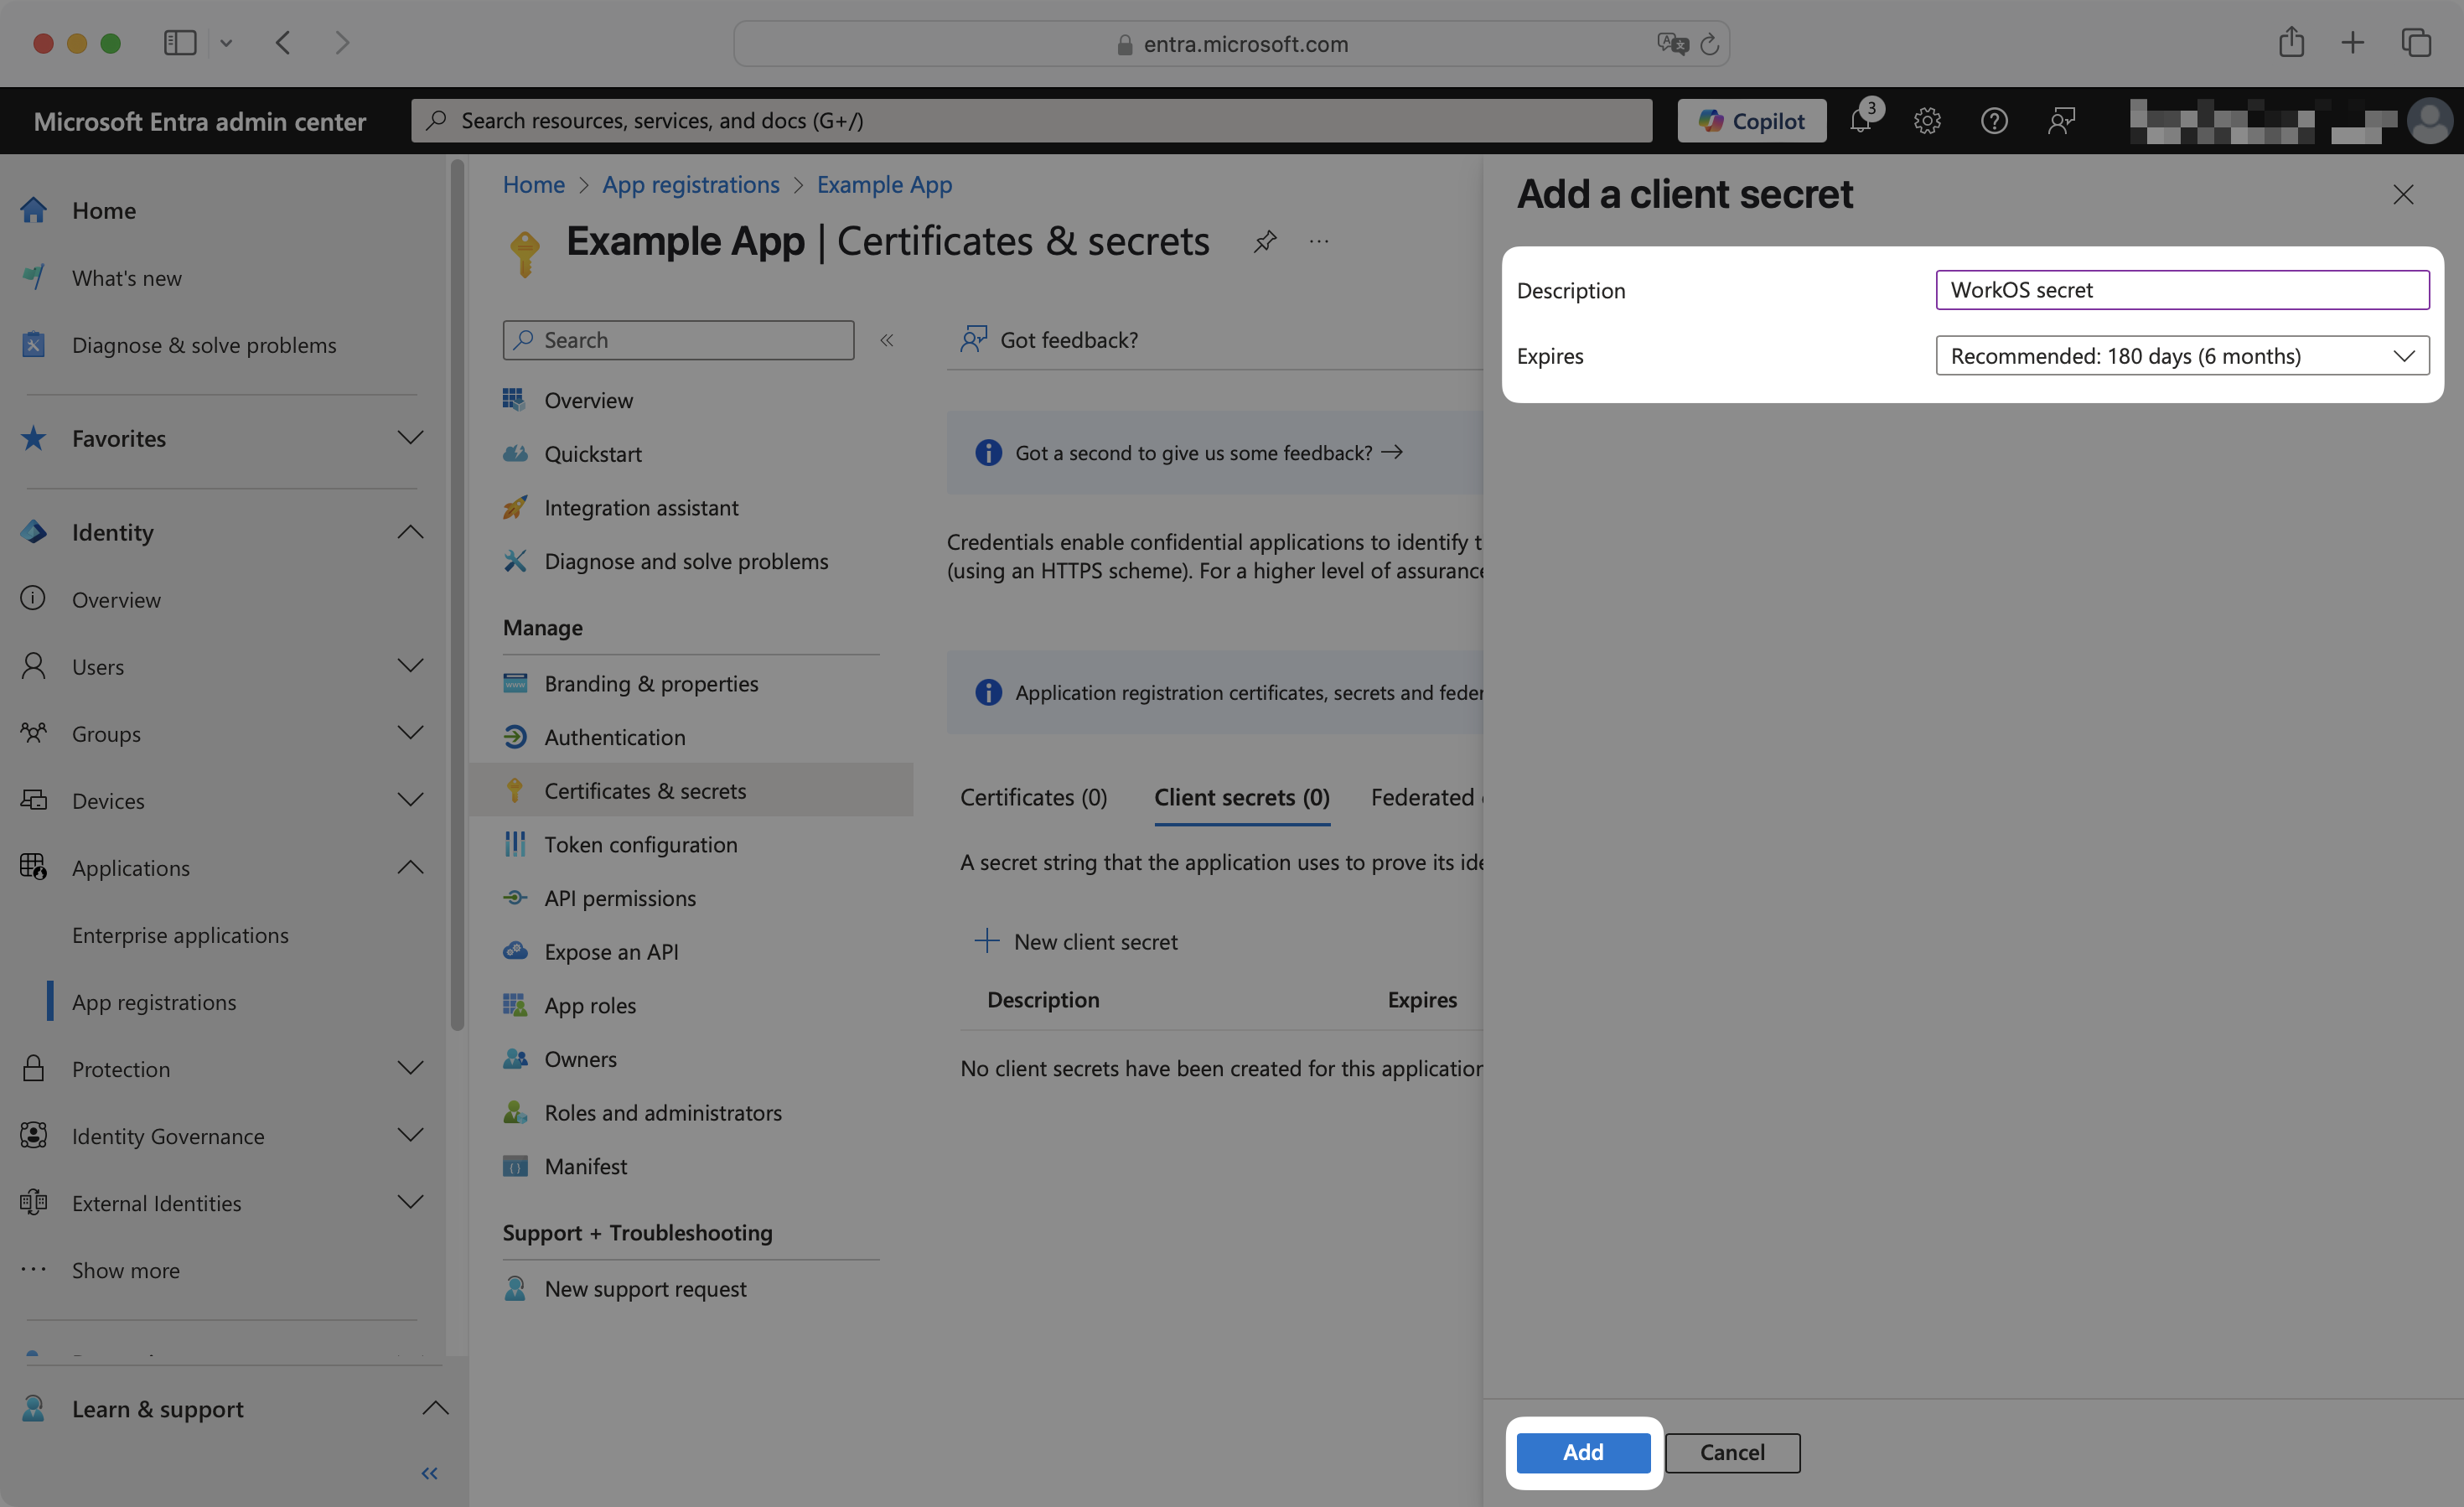
Enter an appropriate secret description and select an expiration period. Click Add.
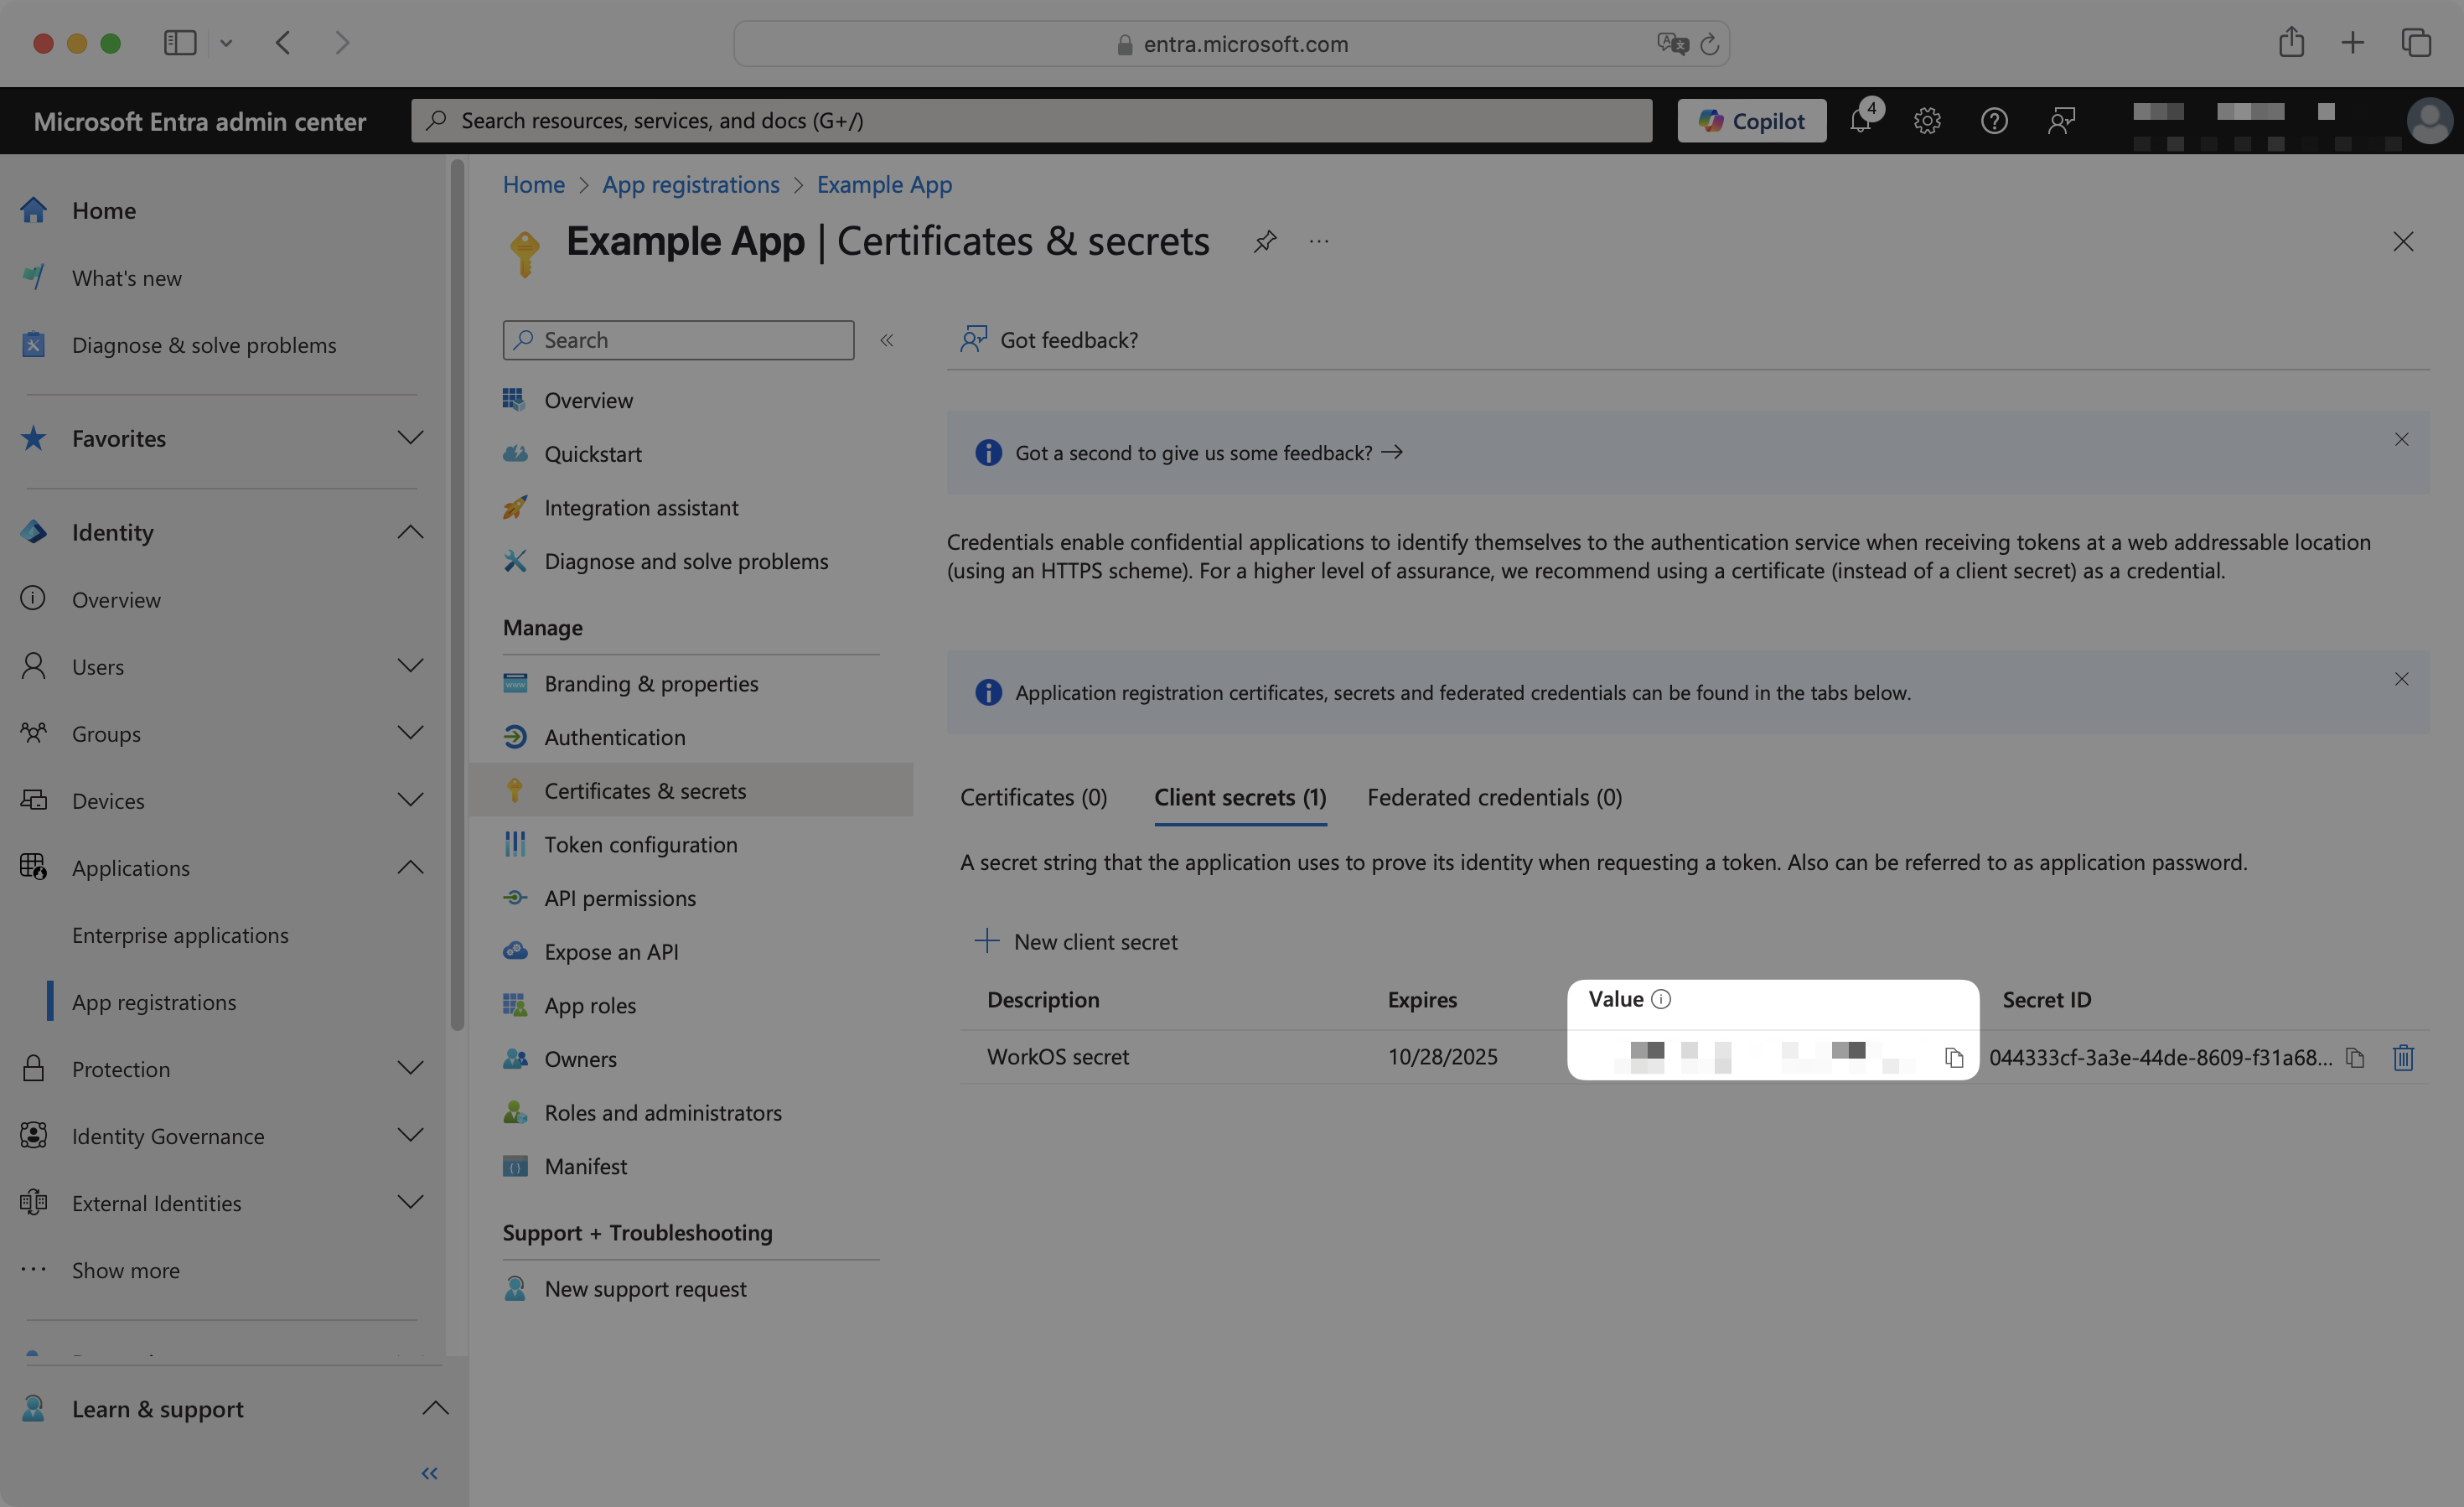
Copy the newly created client secret Value immediately as it will not be shown again after you navigate away from this page.
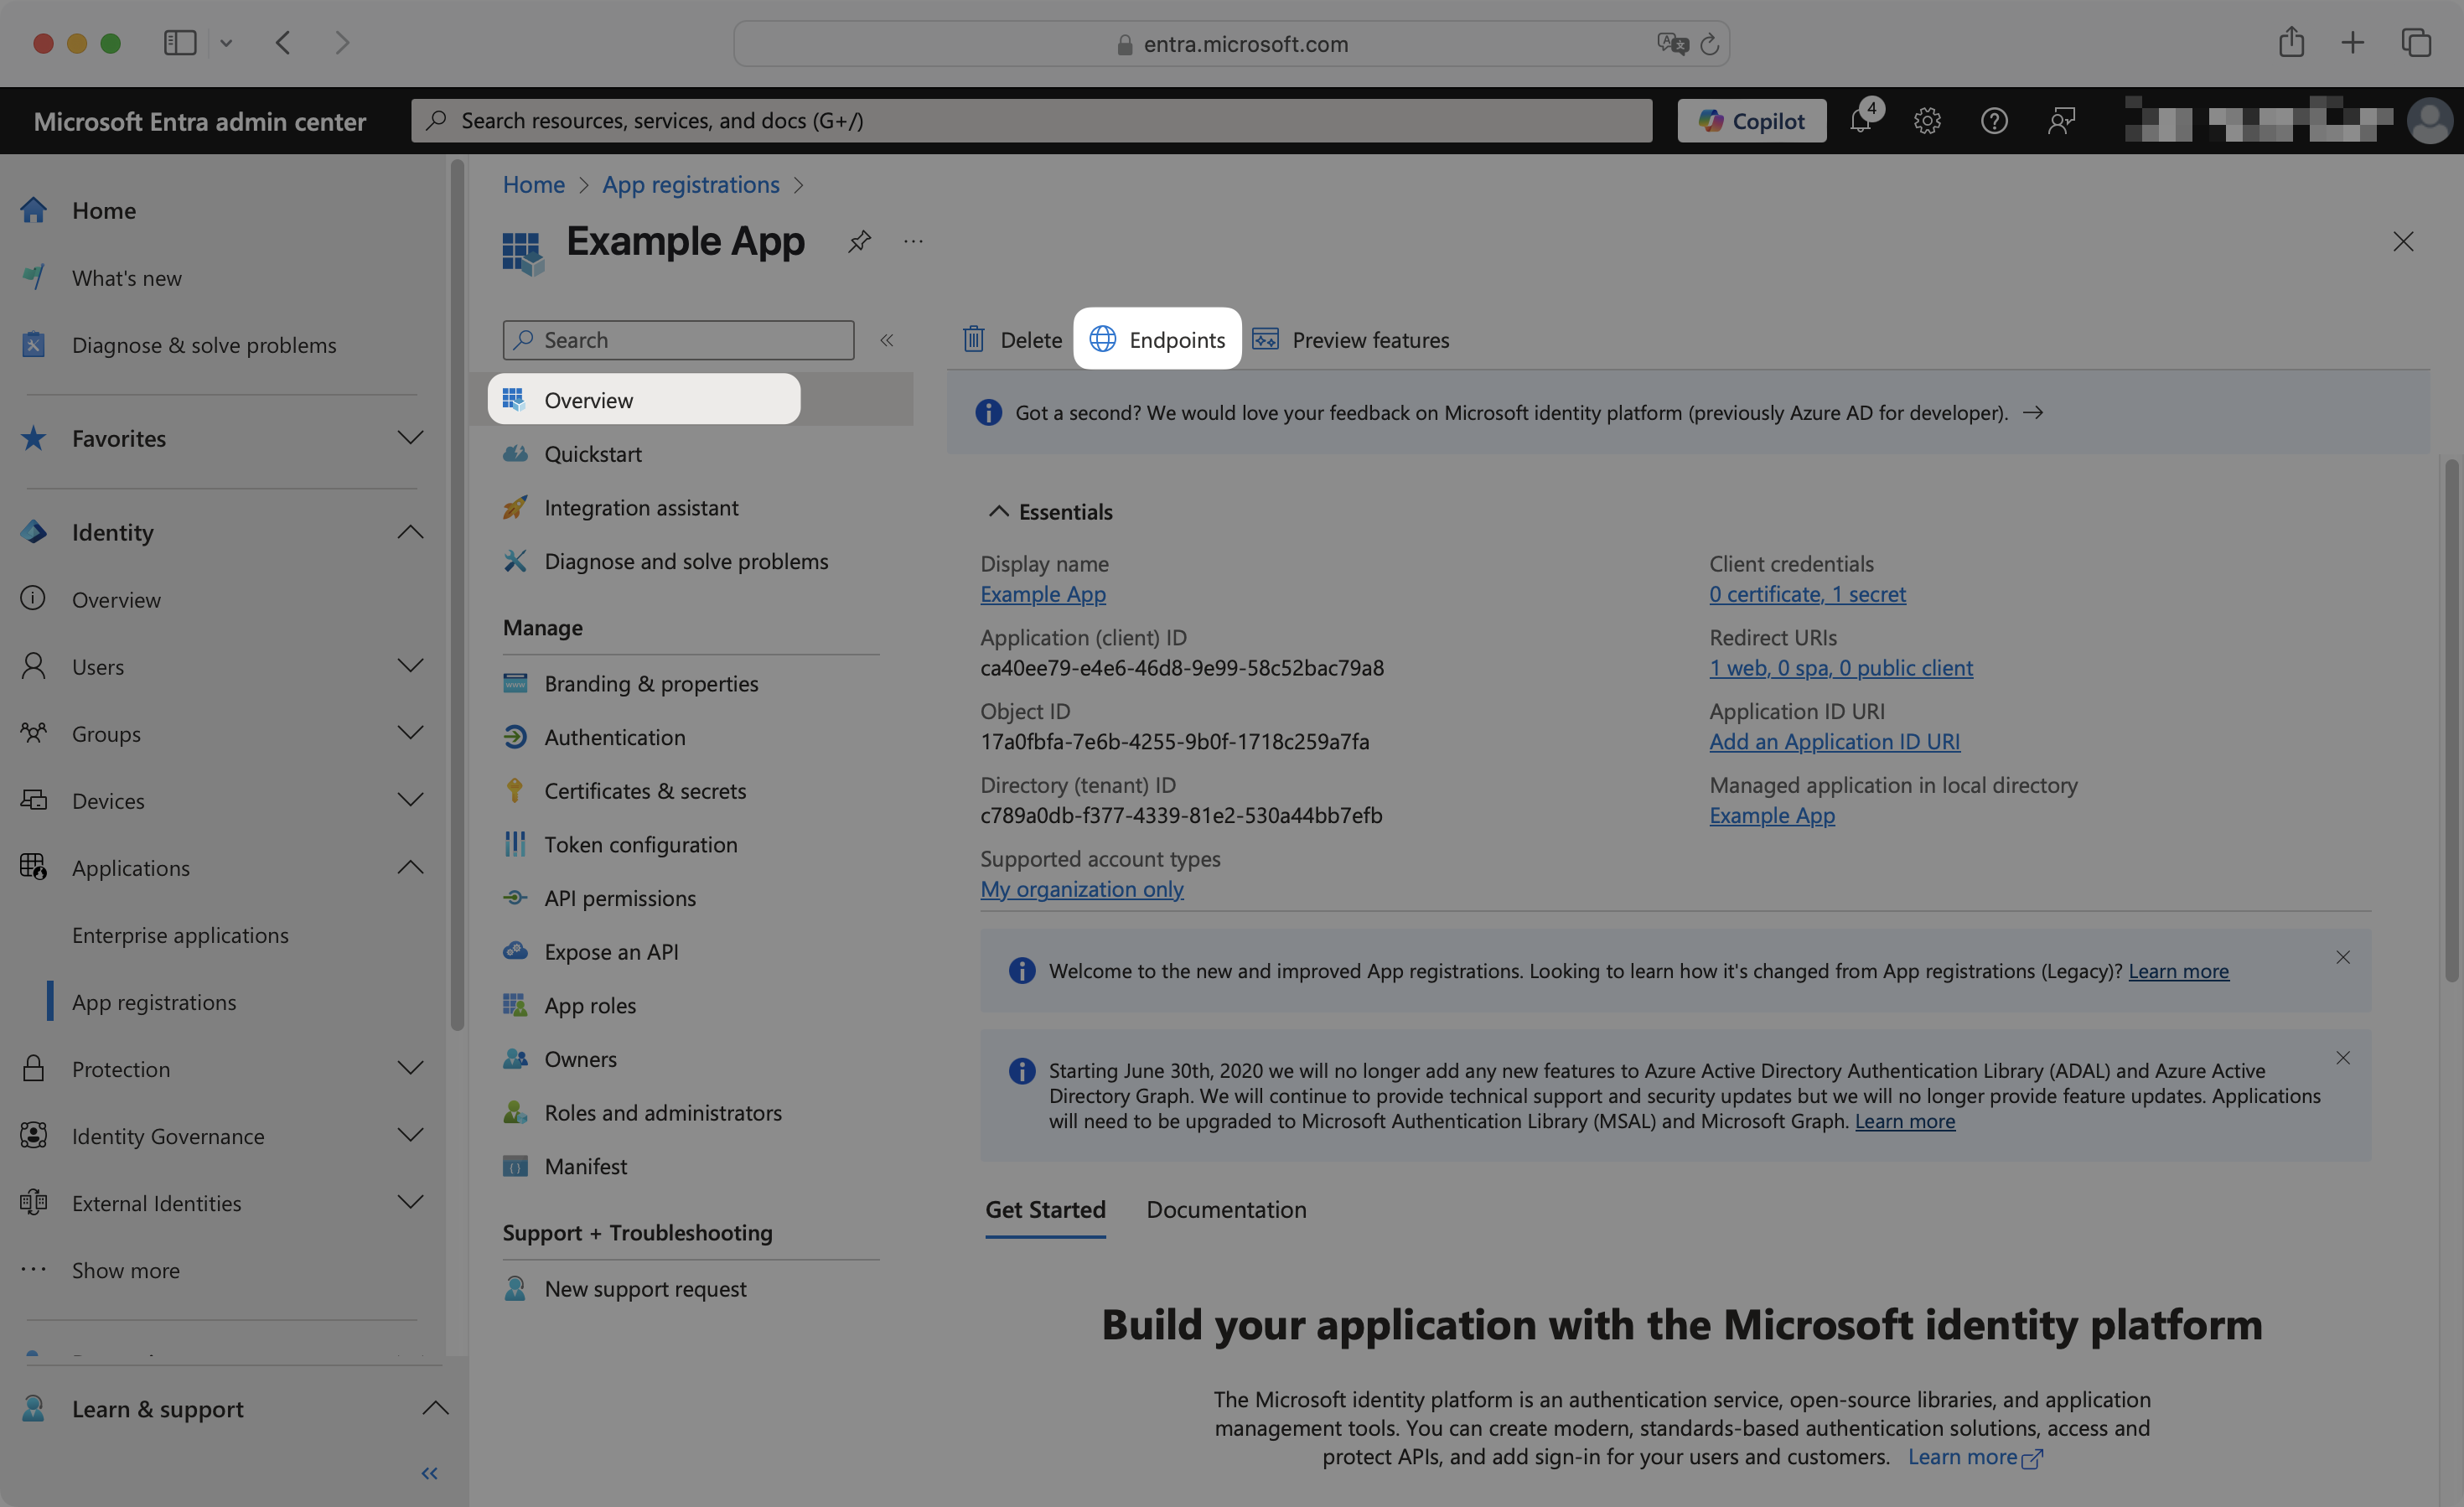
From the application Overview page, click the Endpoints tab.
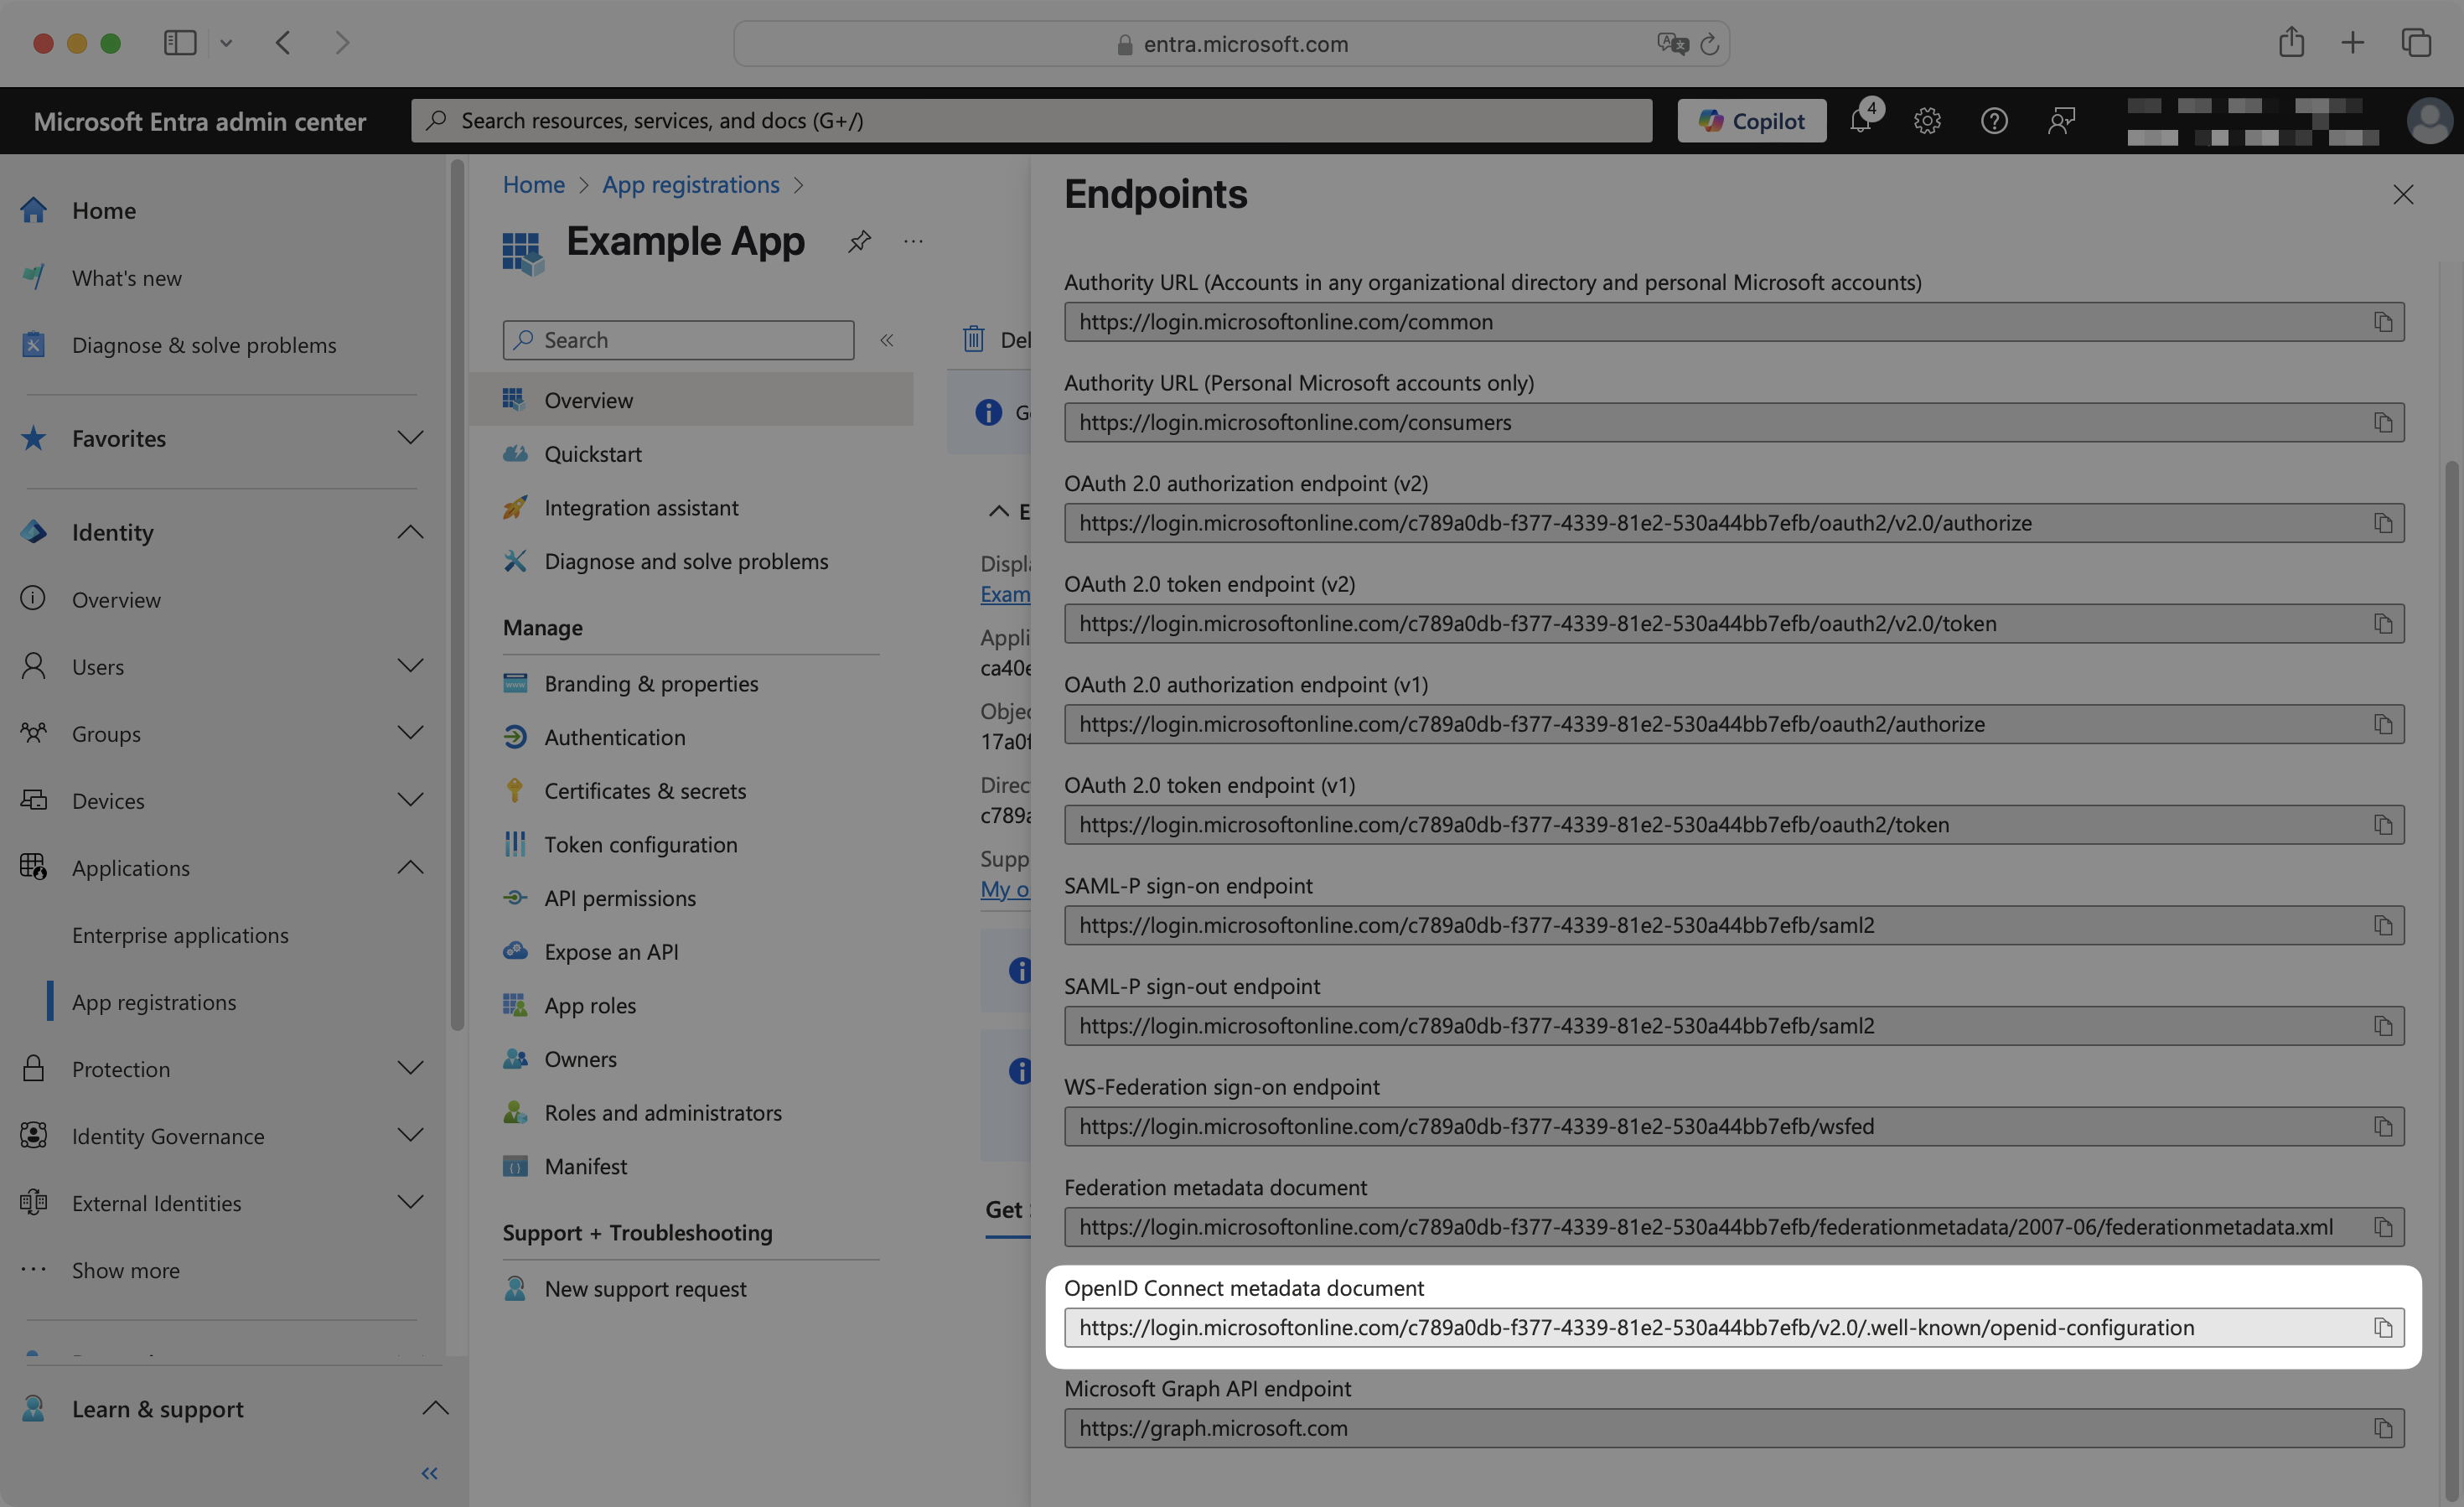
Scroll down to find and copy the OpenID Connect metadata document URL. This is your Discovery Endpoint.
Back in the WorkOS Dashboard on the SSO connection page, enter the client ID, client secret, and discovery endpoint you obtained from Entra ID into the respective fields in the {SSO connection name} Settings section.
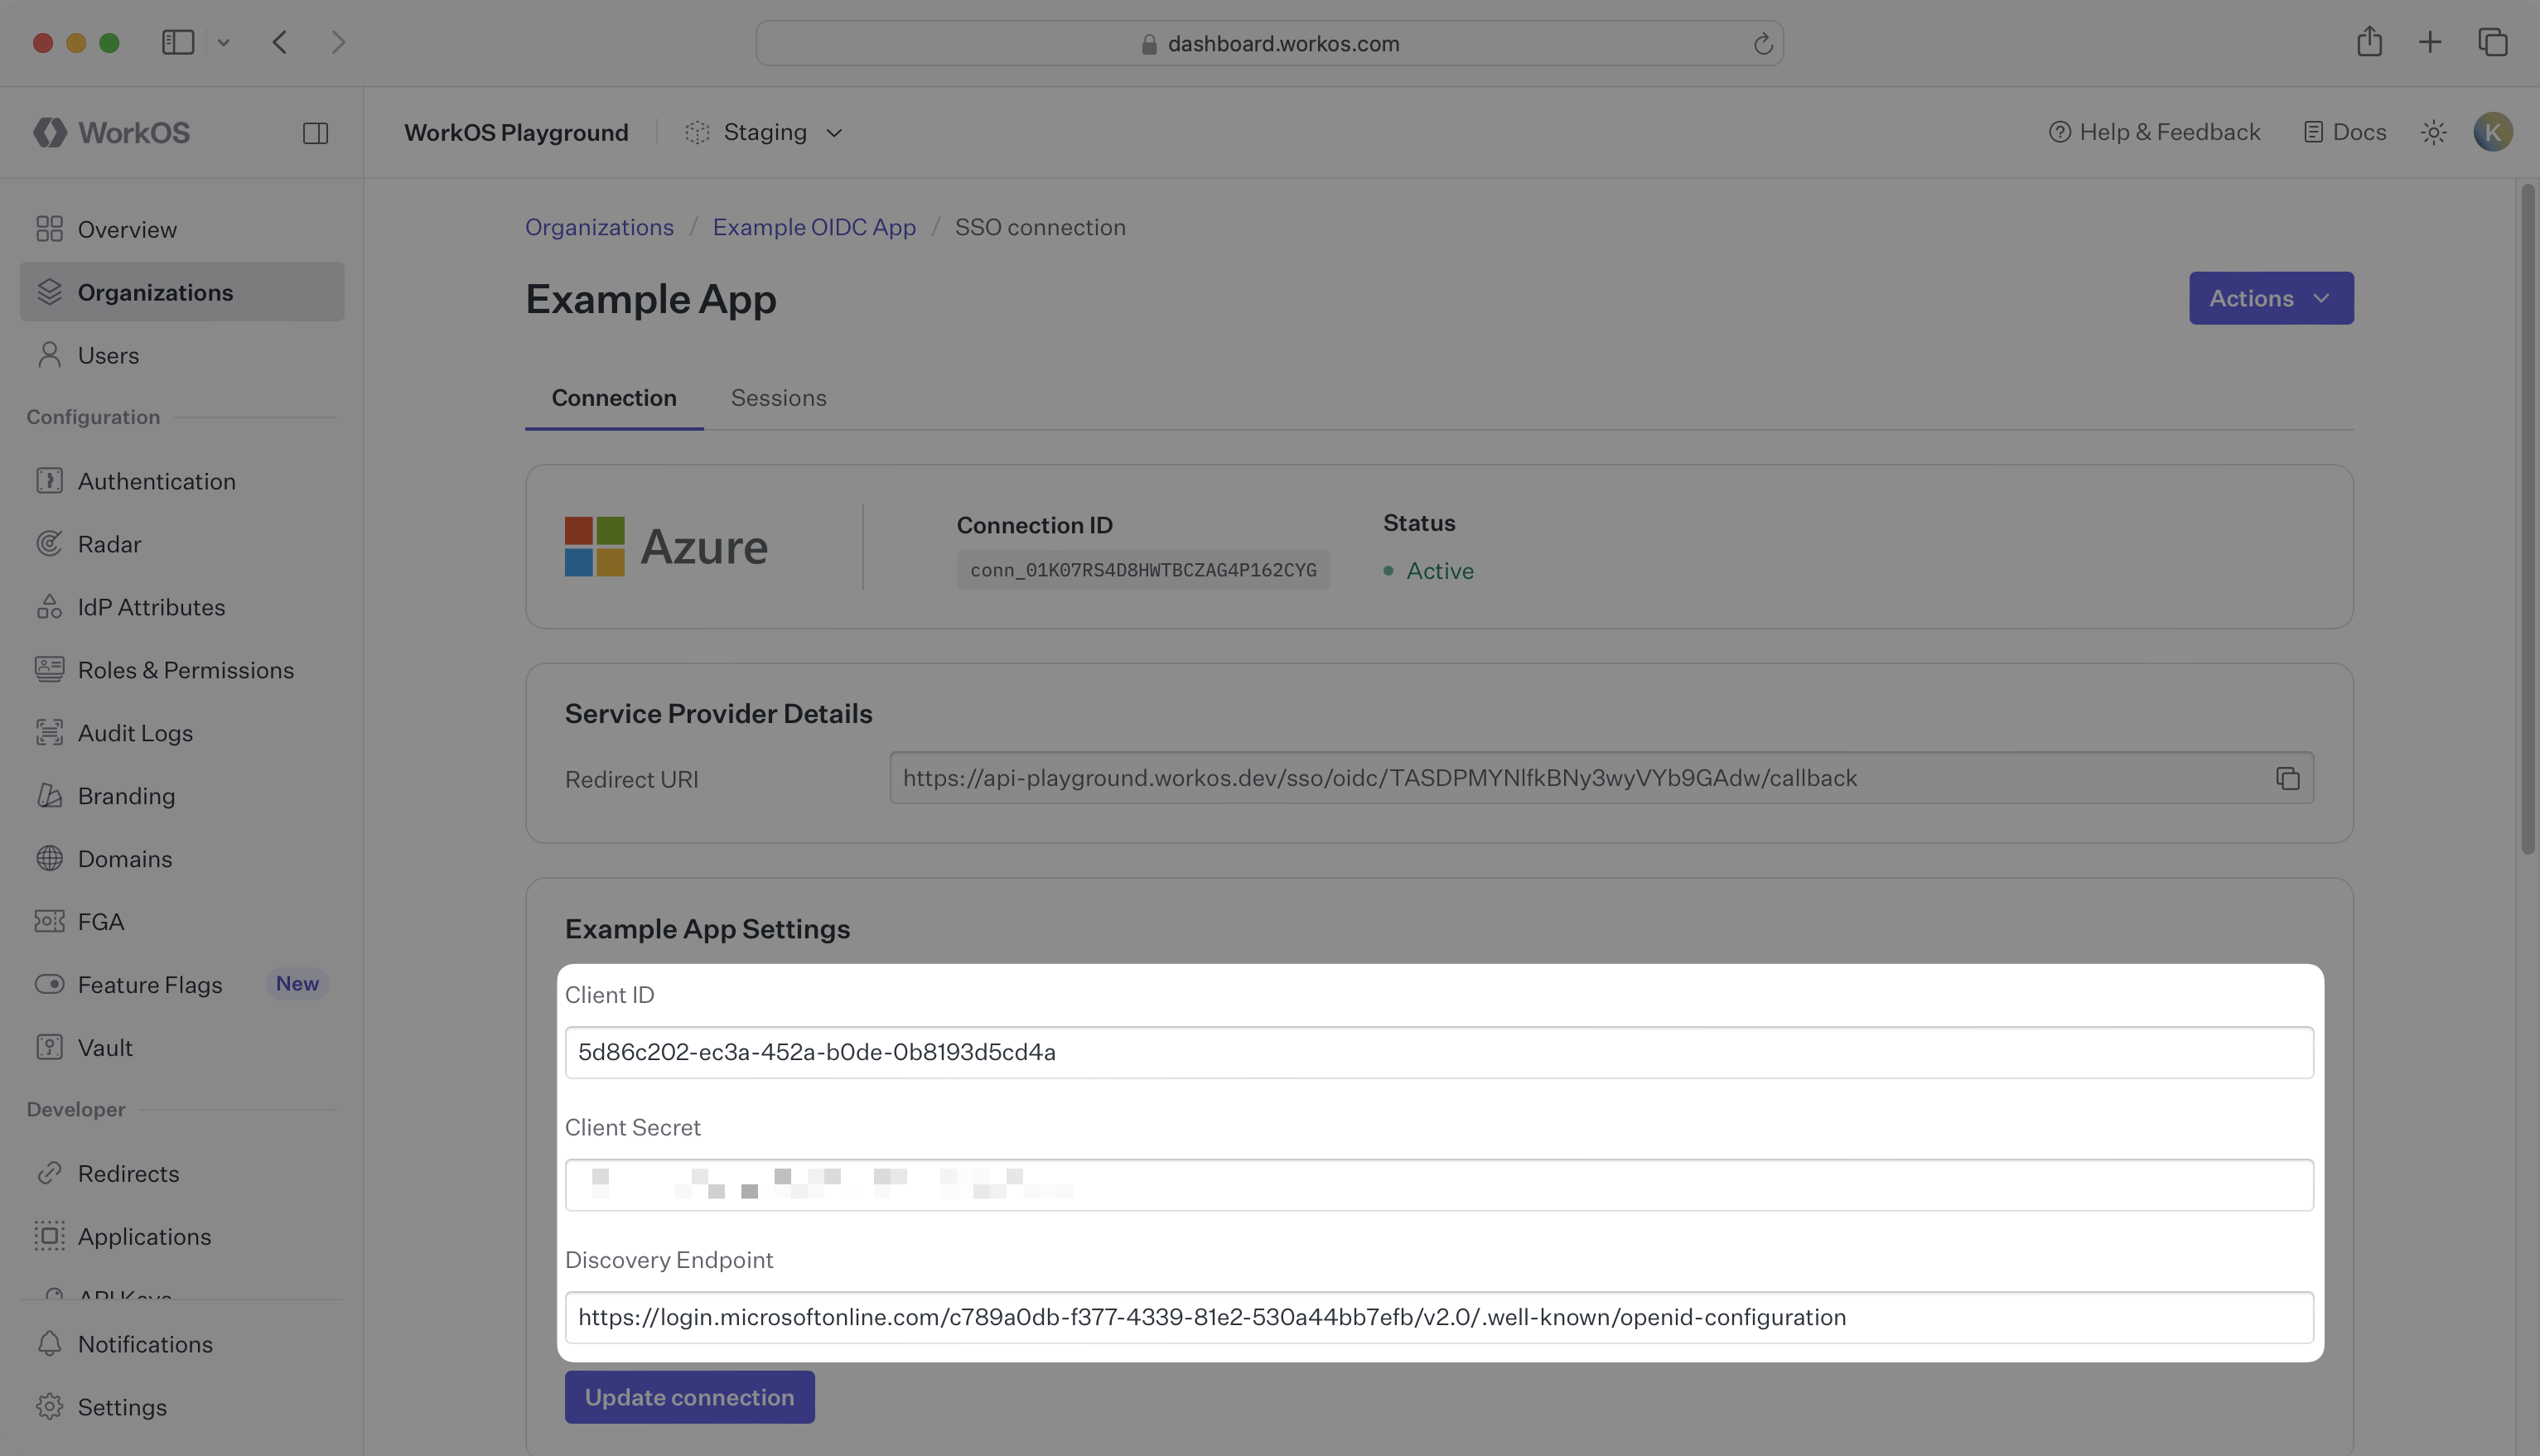
Click Update connection to save.
Navigate to the Token configuration page. Click Add optional claim.
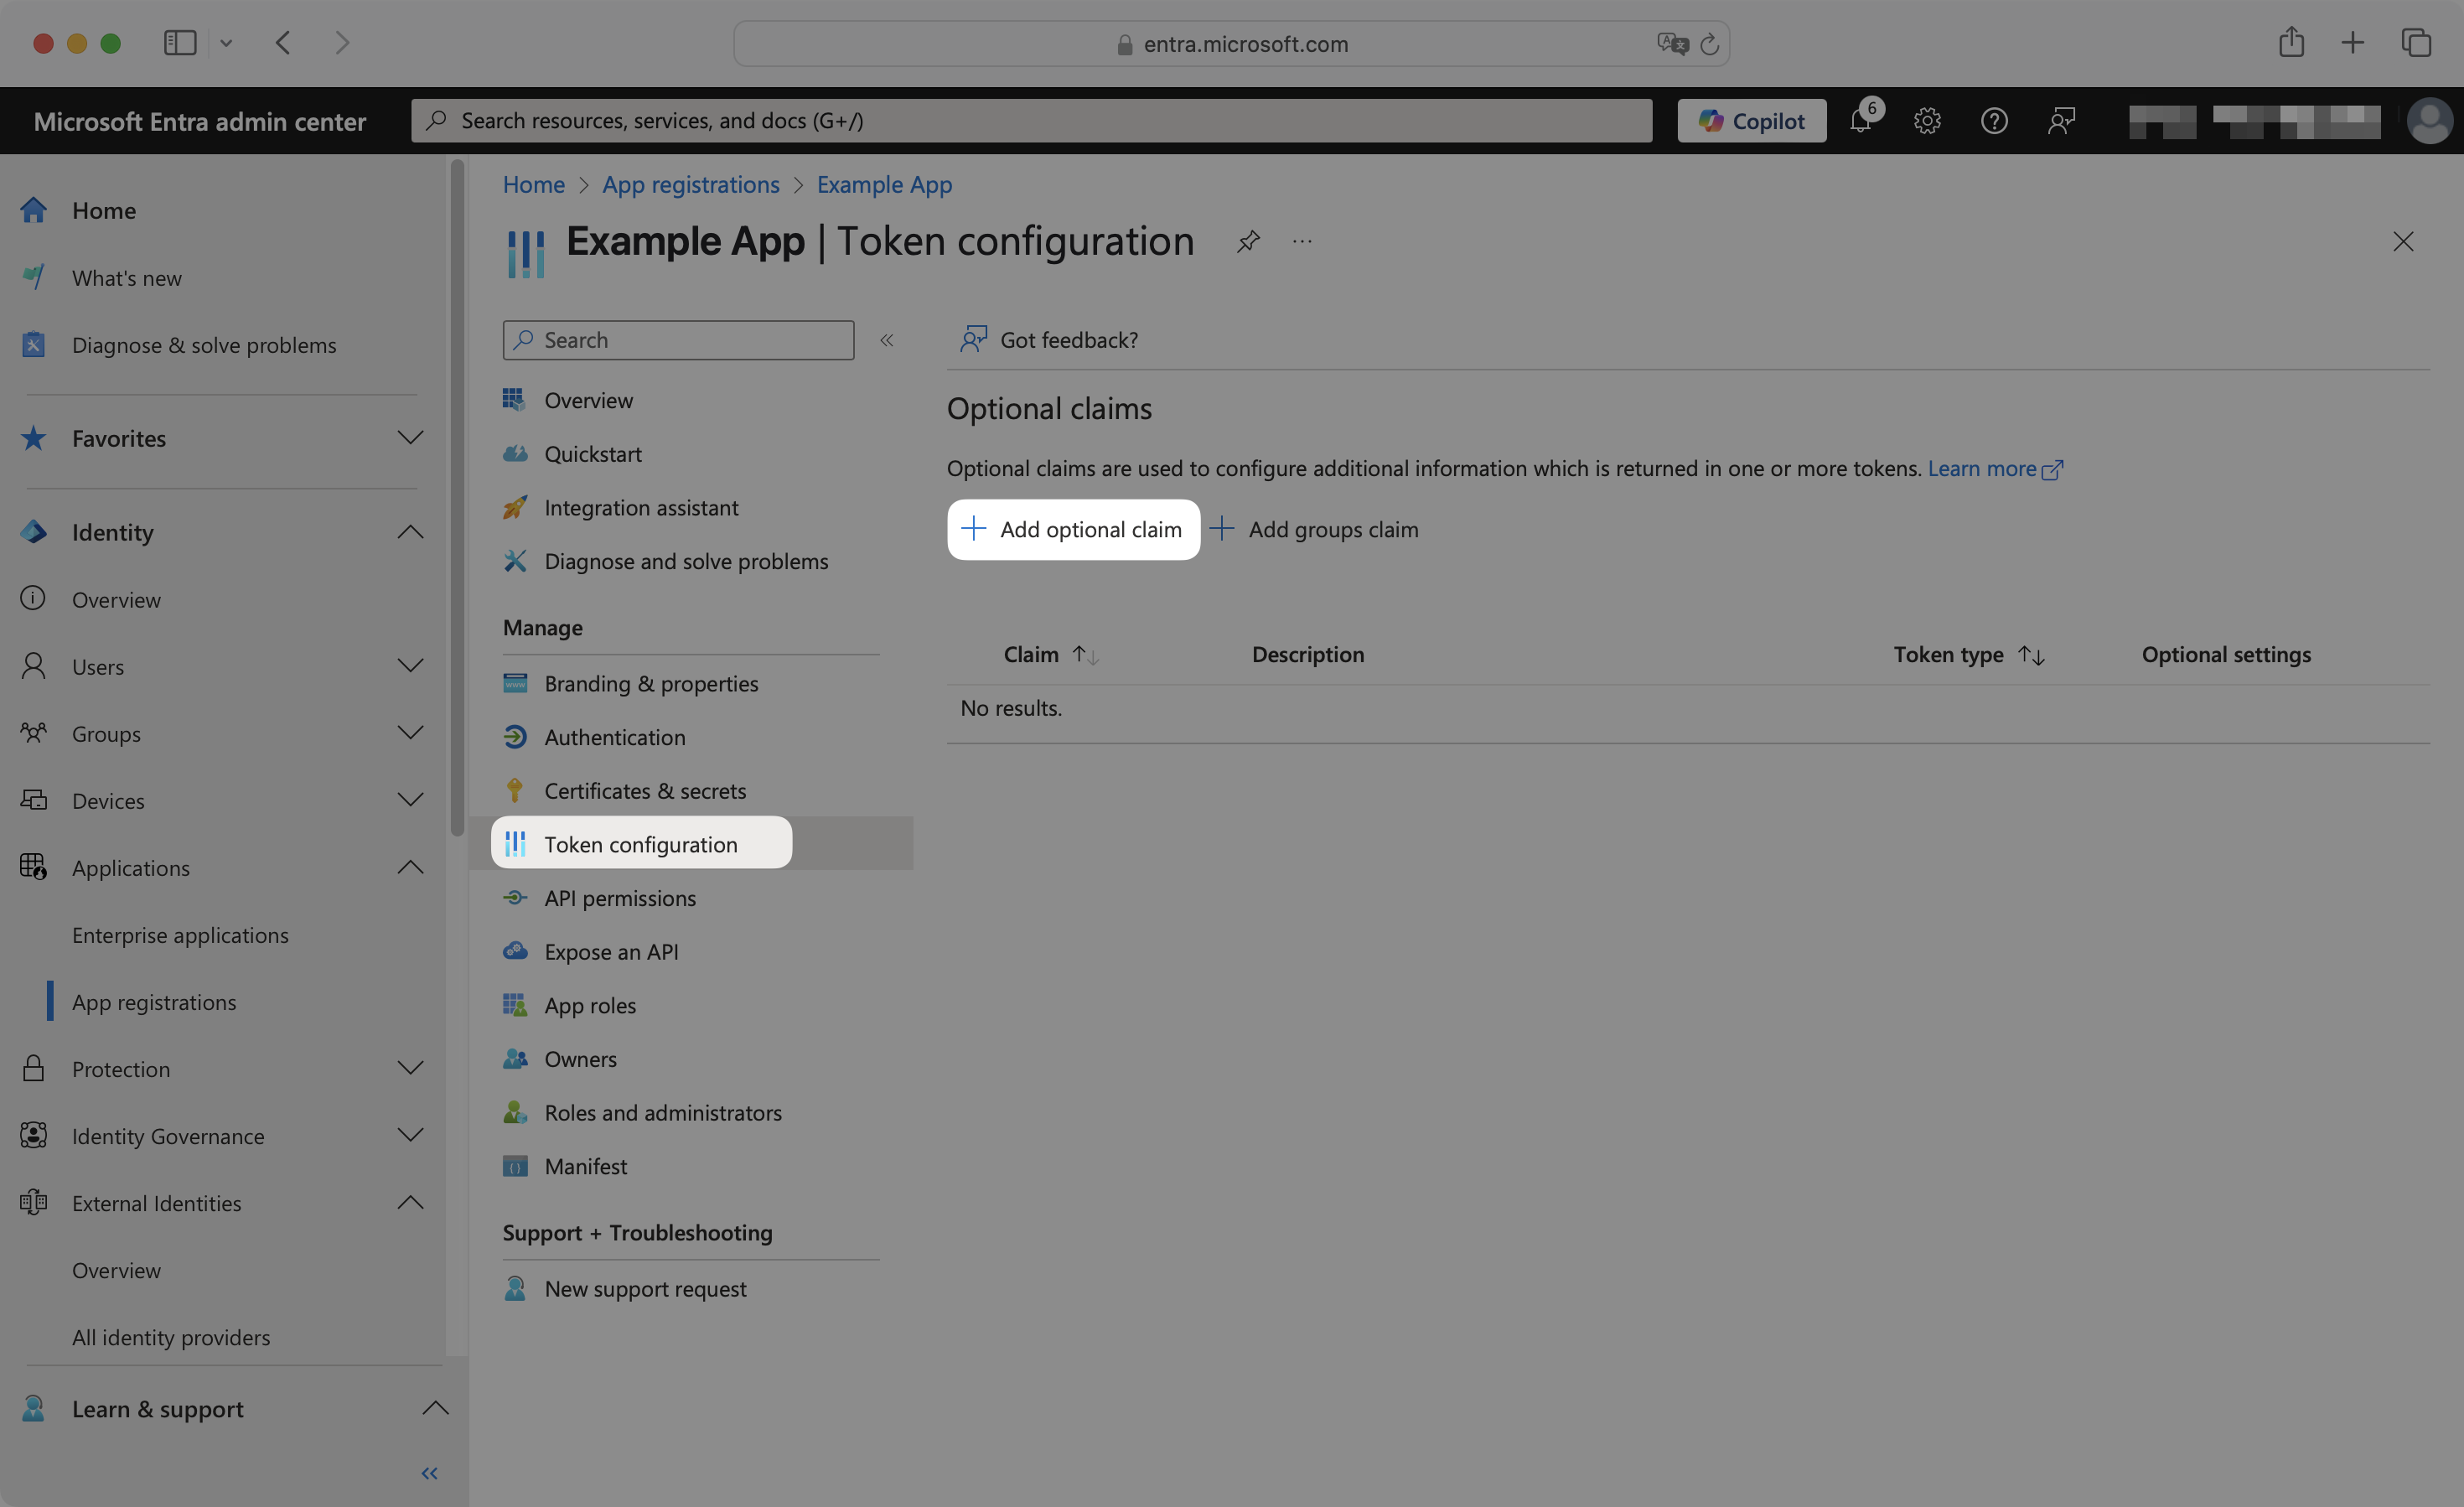
Select ID token type, and then select the following claims:
emailfamily_namegiven_name
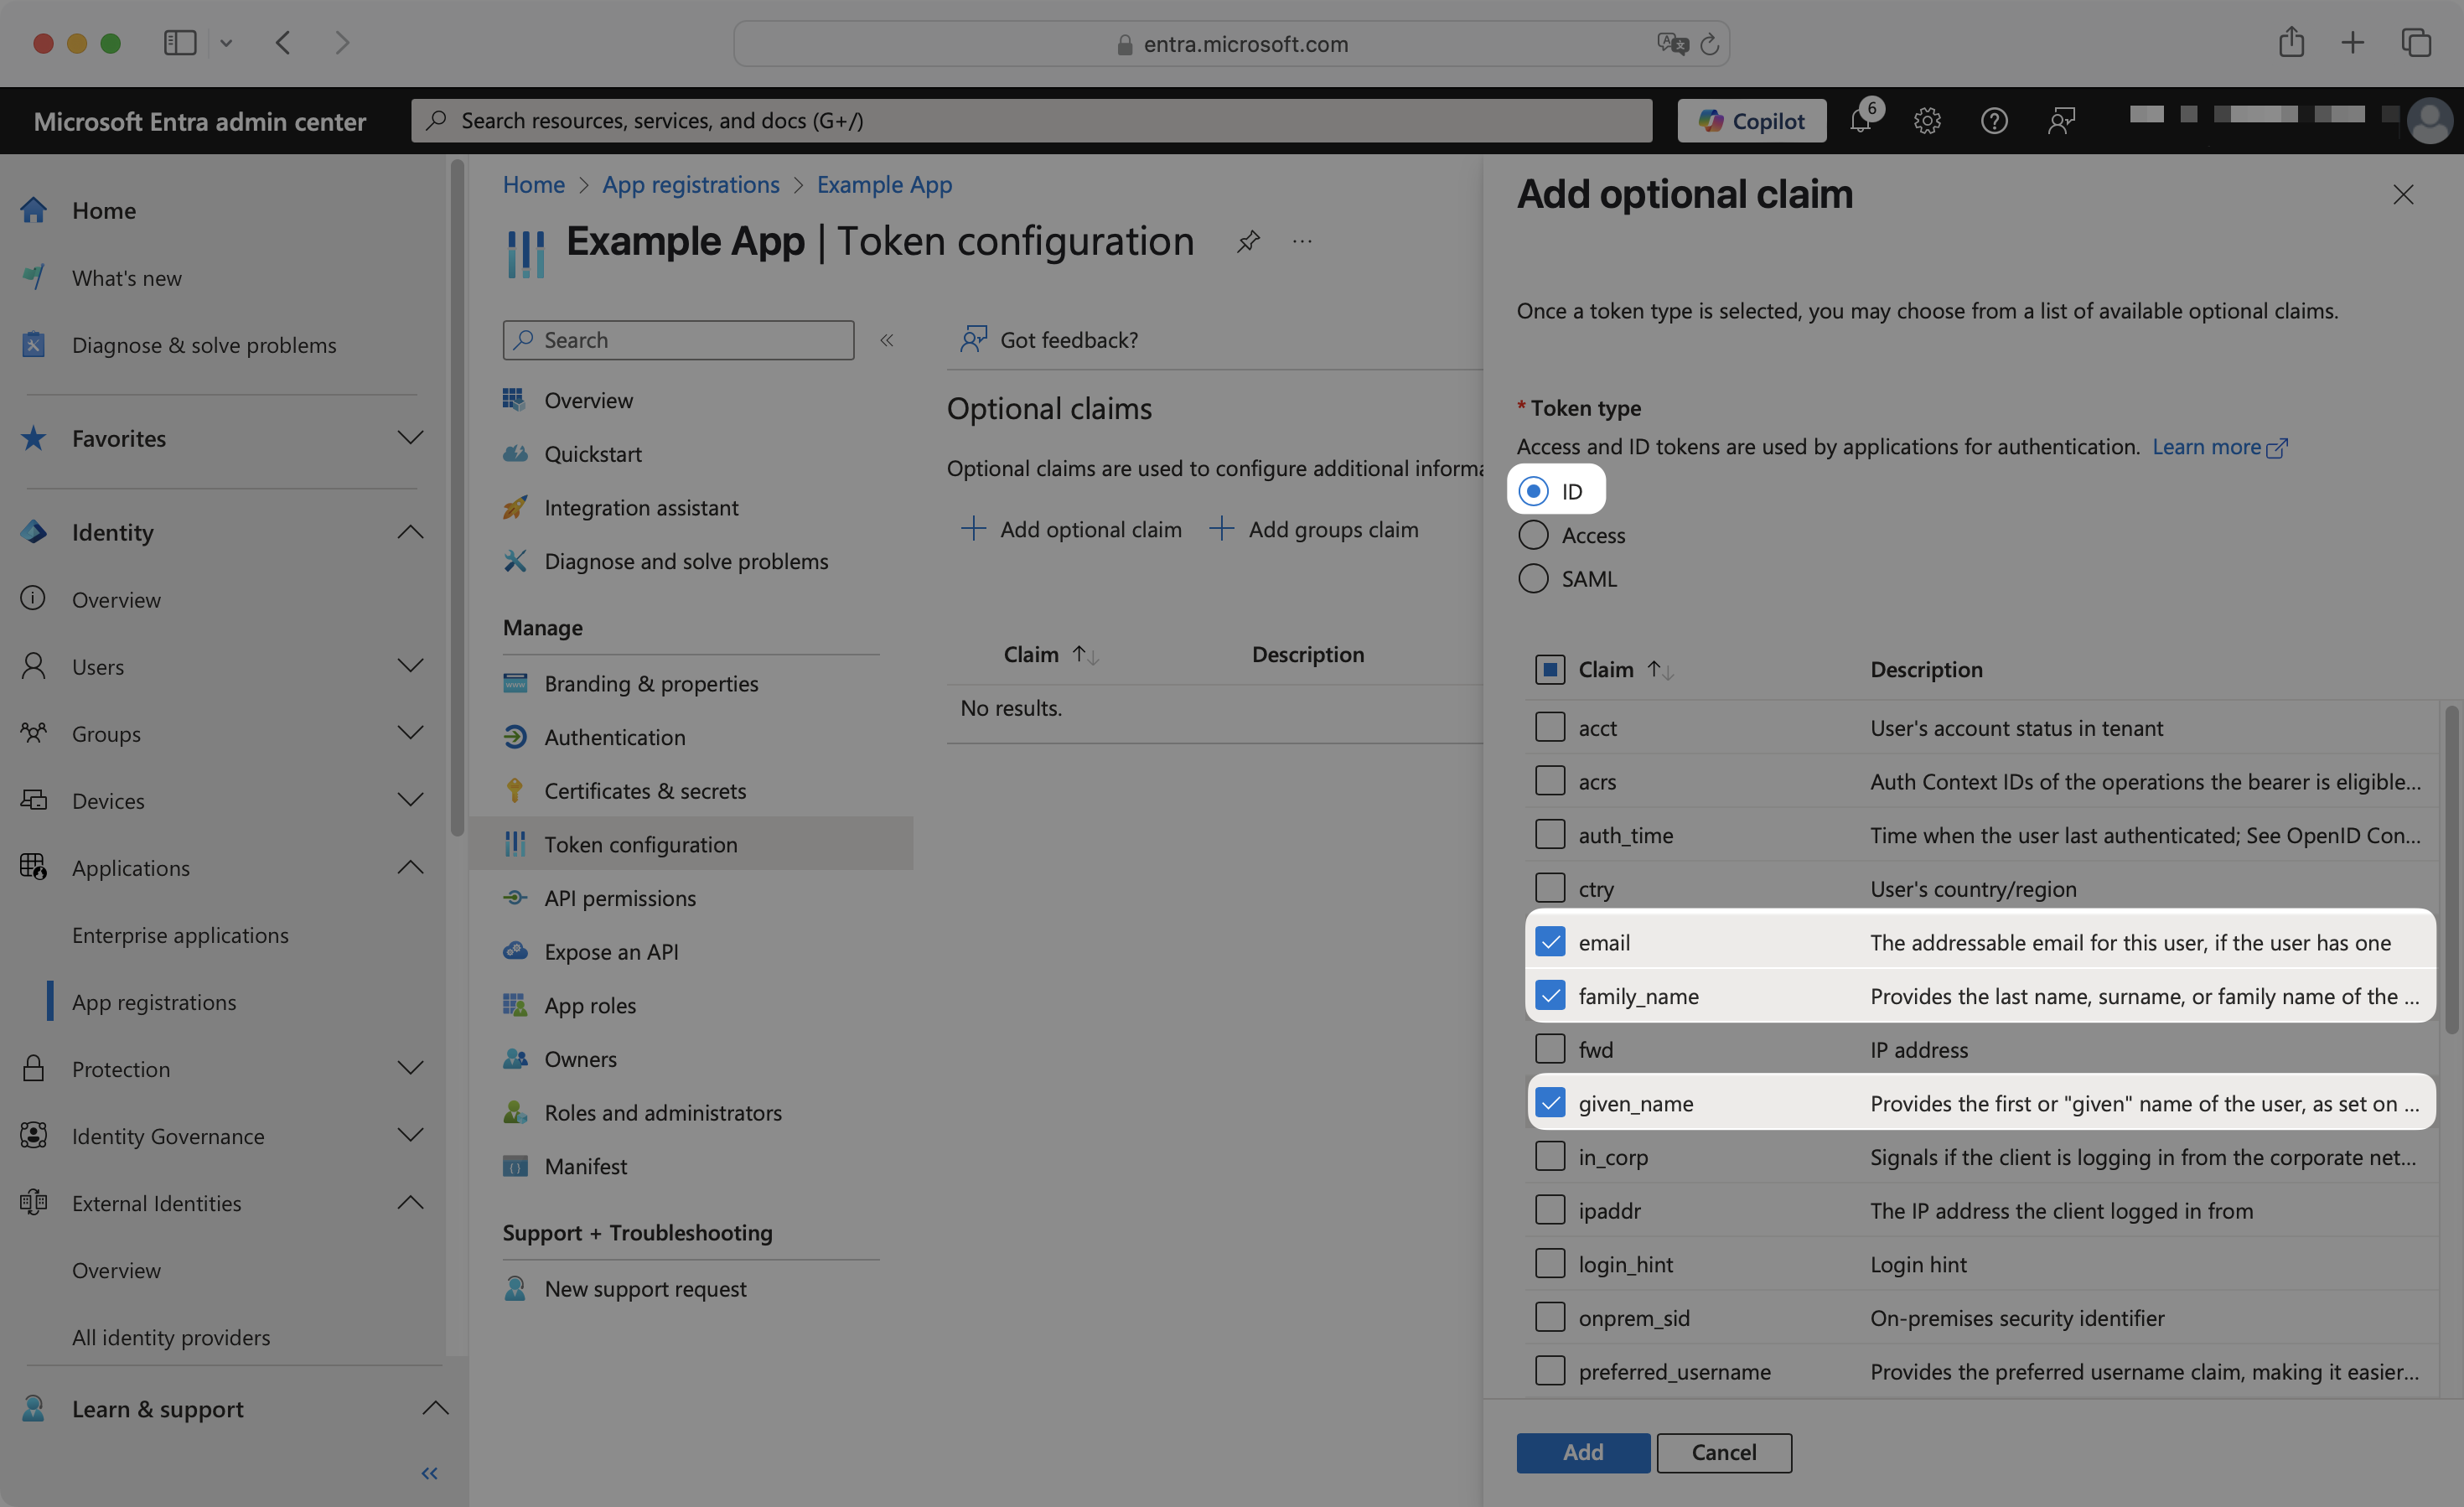
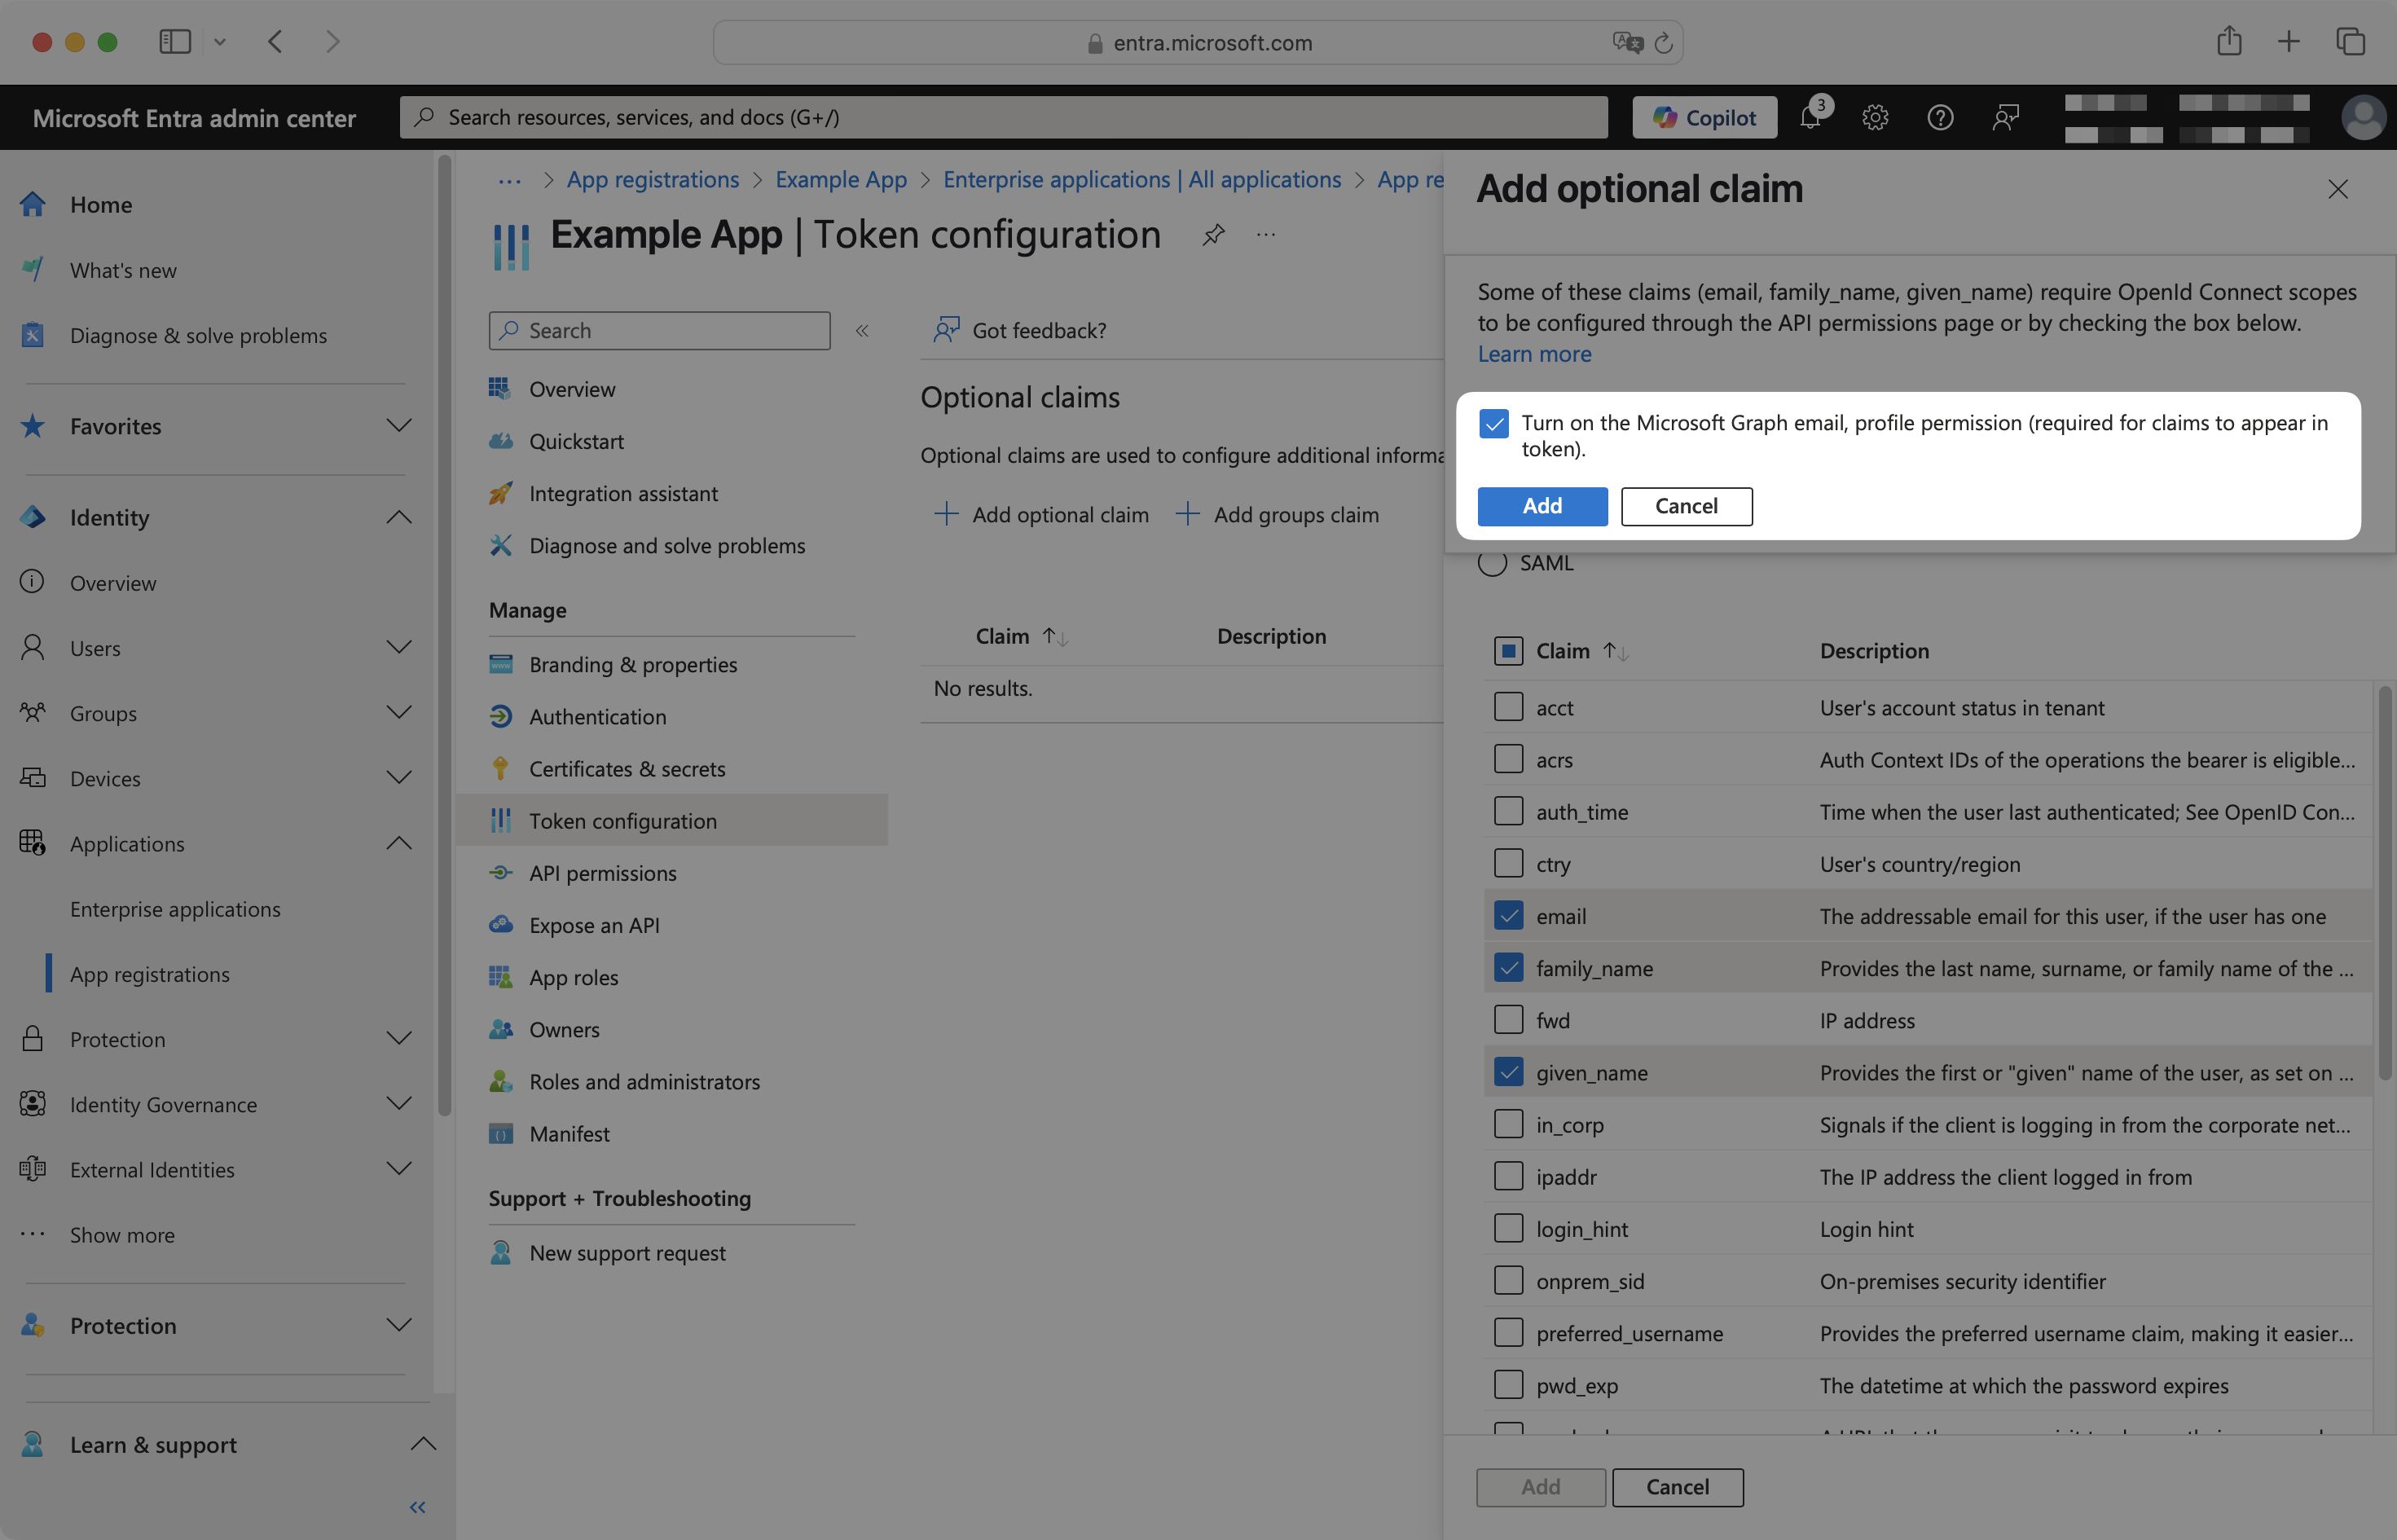
Click Add. In the pop-up, select Turn on the Microsoft Graph email, profile permission, then click Add.
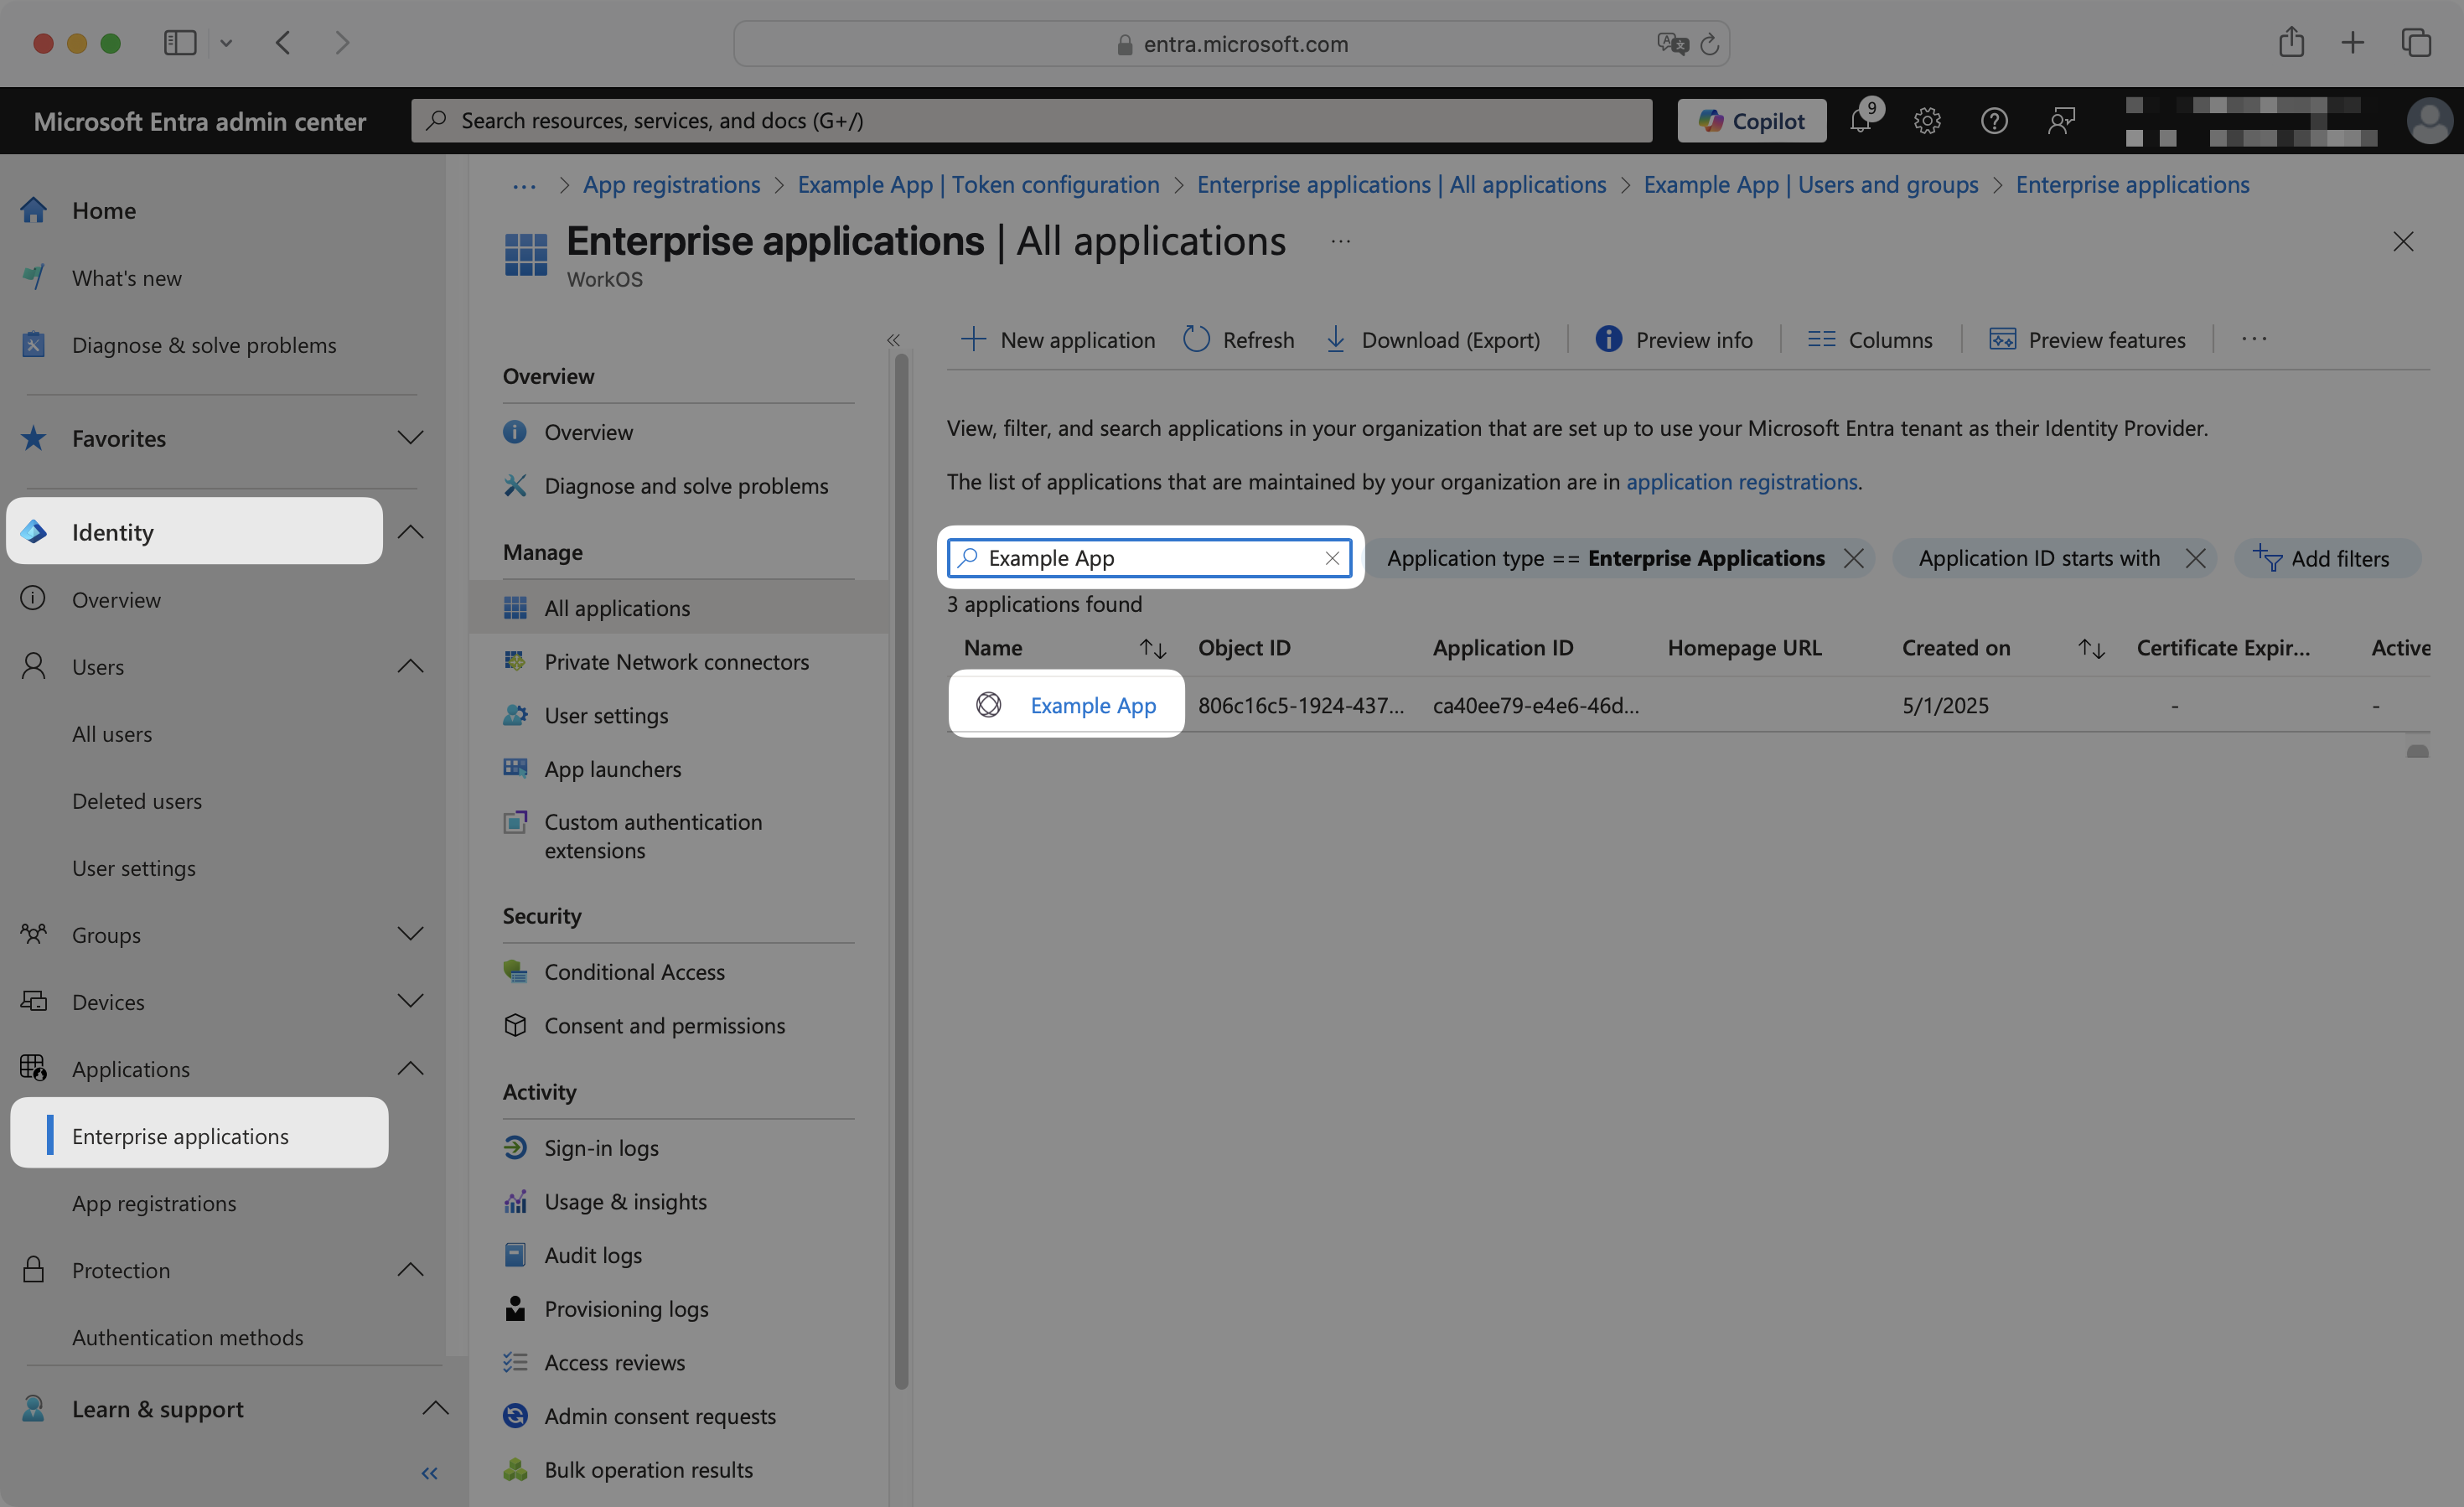
In the left navigation menu, expand the Identity section. Expand the Applications sub-section. Select the Enterprise applications tab.
Search for your application by name and select it.
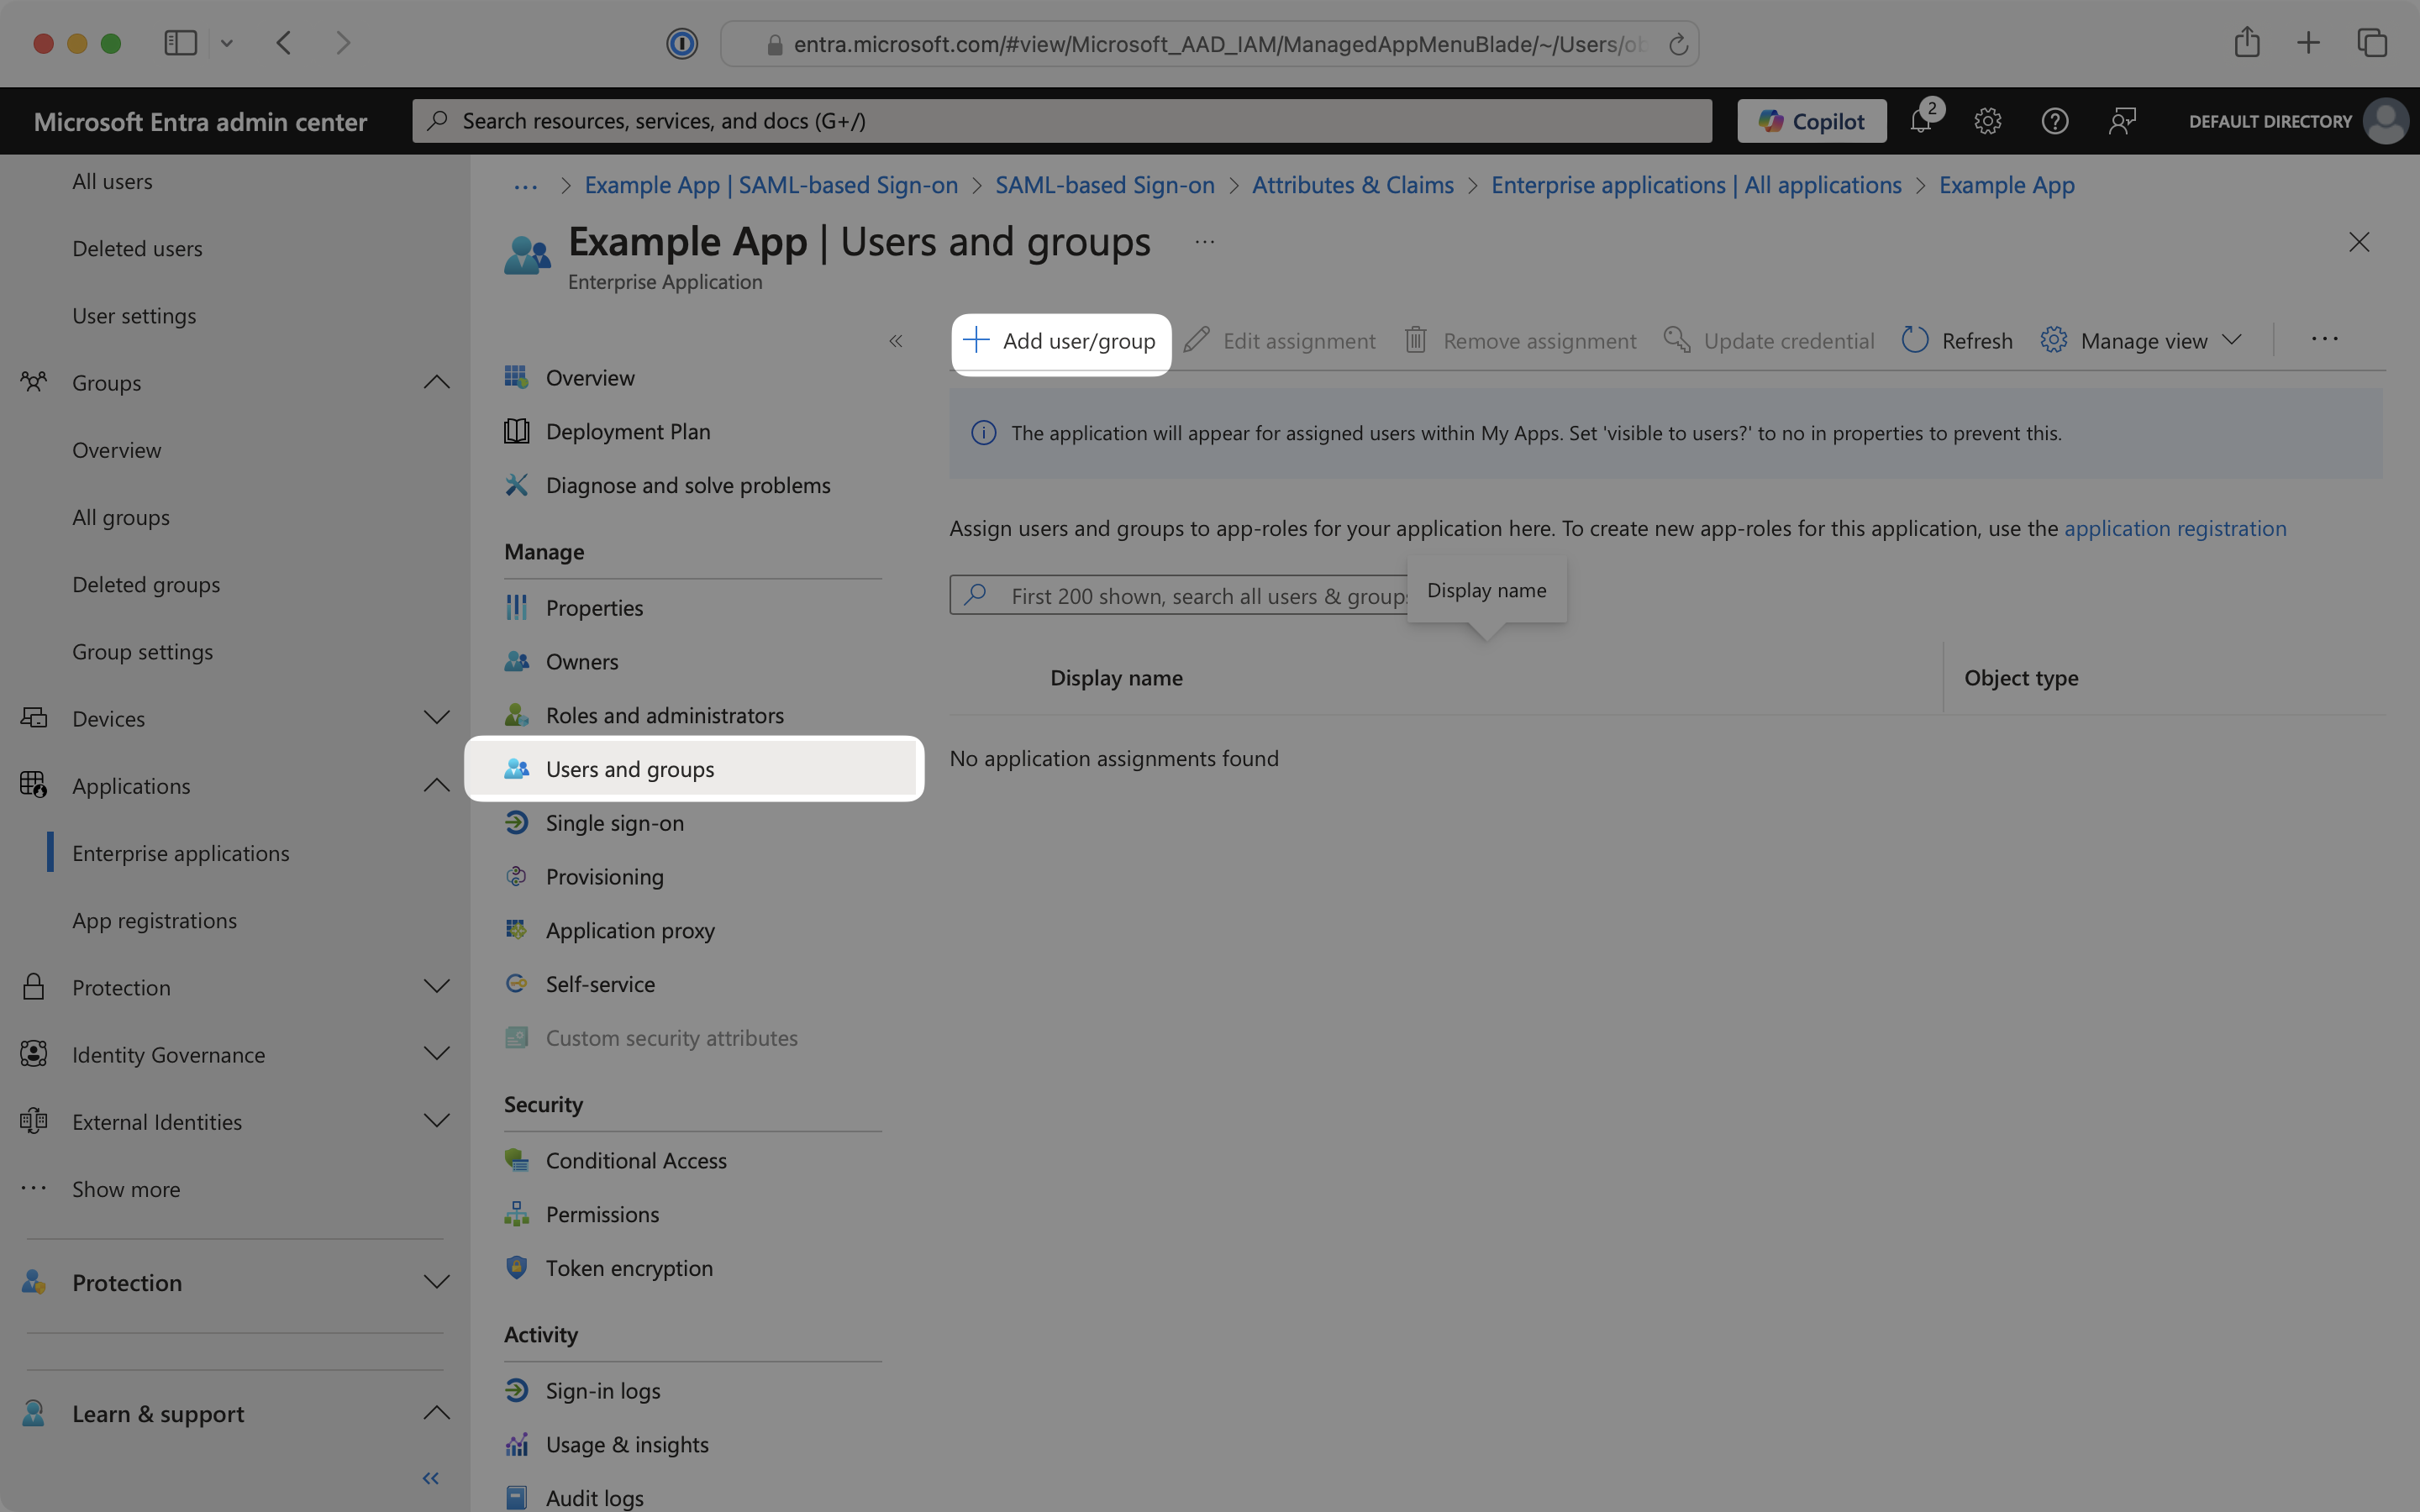
From the Enterprise application page, select the Users and groups tab. Click Add user/group.
Select appropriate users and groups to add to the OIDC application.
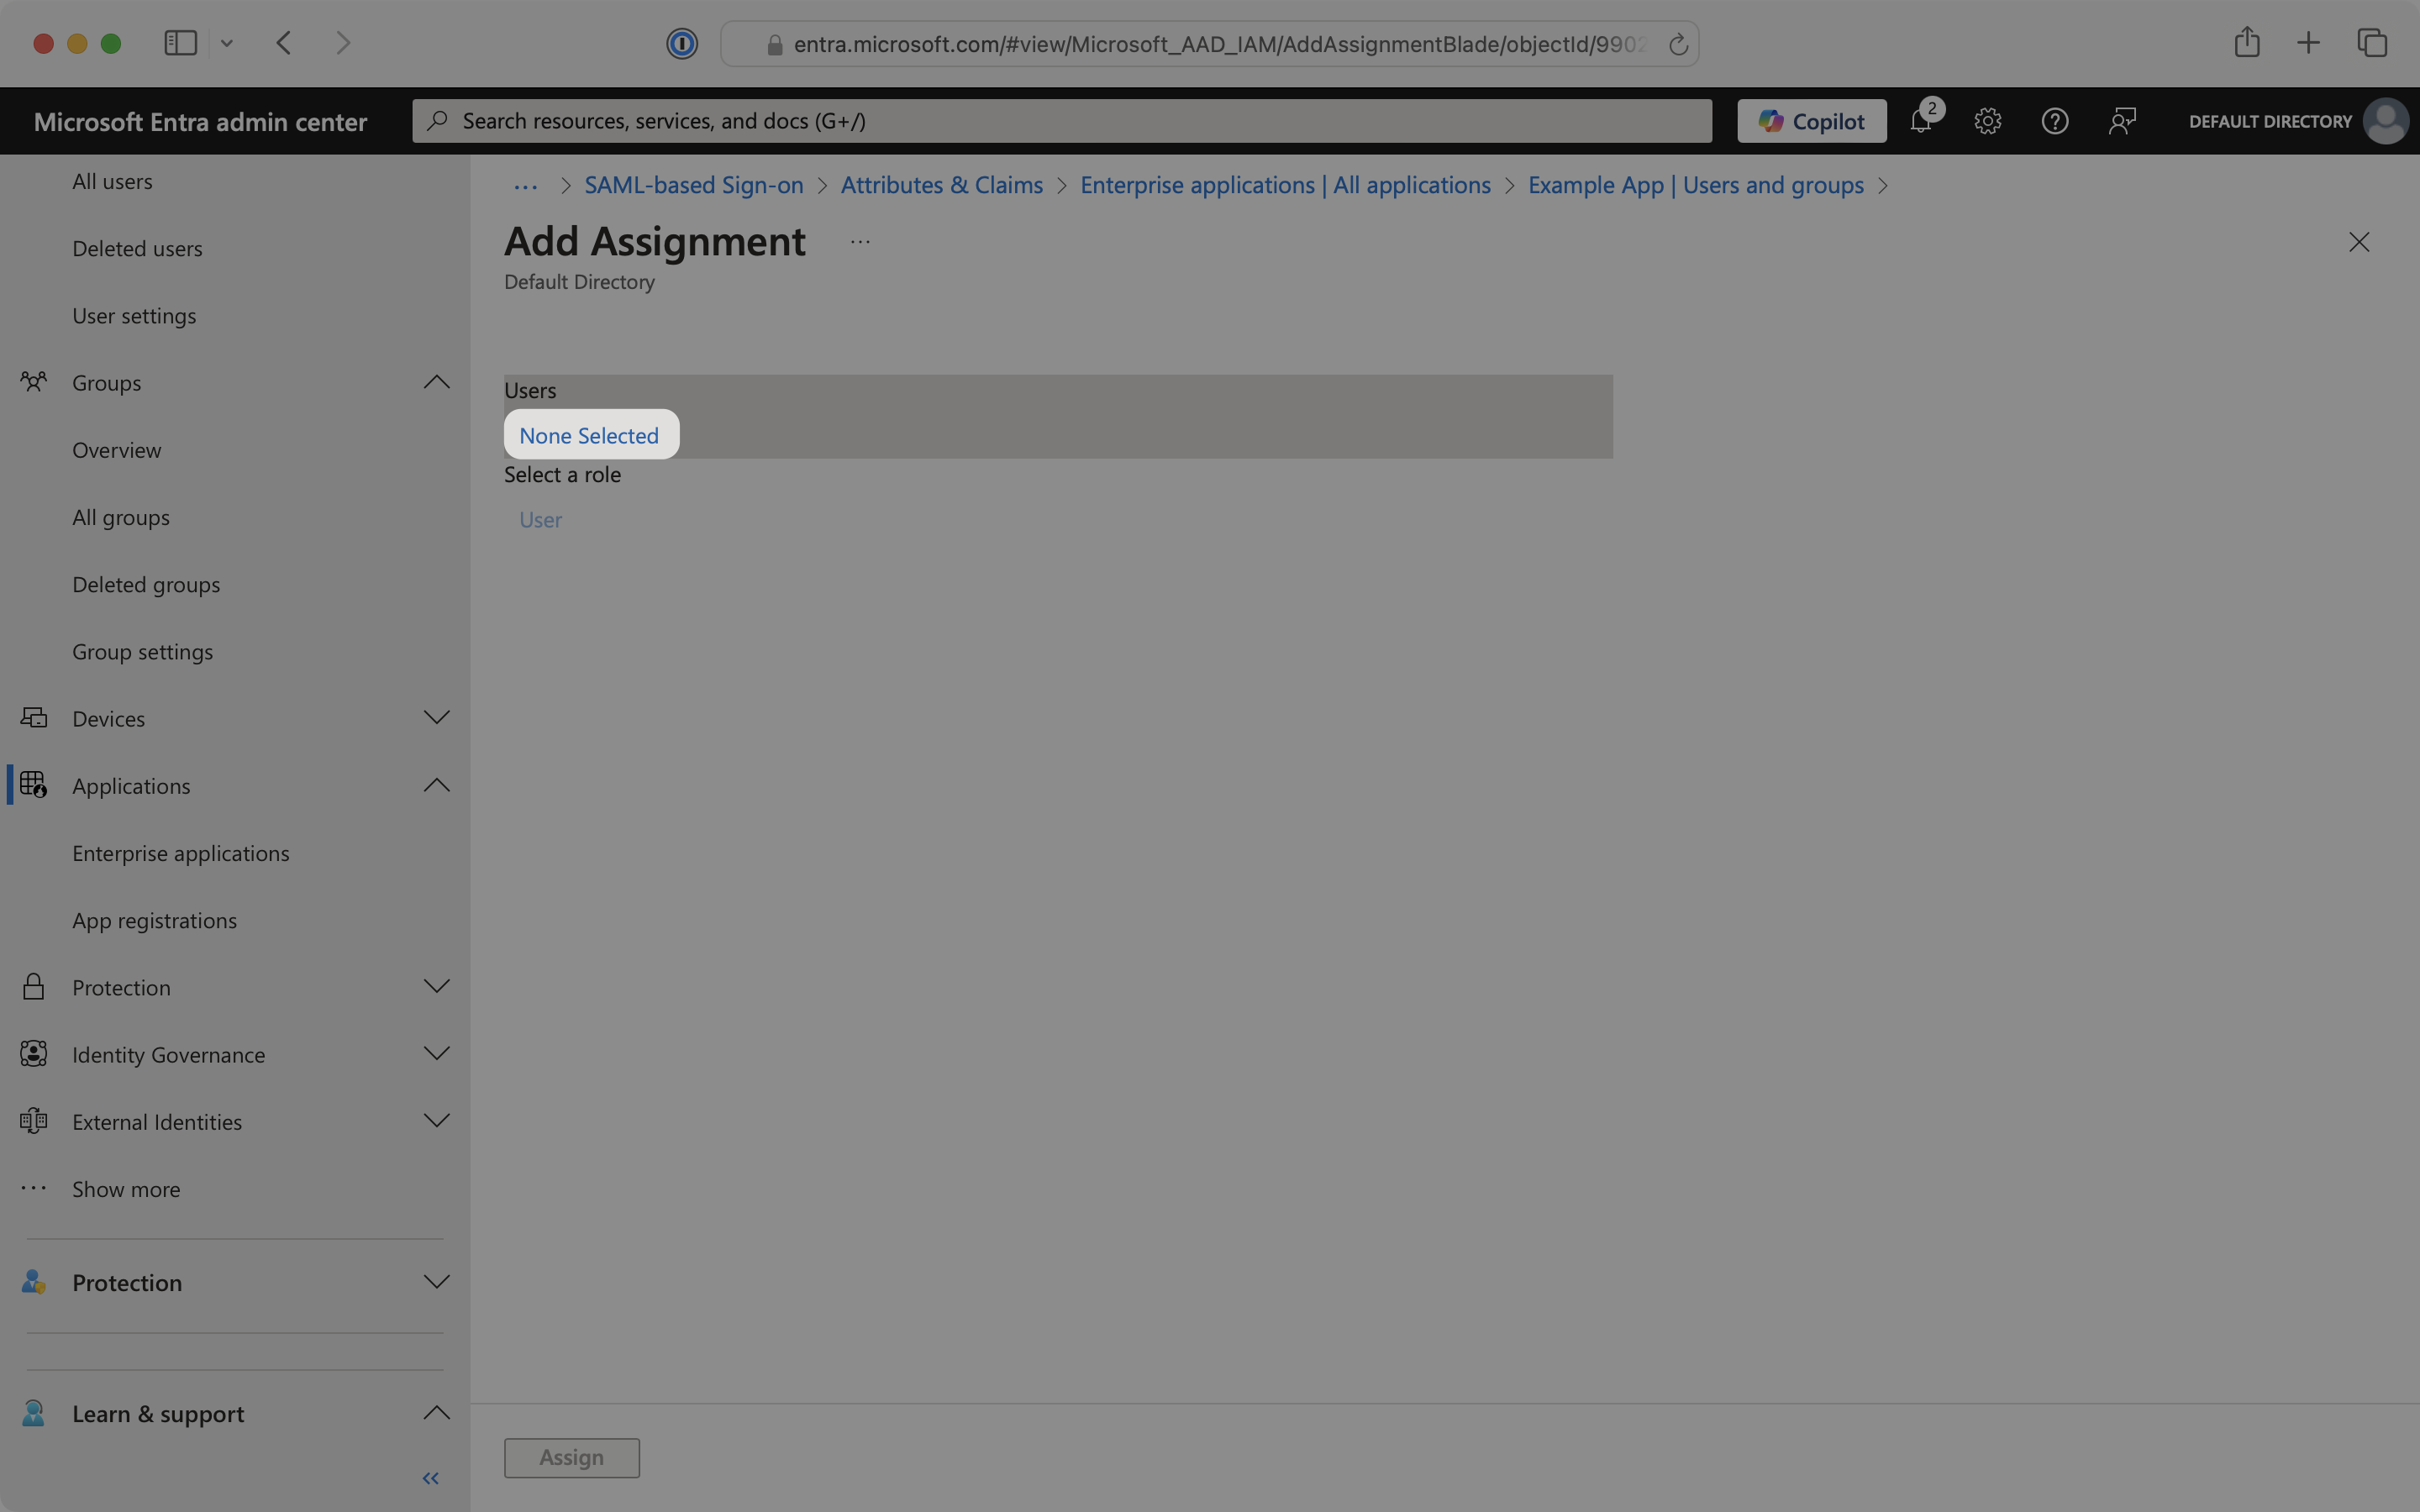
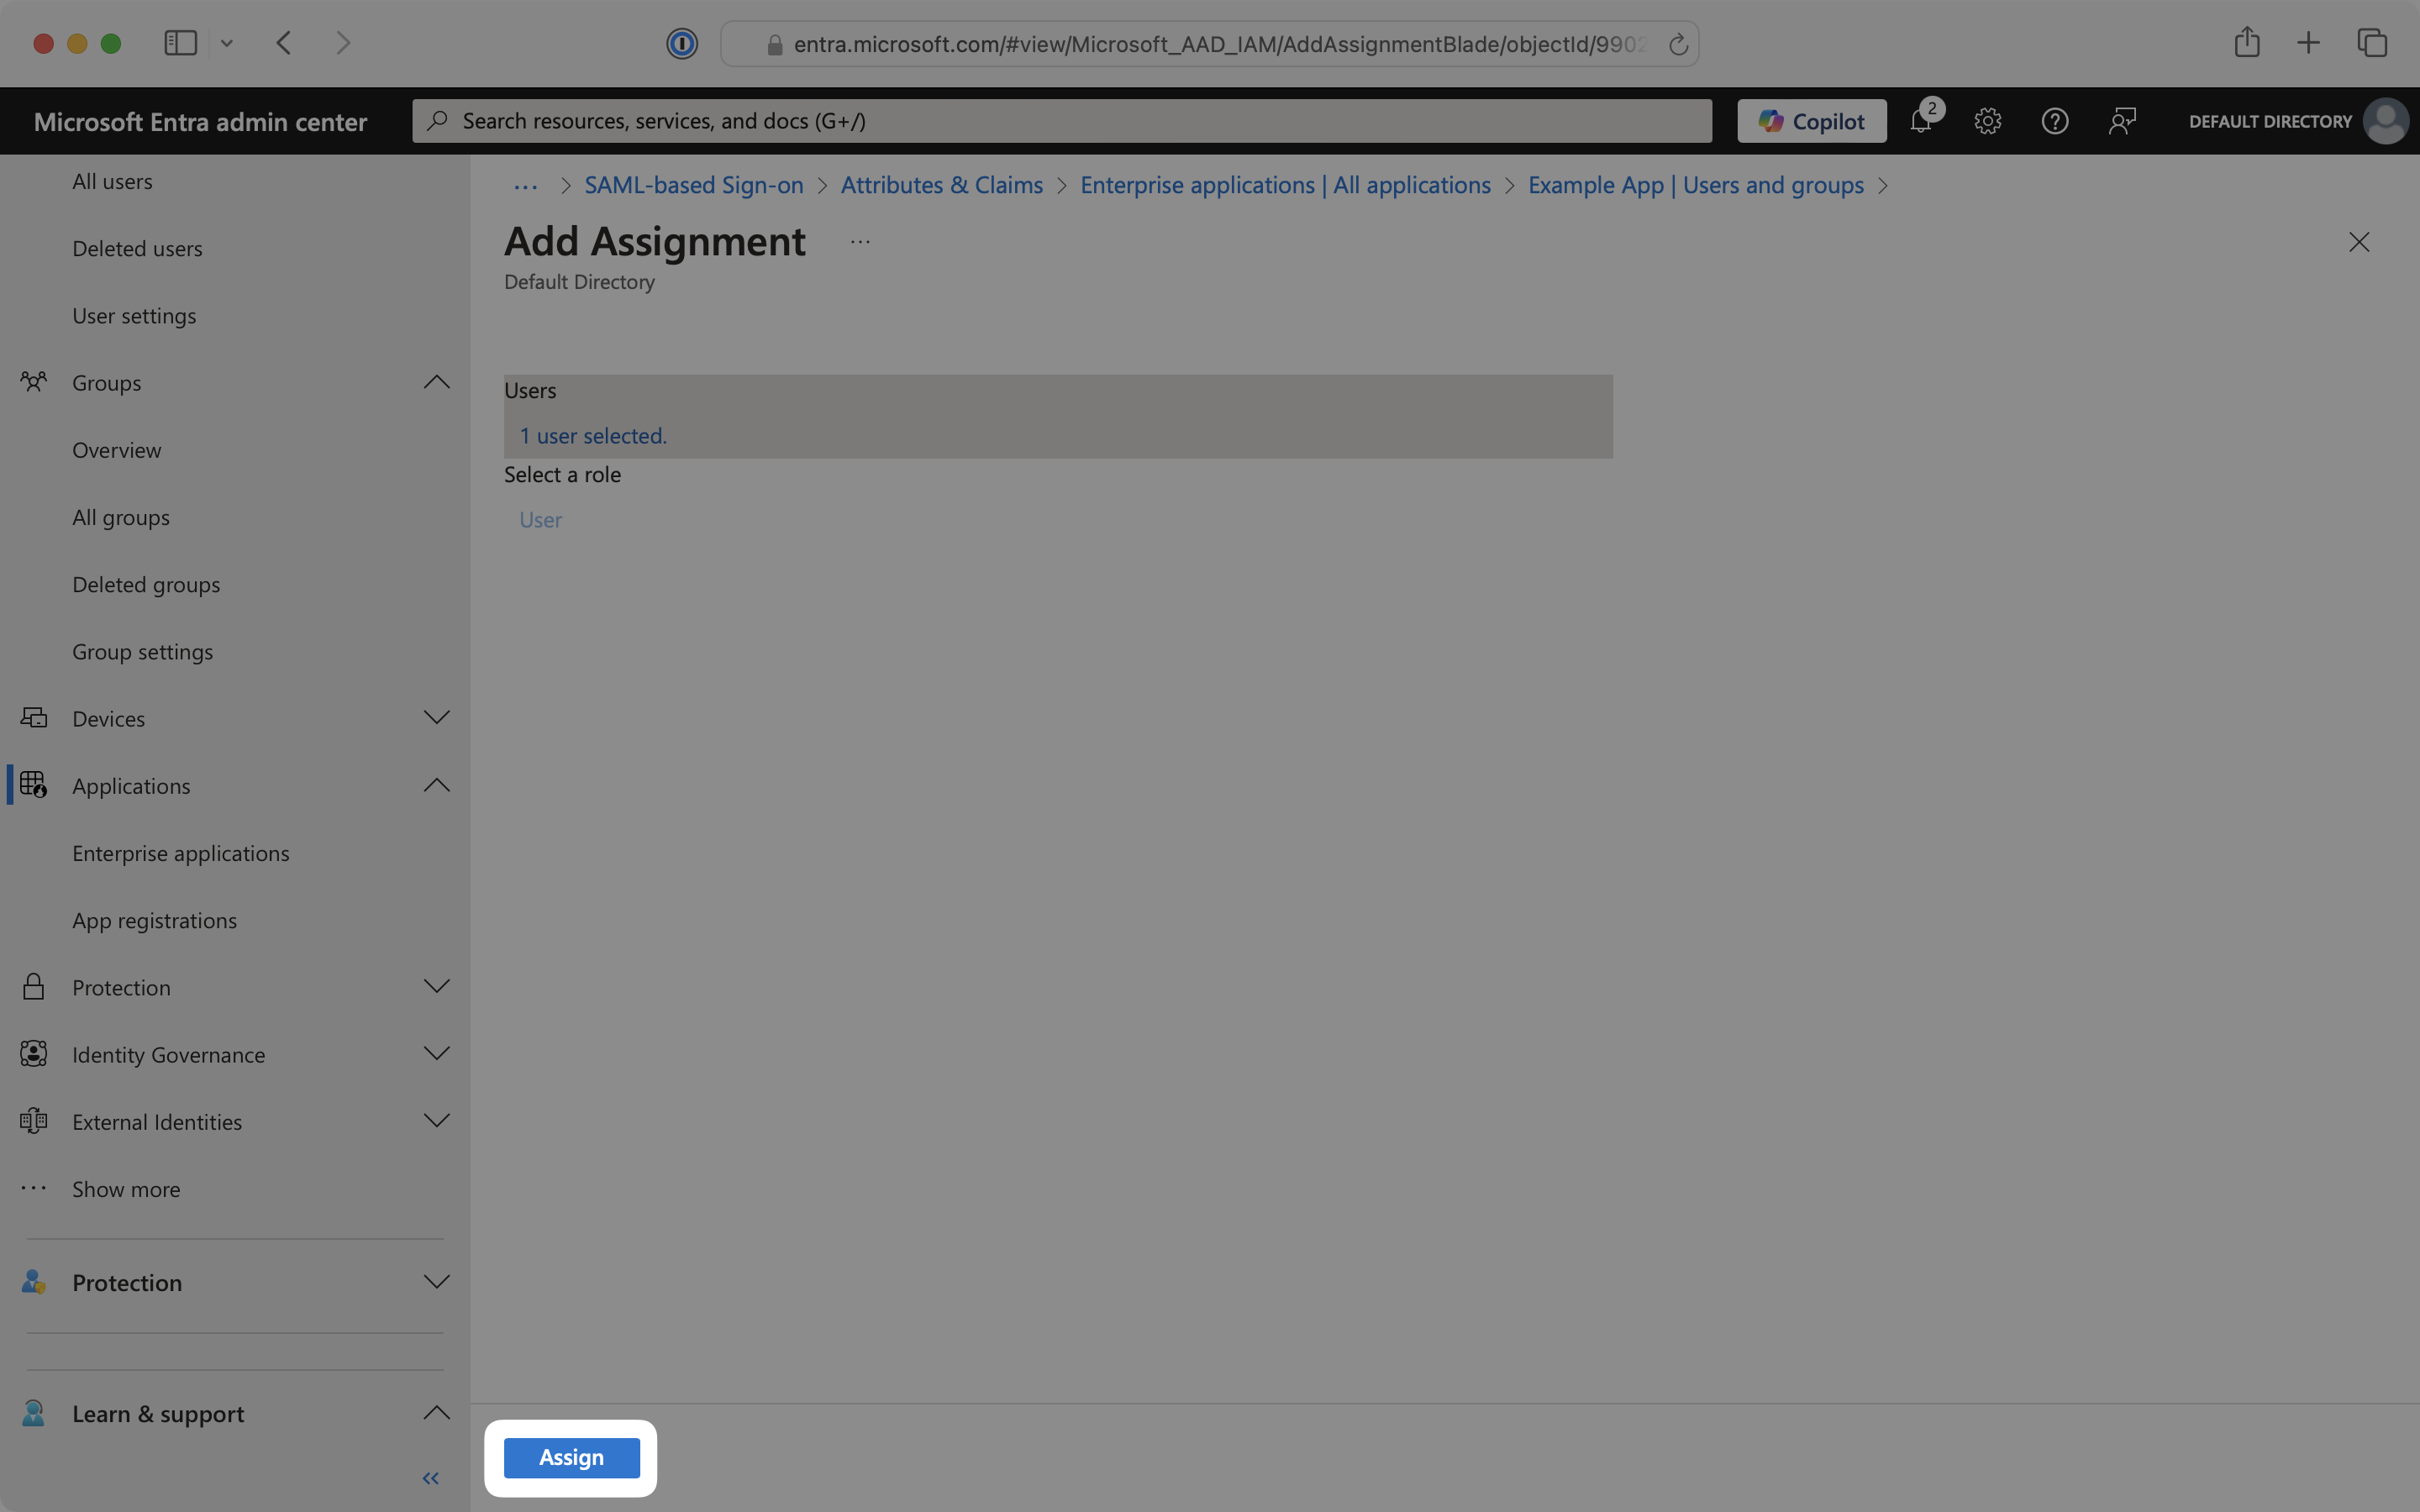
When finished, click Assign to add the selected users to your OIDC application.
With identity provider role assignment, users can receive roles within your application based on their group memberships. Users will automatically be granted the assigned roles within your application when they authenticate. To enable this functionality:
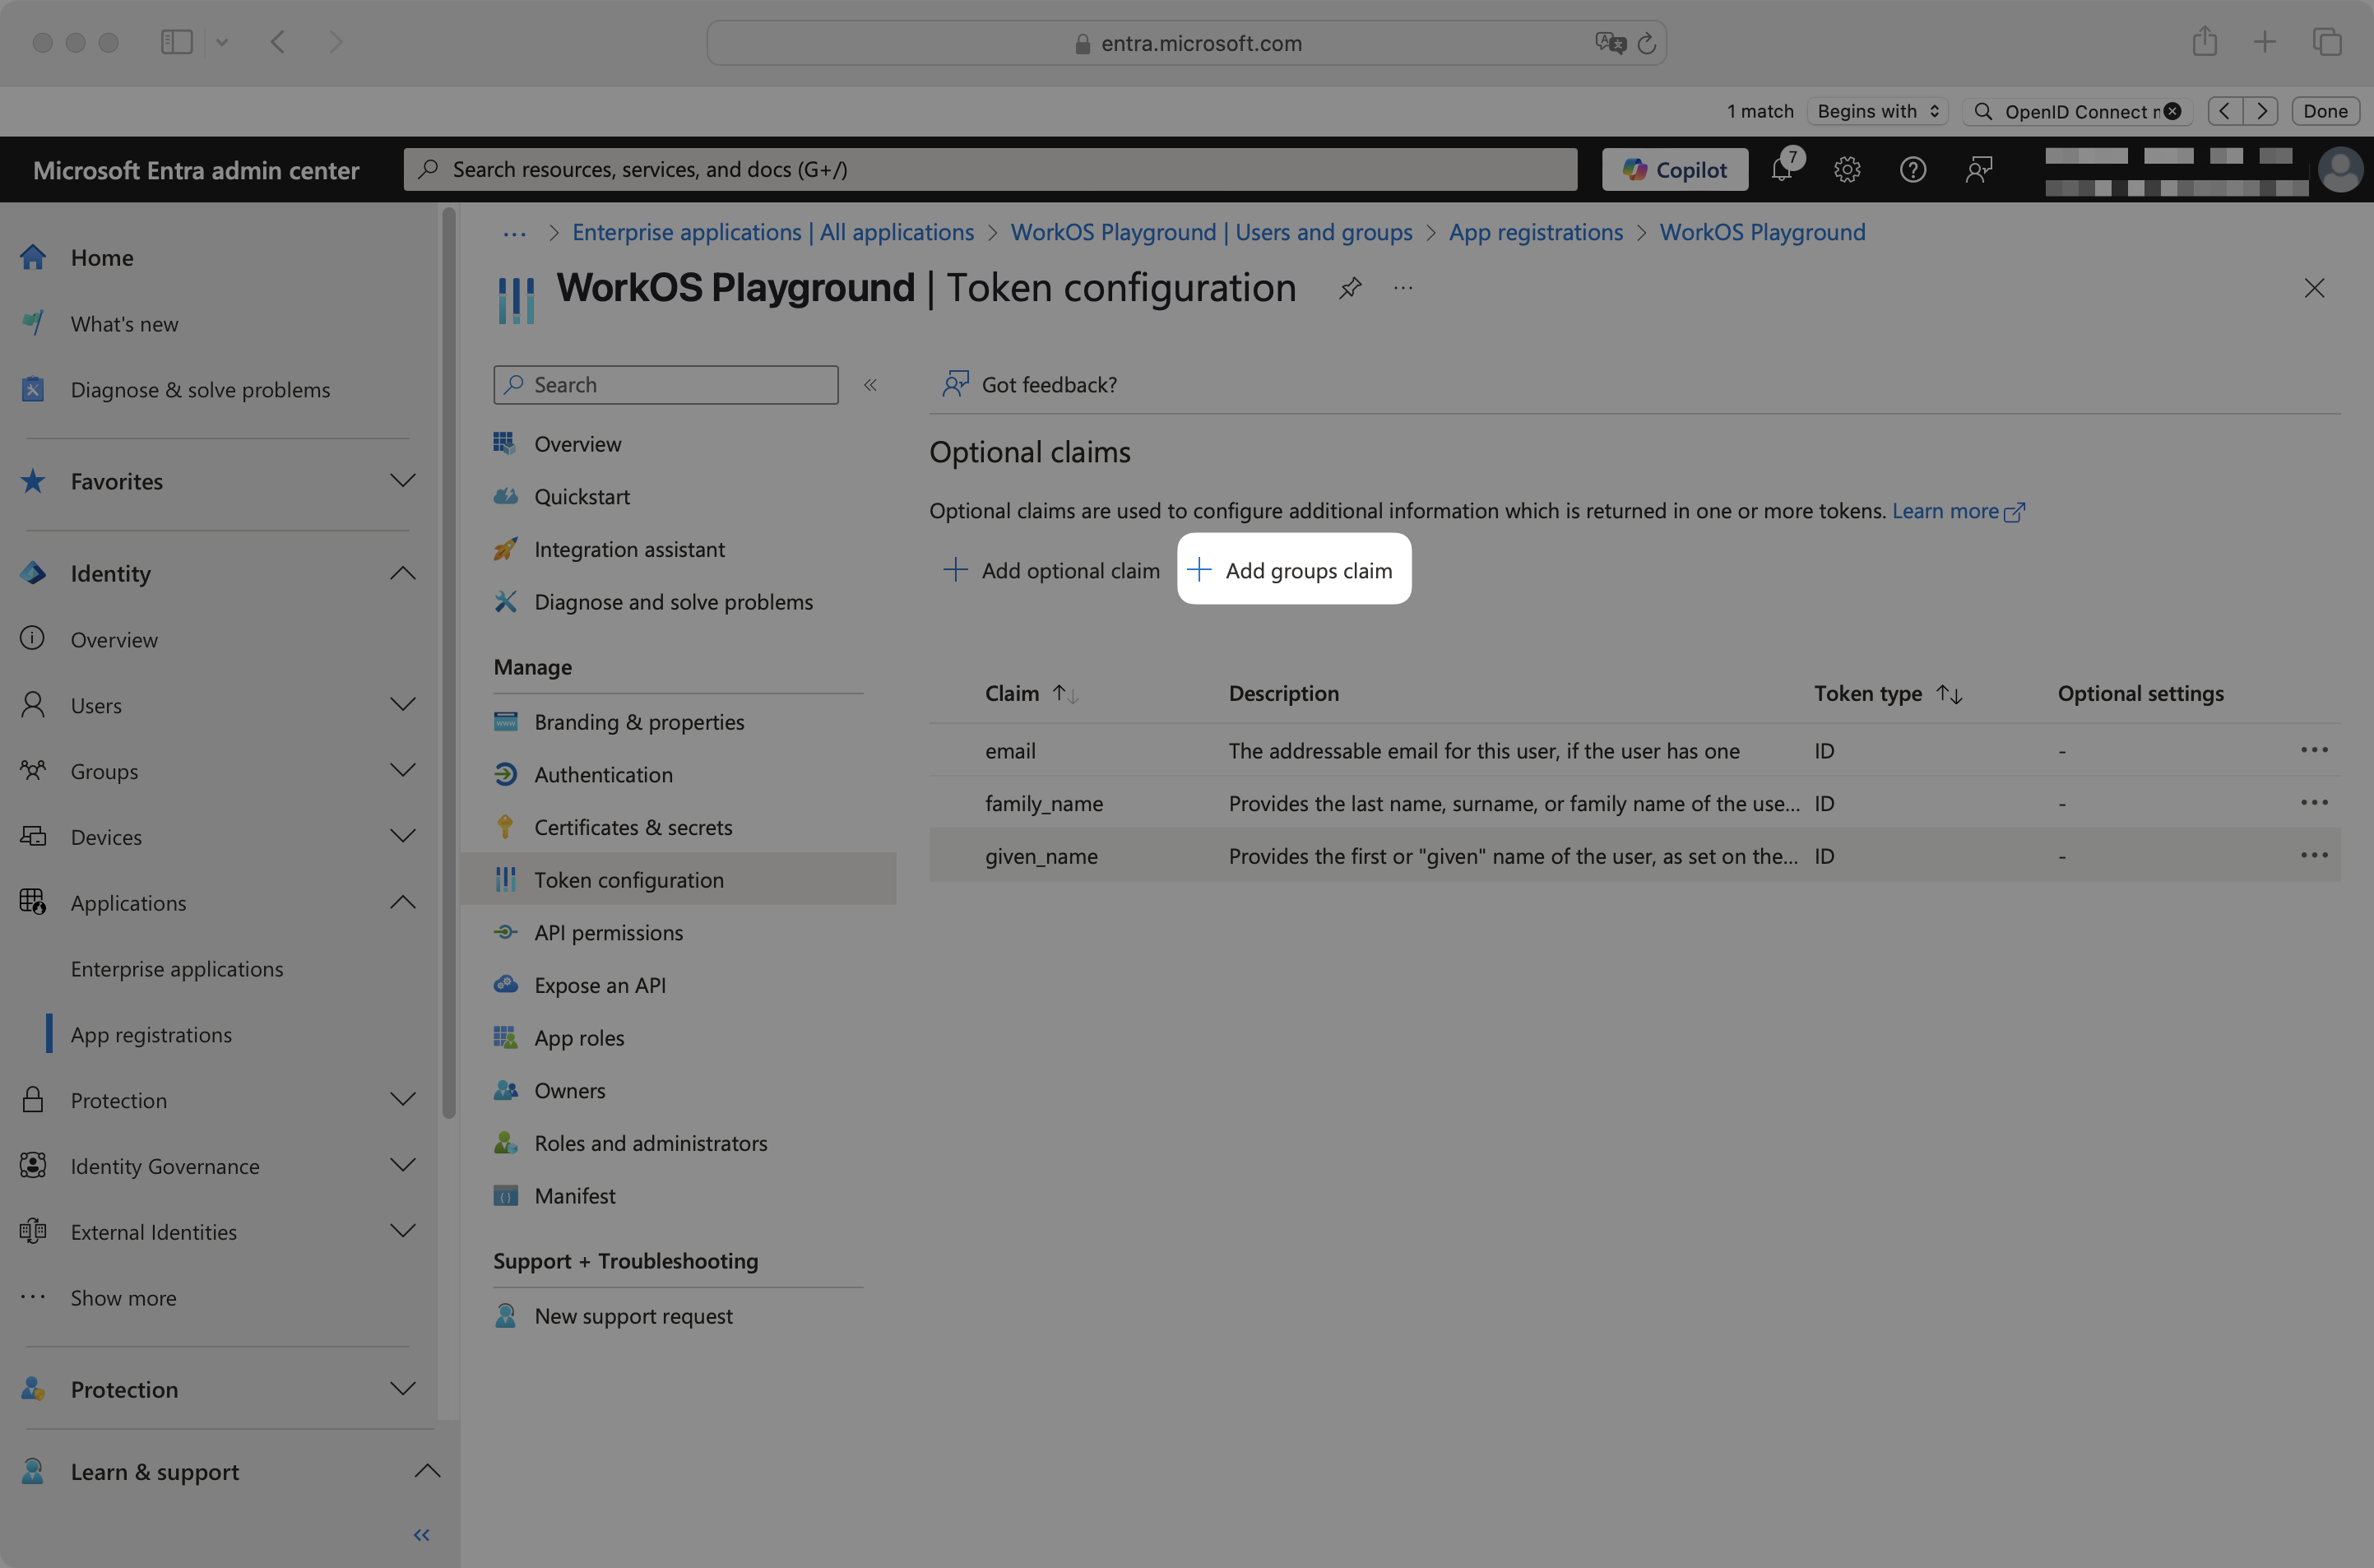
From the app registration, navigate to the Token configuration page. Click Add groups claim.
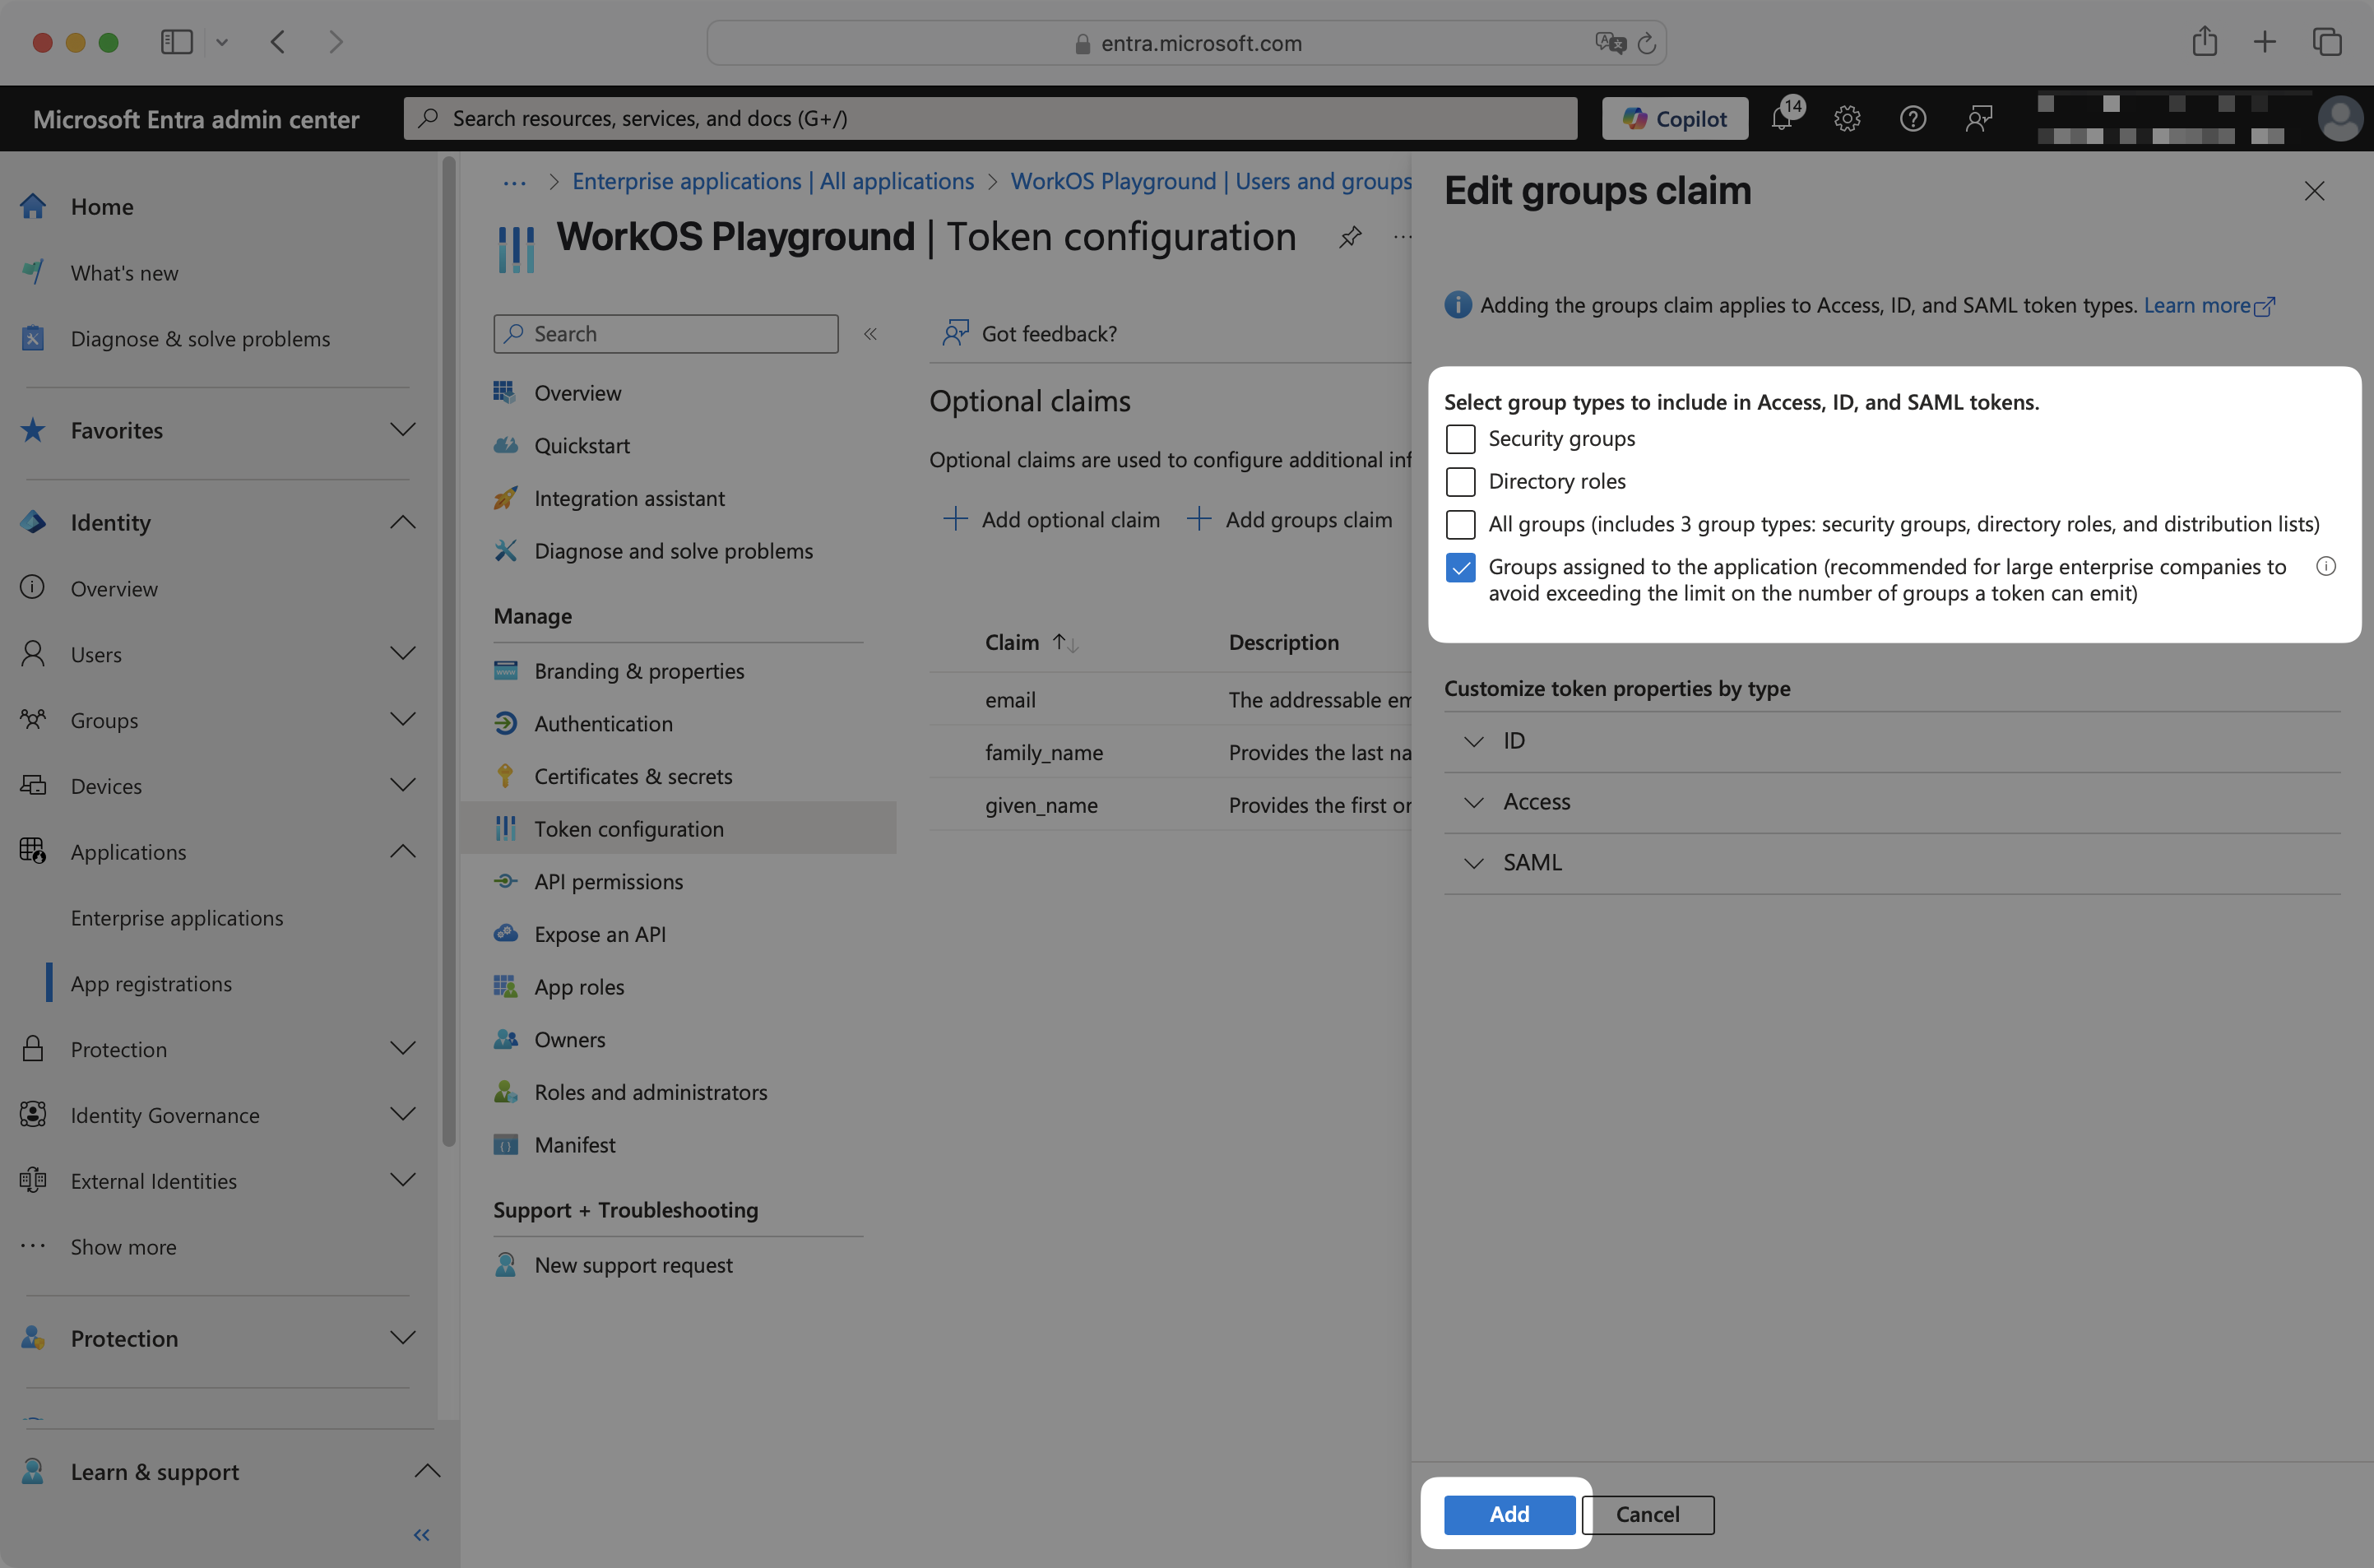
In the Group Claims panel, select appropriate groups. For example, you could select Groups assigned to the application to only send groups assigned to the OIDC app in Entra ID. Click Add.
From the SSO connection page in the WorkOS Dashboard, scroll to the Groups and role assignments section.
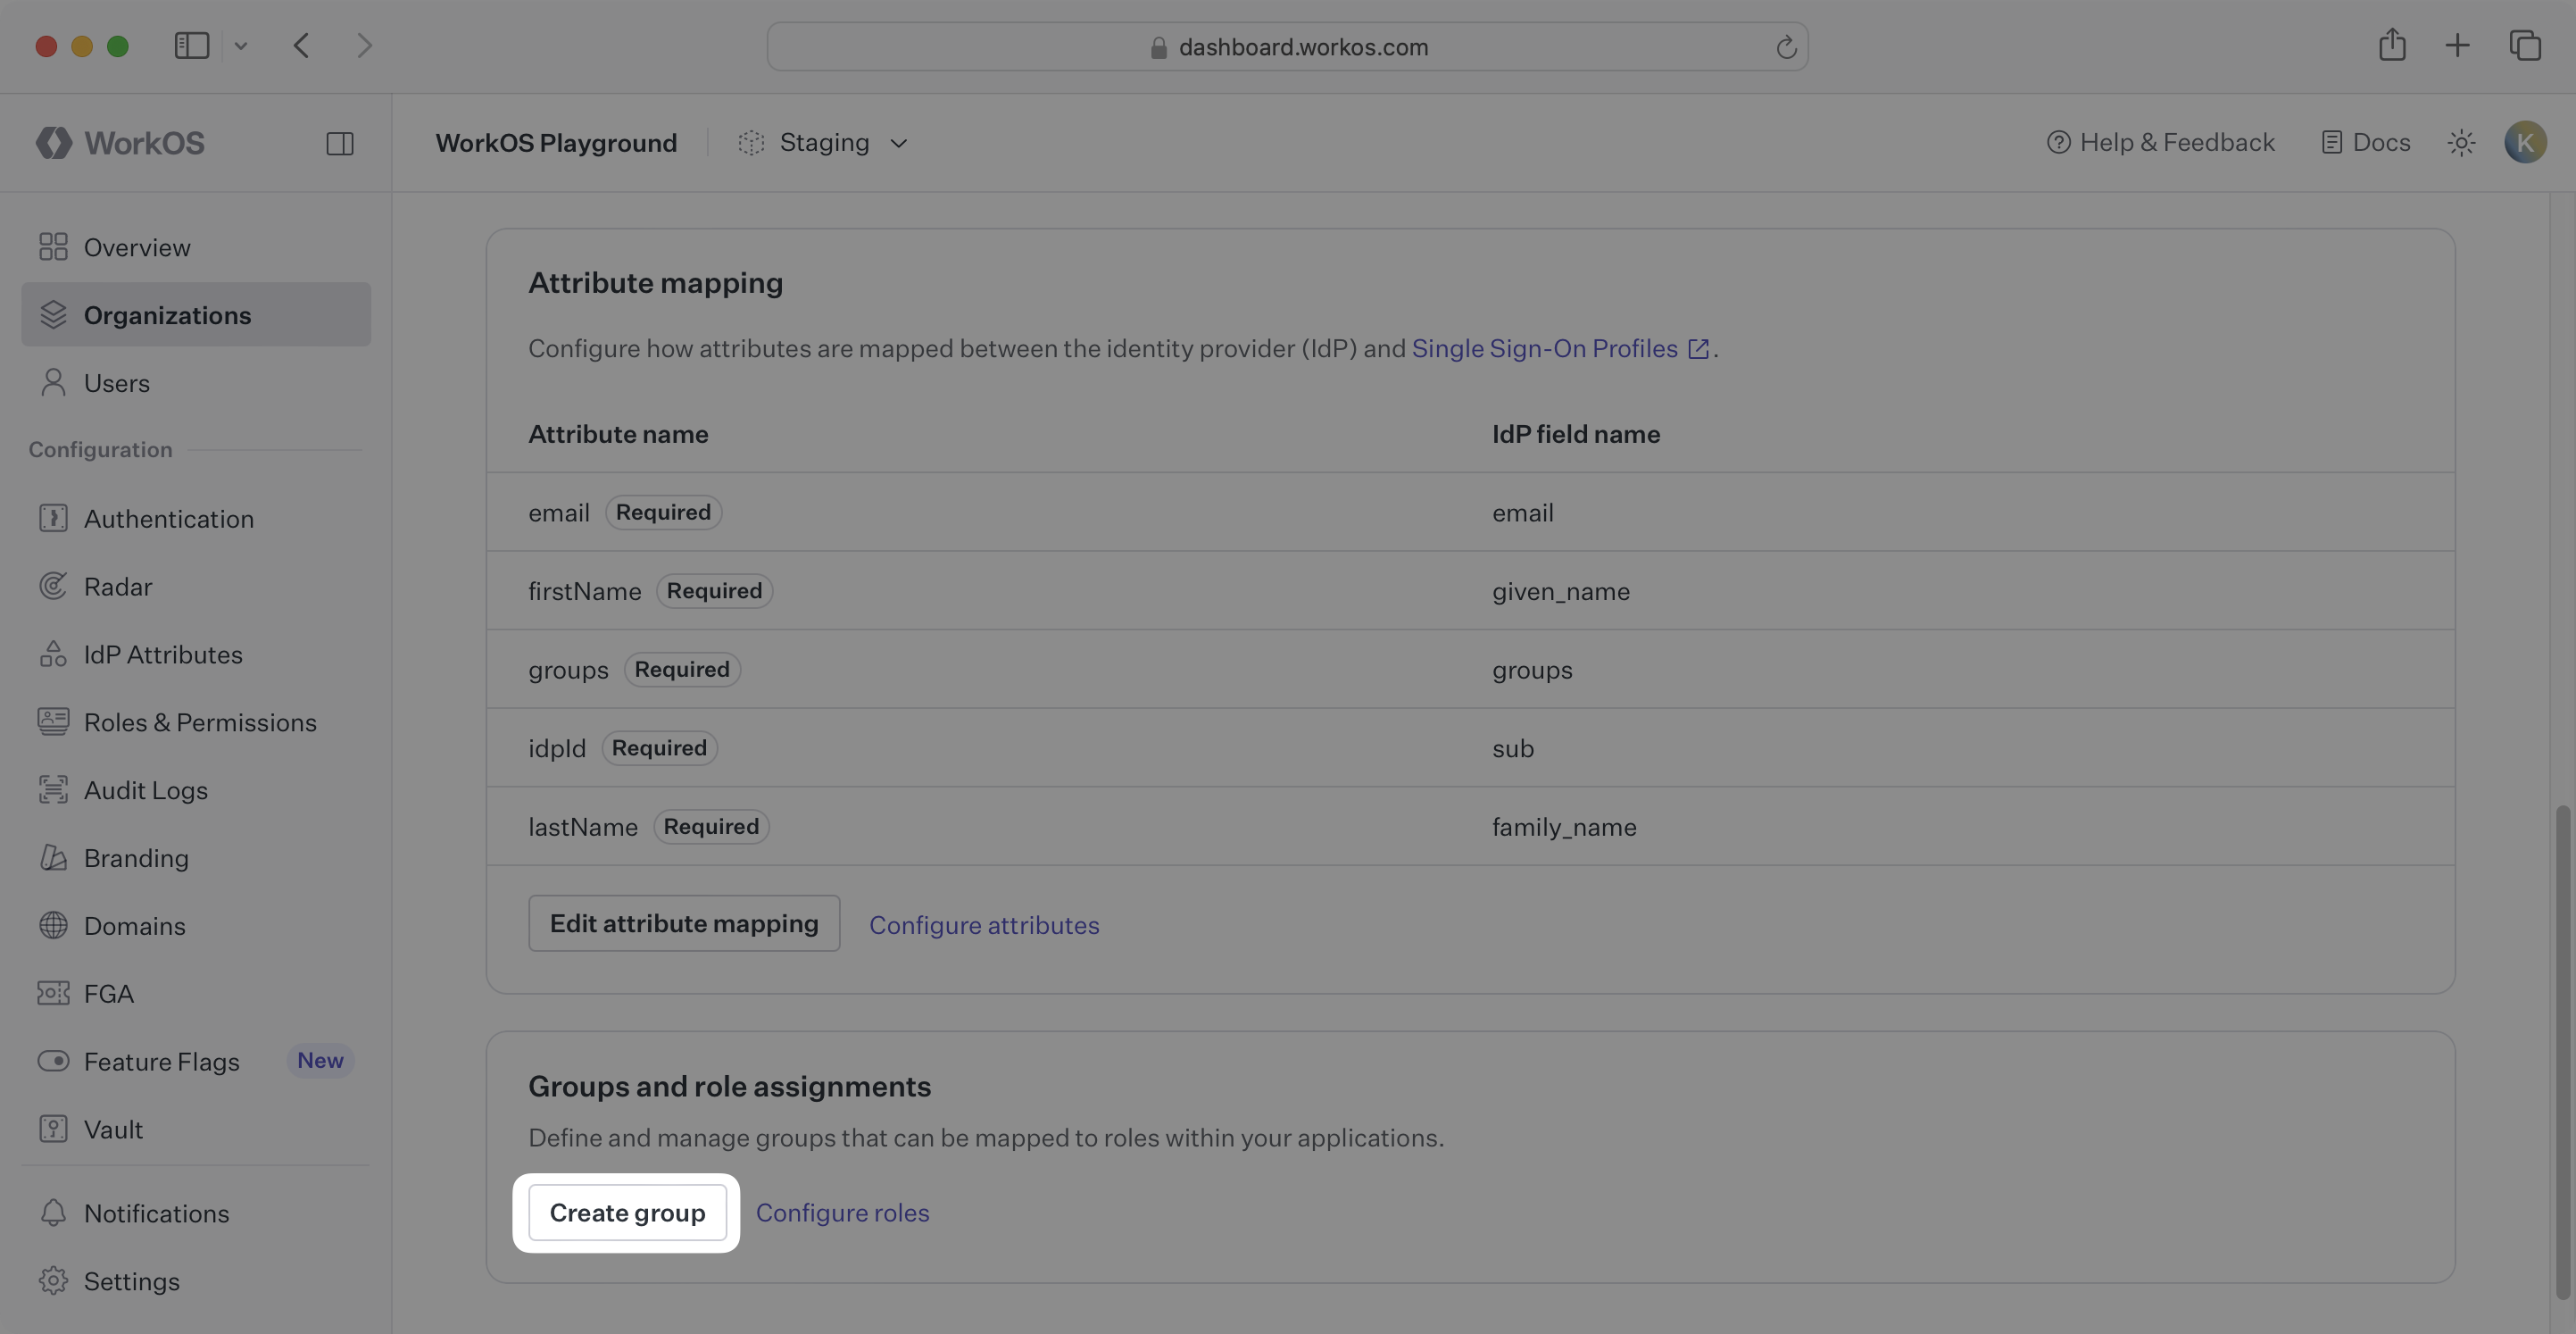
For each group you want to assign a role, click the Create group button and enter the following:
- Copy the group id from Entra ID into the IdP ID field.
- Optionally, enter a group name into the Name field.
- Assign the appropriate role to the group.
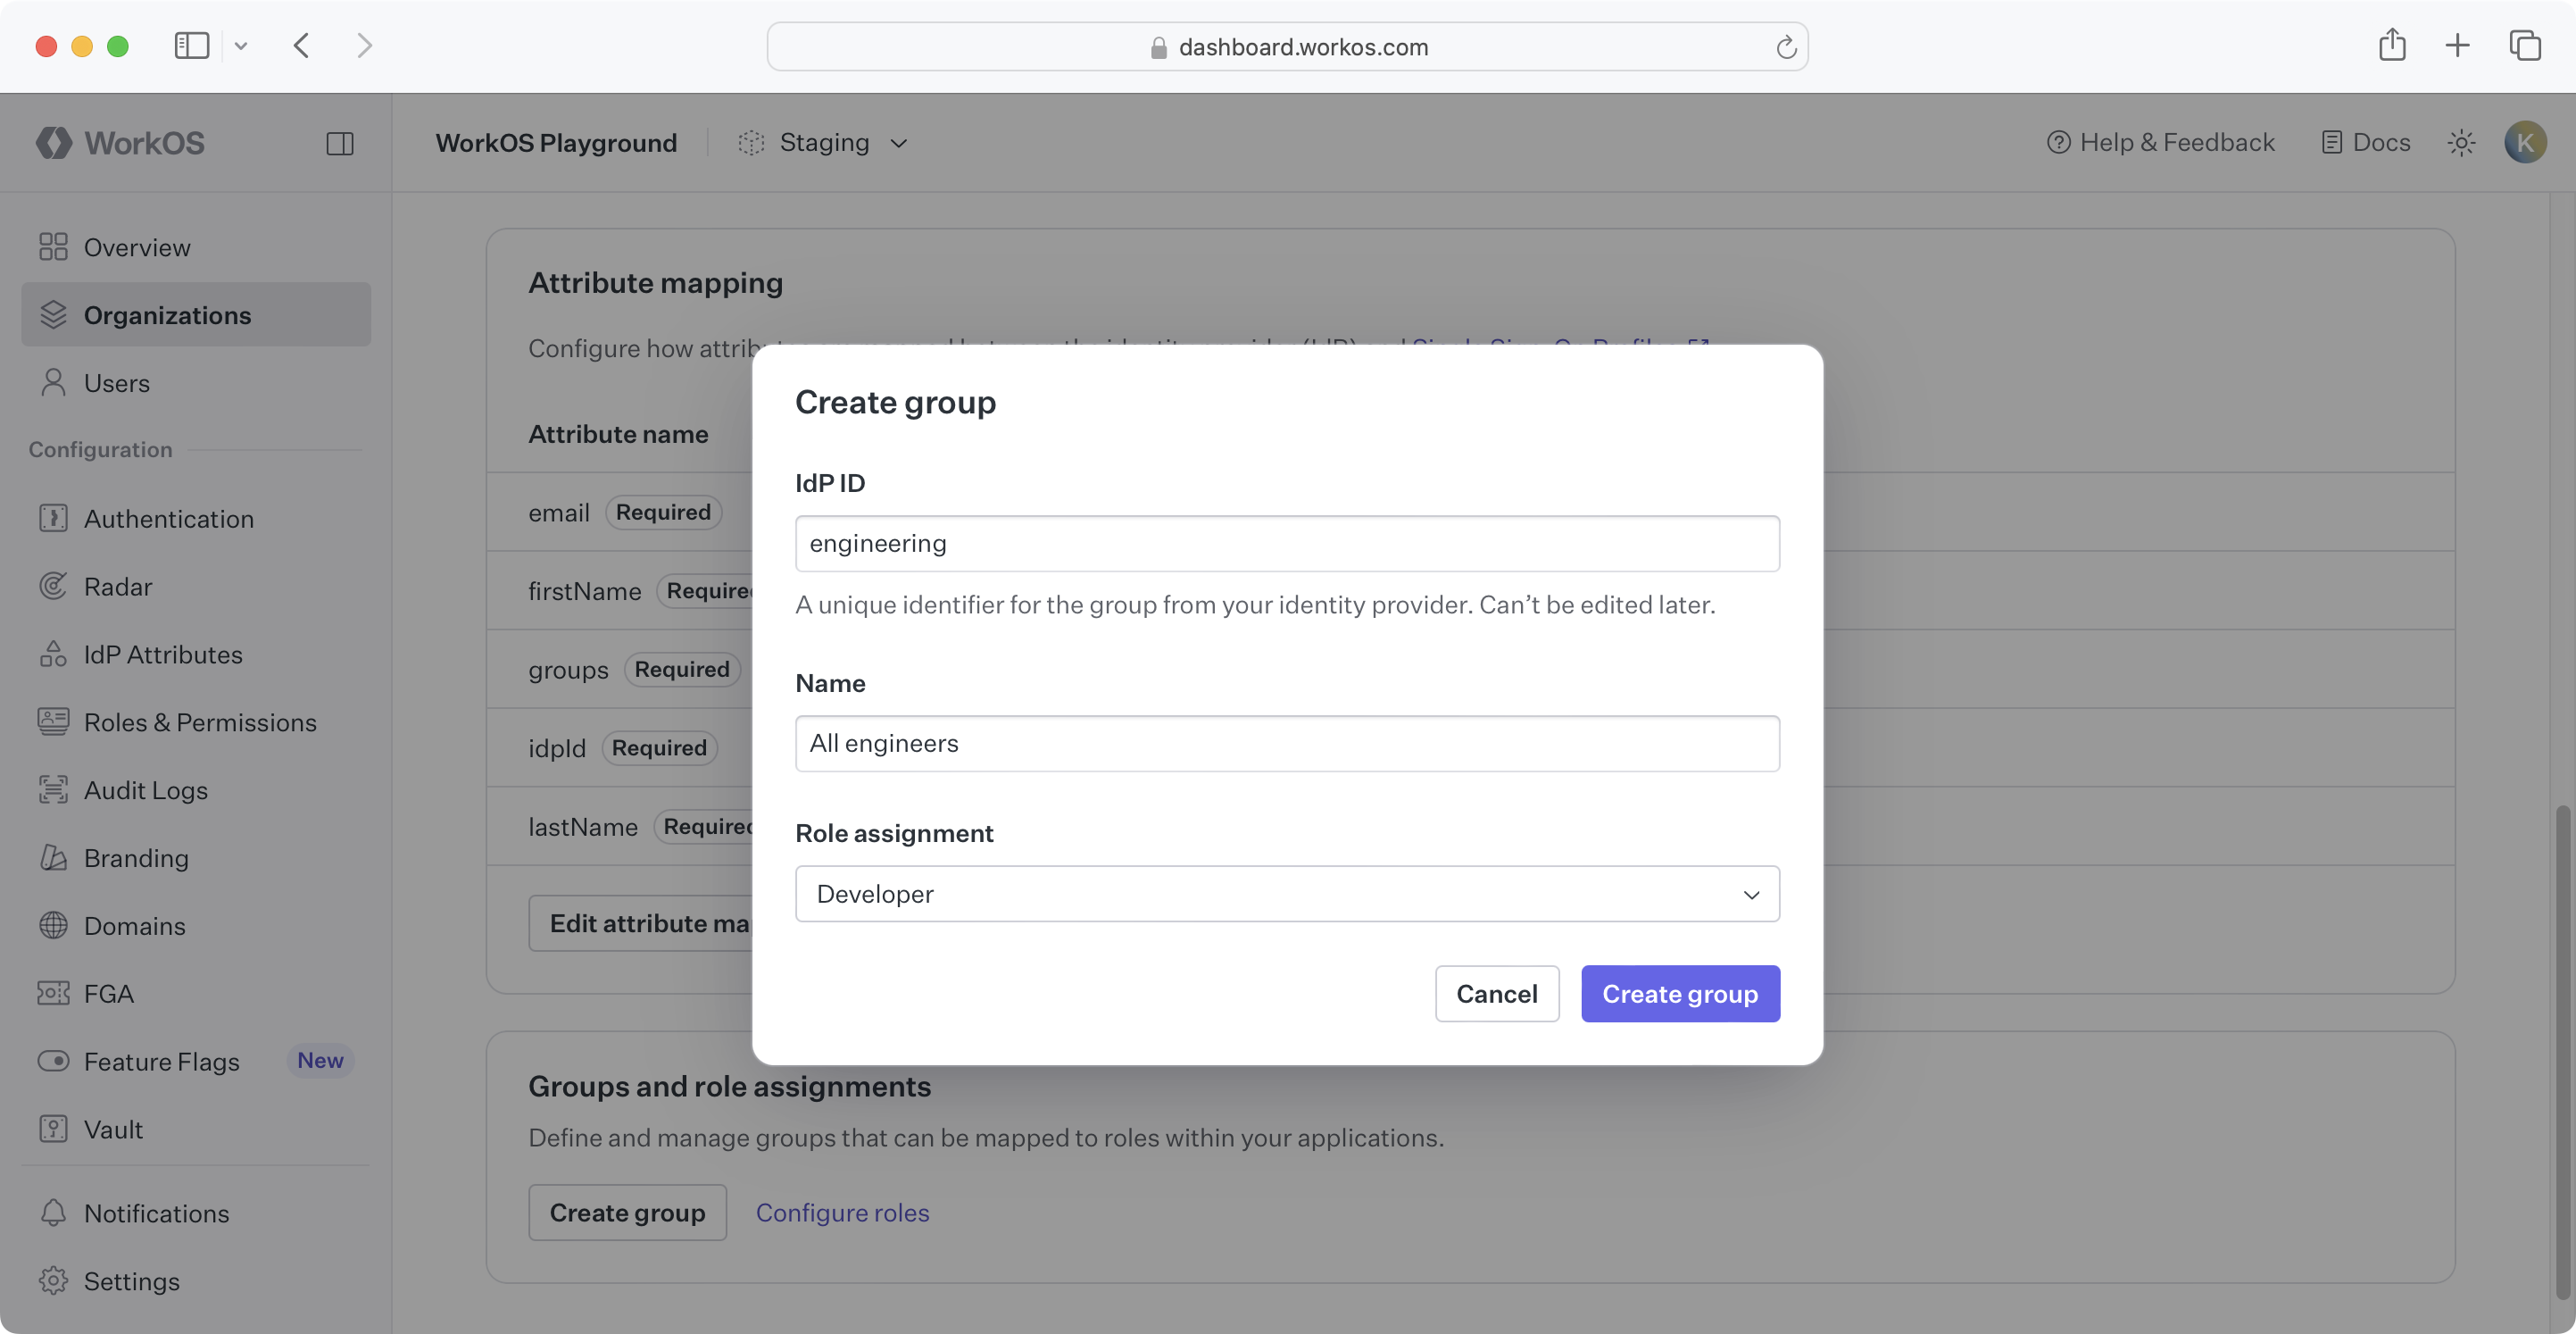
Group members without an explicit role will receive the default role.
Your Entra ID OIDC connection is now configured and ready to use. Users assigned to the application in Entra ID will be able to authenticate through WorkOS using their Microsoft credentials.
To start using this connection in your application, refer to the SSO guide for implementation details.
