Keycloak
Learn how to configure a connection to Keycloak via SAML.
Each SSO Identity Provider requires specific information to create and configure a new Connection. And often, the information required to create a Connection will differ by Identity Provider.
To create an Keycloak SAML Connection, you’ll need three pieces of information: an ACS URL, an Identity Provider Issuer (also known as an Entity ID), and a Metadata URL.
WorkOS provides the ACS URL and IdP URI (Entity ID). It’s readily available in your Connection Settings in the WorkOS Dashboard.
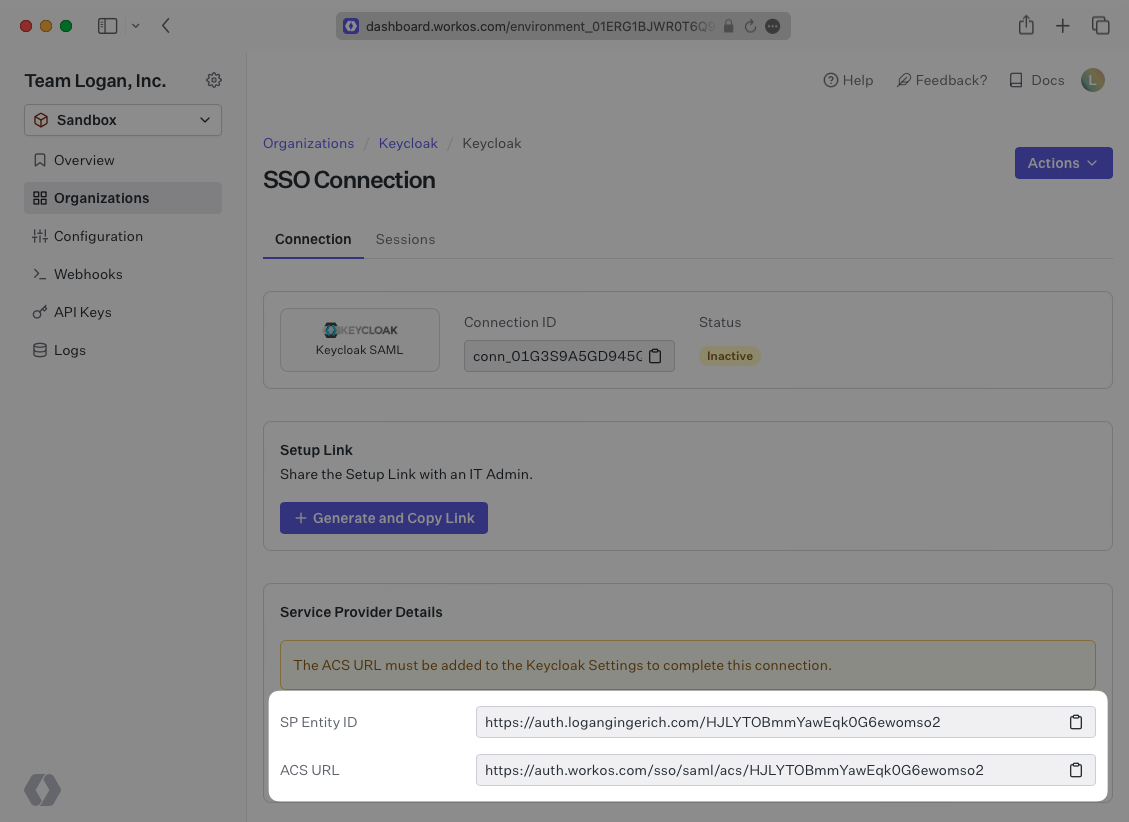
The ACS URL is the location an Identity Provider redirects its authentication response to. In Keycloak’s case, it needs to be set by the organization when configuring your application in their Keycloak instance.
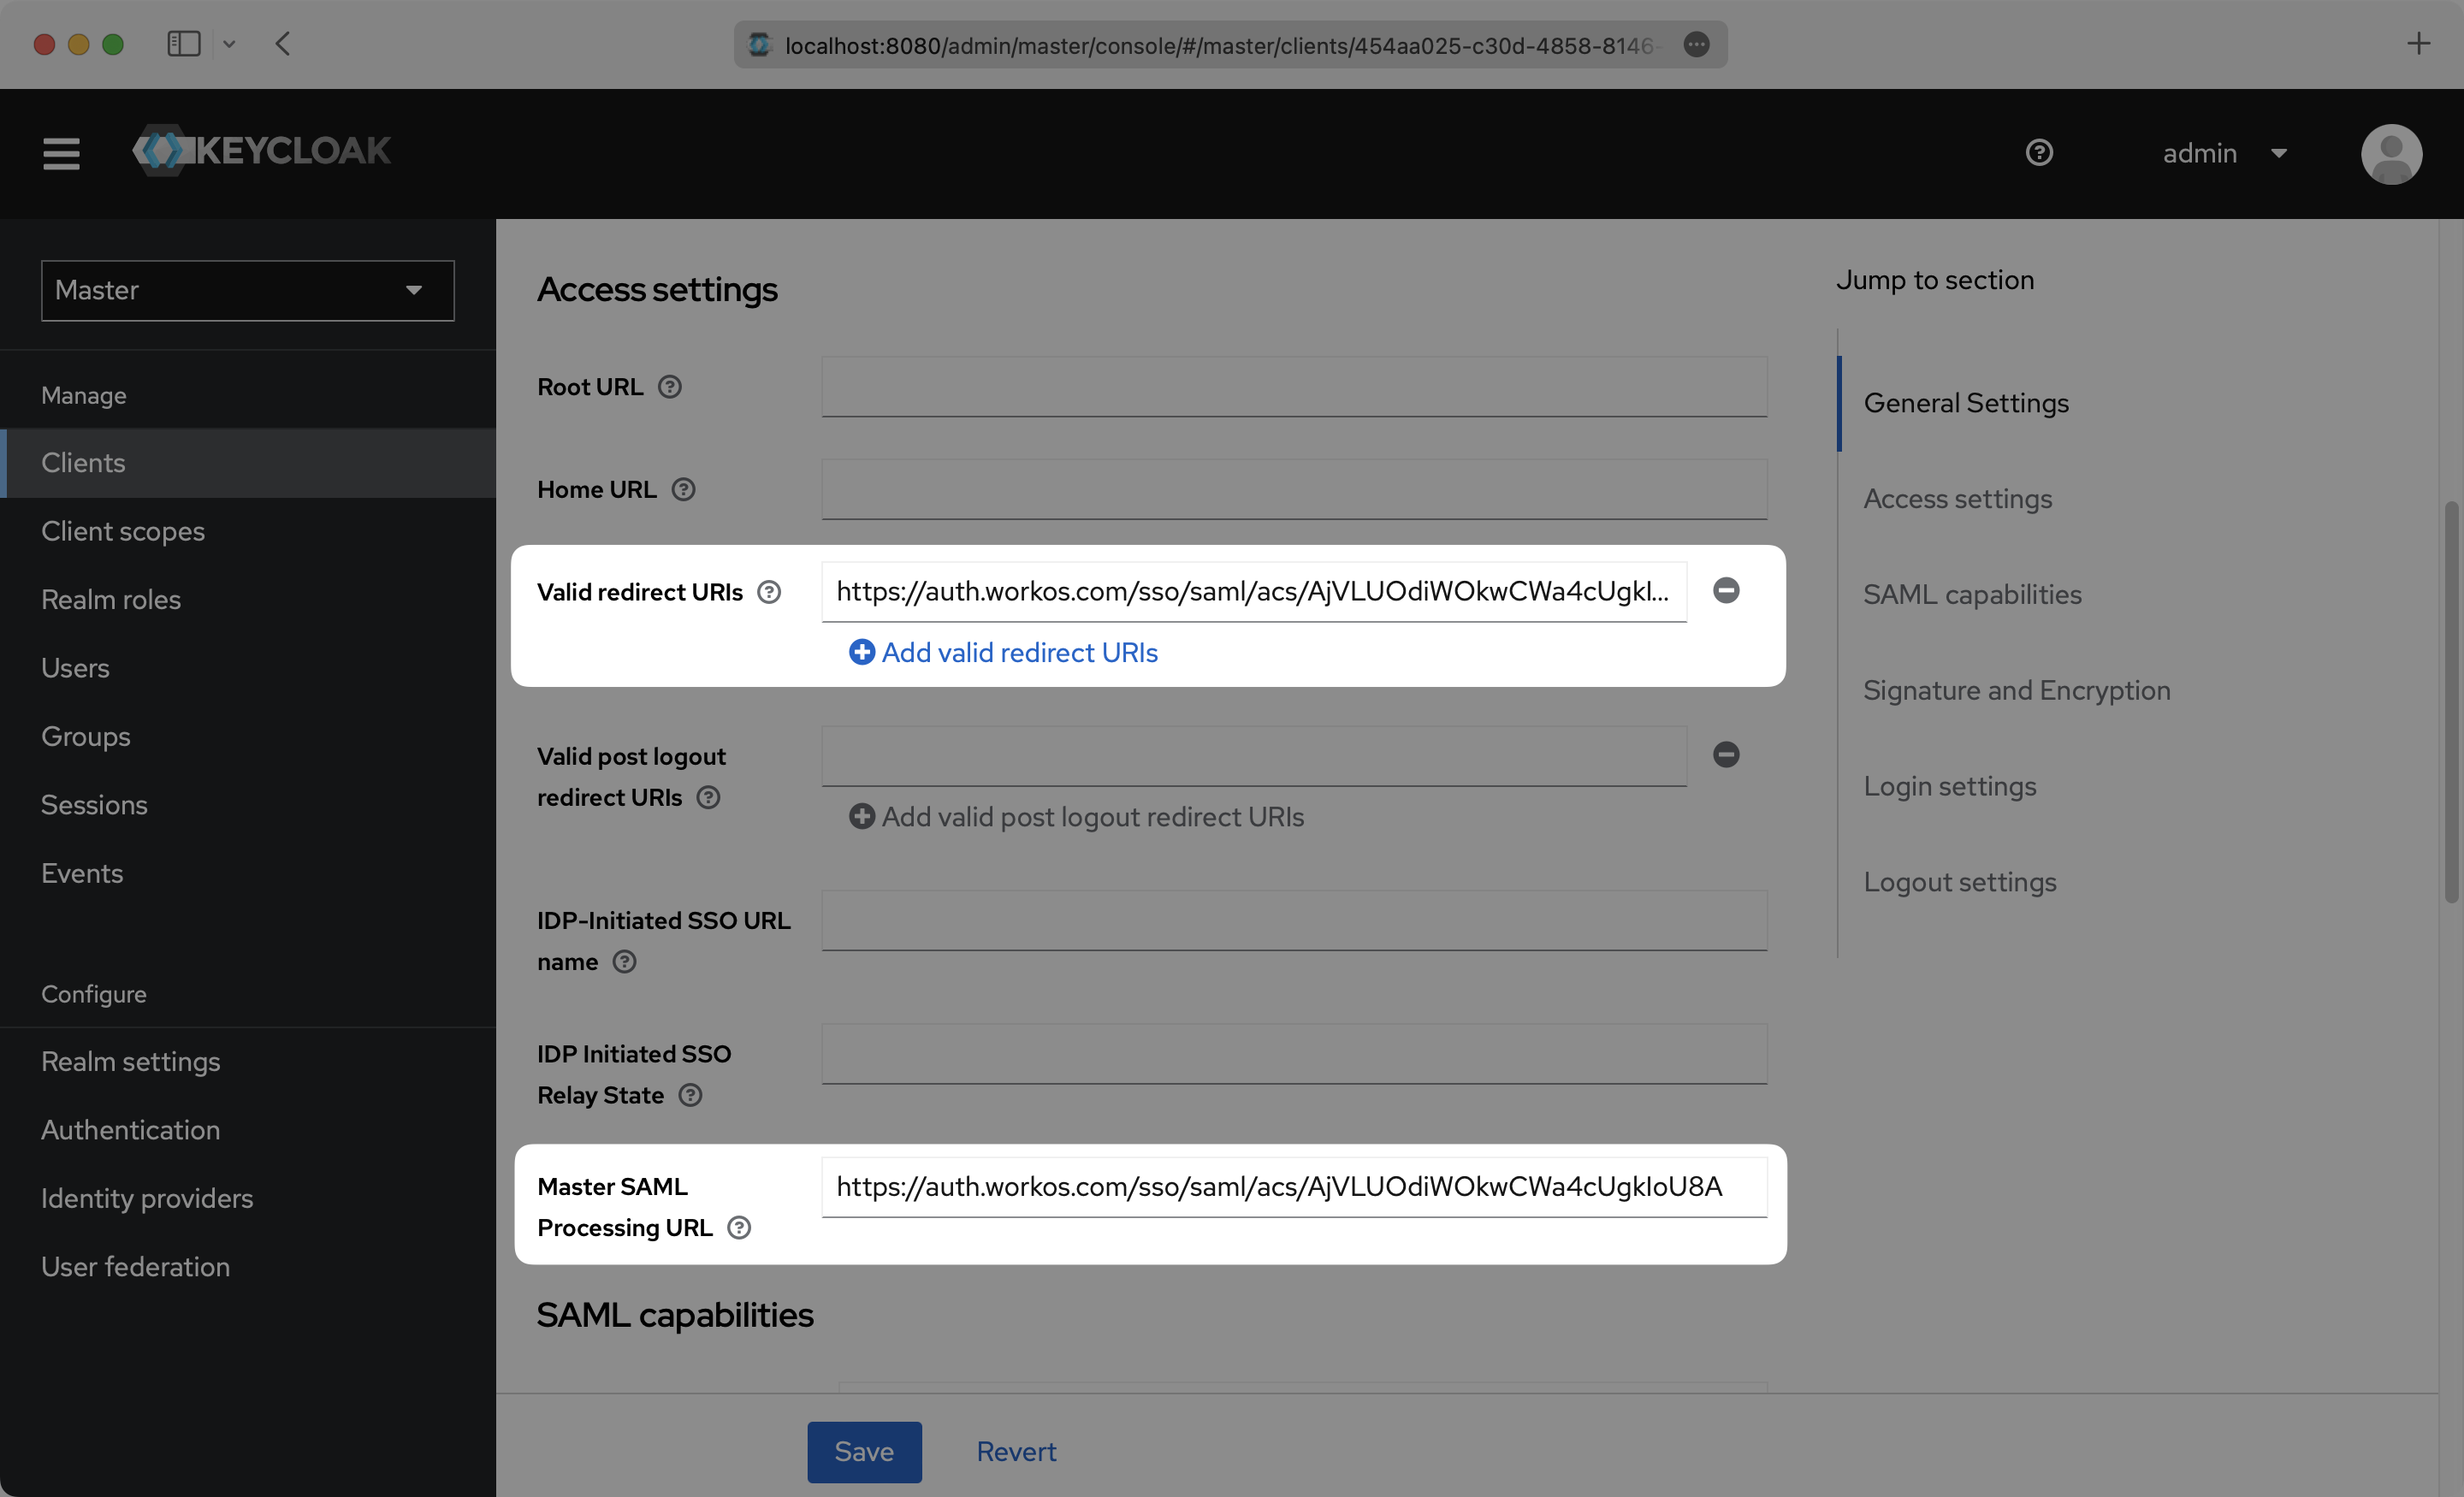
Specifically, the ACS URL will need to be set as the “Valid Redirect URI” and “Master SAML Processing URL” in the SAML client setup in Keycloak.
The Entity ID is a URI used to identify the issuer of a SAML request, response, or assertion. In this case, the entity ID is used to communicate that WorkOS will be the party performing SAML requests to the organization’s Keycloak instance.
Specifically, the Entity ID will need to be set as the “Client ID” when creating a SAML client in Keycloak.
In order to integrate you’ll need the Keycloak Metadata URL. Normally, the this will come from the organization’s IT Management team when they set up your application’s SAML client in their Keycloak instance. But, should that not be the case during your setup, here’s how to obtain it.
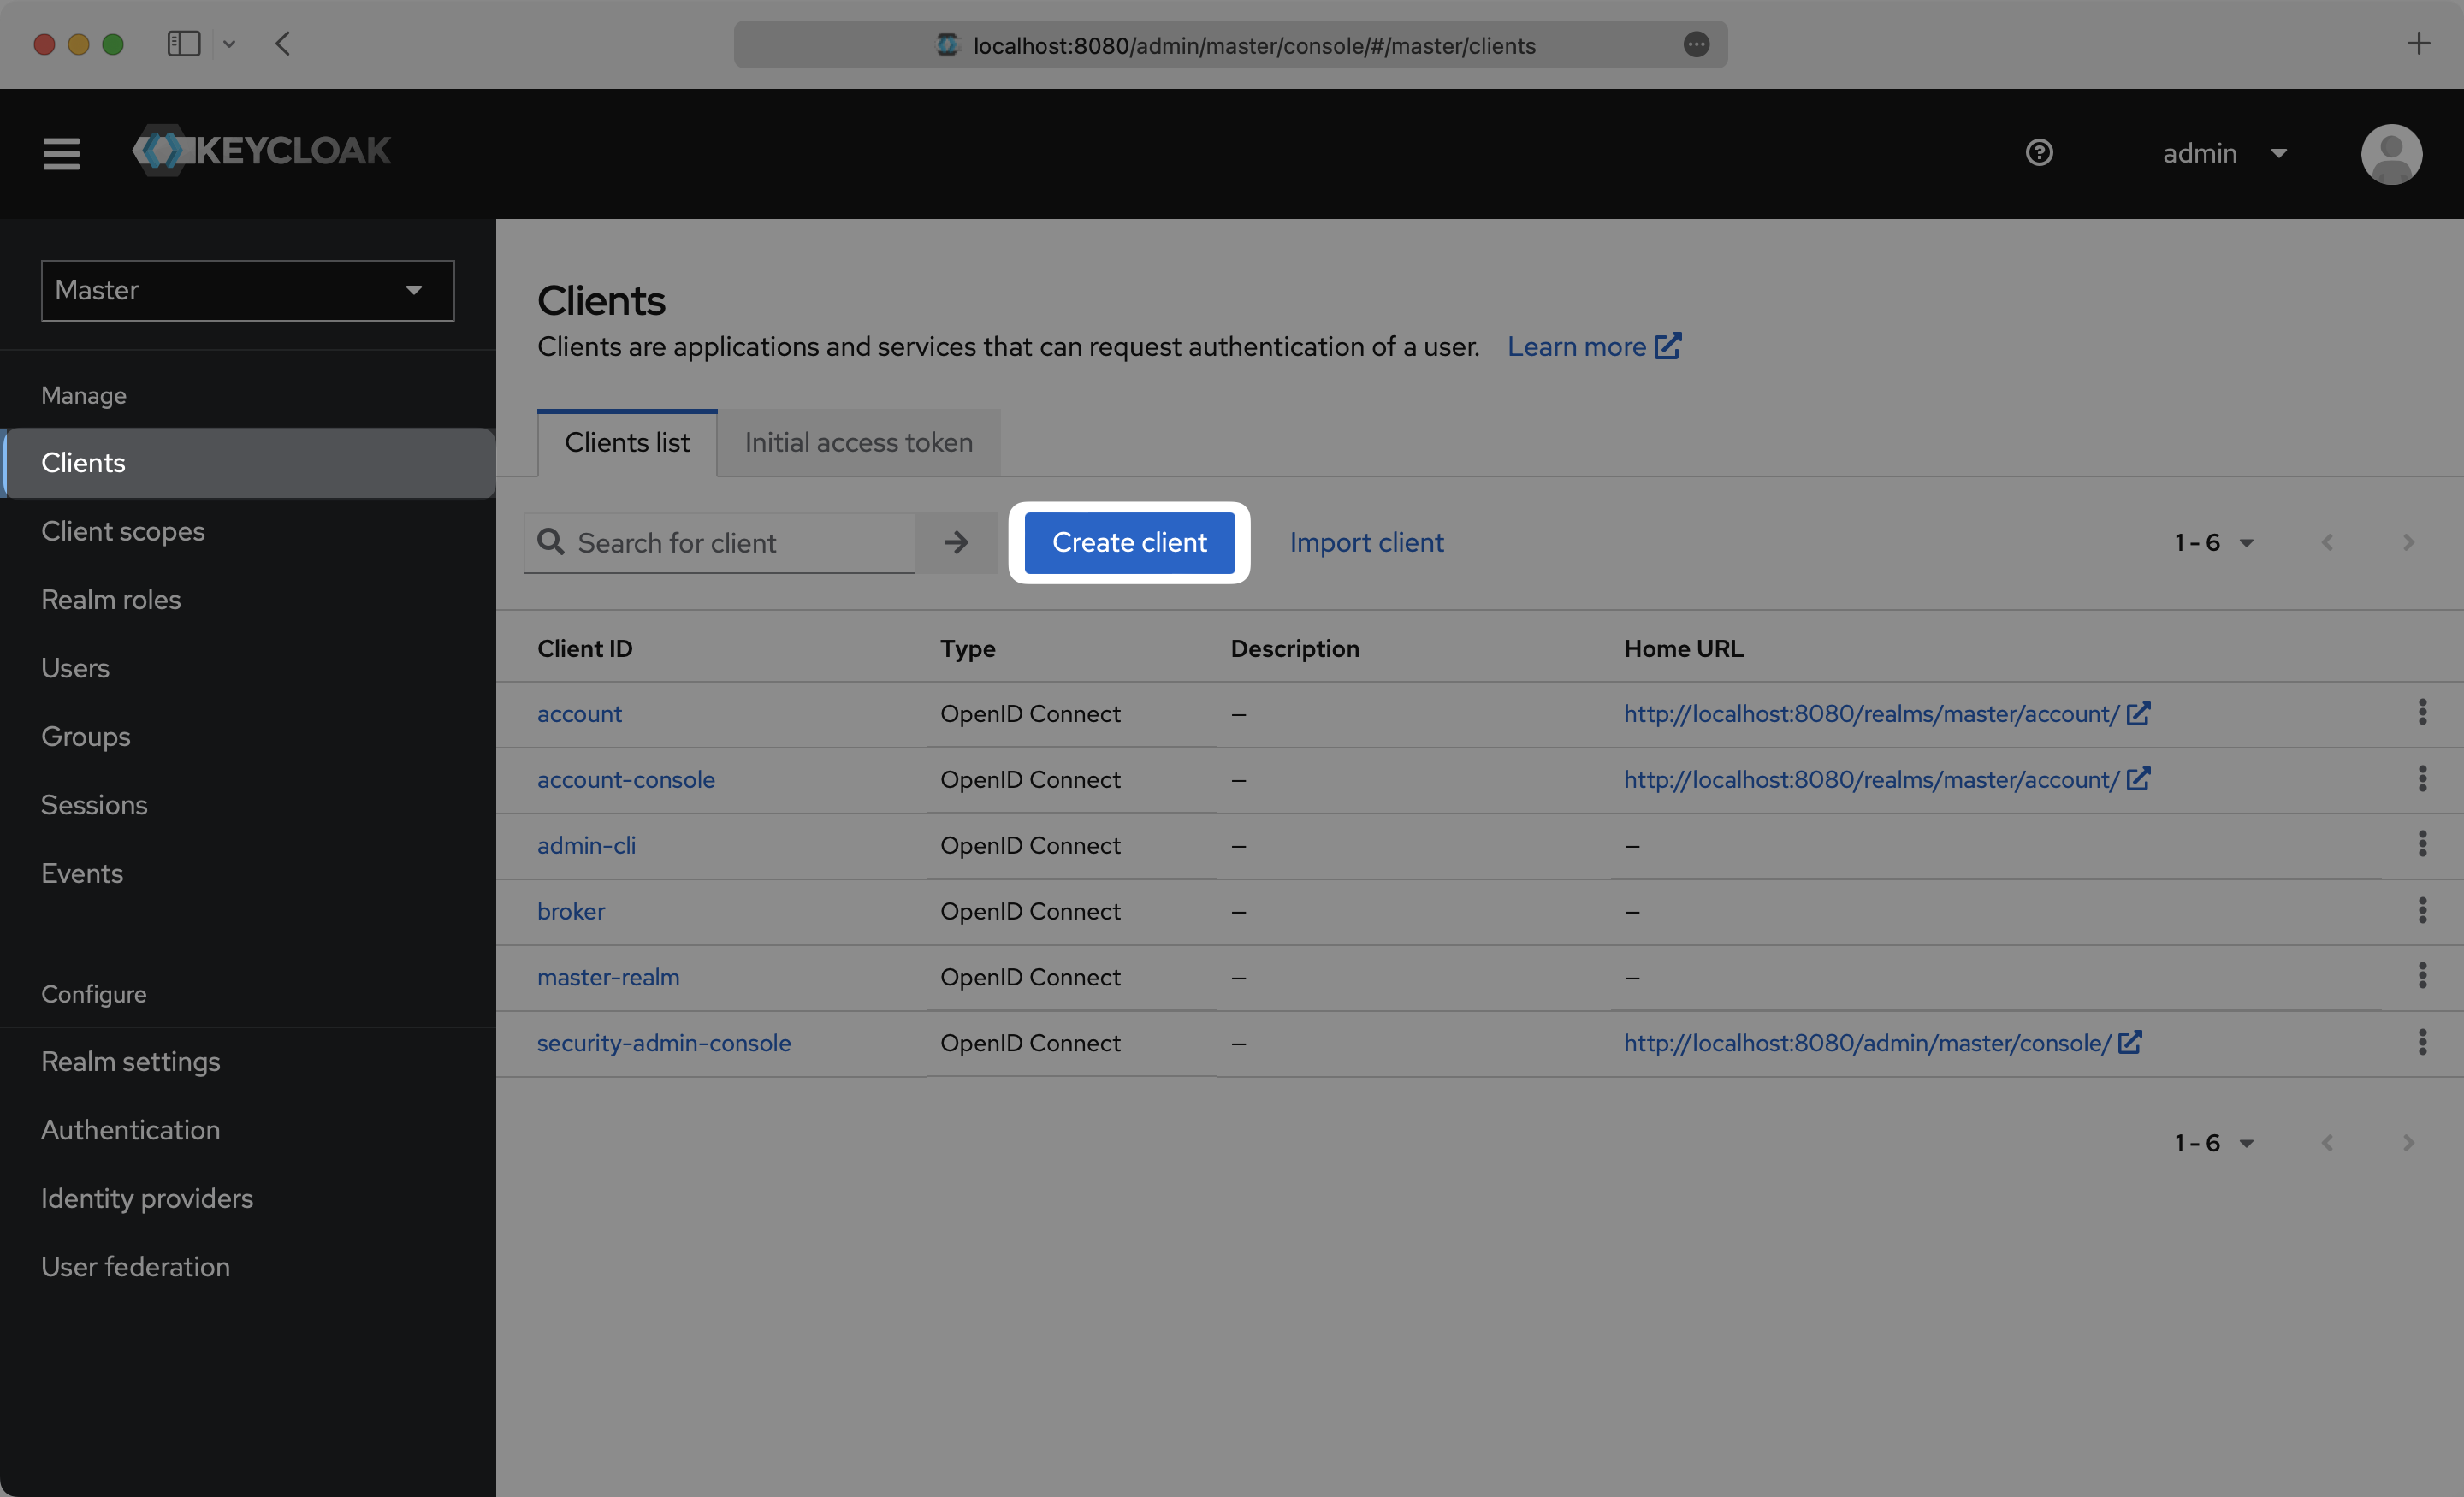
Log in to your Keycloak Admin Console, and navigate to the Realm you want to set up the SAML client in. Select “Clients” from the side menu. If your client is already created, select it from the list of and move to Step 4. If you haven’t created a SAML client in Keycloak, select “Create client”.
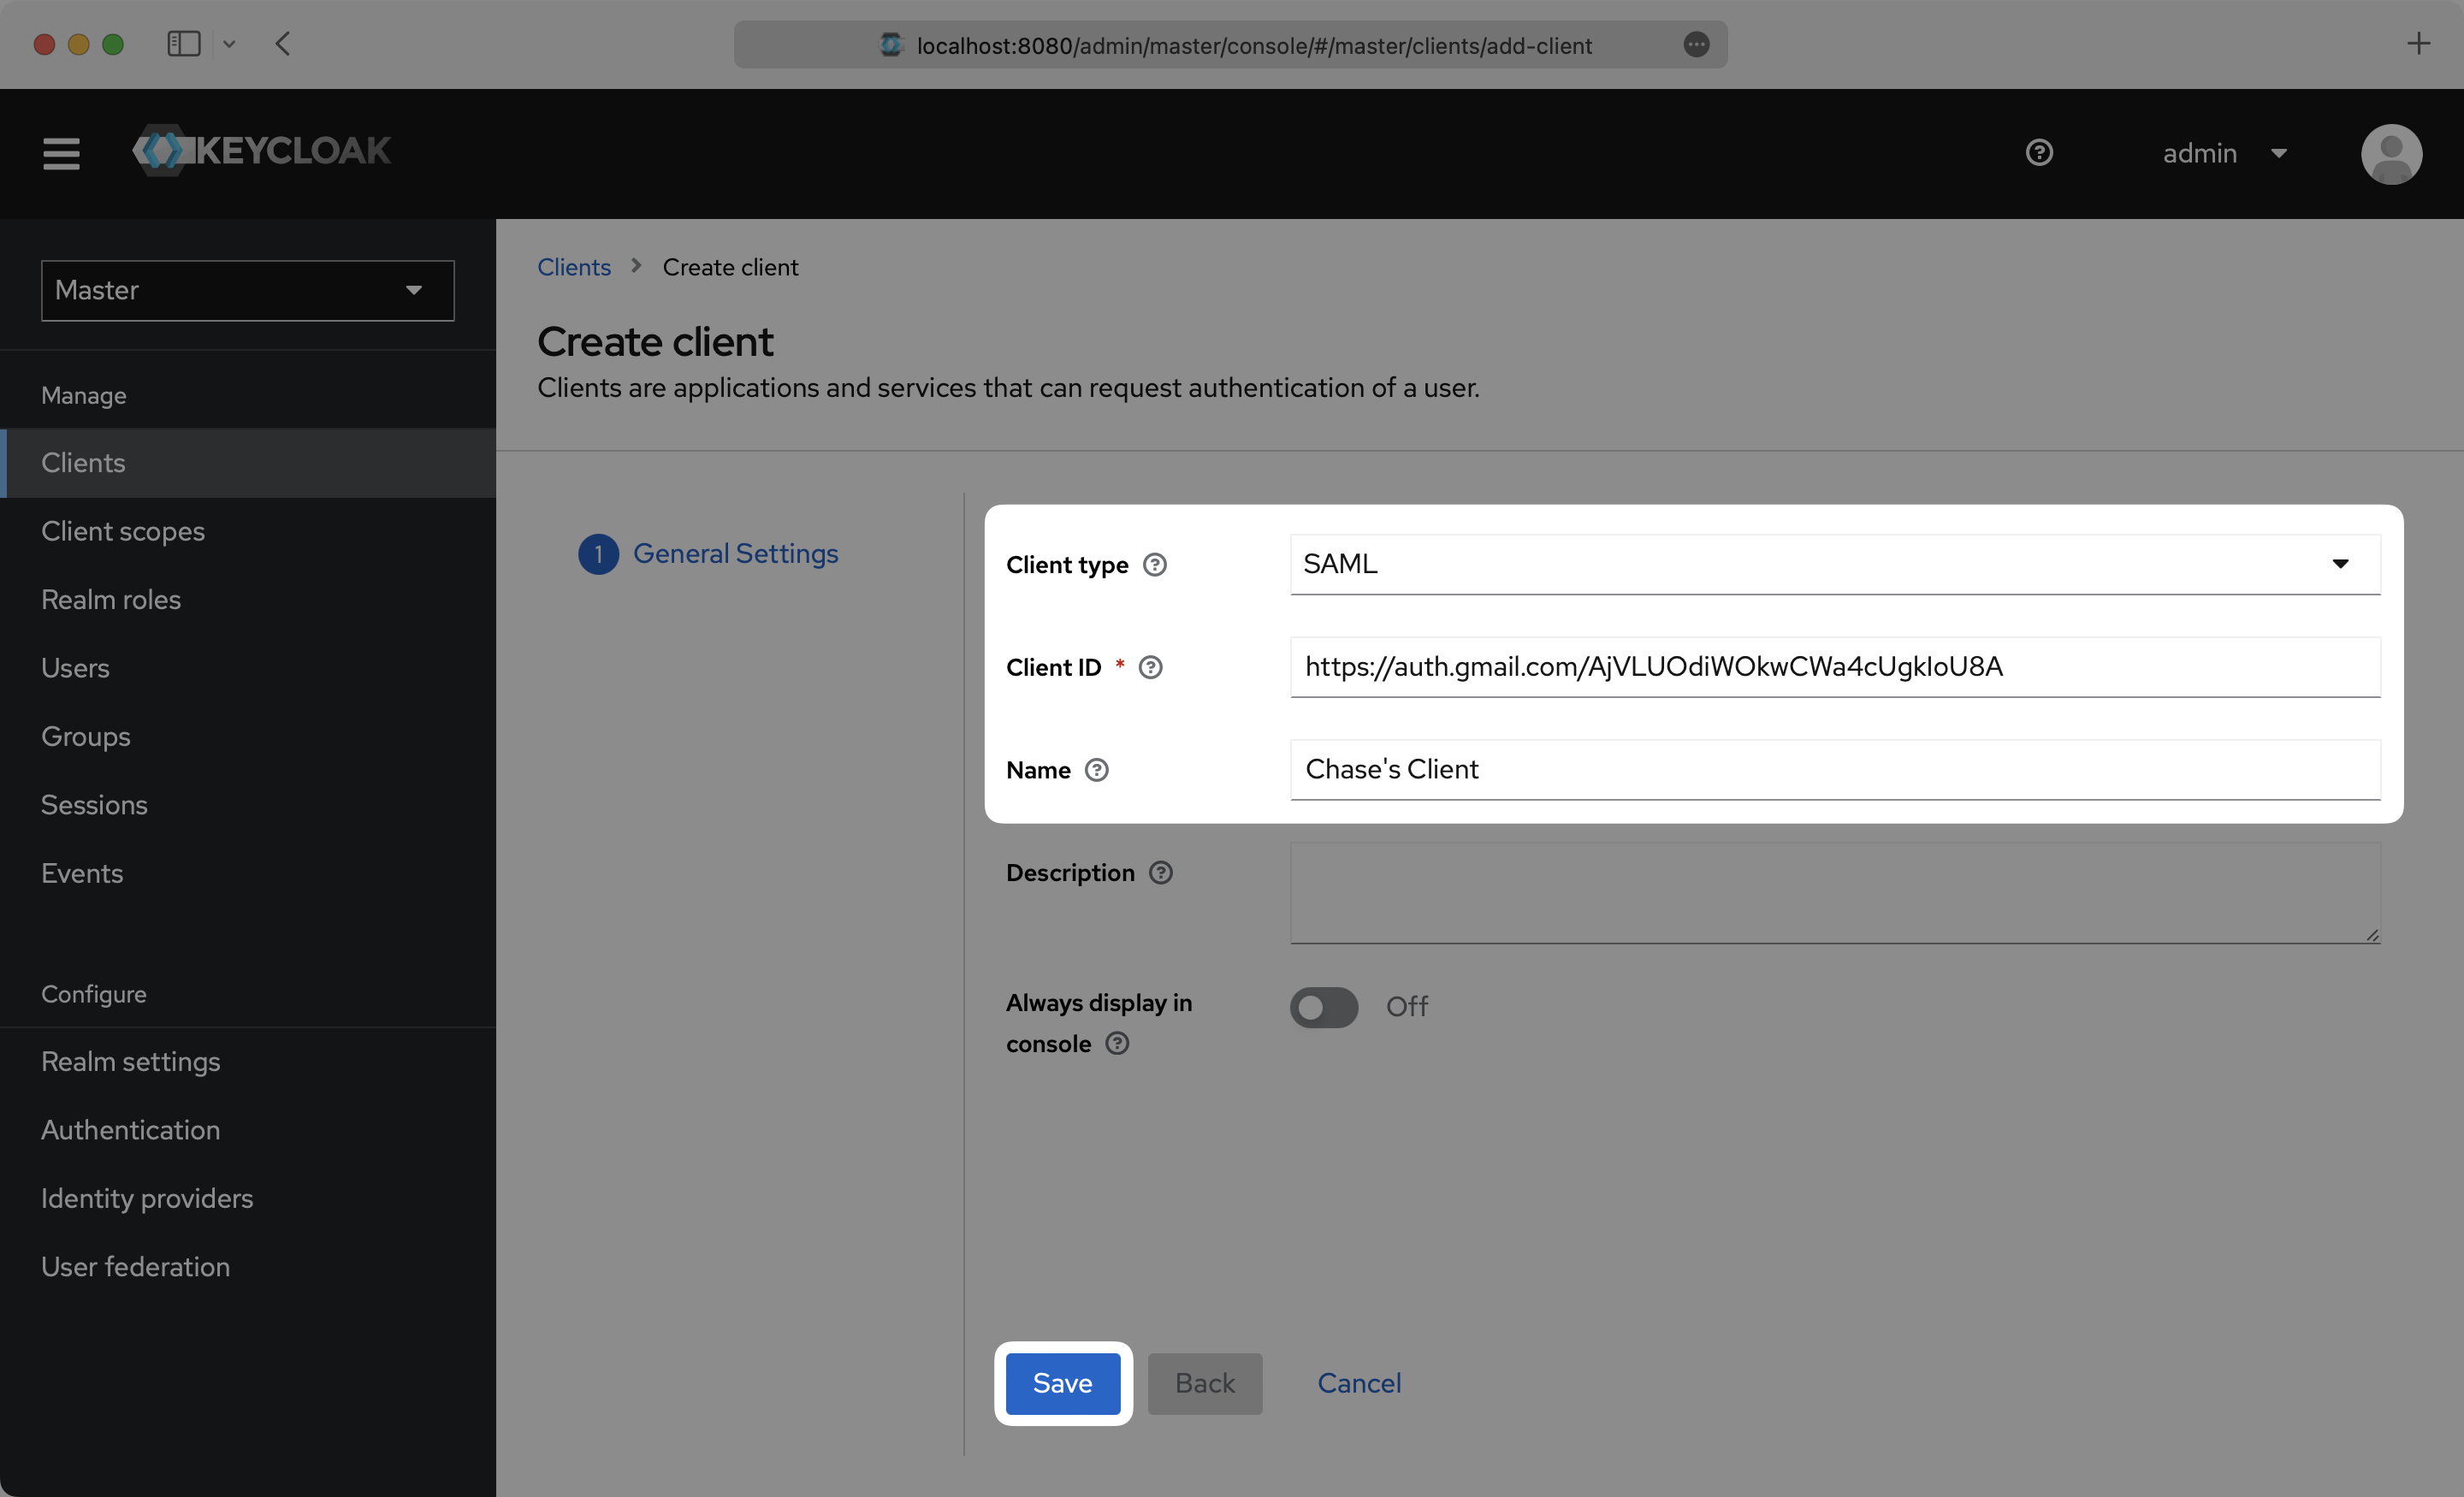
On the Create Client setup step, select SAML as the “Client type”, input the IdP URI (Entity ID) from your WorkOS Dashboard as the “Client ID”, and set a name for your Client. Click “Save”.
On the Settings page, scroll down and input the ACS URL from your WorkOS Dashboard in the “Valid Redirect URIs” and “Master SAML Processing URL” boxes.
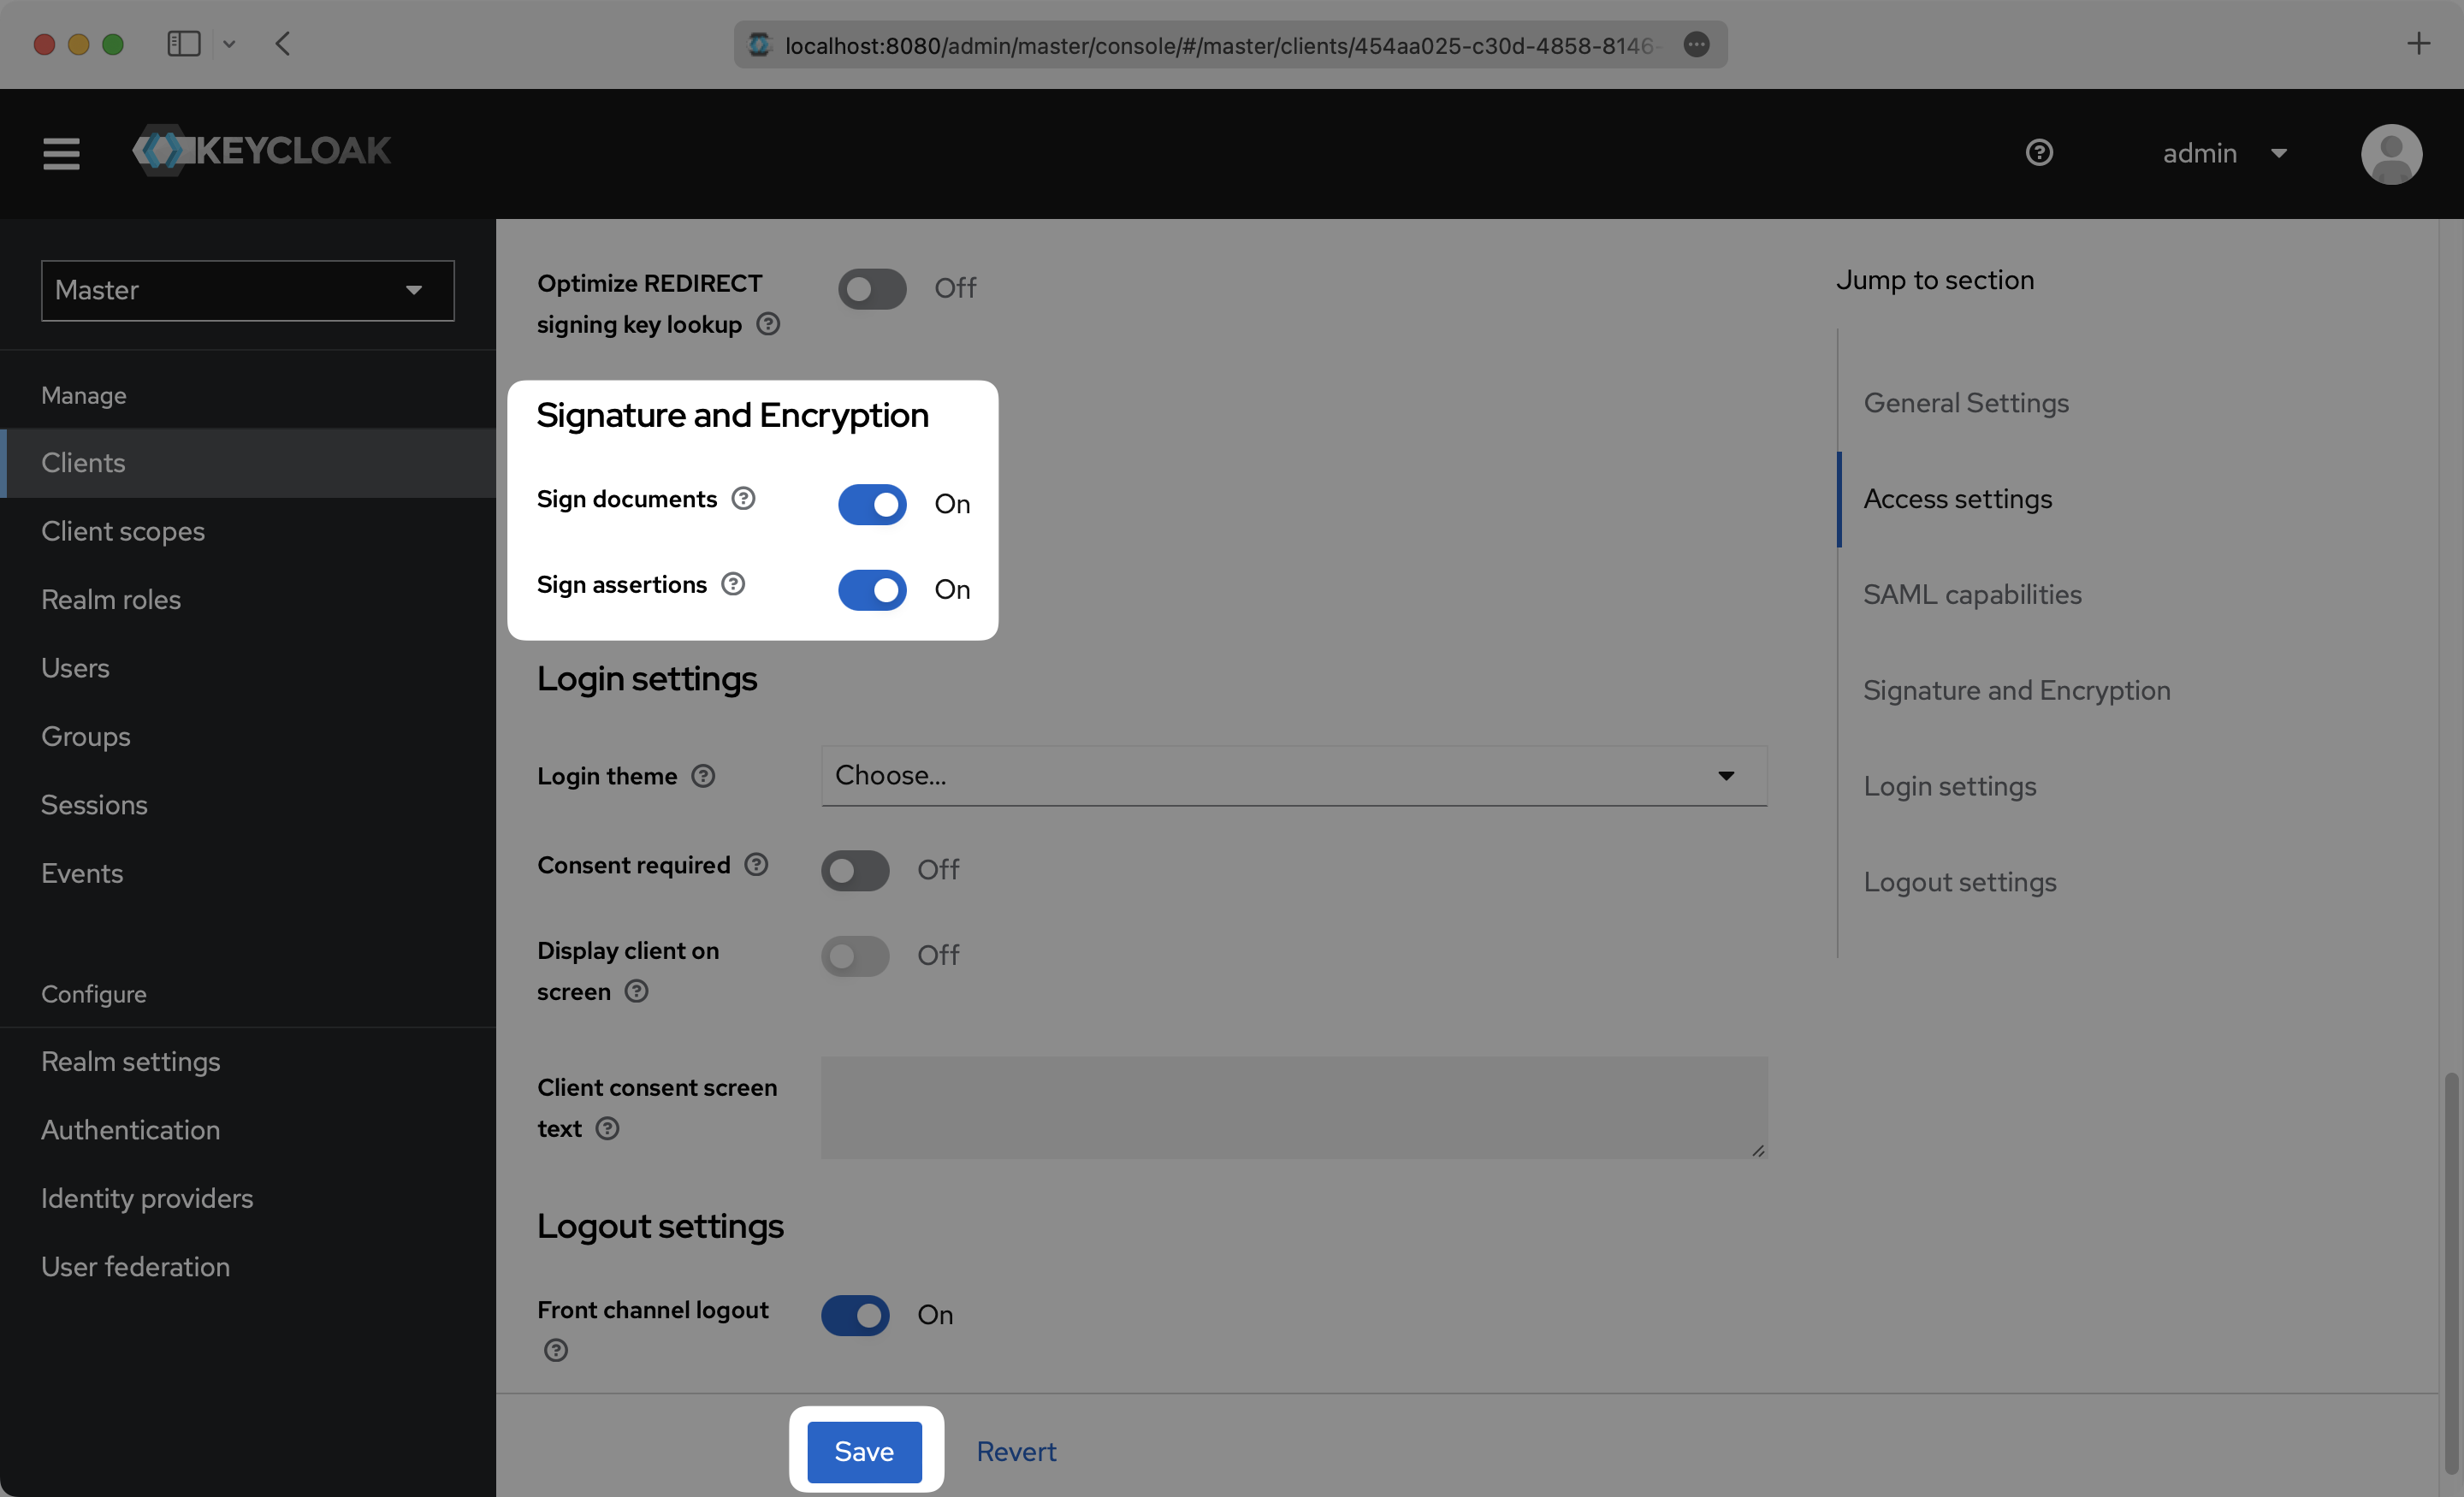
Scroll down further on the Settings page to “Signature and Encryption”, and make sure that “Sign assertions” is toggled On. Click “Save”.
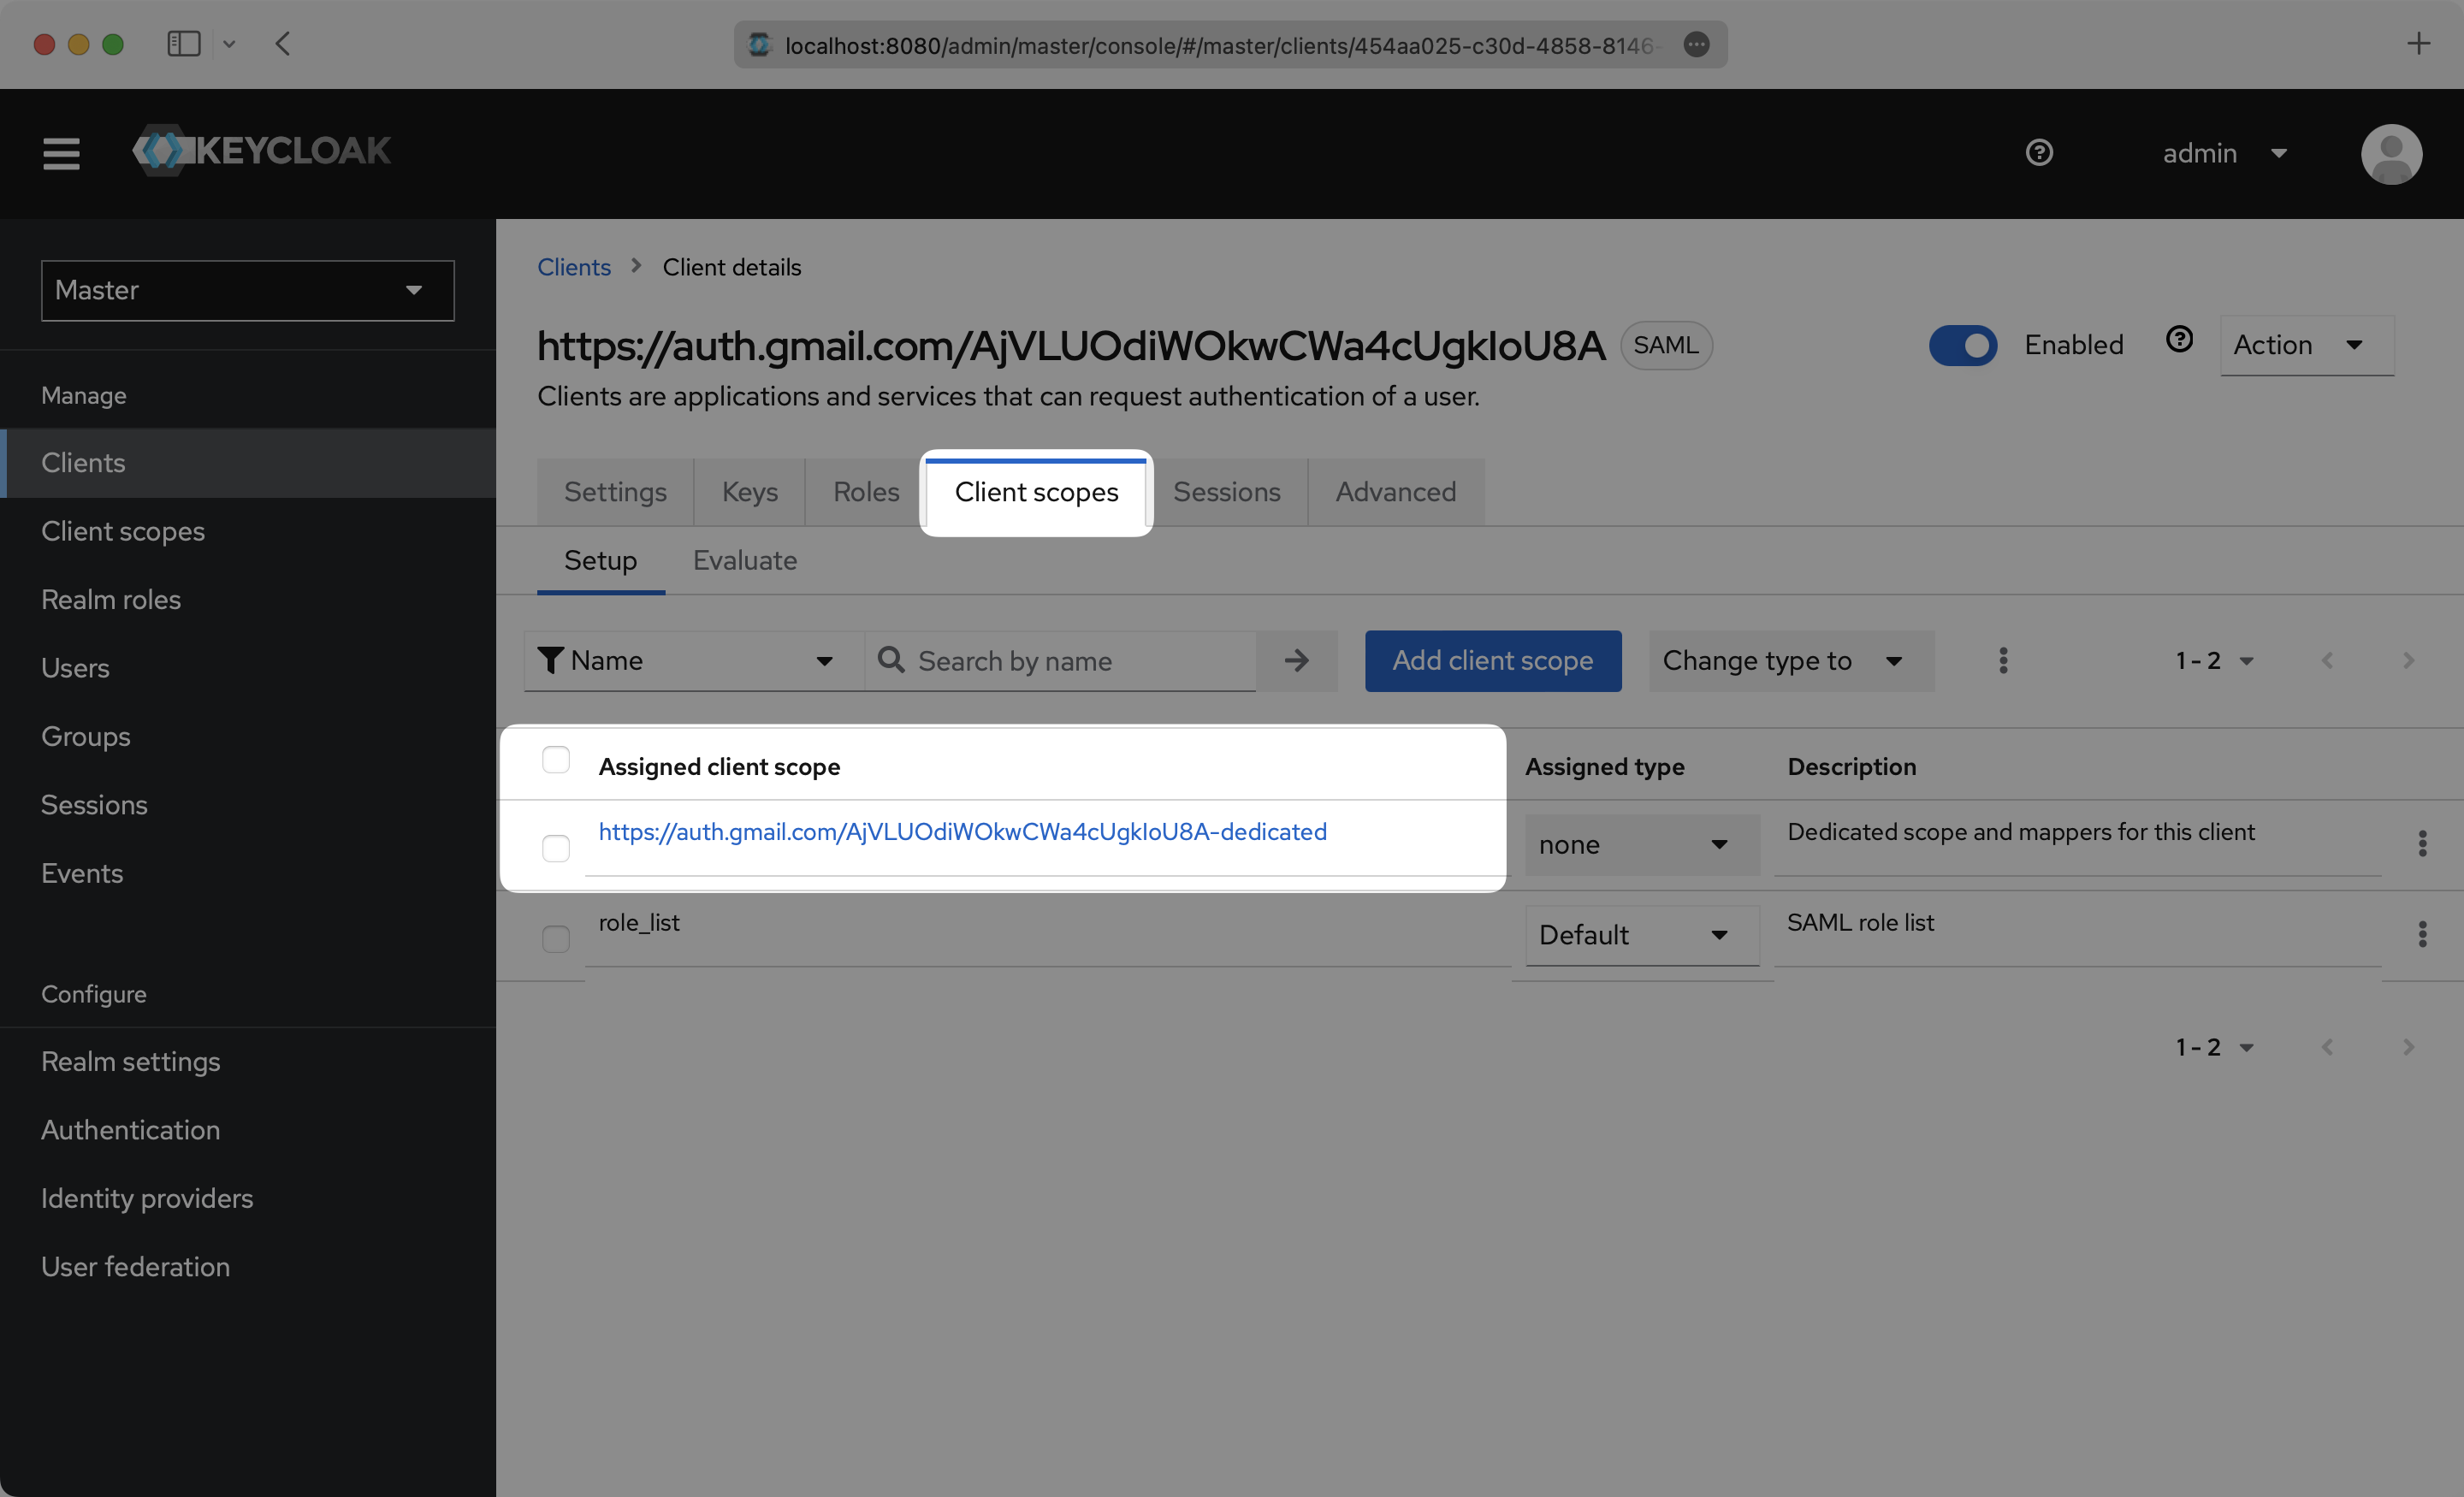
Click the “Client scopes” top menu option and click into your Client.
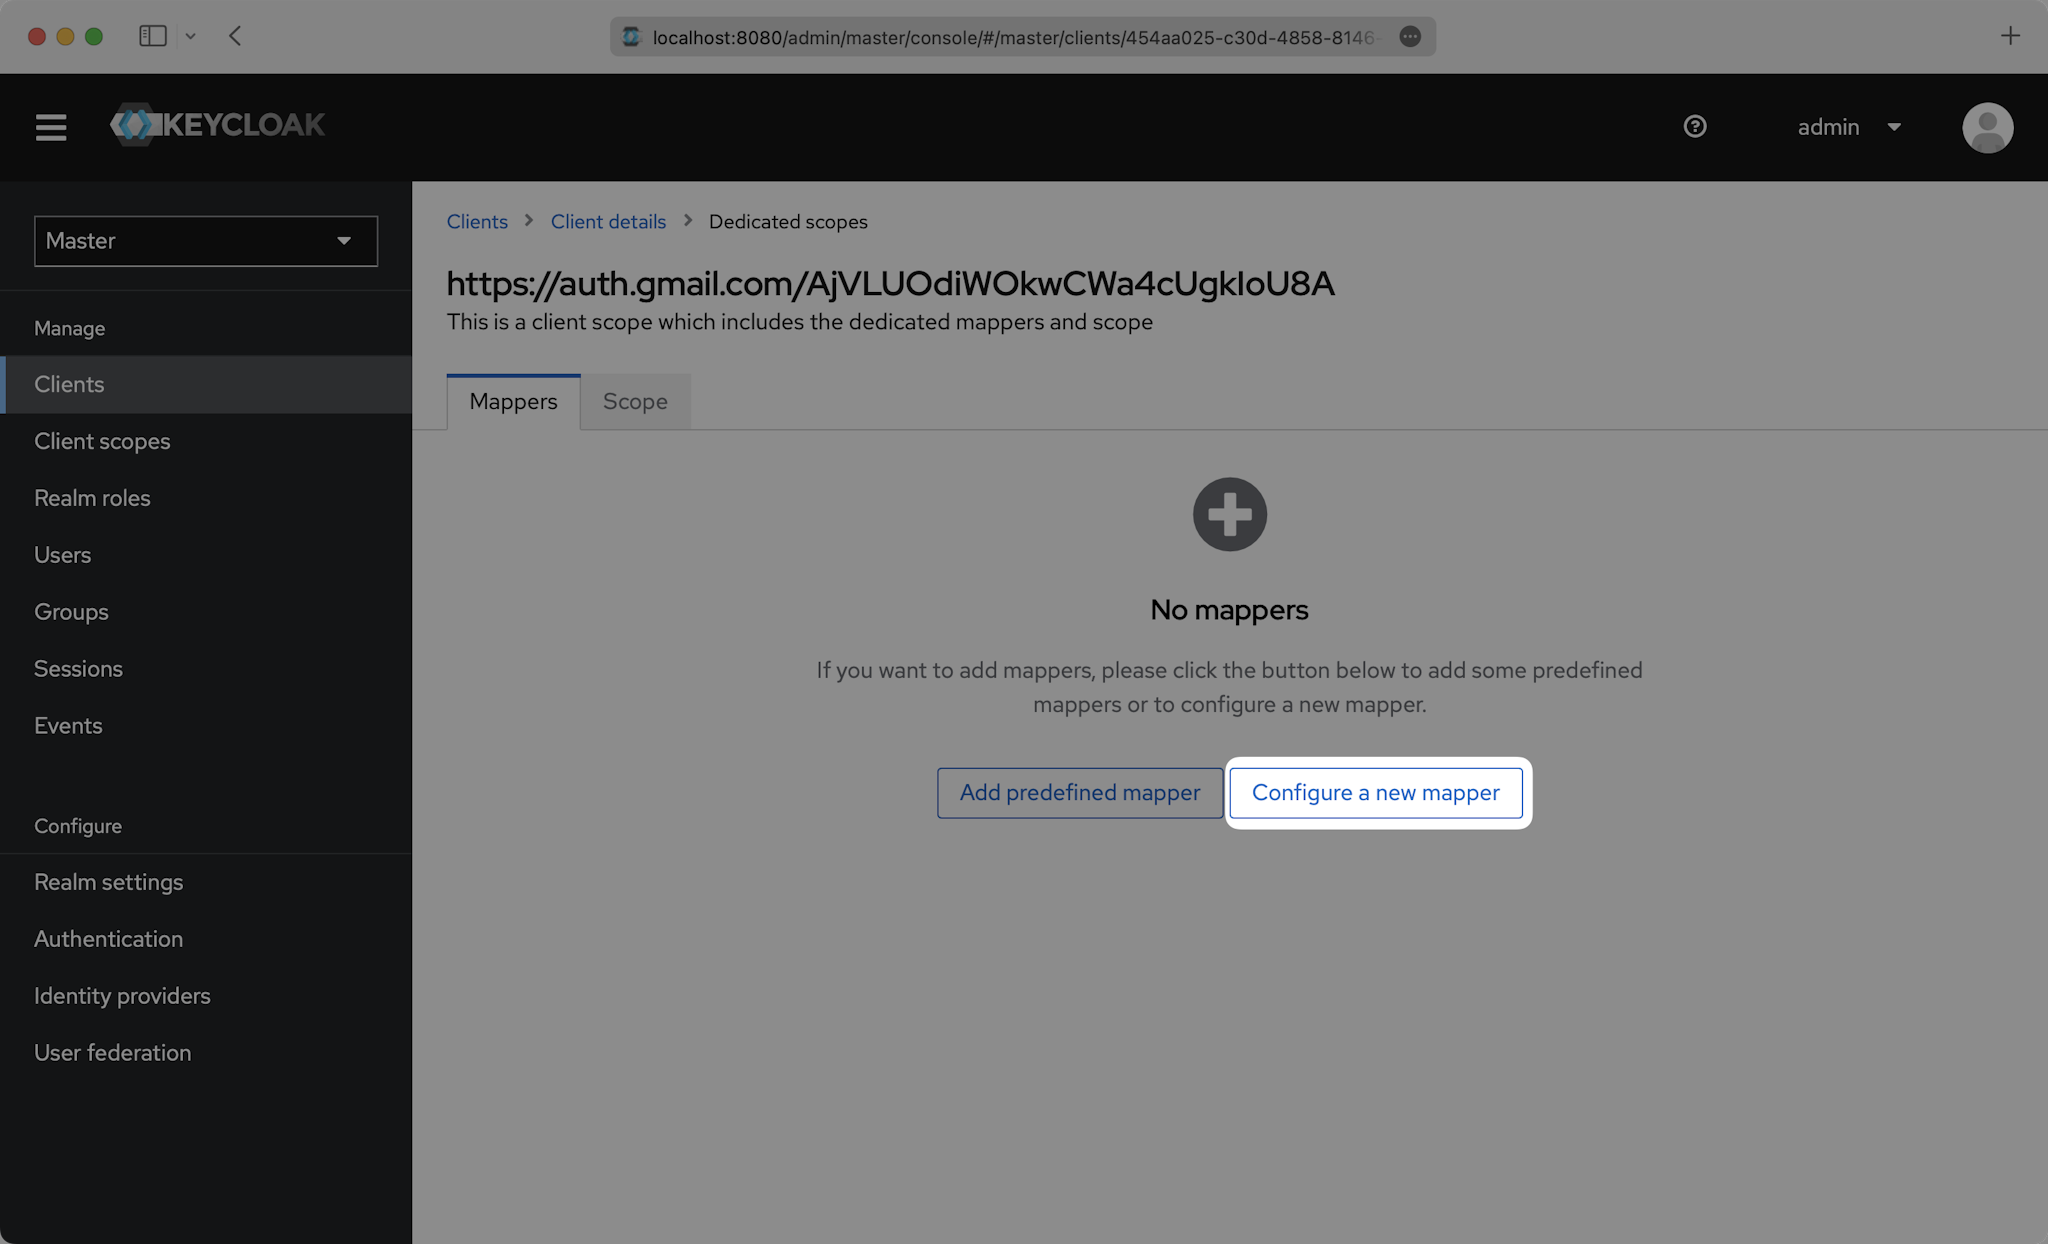
Click “Configure a new mapper”.
Then select “User Property”.
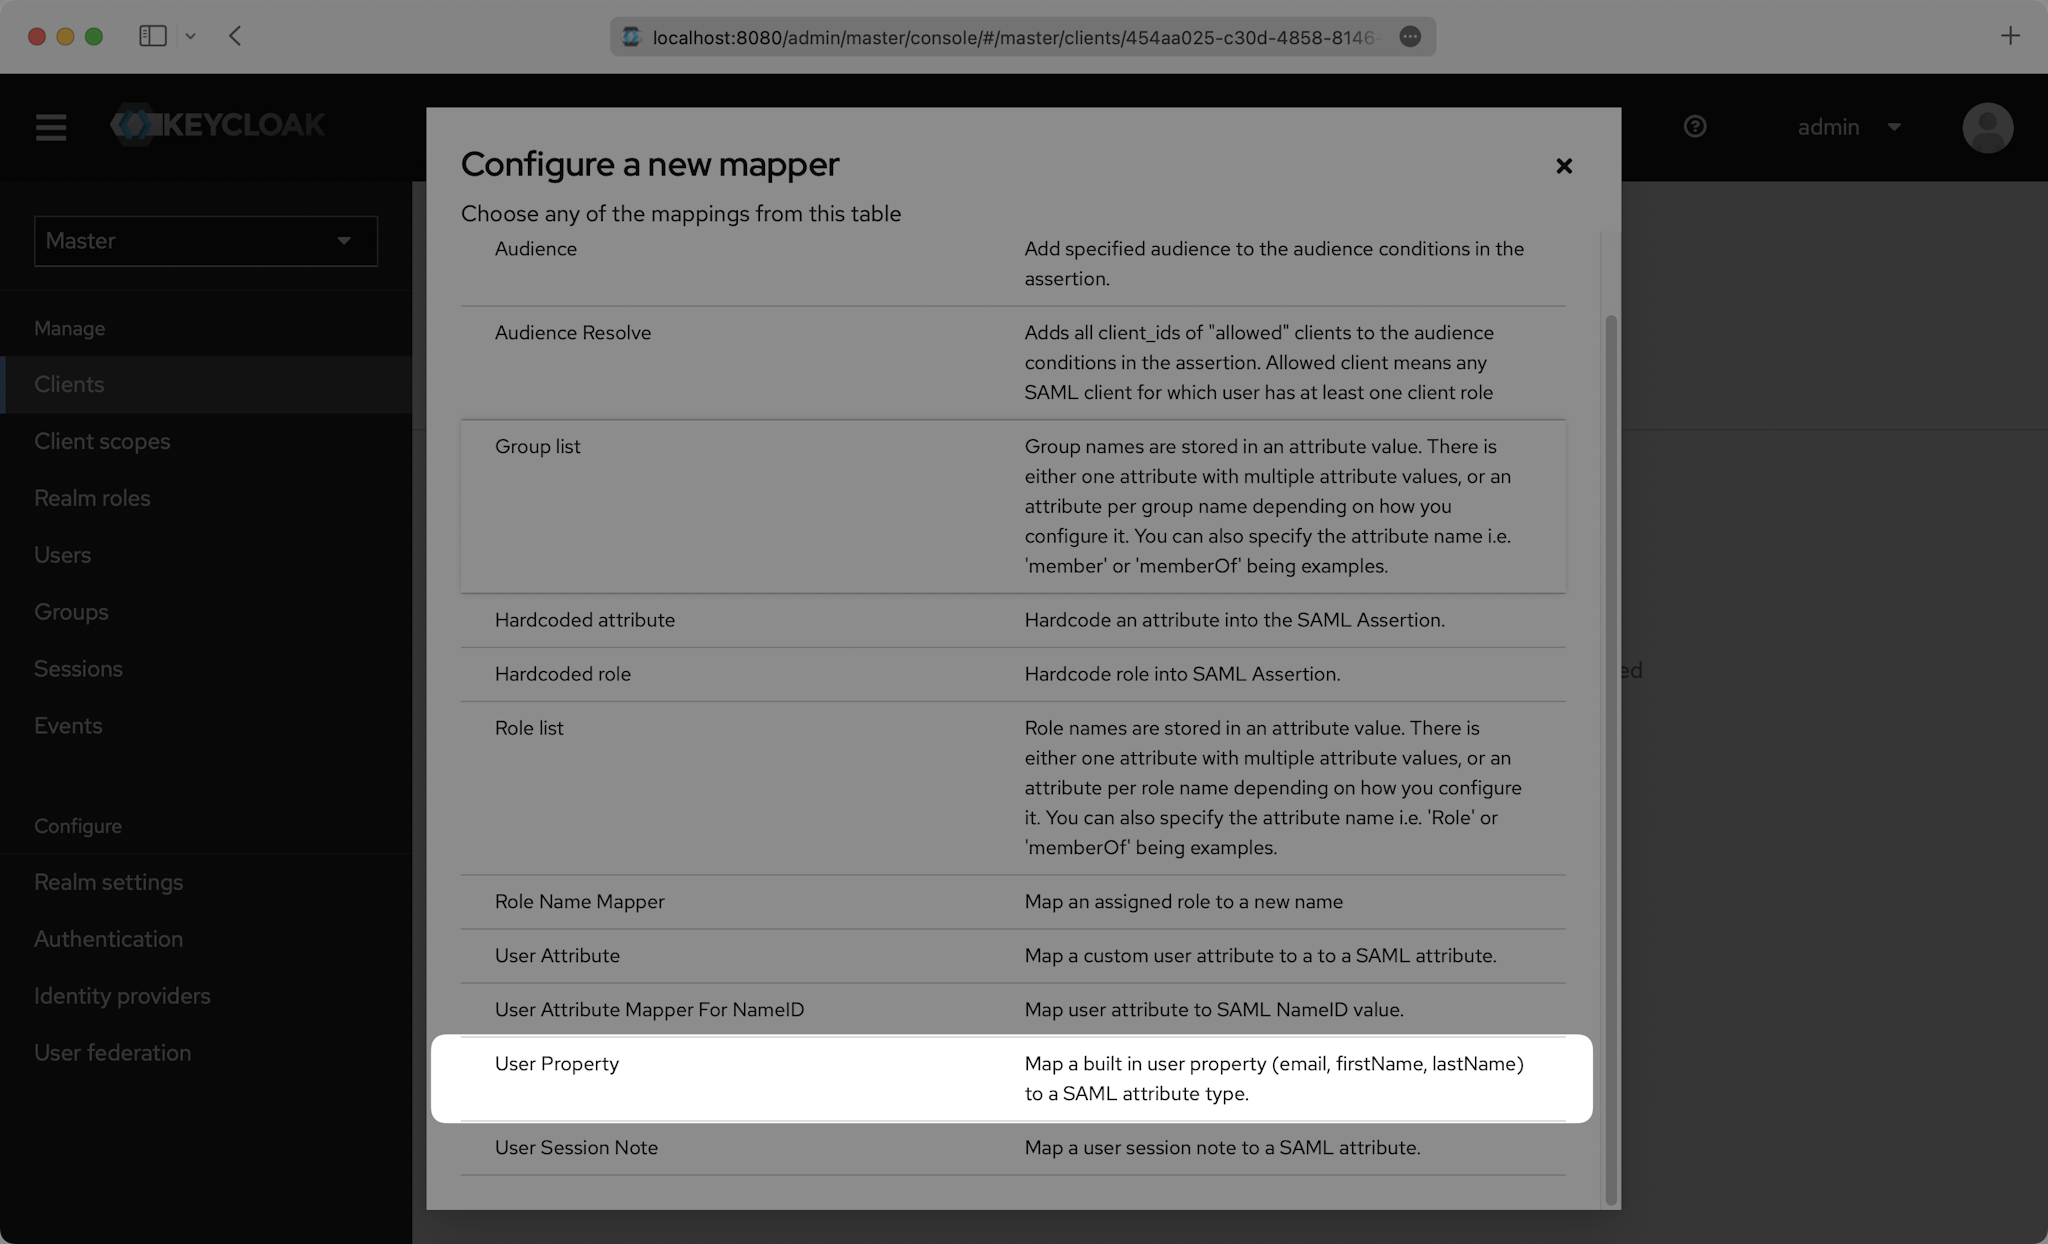
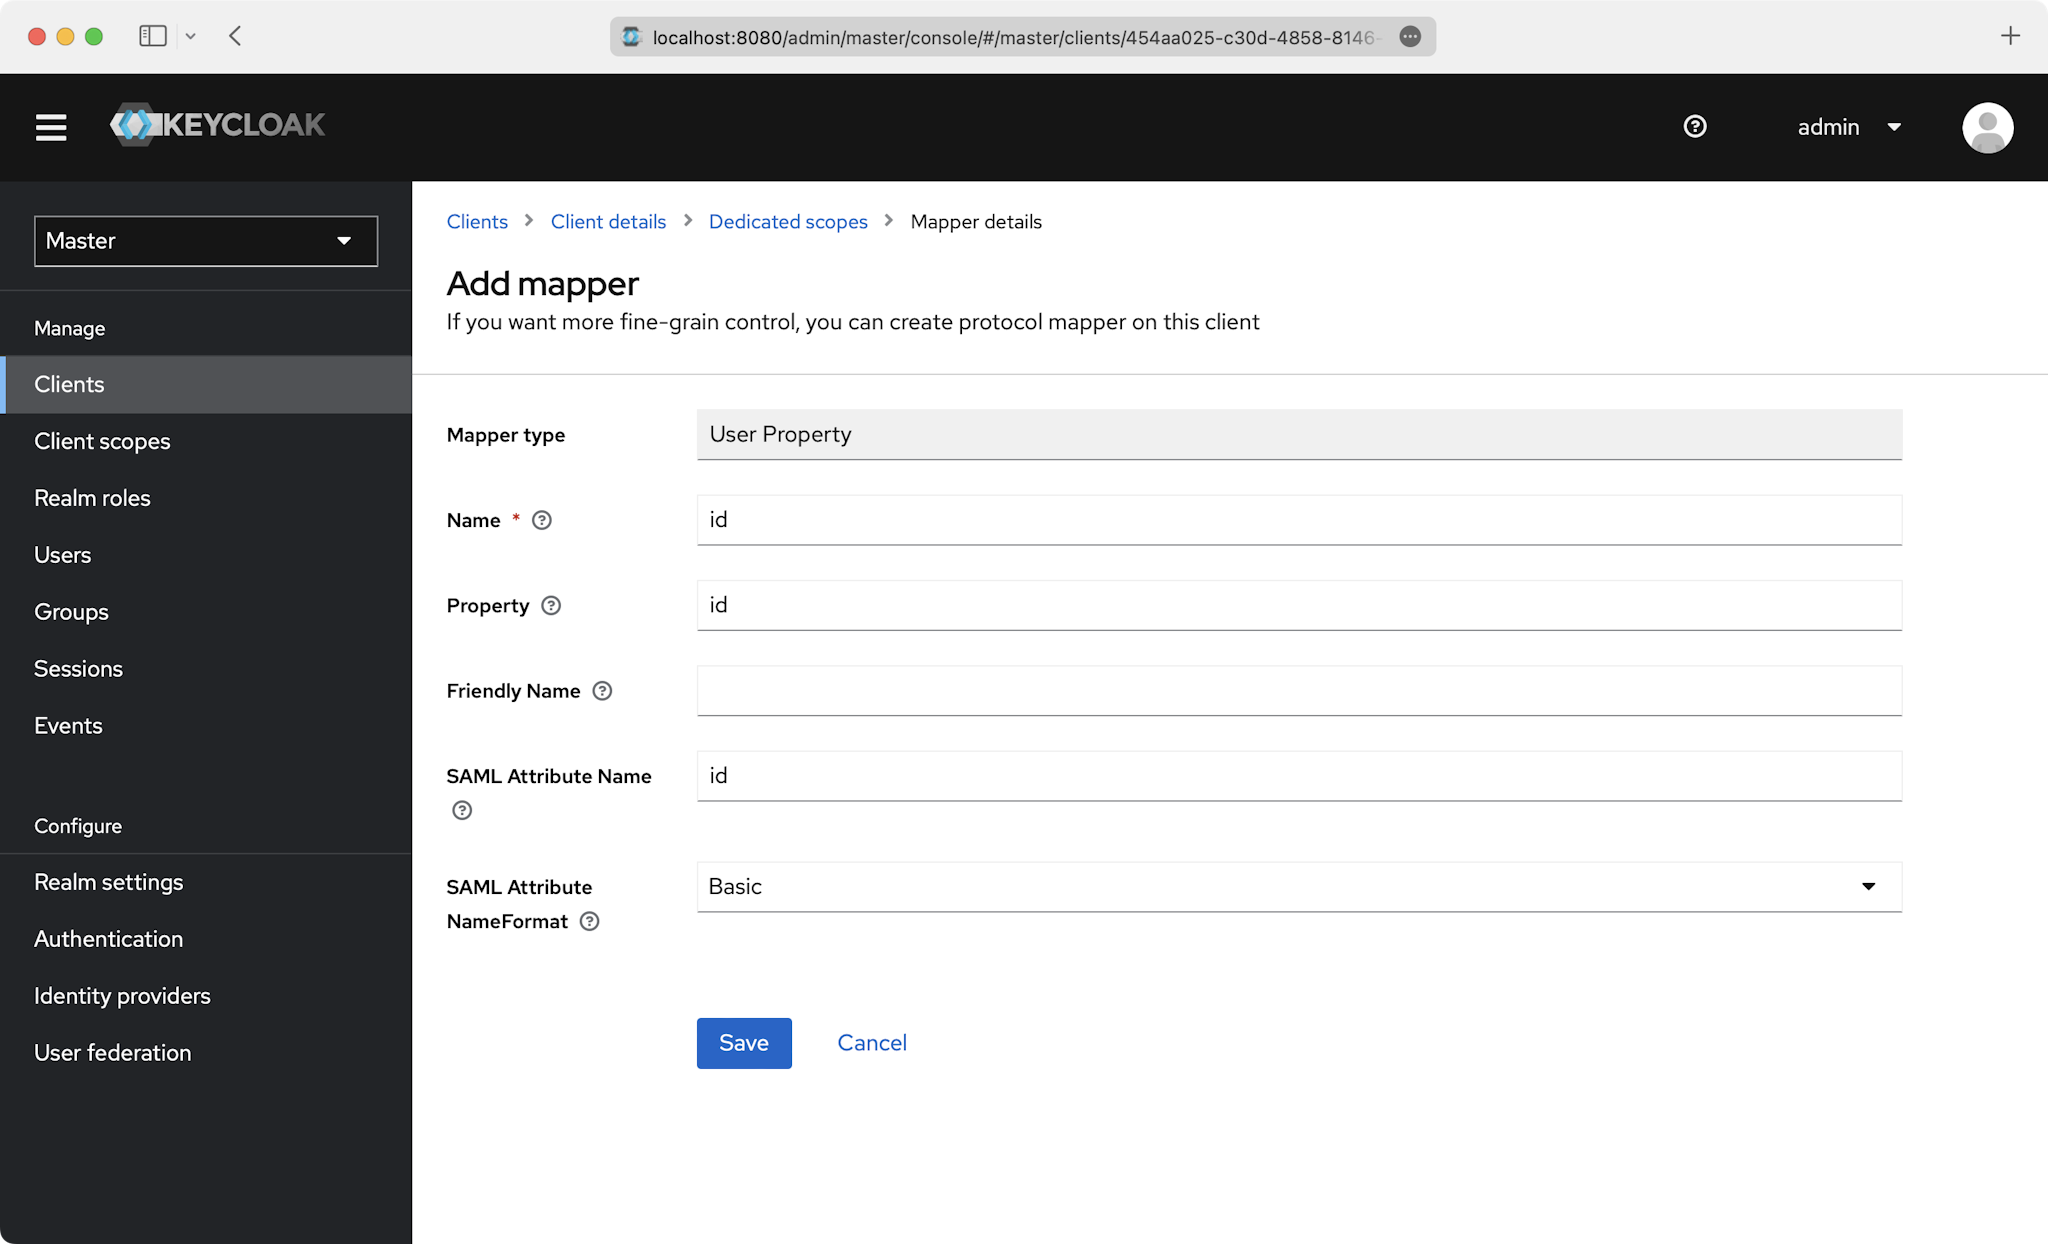
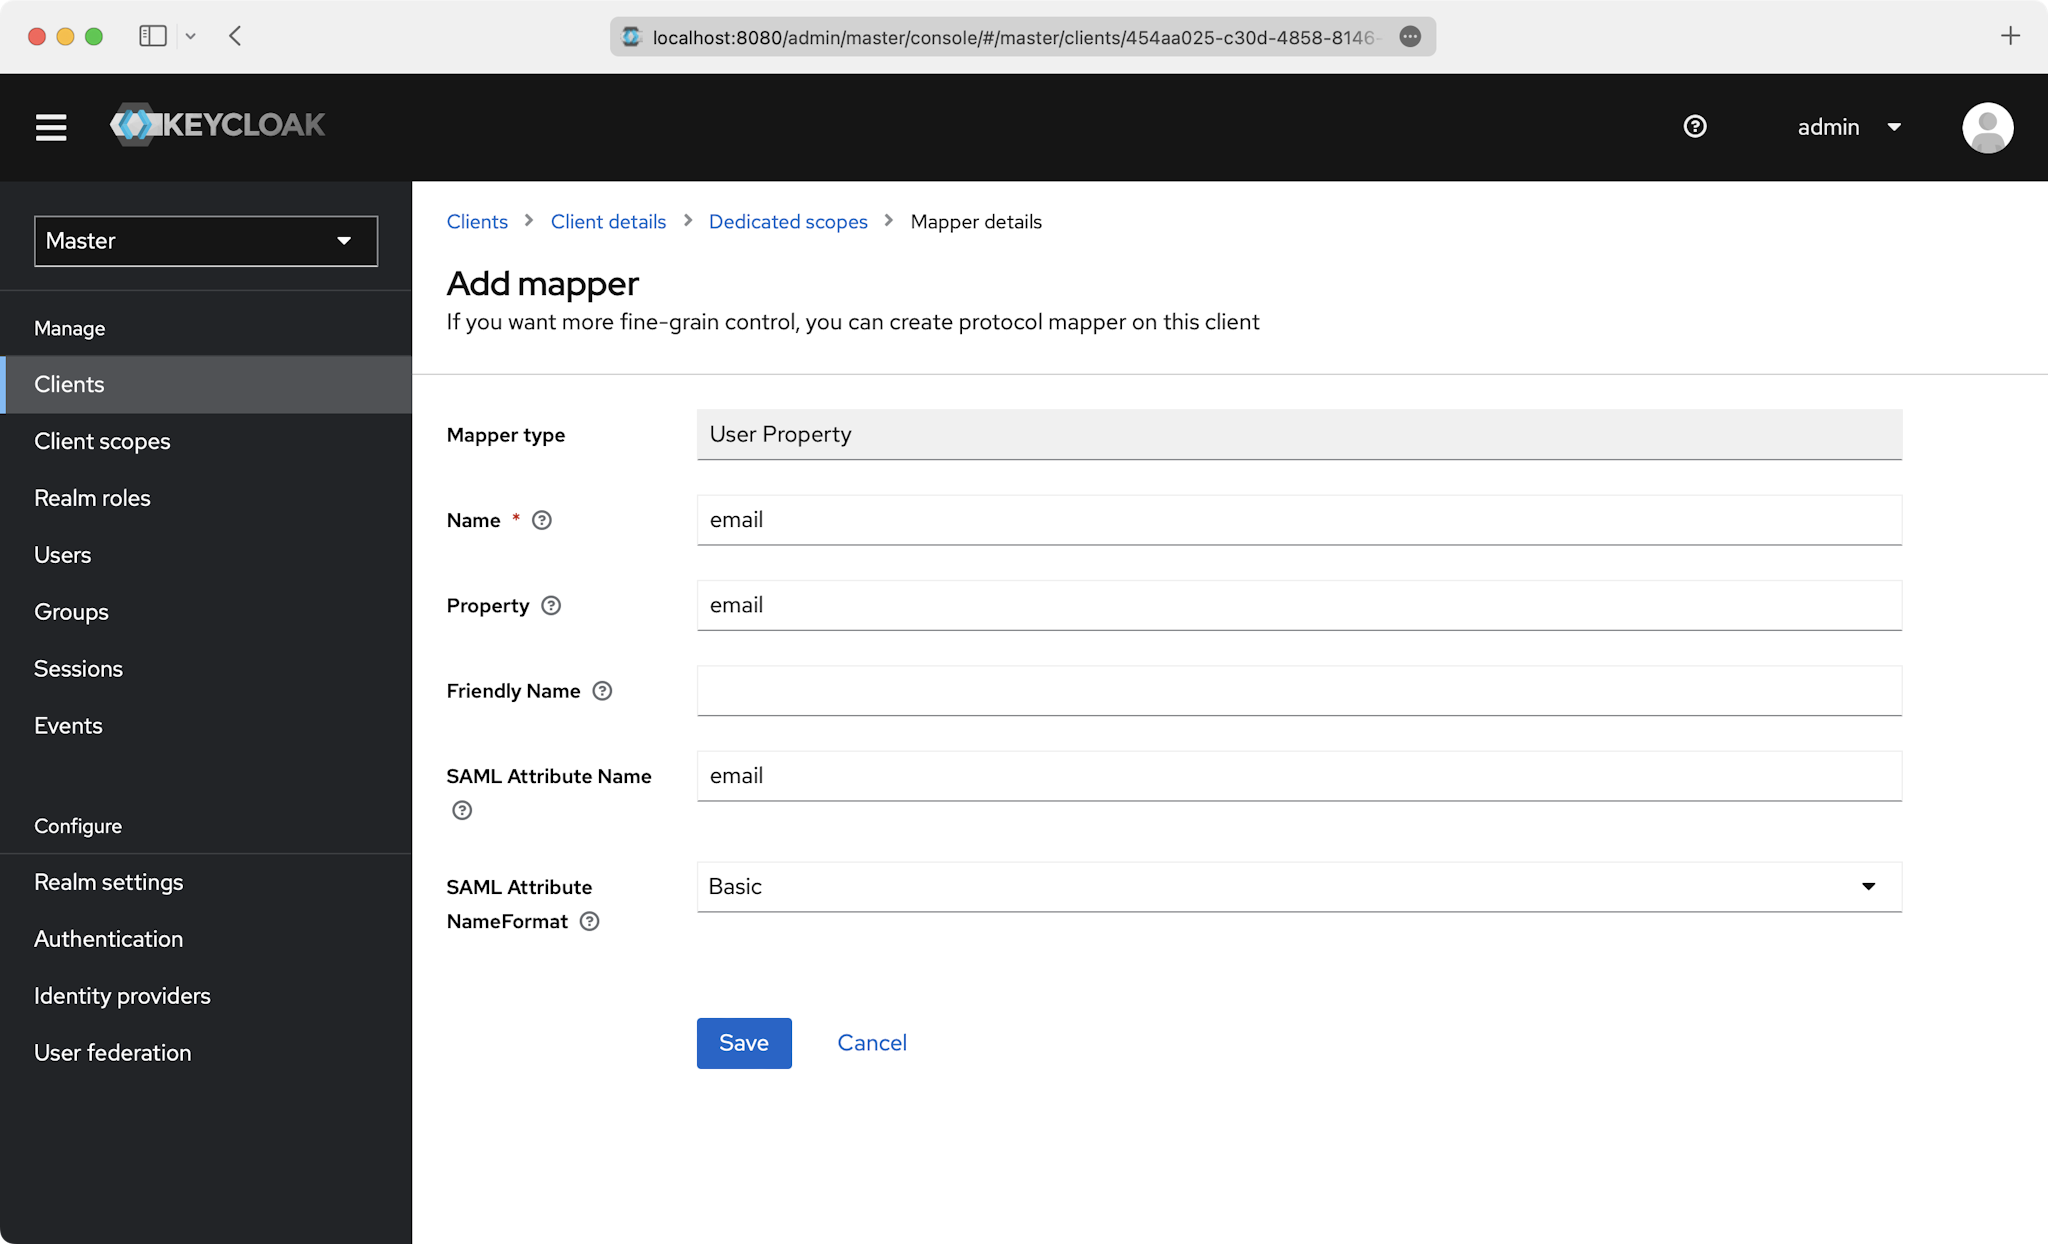
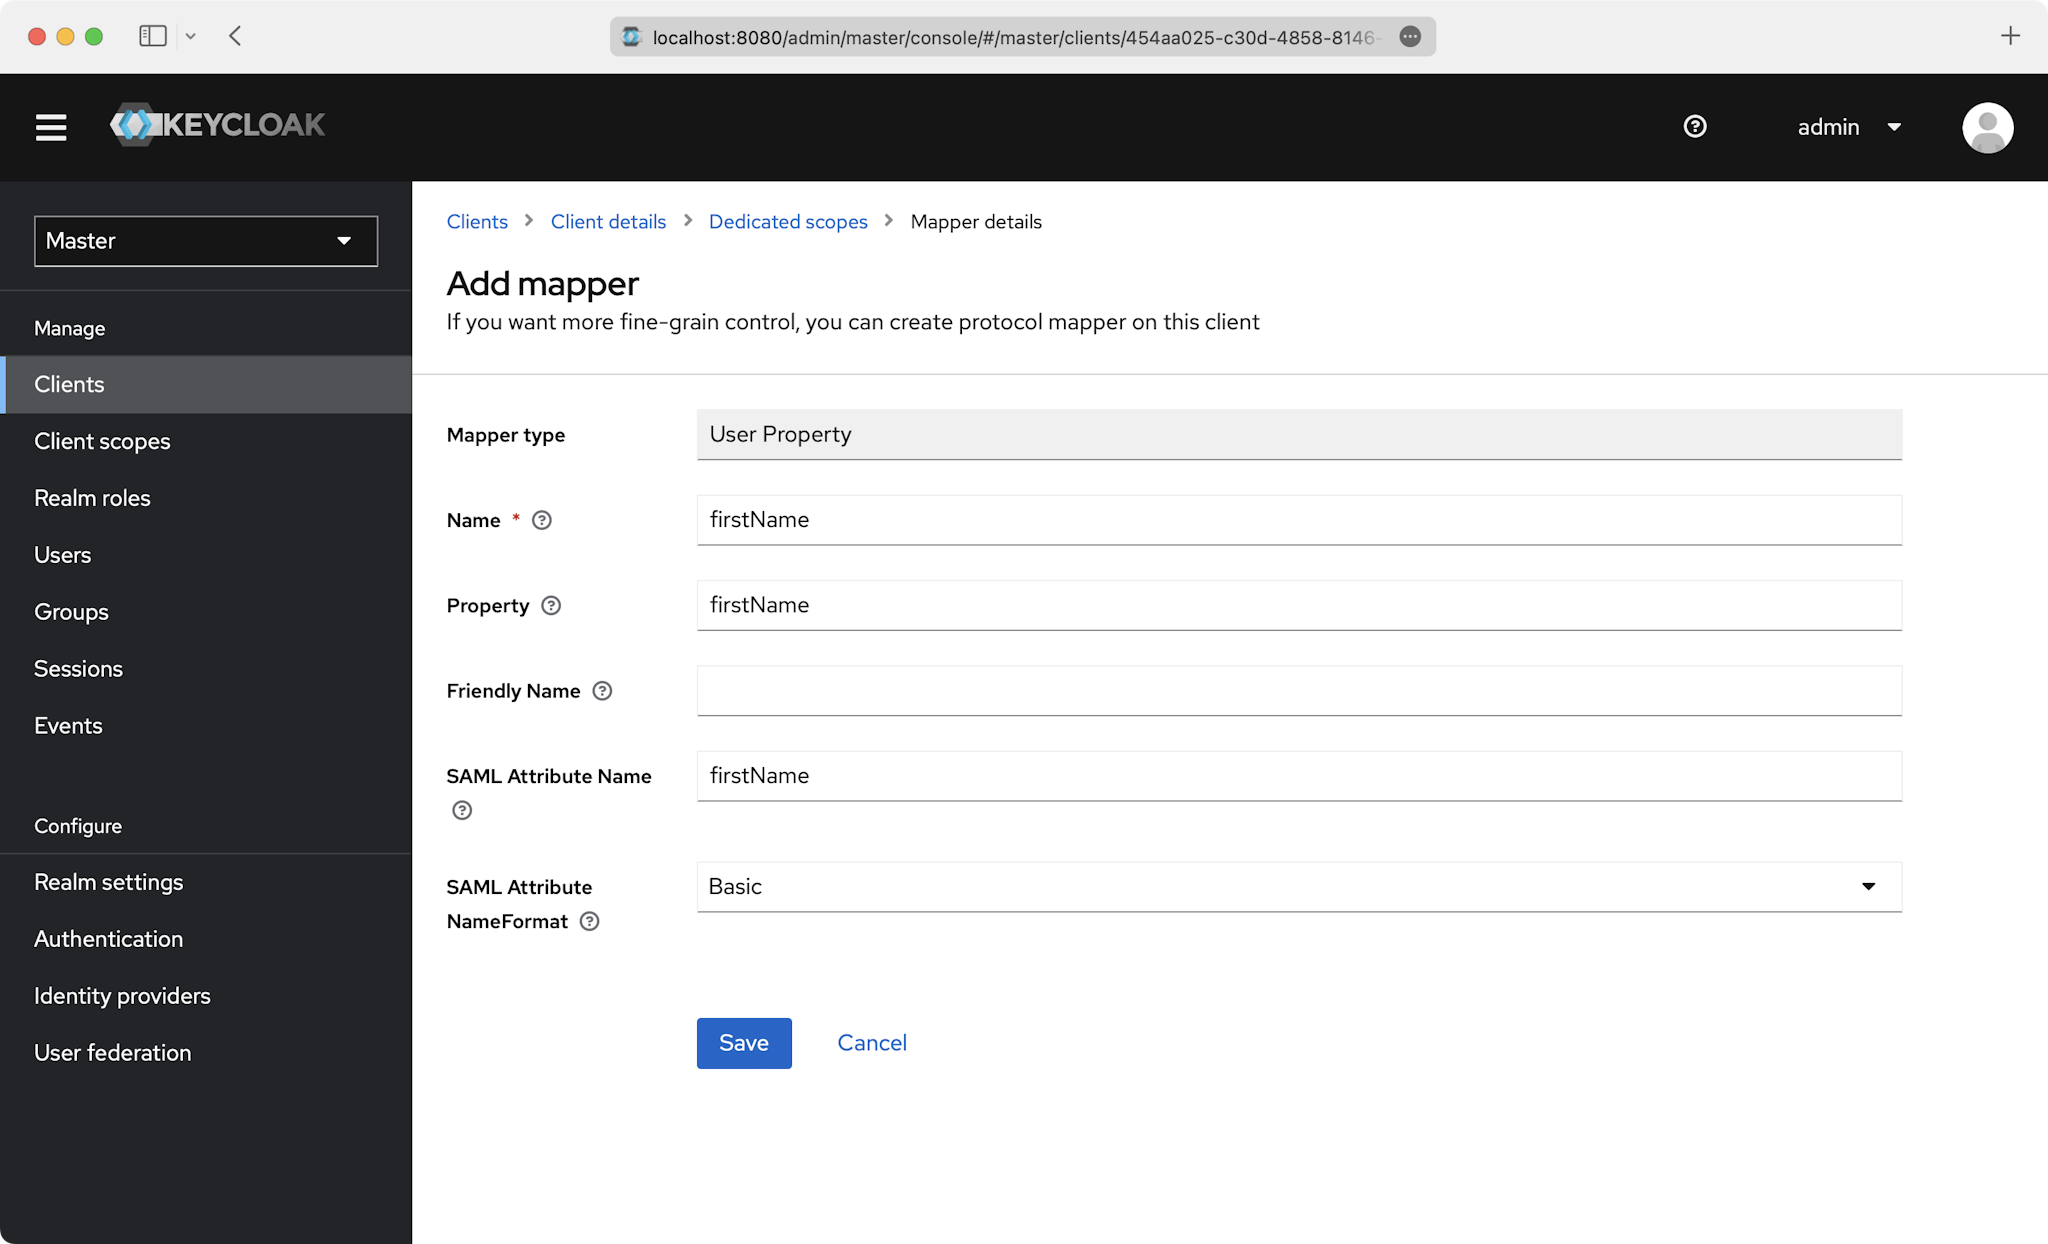
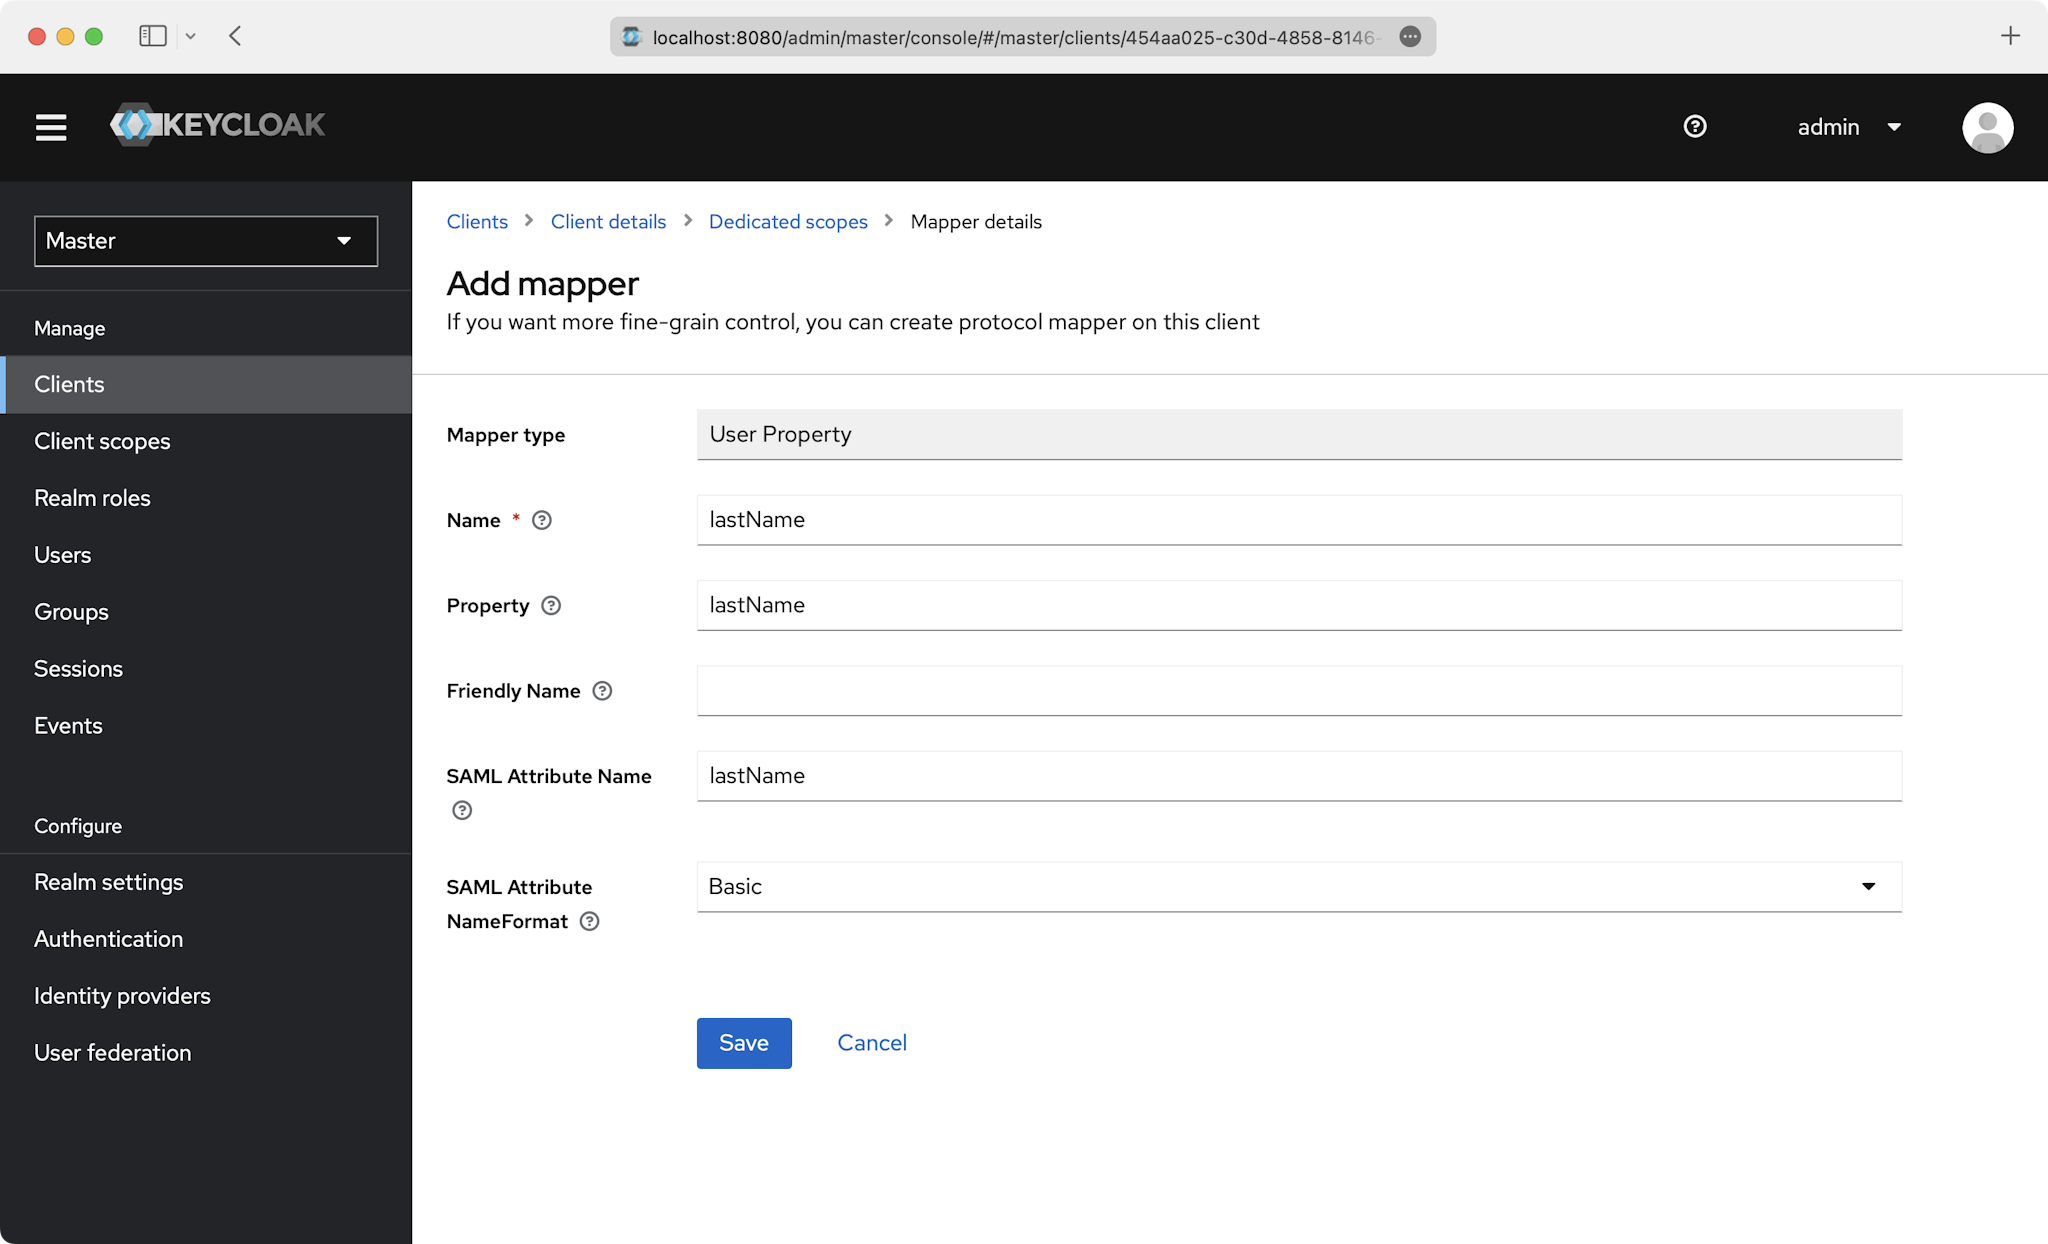
You’ll need to create a “User Property” mapper for the following four attributes:
idemailfirstNamelastName
This is an example of how to fill out the fields for id:
Also do this for the email, firstName, and lastName attributes:
With identity provider role assignment, users can receive roles within your application based on their group memberships. To return this information in the attribute statement, follow the guidance below.
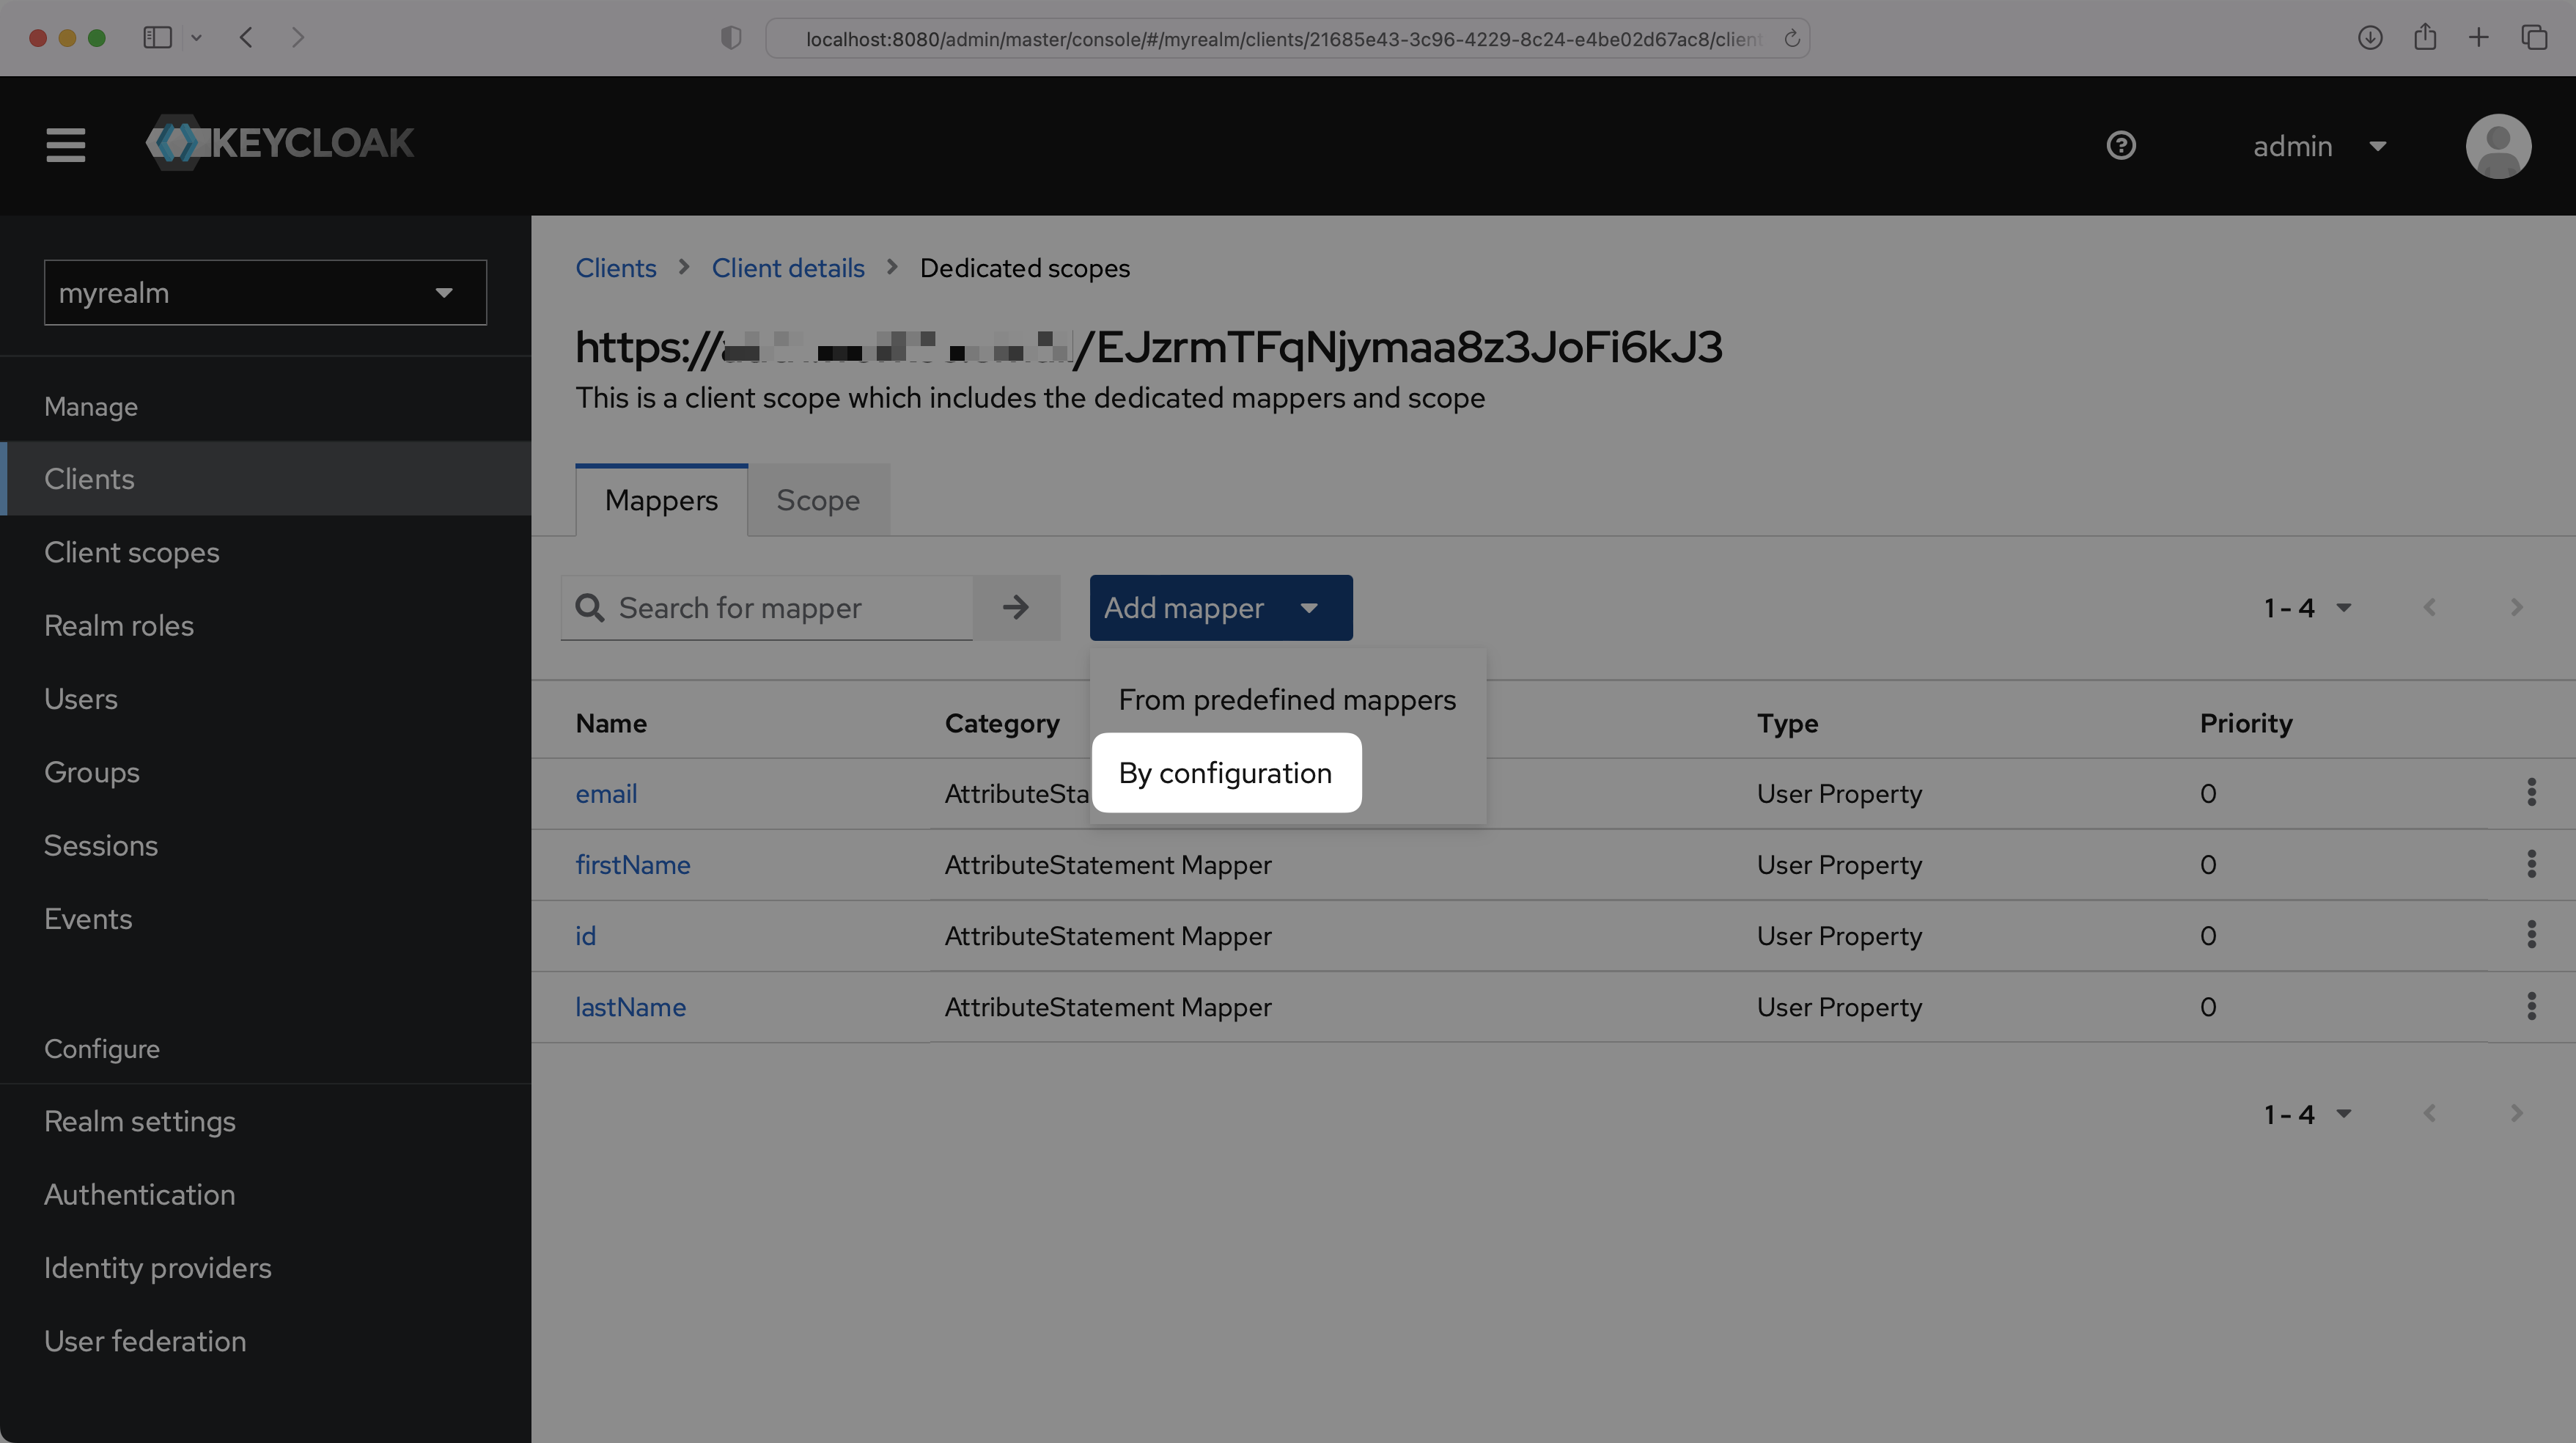
On the “Dedicated scopes” page, select “Add mapper” and then “By configuration”.
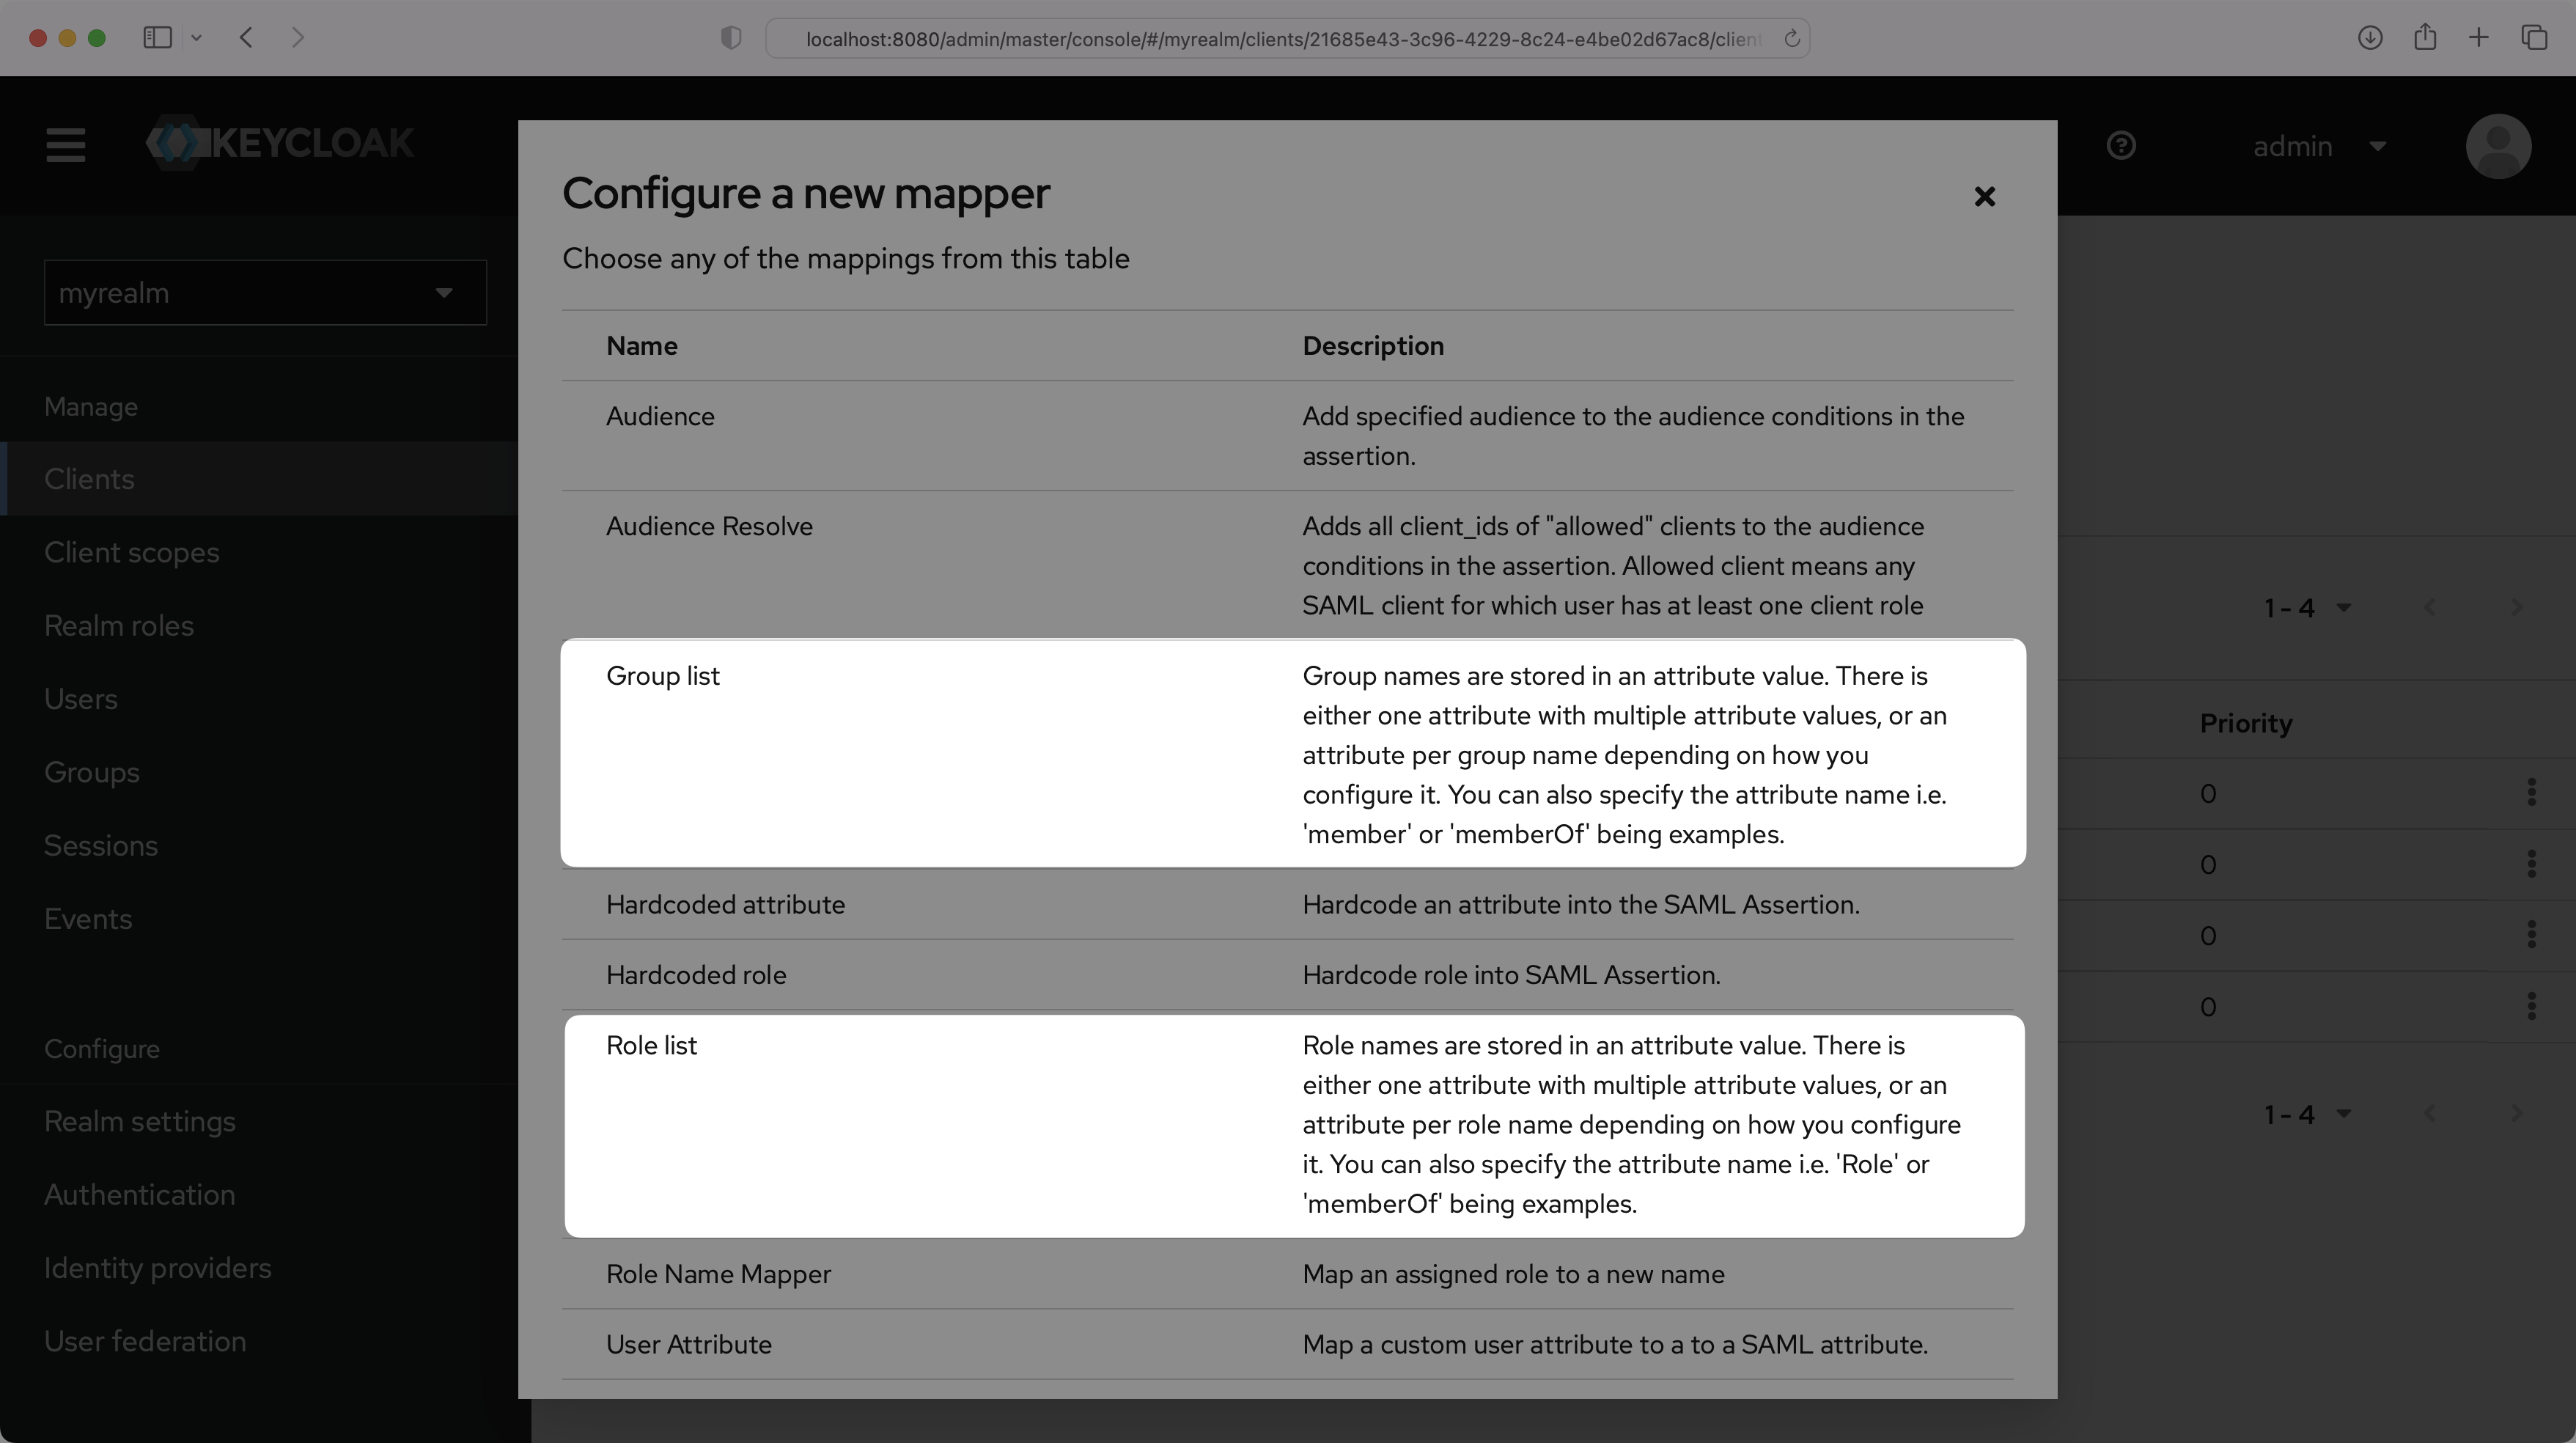
You can choose either “Group list” or “Role list”, whichever option best fits your use case. The example below uses “Group list”. For more information on sending group information, refer to the Keycloak documentation.
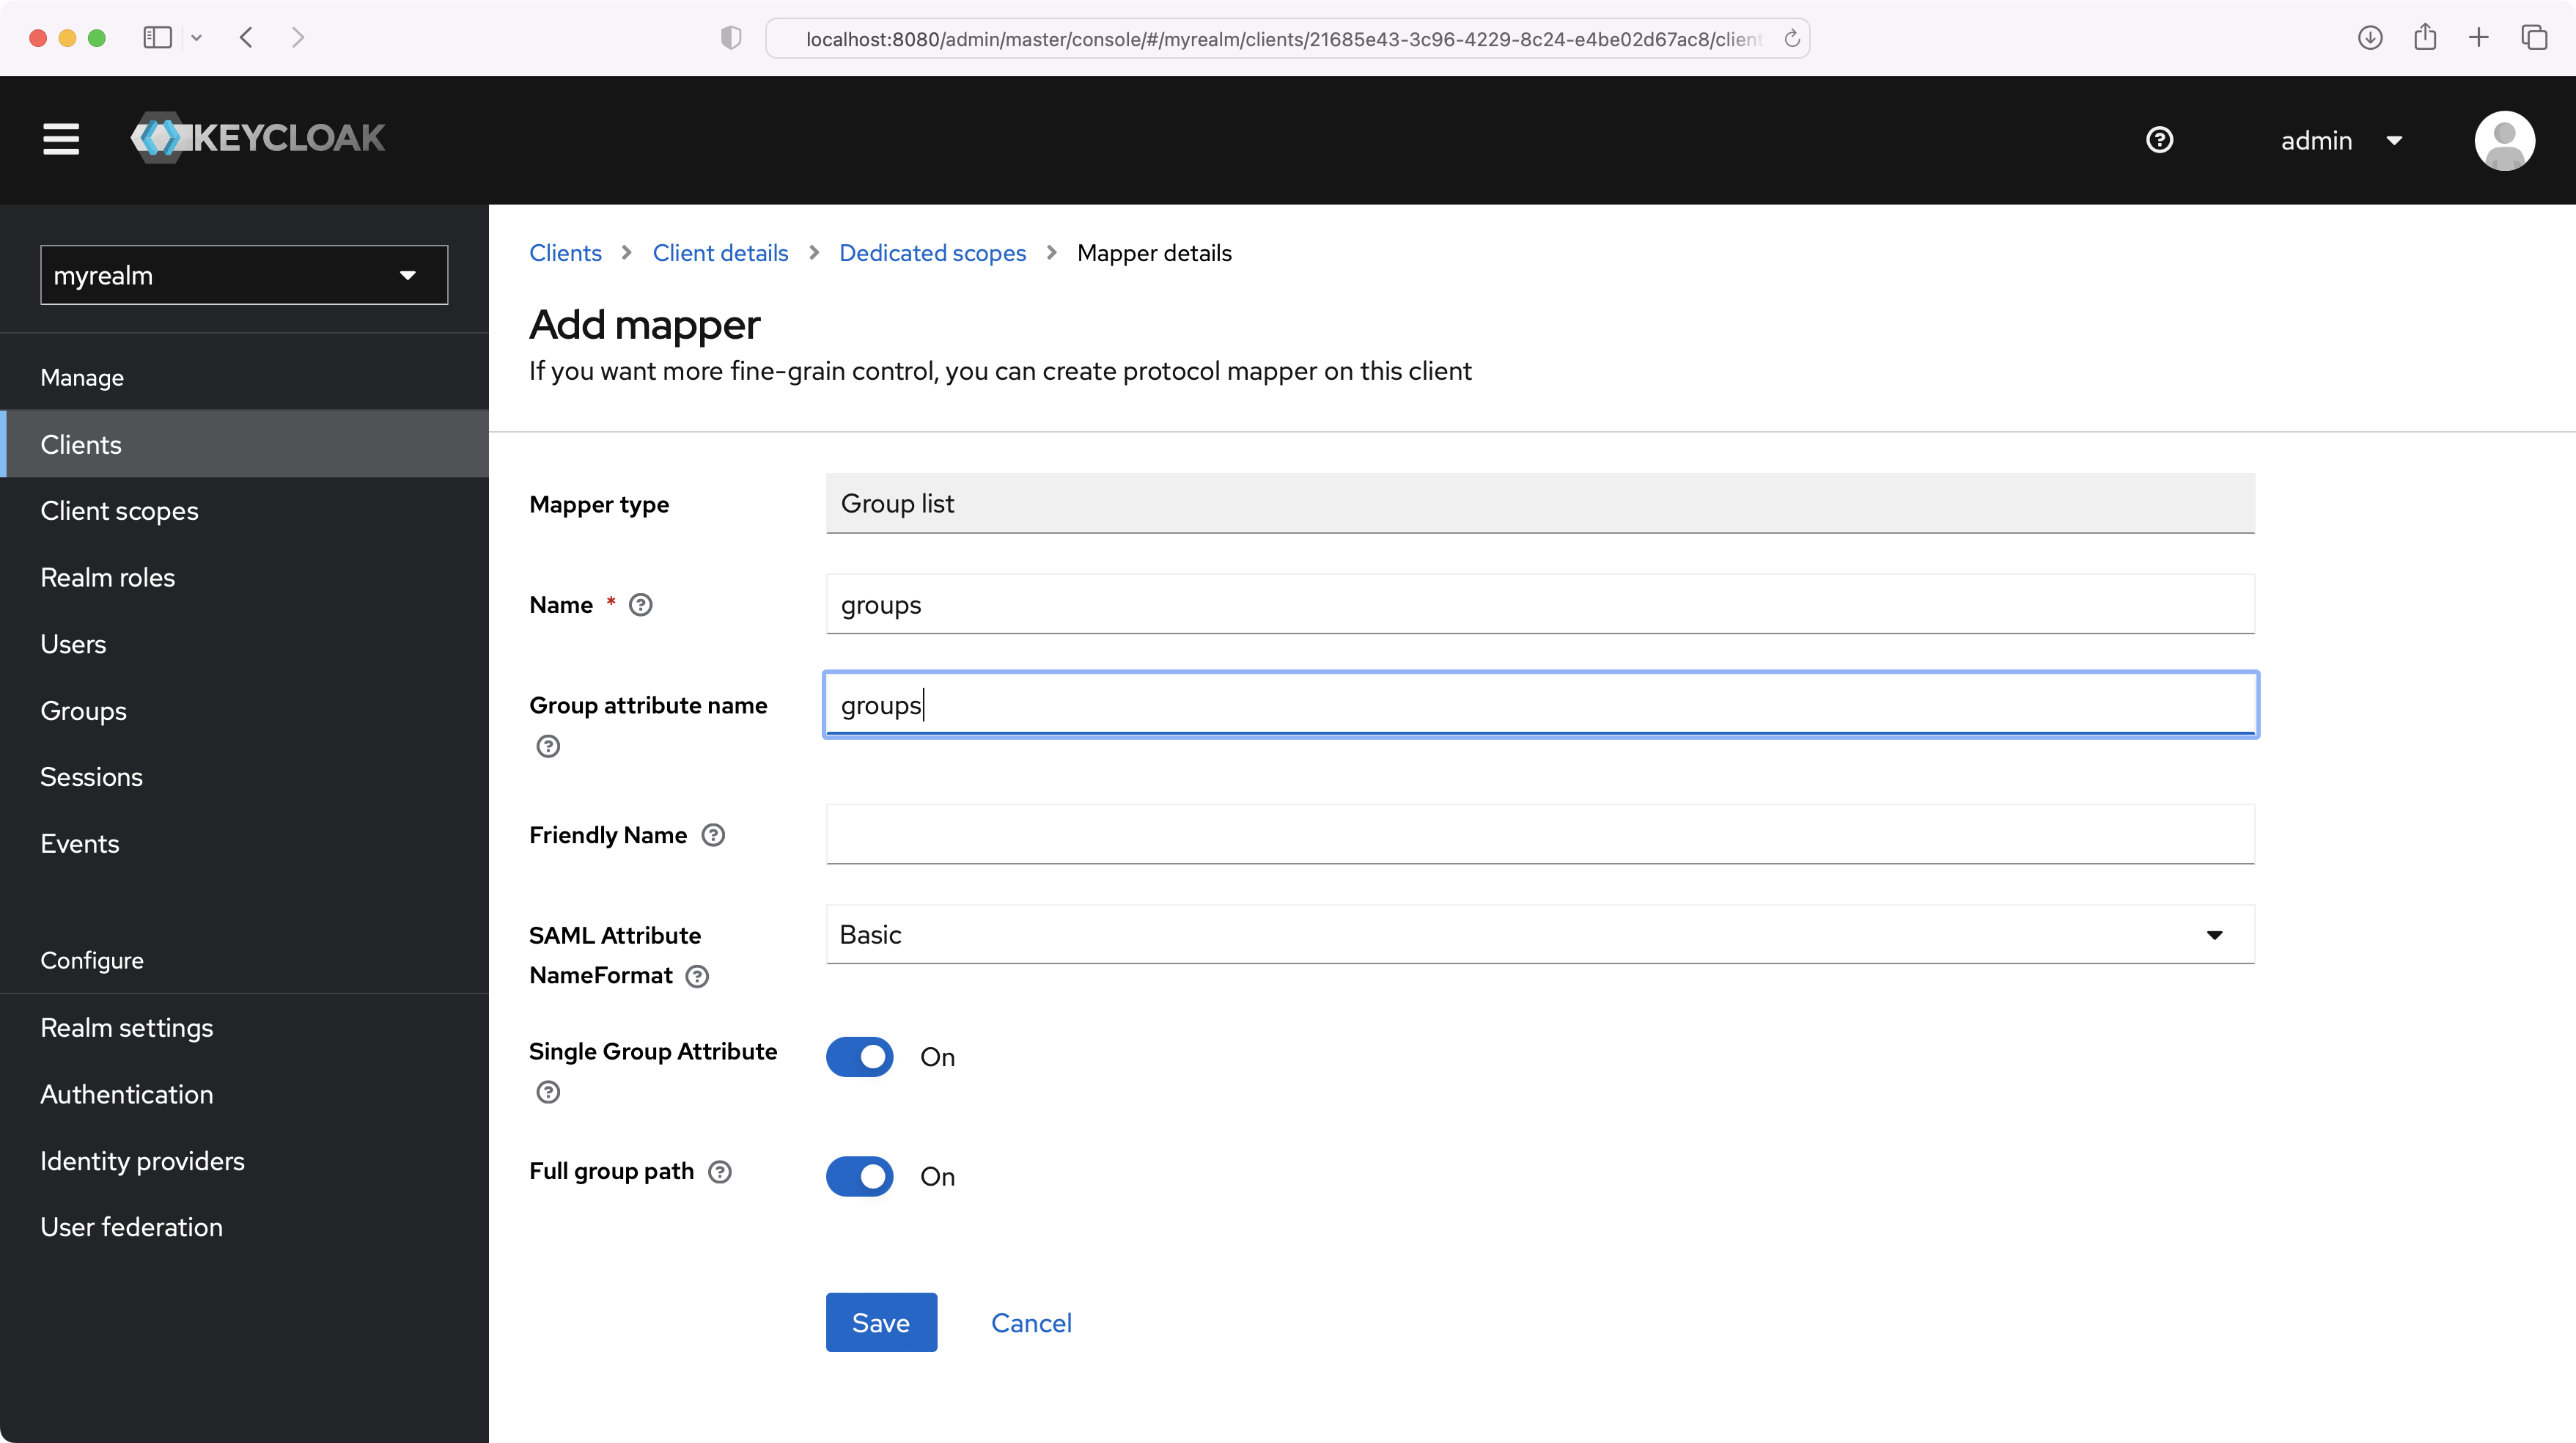
Set the Name and the Group attribute name to “groups”, and make sure the Single Group Attribute toggle is On. Select “Save”.
Finish role assignment set-up by navigating to the SSO connection page in the Organization section of the WorkOS Dashboard. Create SSO groups by referencing the group IdP ID. Then, assign roles to these SSO groups so group members are automatically granted roles within your application.
Select “Realm Settings” in the left sidebar navigation menu, and copy the “SAML 2.0 Identity Provider Metadata” link on the General page.
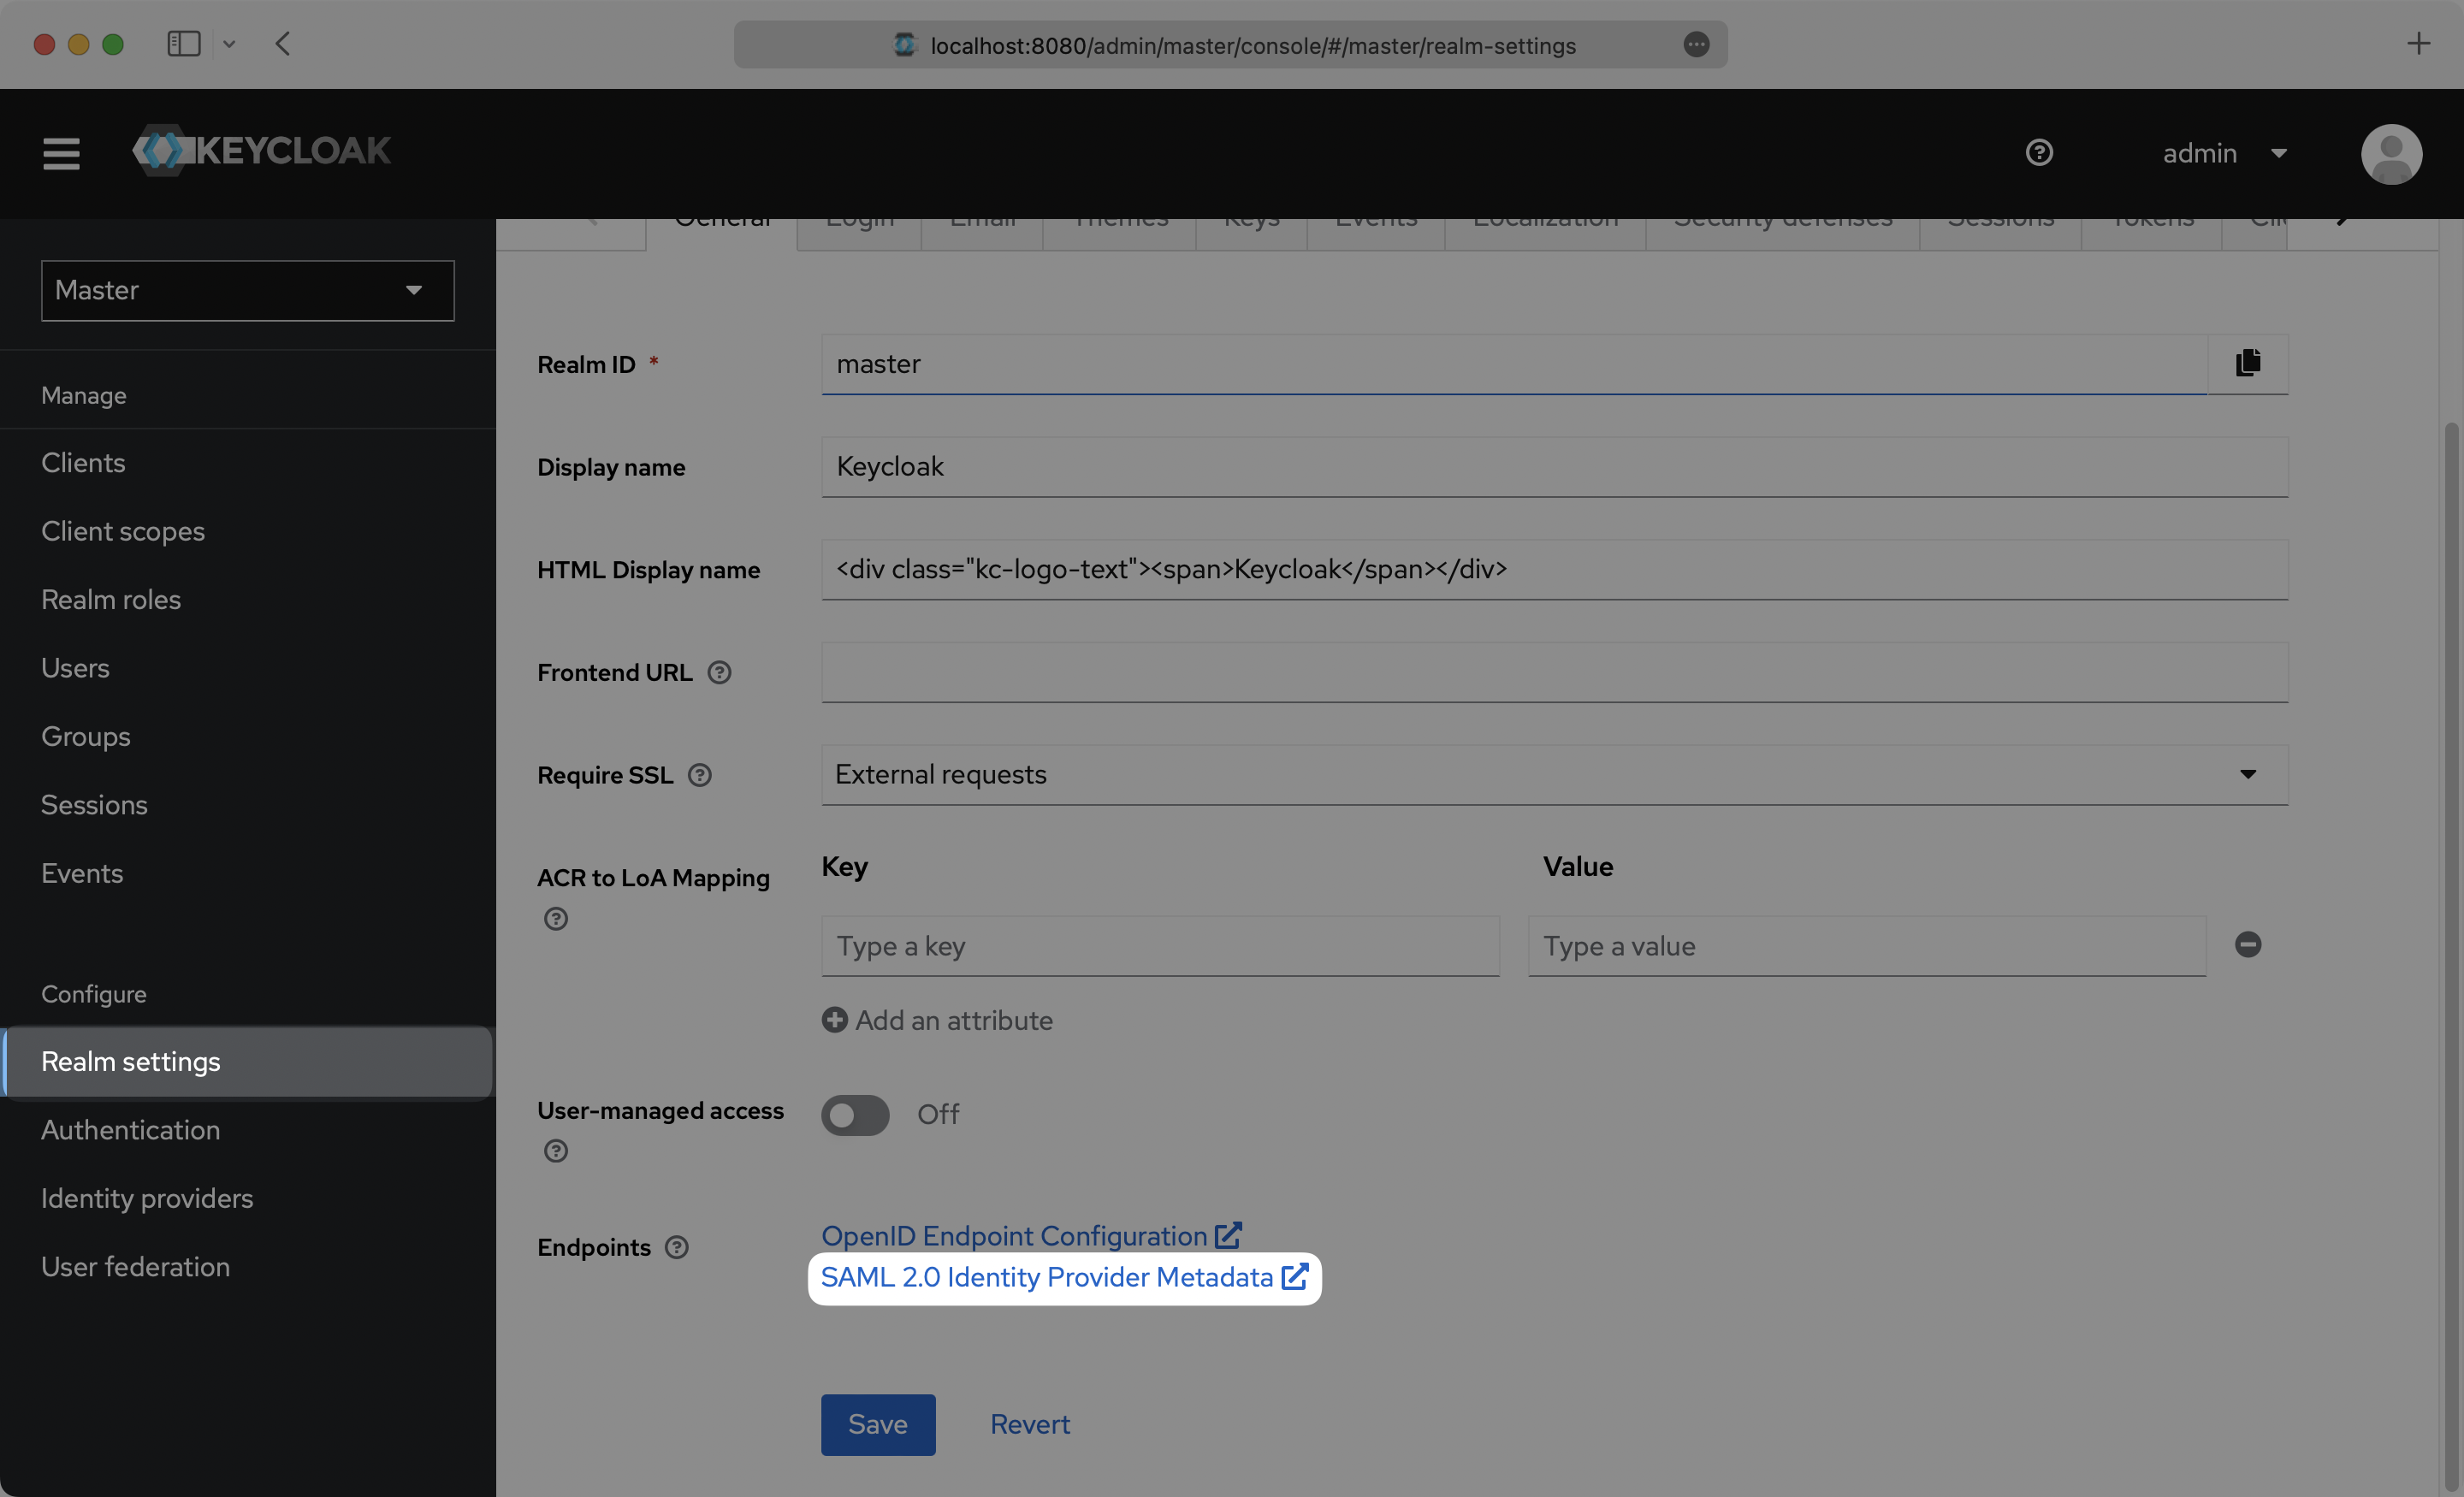
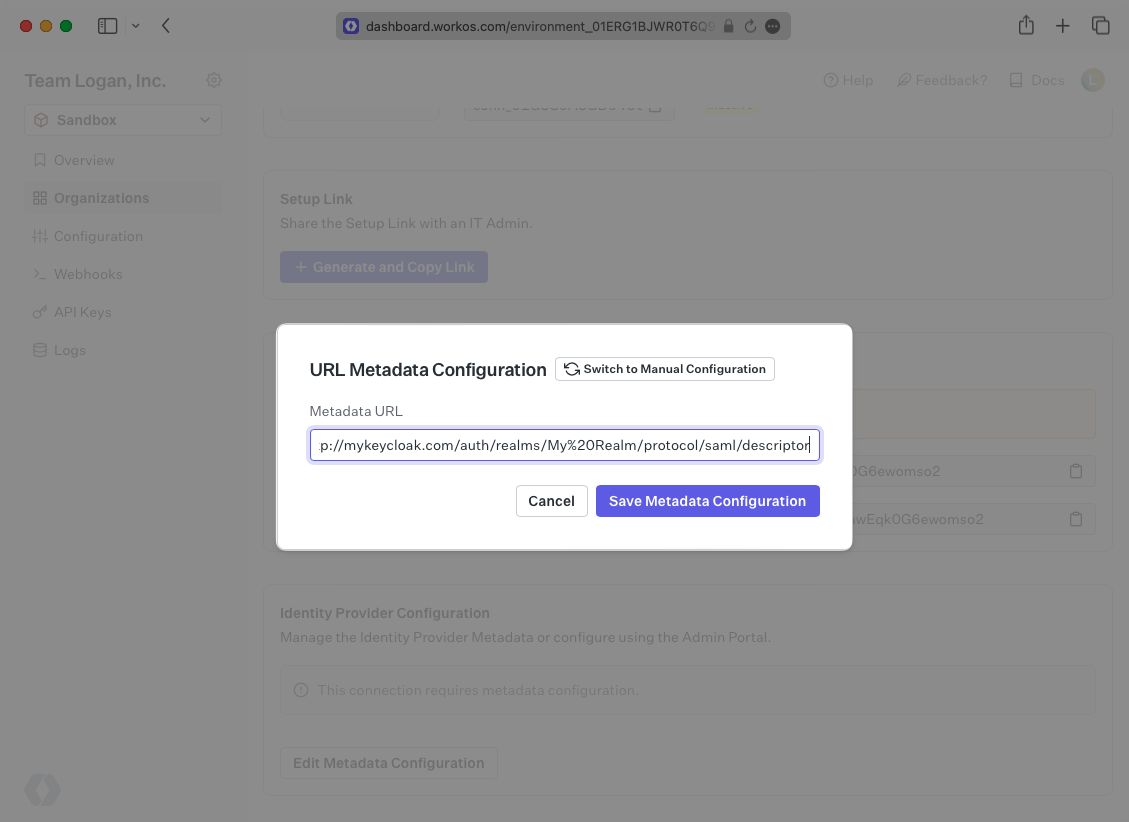
Next, within your connection settings, edit the Metadata Configuration and provide the Metadata URL you obtained from Keycloak. Your Connection will then be verified and good to go!
