Cloudflare
Learn how to configure a connection to Cloudflare via SAML.
Each SSO Identity Provider requires specific information to create and configure a new Connection. Often, the information required to create a Connection will differ by Identity Provider.
To create a Cloudflare SAML Connection, you’ll need to manually enter the SSO URL, IdP Entity ID, and X.509 Certificate obtained from your Cloudflare instance. Instructions on where to obtain these will be covered in this guide.
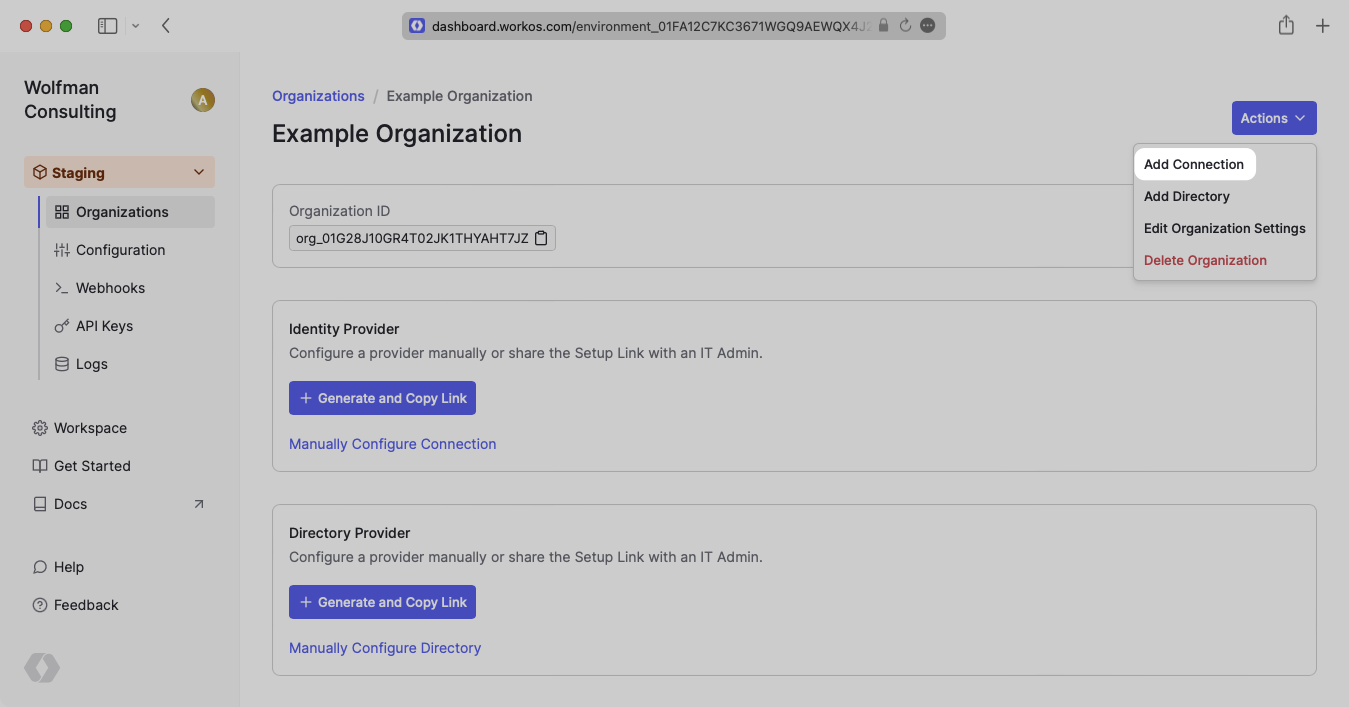
The first thing you’ll need to do is create a new Cloudflare SAML connection in your WorkOS Dashboard. Start by logging in to your WorkOS dashboard and browse to the “Organizations” tab on the left hand navigation bar.
Select the organization you’d like to configure a Cloudflare SAML Connection for, and from the dropdown menu select “Add Connection”.
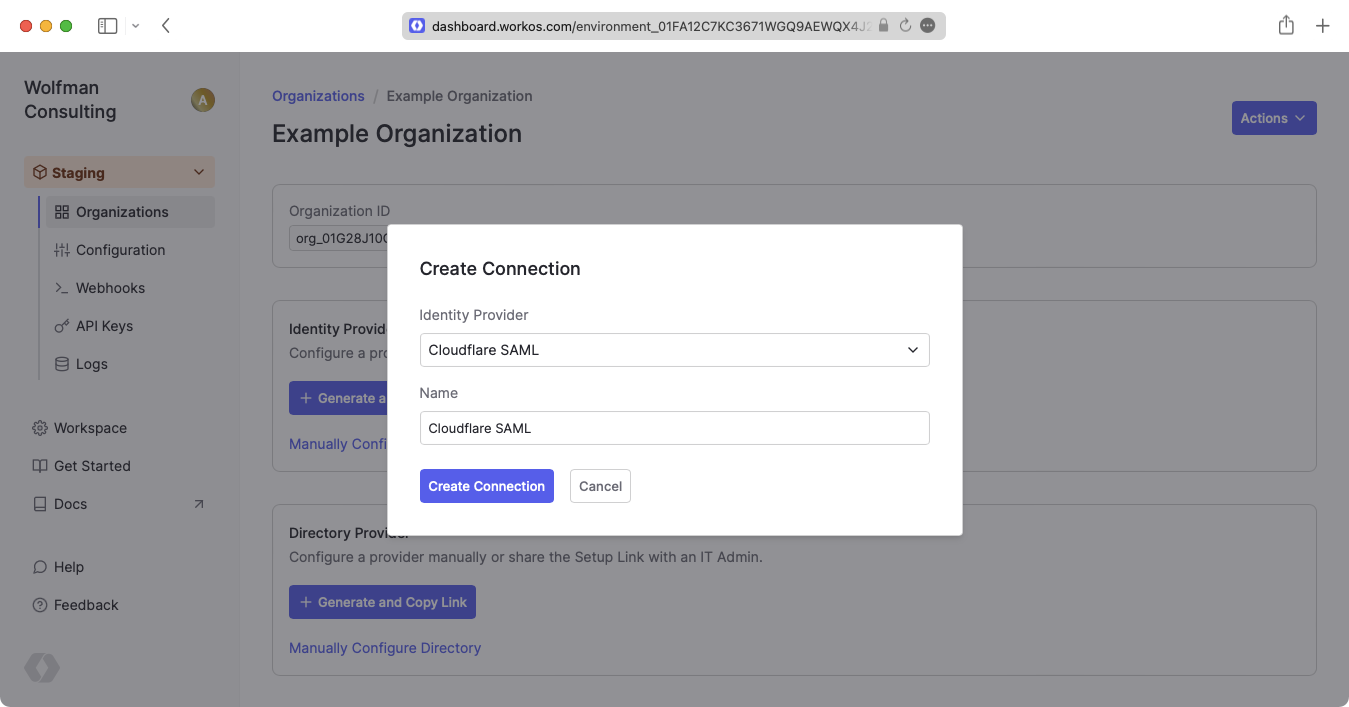
Select “Cloudflare SAML” as the Identity Provider and give the Connection a descriptive name. Once this is filled out, click “Create Connection”.
WorkOS provides the ACS URL and the SP Entity ID. These are available in your Connection’s Settings in the Developer Dashboard.
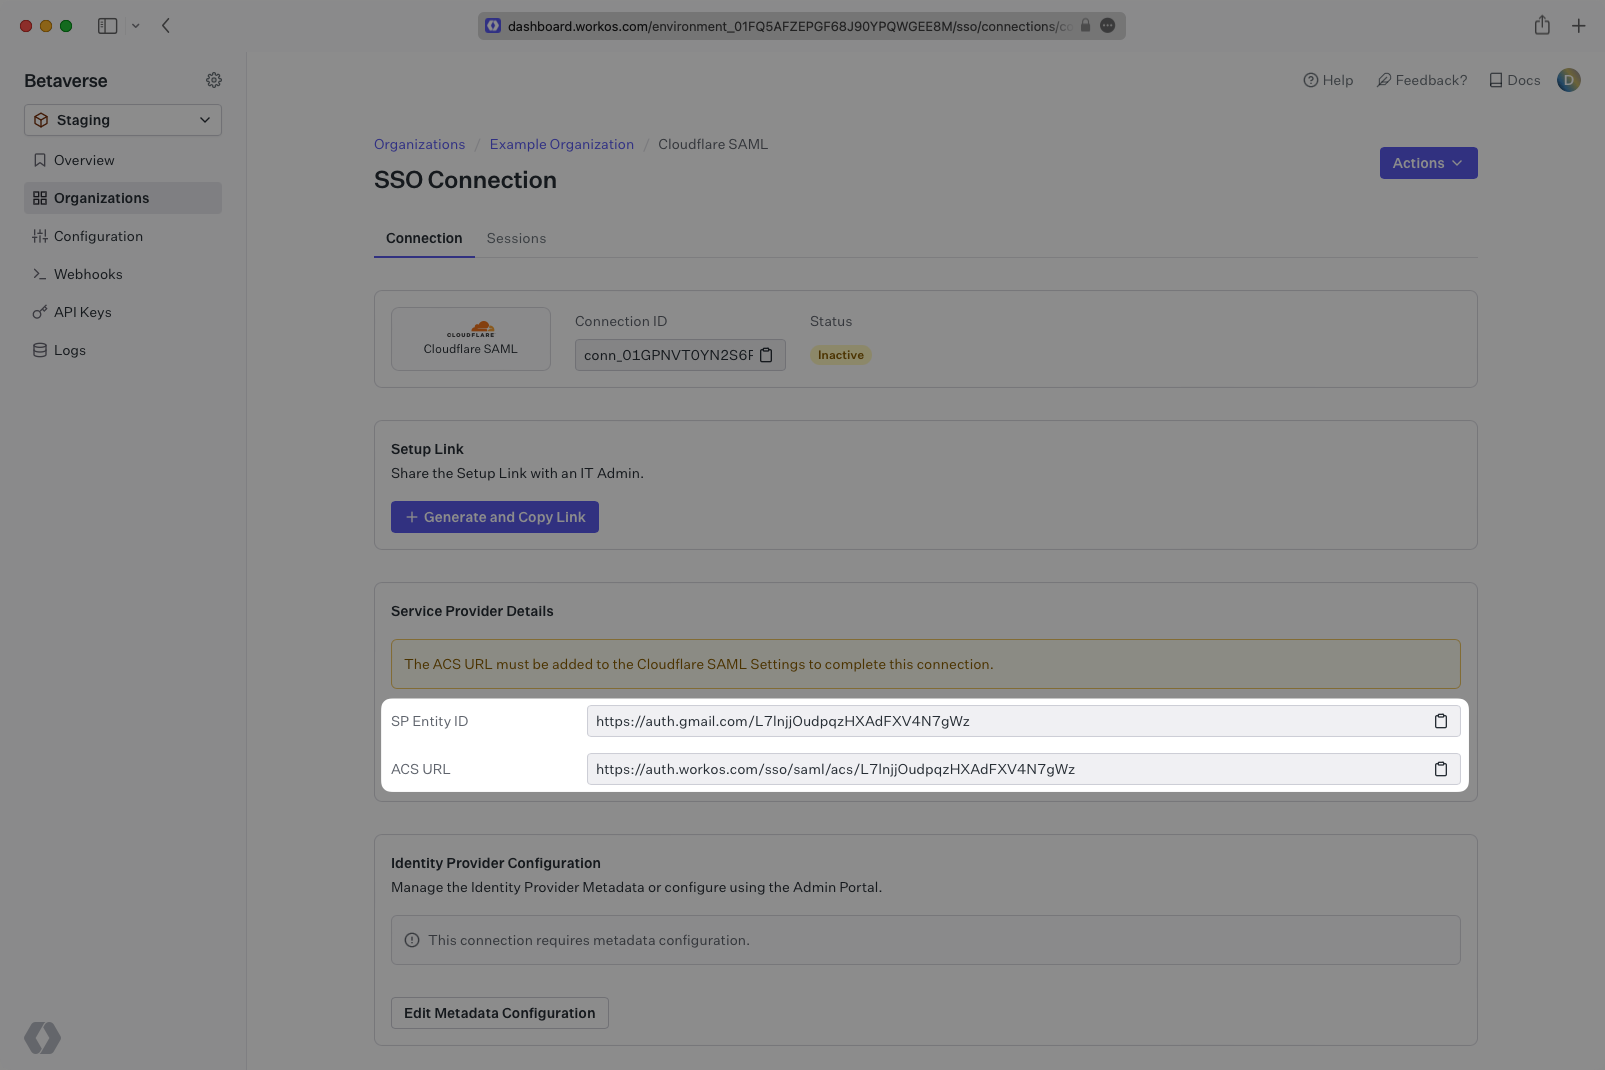
The ACS URL is the location an Identity Provider redirects its authentication response to. In Cloudflare’s case, it needs to be set by the organization when configuring the application in the Cloudflare instance.
The SP Entity ID is a URI used to identify the issuer of a SAML request. In this case, the entity ID is used to communicate that WorkOS will be the party performing SAML requests to the organization’s Cloudflare instance.
Cloudflare SAML is a unique integration in that it sits between WorkOS and the Identity Provider. This allows for additional rules to be configured, but also means there are two connections that need to be made. The first necessary connection is between Cloudflare and the IdP, and the second connection is between WorkOS and Cloudflare.
First, create the connection between Cloudflare and the Identity Provider. Cloudflare Access allows you to connect with any IdP that supports a SAML 2.0 connection. Follow the documentation from Cloudflare to configure a SAML application connection between Cloudflare and your IdP.
The one deviation from the CloudFlare documentation is that the SAML attributes must include email, firstName, lastName, and id. Email is included by default as the “Email attribute name”, but you will need to add the other three as SAML attributes.
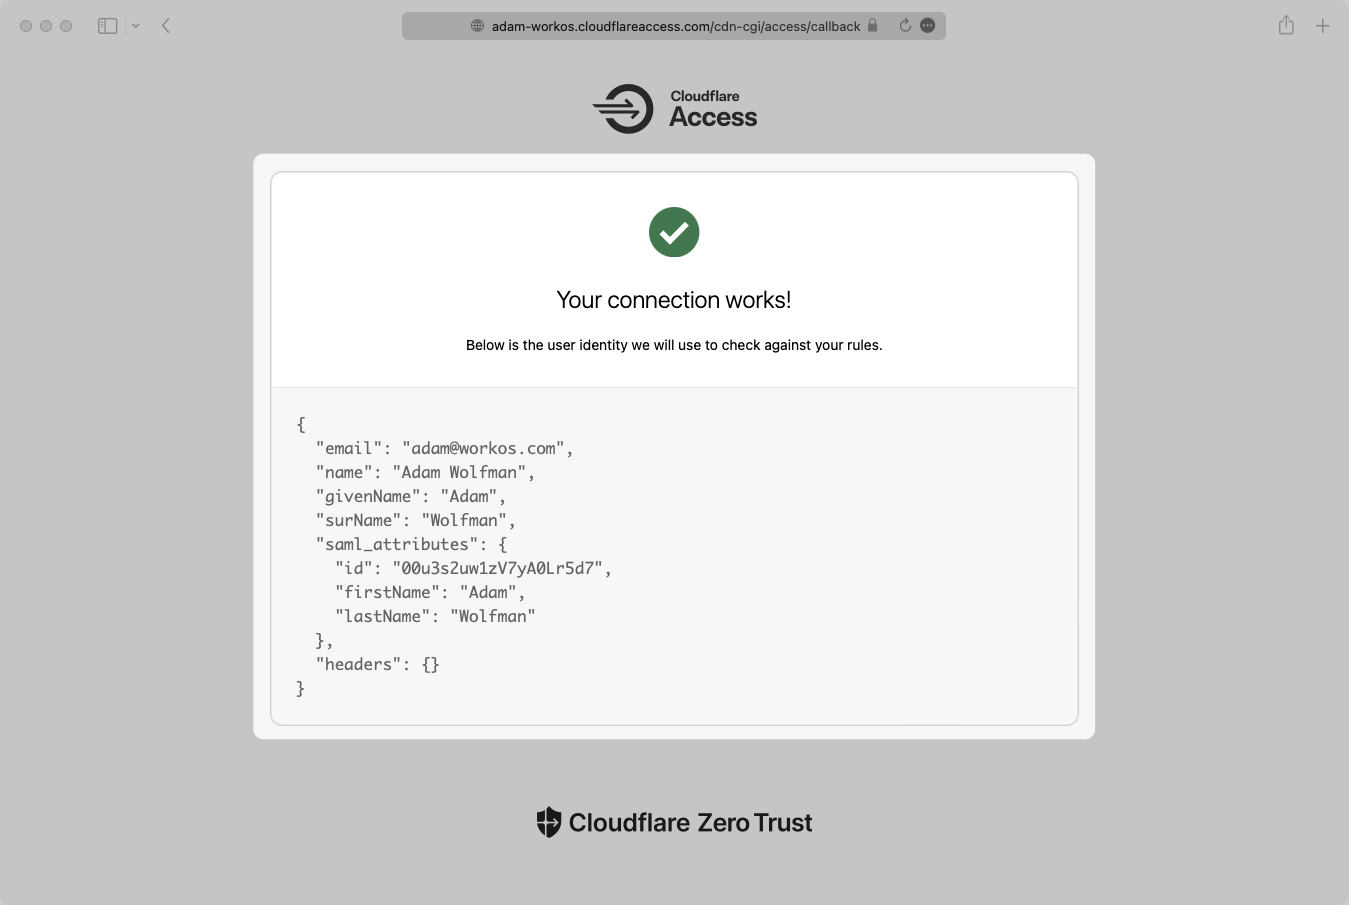
When setting up the connection, be sure to enter email, firstName, lastName, and id as SAML attributes.
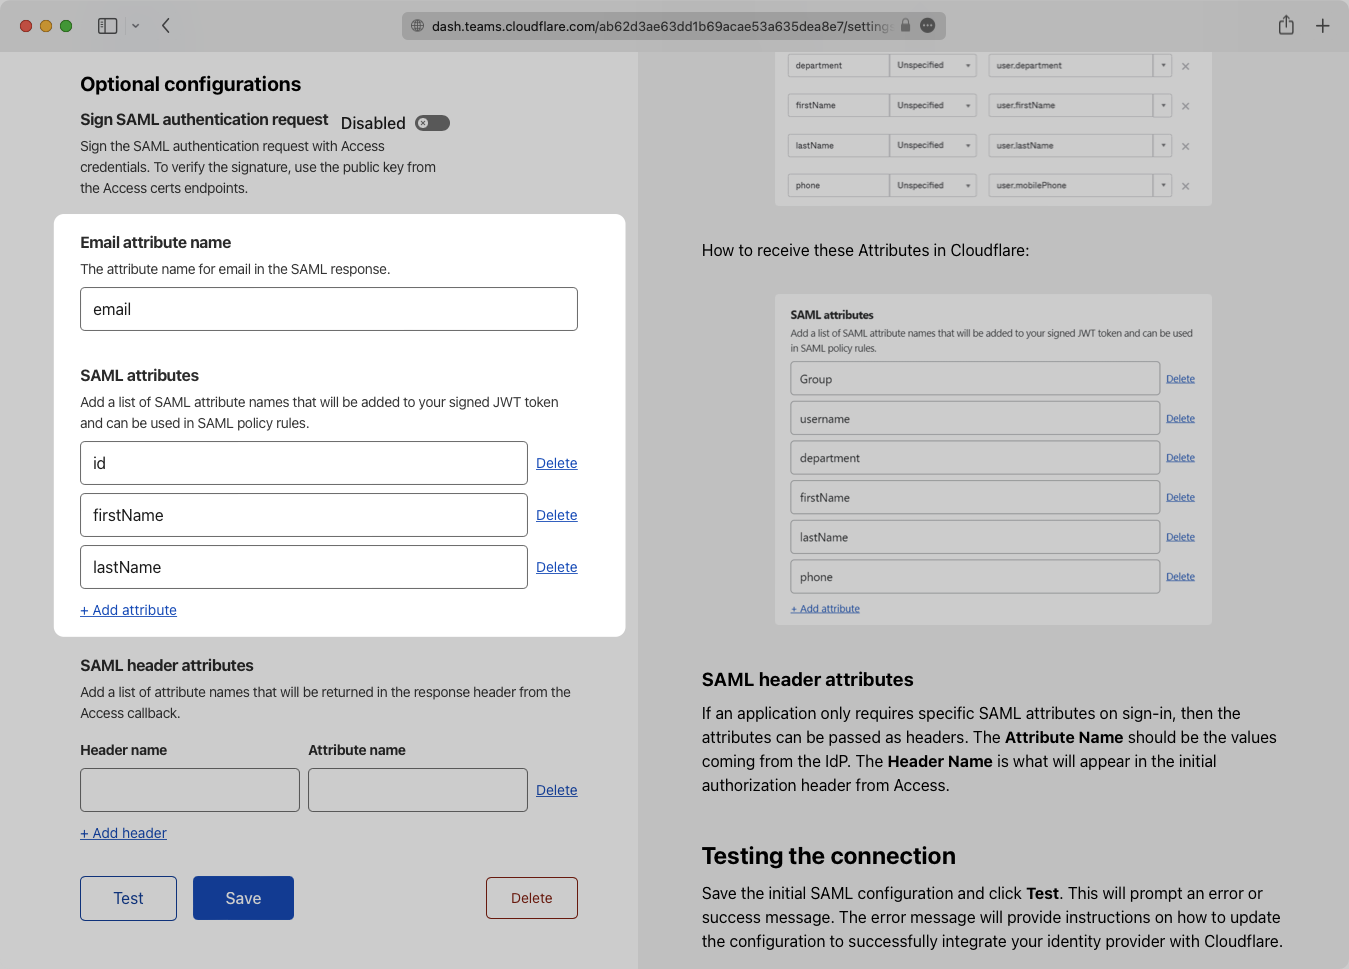
Save the connection and then click the “Test” button. When successful, you will see a success screen including your saml_attributes that have been added.
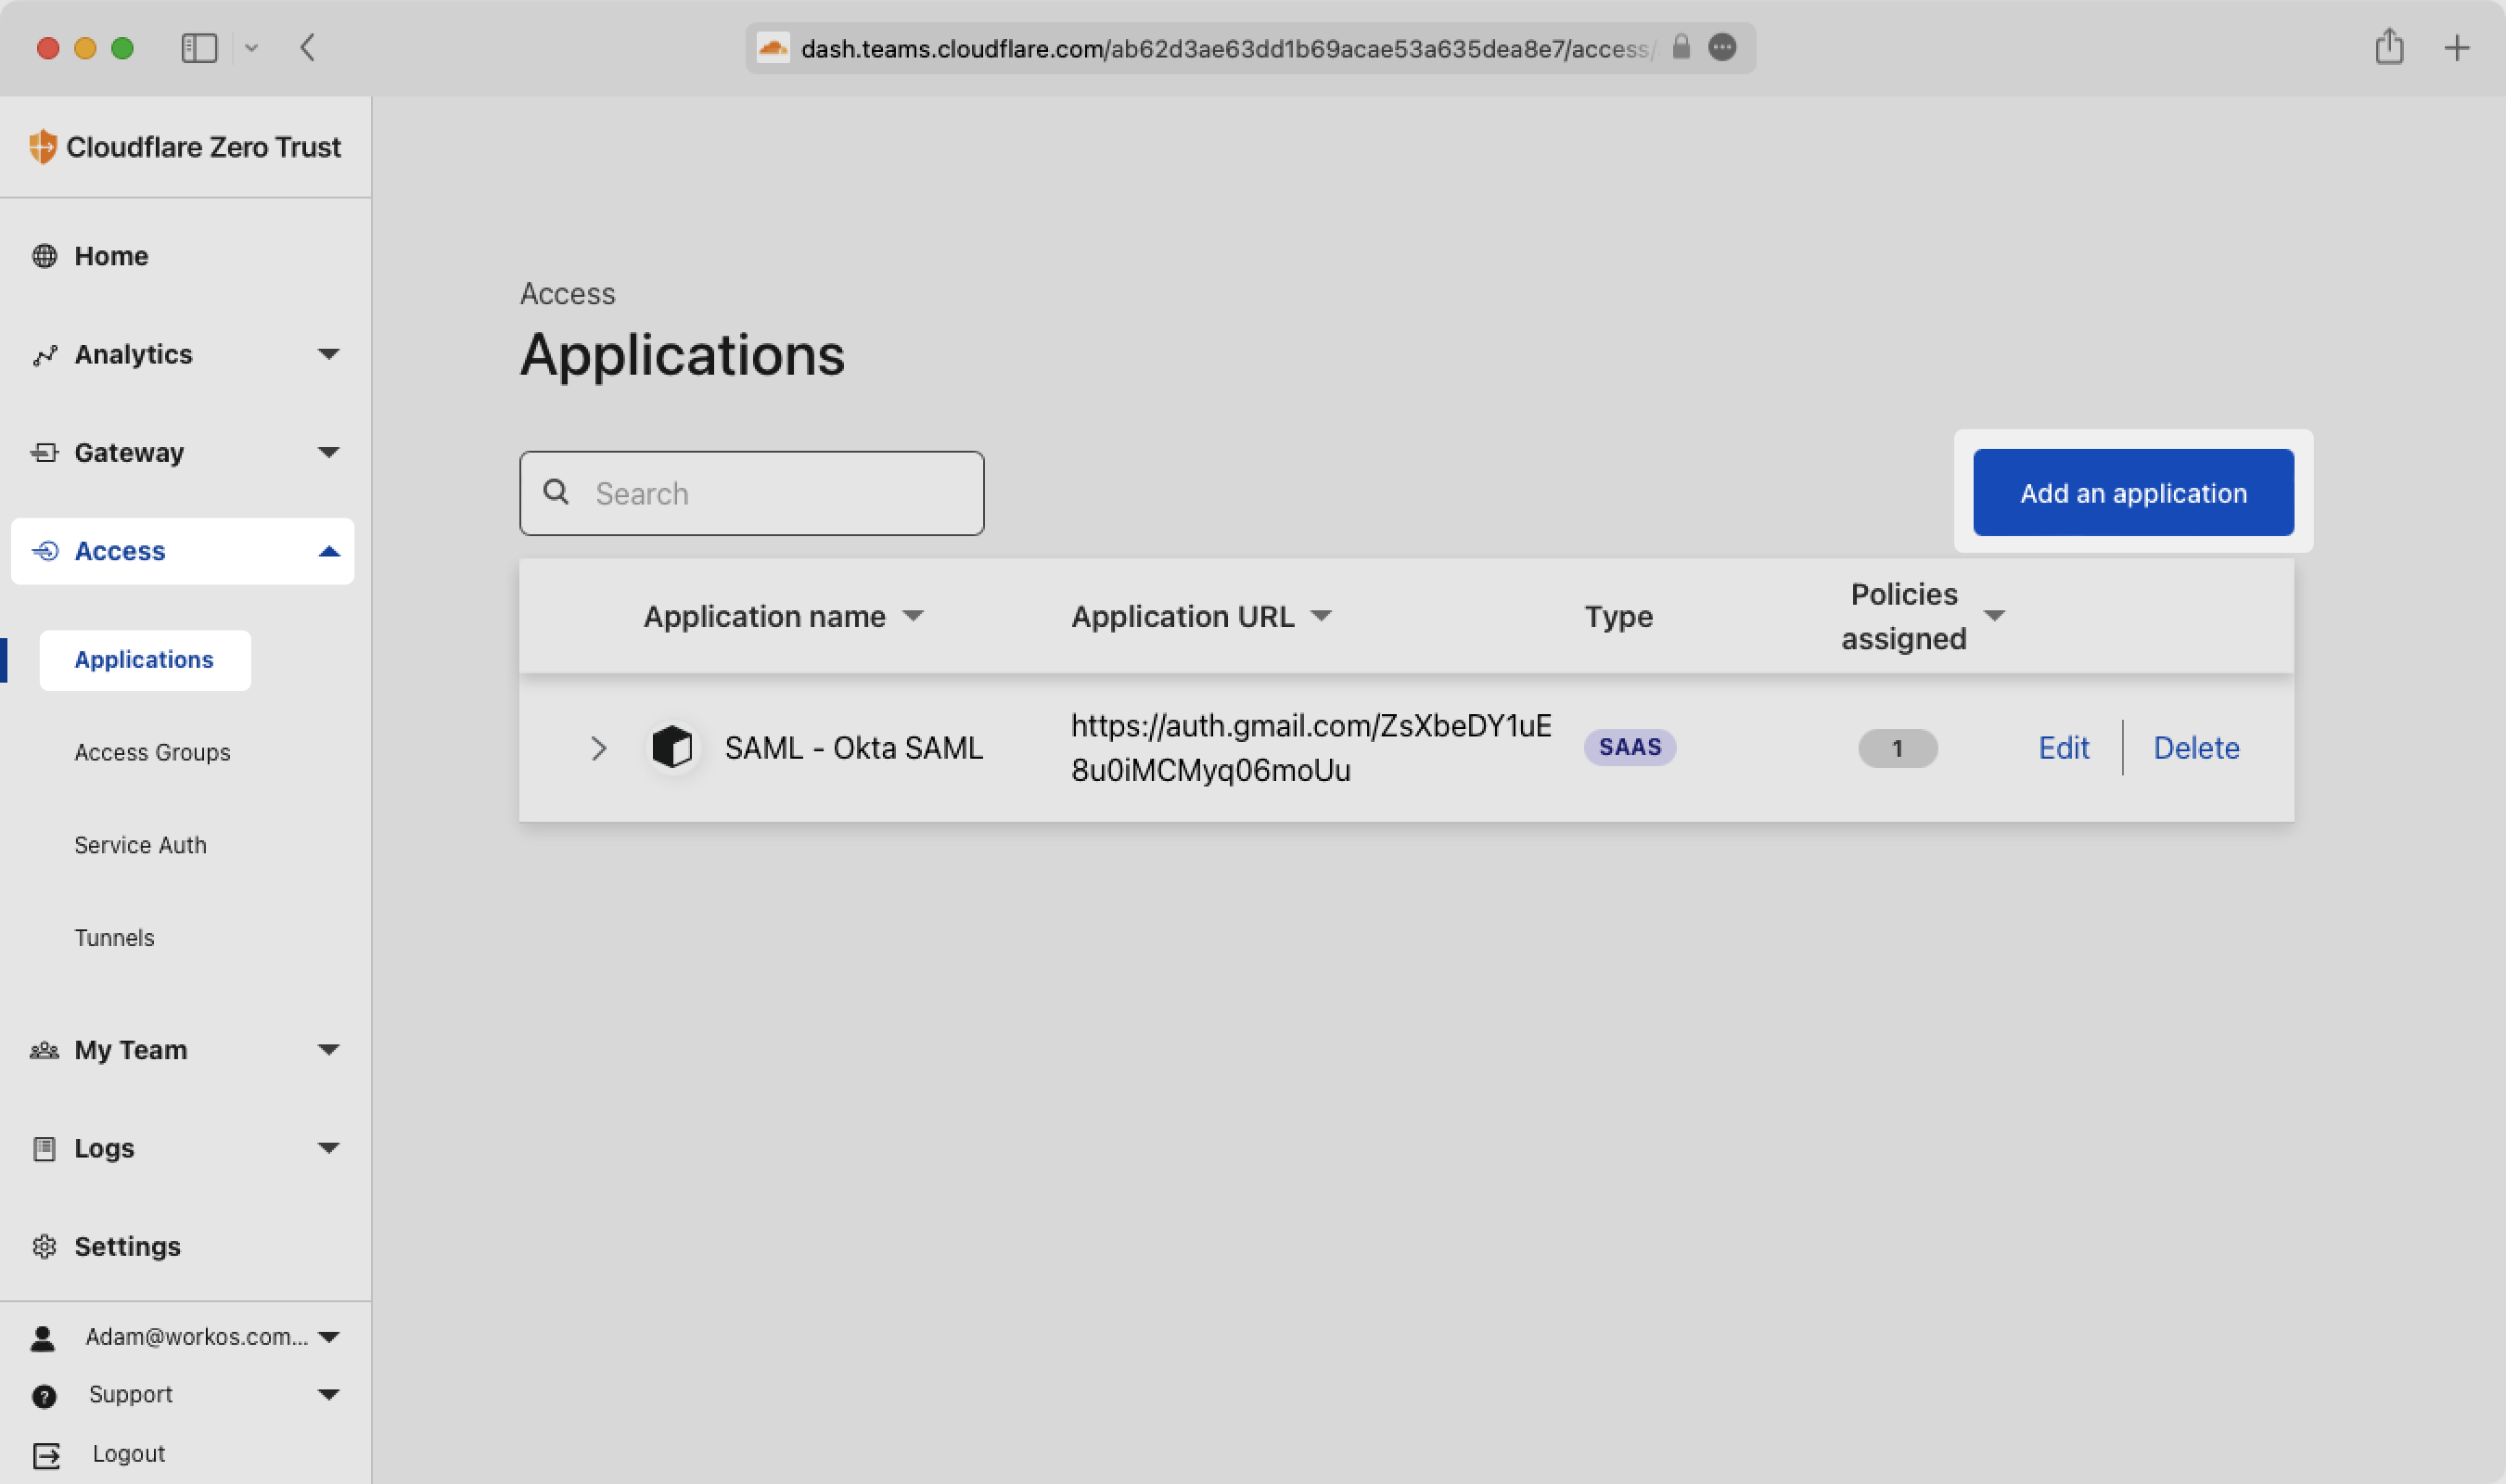
Next, create the connection between Cloudflare and WorkOS. From the Cloudflare Zero Trust dashboard Access menu, select “Applications”, then “Add an application”.
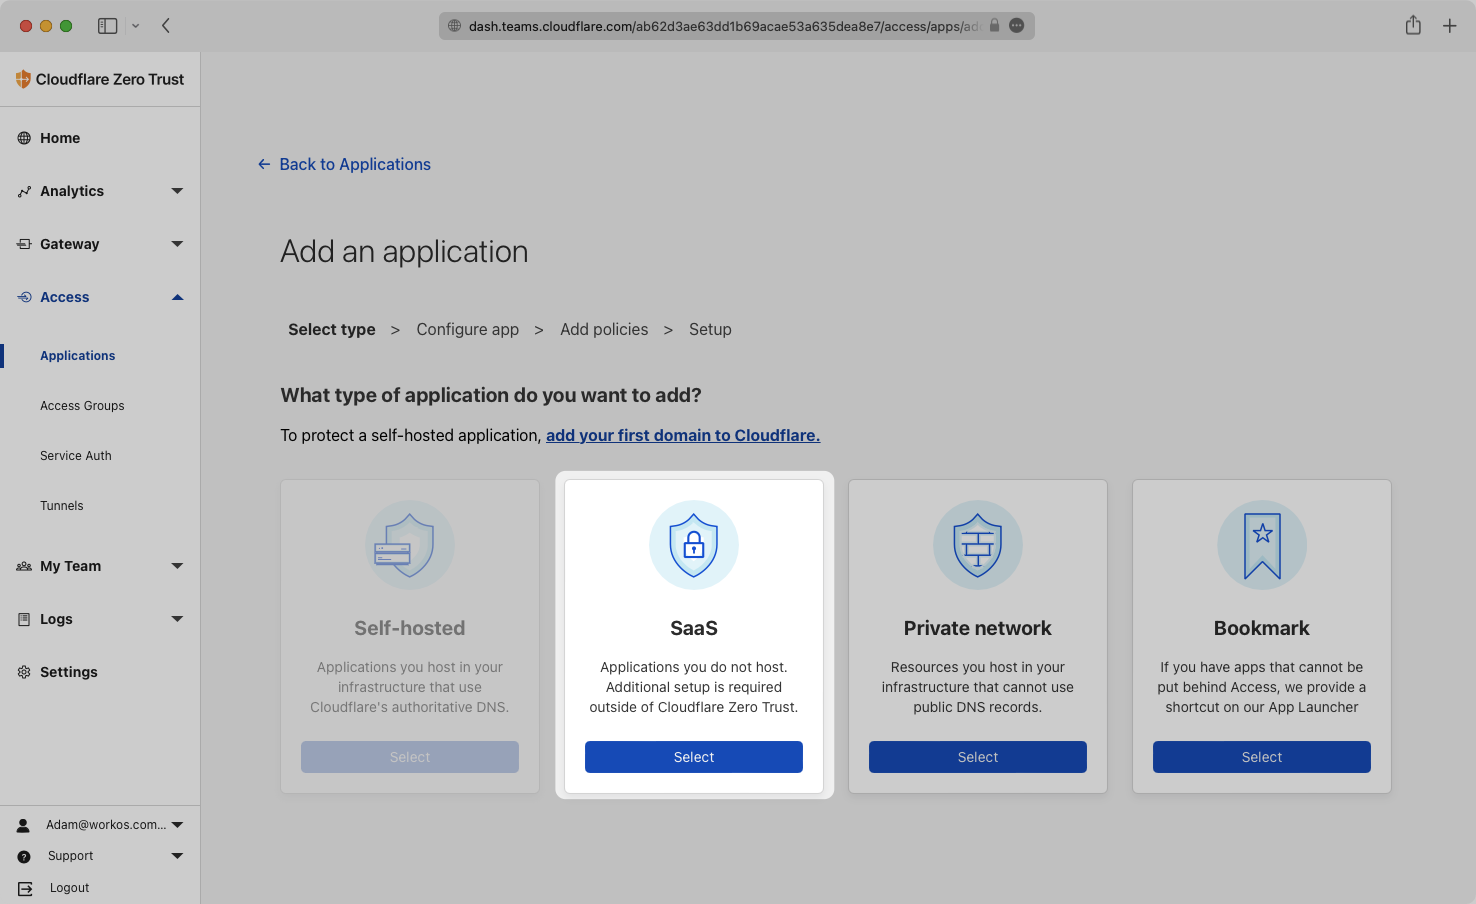
Select “SaaS” for the type of application.
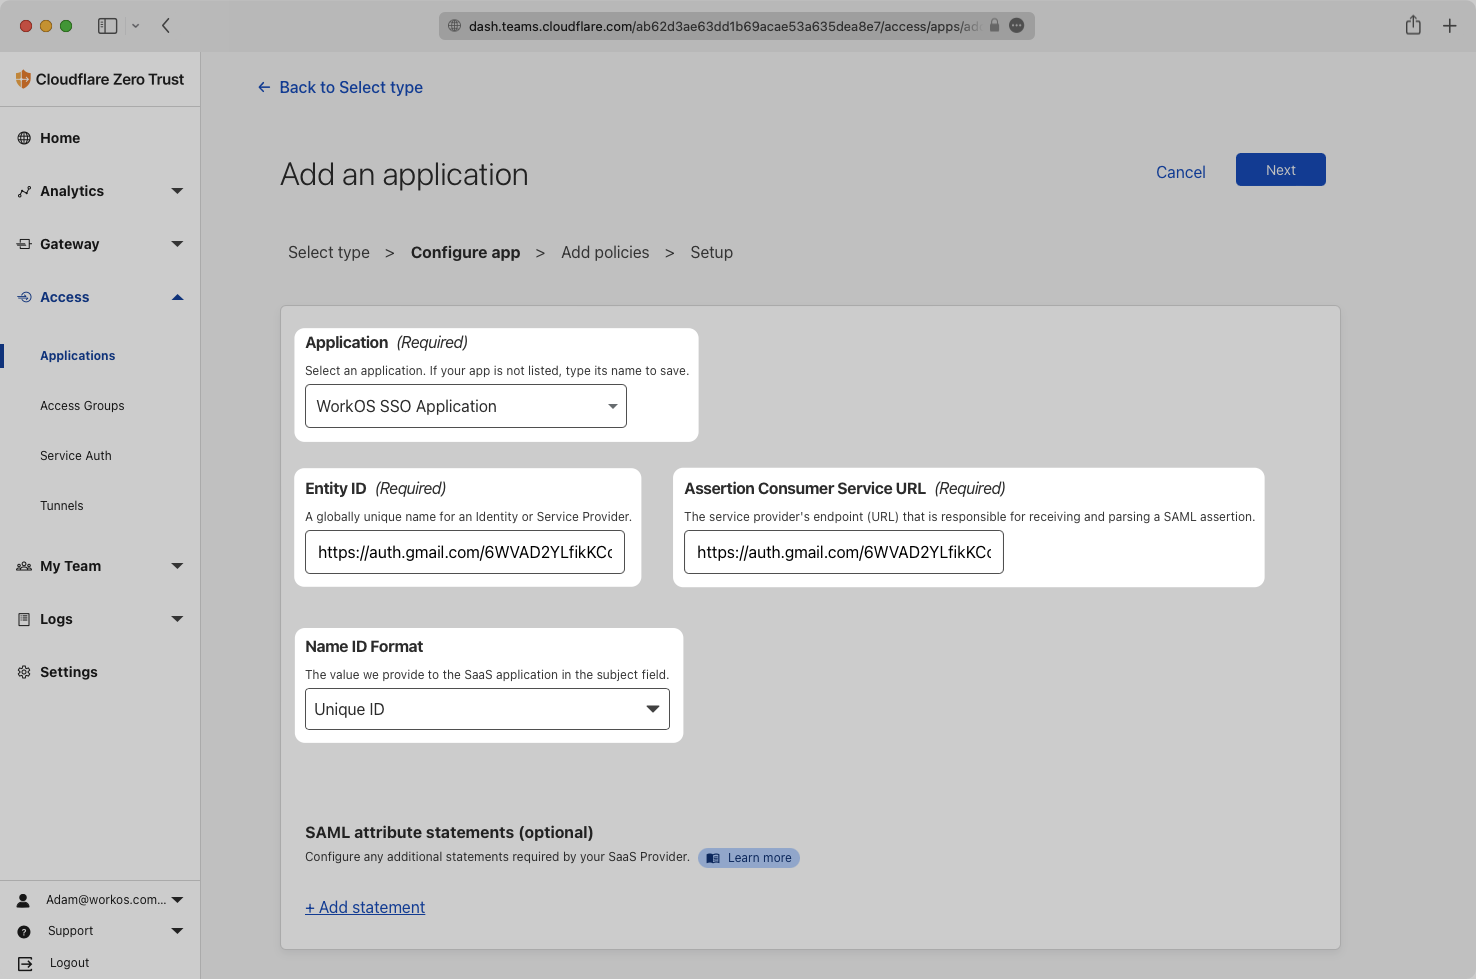
Copy the ACS URL and Entity ID from the Connection Settings in your WorkOS Dashboard.
Select the name of your application from the dropdown menu. If your application is not listed, type the name to save it.
Paste the ACS URL and SP Entity ID to the corresponding fields in Cloudflare. Then select the Name ID Format that you would like to use for this application. For this example we’ll use Unique ID.
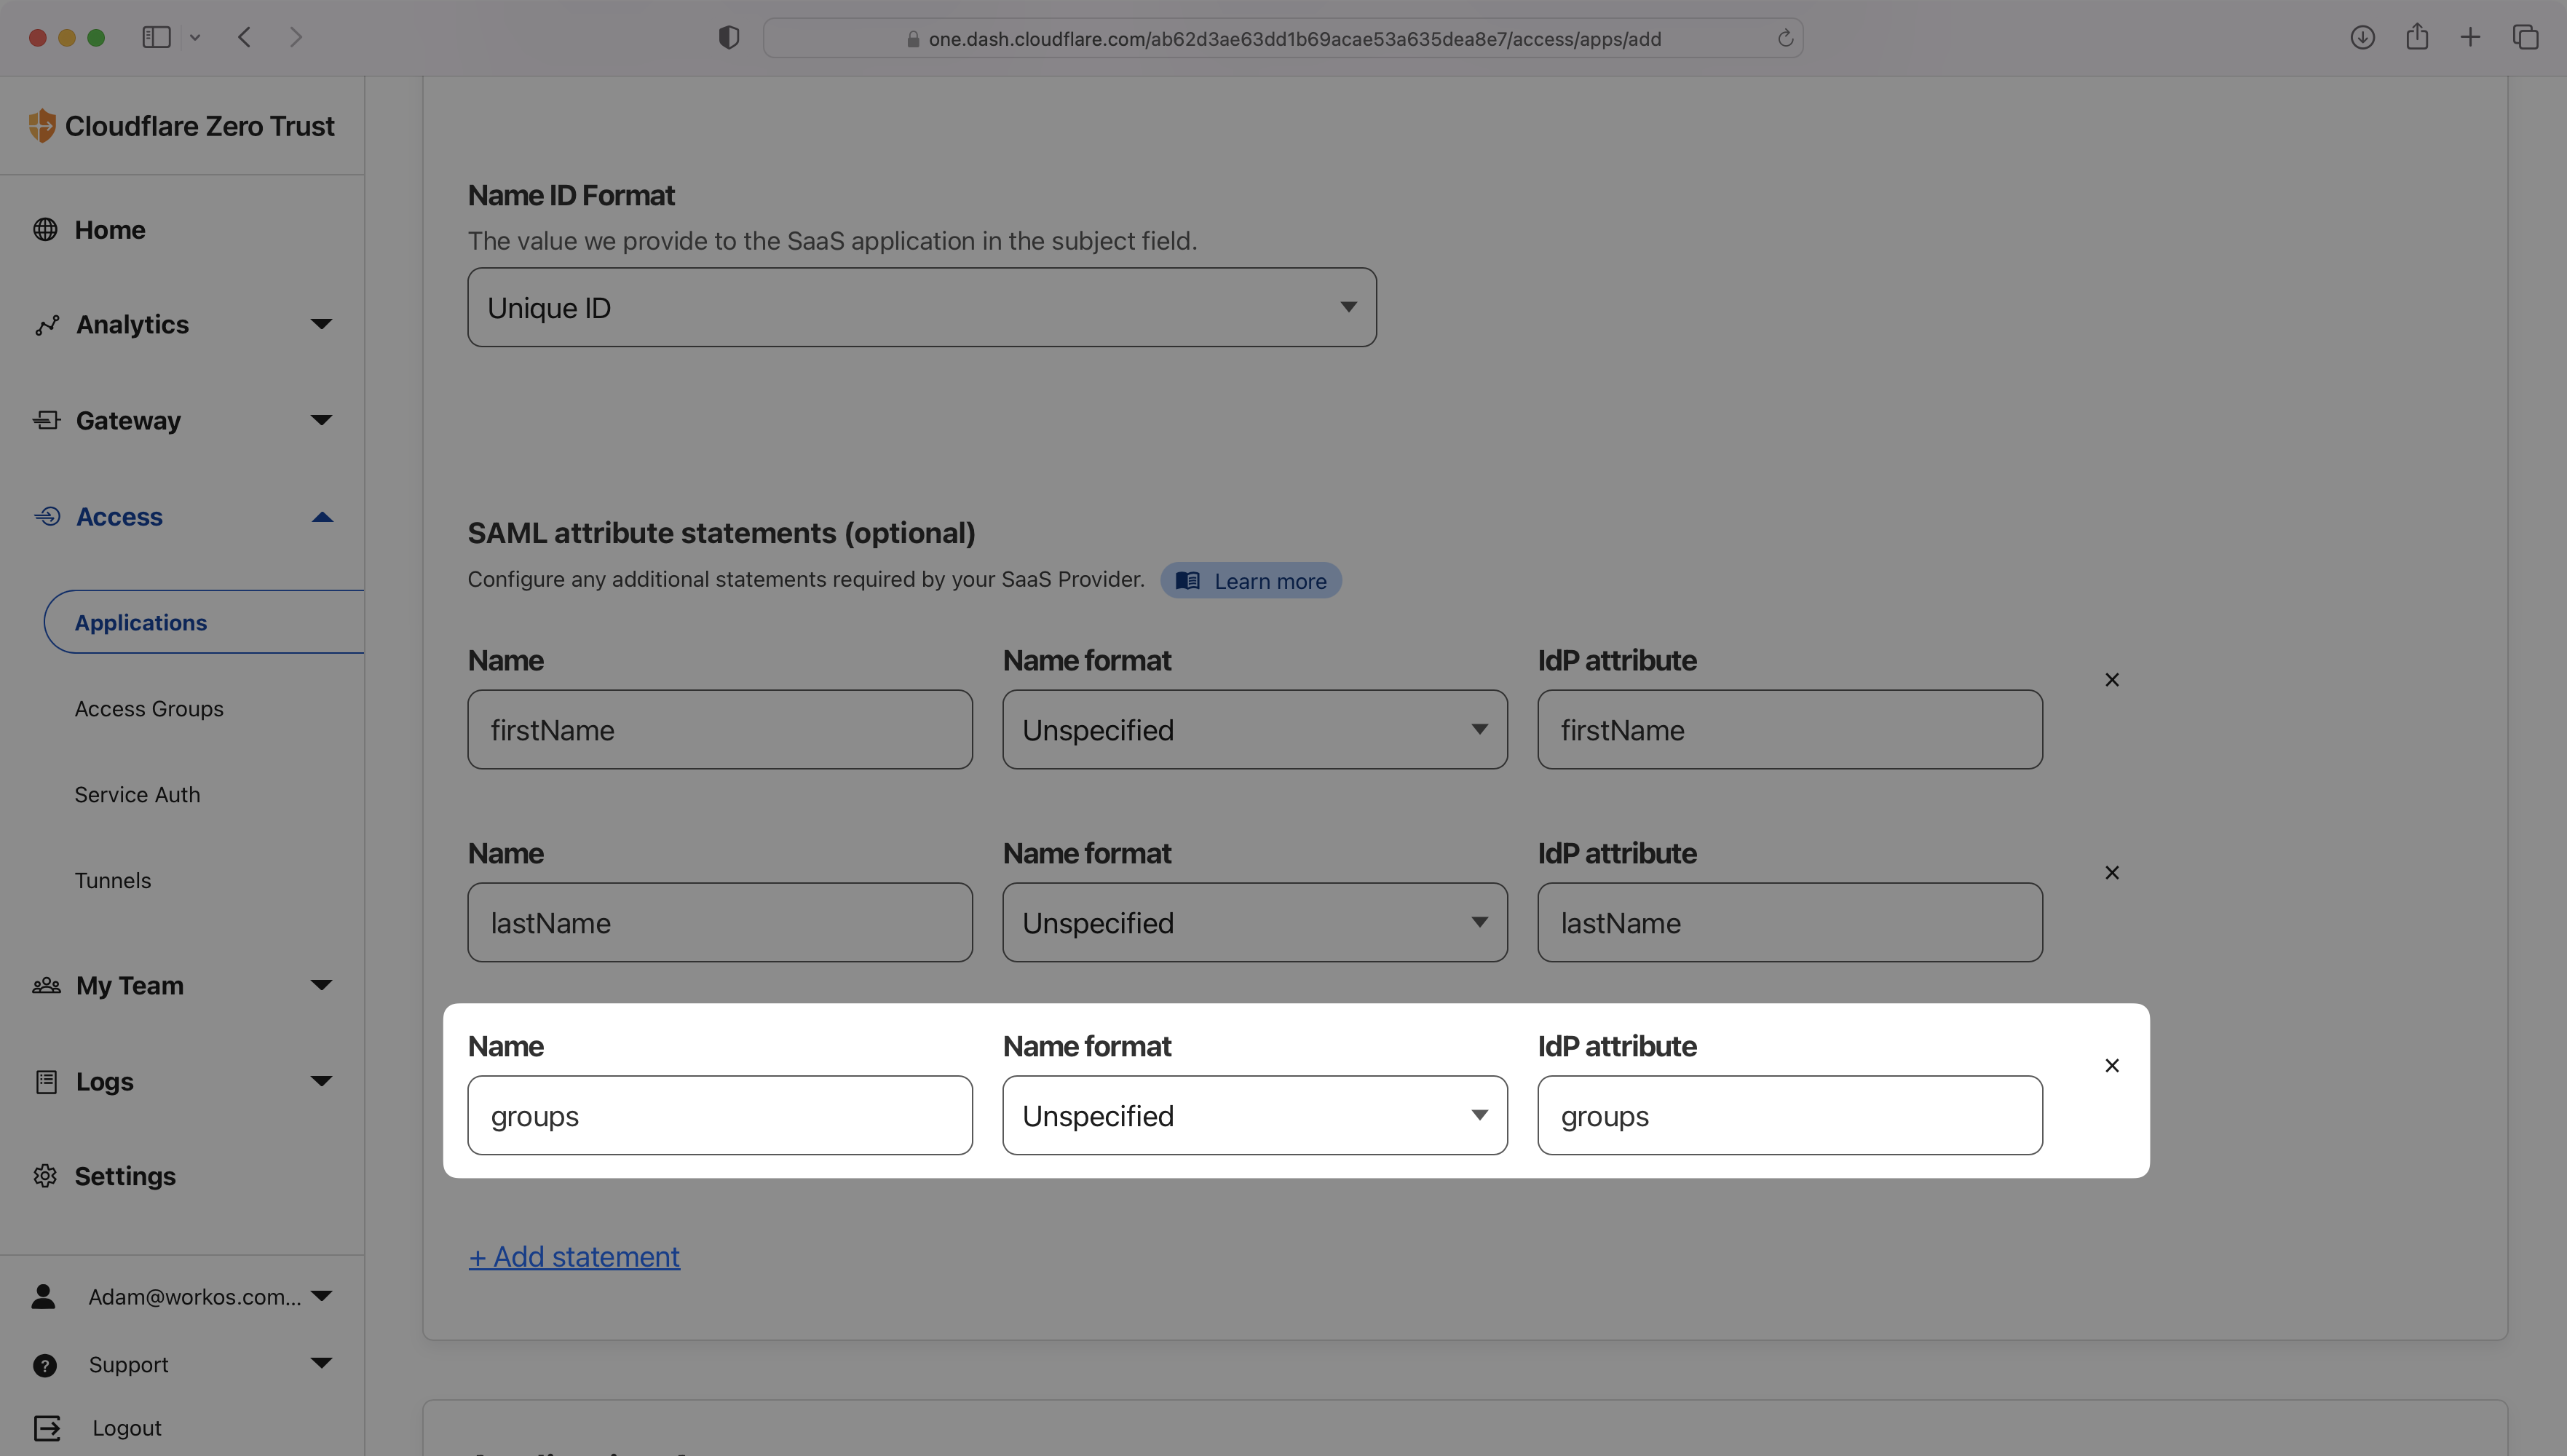
Now, Configure the attribute statements. WorkOS requires that email, firstName, lastName, and id be included. Cloudflare automatically sends id and email, so you only need to add firstName and lastName. These attributes were configured in Step 1, and the mapped values are the same here.
Add firstName and lastName to both the right and left sides of the SAML attribute statements.

With identity provider role assignment, users can receive roles within your application based on their group memberships. To return this information, add a new attribute statement with groups as the “Name” and map it to the “IdP attribute” for groups, as shown in the example below.
Resolving groups attribute issues
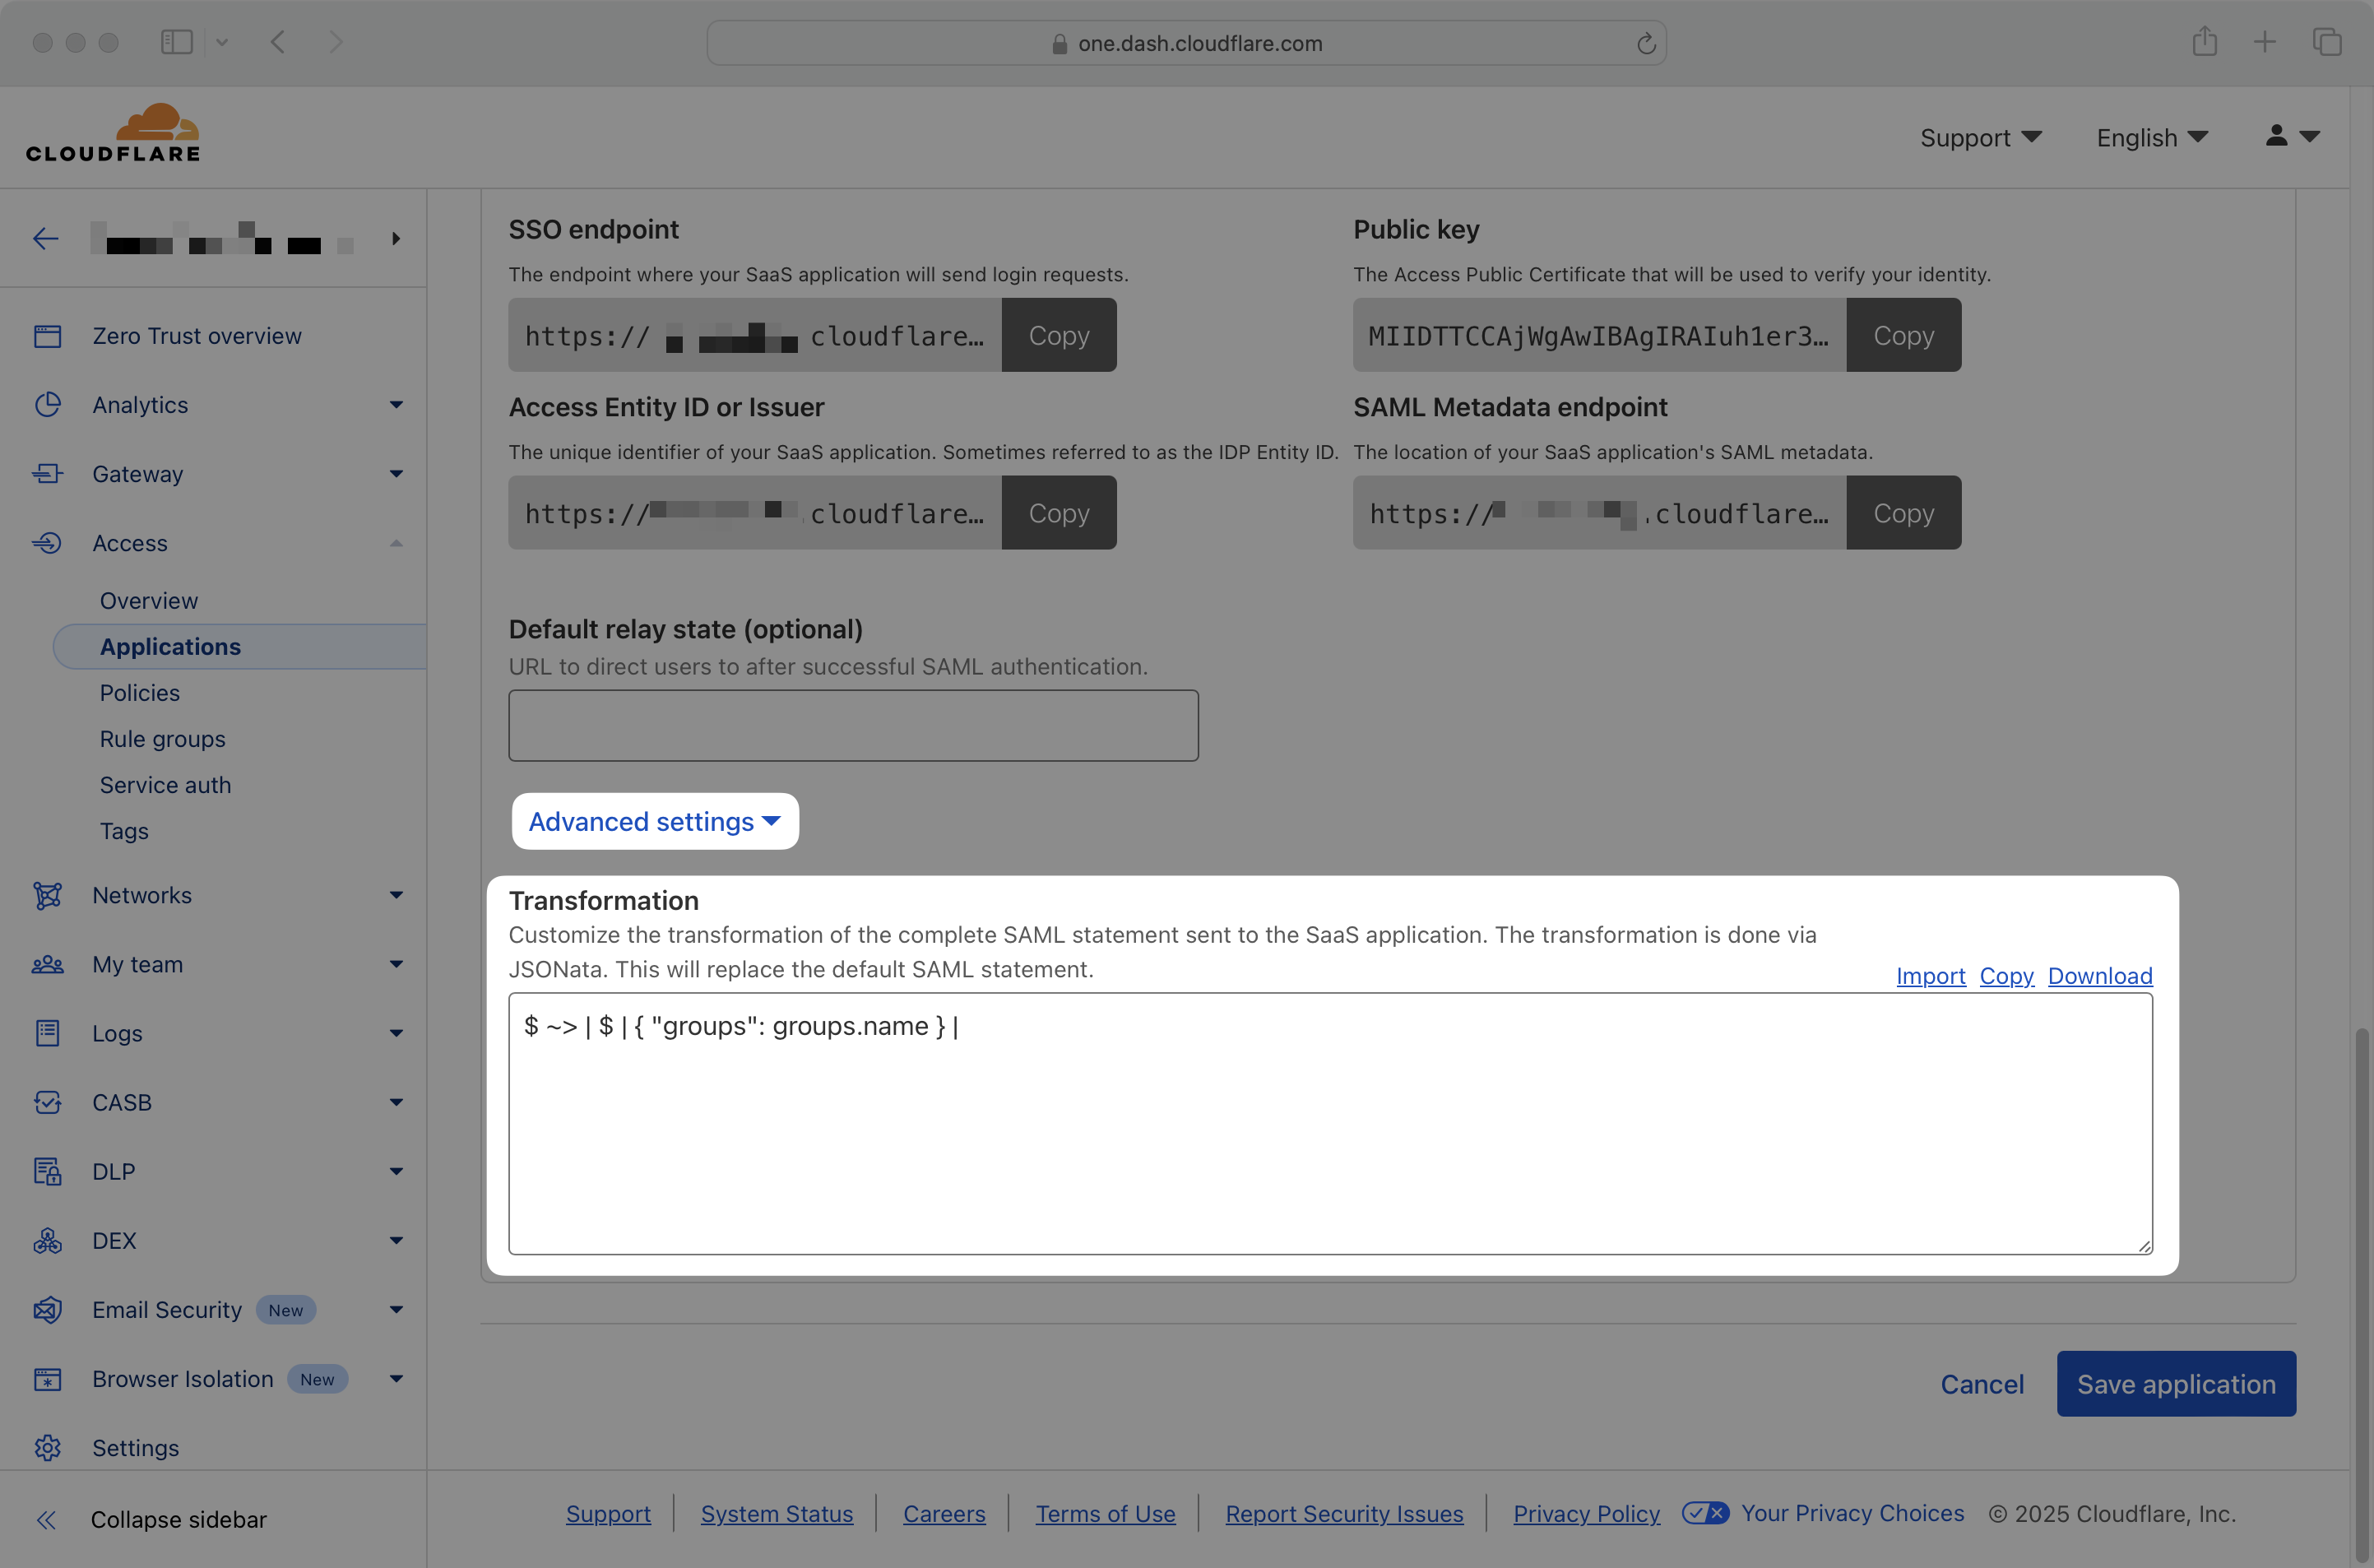
If you’re having issues getting the groups attribute to come through, it’s possible that Cloudflare is sending it as a nested structure, specifically an array of group objects rather than plain strings.
WorkOS expects groups to be a top-level attribute where each value is a simple string, such as the group name or ID.
To resolve this, go to the Advanced Settings section of your Cloudflare Access application and define a JSONata transformation to map the structured groups attribute into the expected format.
For example, to extract the name from each group object, use the following transformation: $ ~> | $ | { "groups": groups.name } |
This will transform an input like:
Into the expected format:
You may also use groups.id if you prefer to map group IDs instead.
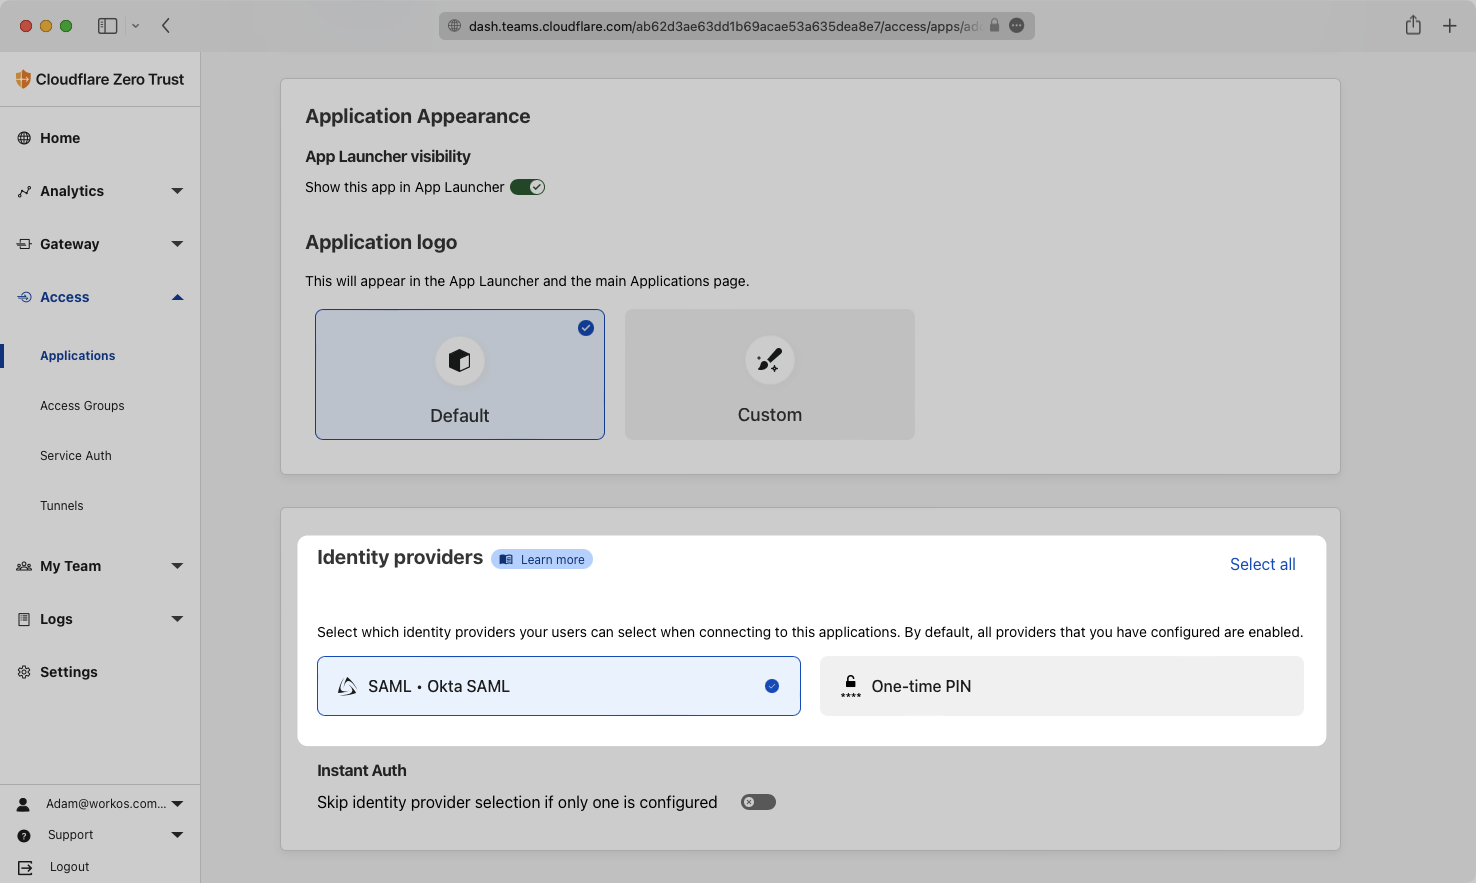
Select the Identity Provider that you are using from the list. In this example we are using an Okta SAML connection.
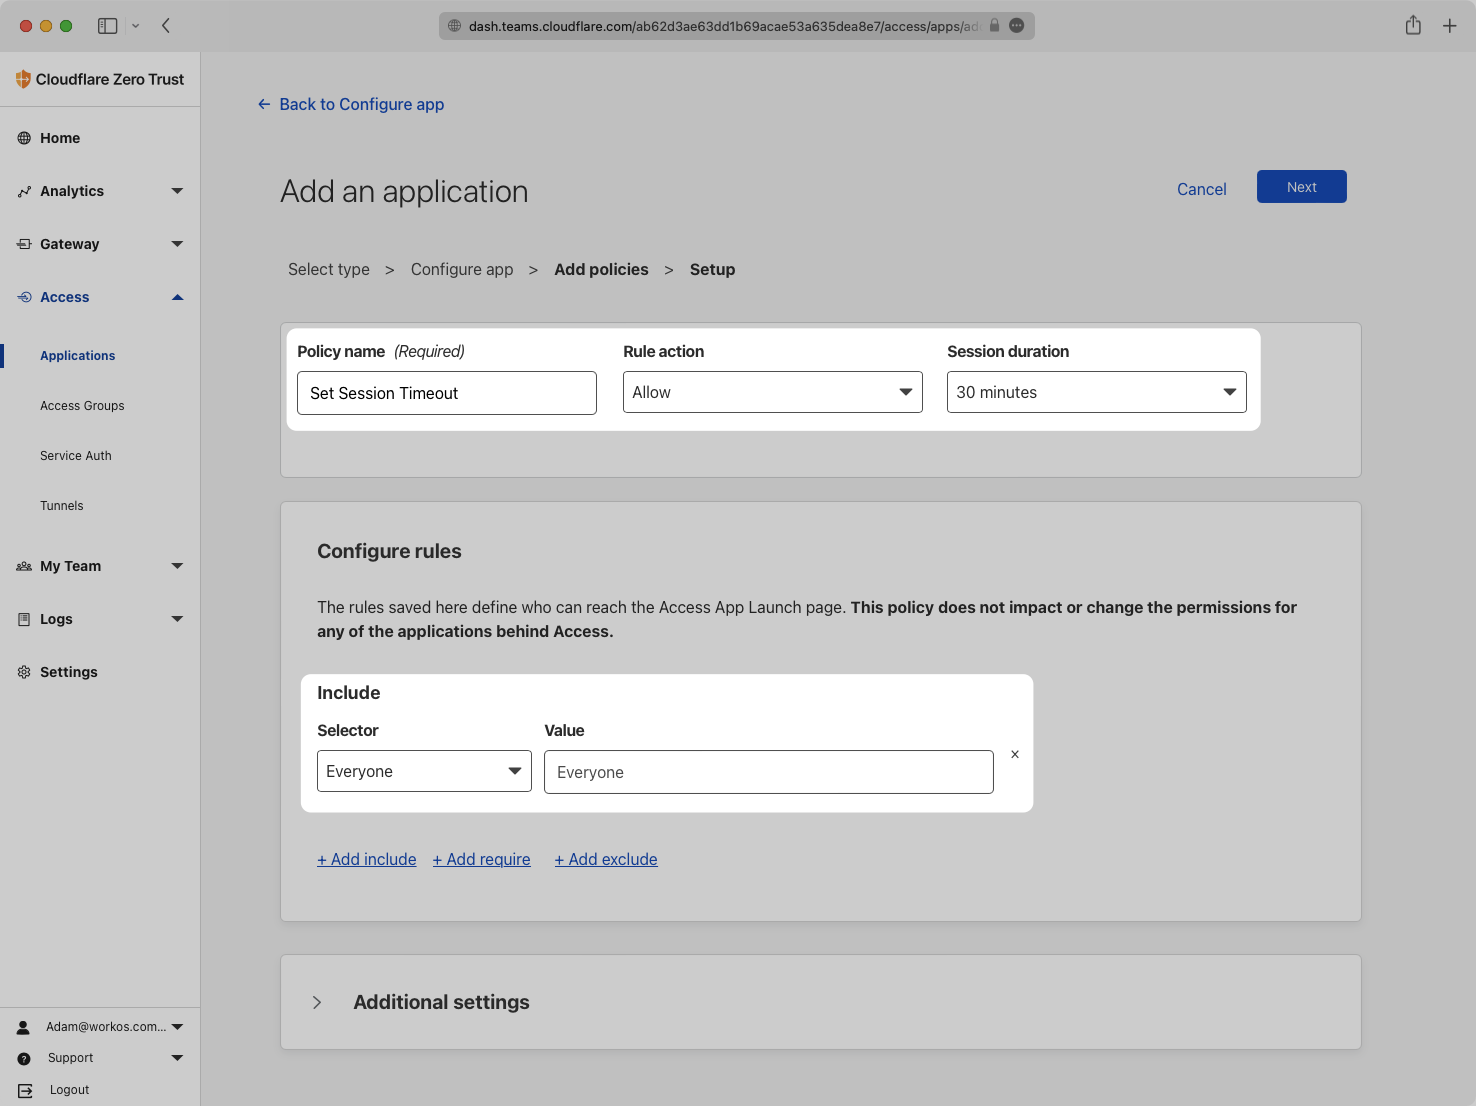
Configure at least one policy and one rule, then click next. For this example the Policy sets the session length to 30 minutes for everyone.
The SSO endpoint, Entity ID, and Public key (X.509 certificate) all will be entered in the Connection details in the WorkOS Dashboard. The SSO endpoint and Entity ID can be entered as-is, but the Public Key needs to be formatted as an X.509 certificate.
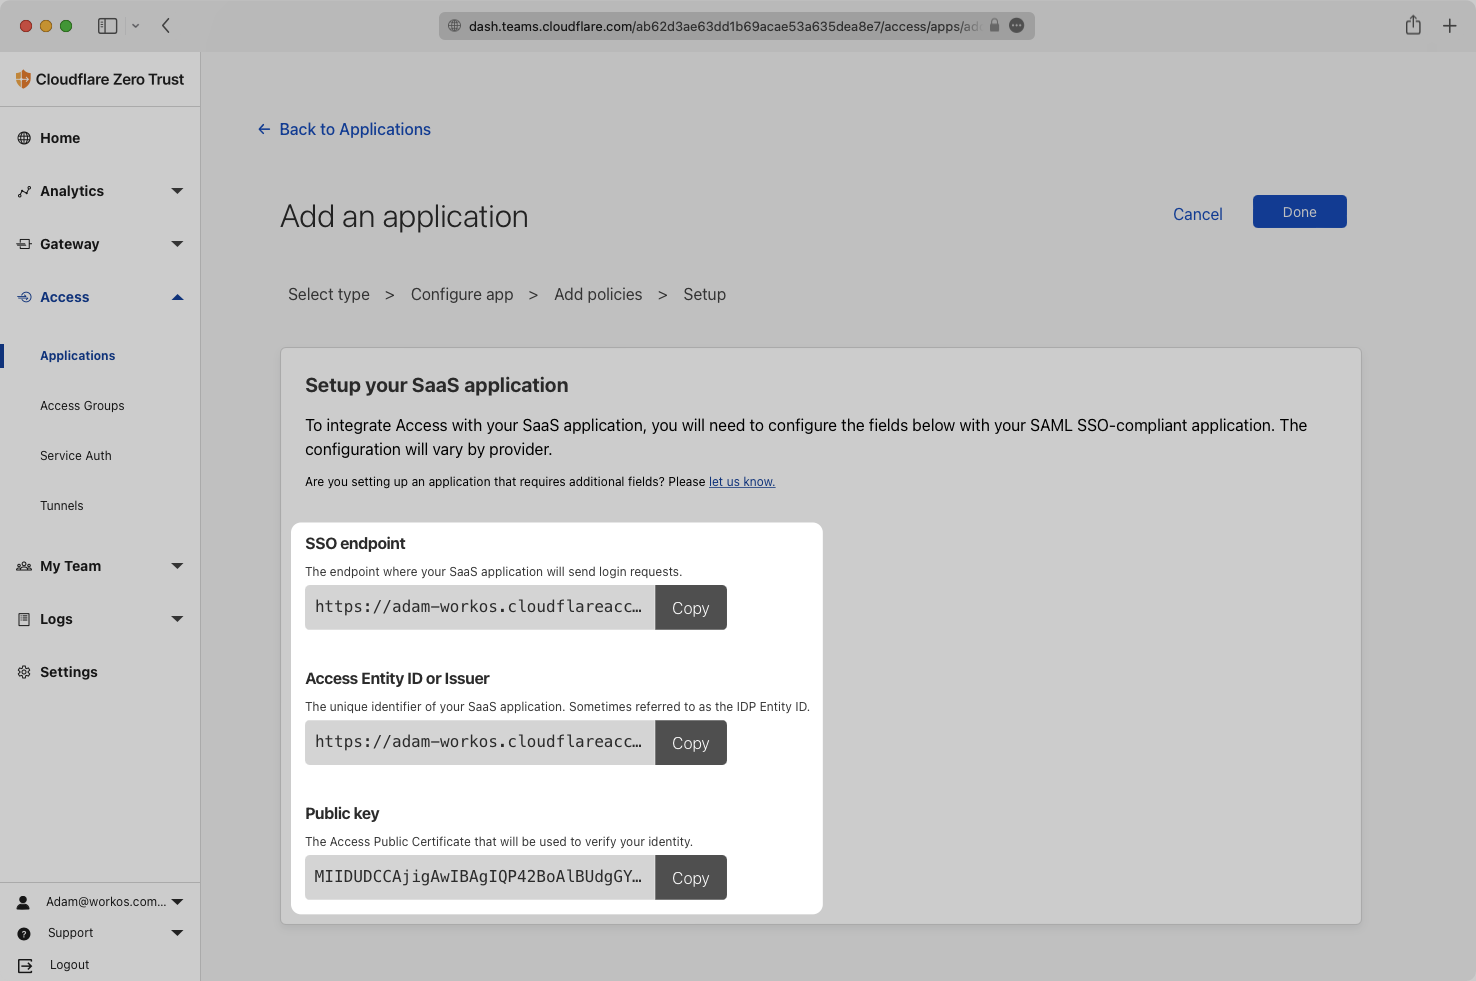
To format the Public Key, copy the value to a text editor and add the following header and footer to the Public Key. Ensure there are no spaces above or below the Key value, then save with the file extension “.cert”.
The format of the file should look like this when you’re finished.
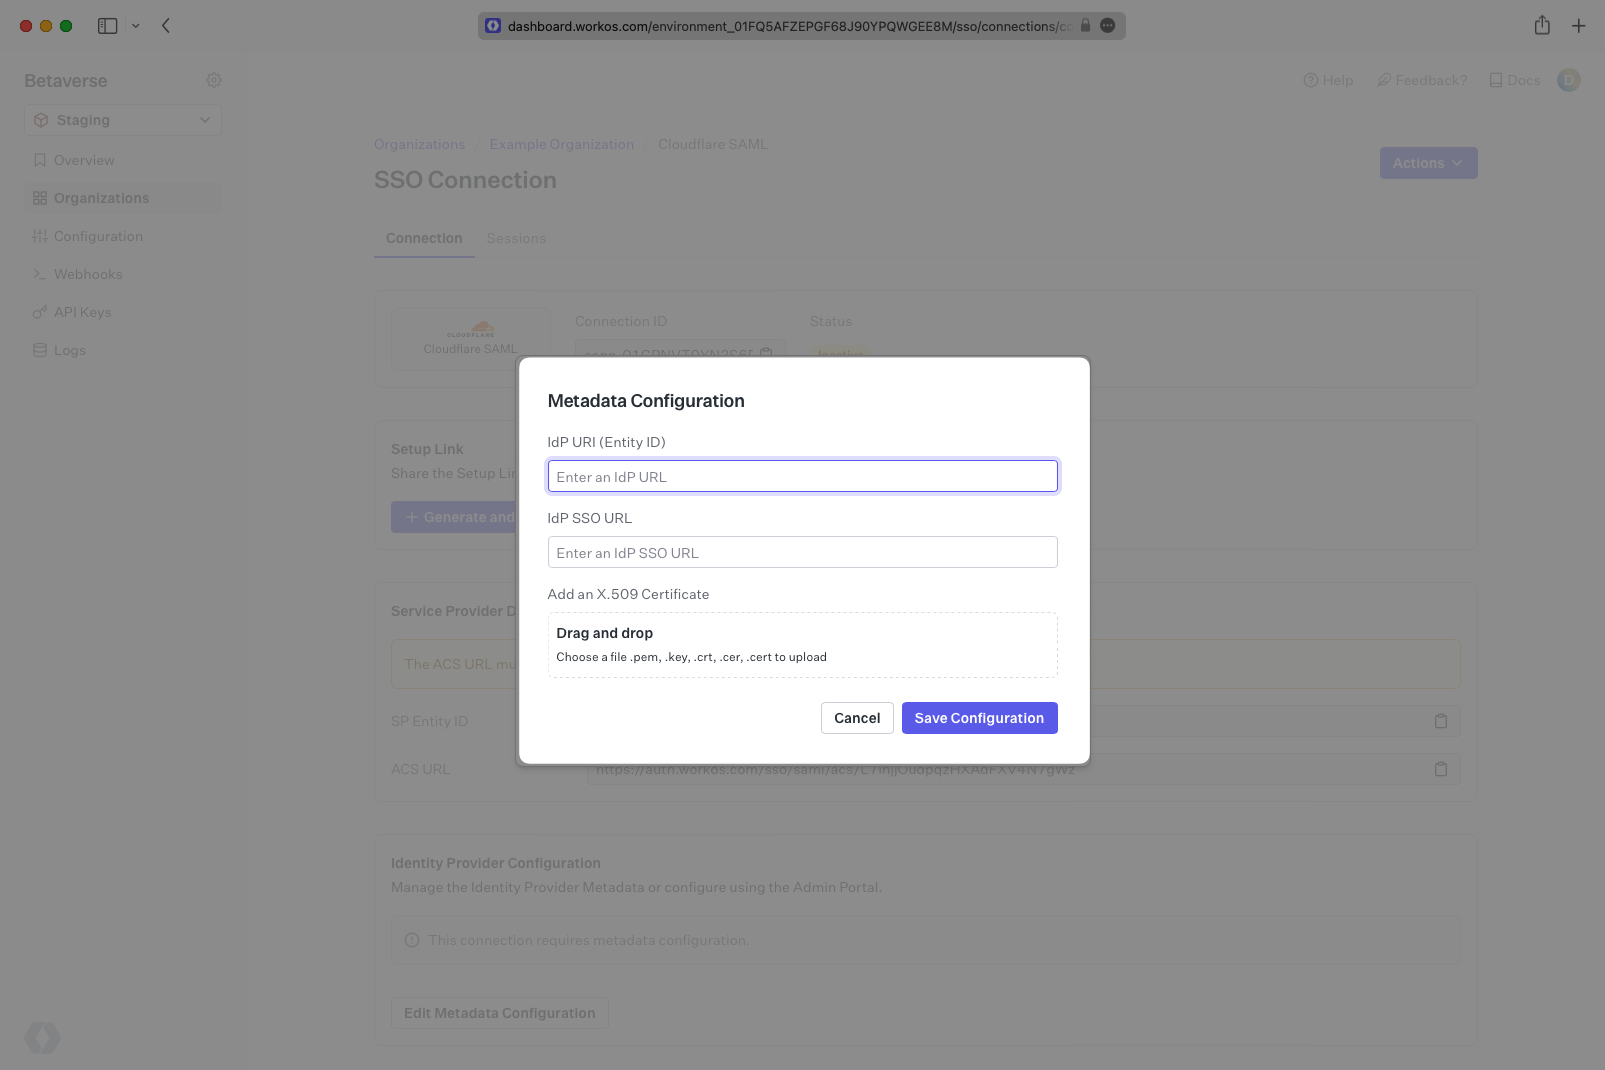
Navigate to the Connection in your Developer Dashboard. Enter the SSO endpoint in the IdP SSO URL field and enter the “Access Entity ID or Issuer” value into the “IdP URI (Entity ID)” field.
Upload the file that you saved for the X.509 certificate to the “Add an X.509 Certificate” field. Click Save Configuration.
Your Connection will then be Active and good to go!