CyberArk SAML
Learn how to configure a connection to CyberArk via SAML.
Each SSO Identity Provider requires specific information to create and configure a new Connection. Often, the information required to create a Connection will differ by Identity Provider.
To create a CyberArk SAML Connection, you’ll need the Identity Provider metadata that is available from your CyberArk instance.
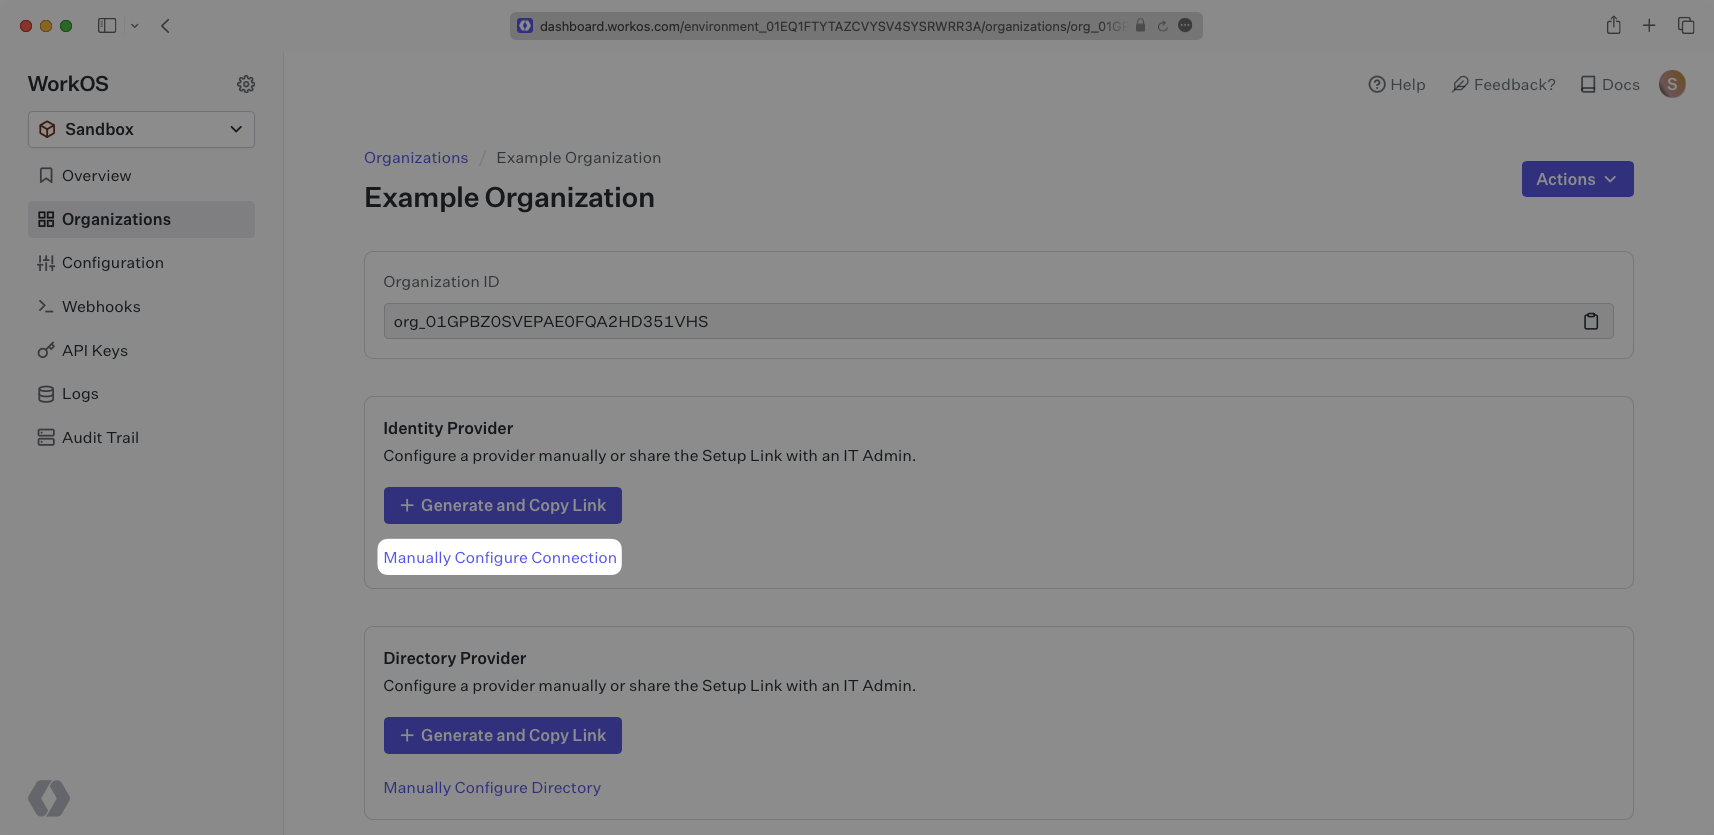
The first thing you’ll need to do is create a new CyberArk SAML connection in your WorkOS dashboard. Start by logging in to your WorkOS dashboard and browse to the “Organizations” tab on the left hand navigation bar.
Select the organization you’d like to configure a CyberArk SAML Connection for, and then click “Manually Configure Connection”.
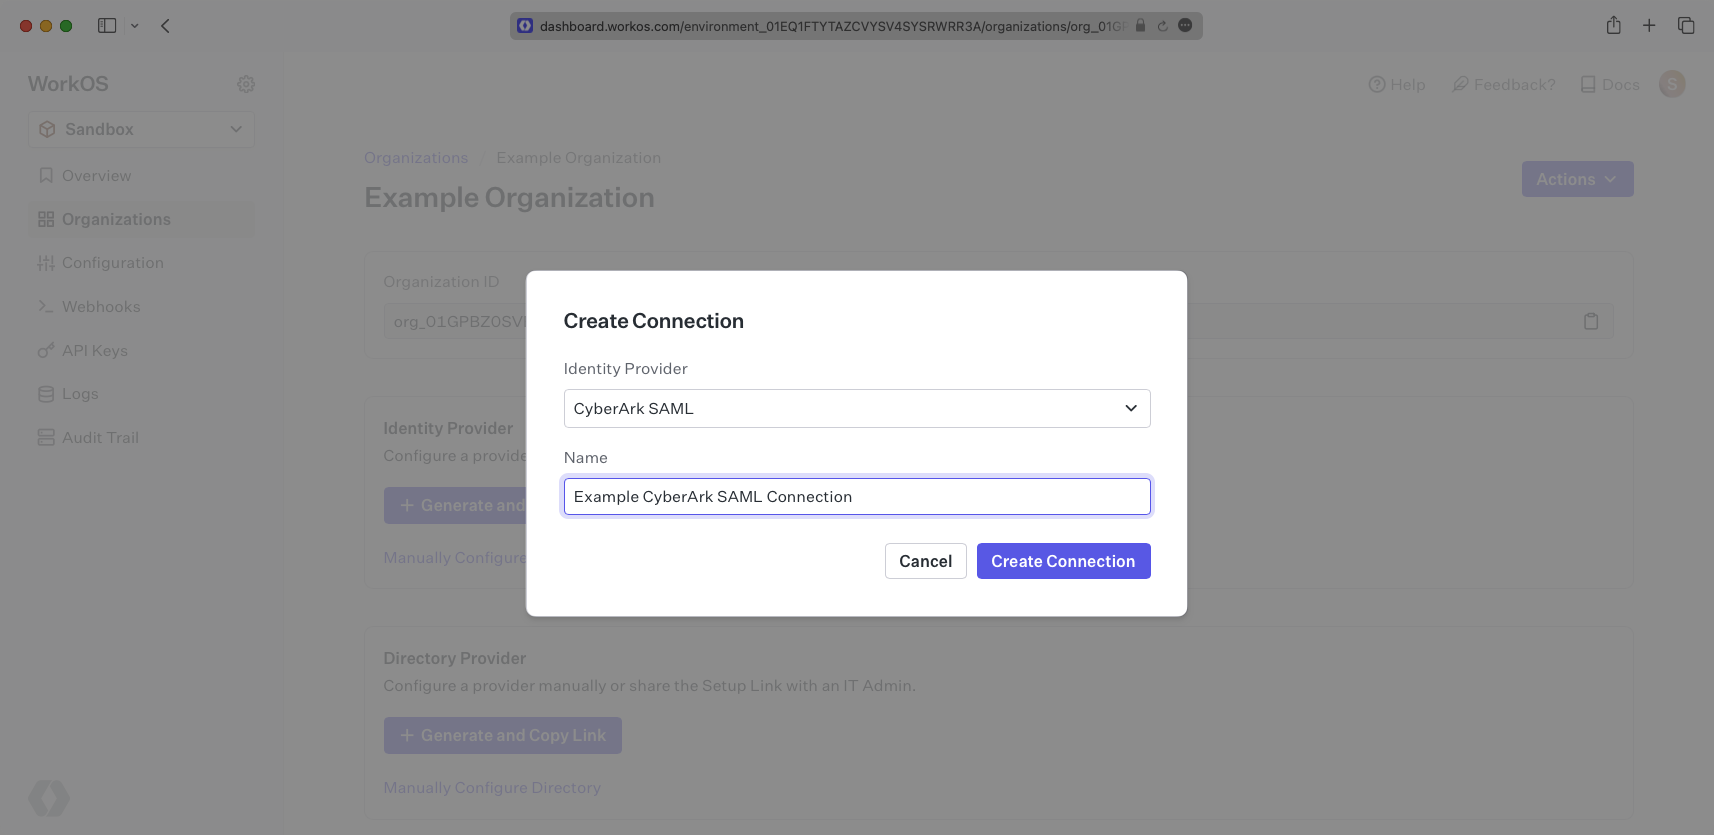
Select “CyberArk SAML” as the Identity Provider, give the Connection a descriptive name, and click “Create Connection”.
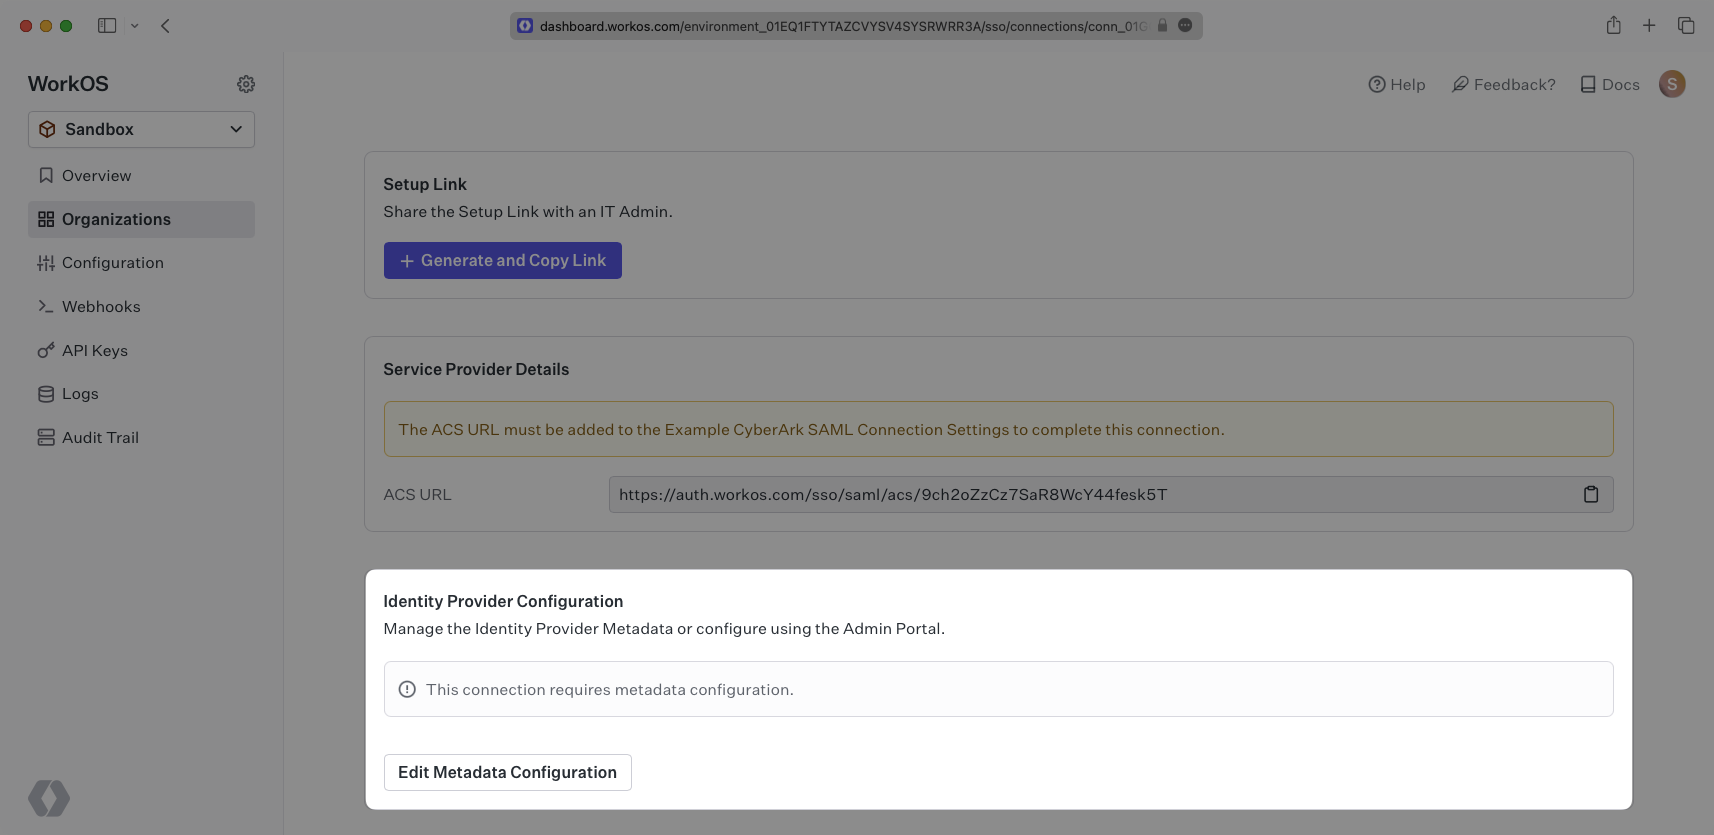
WorkOS provides the ACS URL and SP Entity ID. They are readily available in your Connection Settings in the WorkOS dashboard.
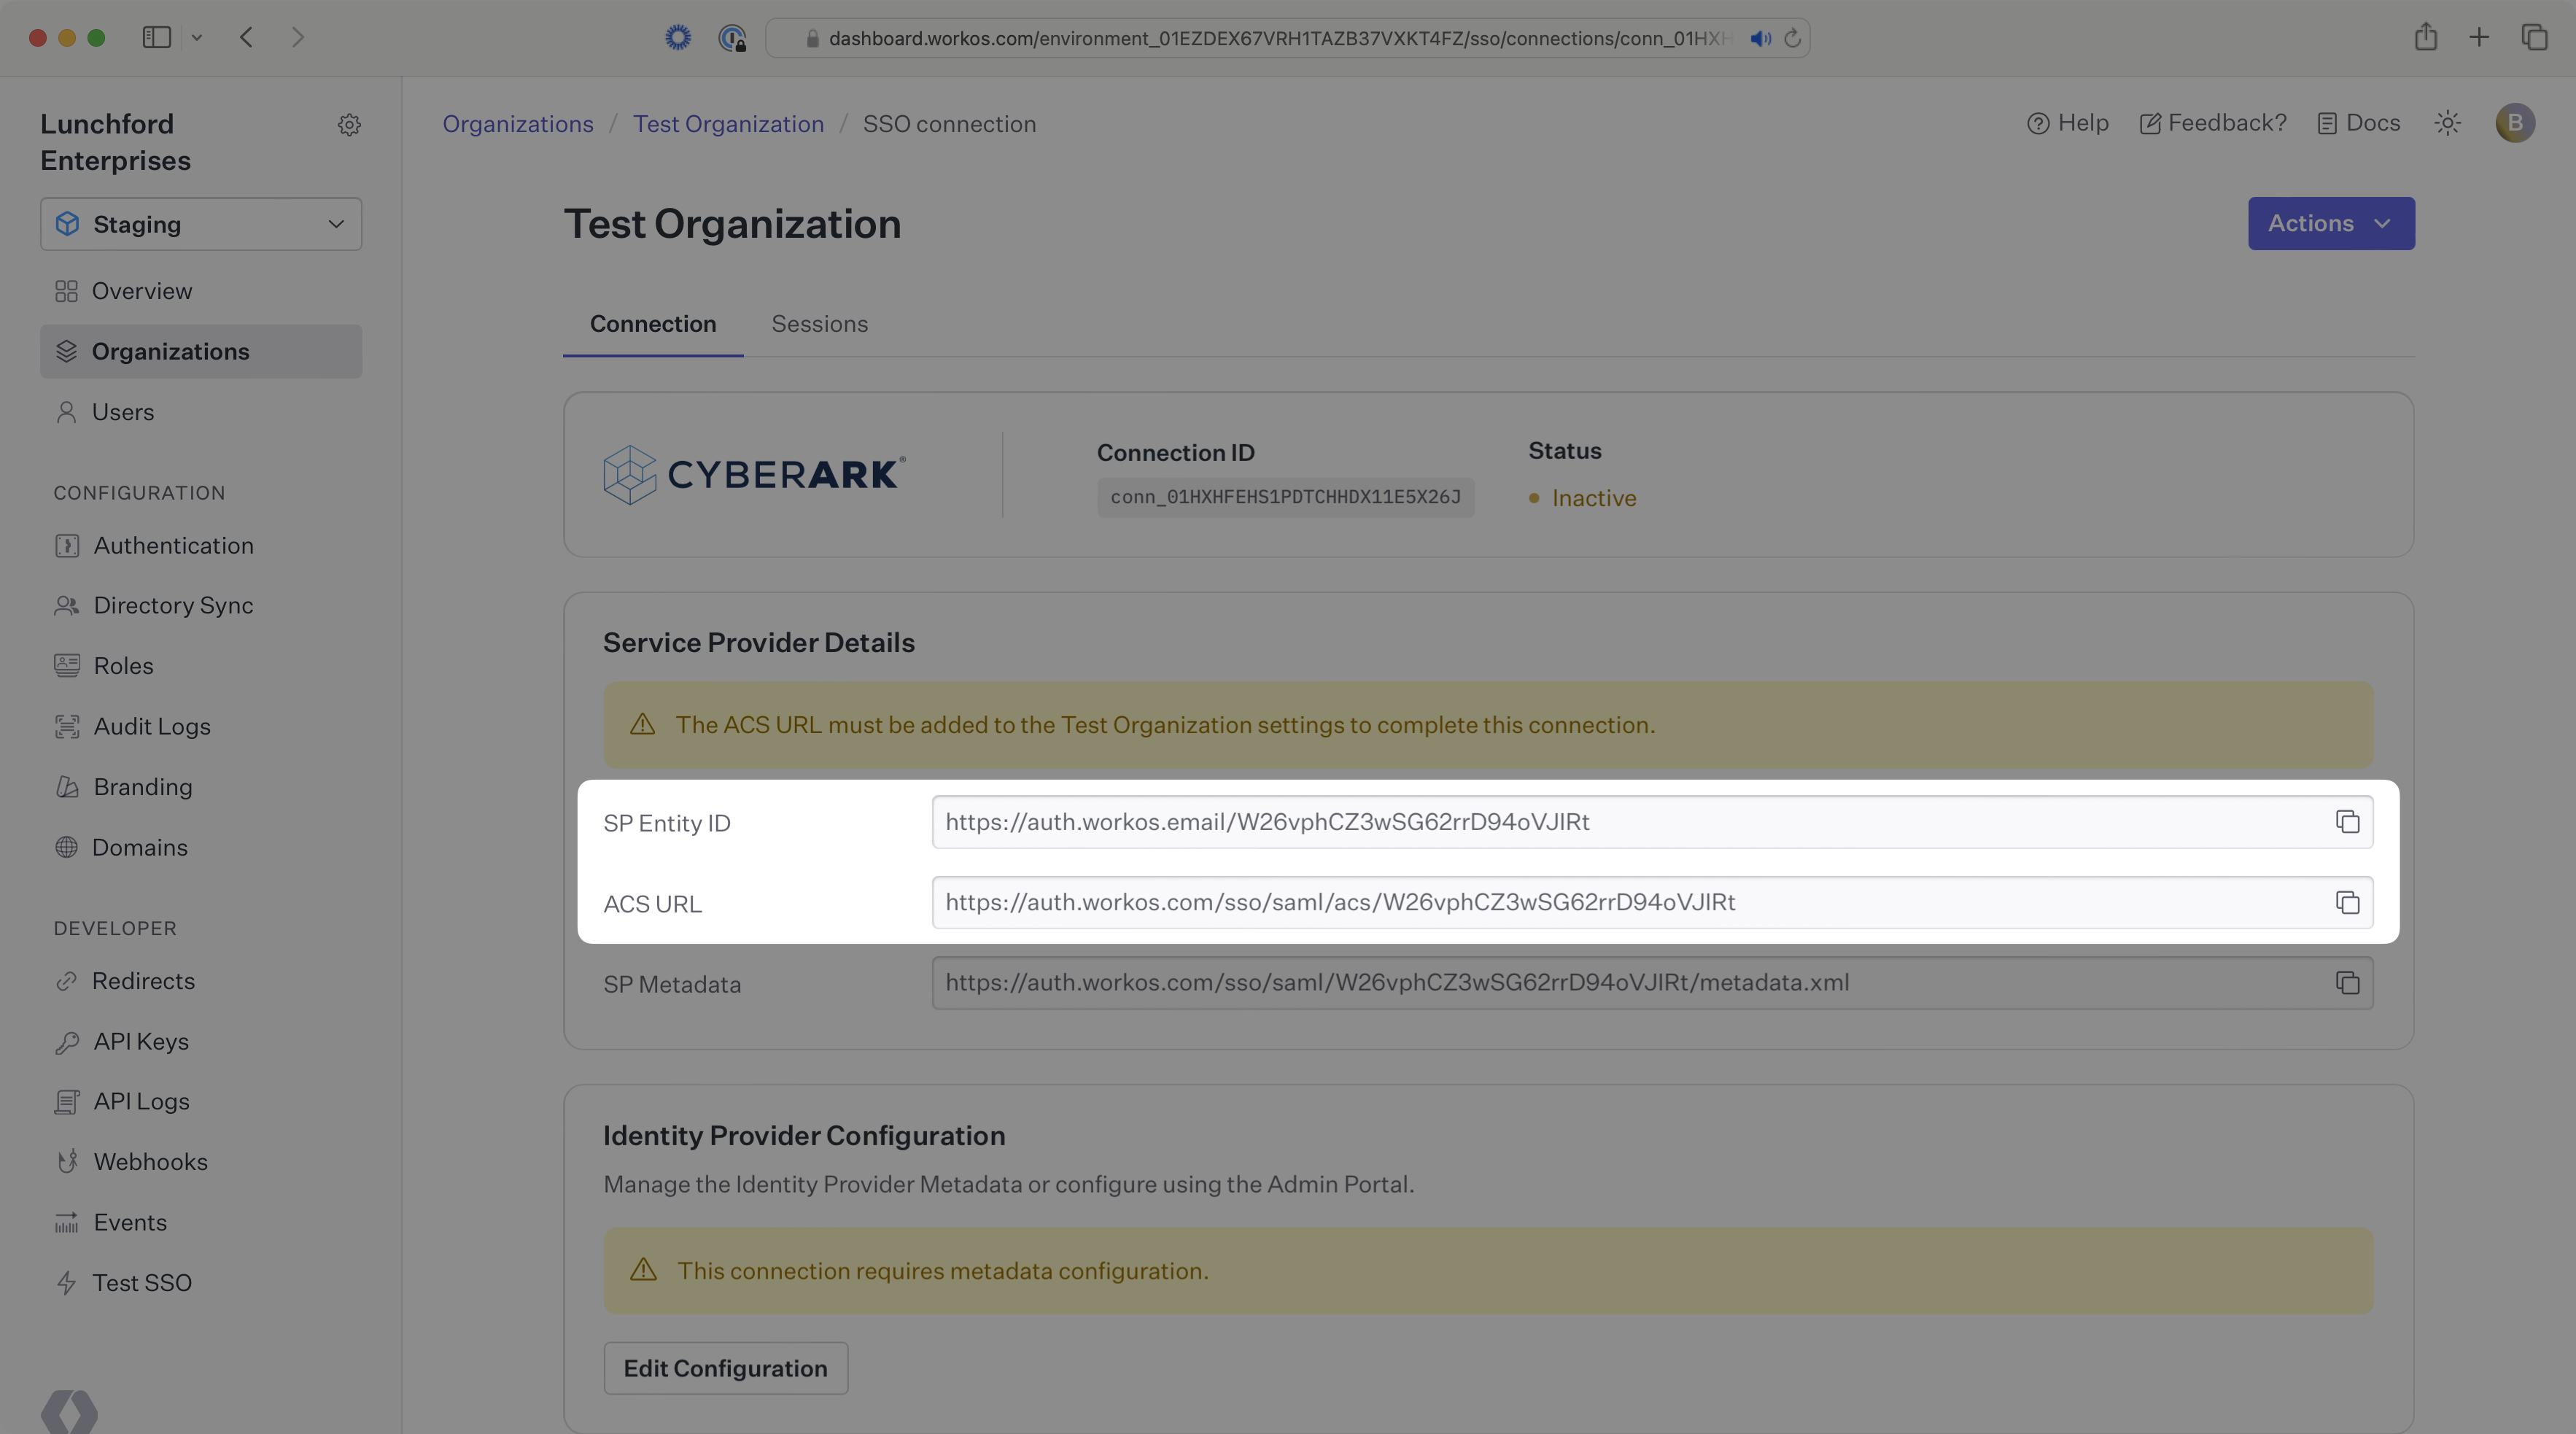
The ACS URL is the location an Identity Provider redirects its authentication response to. In CyberArk’s case, it needs to be set by the organization when configuring your application in their CyberArk instance.
The SP Entity ID is a URI used to identify the issuer of a SAML request and the audience of a SAML response. In this case, the SP Entity ID is used to communicate that WorkOS will be the party performing SAML requests to the organization’s CyberArk instance, and that WorkOS is the intended audience of the SAML responses from the CyberArk instance.
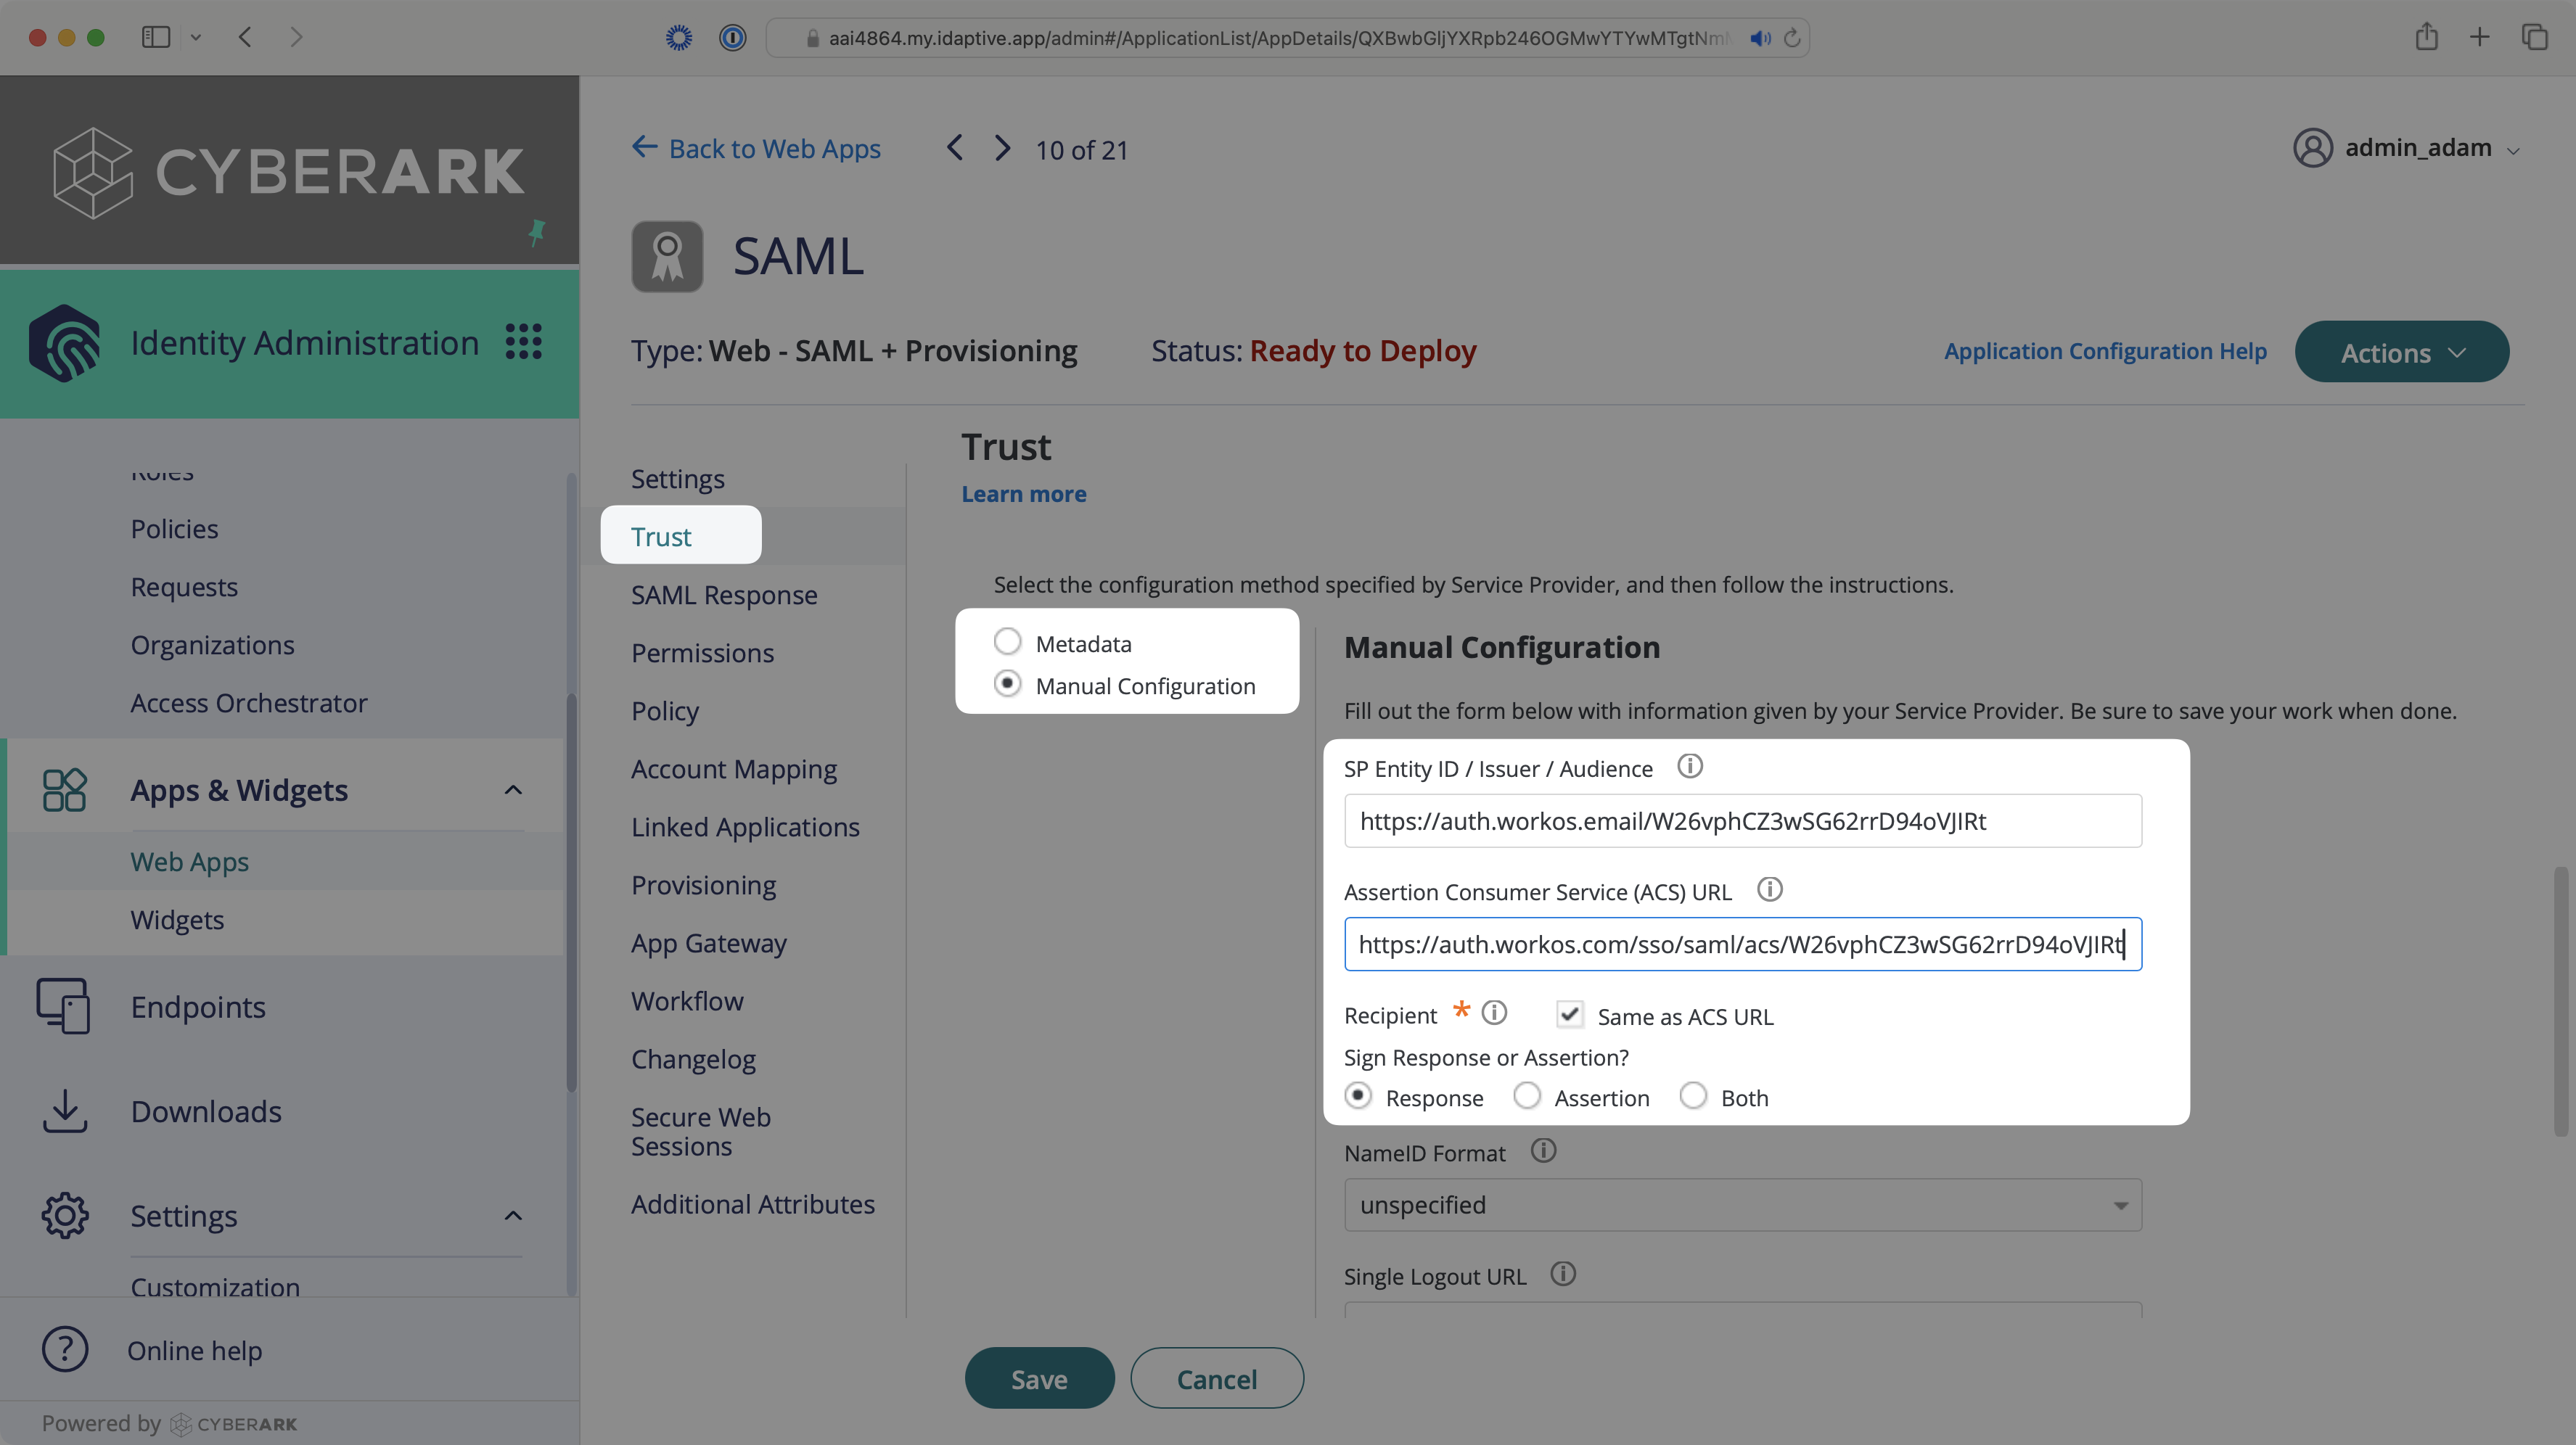
Specifically, the ACS URL will need to be set as the “Assertion Consumer Service (ACS) URL”, and the SP Entity ID will need to be set as the “SP Entity Id / Issuer / Audience”, in the “Service Provider Configuration” section of the “Trust” tab in the SAML App.
Next, provide the Identity Provider metadata.
Normally, this information will come from the organization’s IT Management team when they set up your application’s SAML configuration in their CyberArk Identity Admin Portal. If that’s not the case during your setup, the following steps describe how to get the necessary information.
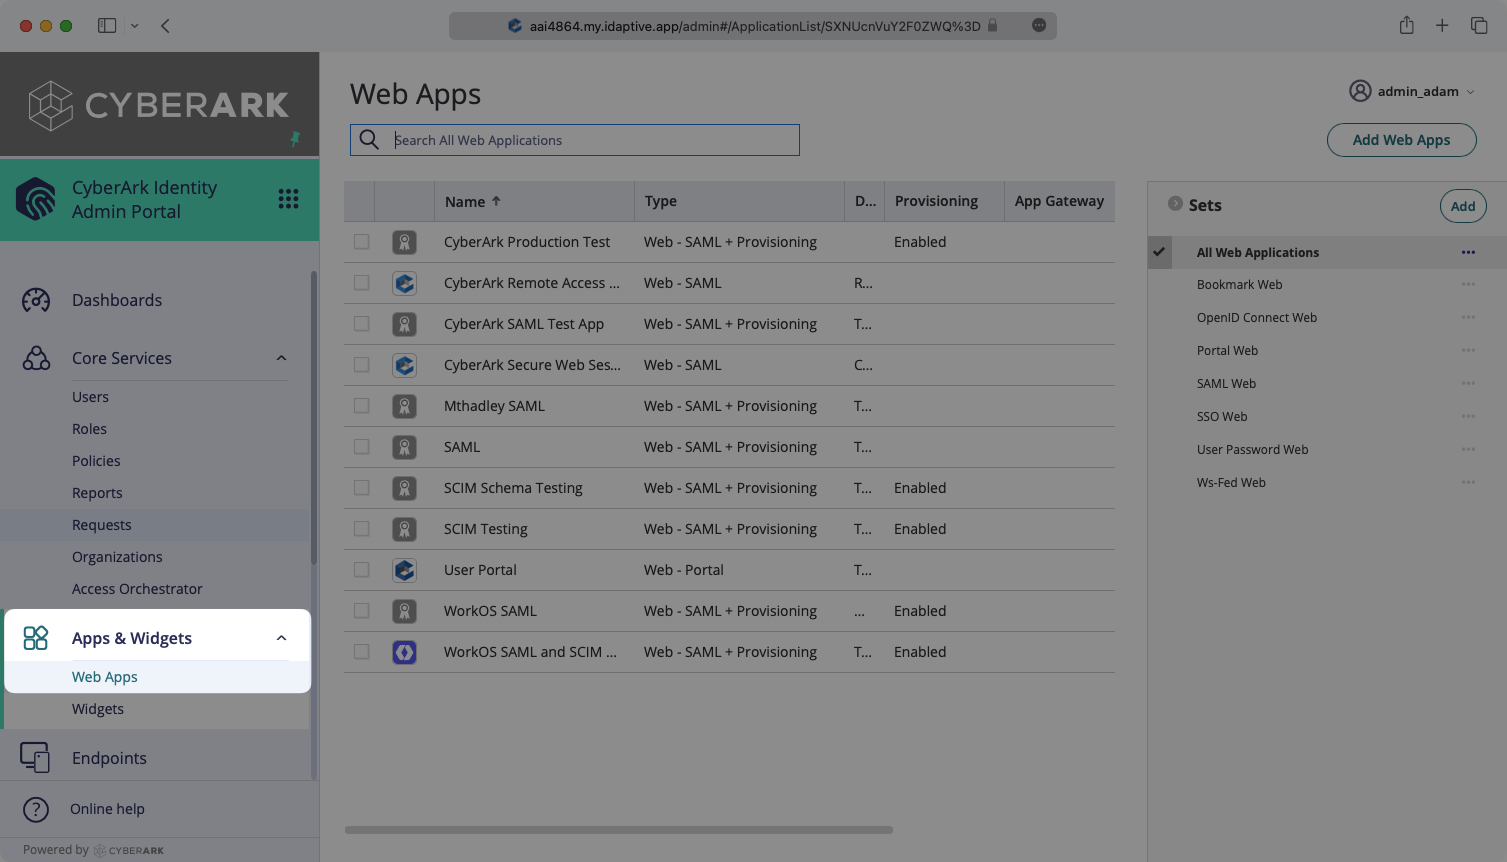
Log in to the CyberArk Identity Admin Portal and select “Web Apps” from the left-side navigation.
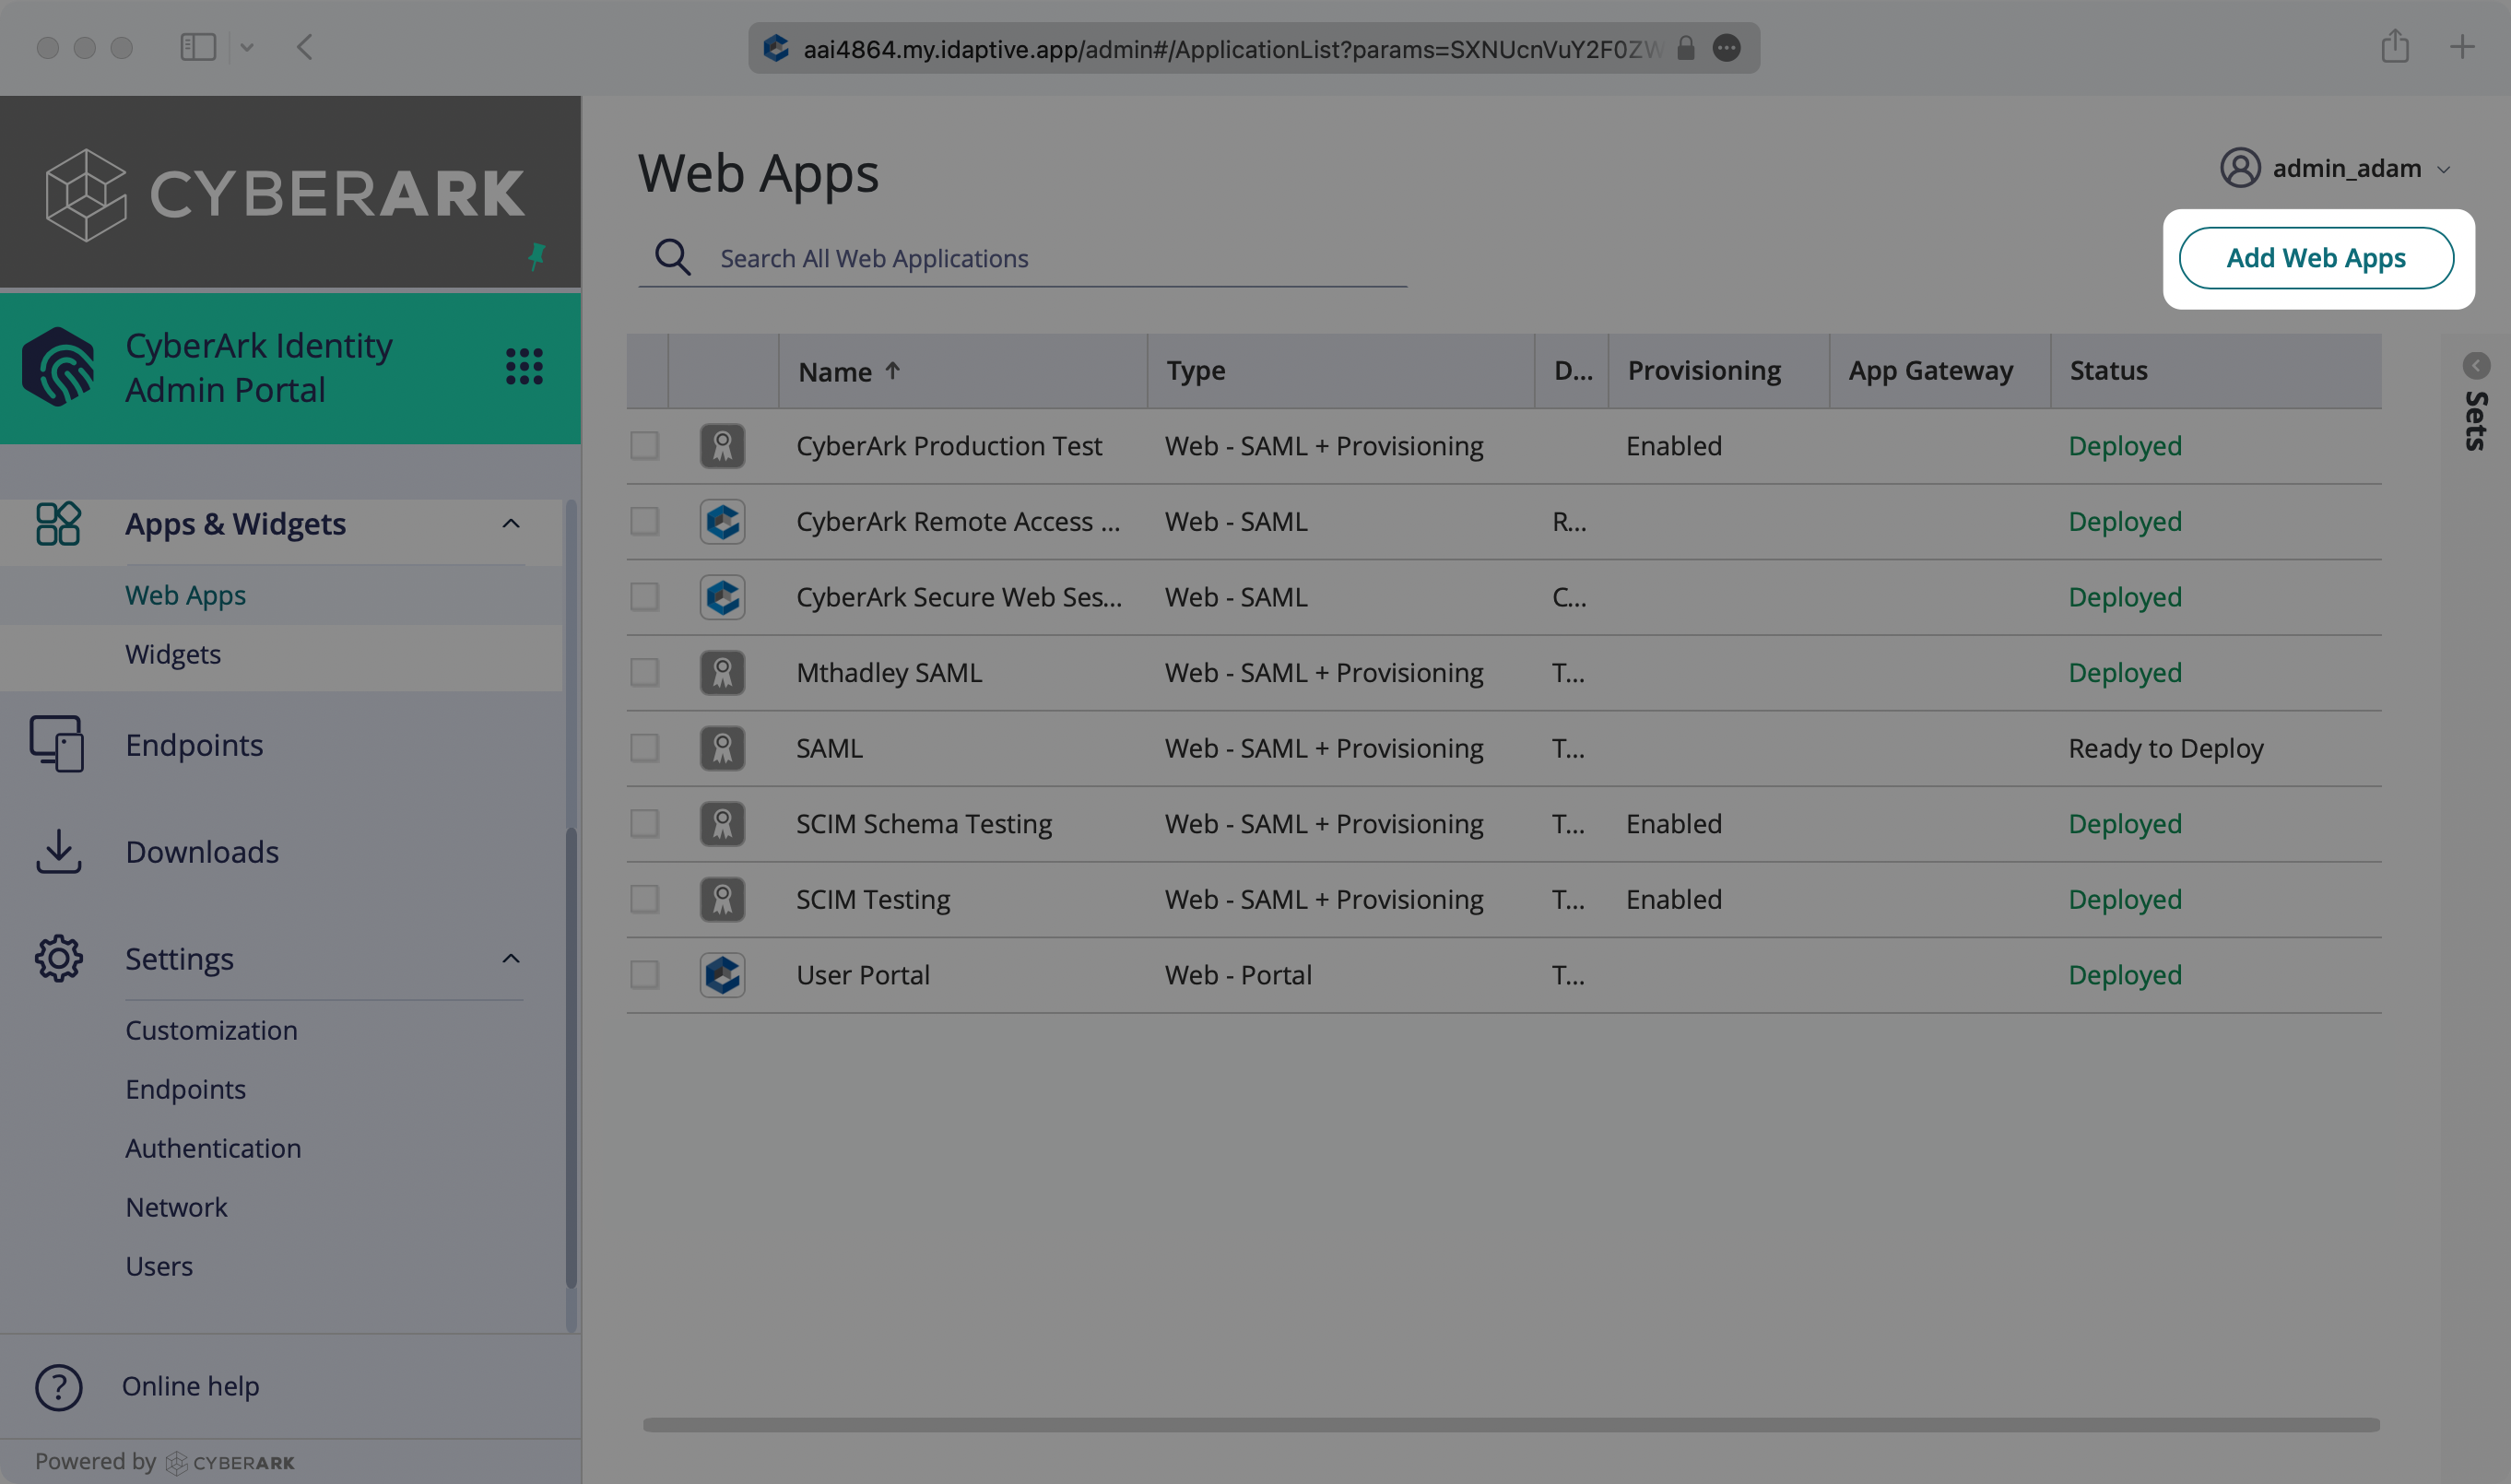
If your application is already created, select it from the list of applications and move to Step 4. If you haven’t created a SAML application in CyberArk, select “Add Web Apps”.
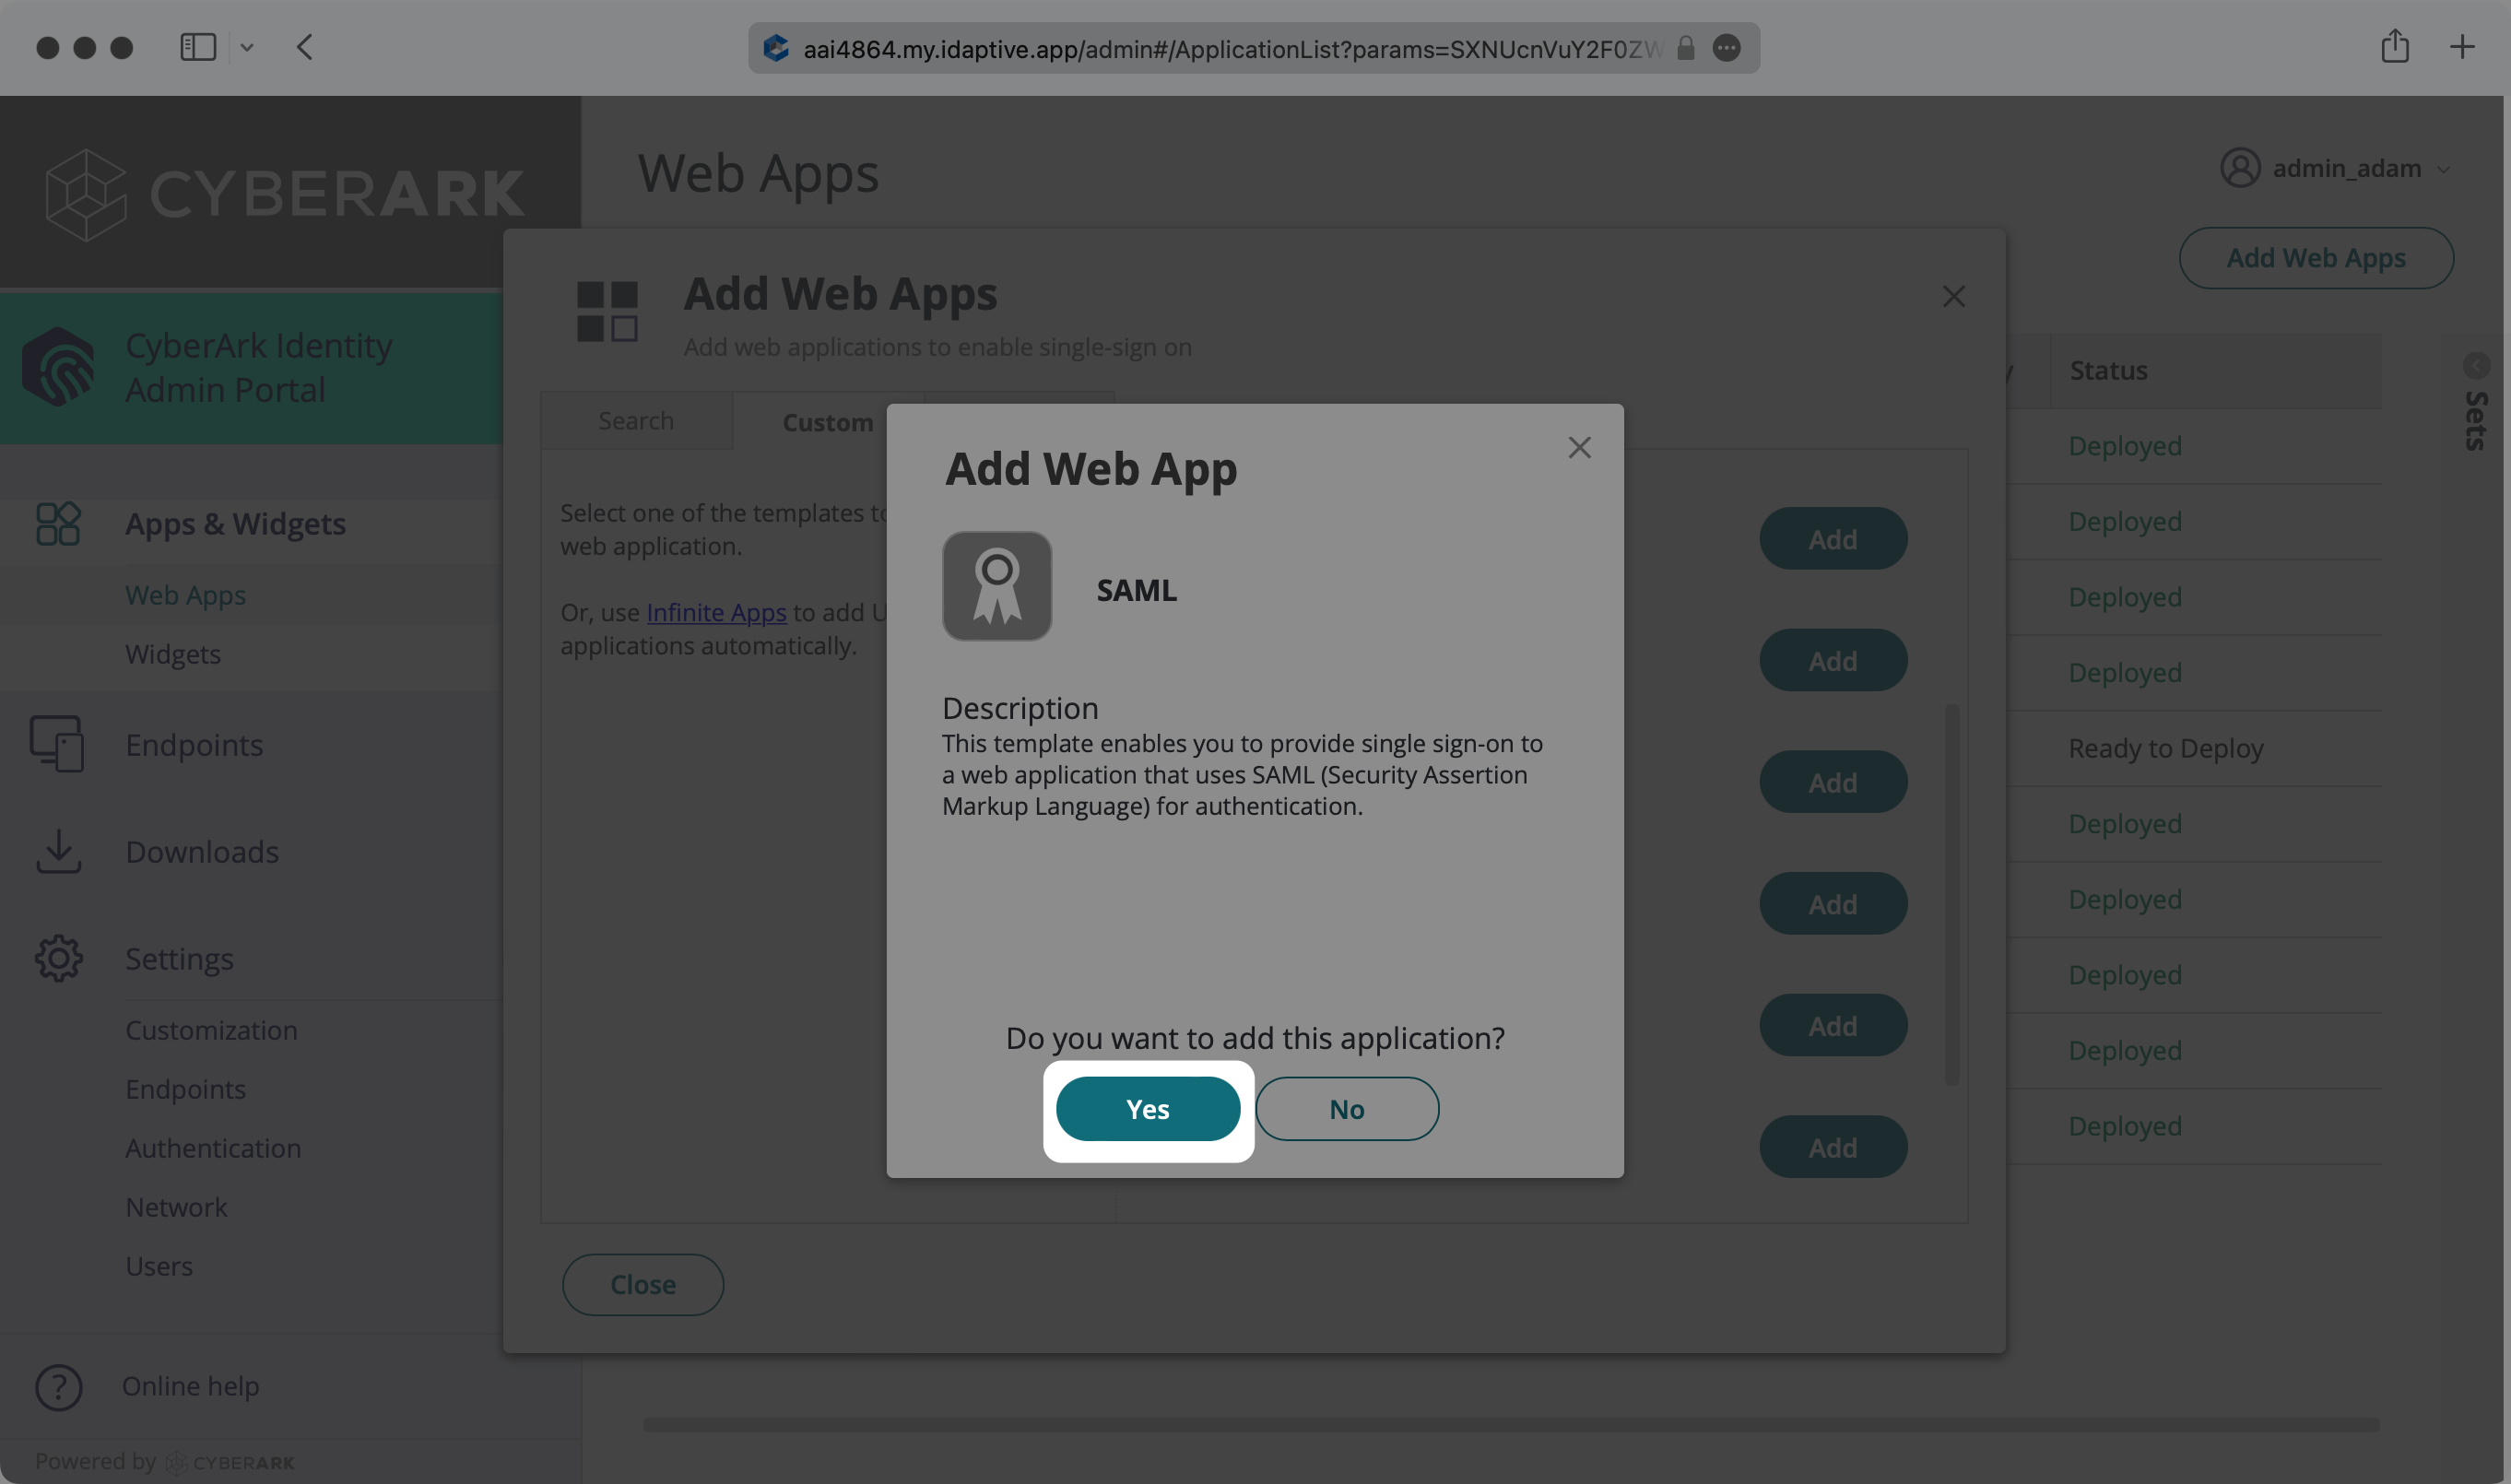
Select the “Custom” tab and then click to add “SAML”.

Select “Yes” to begin setting up the SAML App.
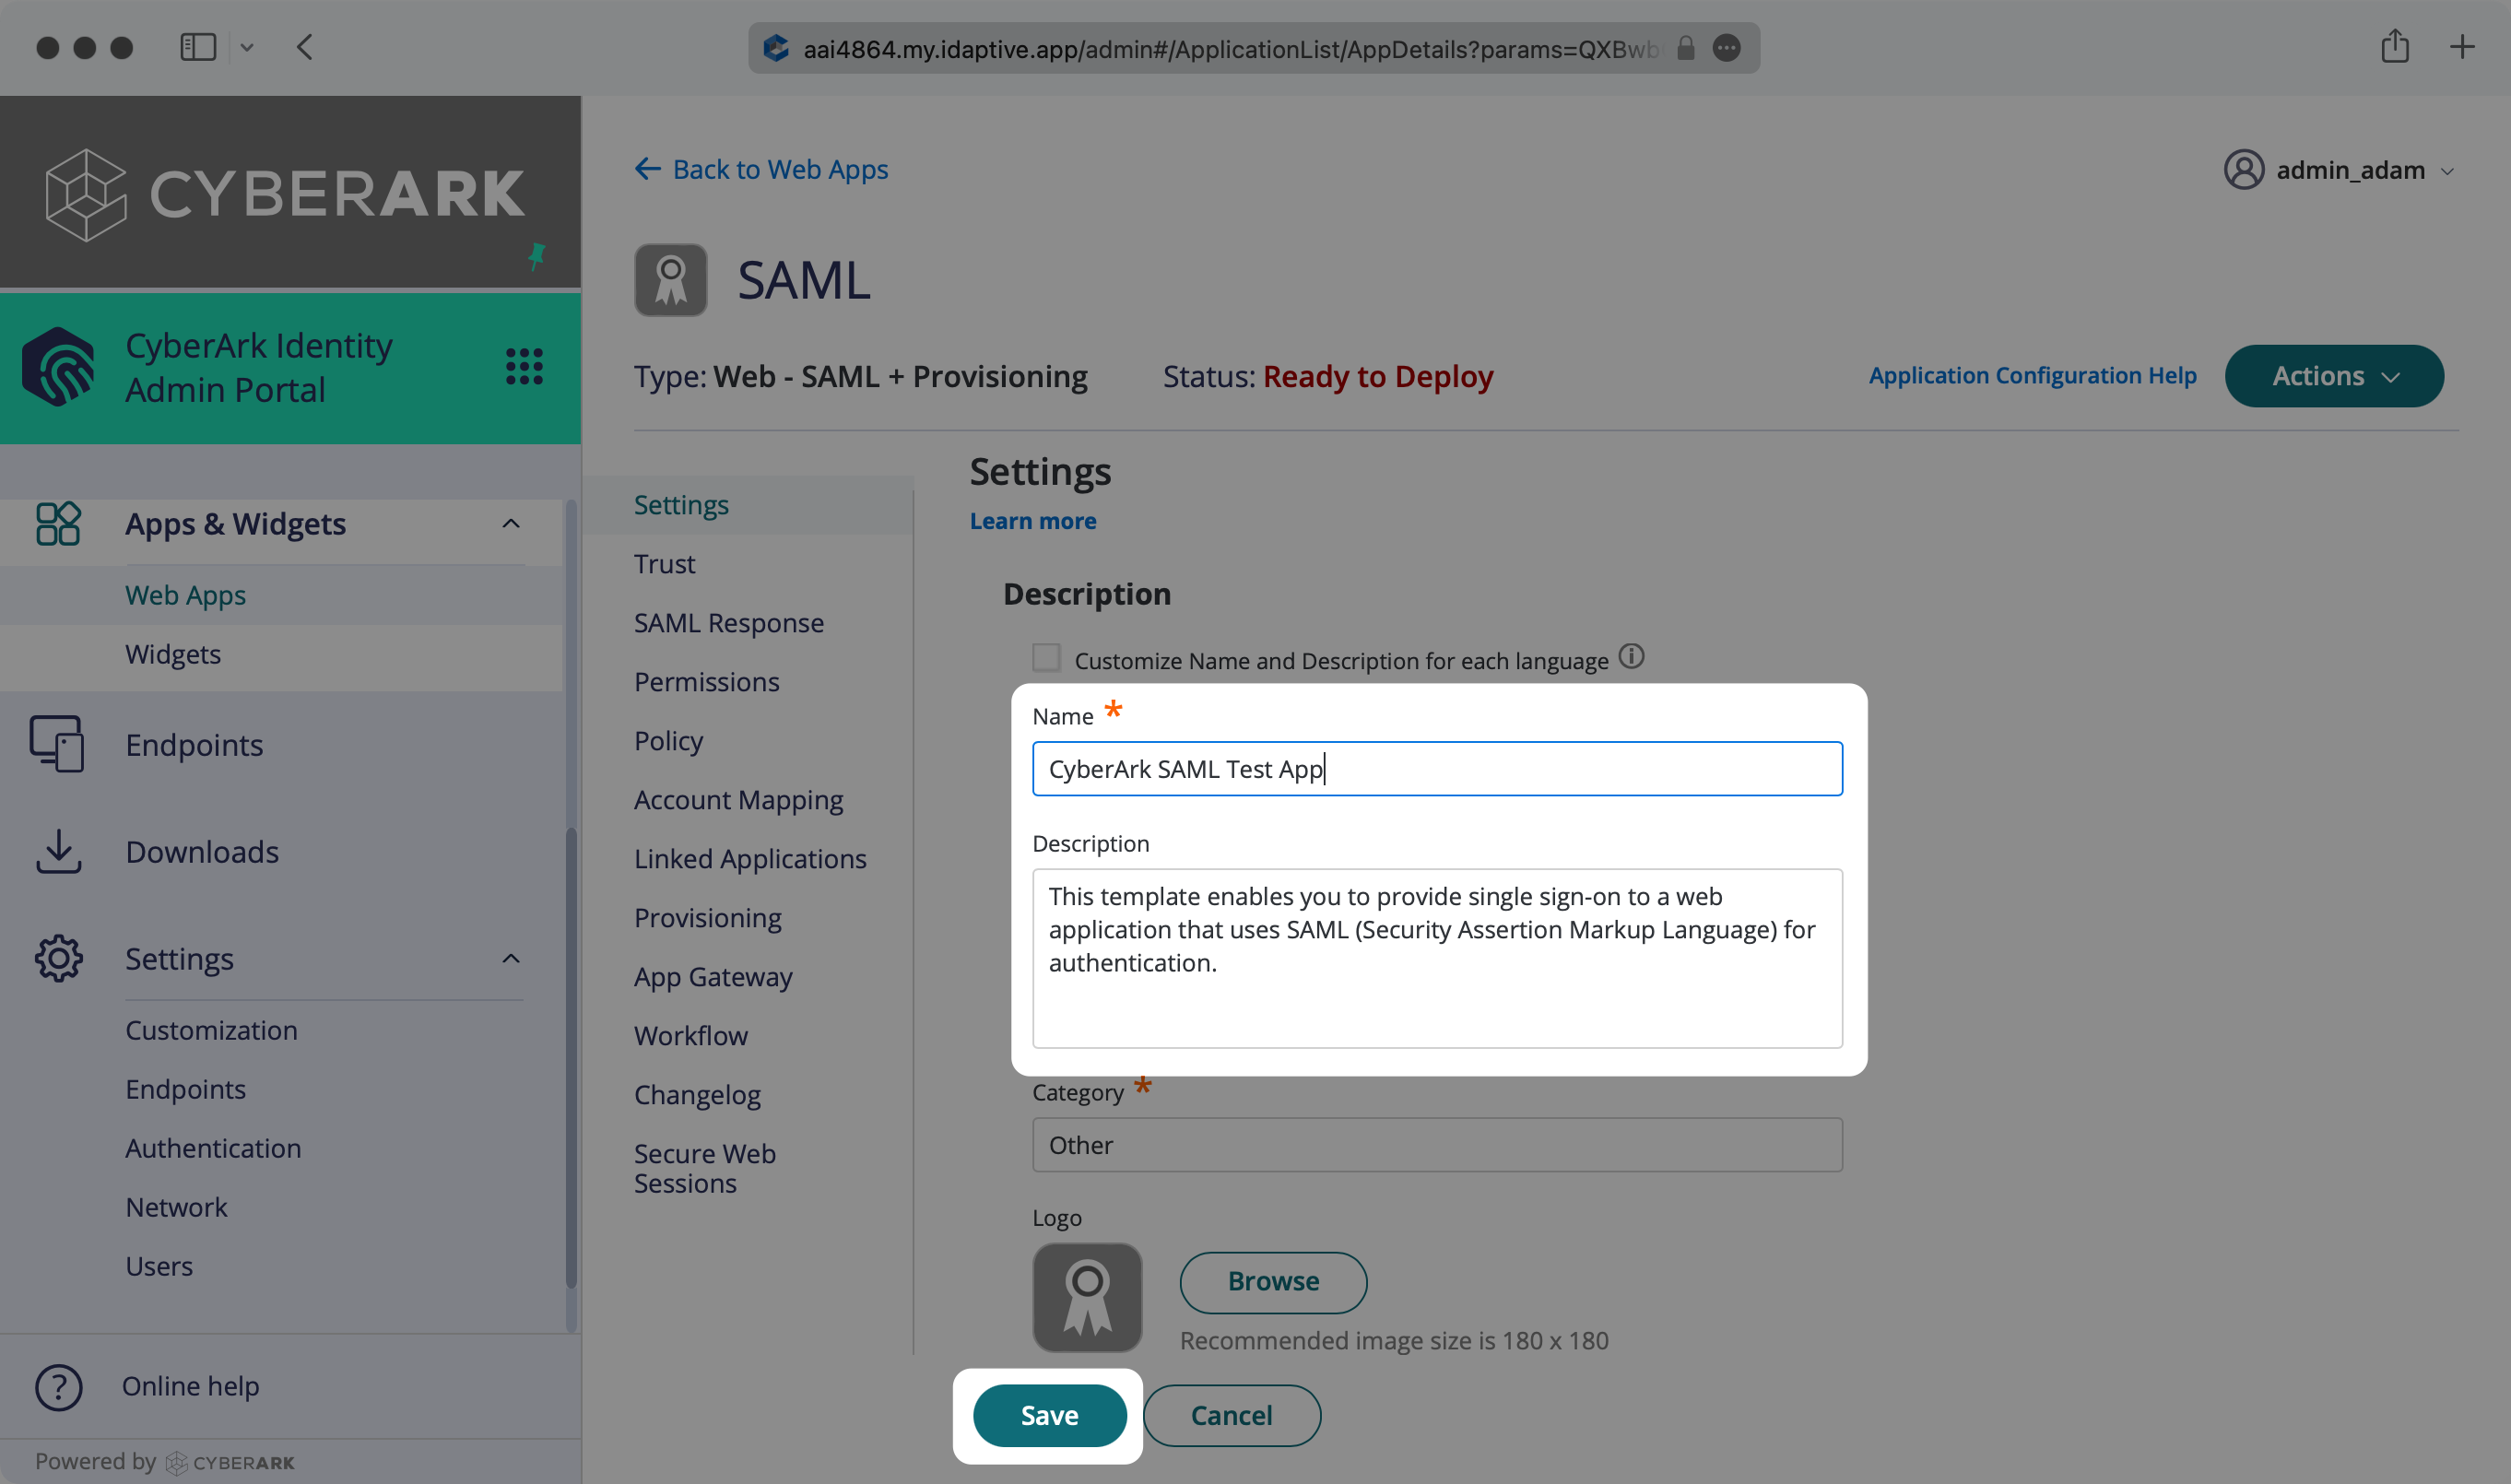
Enter a descriptive App Name and Description, then click “Save”.
Next, navigate to the “Trust” tab and enter the SP Entity ID from the Connection Settings into “SP Entity Id / Issuer / Audience” and the ACS URL from the Connection Settings into “Assertion Consumer Service (ACS) URL” in the “Service Provider Configuration” section of the “Trust” tab in the SAML App.
IMPORTANT: Be sure to check “Both” under “Sign Response or Assertion?”.
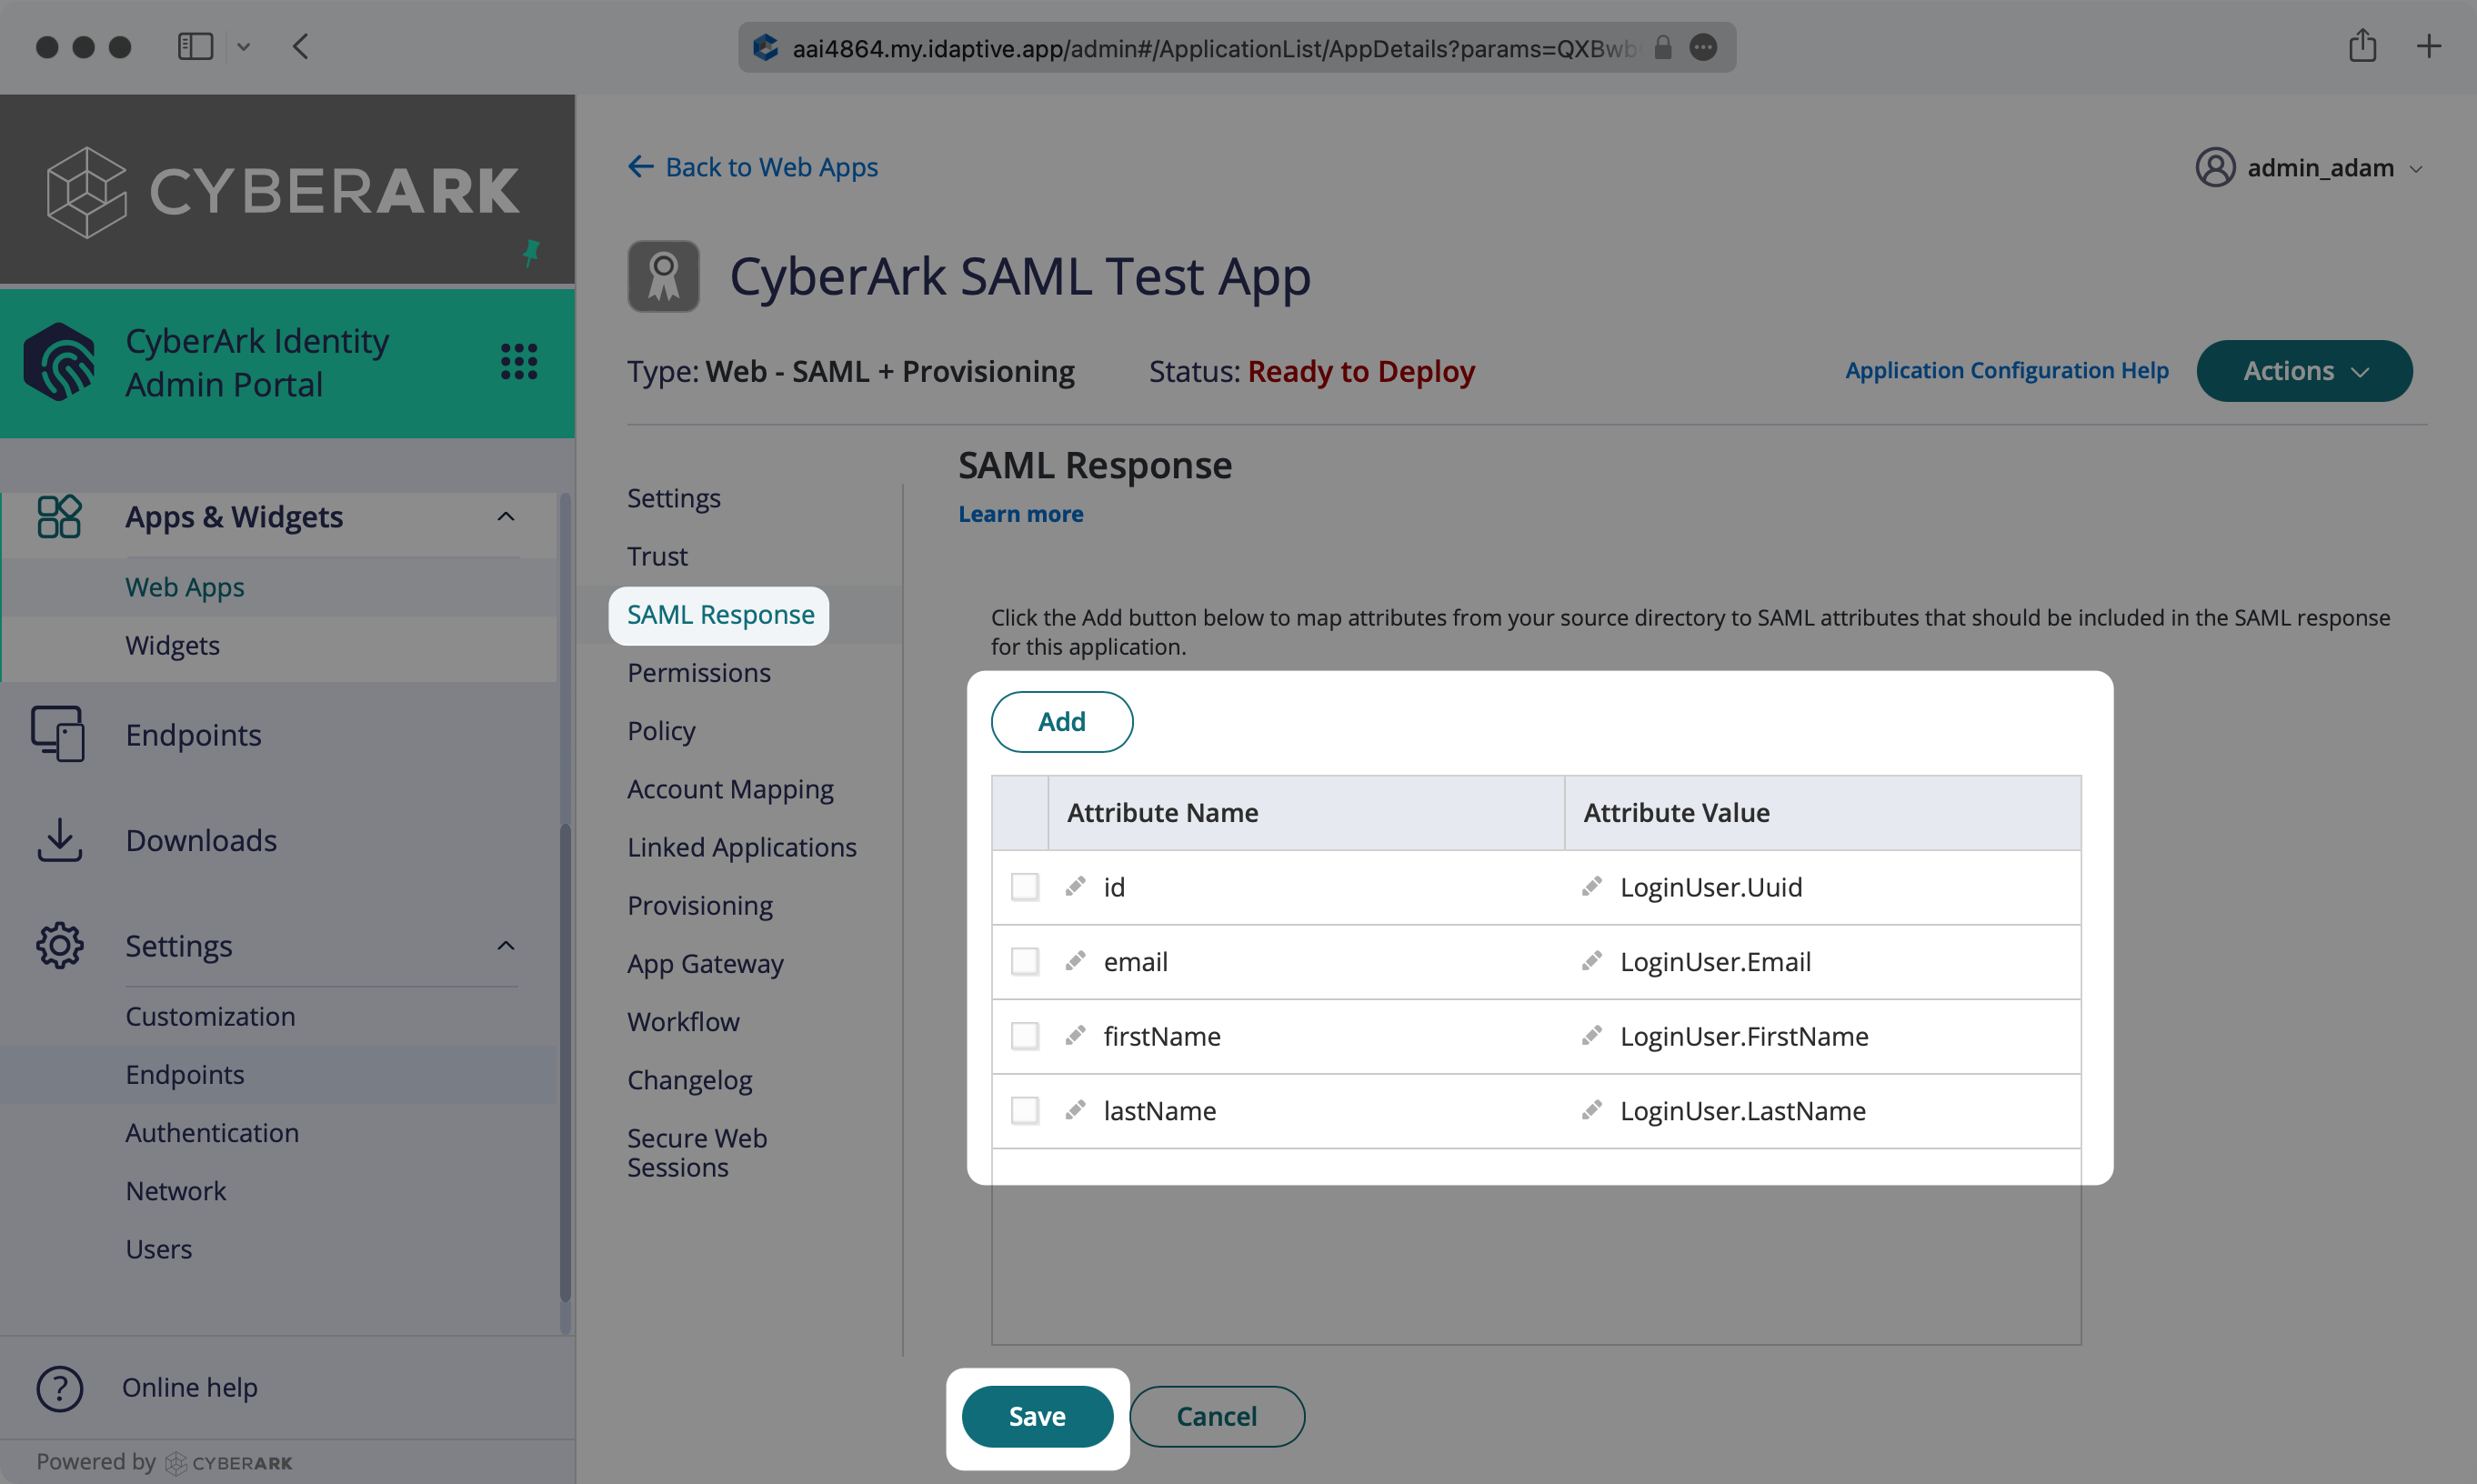
Select the “SAML Response” tab and use the “Add” button to add the following key-value pairs. Then, click “Save”.
id→LoginUser.Uuidemail→LoginUser.EmailfirstName→LoginUser.FirstNamelastName→LoginUser.LastName
With identity provider role assignment, users can receive roles within your application based on their group memberships. To return this information in the attribute statement, first add a new attribute in the “SAML Response” tab. In the “Attribute Name” column, input groups, and map it to the “Attribute Value” for a user’s group membership, such as LoginUser.GroupNames, as shown in the example below.

Once your SAML app is configured to return groups, navigate to the SSO connection page in the Organization section of the WorkOS Dashboard. Create SSO groups by referencing the group IdP ID. Then, assign roles to these SSO groups so group members are automatically granted roles within your application.
To give users permission to authenticate via this SAML app, you will need to assign individual users and/or groups of users to the CyberArk SAML app.
Click on the “Permissions” tab, and select “Add”.
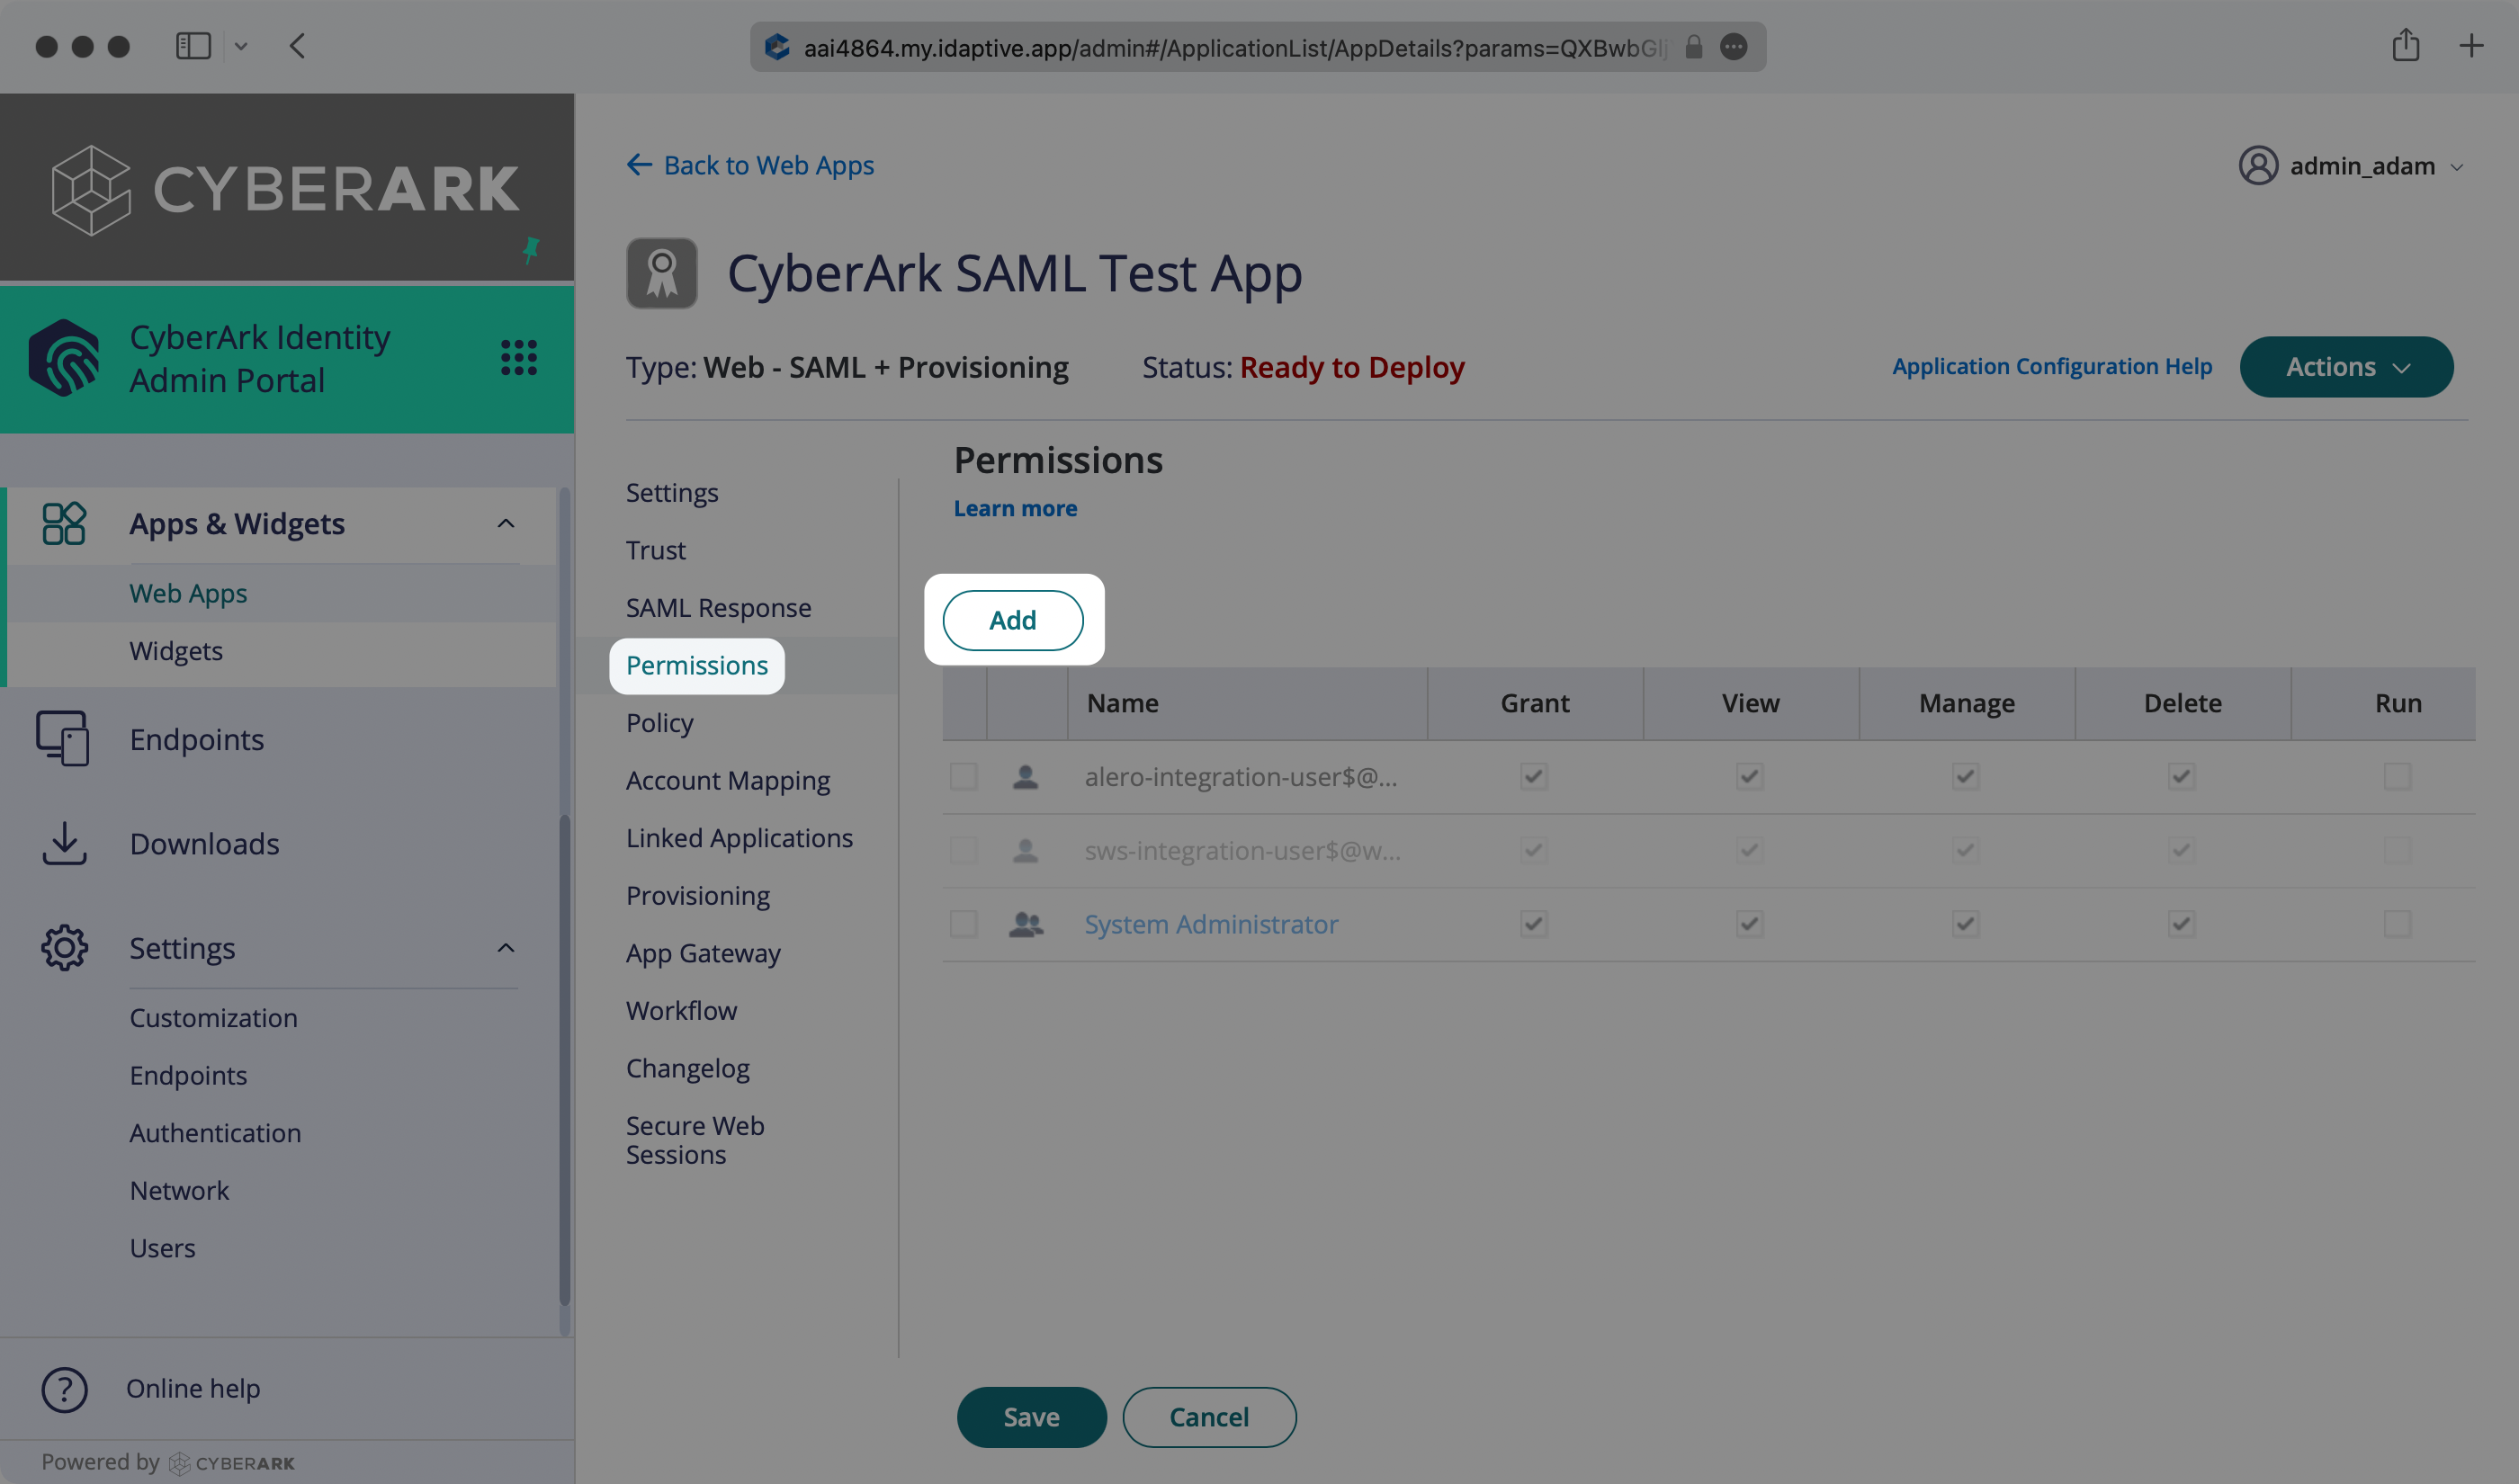
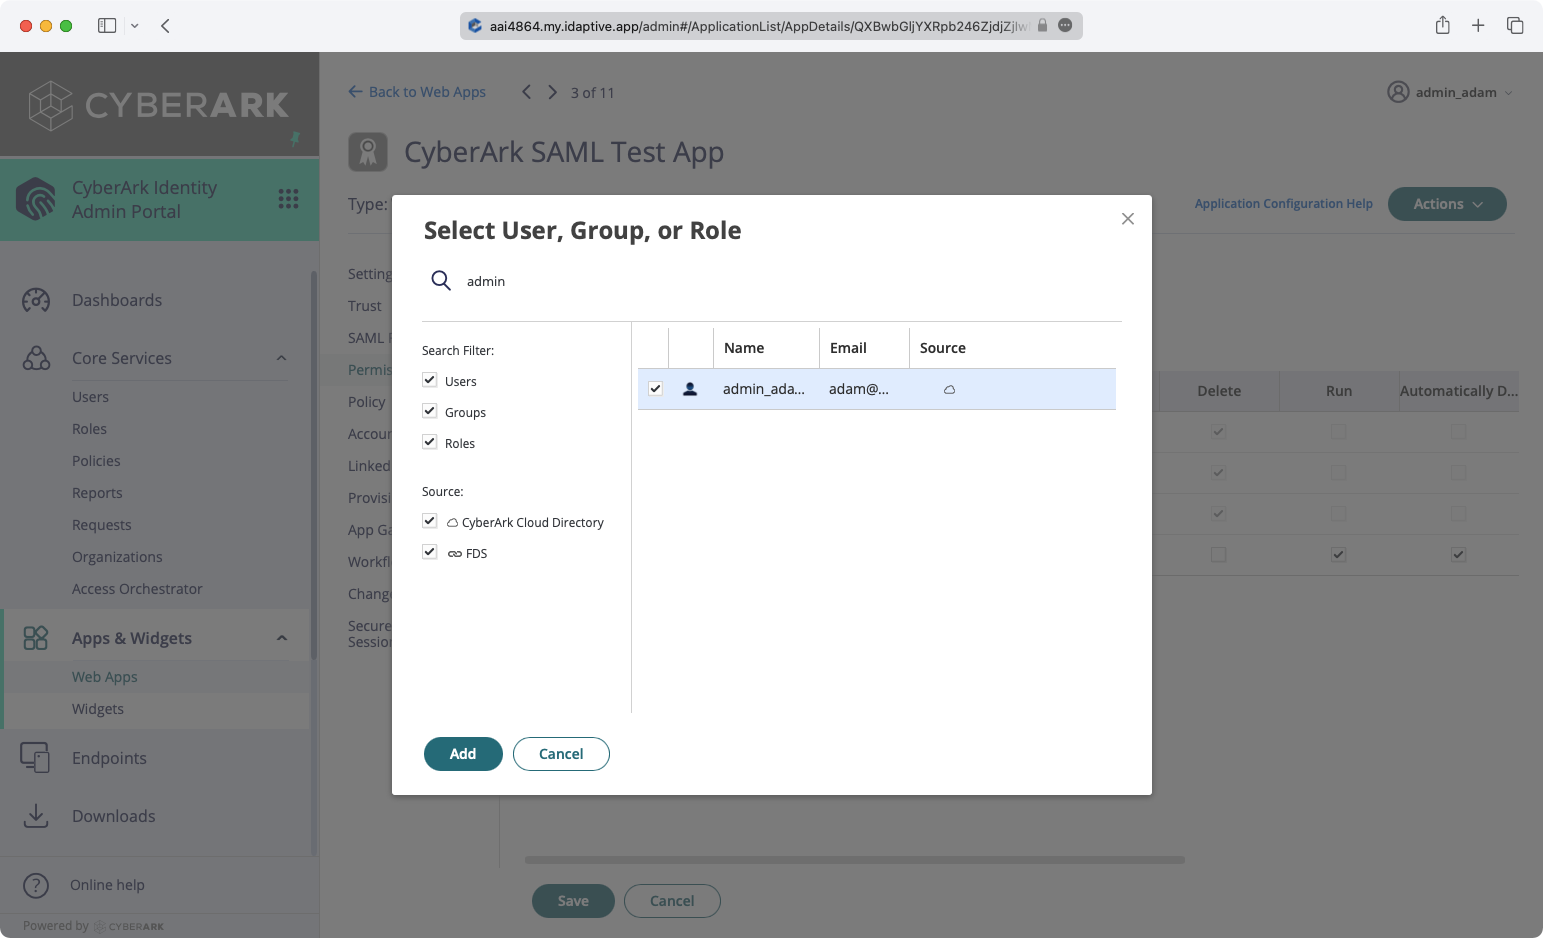
Search for the individual user(s) and/or group(s) that you would like to assign to the app, and check the box next to them. Click “Add” when you are finished. Once users have been successfully added, you should also notice the “Status” of your CyberArk SAML app change to “Deployed”.
On the “Trust” tab of the SAML App, go to the “Service Provider Configuration Section” and select “Metadata”. Then click on “Copy URL” button to copy the Metadata URL. This URL will get entered in the WorkOS dashboard in the next step.