CyberArk SCIM
Learn about syncing your user list with CyberArk SCIM.
This guide outlines how to synchronize your application’s CyberArk directories using SCIM.
To synchronize an organization’s users and groups provisioned for your application, you’ll need to provide the organization with two pieces of information:
- An Endpoint that CyberArk will make requests to.
- A Bearer Token for CyberArk to authenticate its endpoint requests.
After completing step 1 below, both of these are available in your Endpoint’s Settings in the WorkOS Dashboard.
The rest of the steps below will need to be carried out by the organization when configuring your application in their CyberArk instance.
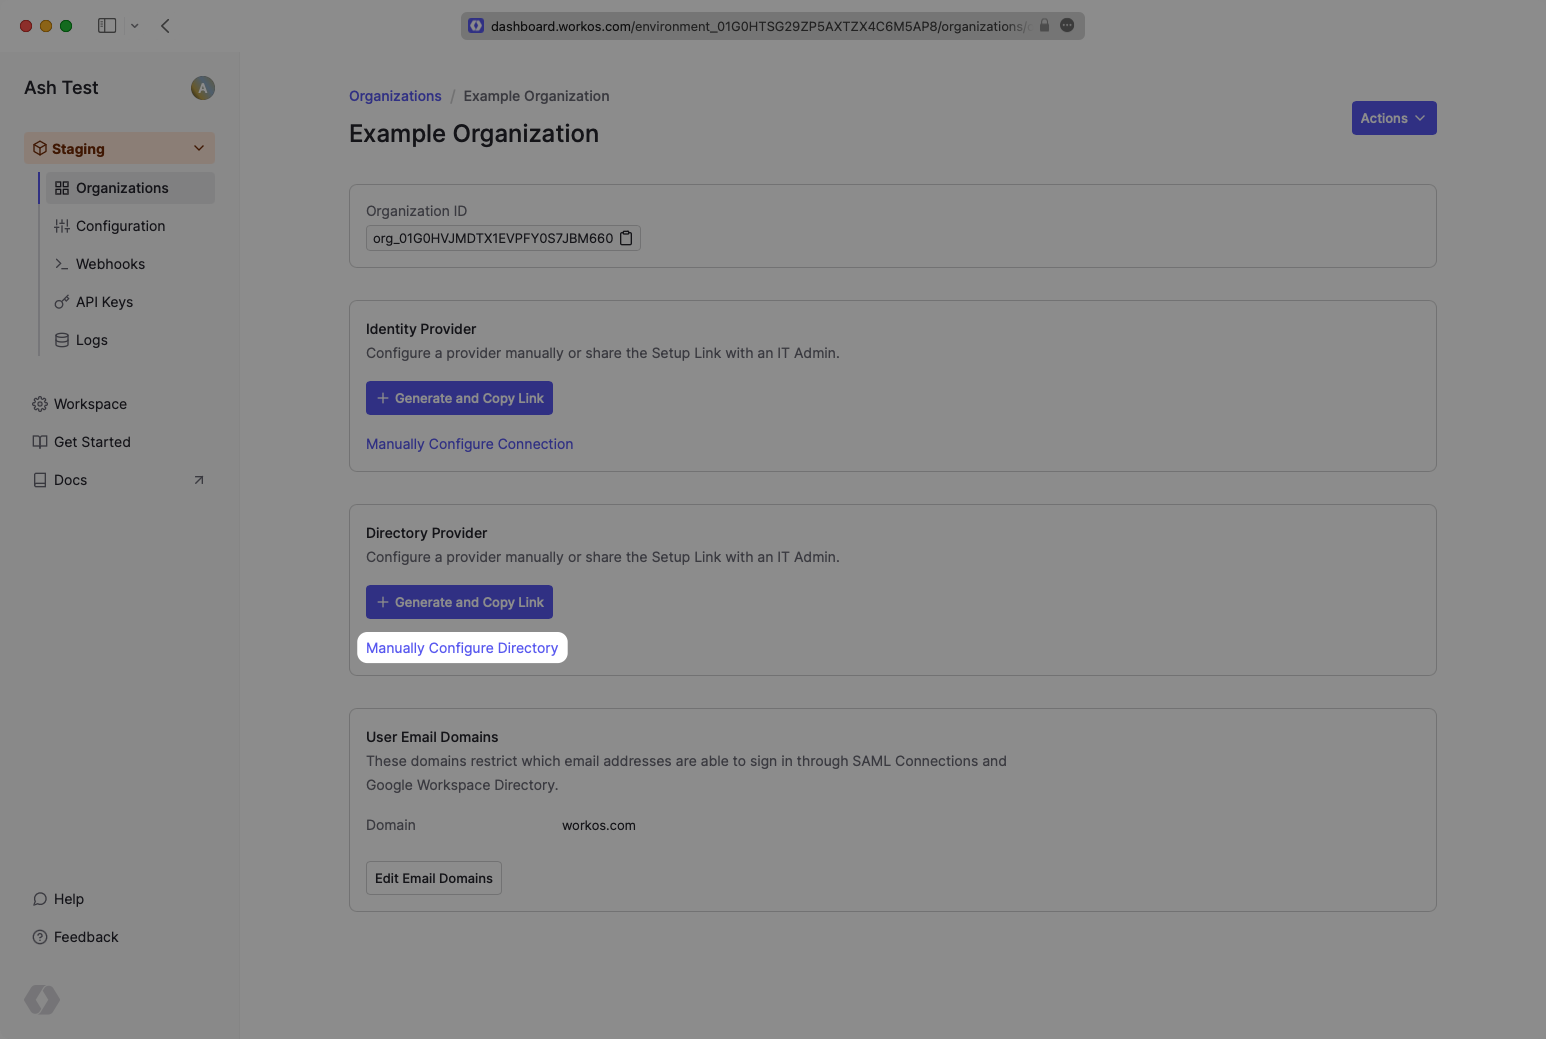
In your WorkOS Dashboard, select or create an Organization. Then select “Manually Configure Directory”.
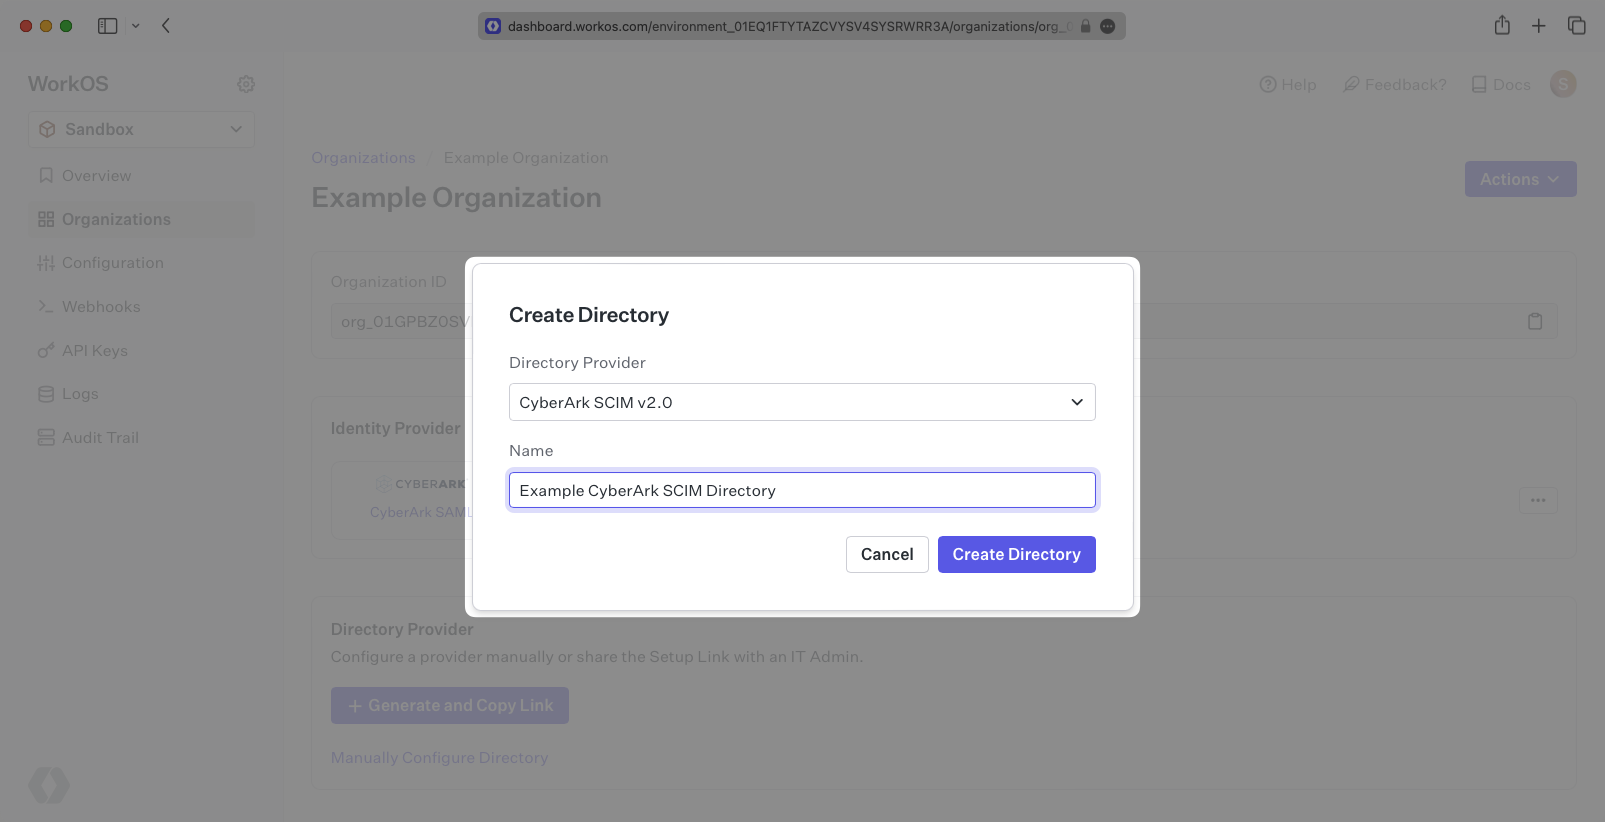
Select “CyberArk” as the Directory Provider and add a descriptive name for the directory sync connection.
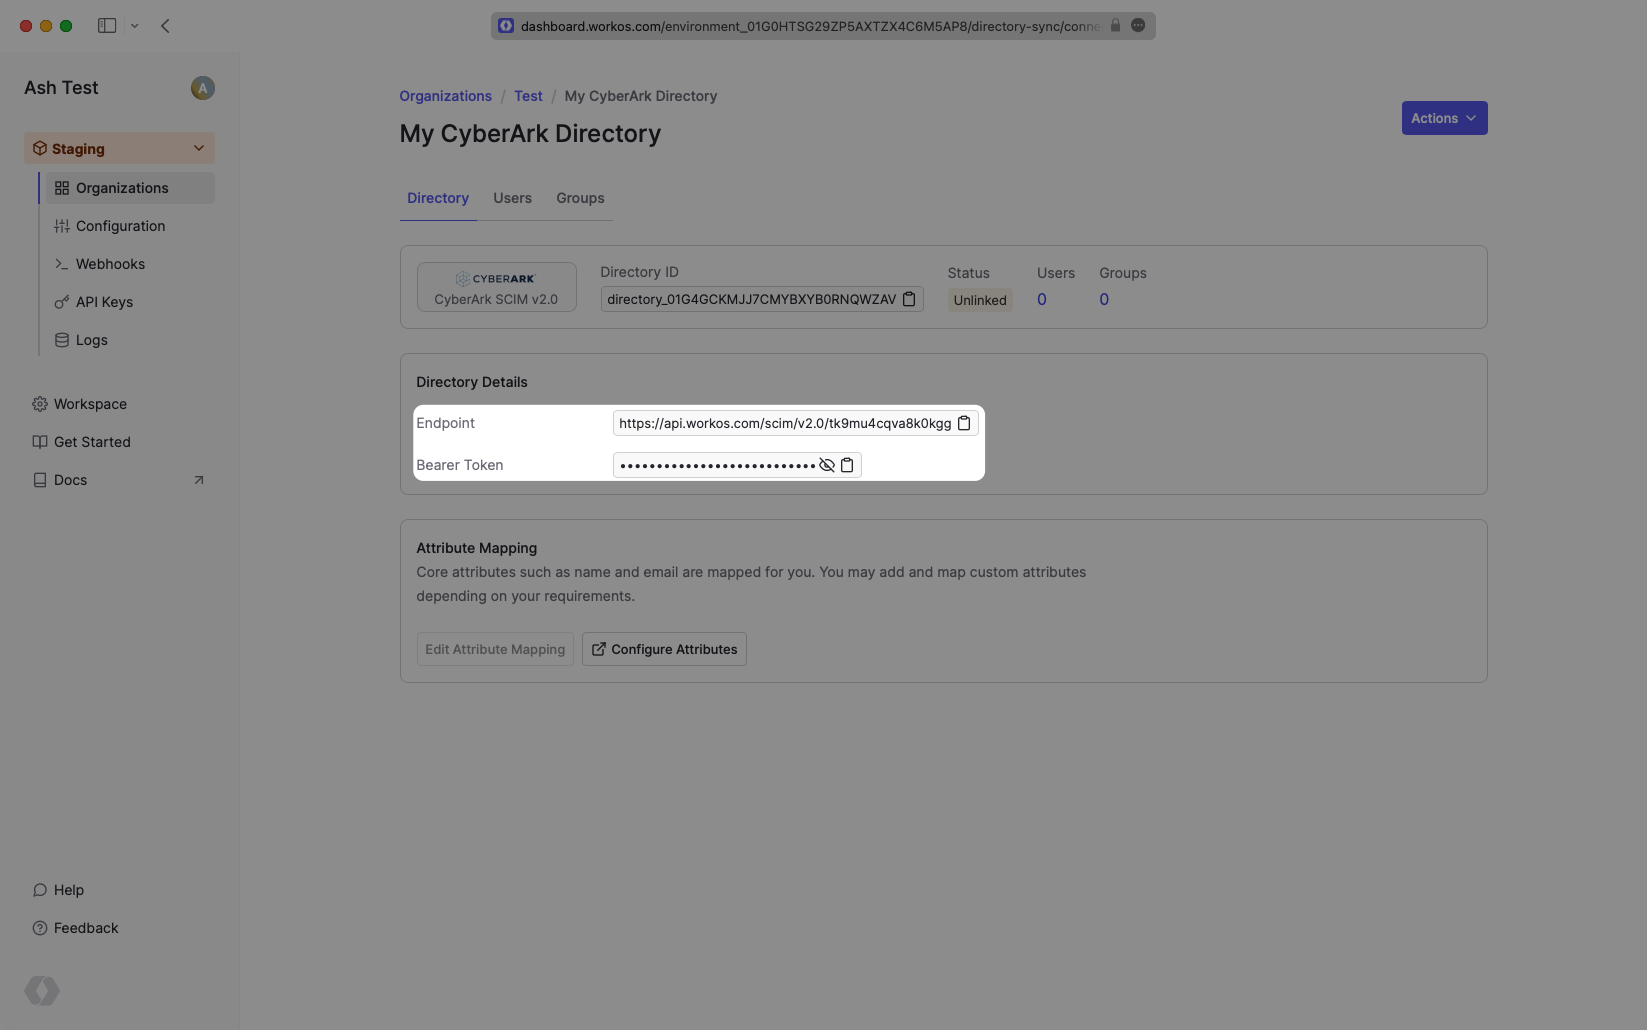
On the Directory Sync connection settings page, save the Endpoint and the Bearer Token. You’ll input these in the CyberArk settings.
We have support for whitelabeled URLs for Directory Sync endpoints. Contact us for more info!
CyberArk supports SCIM provisioning in the context of a SAML app. The usual set up is to enable SAML first, following our docs here.
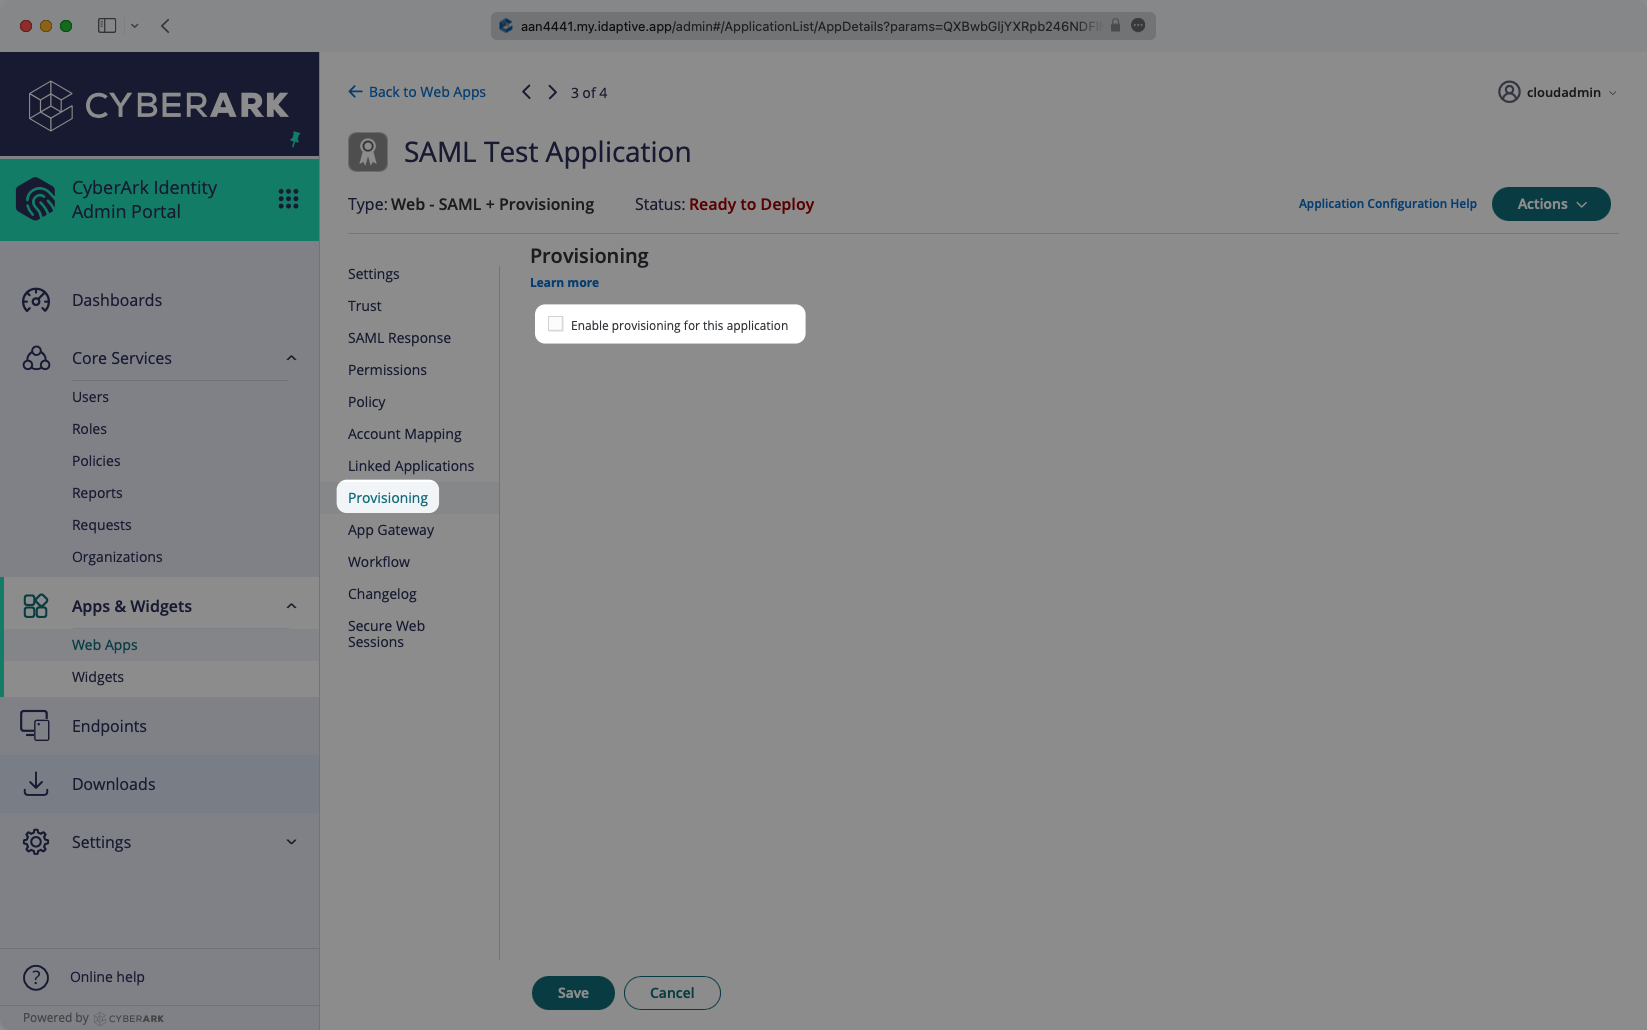
Log in to the CyberArk Admin Portal, and navigate to your SAML app. Open the “Provisioning” tab, and select the box to “Enable provisioning for this application”.
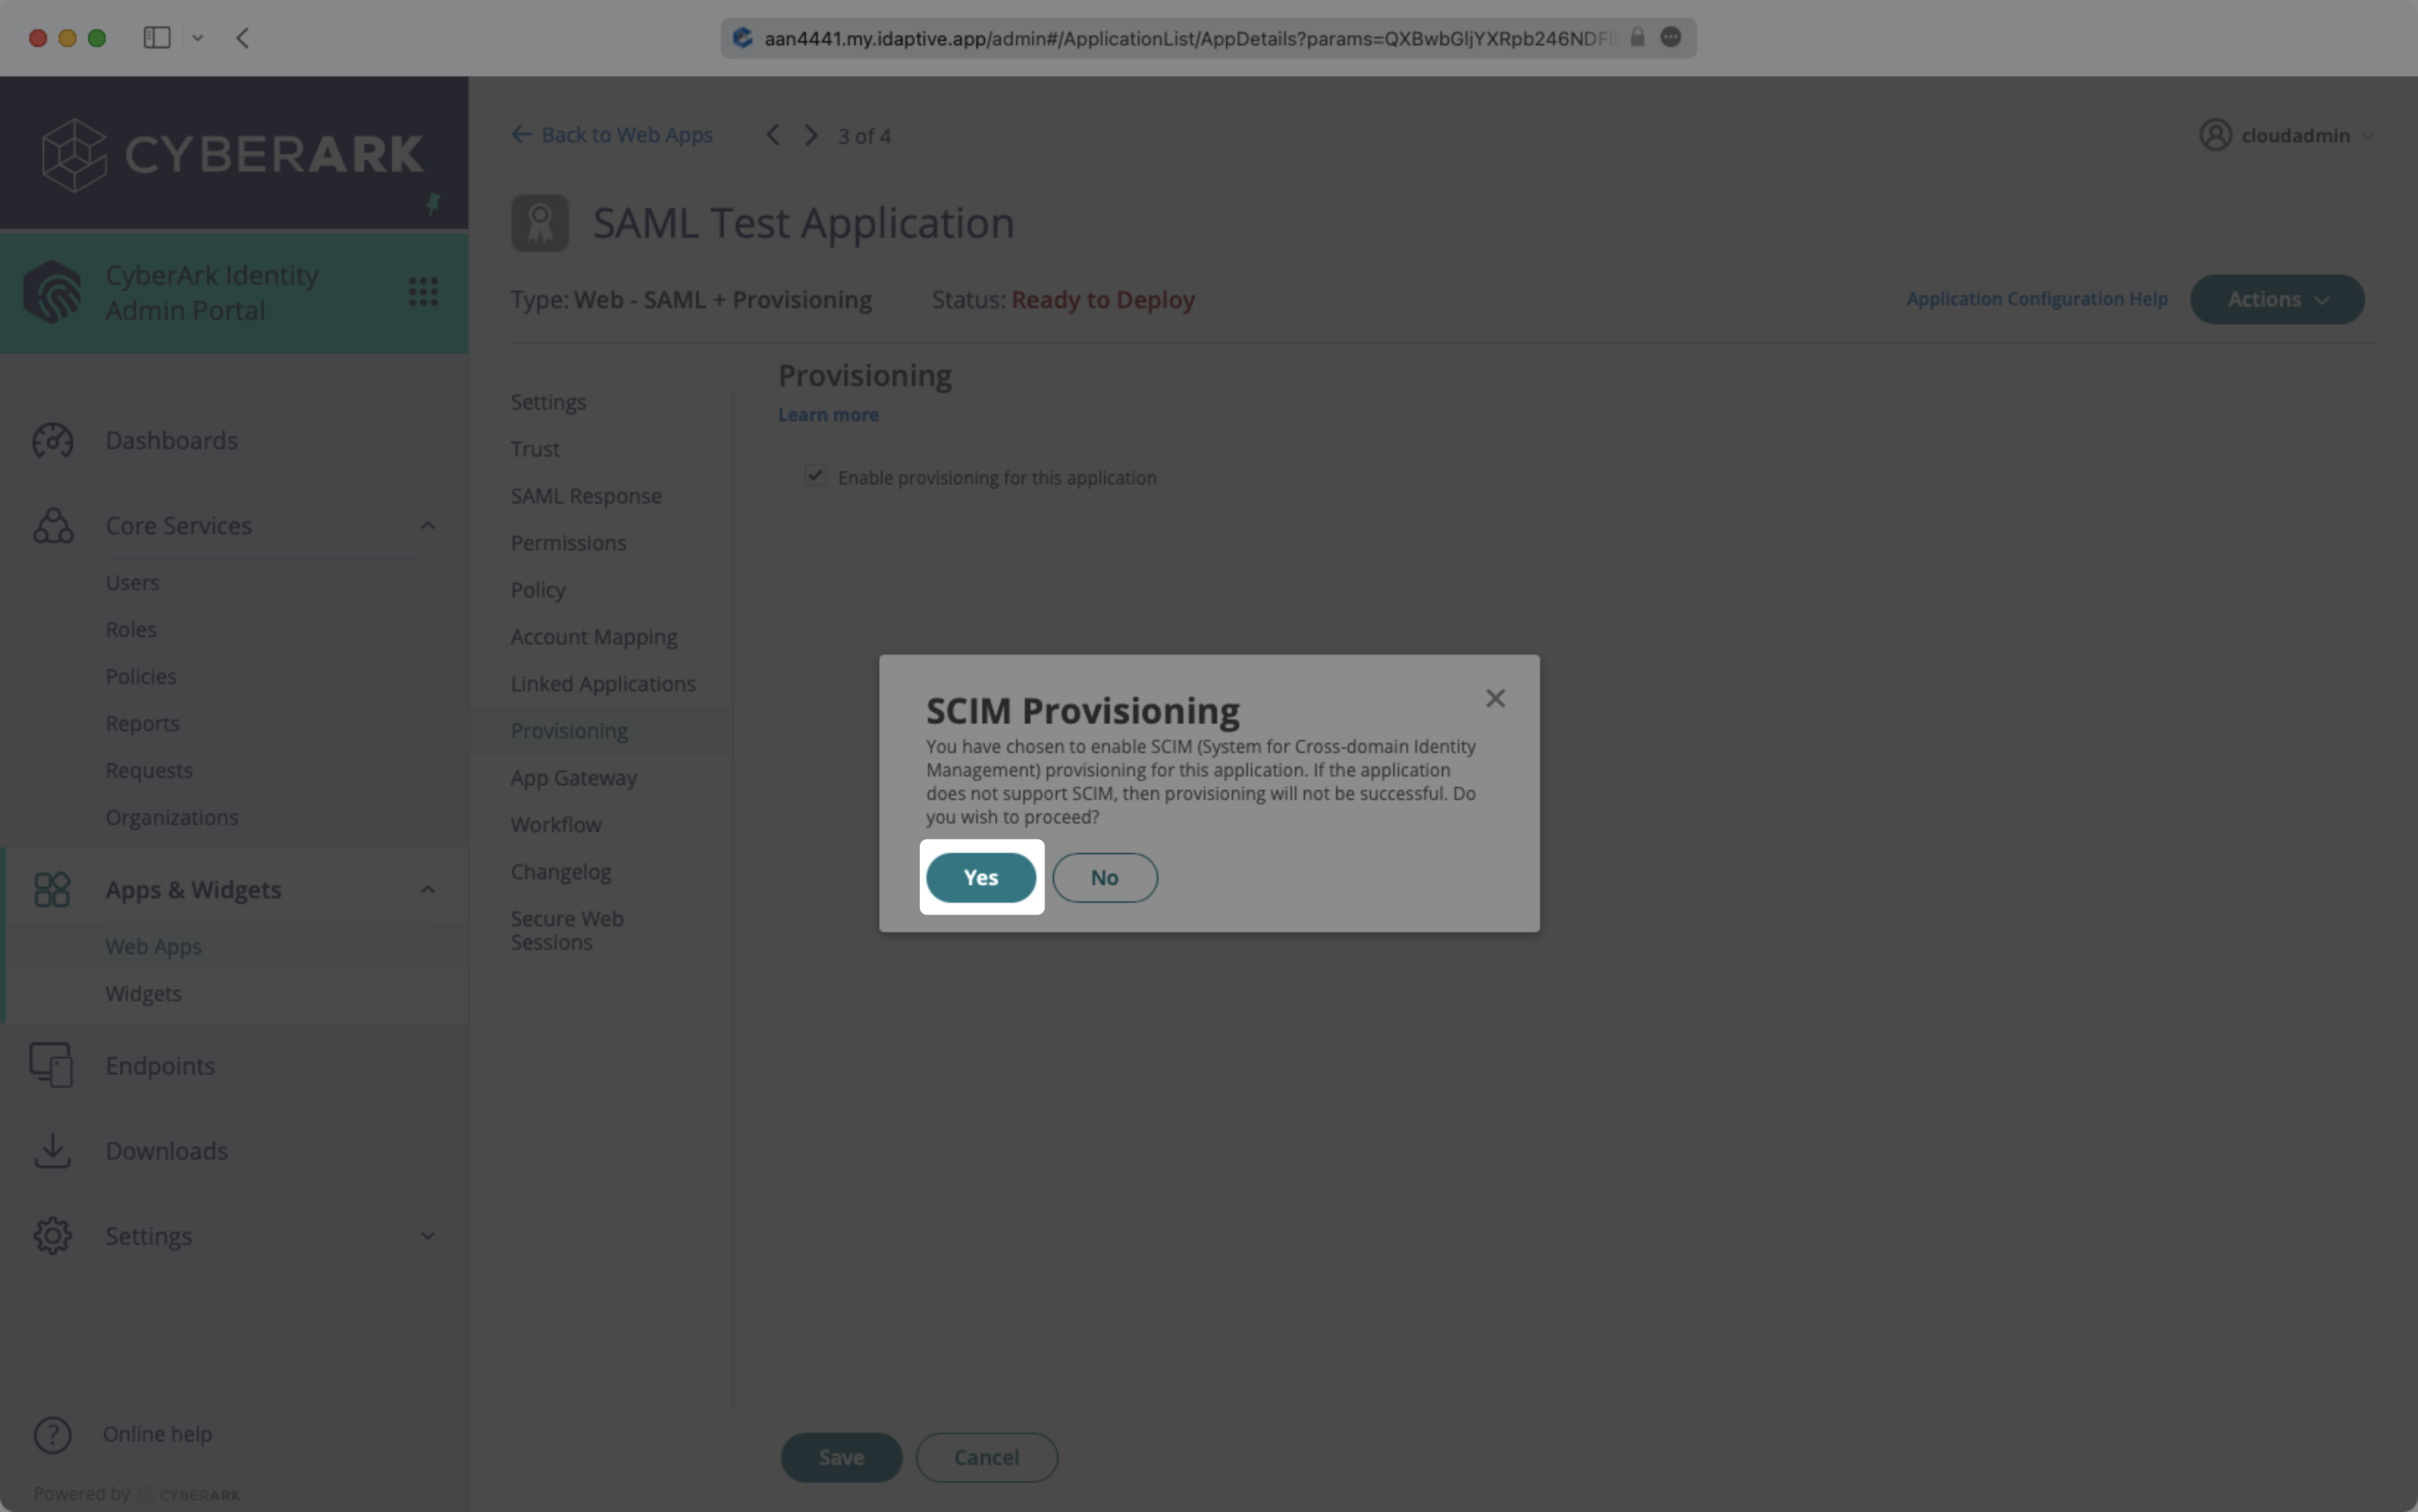
Click “Yes” in the confirmation modal.
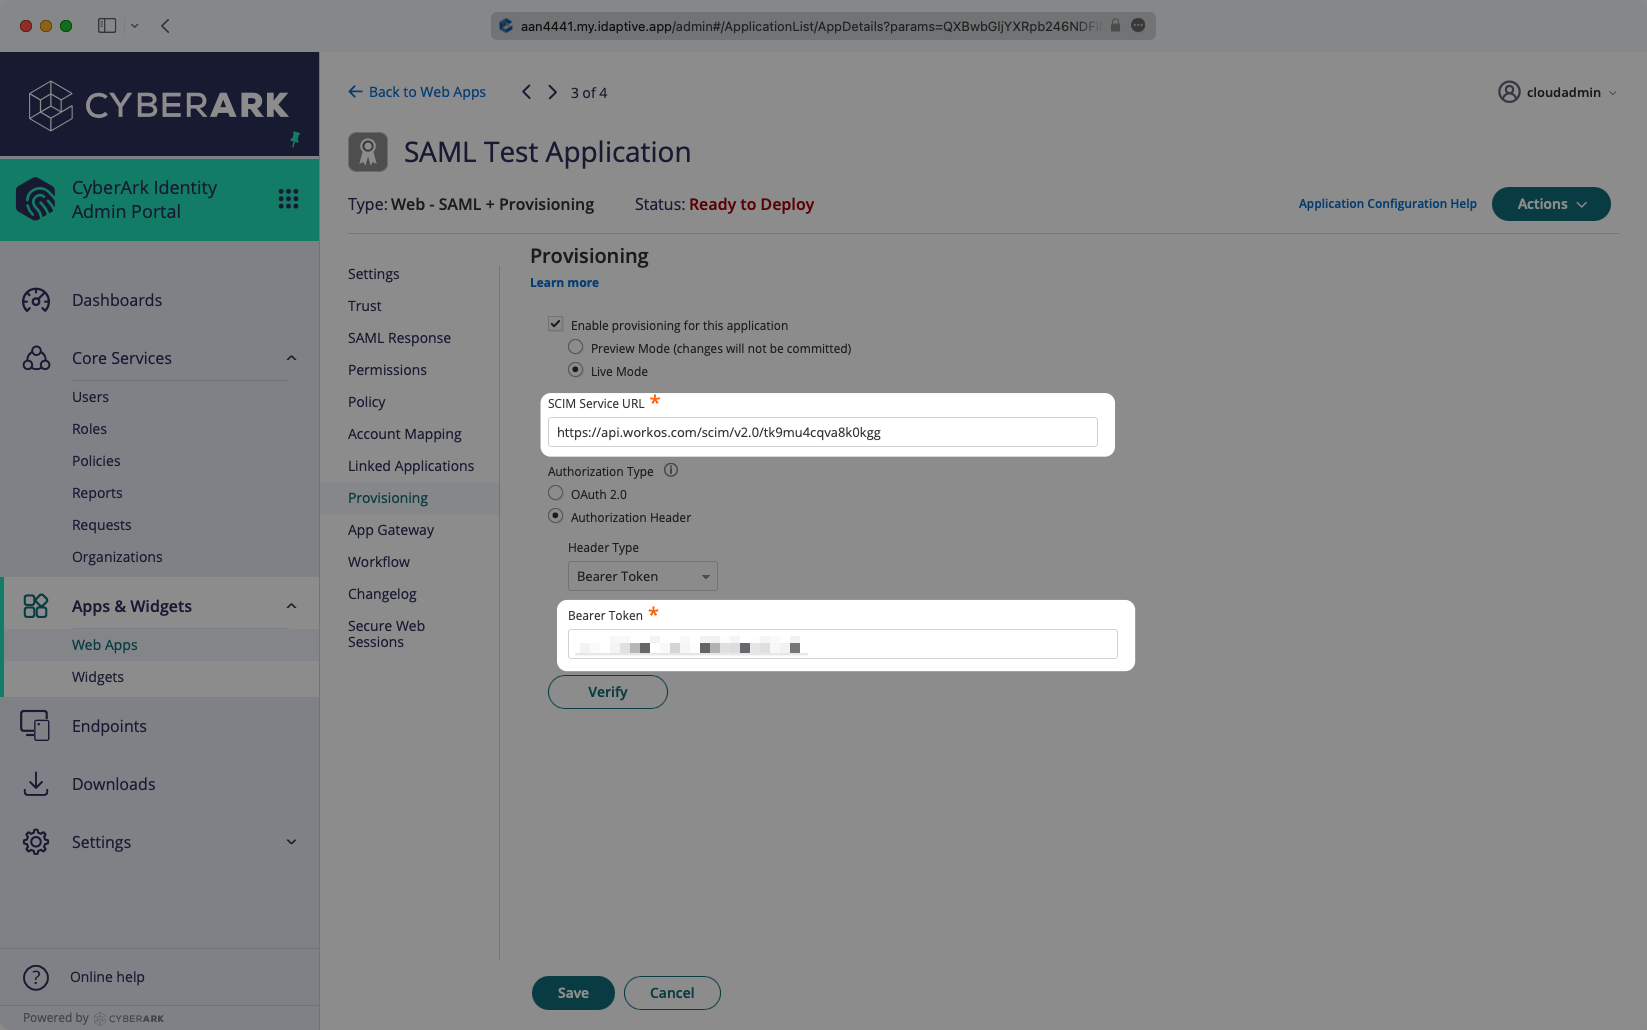
Enter the Endpoint from the WorkOS Dashboard into the “SCIM Service URL” field, and enter the Bearer Token from the WorkOS Dashboard into the corresponding field in the Provisioning tab. Select “Verify” to save these credentials.
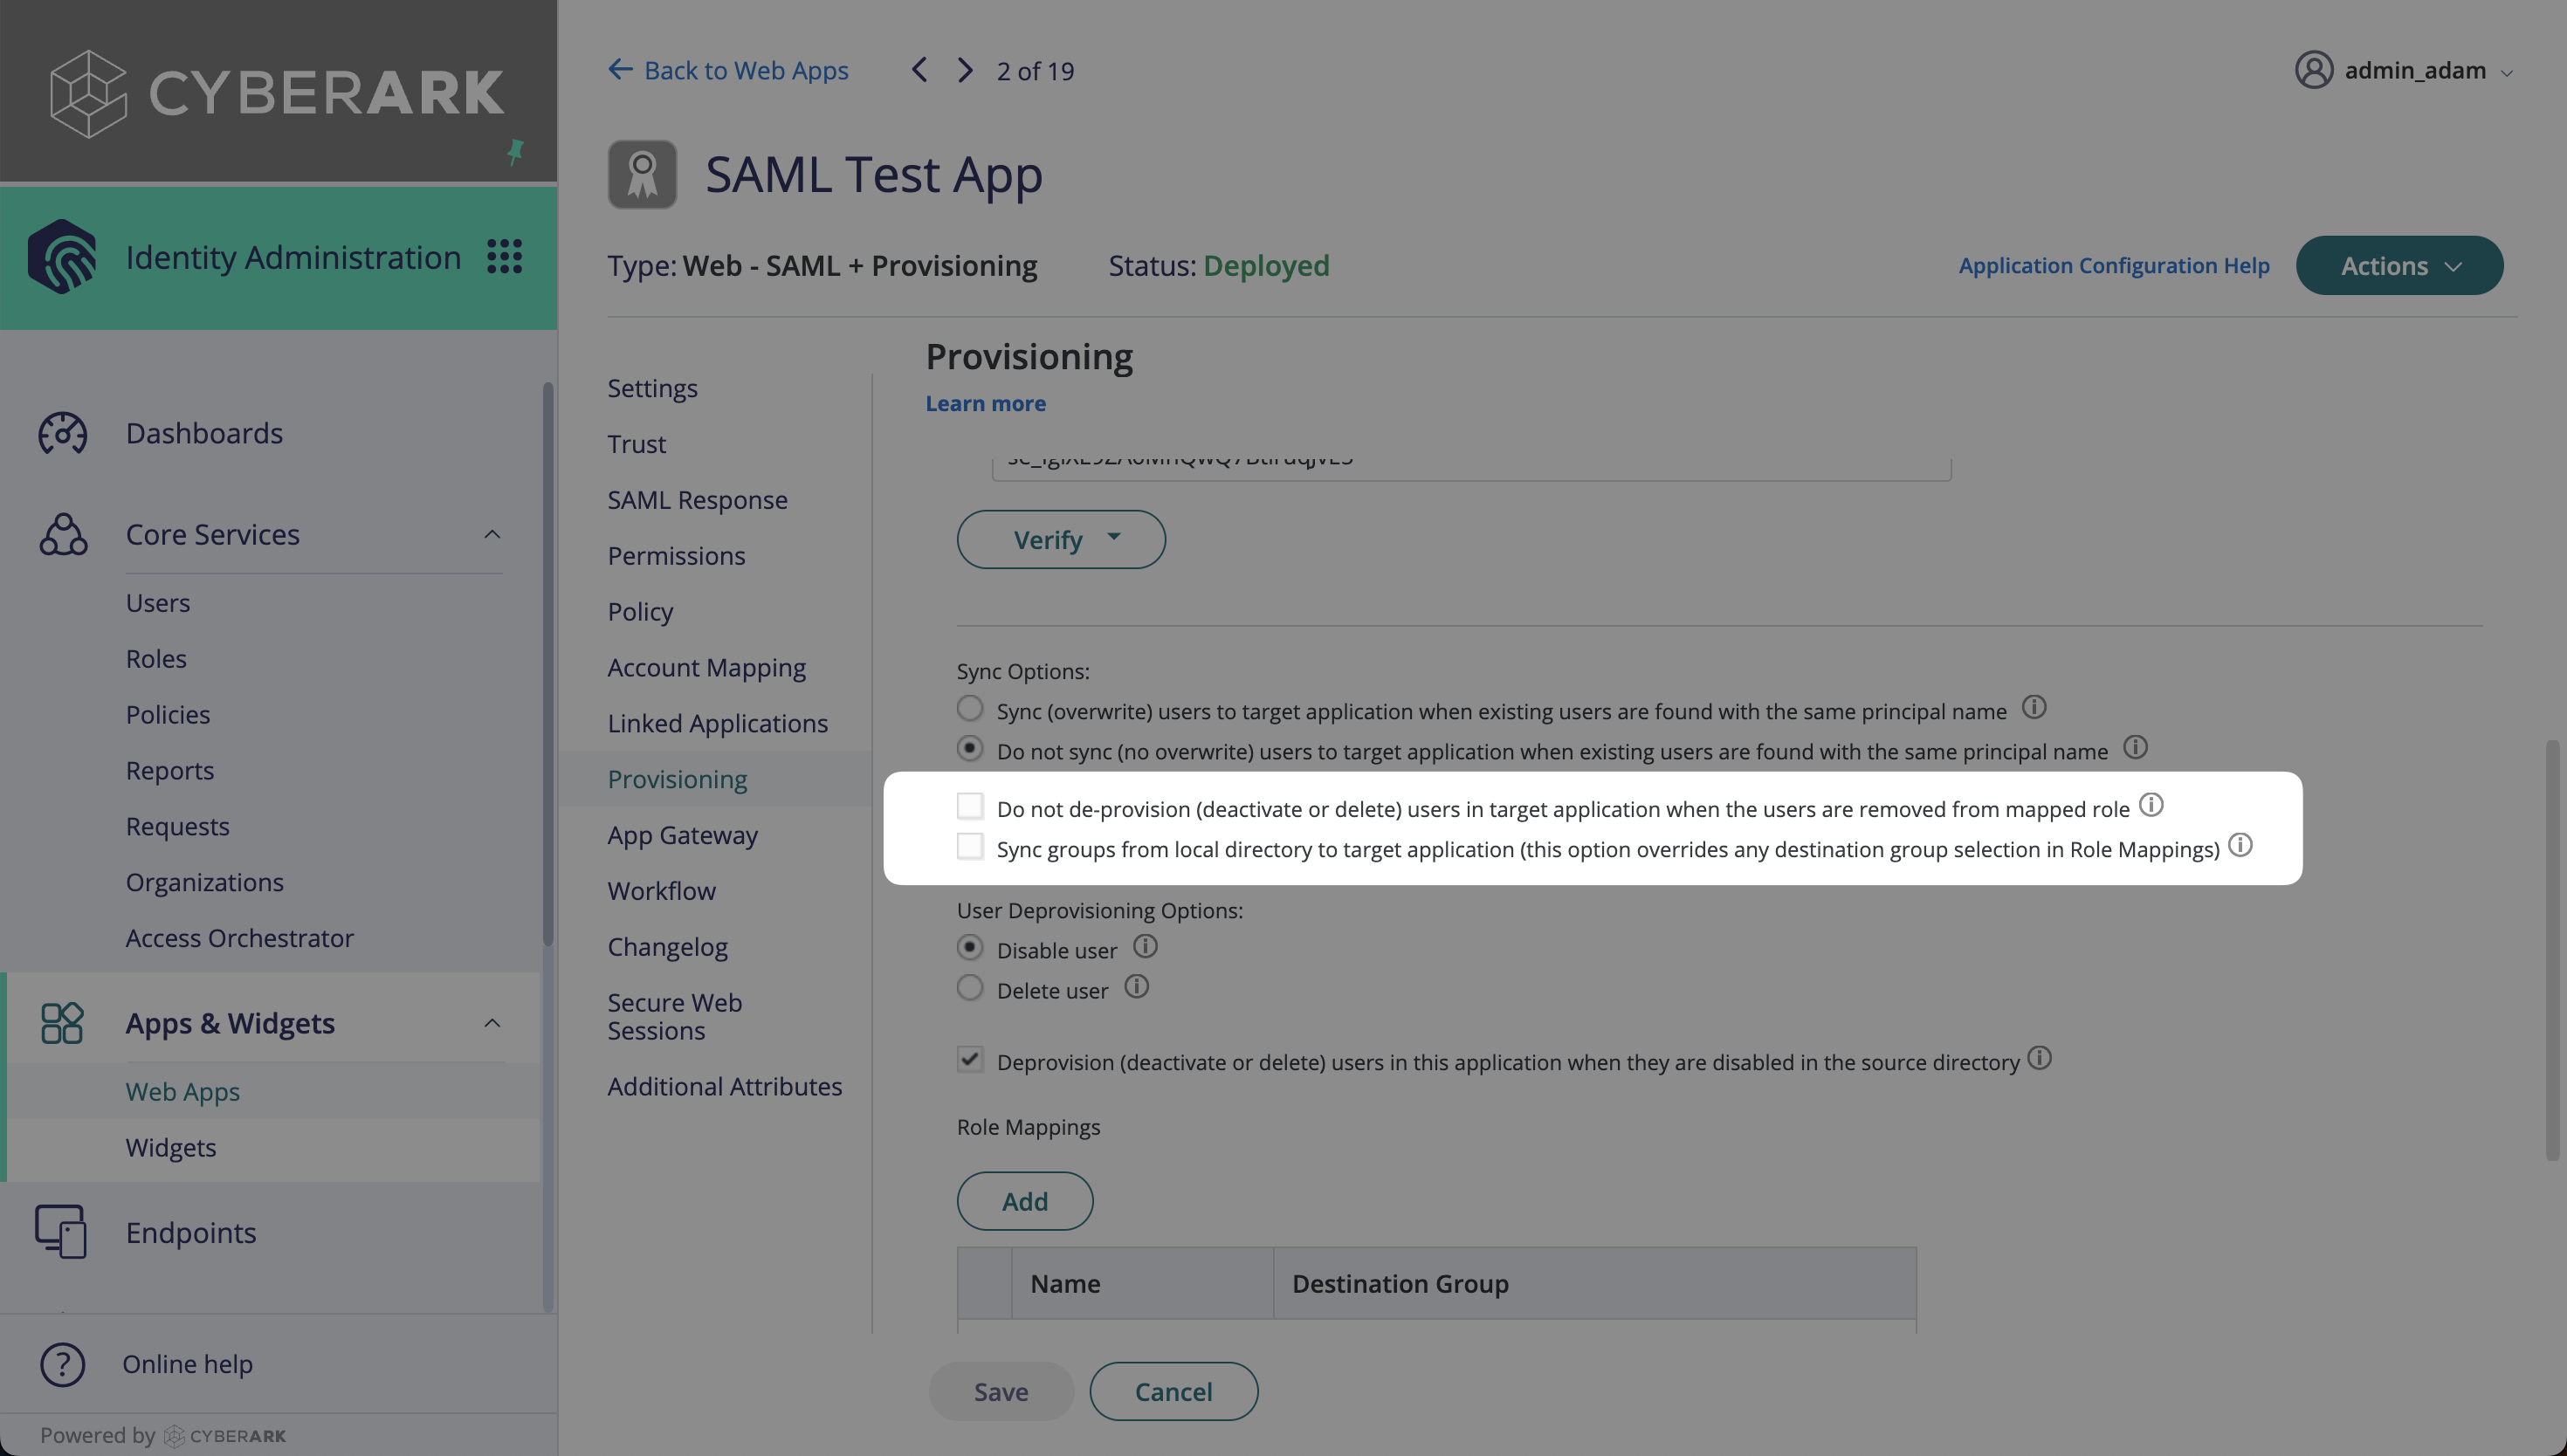
Once the credentials have been verified, more options will be appear below. Deselect “Do not de-provision (deactivate or delete) users in target application” as seen below.
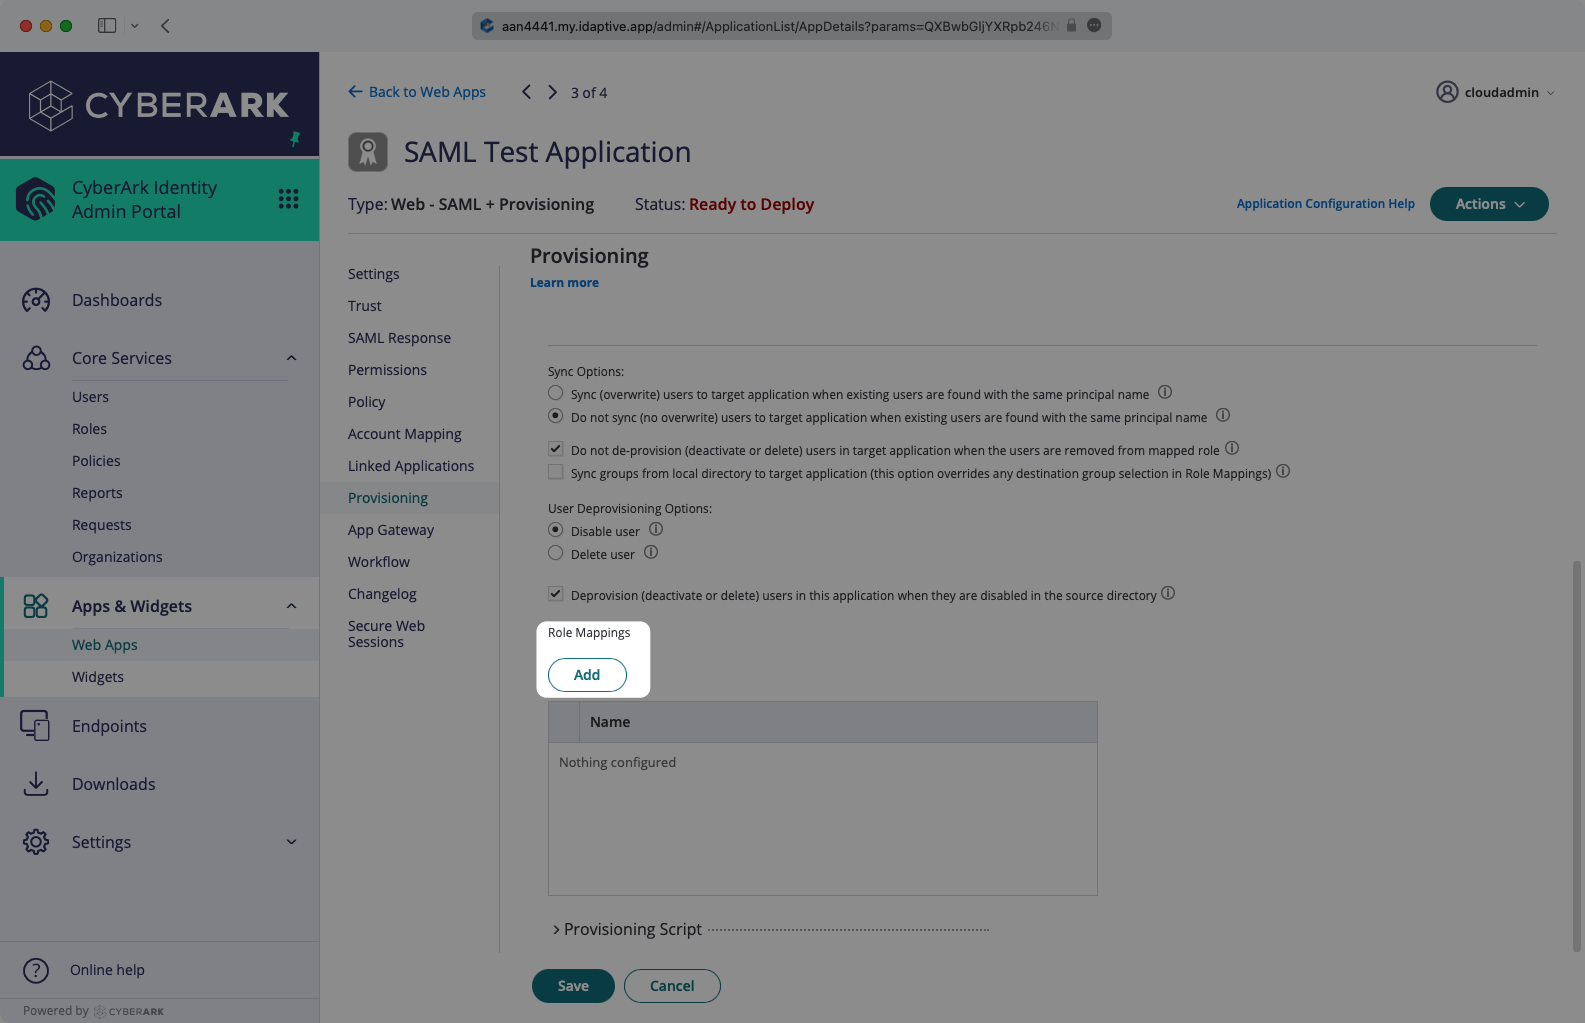
Users assigned to the SAML app will be synced, and roles mapped will be synced as groups. The roles are mapped on the Provisioning settings page, by selecting the “Add” button.
In the role mapping modal, select the role you’d like to map, and then create a destination group. The name will be what you see as the group name in directory sync. All users assigned to that role will be members of the mapped group. Select “Done”.
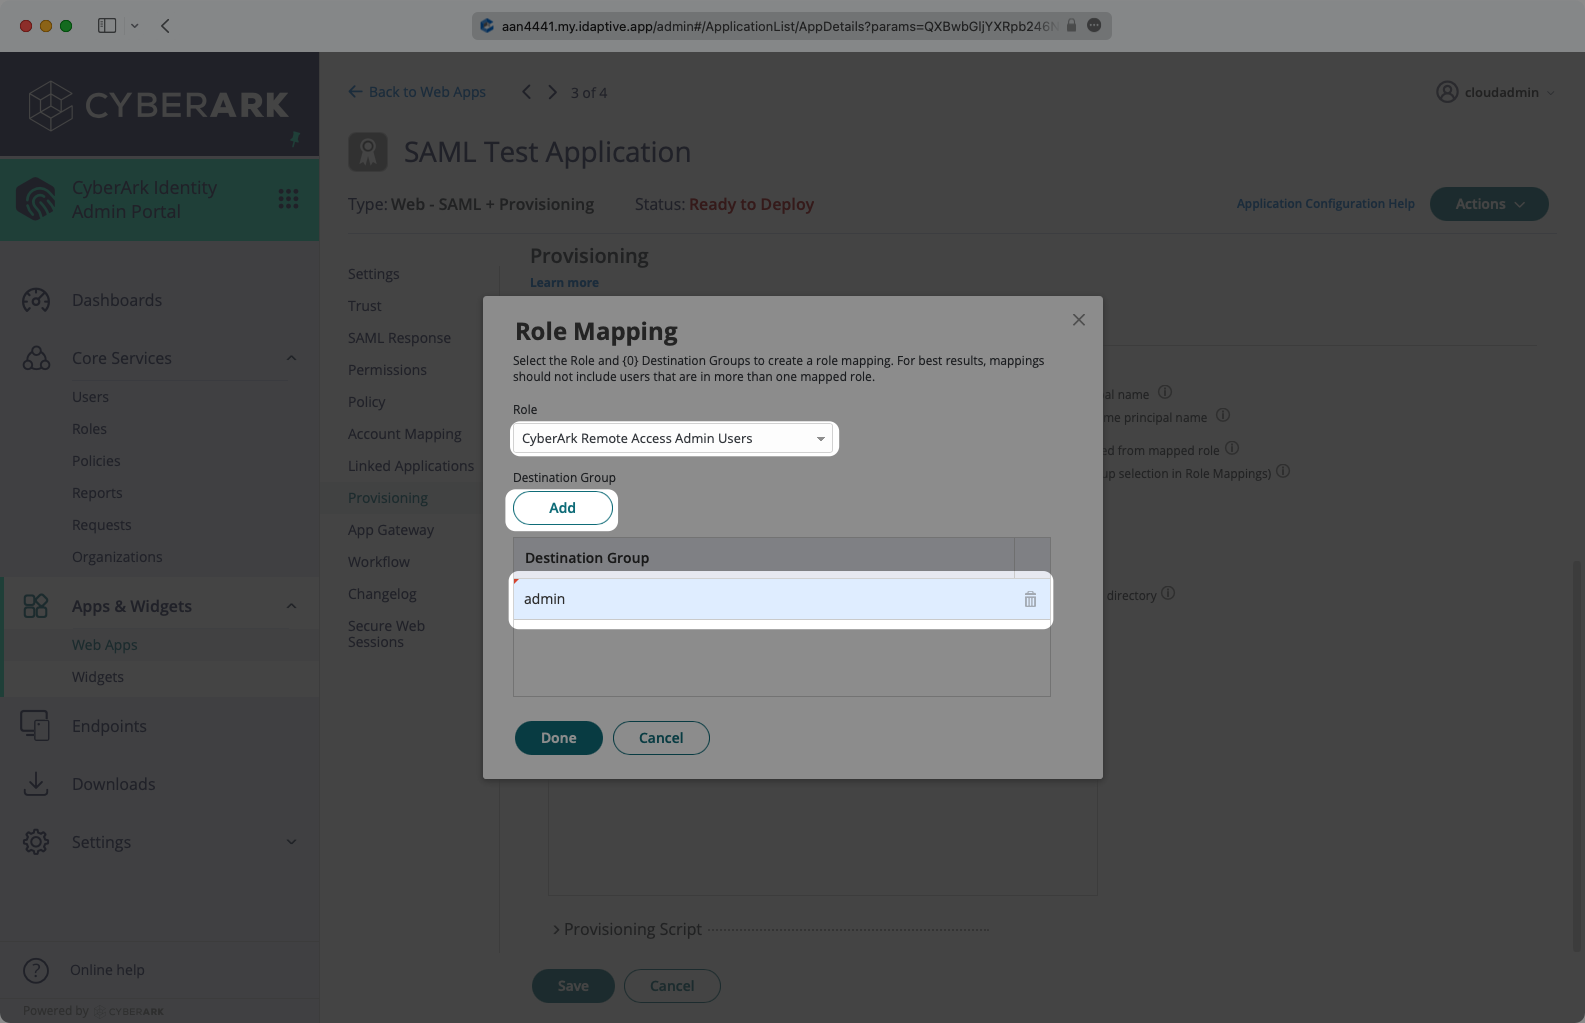
After the role mapping is completed, click “Save”. The SCIM configuration part of the setup is complete.
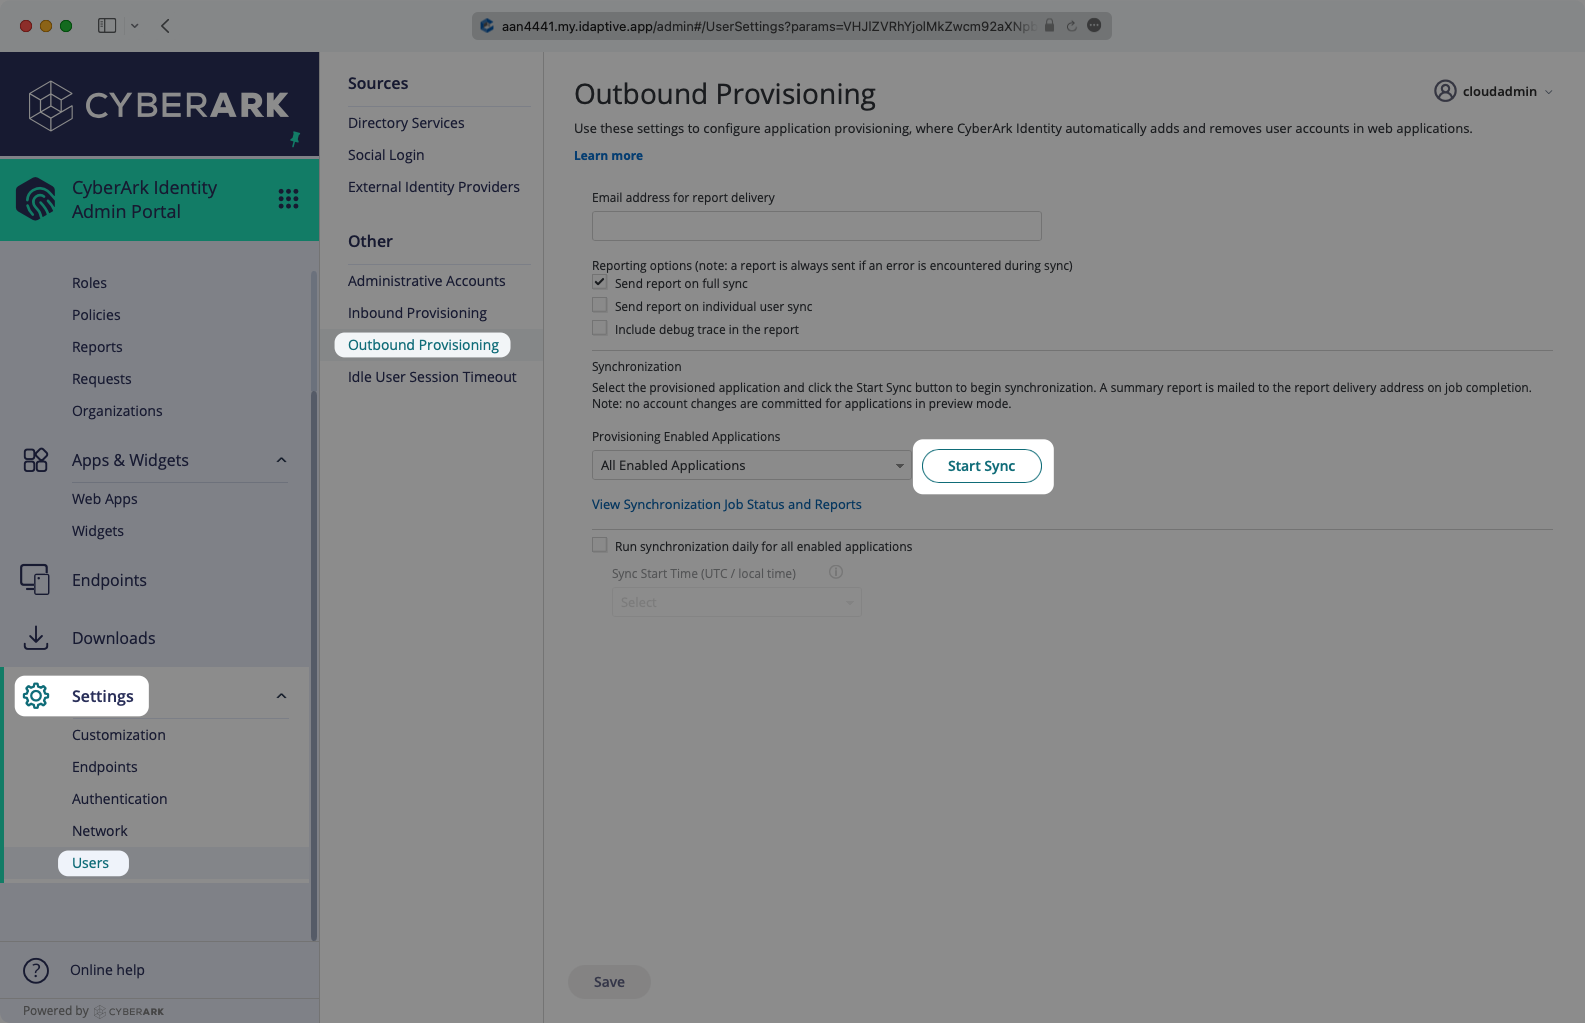
In CyberArk, navigate to the Settings → Users → Outbound Provisioning page. Under Synchronizations, start the sync. You can also set up scheduled syncs here.
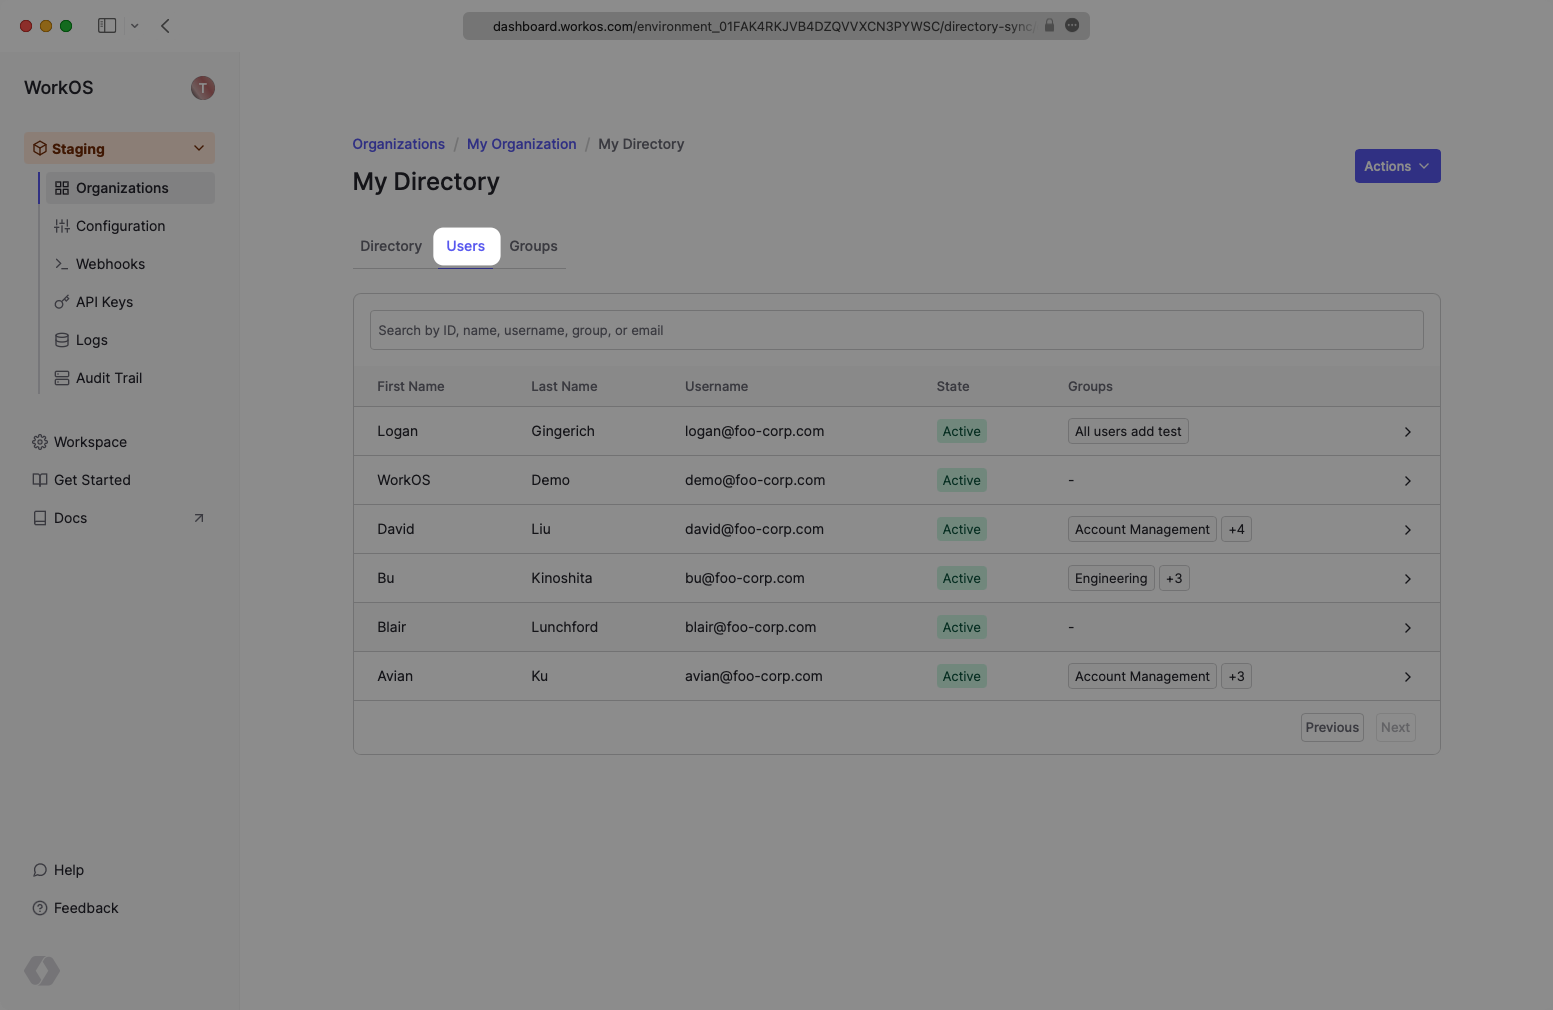
In the CyberArk SCIM directory in the WorkOS dashboard, select the “Users” tab and you will now see the users and groups synced over.
A detailed guide to integrate the WorkOS API with your application can be found here
When a group is removed, I don’t see a dsync.group.deleted or dsync.group.user_removed events – is this expected?
Instead of individually assigning users to a SCIM application, CyberArk SCIM requires that users are assigned to the application through group membership.
It is a known issue with CyberArk SCIM that when a group is removed from the app, no indication is received that the group has changed.
The users of the group must be cleaned up before the group itself is removed from the SCIM application.