Duo
Learn how to configure a connection to Duo via SAML.
Each SSO Identity Provider requires specific information to create and configure a new Connection. Often, the information required to create a Connection will differ by Identity Provider.
To create a Duo SAML Connection, you’ll need three pieces of information: an ACS URL (provide by WorkOS), an SP Entity ID (provided by WorkOS), and the Metadata URL (provided by Duo).
Duo is also unique in that it requires a 3rd party IdP to federate the authentication. This means that along with the three pieces of information, you’ll also need to configure a Single Sign-On Authentication Source and a Cloud Application in your Duo Workspace.
The high level overview of the authentication flow:
Your App → WorkOS → Duo → Your SSO IdP → Duo → WorkOS → Your App

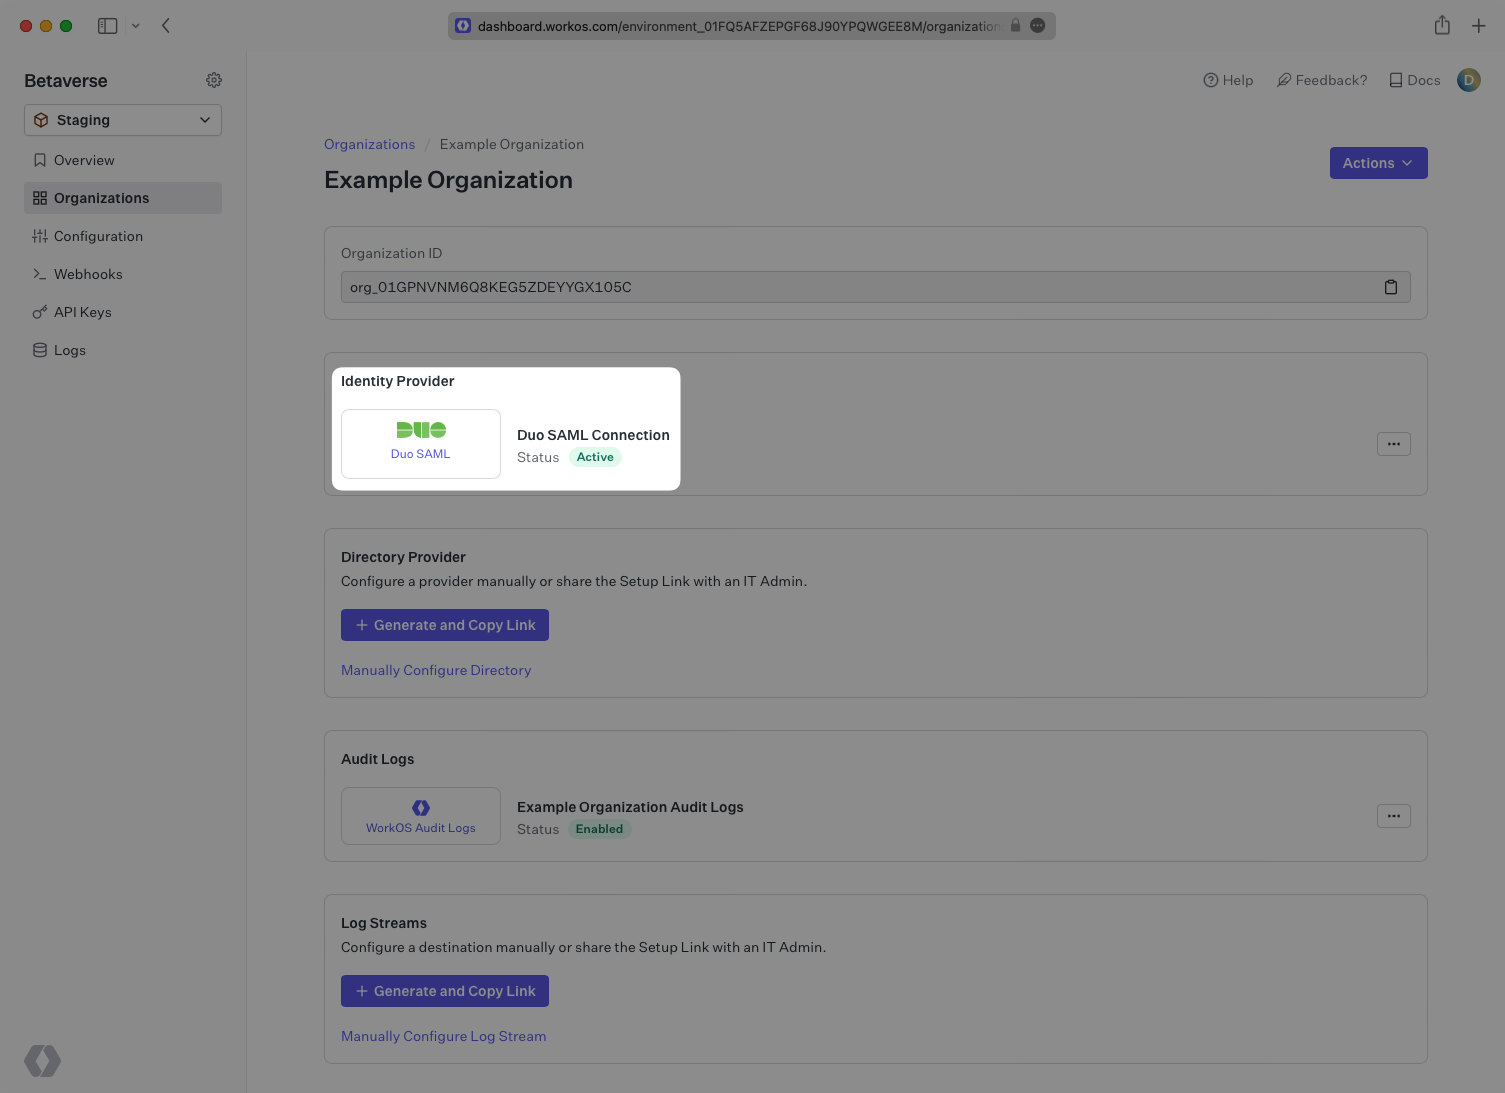
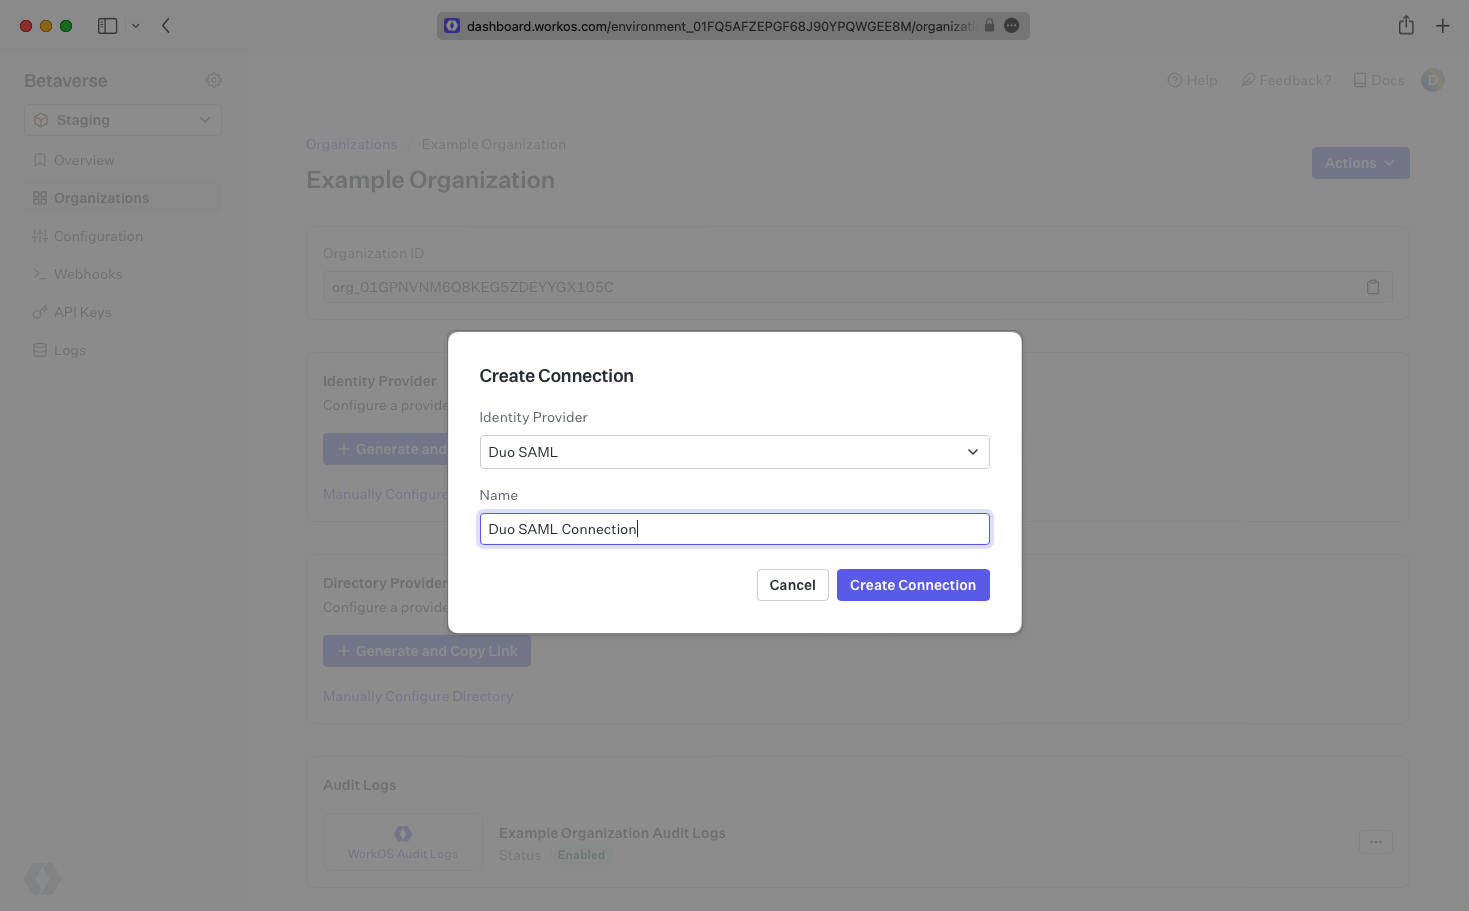
Navigate to the Organization in your WorkOS Dashboard under which you would like to set up this new SSO Connection. Click “Manually Configure Connection” and select Duo SAML from the list of SSO Identity Providers. You’ll want to select “Duo SAML” as the Identity Provider and give the Connection a descriptive name. Once this is filled out, click “Create Connection”.
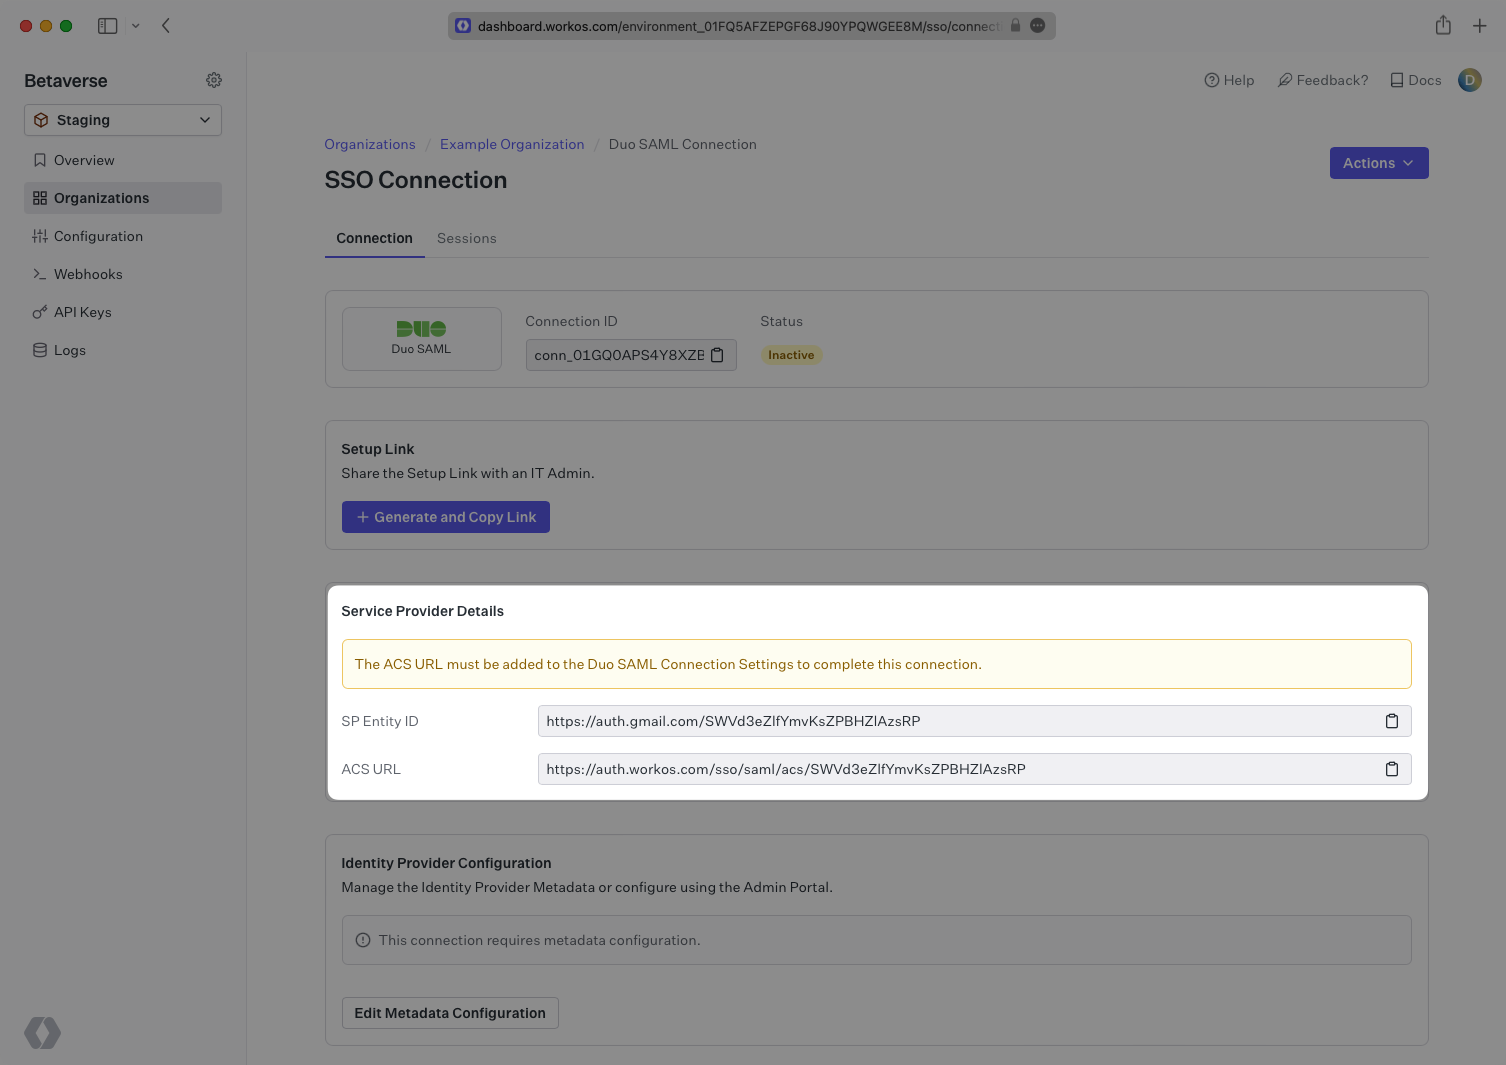
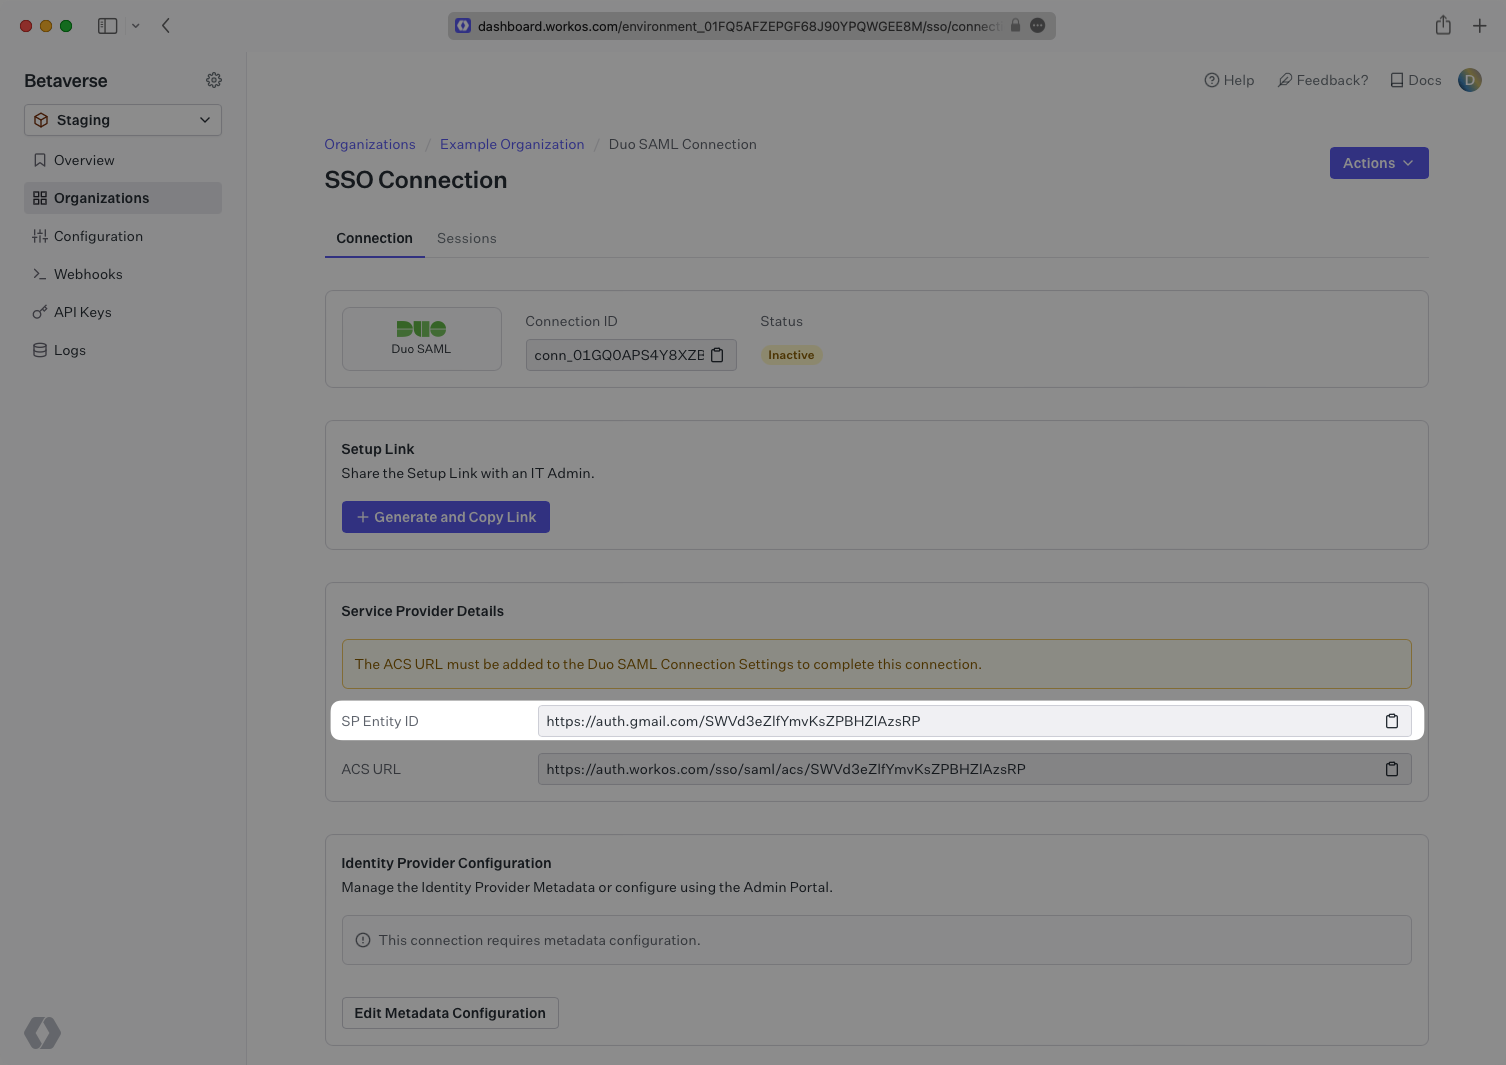
Take note of the Connection Details as you’ll need to enter those in Duo later on. This page is also where you’ll enter the Metadata URL in a later step.
WorkOS will allow you to use any Duo supported IdP to handle the Federated authentication. Since each IdP will have different ways of setting up the SSO connection between Duo and the IdP, please refer to the documentation that Duo provides to configure a Duo SSO Connection.
After configuring the Duo SSO Connection with the IdP of your choice, the next step is to create a Cloud Application in Duo. This app will handle the connection between WorkOS and Duo.
Navigate to the Duo Admin Panel and click on Applications on the left sidebar.
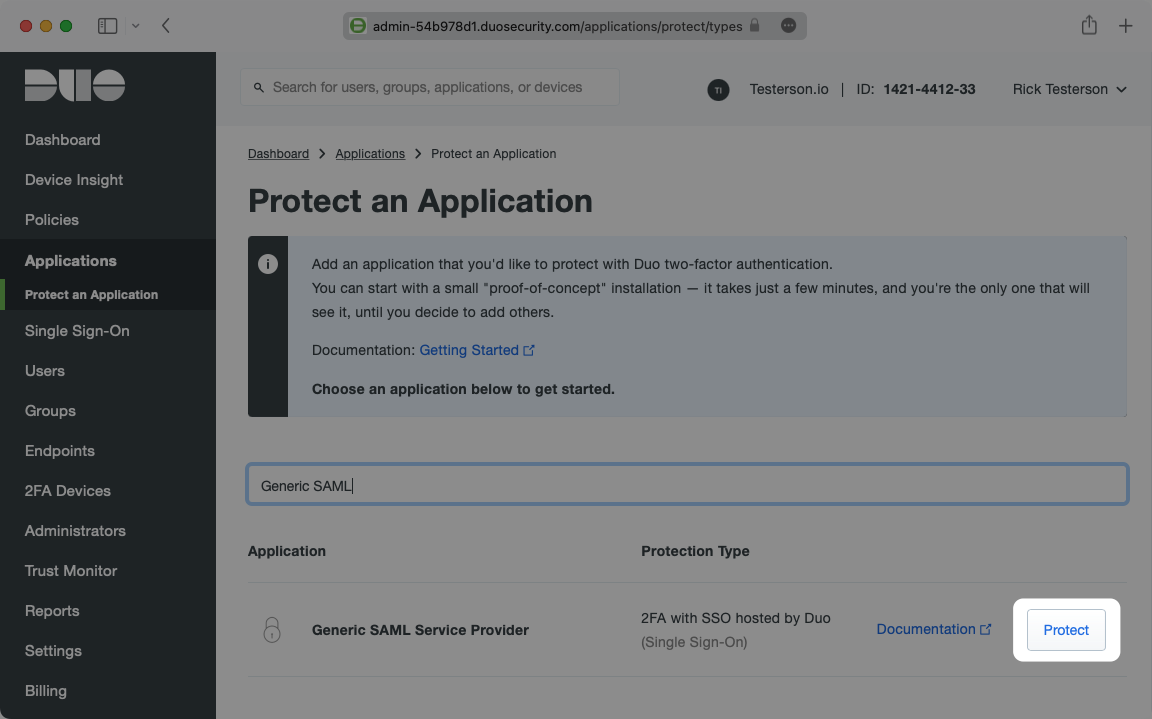
Click “Protect an Application” and locate the entry for “Generic SAML Service Provider” with a protection type of “2FA with SSO hosted by Duo (Single Sign-On)” in the applications list. Click Protect to the far-right to start configuring “Generic SAML Service Provider”.
Next, configure the Generic Service Provider settings. There are pieces of information on this page that need to come from WorkOS and your Duo SSO Connection, and also information to copy and enter in the WorkOS Connection.
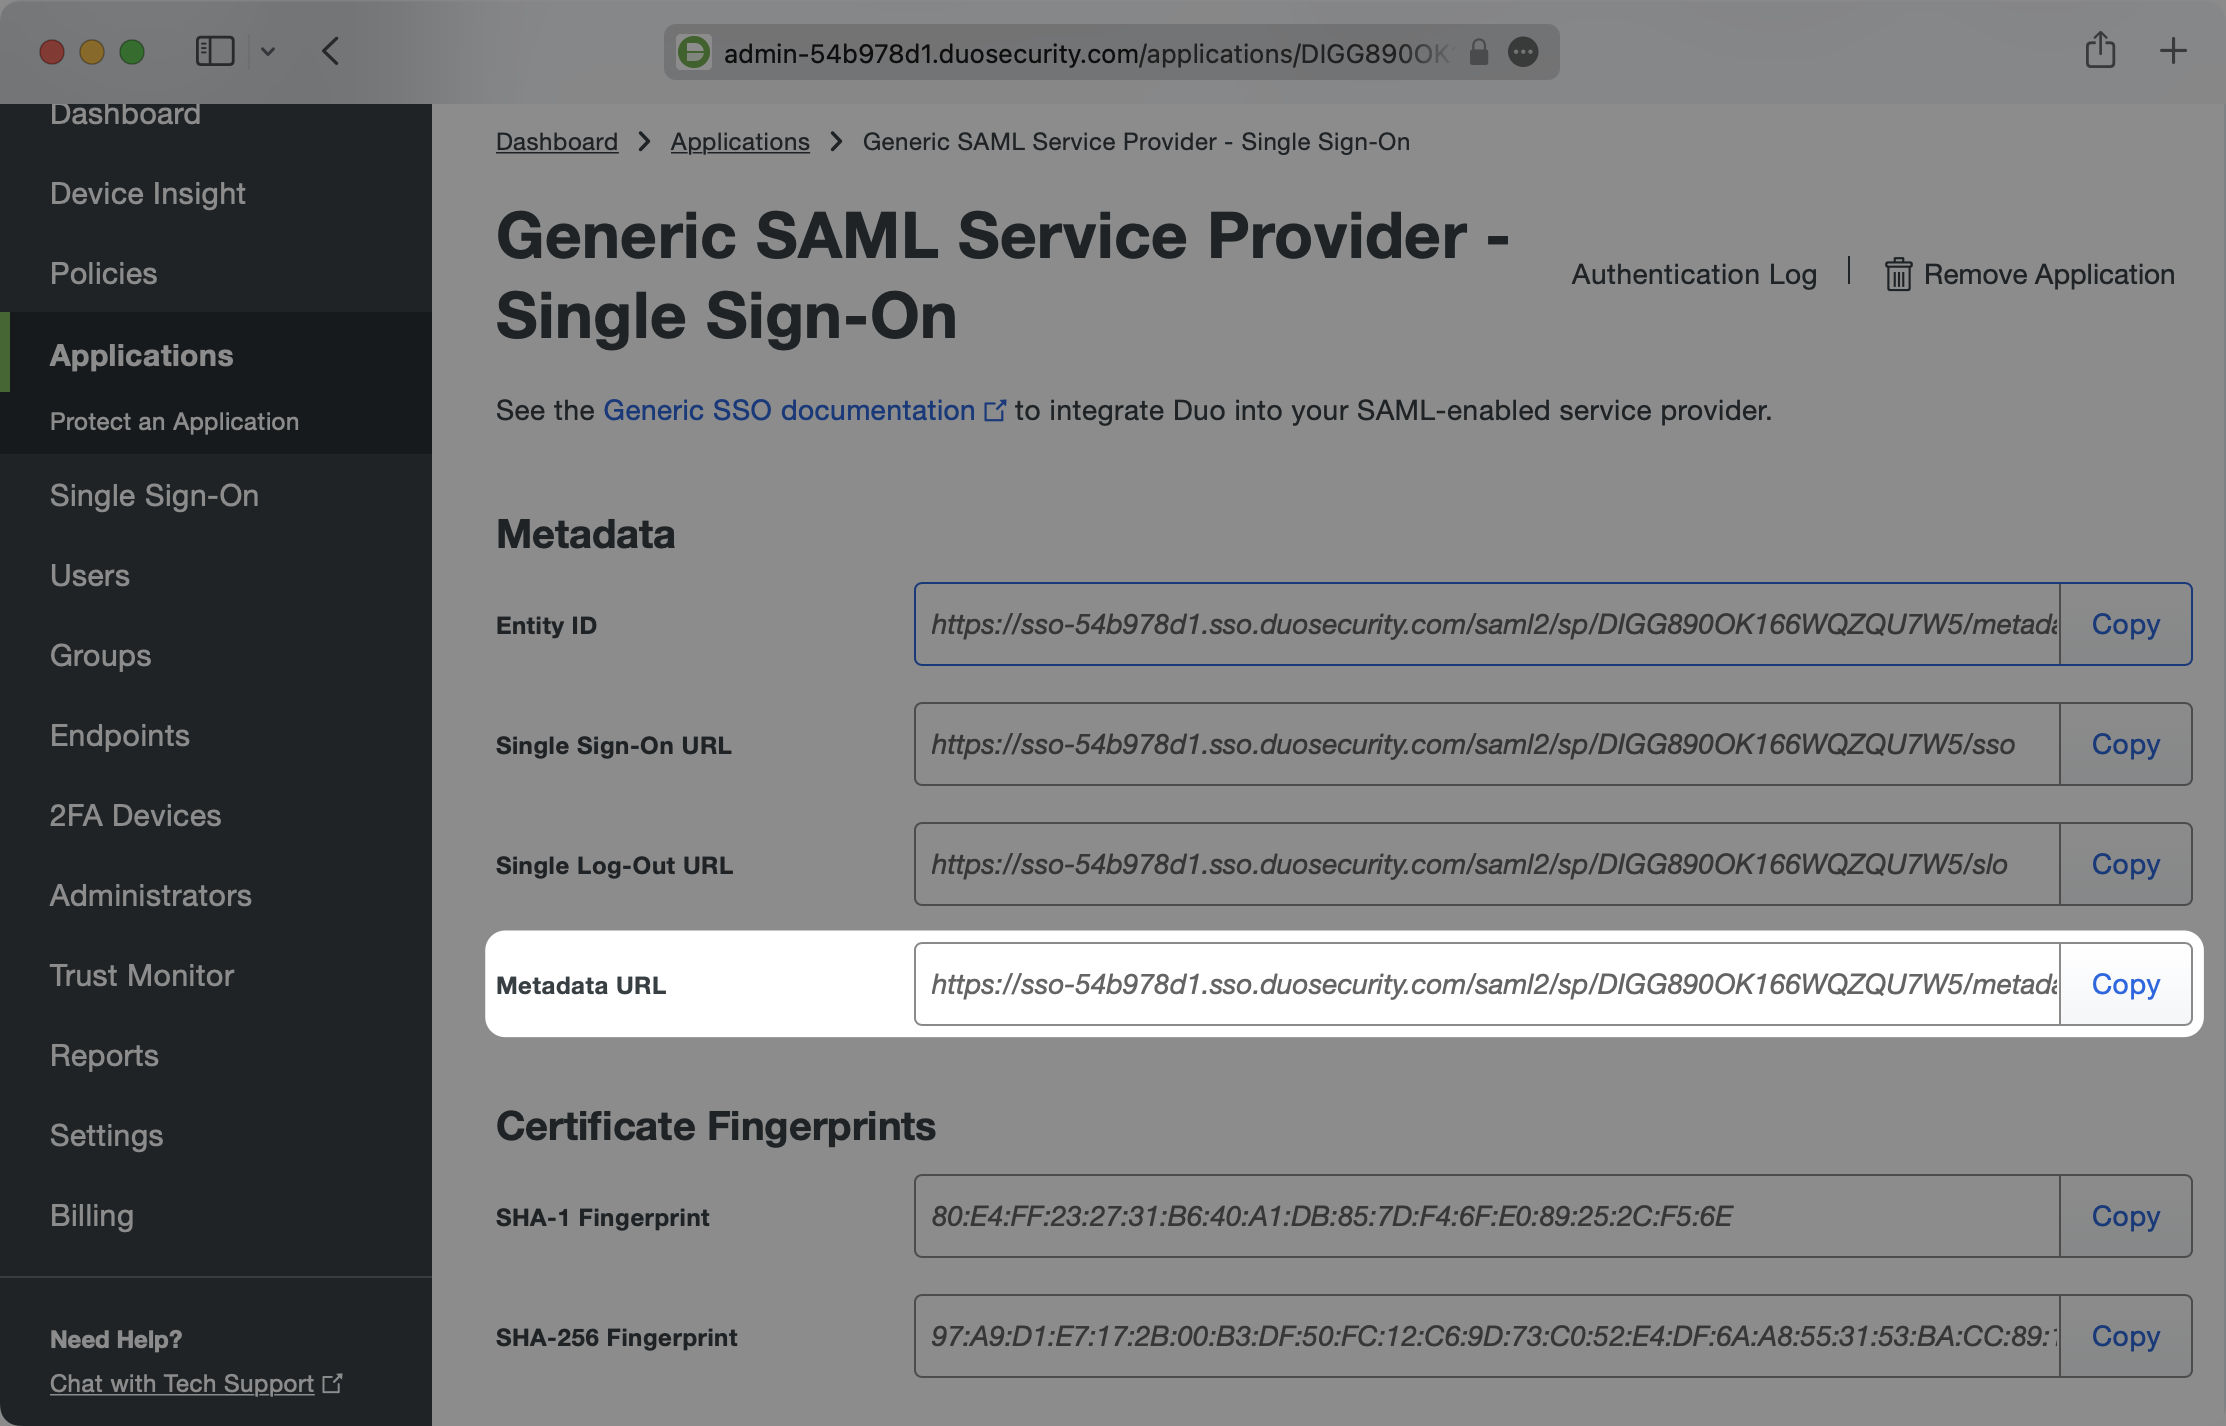
Start by gathering the Metadata URL to enter in the WorkOS Duo SAML Connection that you created in the prior step.
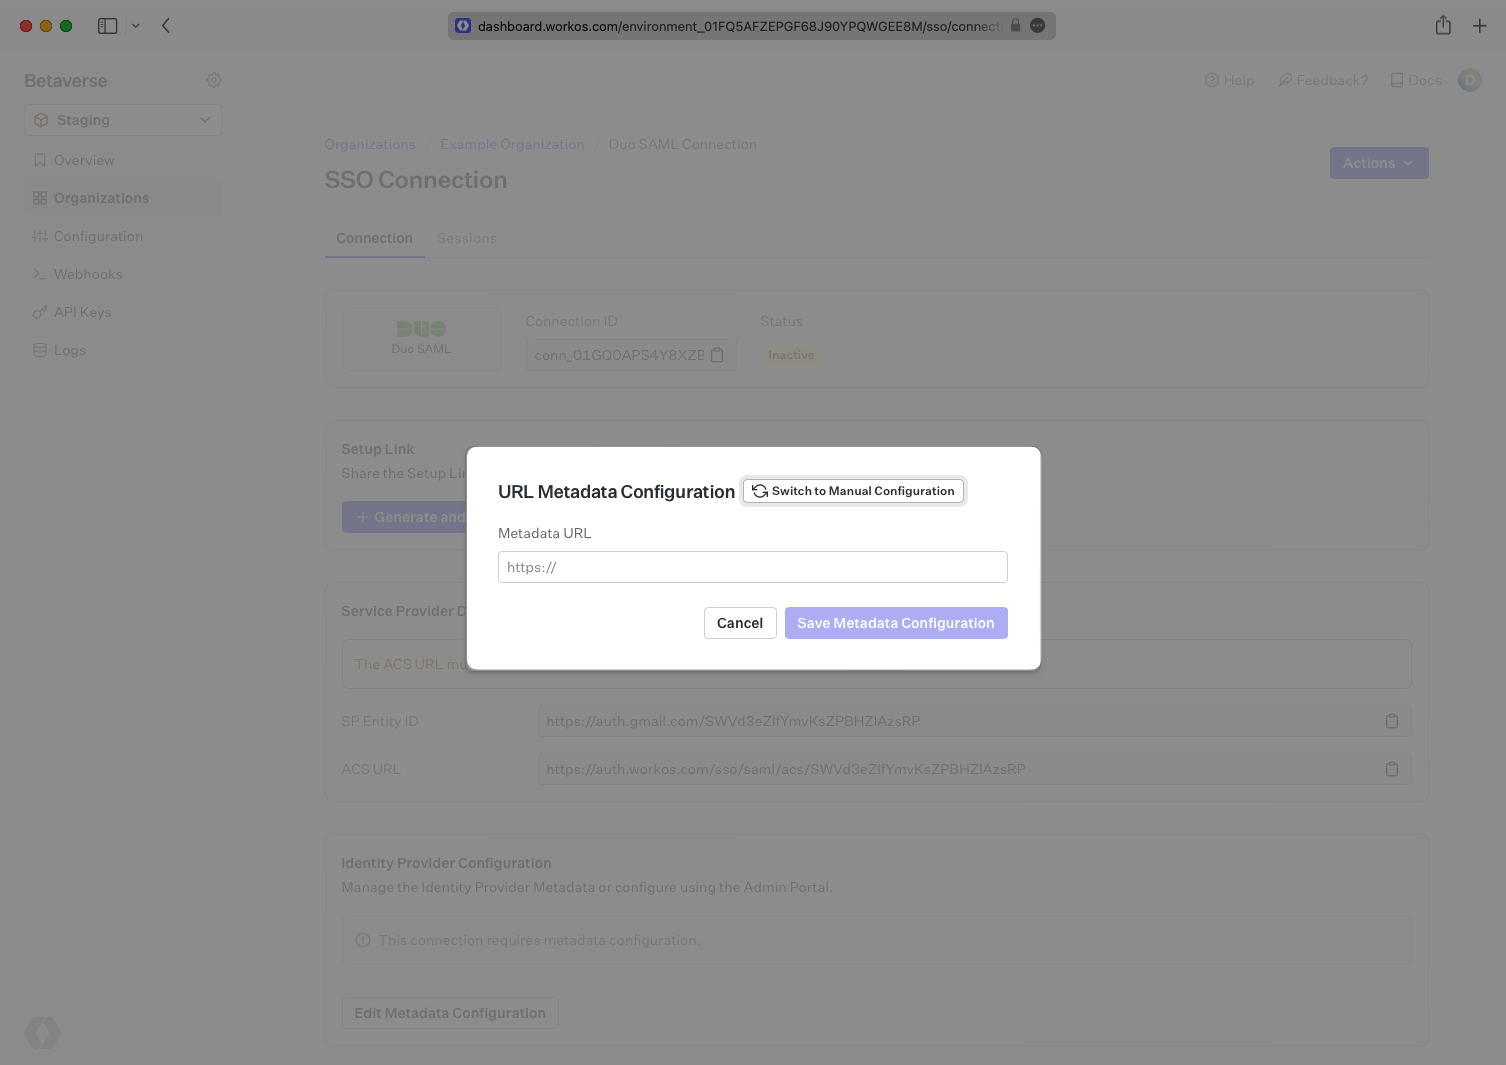
Navigate to your WorkOS Duo SAML Connection and paste the Metadata URL in to the Metadata field.
You won’t see the connection flip to Active yet as there is still some configuration to do on the Duo side.
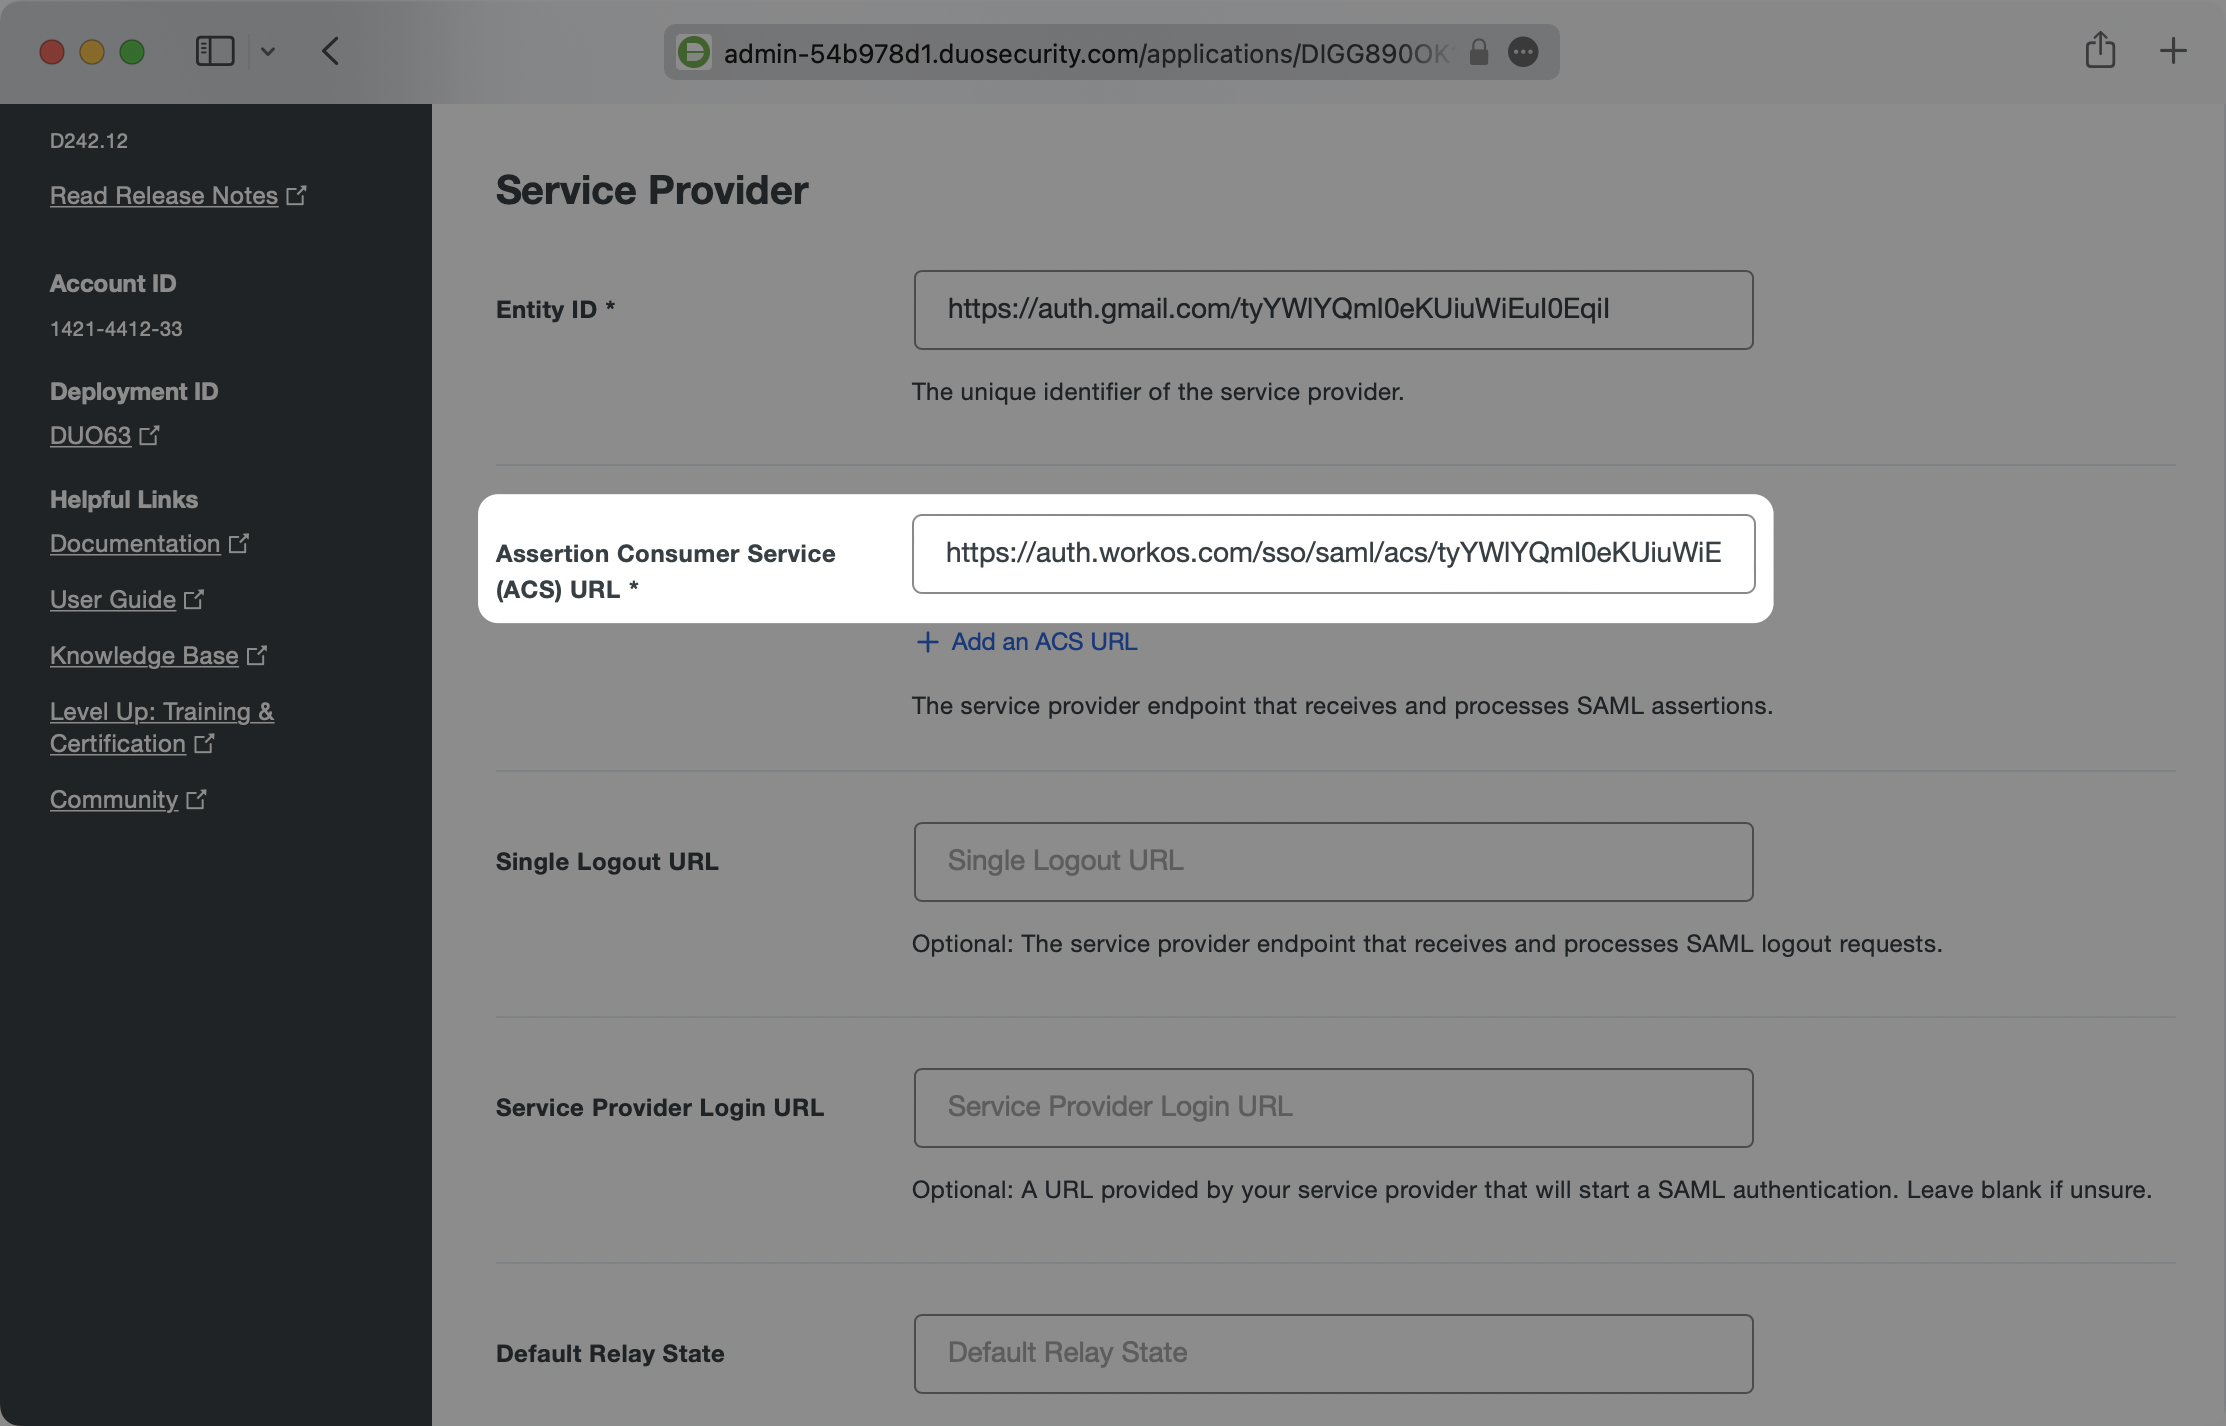
From the WorkOS Connection page you are currently on, copy the ACS URL value from the field just above the SAML Settings.
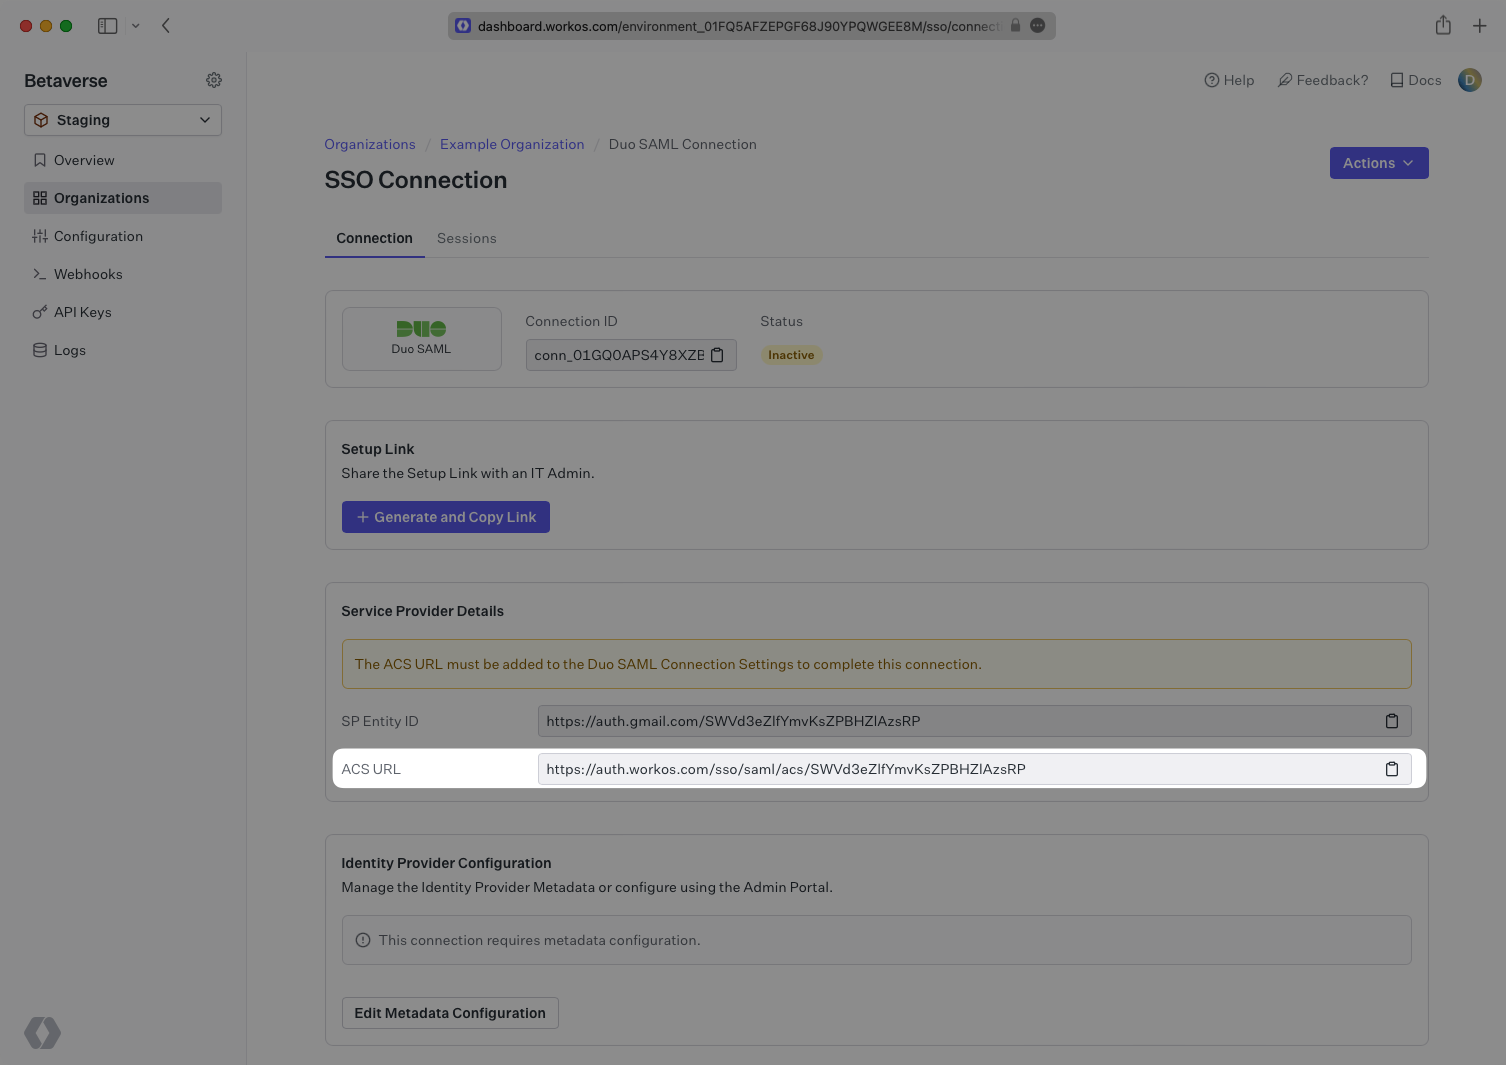
Navigate to the Duo Applications Generic Service Provider configuration settings and paste the ACS URL in the Assertion Consumer Service (ACS) URL field under the Service Provider section.
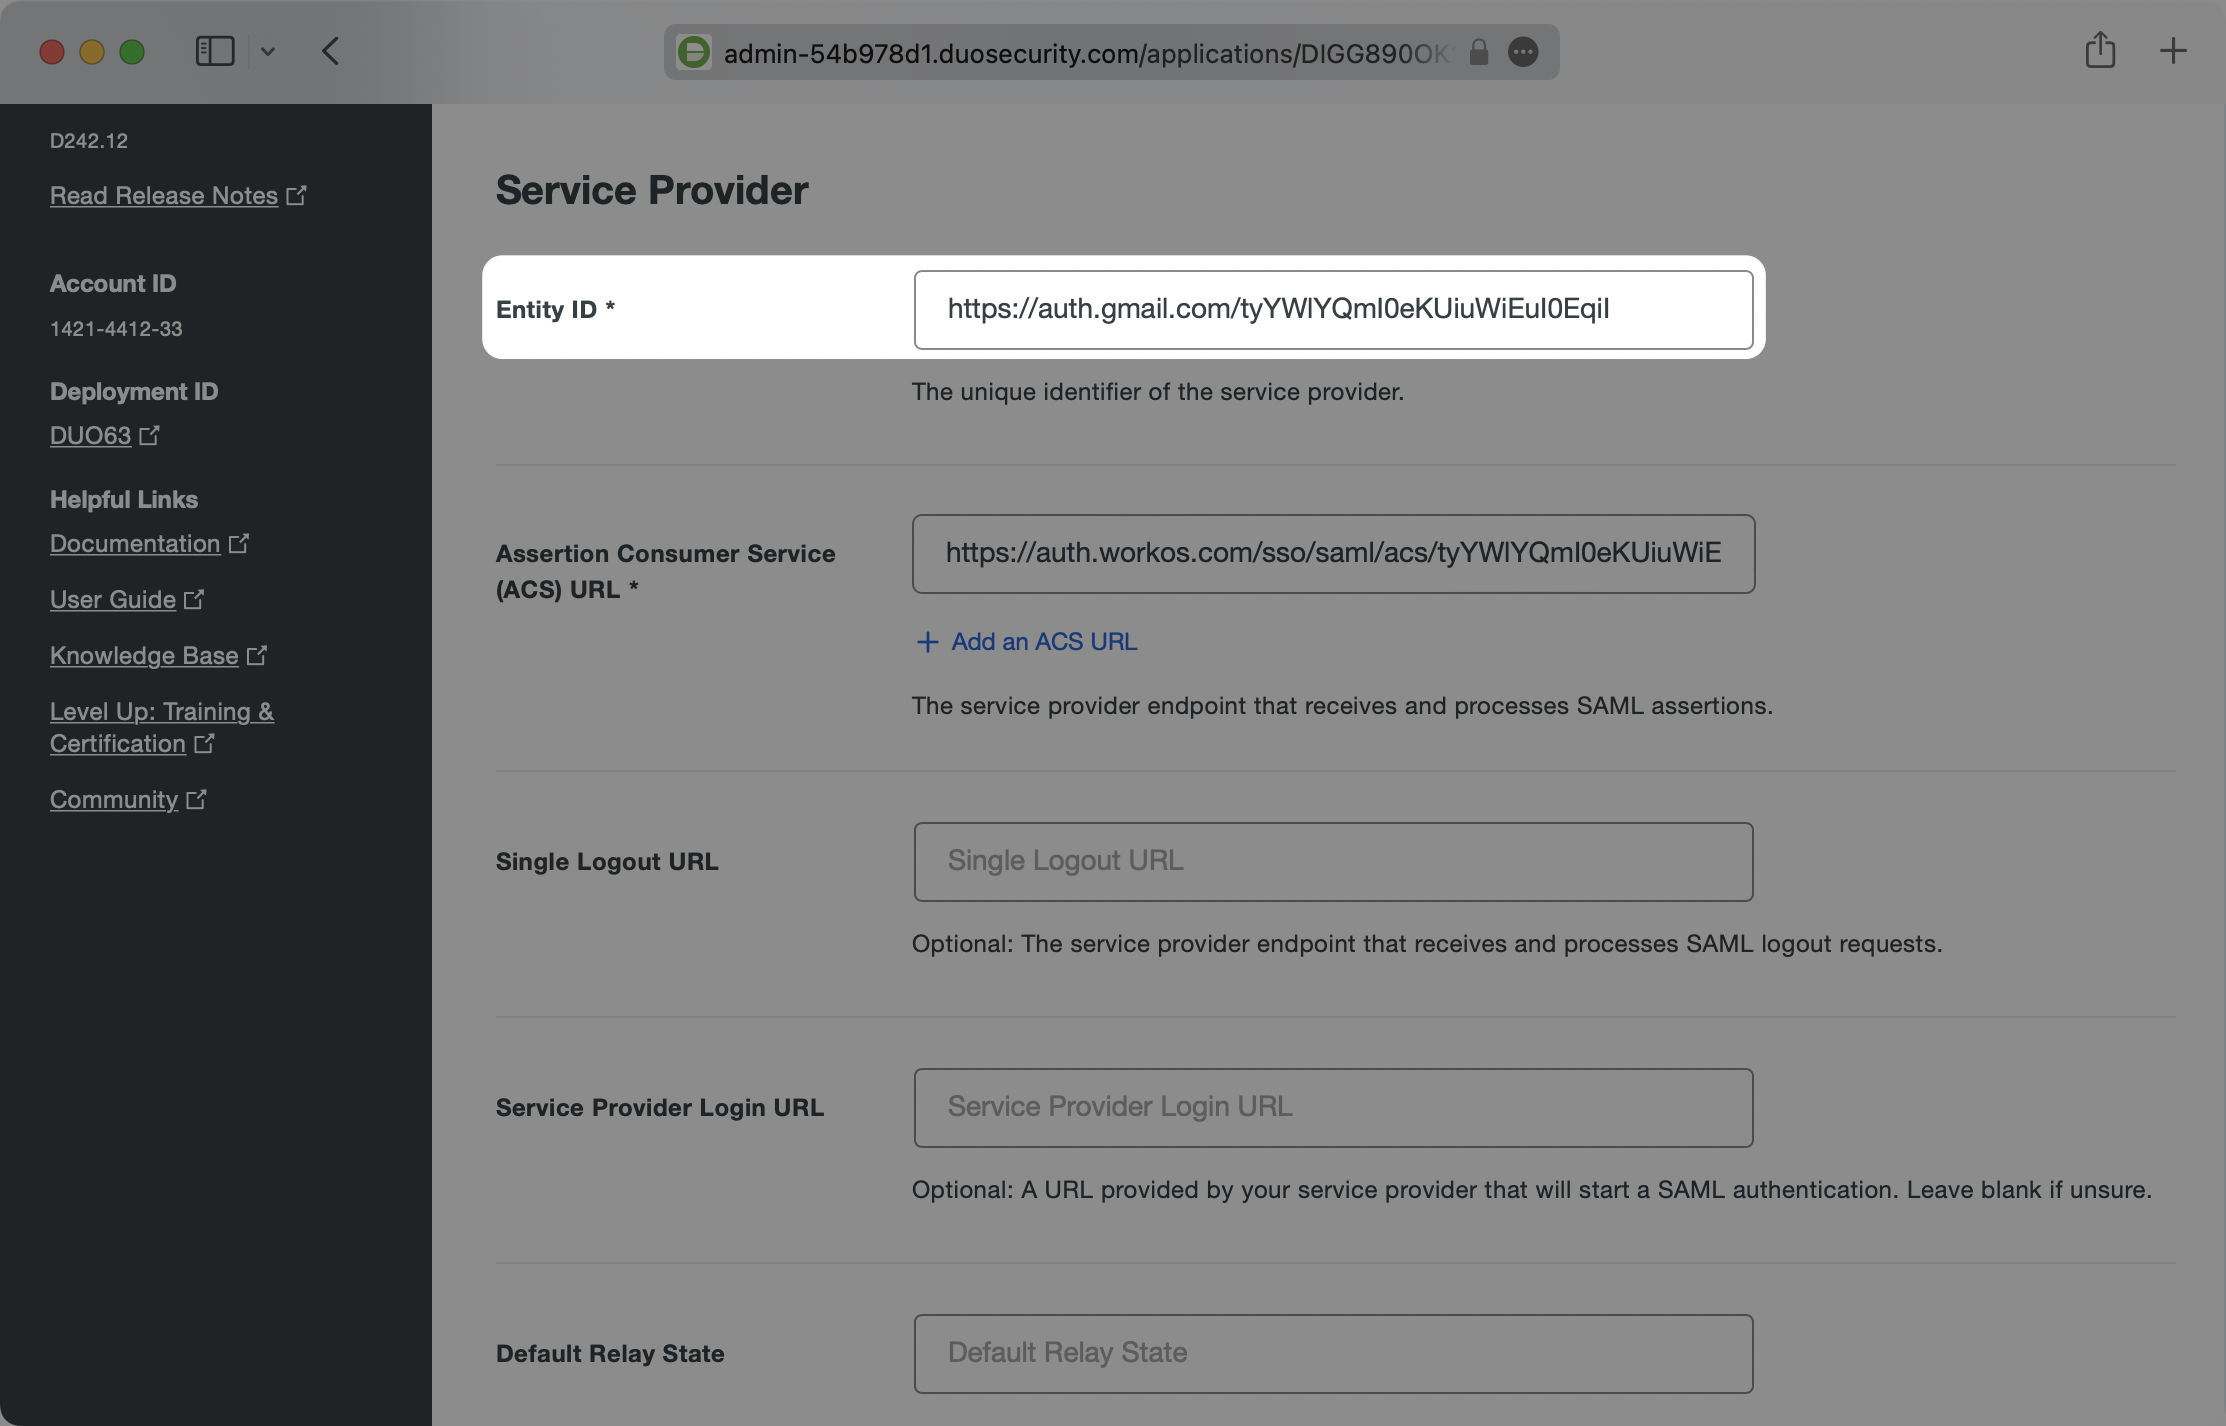
Next, copy the SP Entity ID value from the WorkOS Connection page.
Paste the SP Entity ID into the Entity ID field under the Service Provider section in the Duo Applications Generic Service Provider configuration.
You may leave the Single Logout URL, Service Provider Login URL, and Default Relay State fields empty.
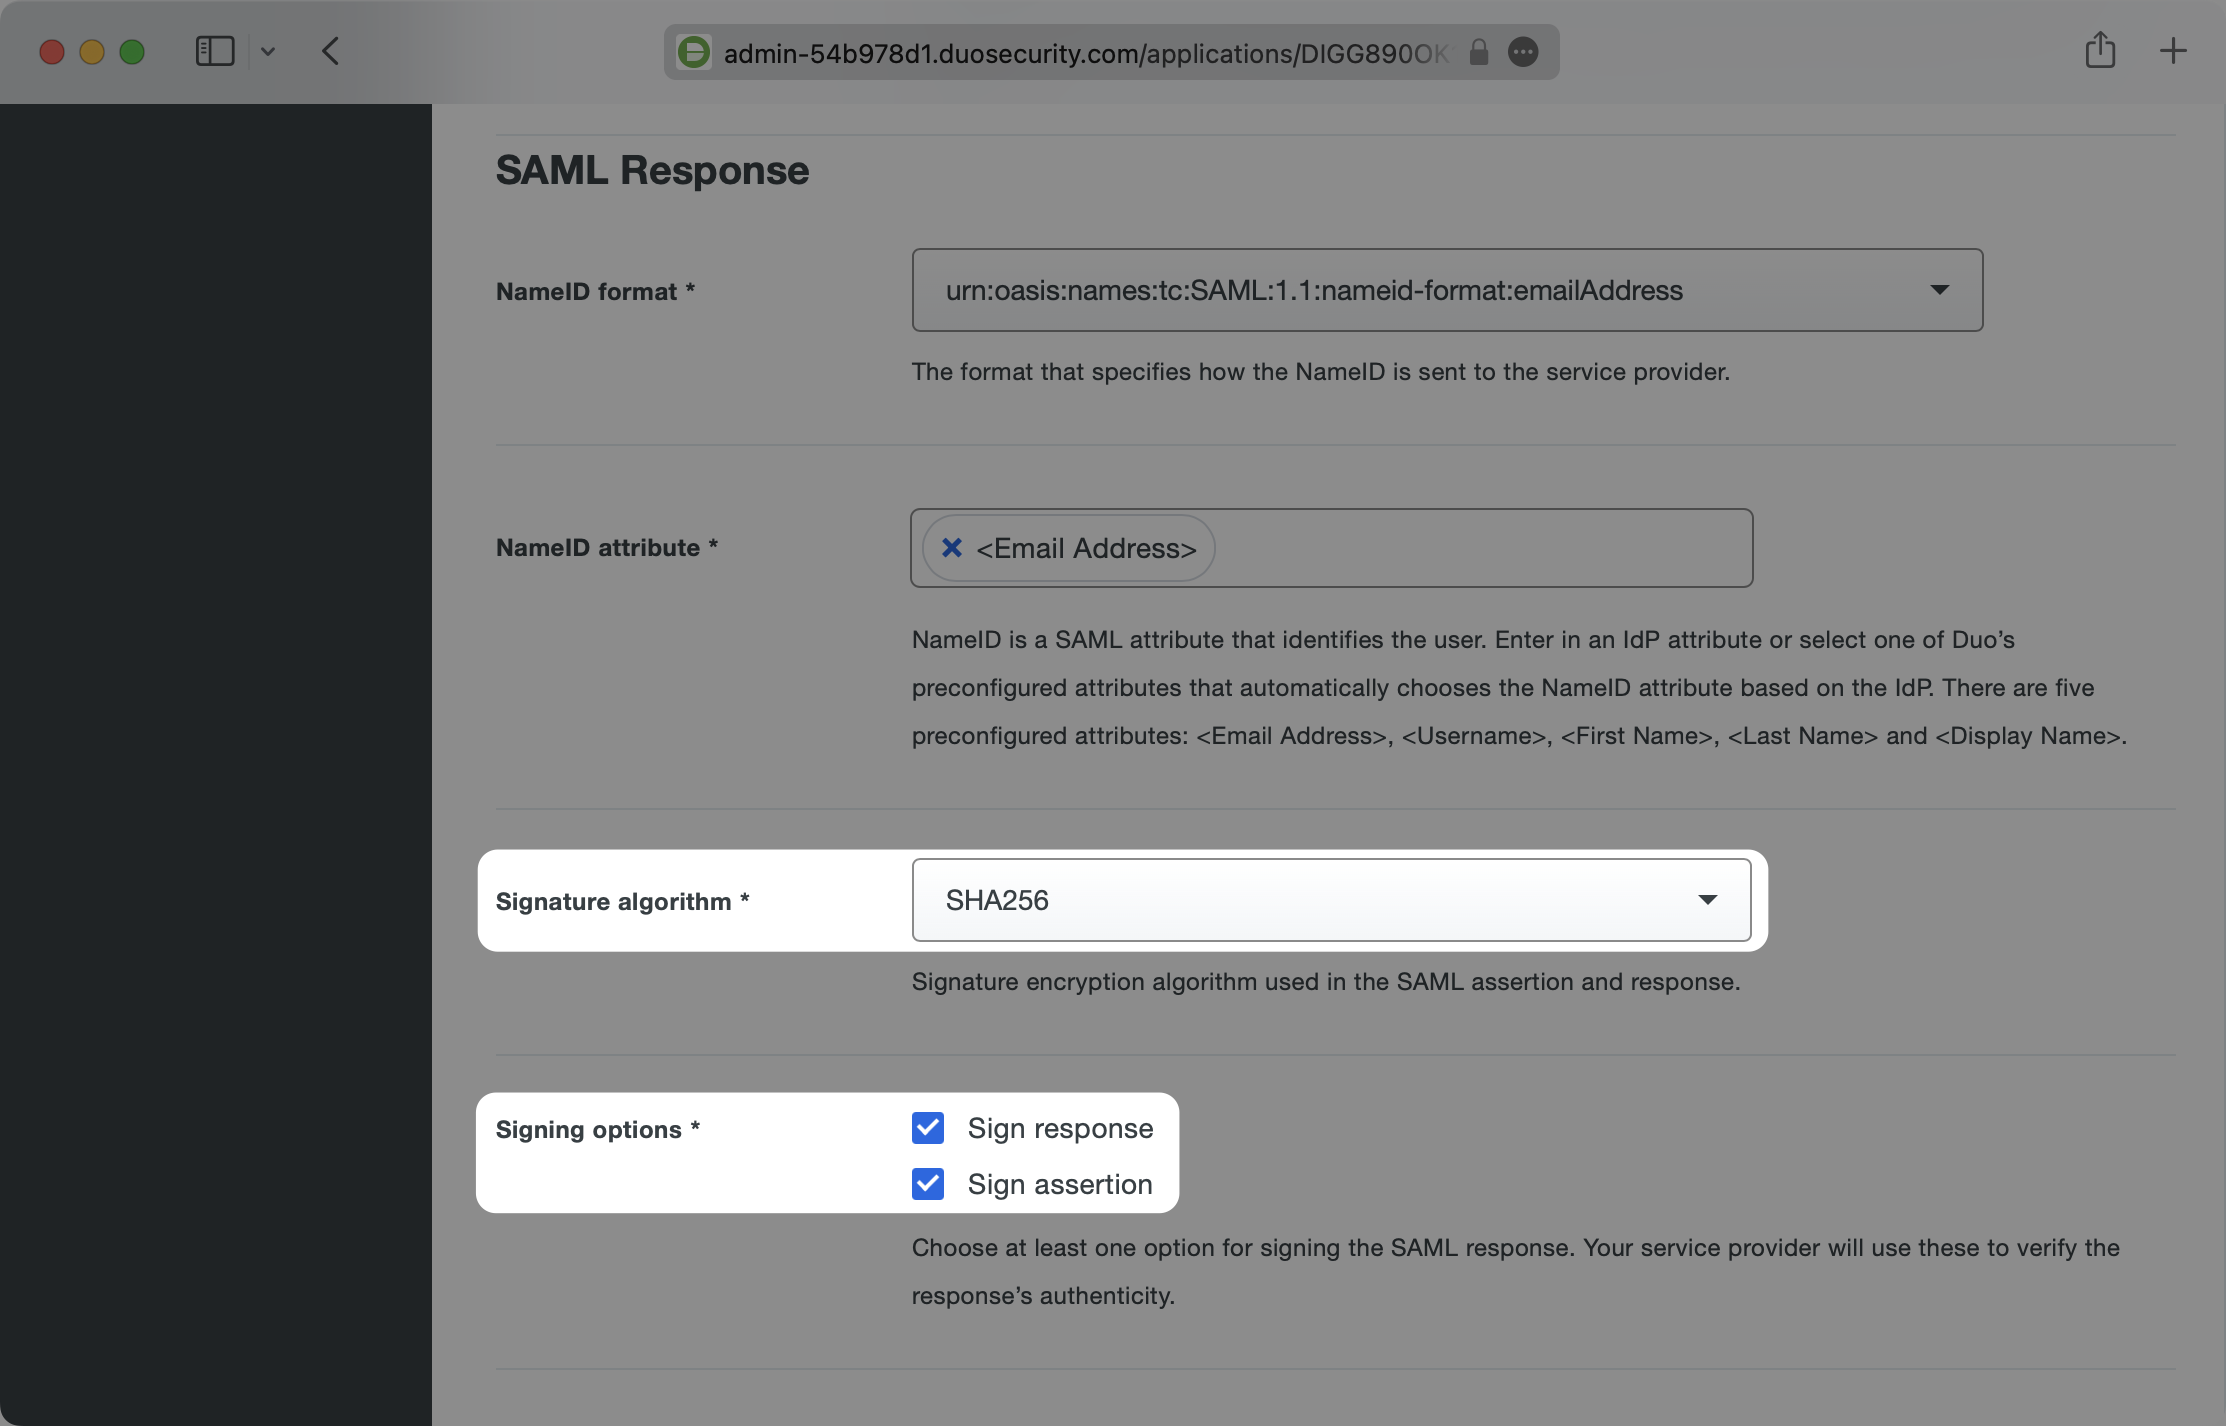
Scroll down on this page to the SAML Response section. Ensure that the NameID format has the id that you’d like to use for the unique identifier selected and matches the NameID attribute that you’d like to use as the value. If you’re using email as the unique ID, the options would look like the below.
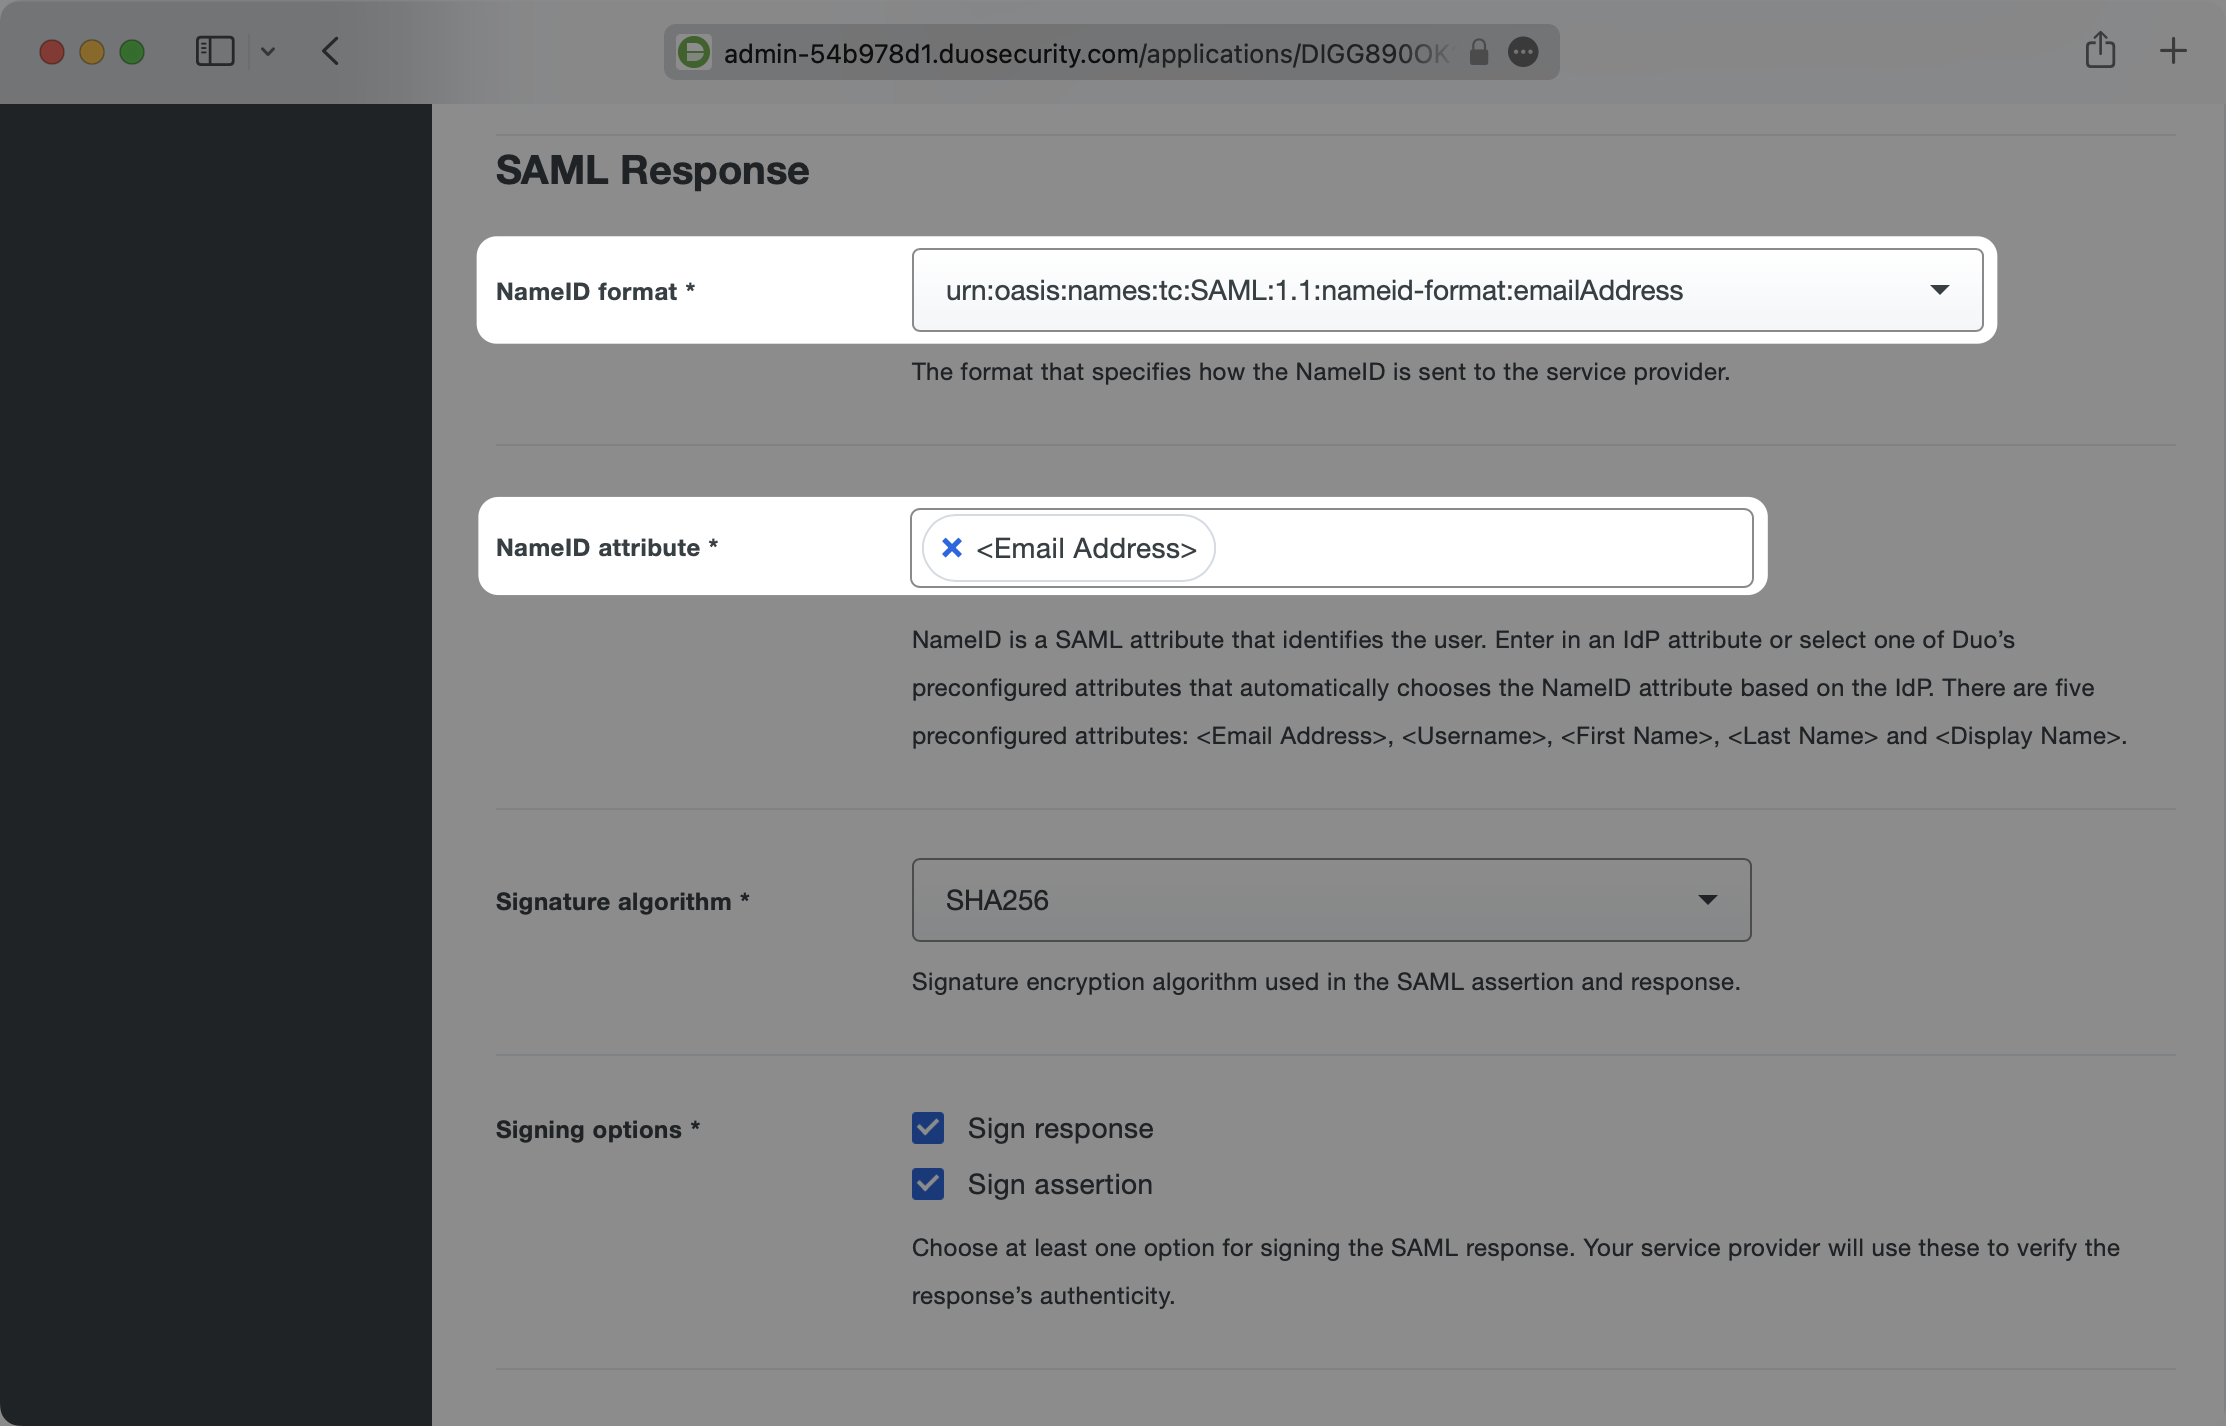
Ensure the Signature algorithm is SHA256 and that the Signing options have both Sign response and Sign assertion selected.
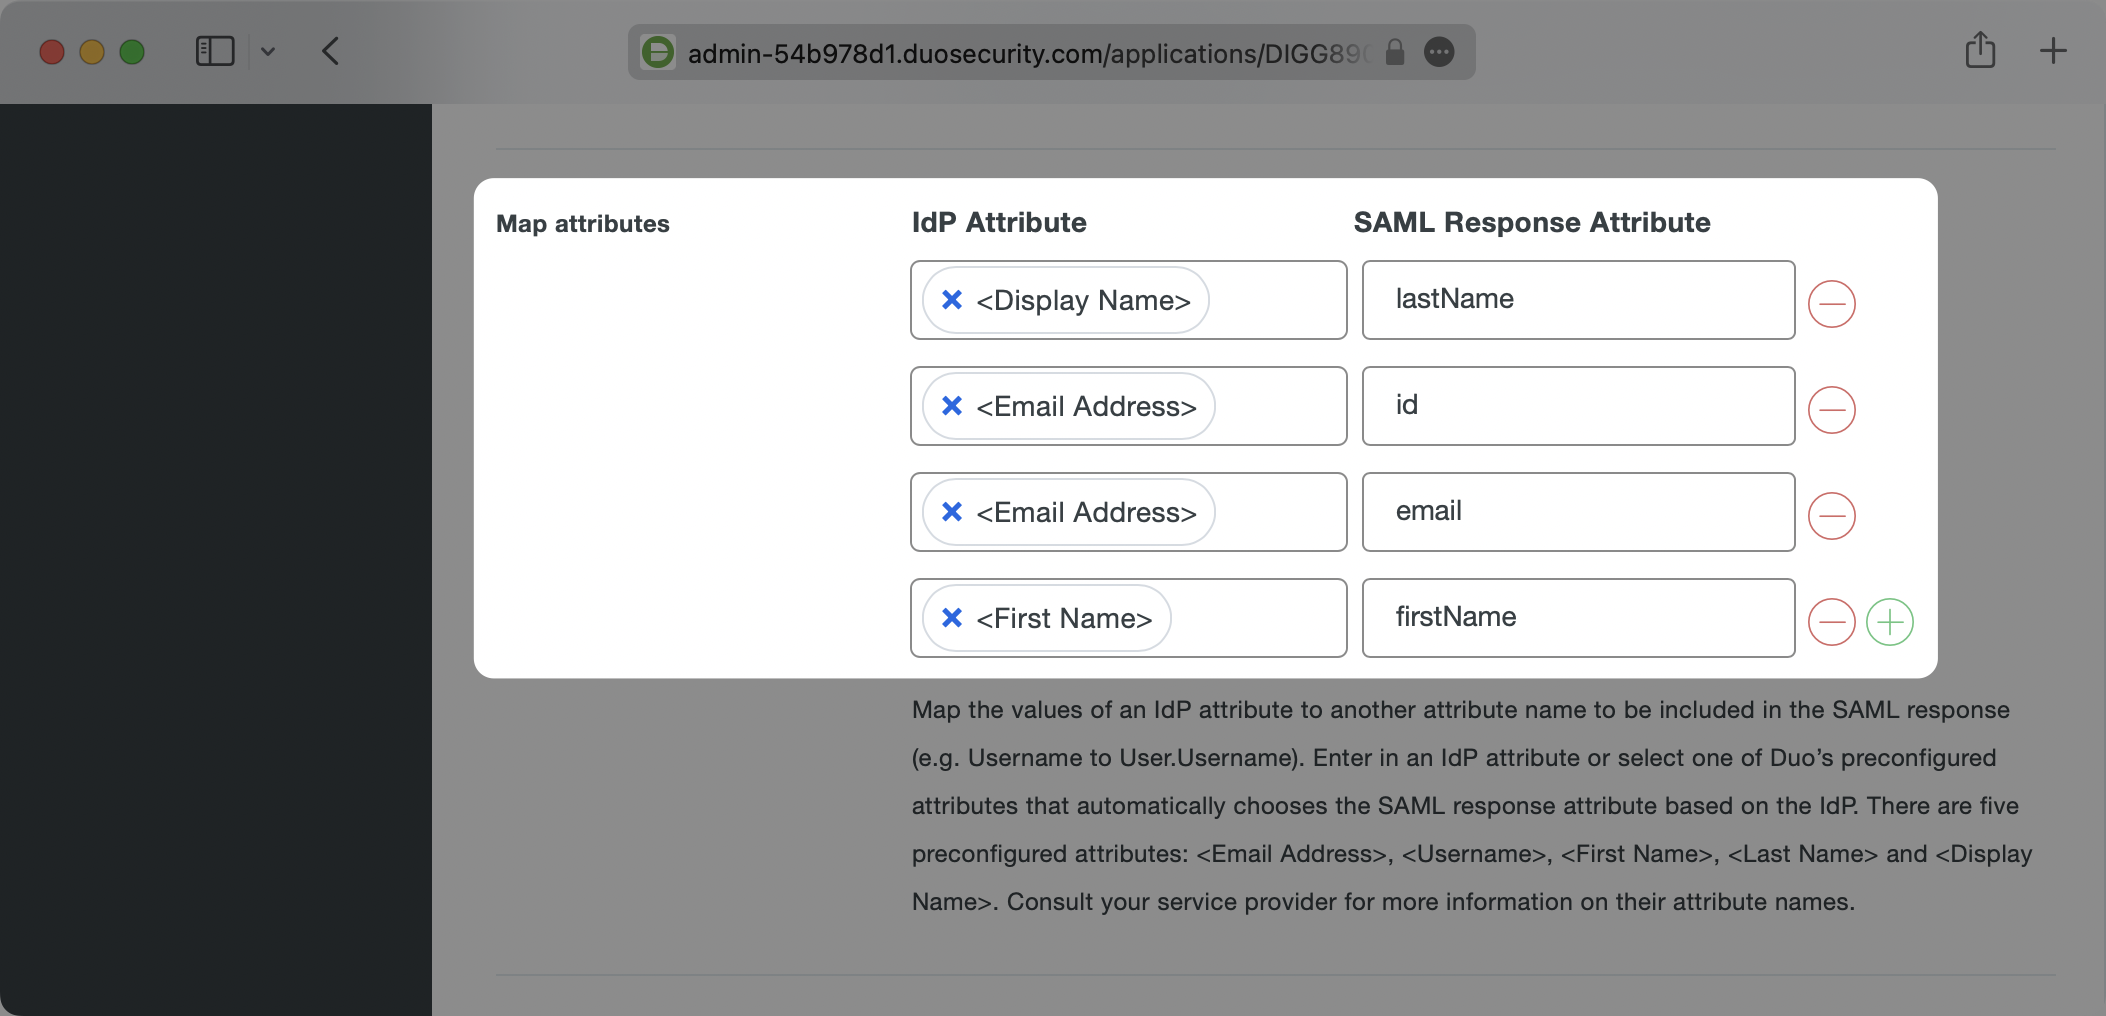
Next make sure that you are mapping the attributes which WorkOS requires: id, email, firstName, and lastName. In the Map Attributes section enter these on the right side under SAML Response Attribute. on the left side, click the empty field box and select the pre-populated values that look like <Email Address>. Duo will automatically grab the corresponding fields and map them to the expected values.
You can map any values you like, but WorkOS requires that these four values are included in SAML responses. If your users don’t have a last name value for instance, you could map Display Name or any other value to lastName, but lastName still needs to be included or WorkOS will reject the SAML Response.
Here’s an example of the attribute mappings:
With identity provider role assignment, users can receive roles within your application based on their group memberships. To return this information in the attribute statement, follow the guidance below.
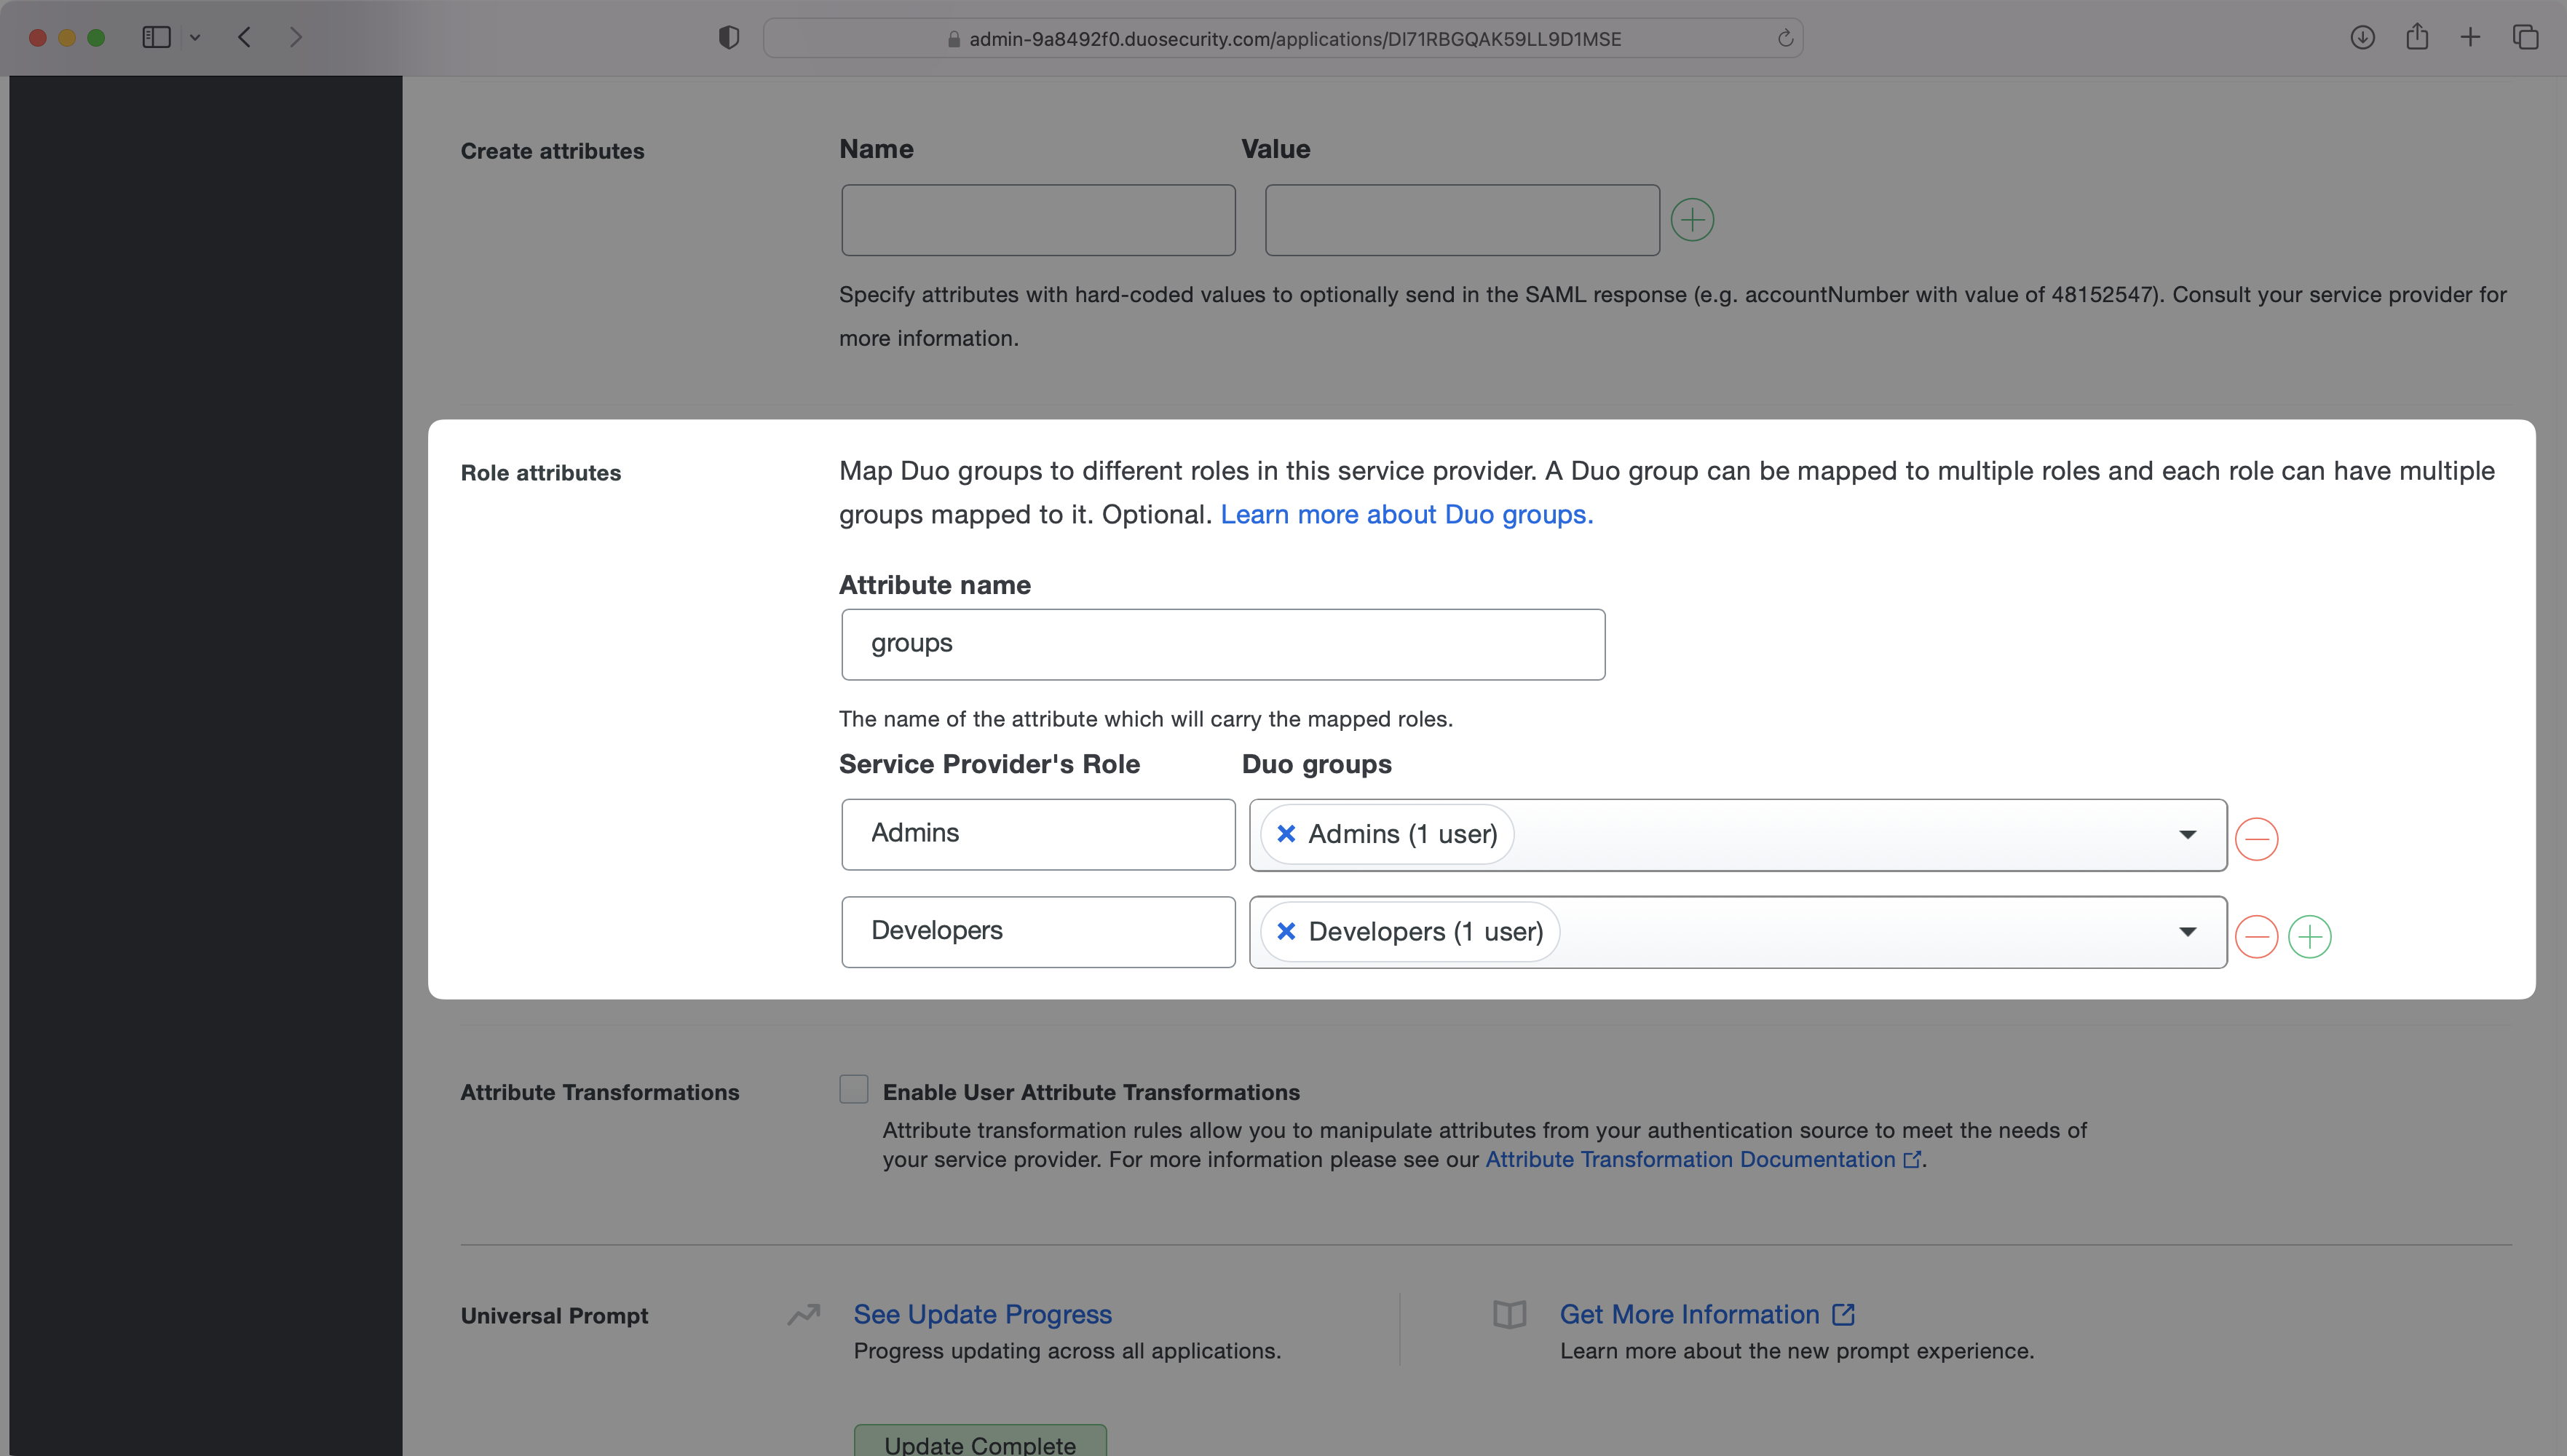
In the “Role Attributes” section, enter groups as the “Attribute name”. Then map the role names to their corresponding Duo groups. In the example below, the “Admins” role is mapped to the Admins group and the “Developers” role is mapped to the Developers group.
Finish role assignment set-up by navigating to the SSO connection page in the Organization section of the WorkOS Dashboard. Create SSO groups by referencing the group IdP ID. Then, assign roles to these SSO groups so group members are automatically granted roles within your application.
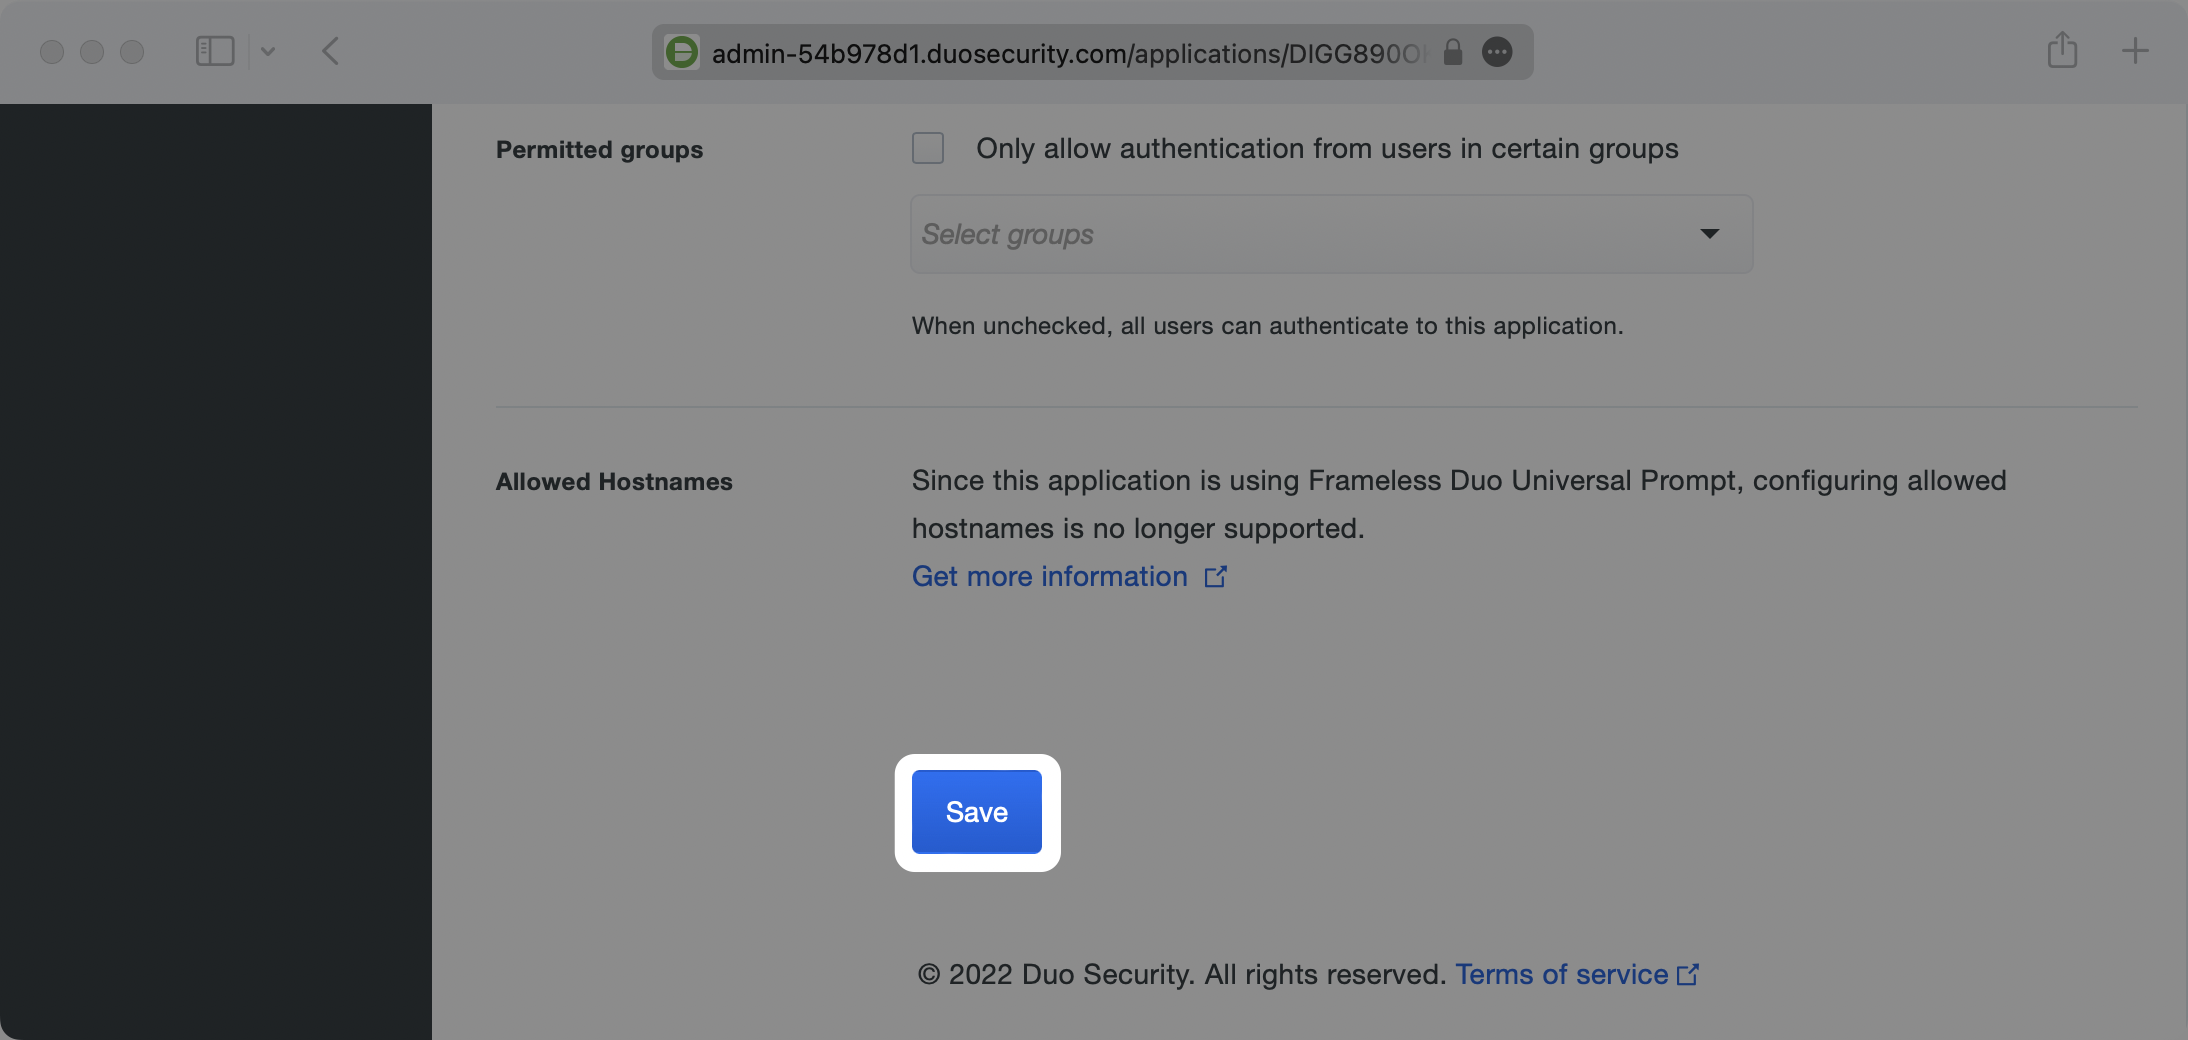
You may leave all of the other fields as their defaults. Scroll to the very bottom of the page and click the Save button.