Microsoft AD FS SAML
Configure a connection to Microsoft Active Directory Federation Services.
Each SSO Identity Provider requires specific information to create and configure a new Connection. Often, the information required to create a Connection will differ by Identity Provider.
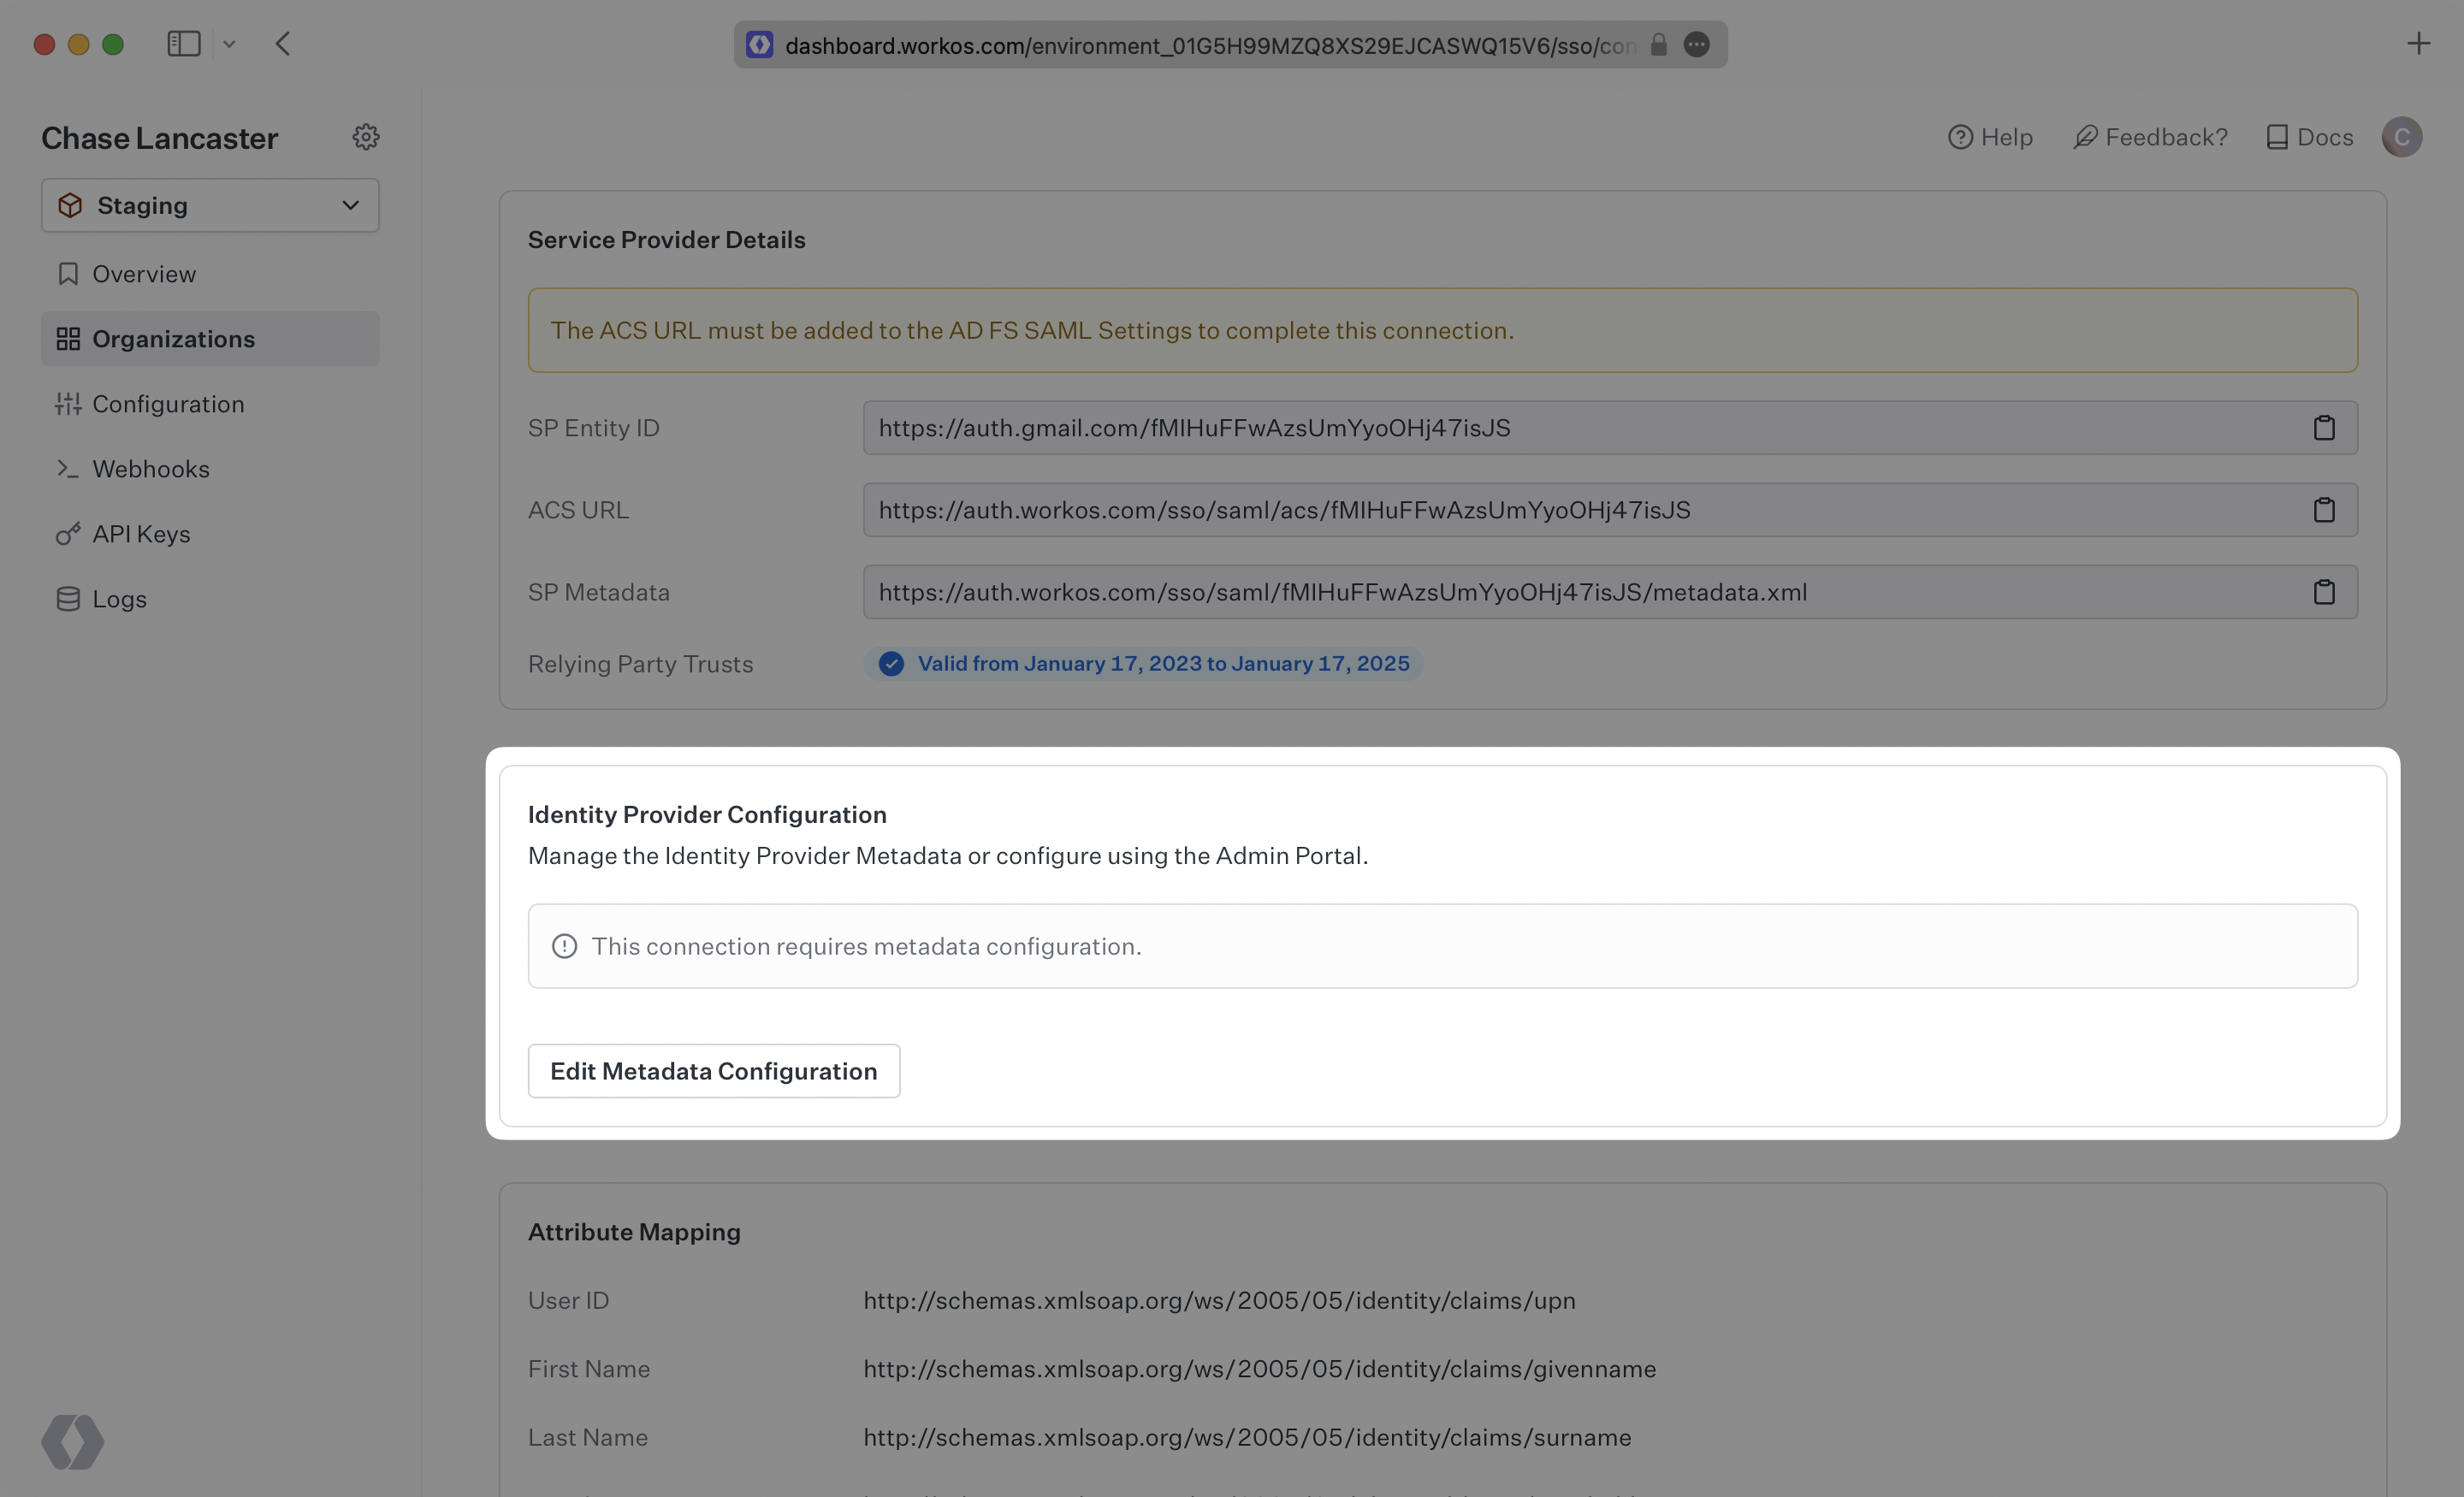
To create an AD FS SAML Connection, you’ll need two pieces of information: an SP Metadata file and an IdP Metadata URL.
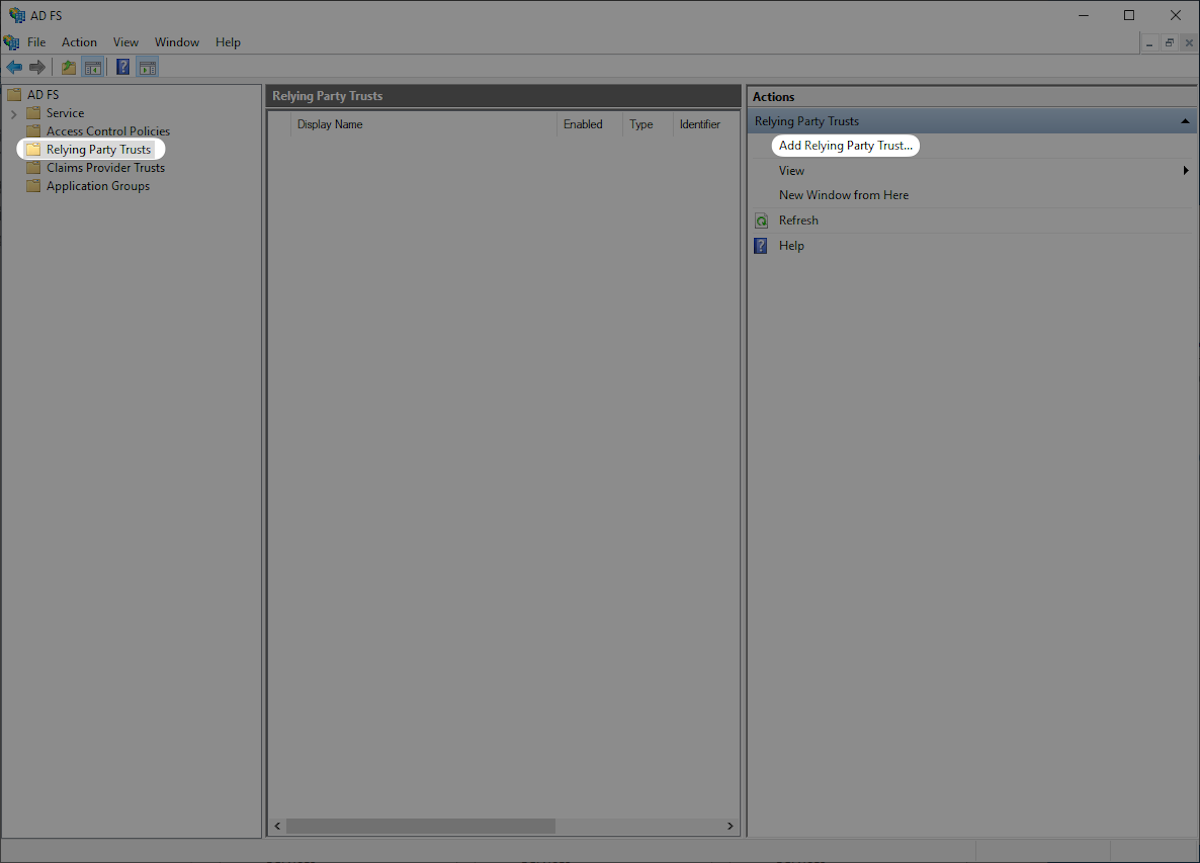
Open the AD FS Management console.

Click “Relying Party Trusts” on the left sidebar. Click “Add Relying Party Trust…” on the right sidebar to open the “AD FS Relying Party Trust Wizard”.
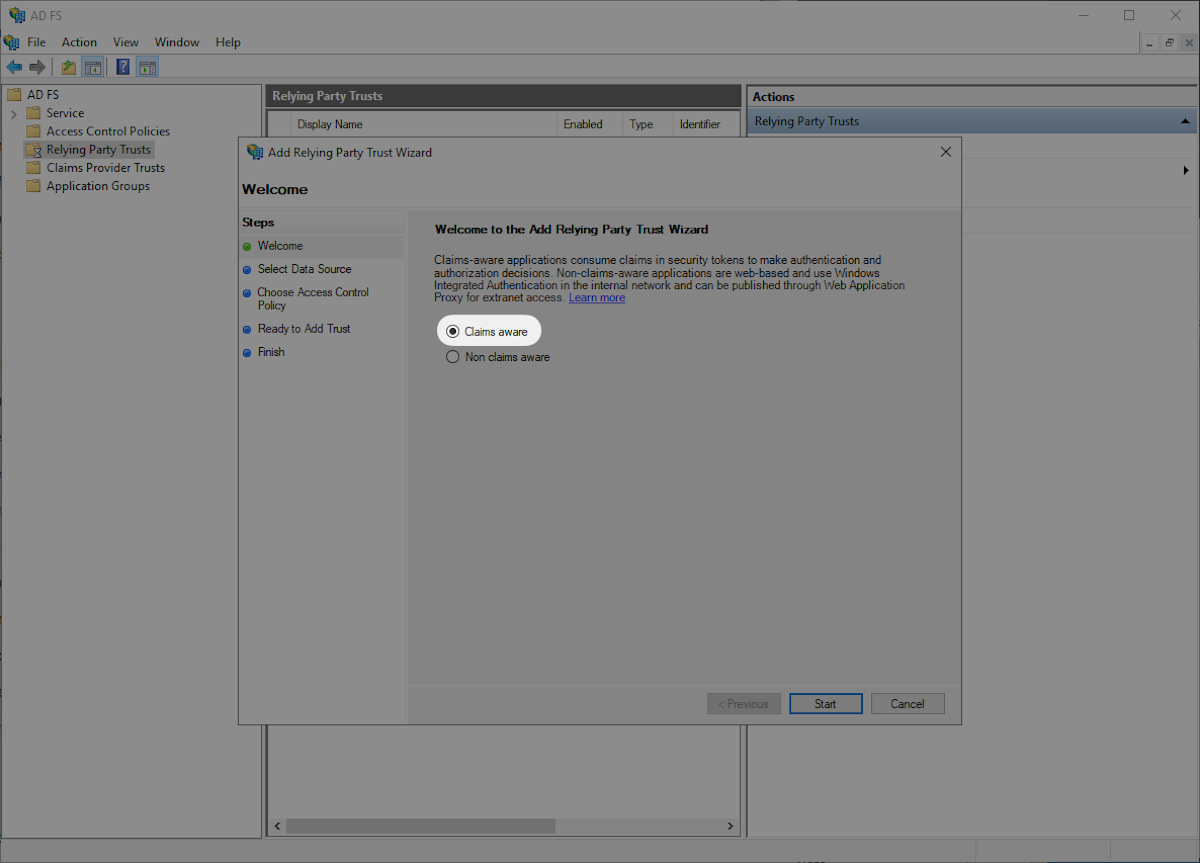
Select “Claims aware” and then “Start”.
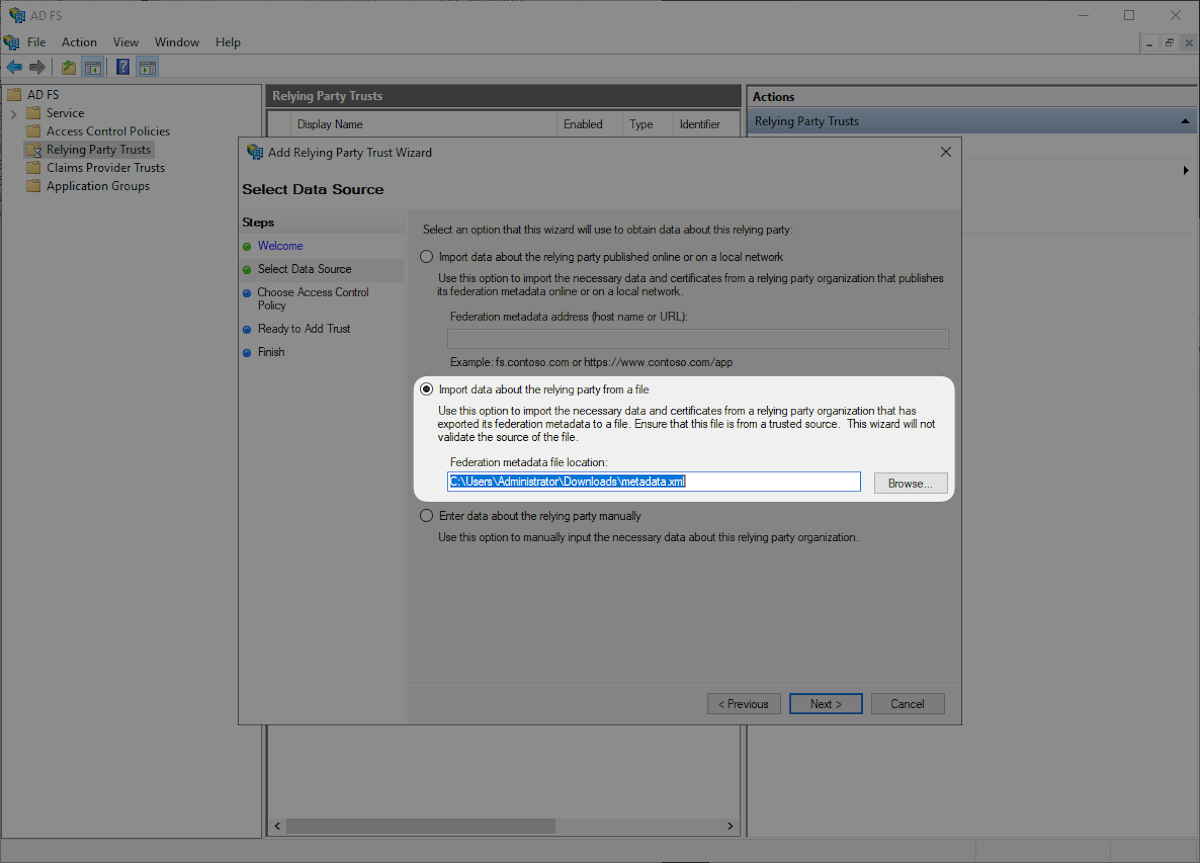
Download the provided Metadata file from WorkOS by heading to the SP Metadata link in the Dashboard. Select “Import data about the relying party from a file” then select the SP Metadata file you downloaded, and click “Next”.
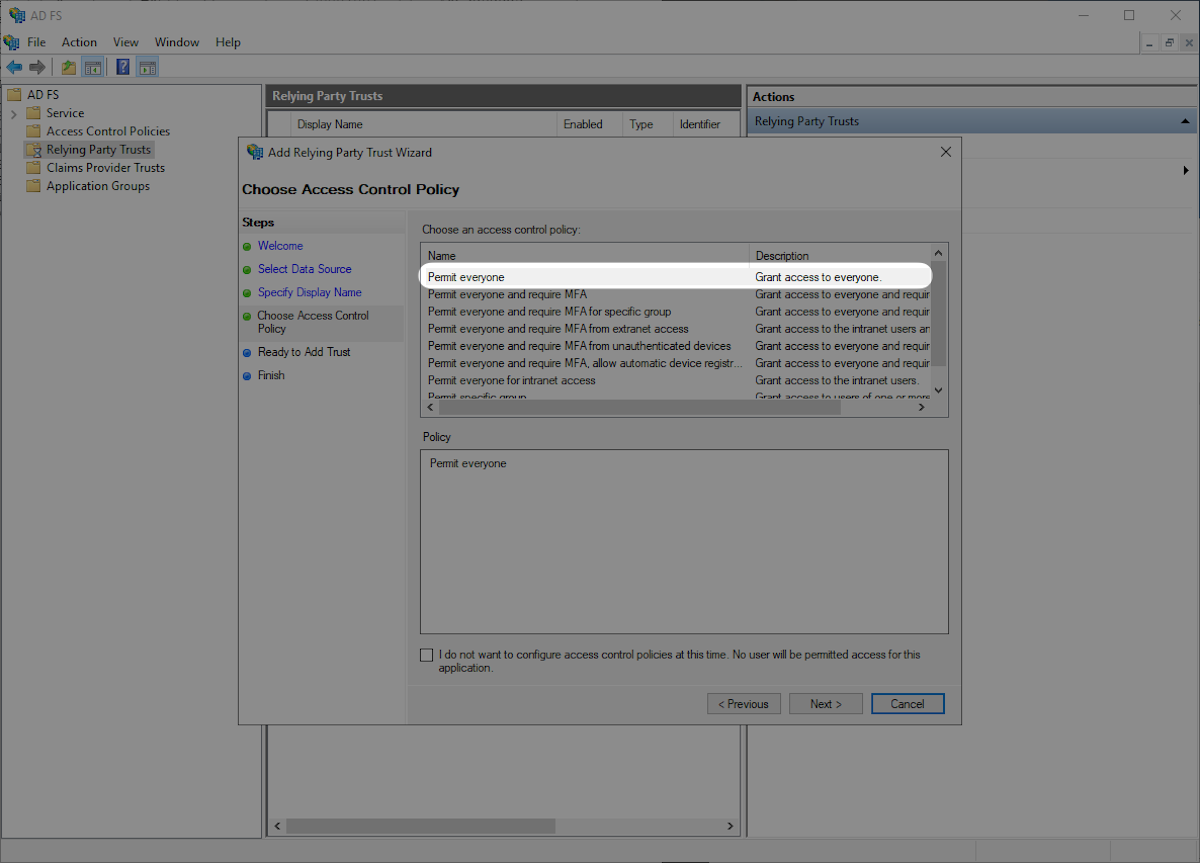
Select “Permit everyone” and then “Next”.
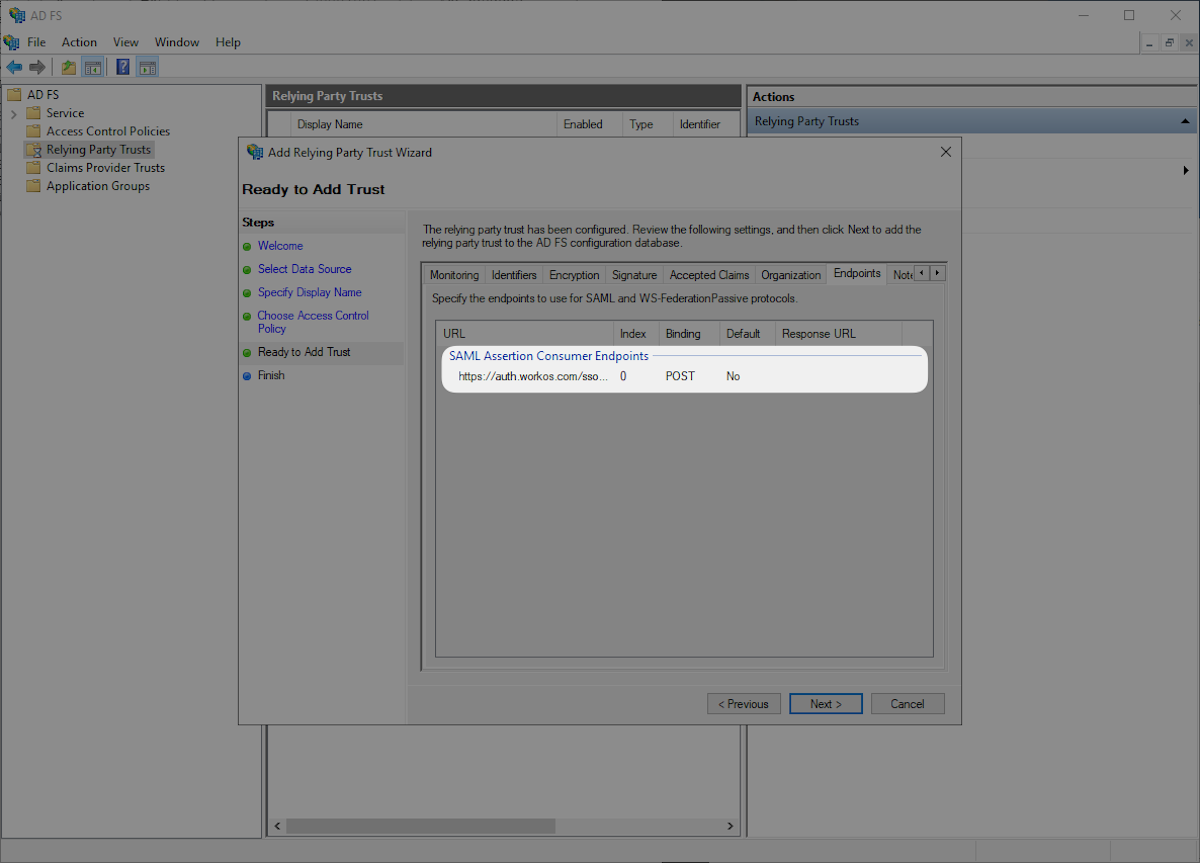
Click the “Endpoints” tab and confirm that the “SAML Assertion Consumer Endpoints” matches the SAML Assertion Consumer Endpoint https://auth.workos.com/sso/saml/acs/:id and click “Next”.
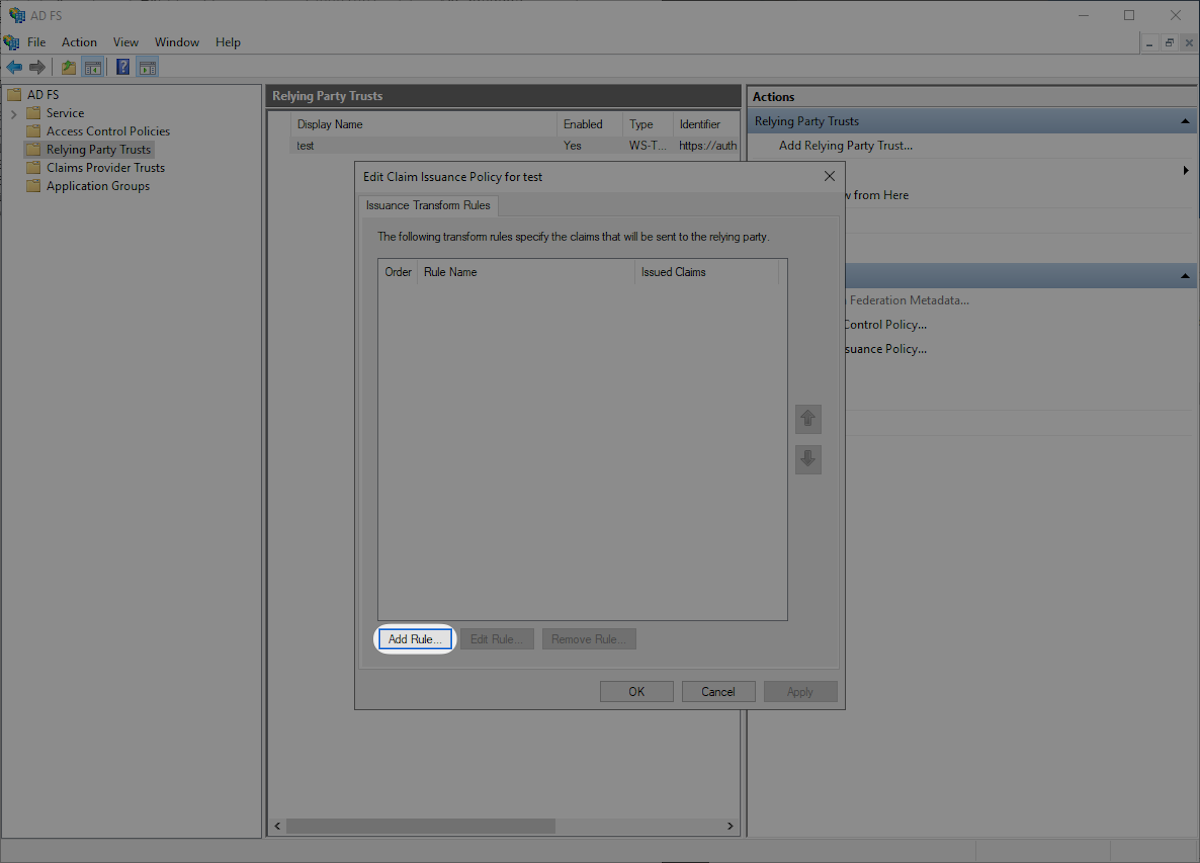
Select “Configure claims issuance policy for this application” and “Close”.

Click “Add Rule” in the “Edit Claims Issuance Policy” window.
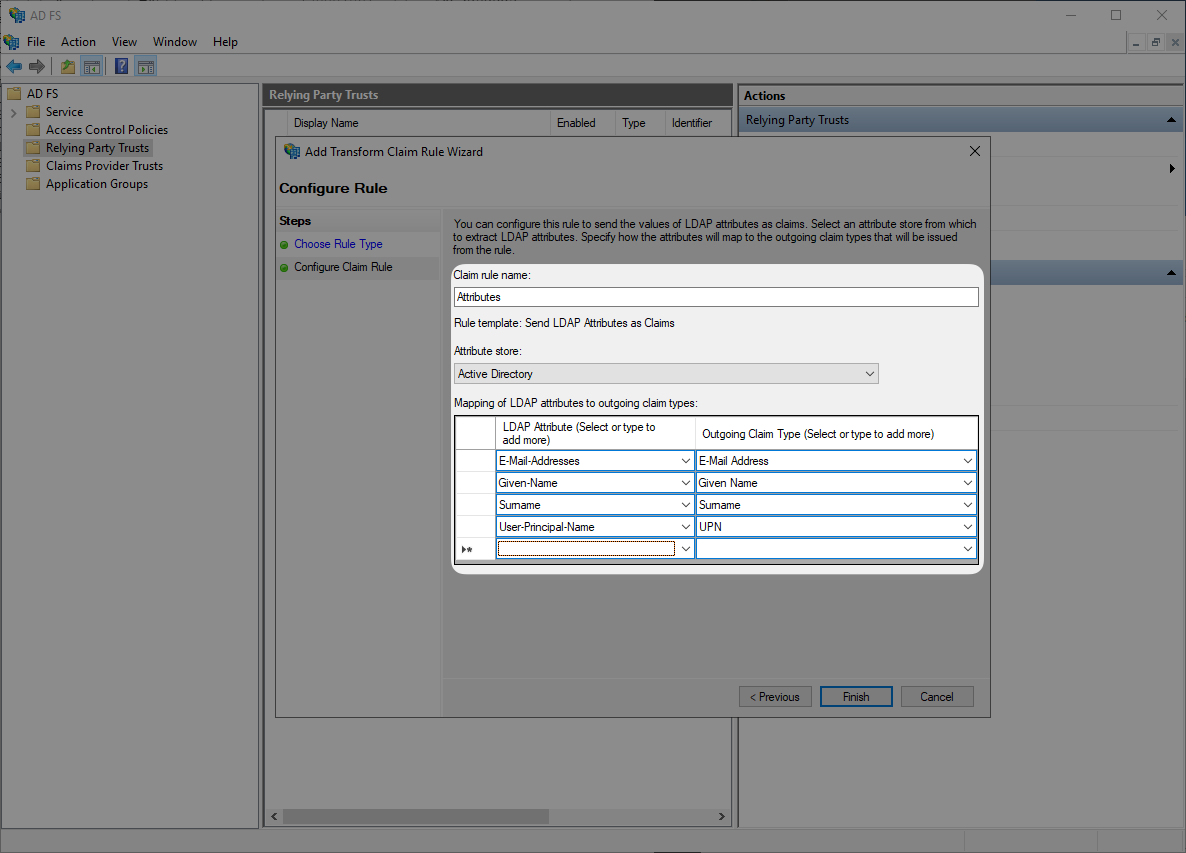
Select “Send LDAP Attributes as Claims” and then “Next”.

Submit “Attributes” as “Claim rule name”, then select “Active Directory” as “Attribute Store”, and configure the following attribute mappings. Then click “OK”.
E-Mail-Addresses→E-Mail AddressGiven-Name→Given NameSurname→SurnameUser-Principal-Name→UPN
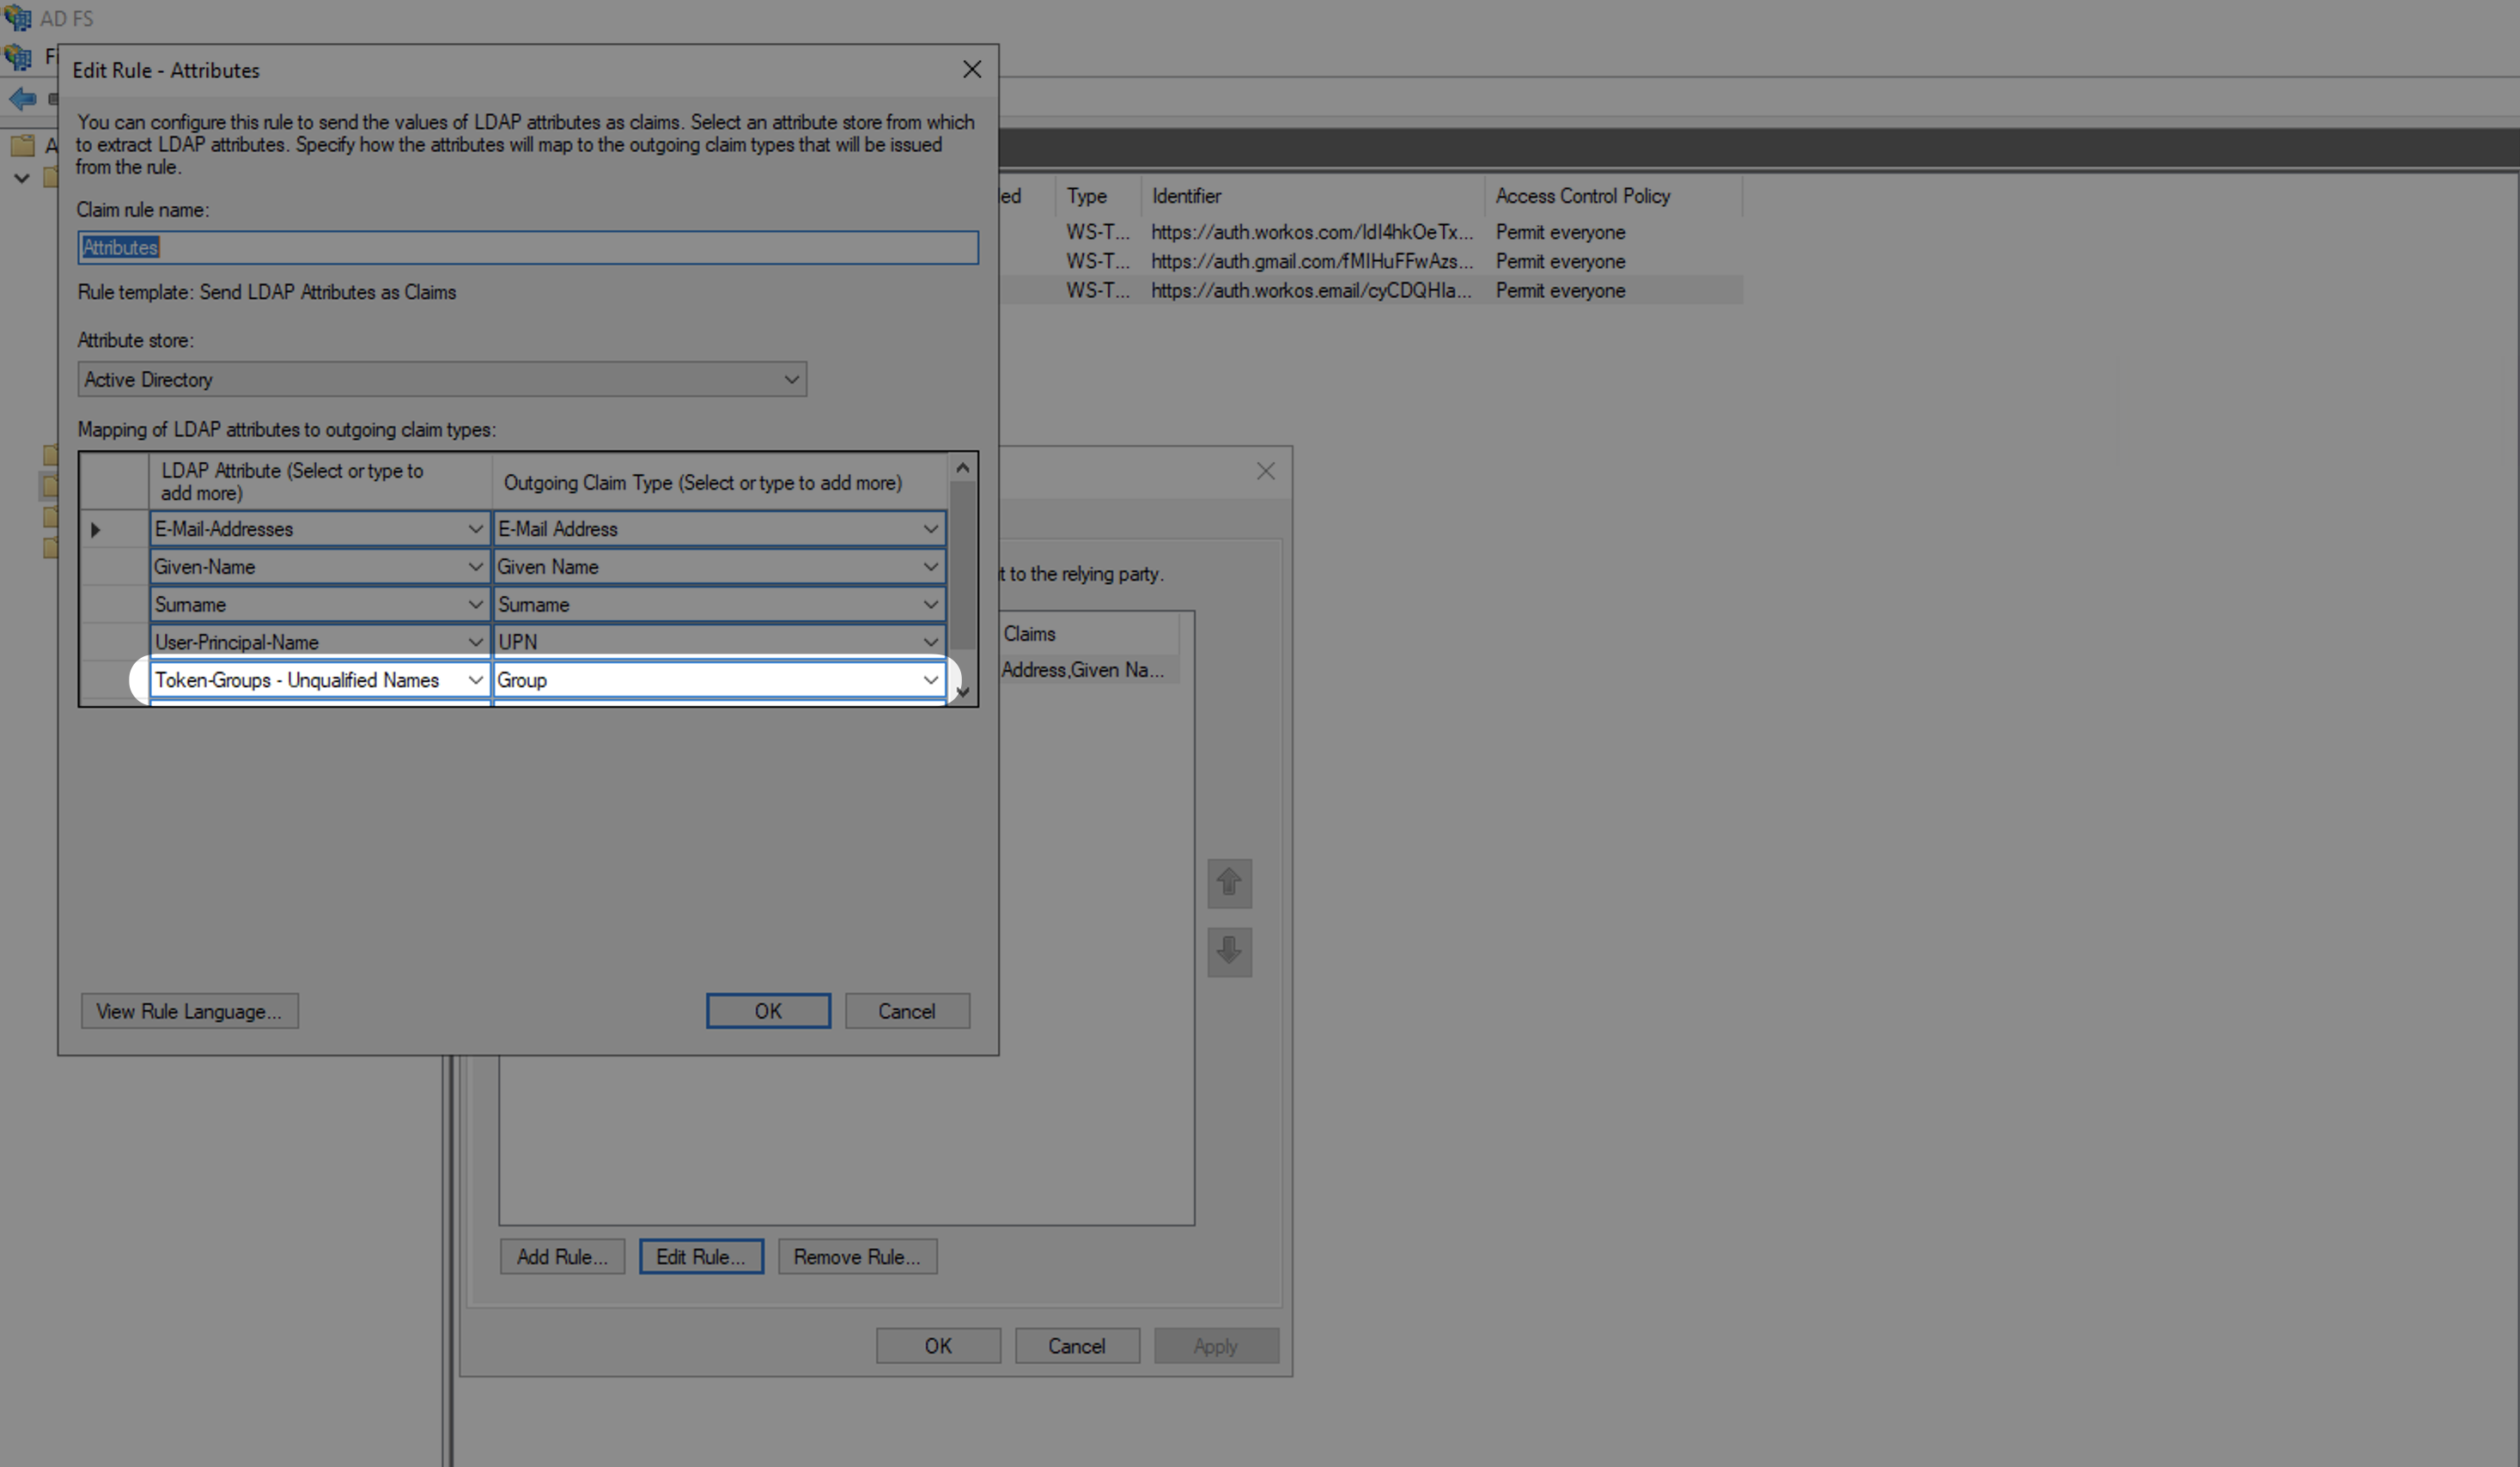
With identity provider role assignment, users can receive roles within your application based on their group memberships. To return this information in the attribute statement, follow the guidance below.
Select “Group” as the “Outgoing Claim Type” and map an LDAP Attribute to send groups. For example, to send all groups, map the “Token-Groups – Unqualified Names” attribute.
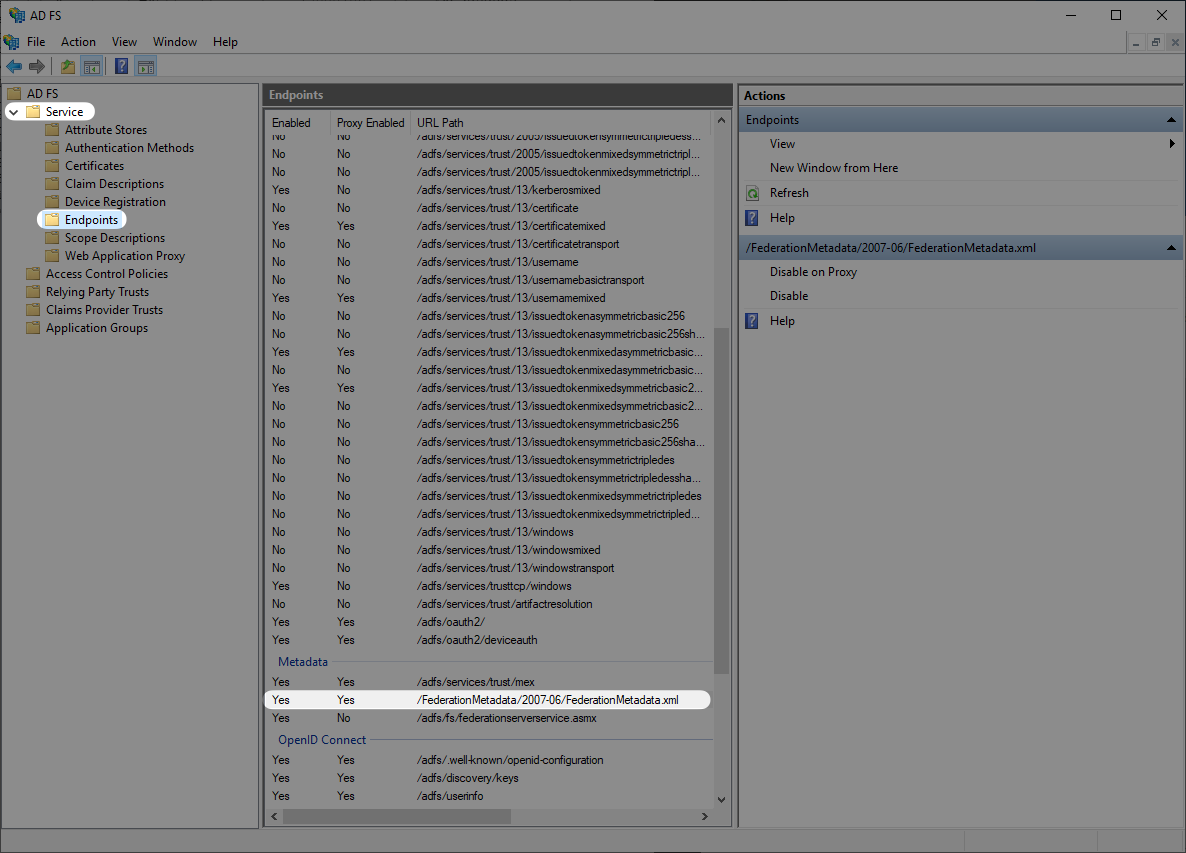
Next you will want to obtain the Metadata URL from your AD FS server. AD FS publishes its metadata to a standard URL by default: https://SERVER/federationmetadata/2007-06/federationmetadata.xml where “SERVER” is your federation service FQDN. You can also find your ADFS Federation Metadata URL through the AD FS Management in “AD FS → Service → Endpoints” and navigate to the Metadata section.
Once you have obtained the Metadata URL you will then navigate to the connection settings in WorkOS, click “Edit Metadata configuration”, and upload the Metadata URL.
Once uploaded the connection will be verified and linked!