OpenID Connect
Learn how to configure a new generic OIDC connection
To set up an OpenID Connect (OIDC) connection on behalf of an organization, you’ll need the client credentials and the discovery endpoint of their OIDC provider from the organization’s IT team.
When setting up an OIDC connection, WorkOS provides one key piece of information in the Service Provider Details section for an SSO connection within the WorkOS Dashboard:
- Redirect URI: The endpoint where identity providers send authentication responses after successful login
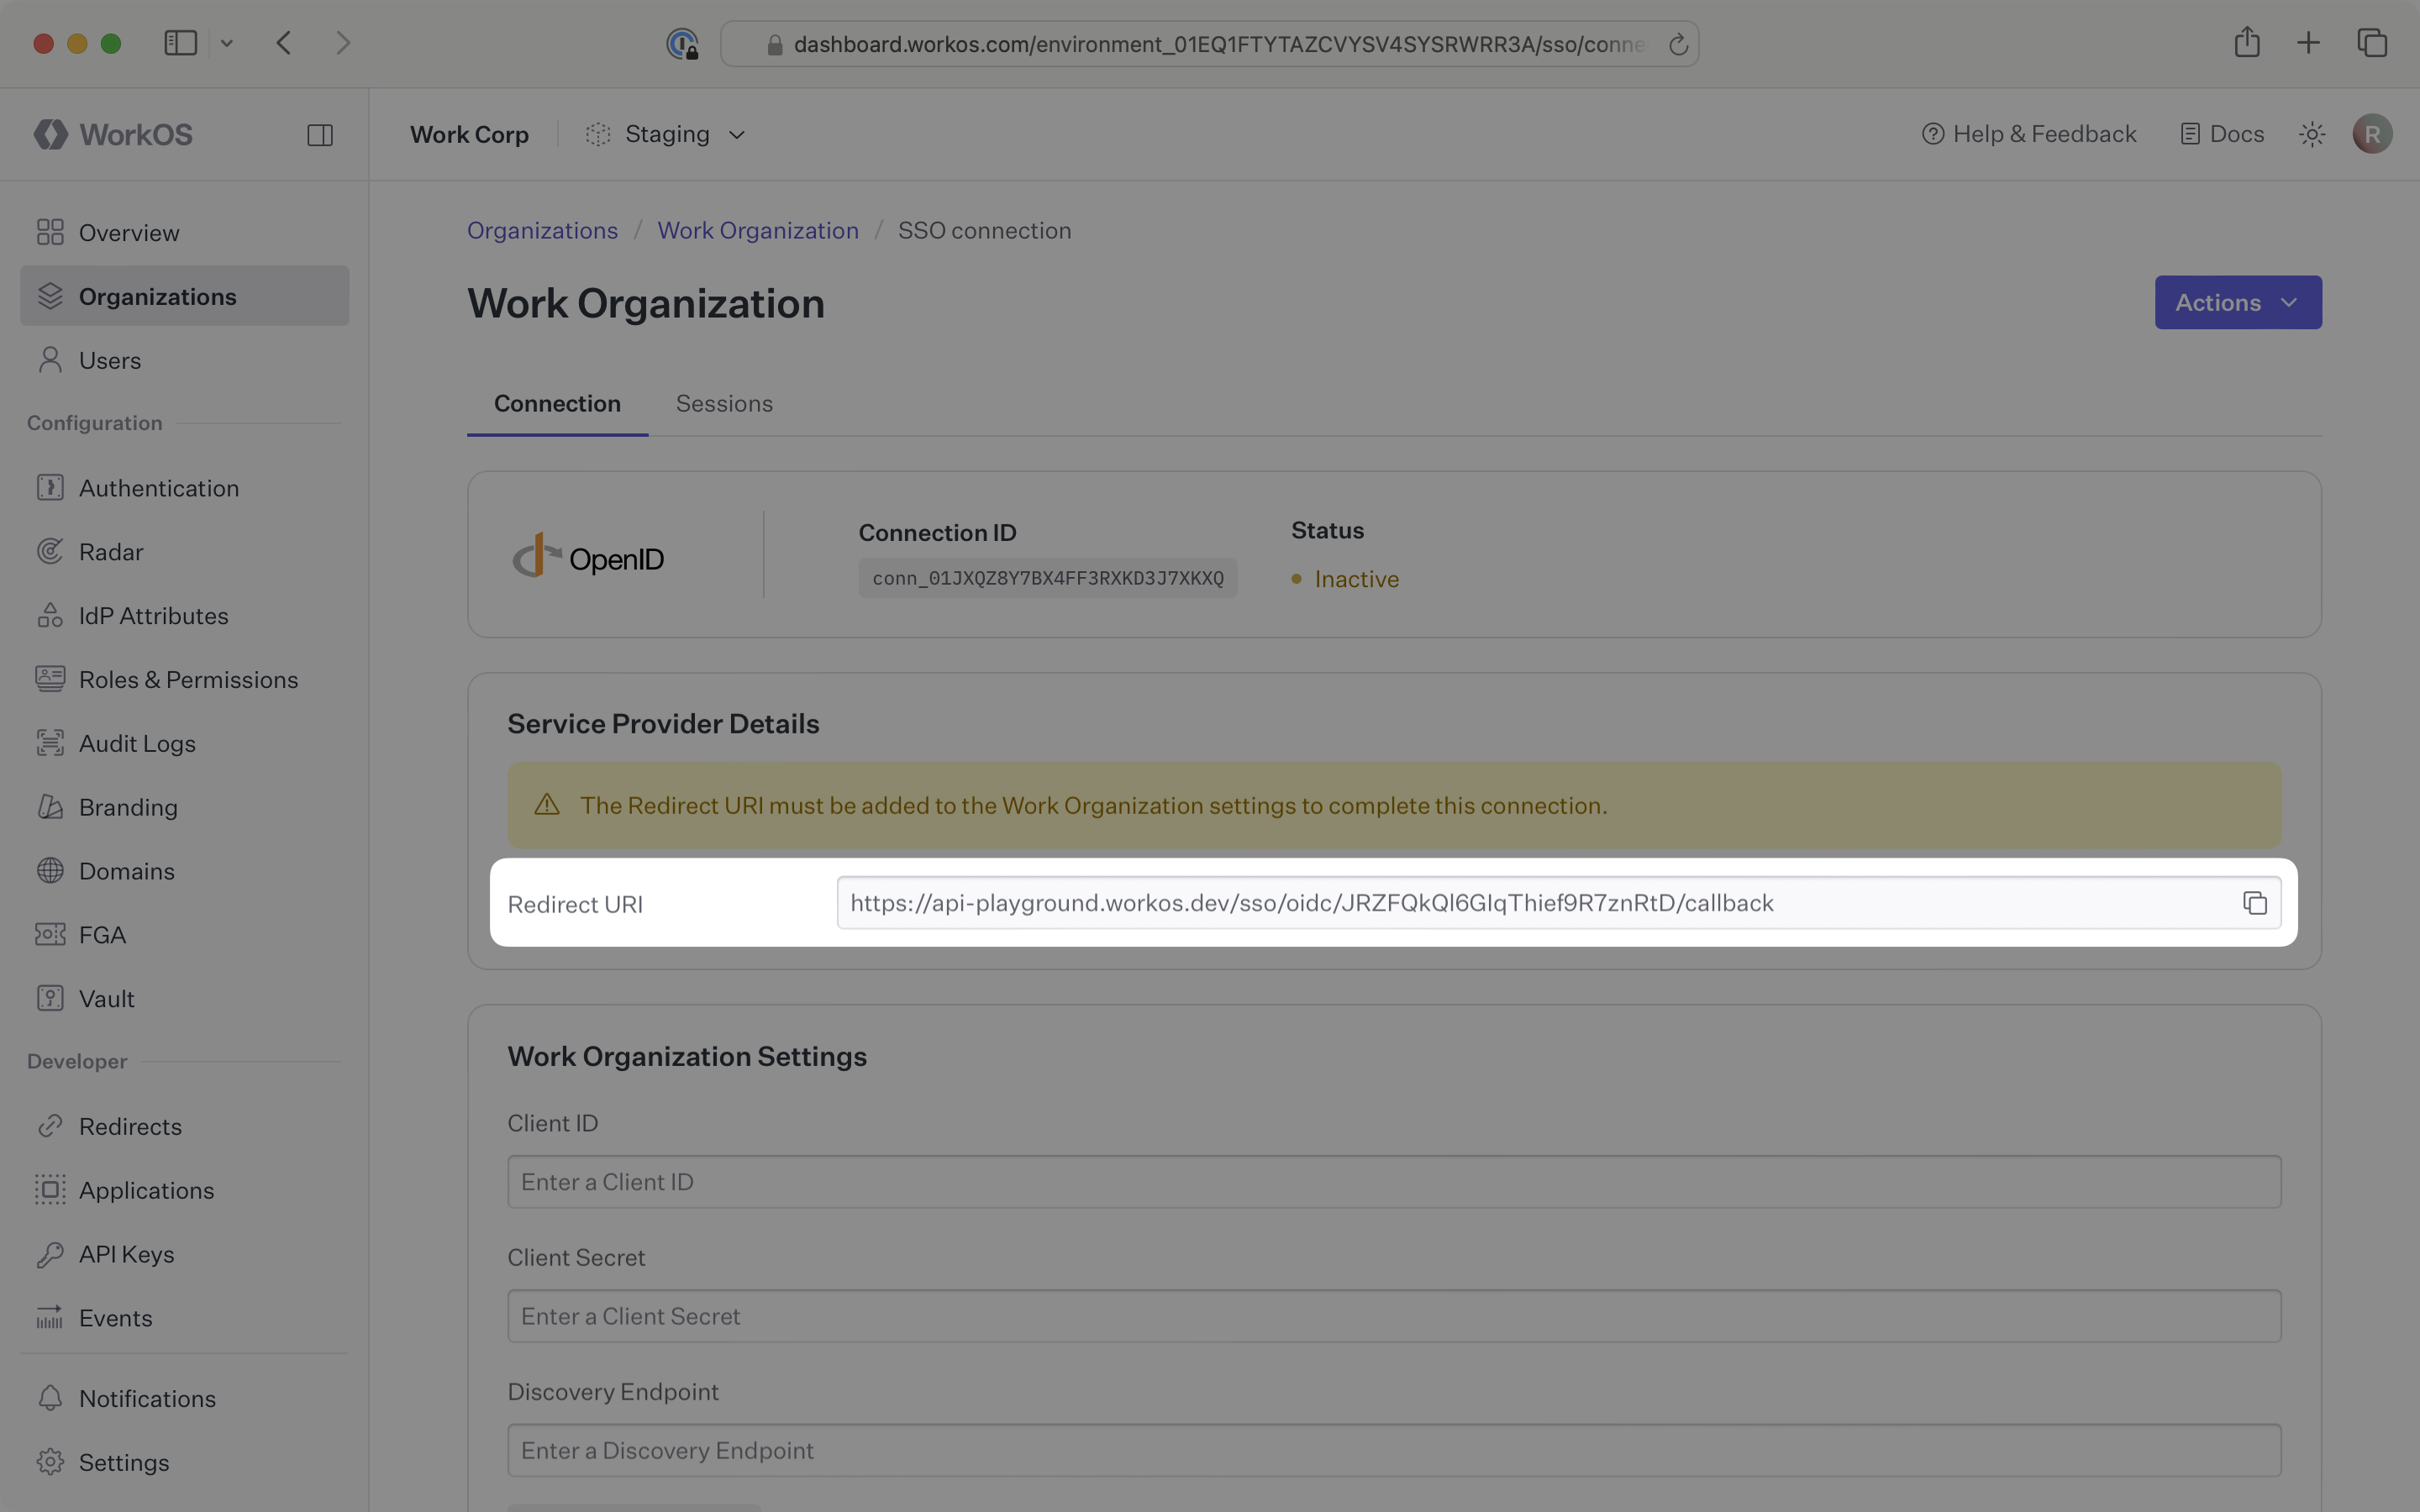
The Redirect URI serves as the destination for authentication responses and must be configured in the organization’s identity provider admin dashboard.
You will need to obtain three pieces of information from the organization:
- Client ID: Application identifier from the OIDC provider
- Client Secret: Authentication secret for the application
- Discovery Endpoint: Configuration URL containing OIDC metadata
Typically, the organization’s IT team will provide these values when they configure your application in their identity provider admin dashboard. However, if you need to guide them through the process, the following sections will help.
For SSO to properly function, the organization needs to create and configure an OpenID Connect application in their identity provider that supports the authorization code grant type.
Copy the Redirect URI from the WorkOS Dashboard connection settings.
Instruct the organization admin to paste this value as the login redirect URI in their OIDC application configuration. This ensures authentication responses are sent to the correct WorkOS endpoint.
The organization’s OIDC provider needs to include specific claims in the user ID token. Instruct them to add the following claims to their OIDC provider settings:
sub: Maps to theidp_idattribute in WorkOS user profilesemail: Maps to theemailattribute in WorkOS user profilesgiven_name: Maps to thefirst_nameattribute in WorkOS user profilesfamily_name: Maps to thelast_nameattribute in WorkOS user profiles
For many providers, these claims are included by default, but some providers require manual configuration.
With identity provider role assignment, users can receive roles within your application based on their group memberships. To enable this functionality, instruct the organization to add the groups claim to the user ID token in their OIDC provider settings. This claim should map to a list of the user’s group memberships.
After the organization creates an OpenID Connect application, their identity provider will provision client credentials and a discovery endpoint.
The discovery endpoint will always end with /.well-known/openid-configuration as described in the OpenID Provider Configuration Request documentation. You can confirm that the discovery endpoint is correct by entering it in a browser window. If there is a JSON object with metadata about the connection returned, the endpoint is correct.
In the WorkOS Dashboard, navigate to your connection settings. Paste the Client ID, Client Secret, and Discovery Endpoint values from the organization’s IT team into their respective input fields. Click Update connection.
