OneLogin SAML
Learn how to configure a connection to OneLogin via SAML.
Each SSO Identity Provider requires specific information to create and configure a new Connection. Often, the information required to create a Connection will differ by Identity Provider.
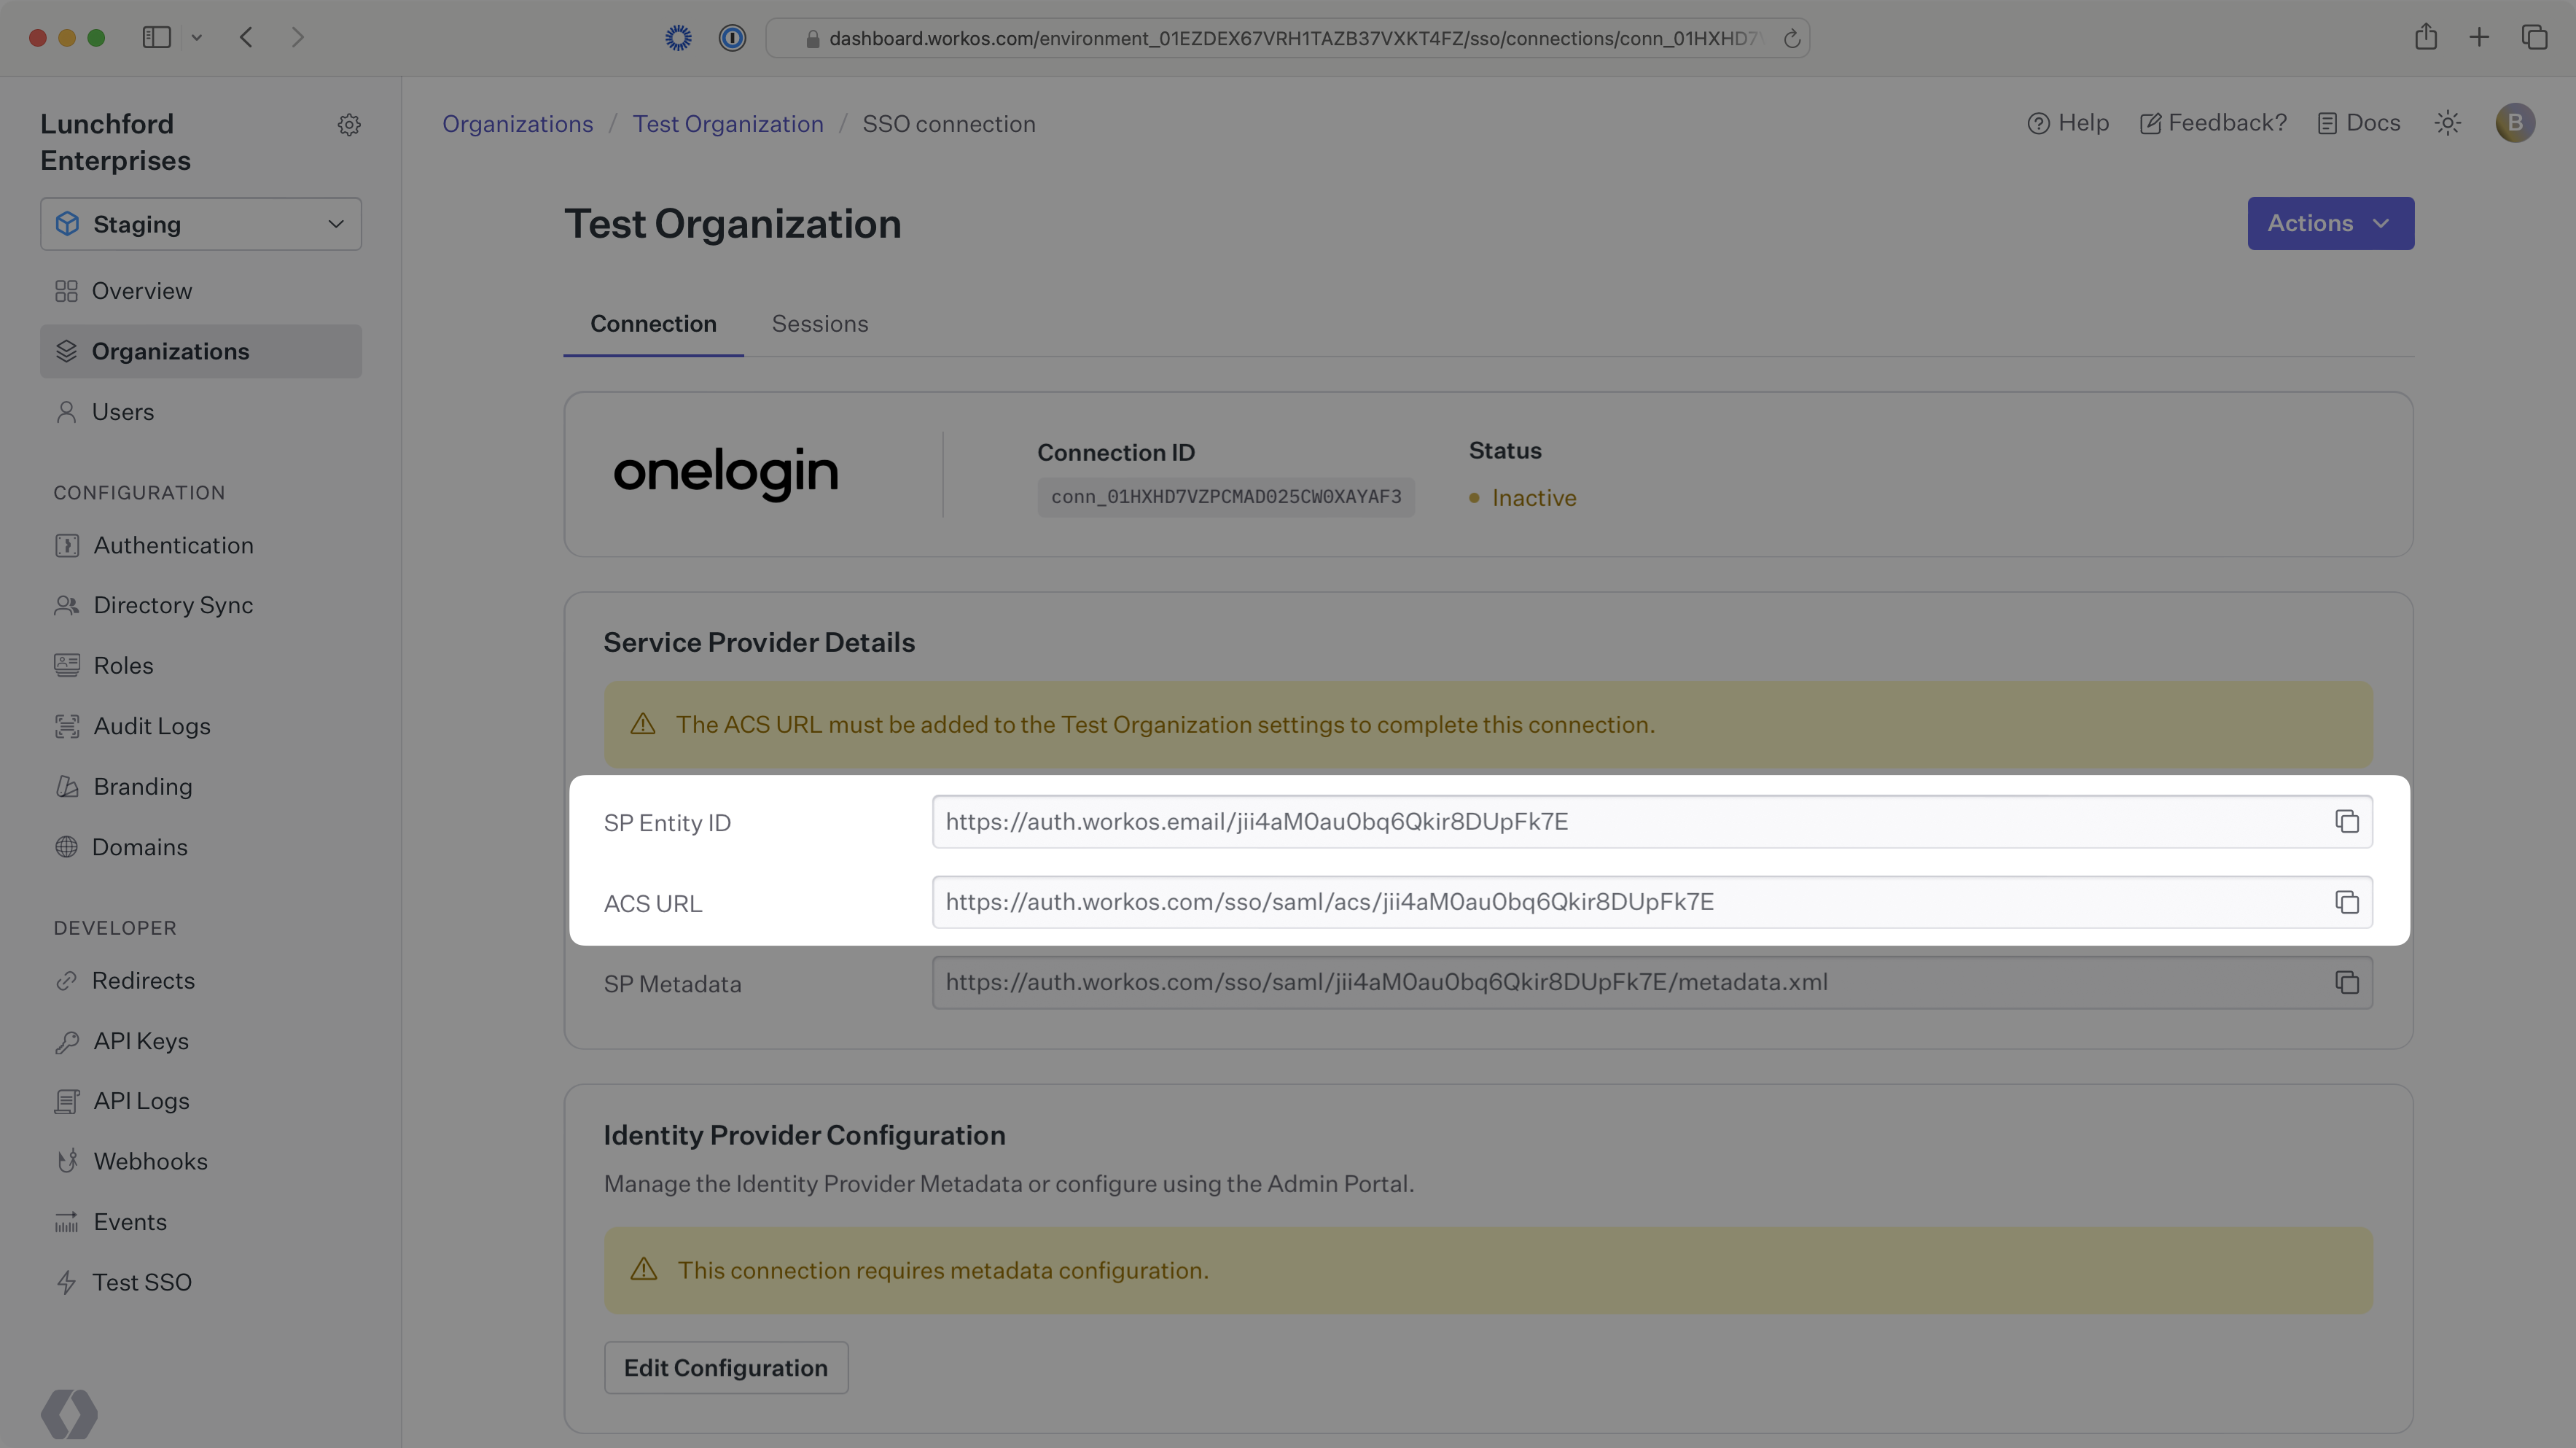
To create an OneLogin SAML Connection, you’ll need three pieces of information: an ACS URL, an SP Entity ID, and the OneLogin SAML Metadata file.
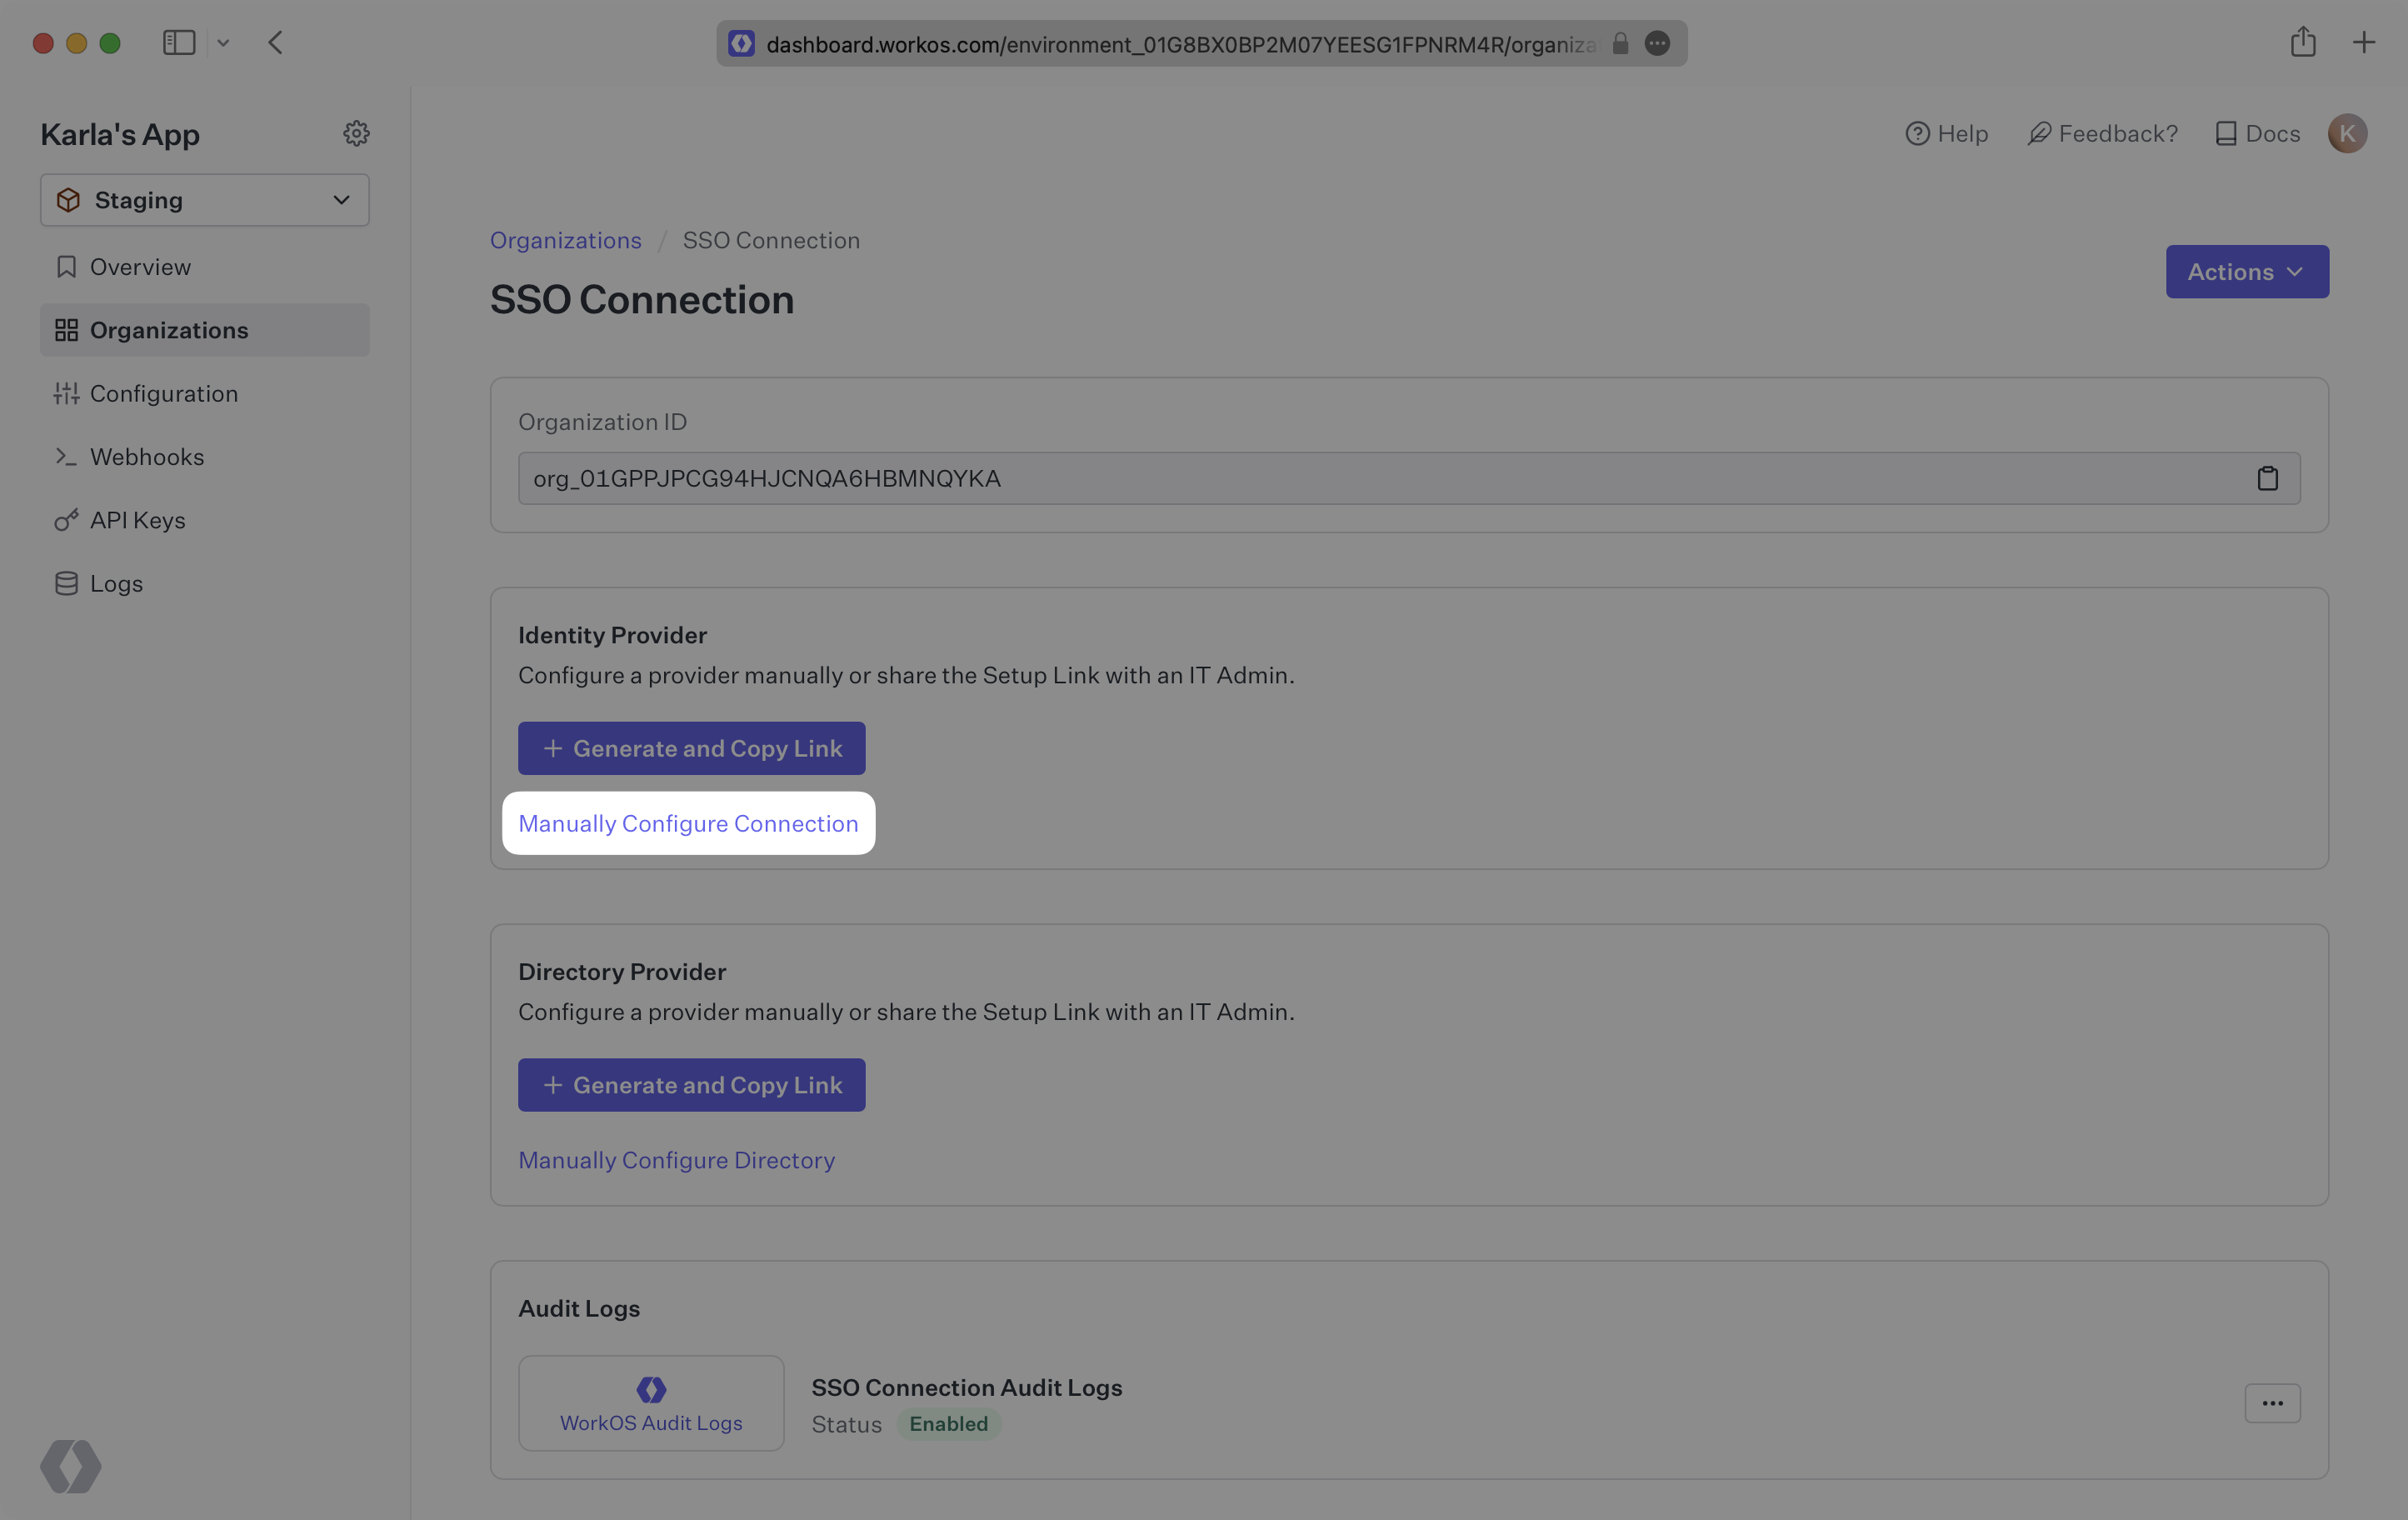
Start by logging into your WorkOS Dashboard and selecting “Organizations” from the left hand navigation bar.
Click on the organization you’d like to configure a OneLogin SAML connection for and select “Manually Configure Connection”.
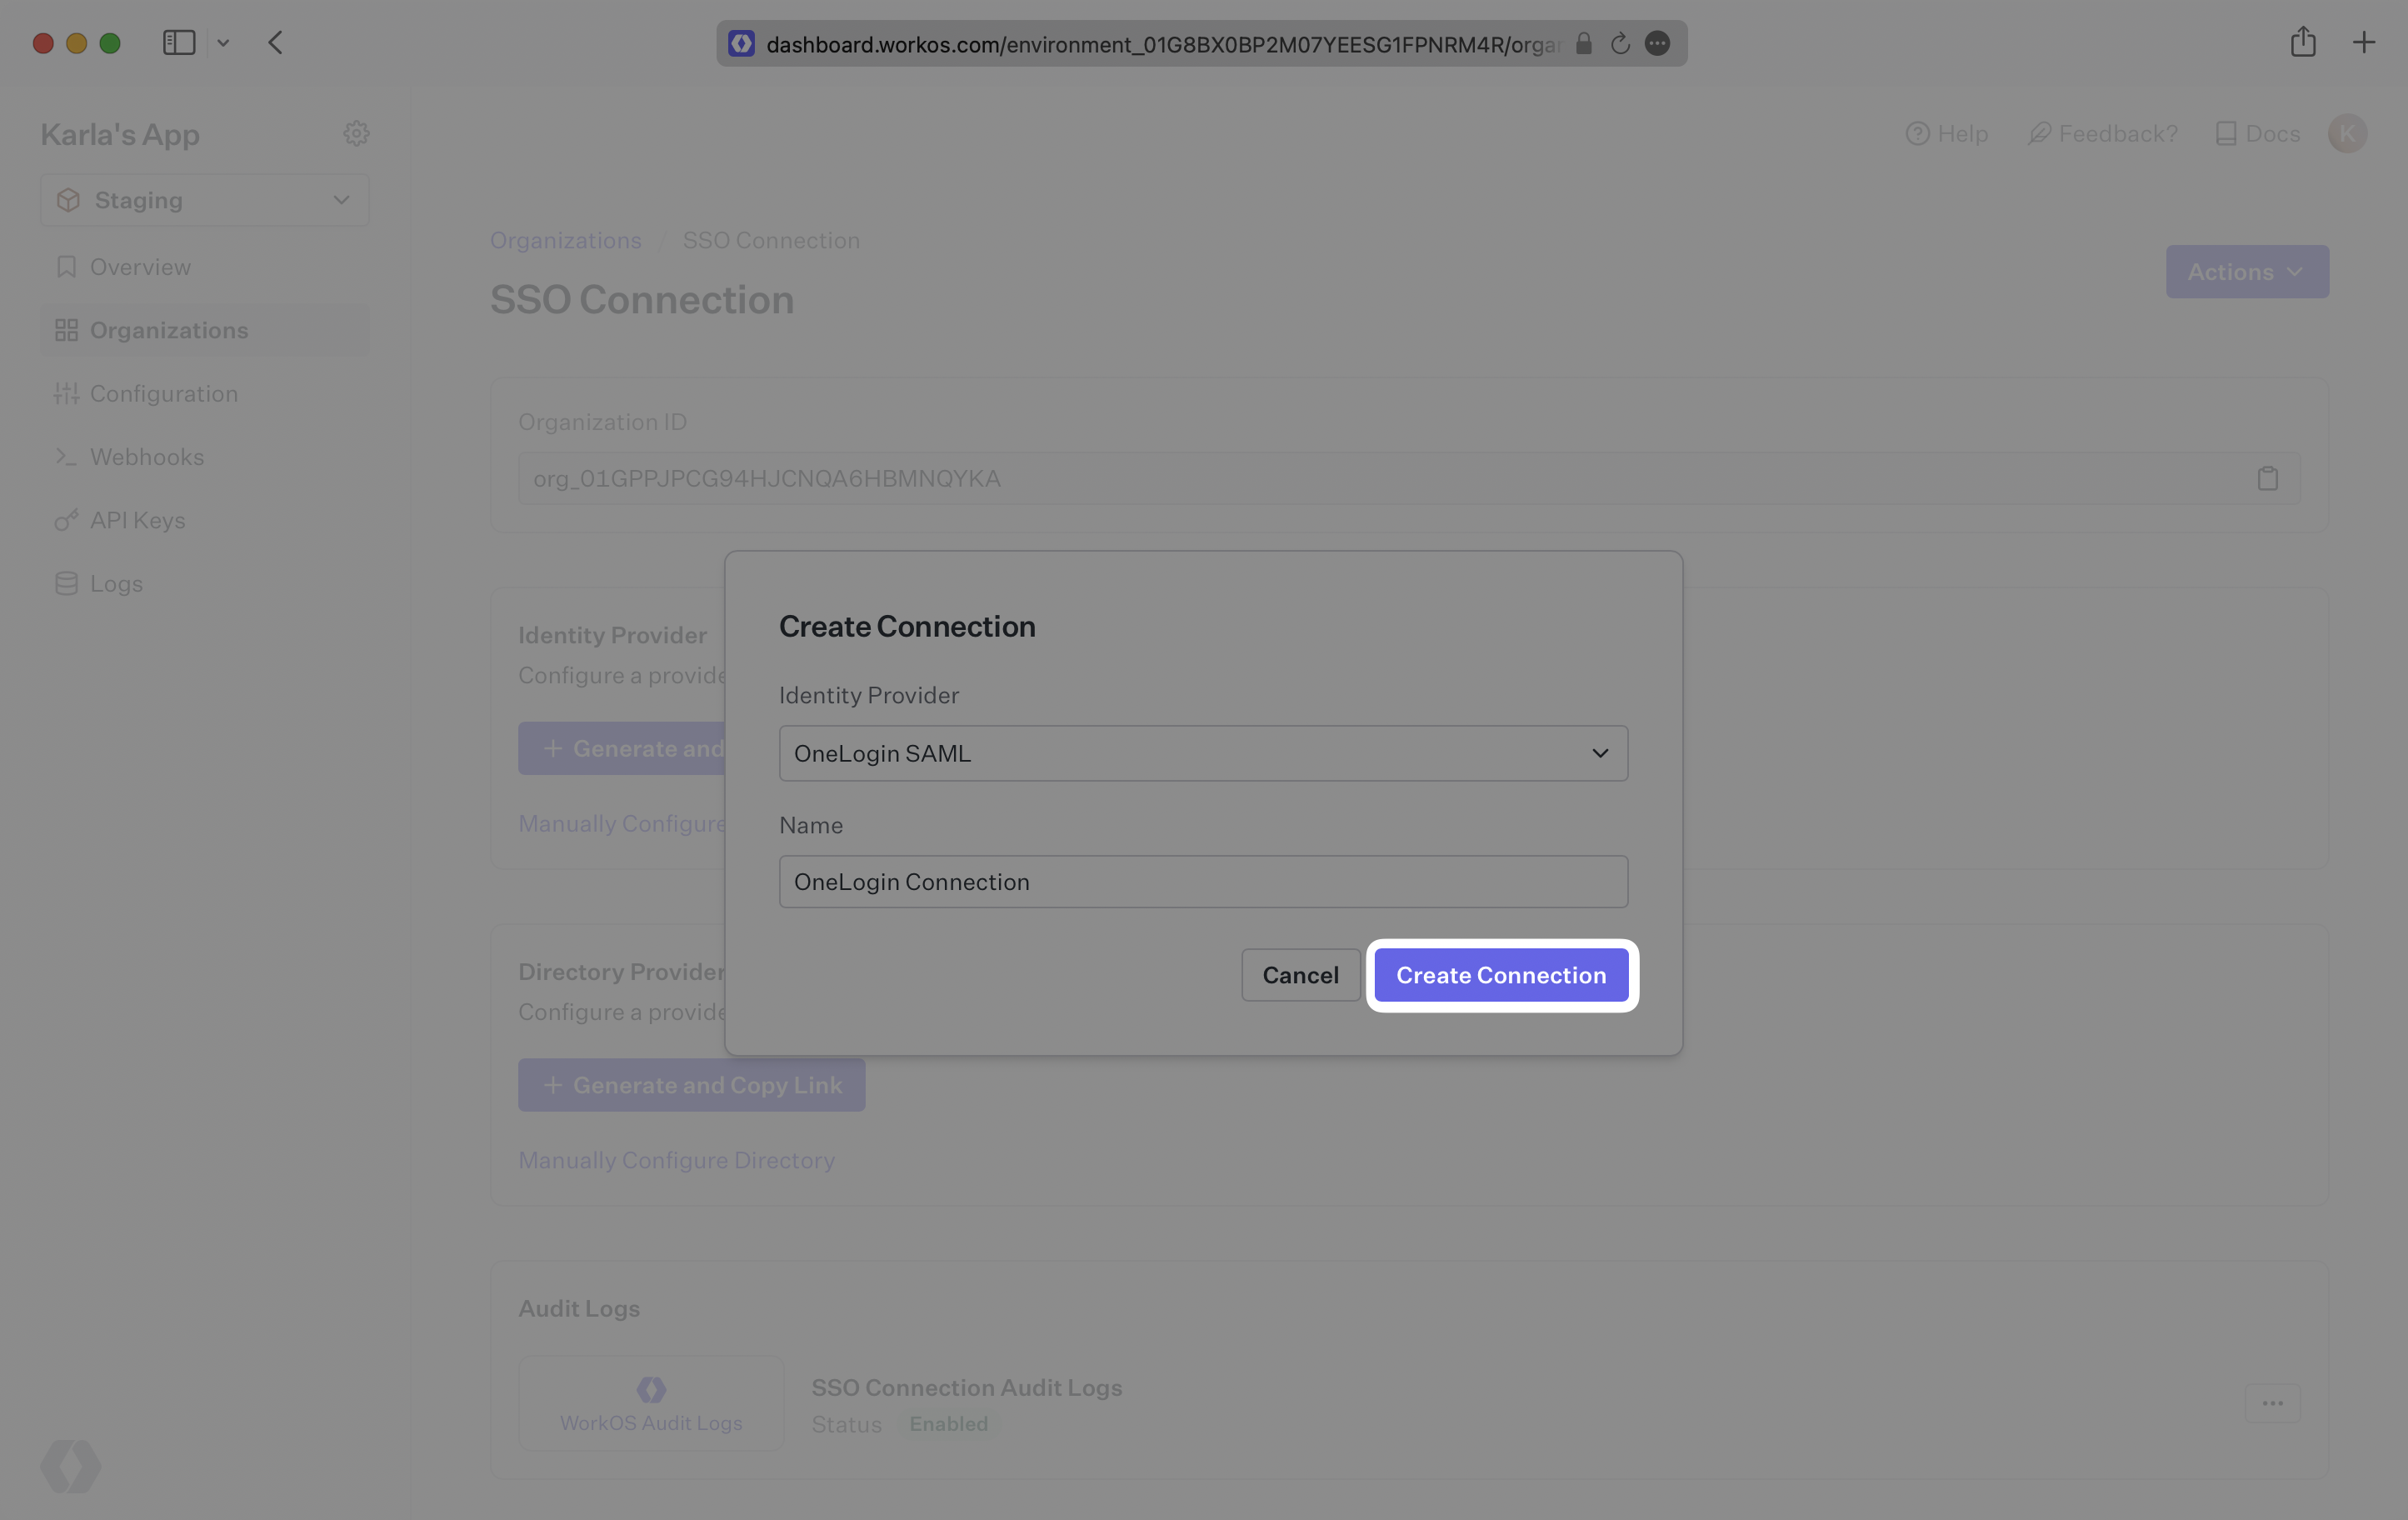
Select “OneLogin SAML” from the Identity Provider dropdown, enter a descriptive name for the connection, and then select the “Create Connection” button.
WorkOS provides the ACS URL and SP Entity ID. They are readily available in your Connection Settings in the WorkOS Dashboard.
The ACS URL is the location an Identity Provider redirects its authentication response to. In OneLogin’s case, it needs to be set by the organization when configuring your application in their OneLogin instance.
The SP Entity ID is a URI used to identify the issuer of a SAML request and the audience of a SAML response. In this case, the SP Entity ID is used to communicate that WorkOS will be the party performing SAML requests to the organization’s OneLogin instance, and that WorkOS is the intended audience of the SAML responses from the OneLogin instance.
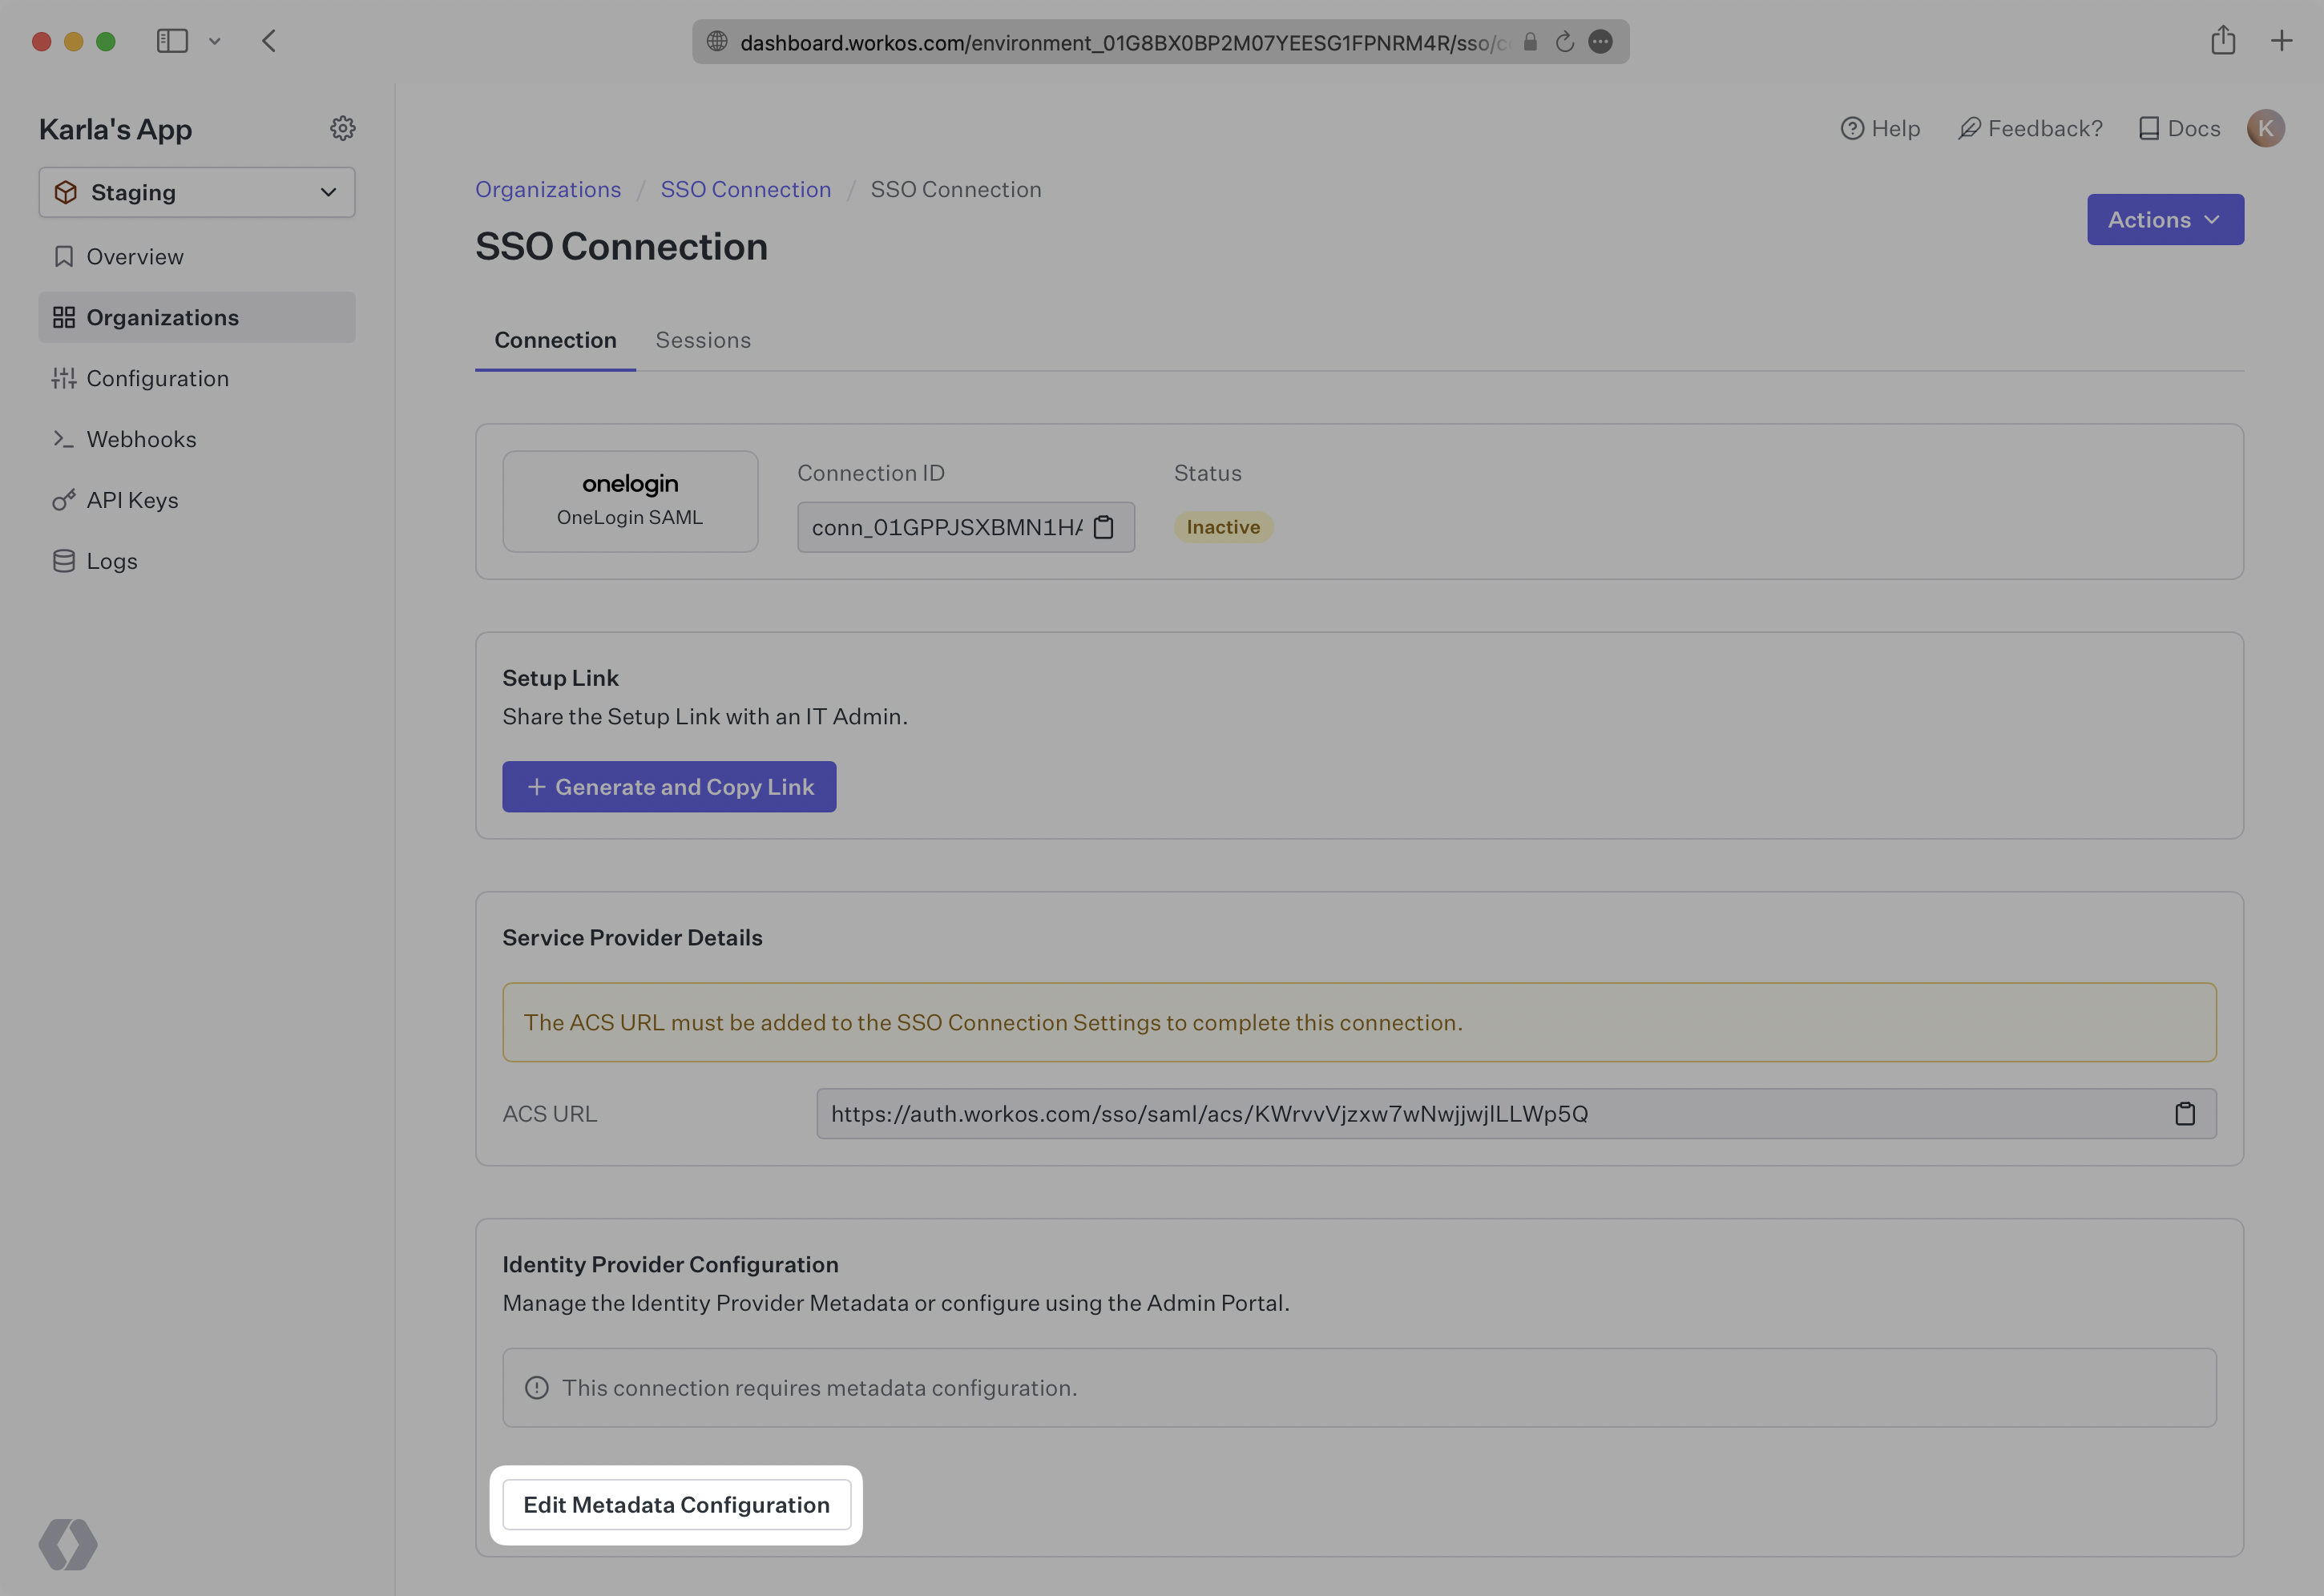
Next, provide the OneLogin SAML Metadata file.
Normally, this will come from the organization’s IT Management team when they set up your application’s SAML 2.0 configuration in their OneLogin admin dashboard. But, should that not be the case during your setup, the next steps will show you how to obtain it.
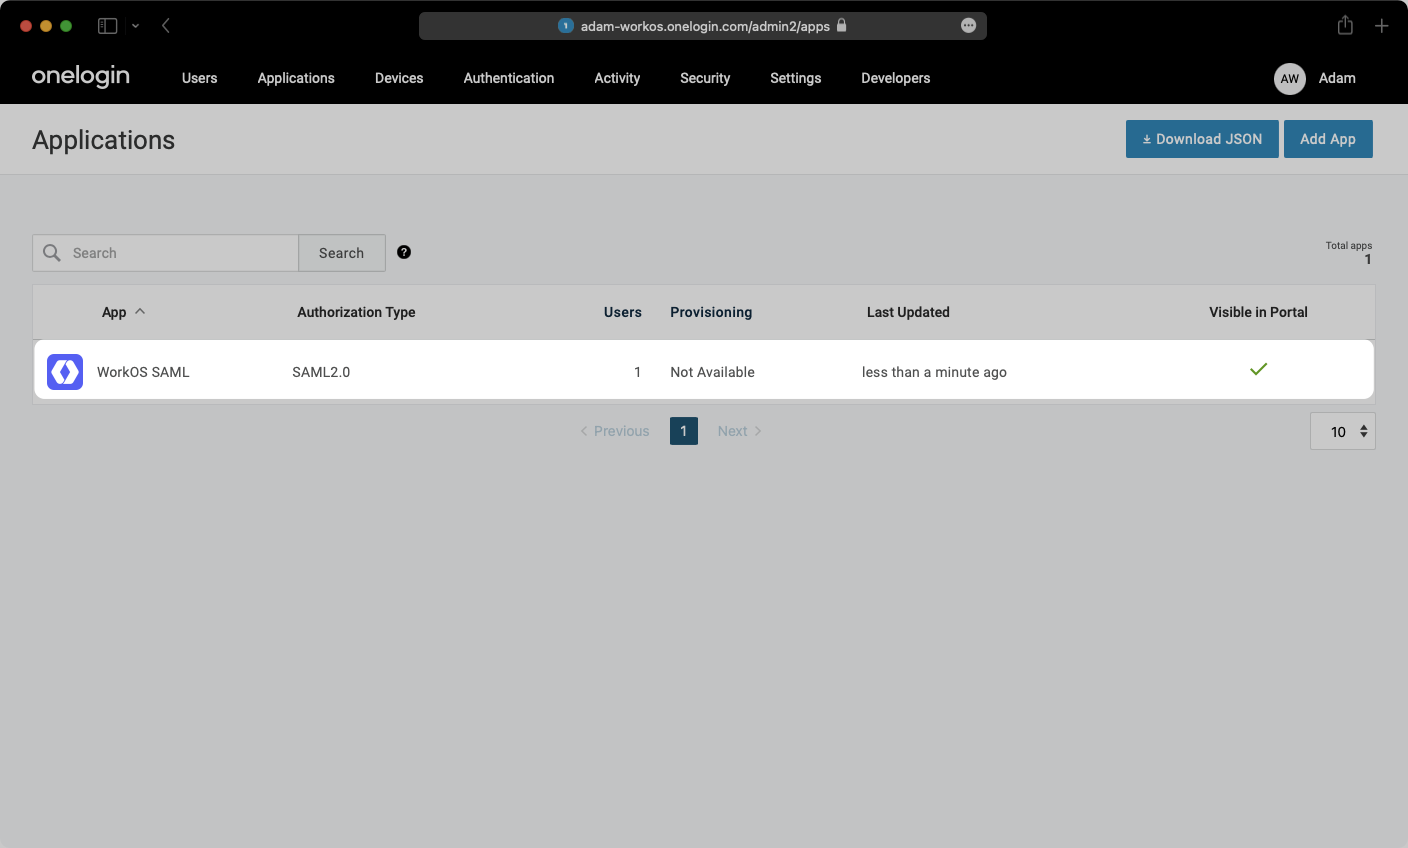
Log in to OneLogin, go to the admin dashboard, and select “Applications” in the navigation bar.
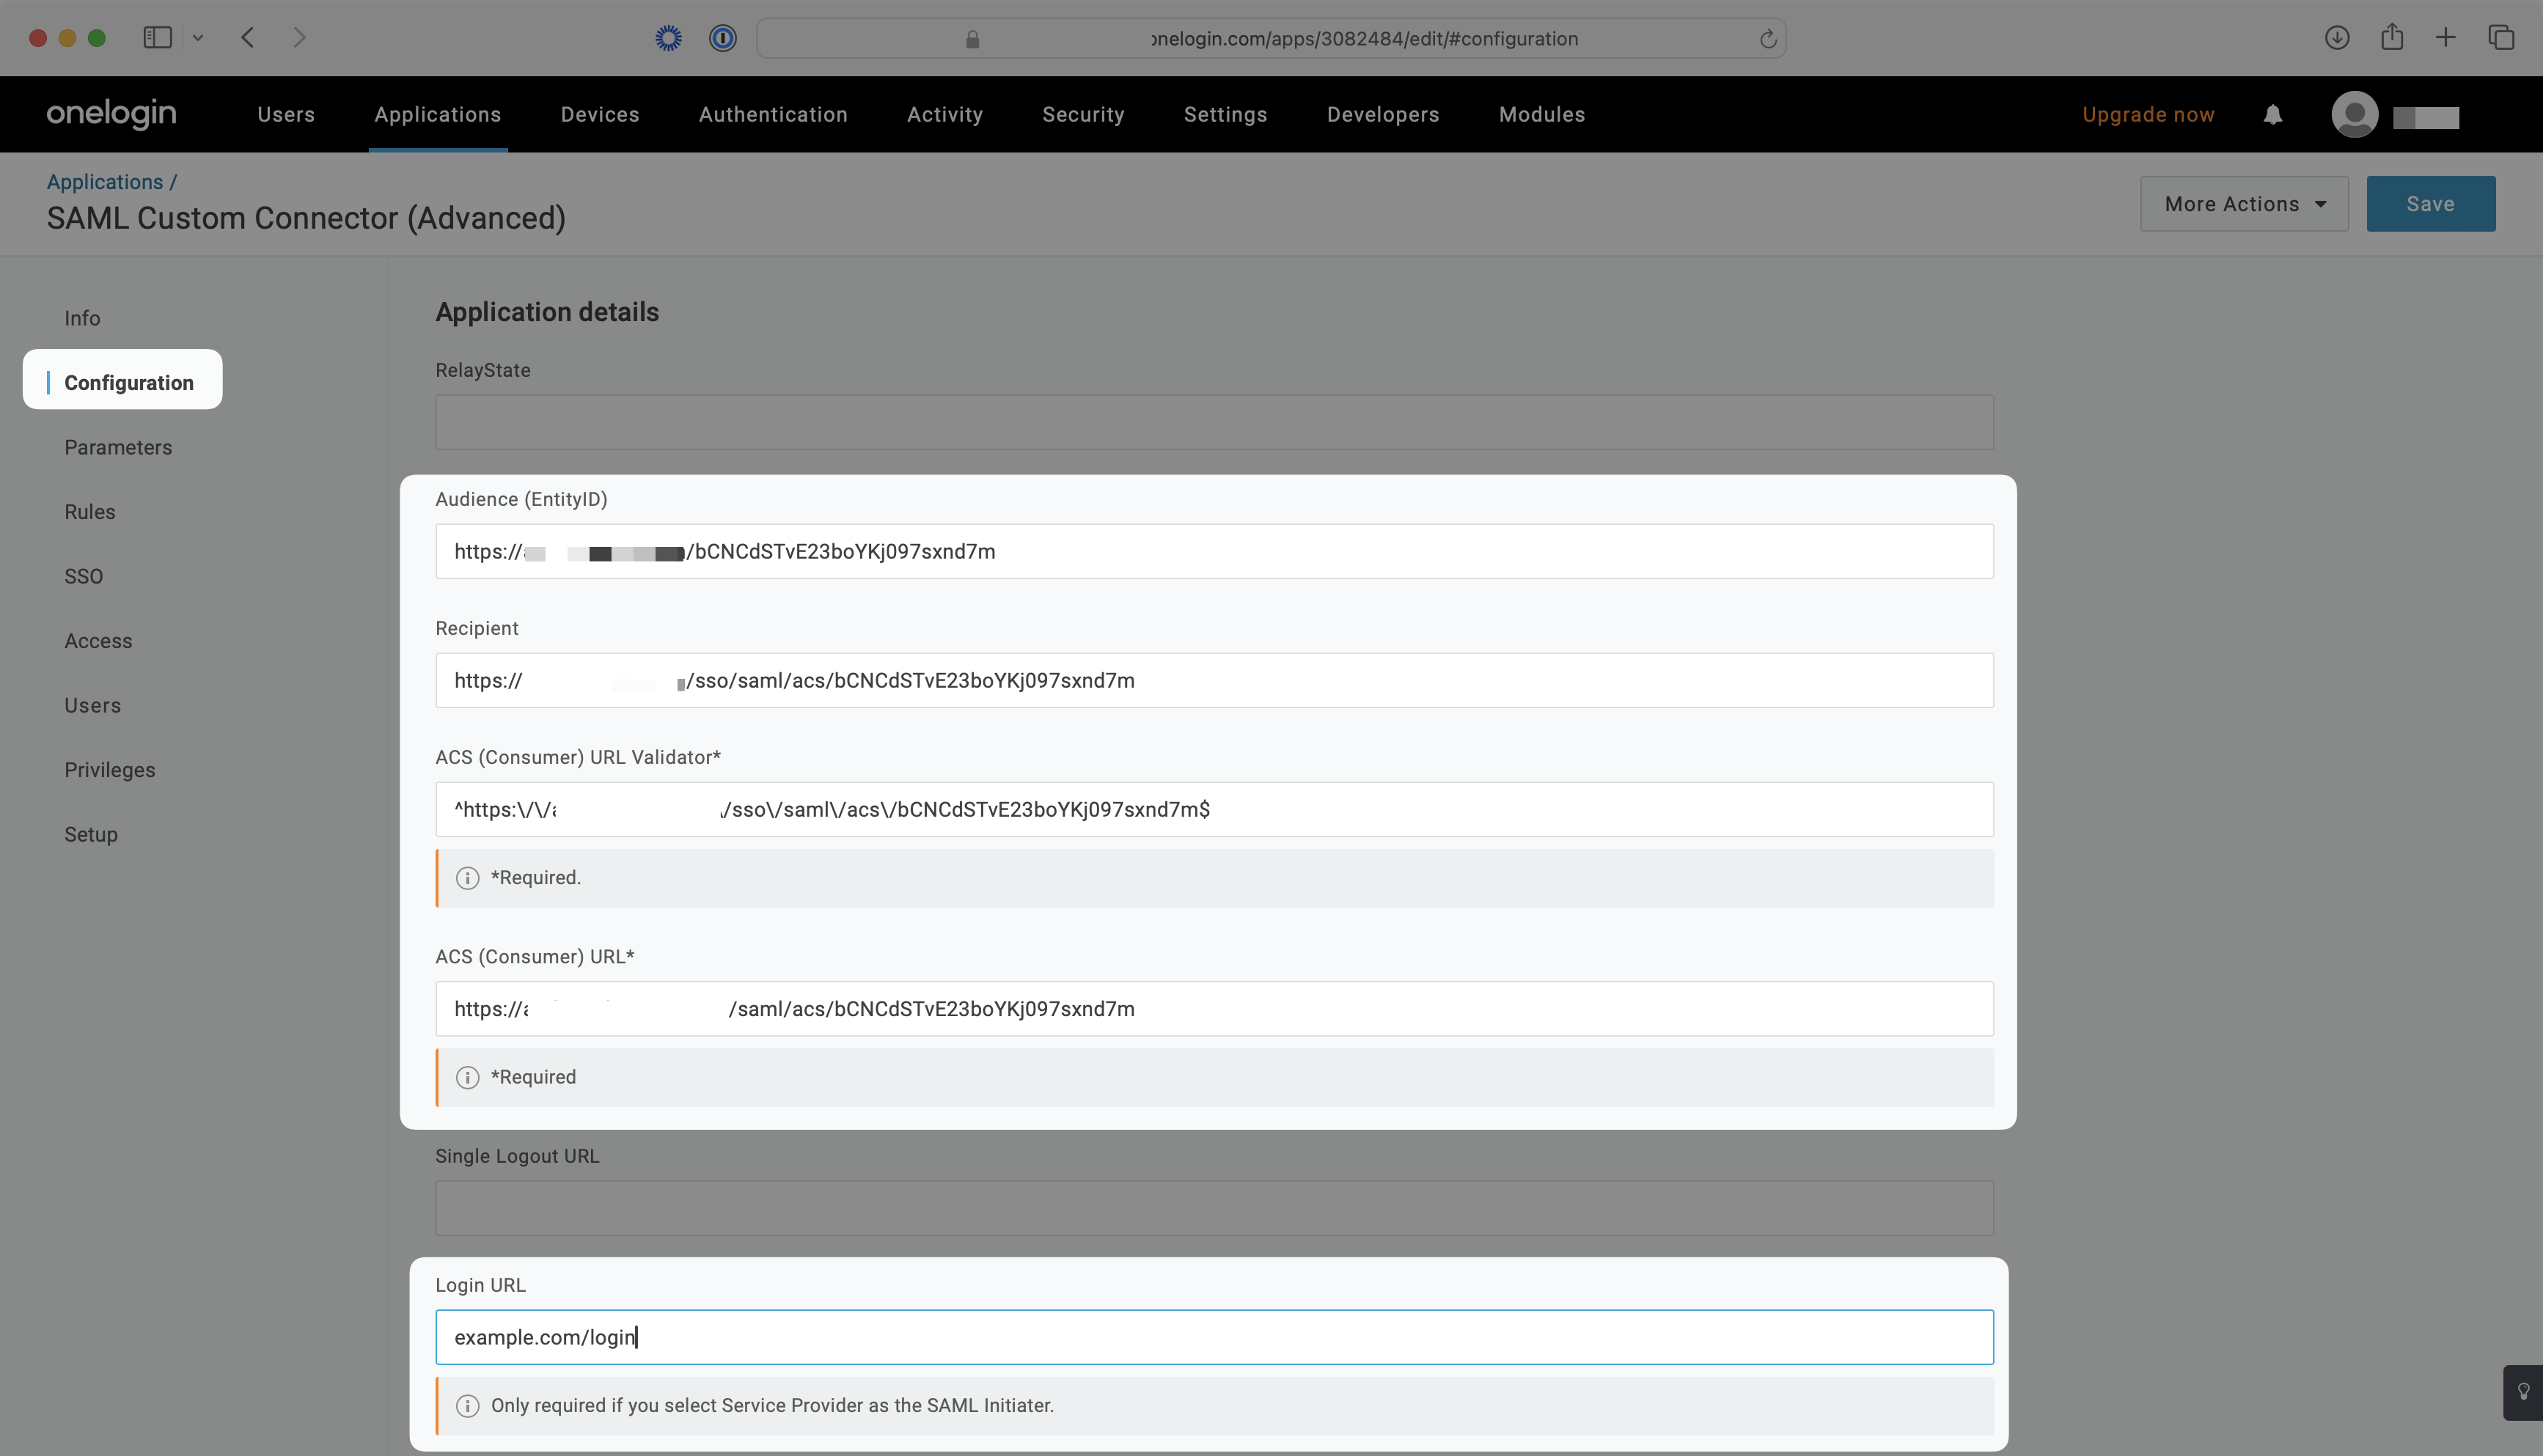
Select “Configuration” from the left-hand navigation:
- Enter the SP Entity ID as the Audience (EntityID) e.g.
https://auth.workos.com/wz5SpShhRIcSEyMM - Enter the ACS URL as the Recipient e.g.
https://auth.workos.com/sso/saml/acs/wz5SpShhRIcSEyMM - Enter your ACS URL Validator e.g.
^https:\/\/auth\.workos\.com\/sso\/saml\/acs\/wz5SpShhRIcSEyMM$ - Enter your ACS URL e.g.
https://auth.workos.com/sso/saml/acs/wz5SpShhRIcSEyMM - Enter your application’s login URL
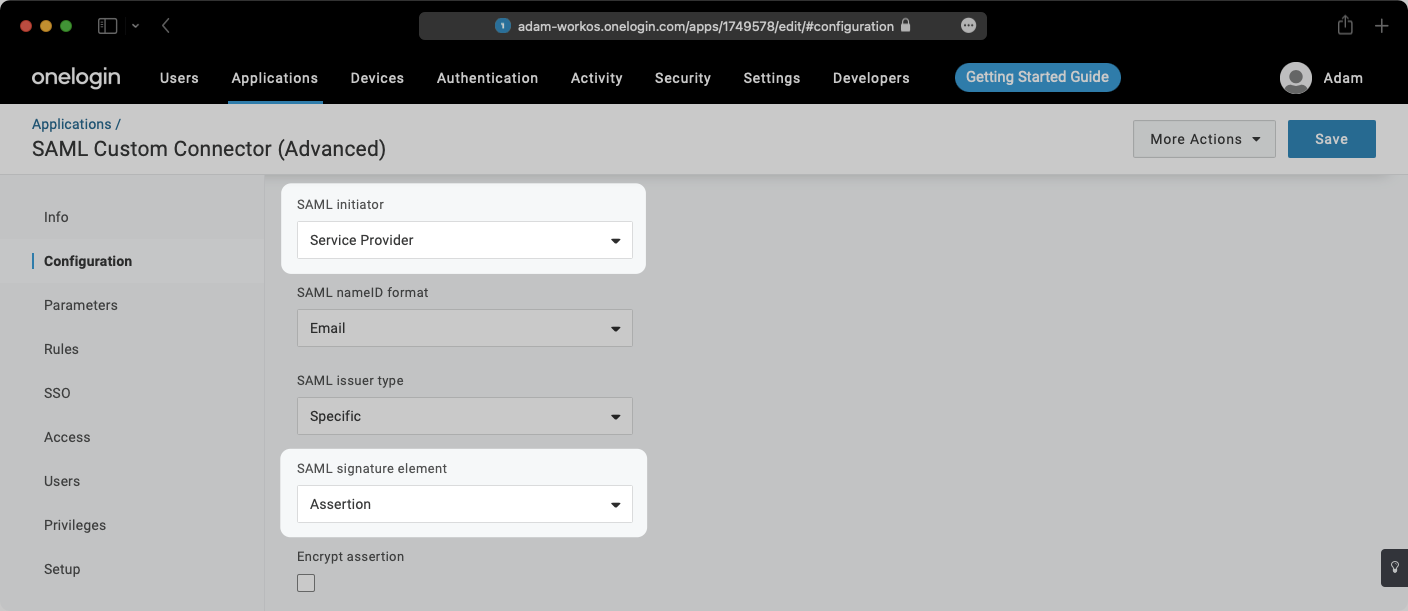
- Select “Service Provider” from the “SAML Initiator” dropdown menu
- Select “Assertion” from the “SAML Signature Element” dropdown menu
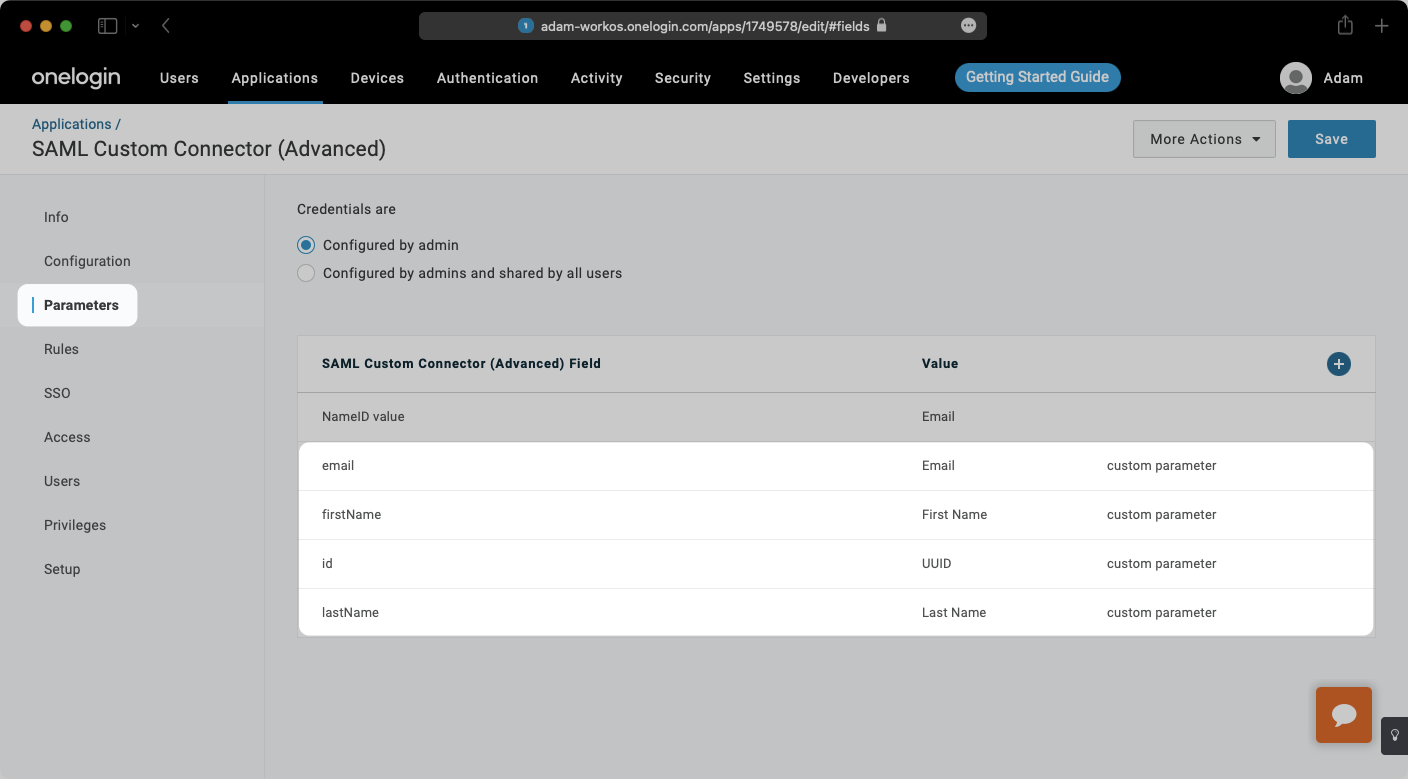
Select “Parameters” from the left-hand navigation and add the following field-value parameter pairs:
email→EmailfirstName→First Nameid→UUIDlastName→Last Name
Check the “Include in SAML assertion” flag for each pair.
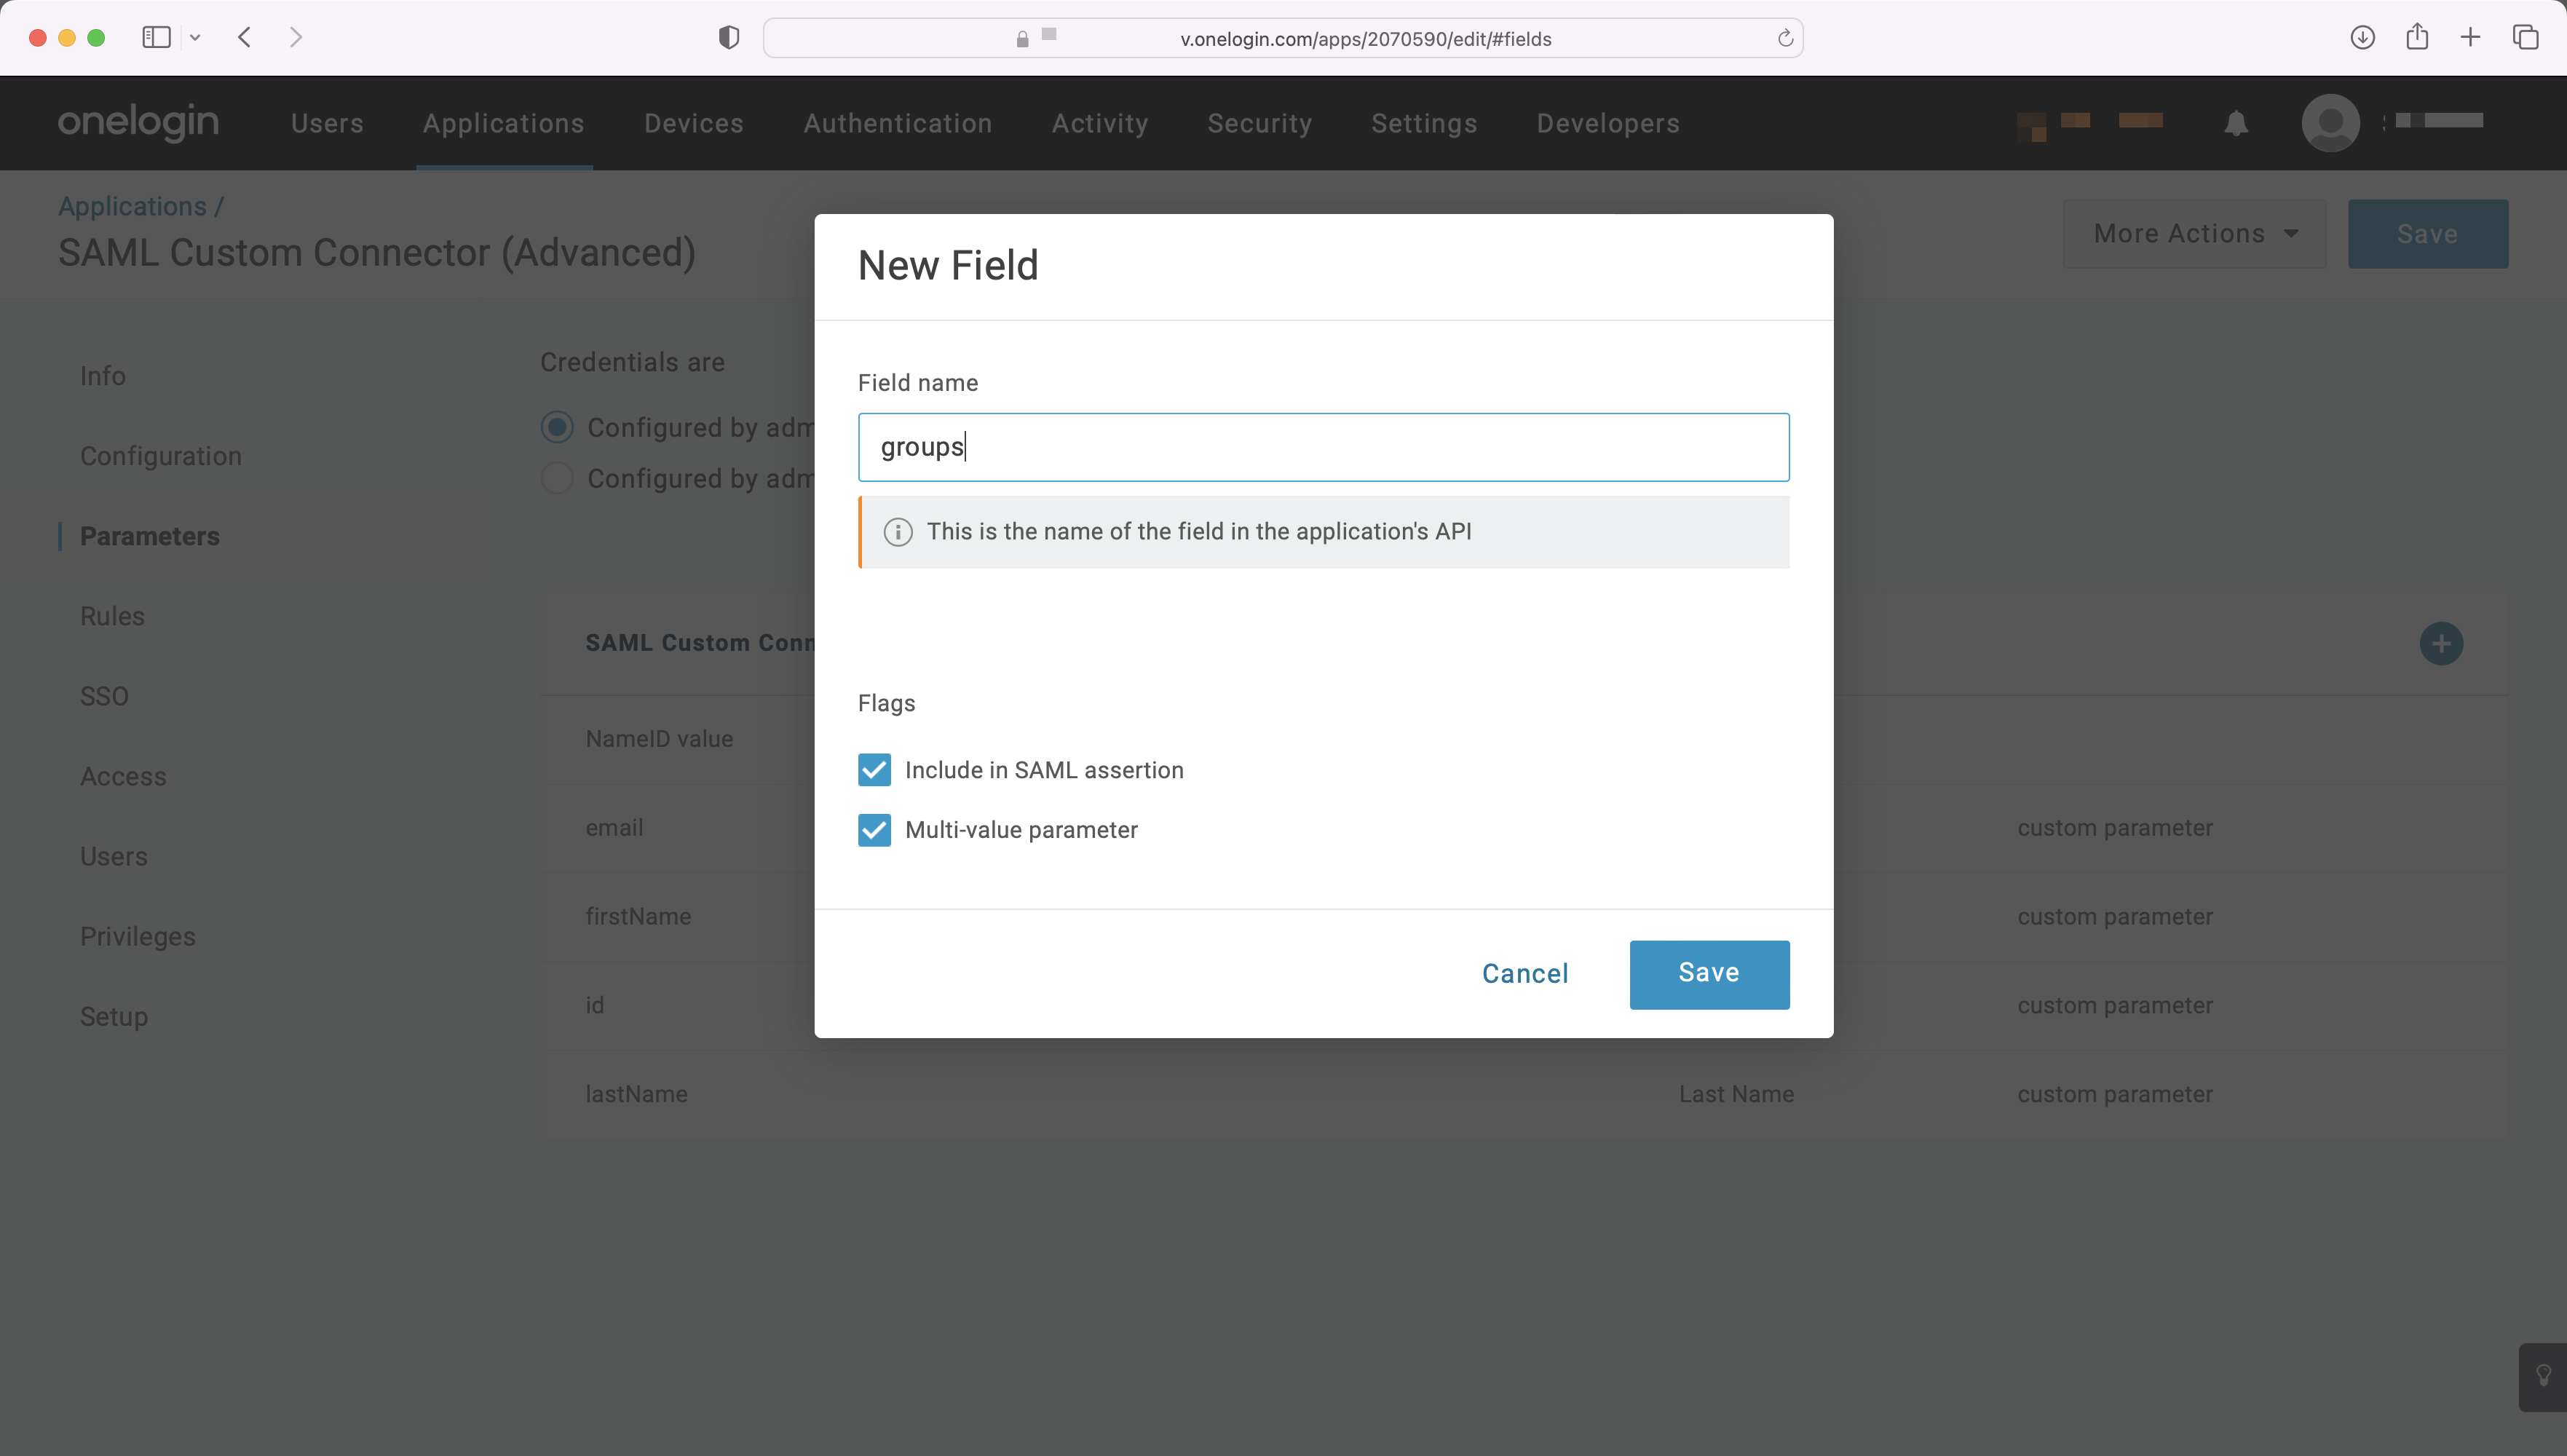
With identity provider role assignment, users can receive roles within your application based on their group memberships. To return this information in the attribute statement, follow the guidance below.
Add a new parameter, and set the “Field name” to groups. Under “Flags”, click the checkboxes for both “Include in SAML assertion” and “Multi-value parameter”.
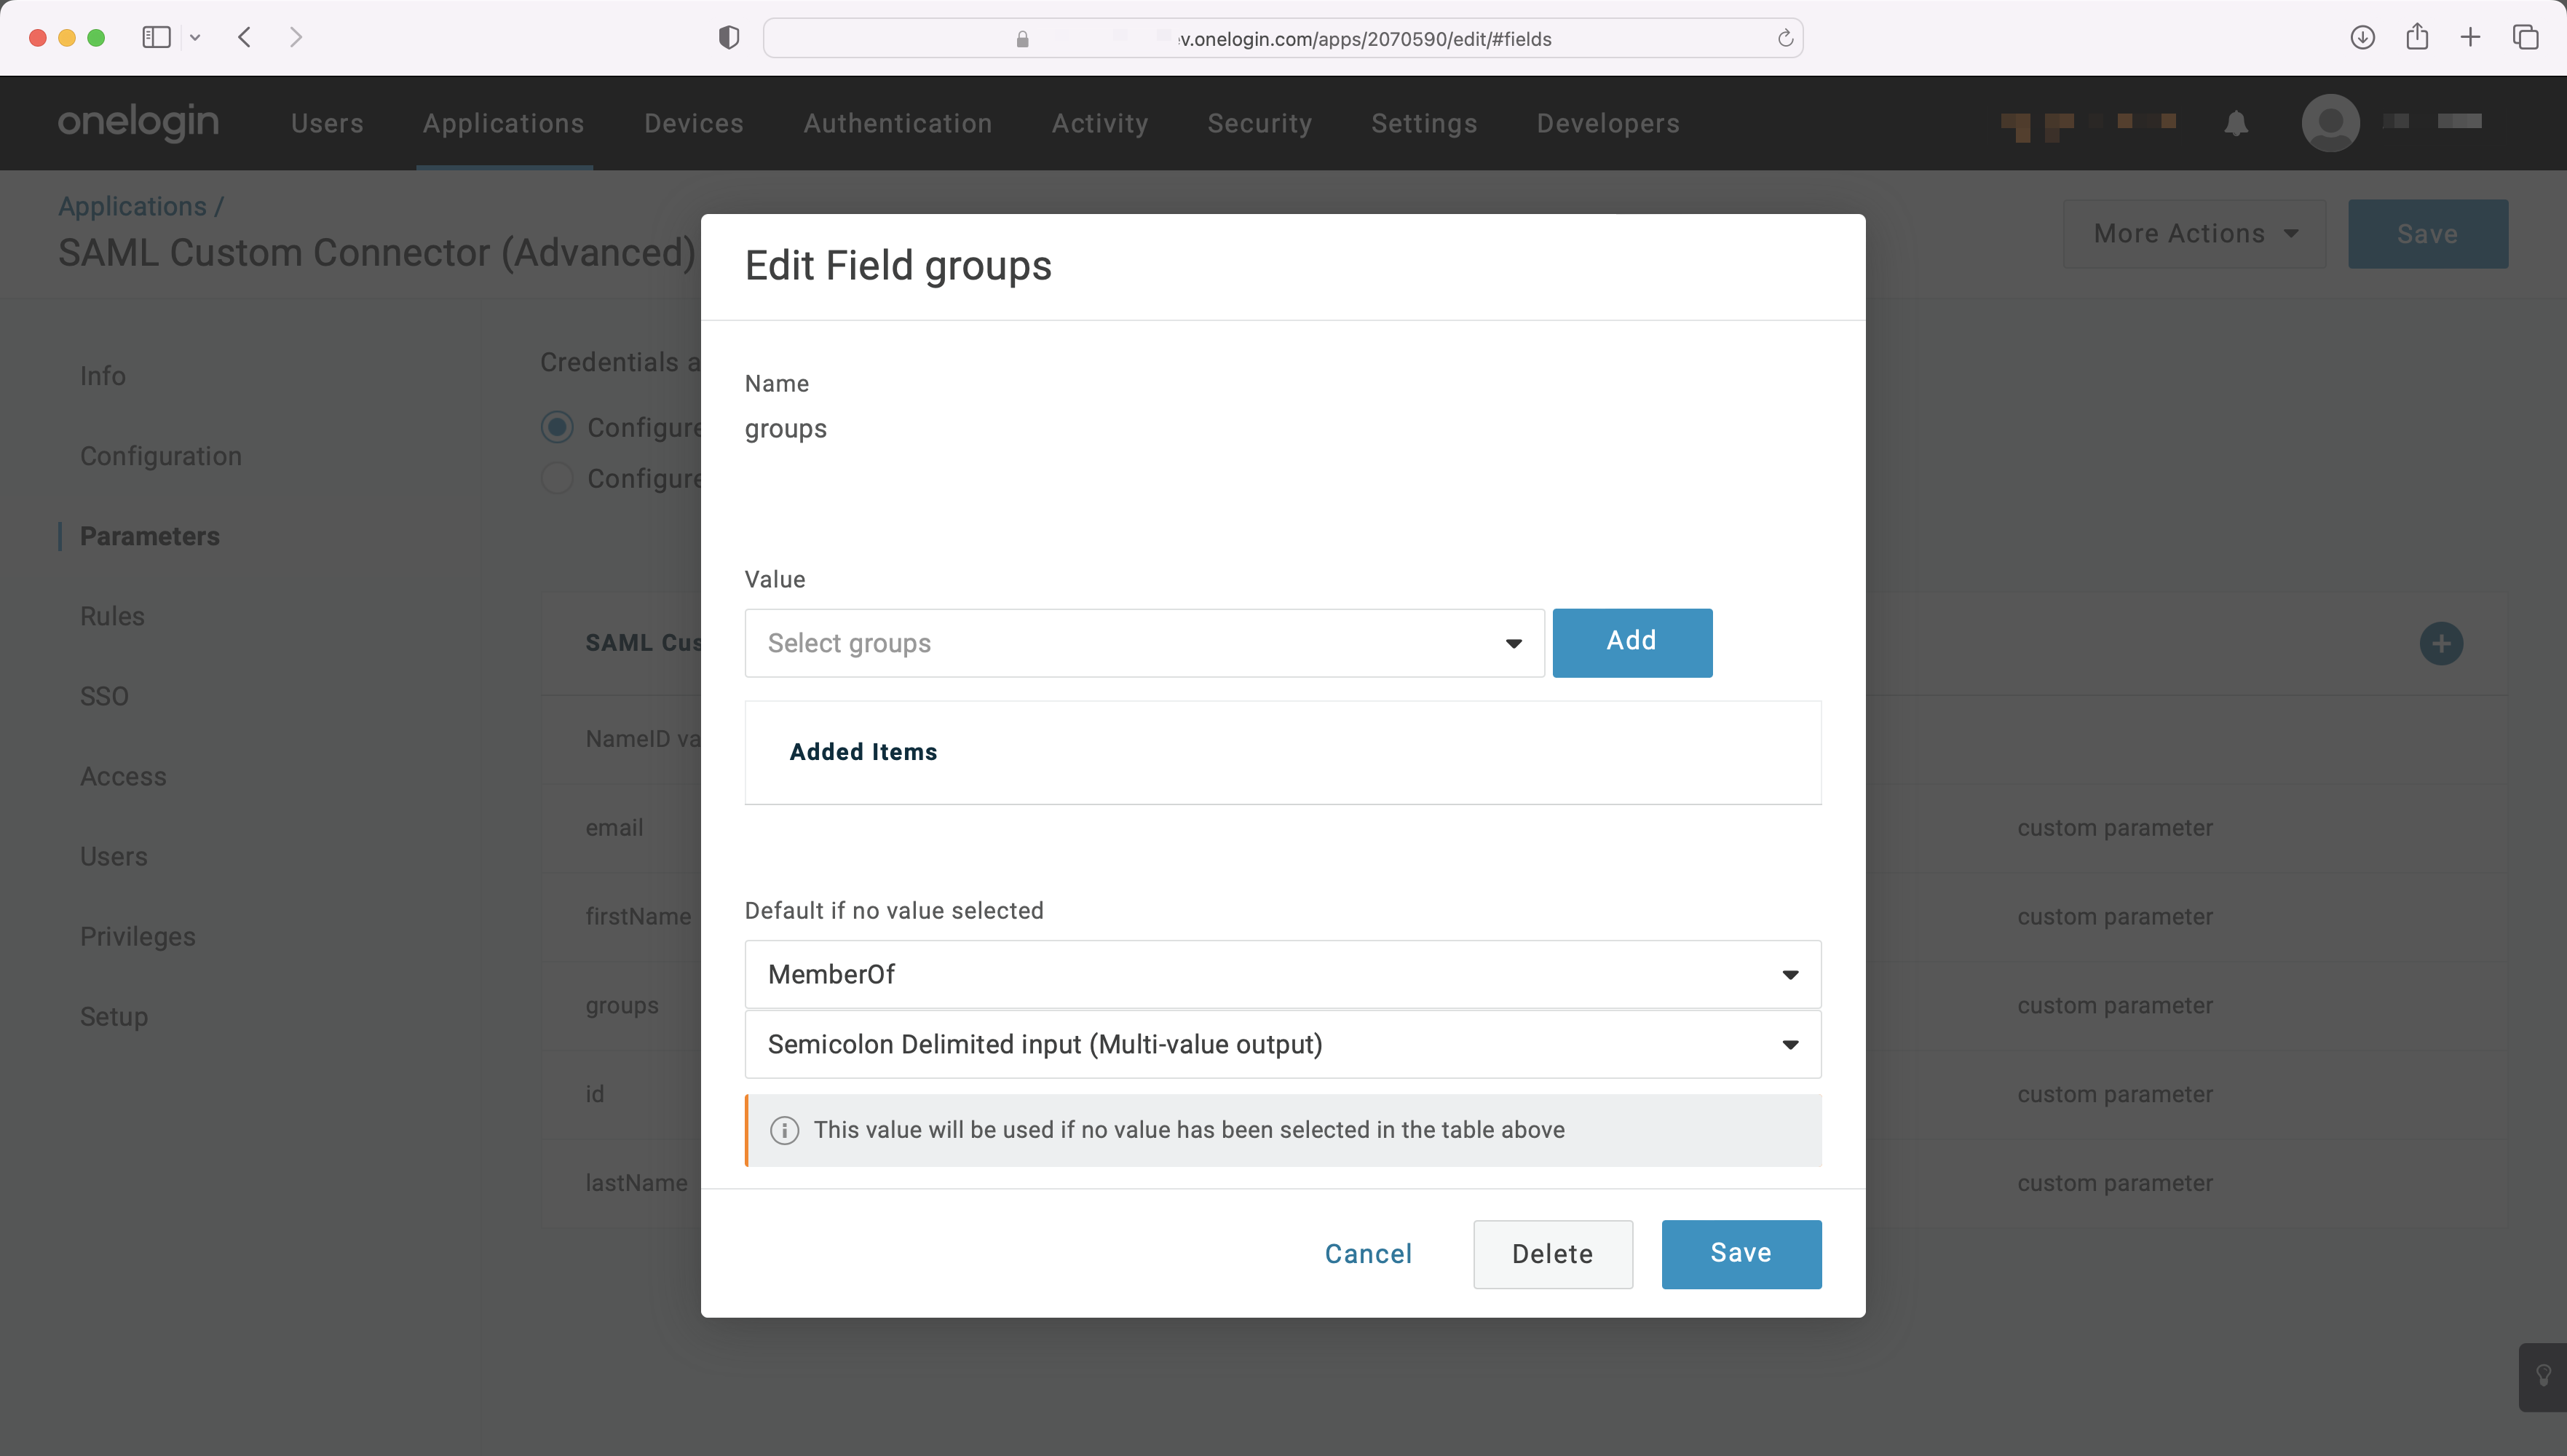
Map the groups field to the attribute in OneLogin containing a user’s group membership, such as “MemberOf”, shown in the example below. For more information on sending group information, refer to the OneLogin documentation.
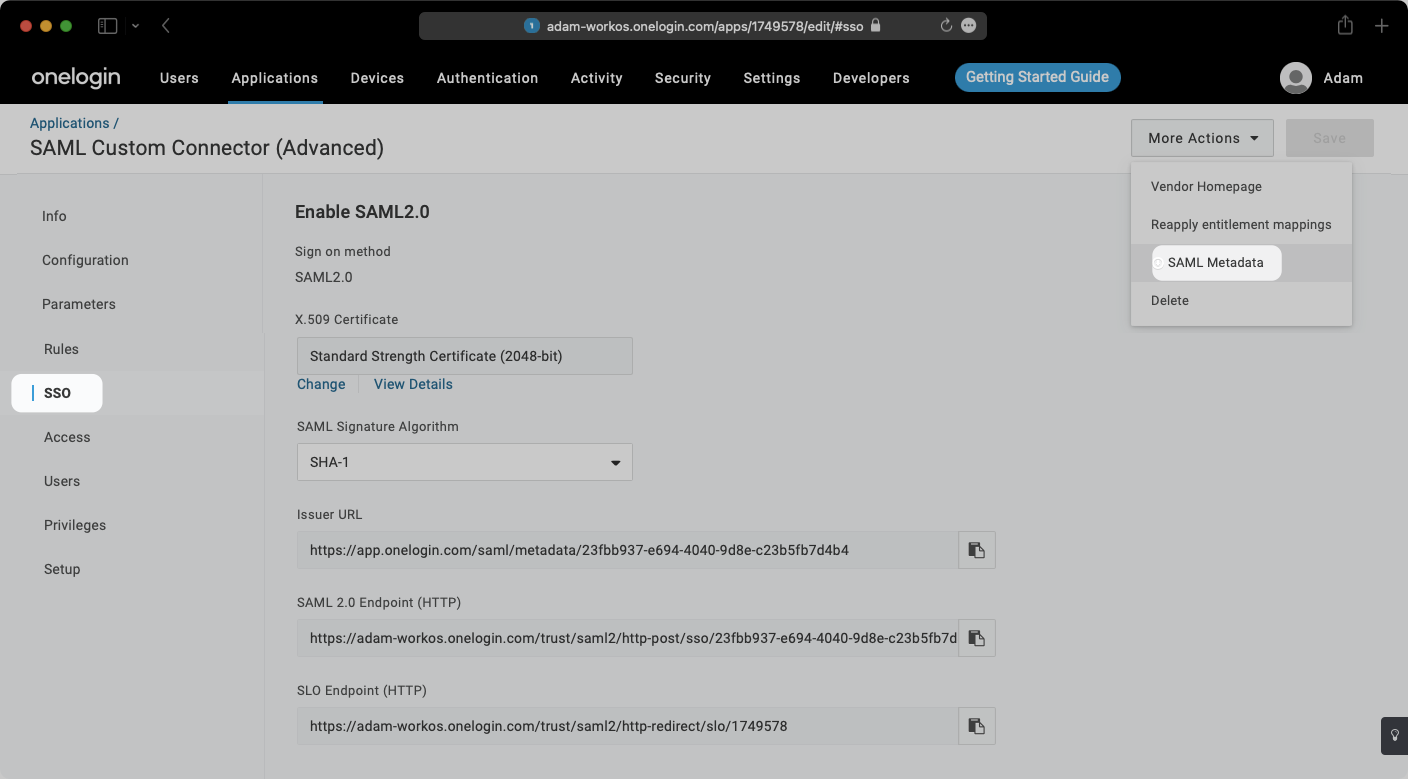
Select “SSO” from the left-hand navigation.
Select the “More Actions” dropdown and click on “SAML Metadata”. This will download an XML metadata file.
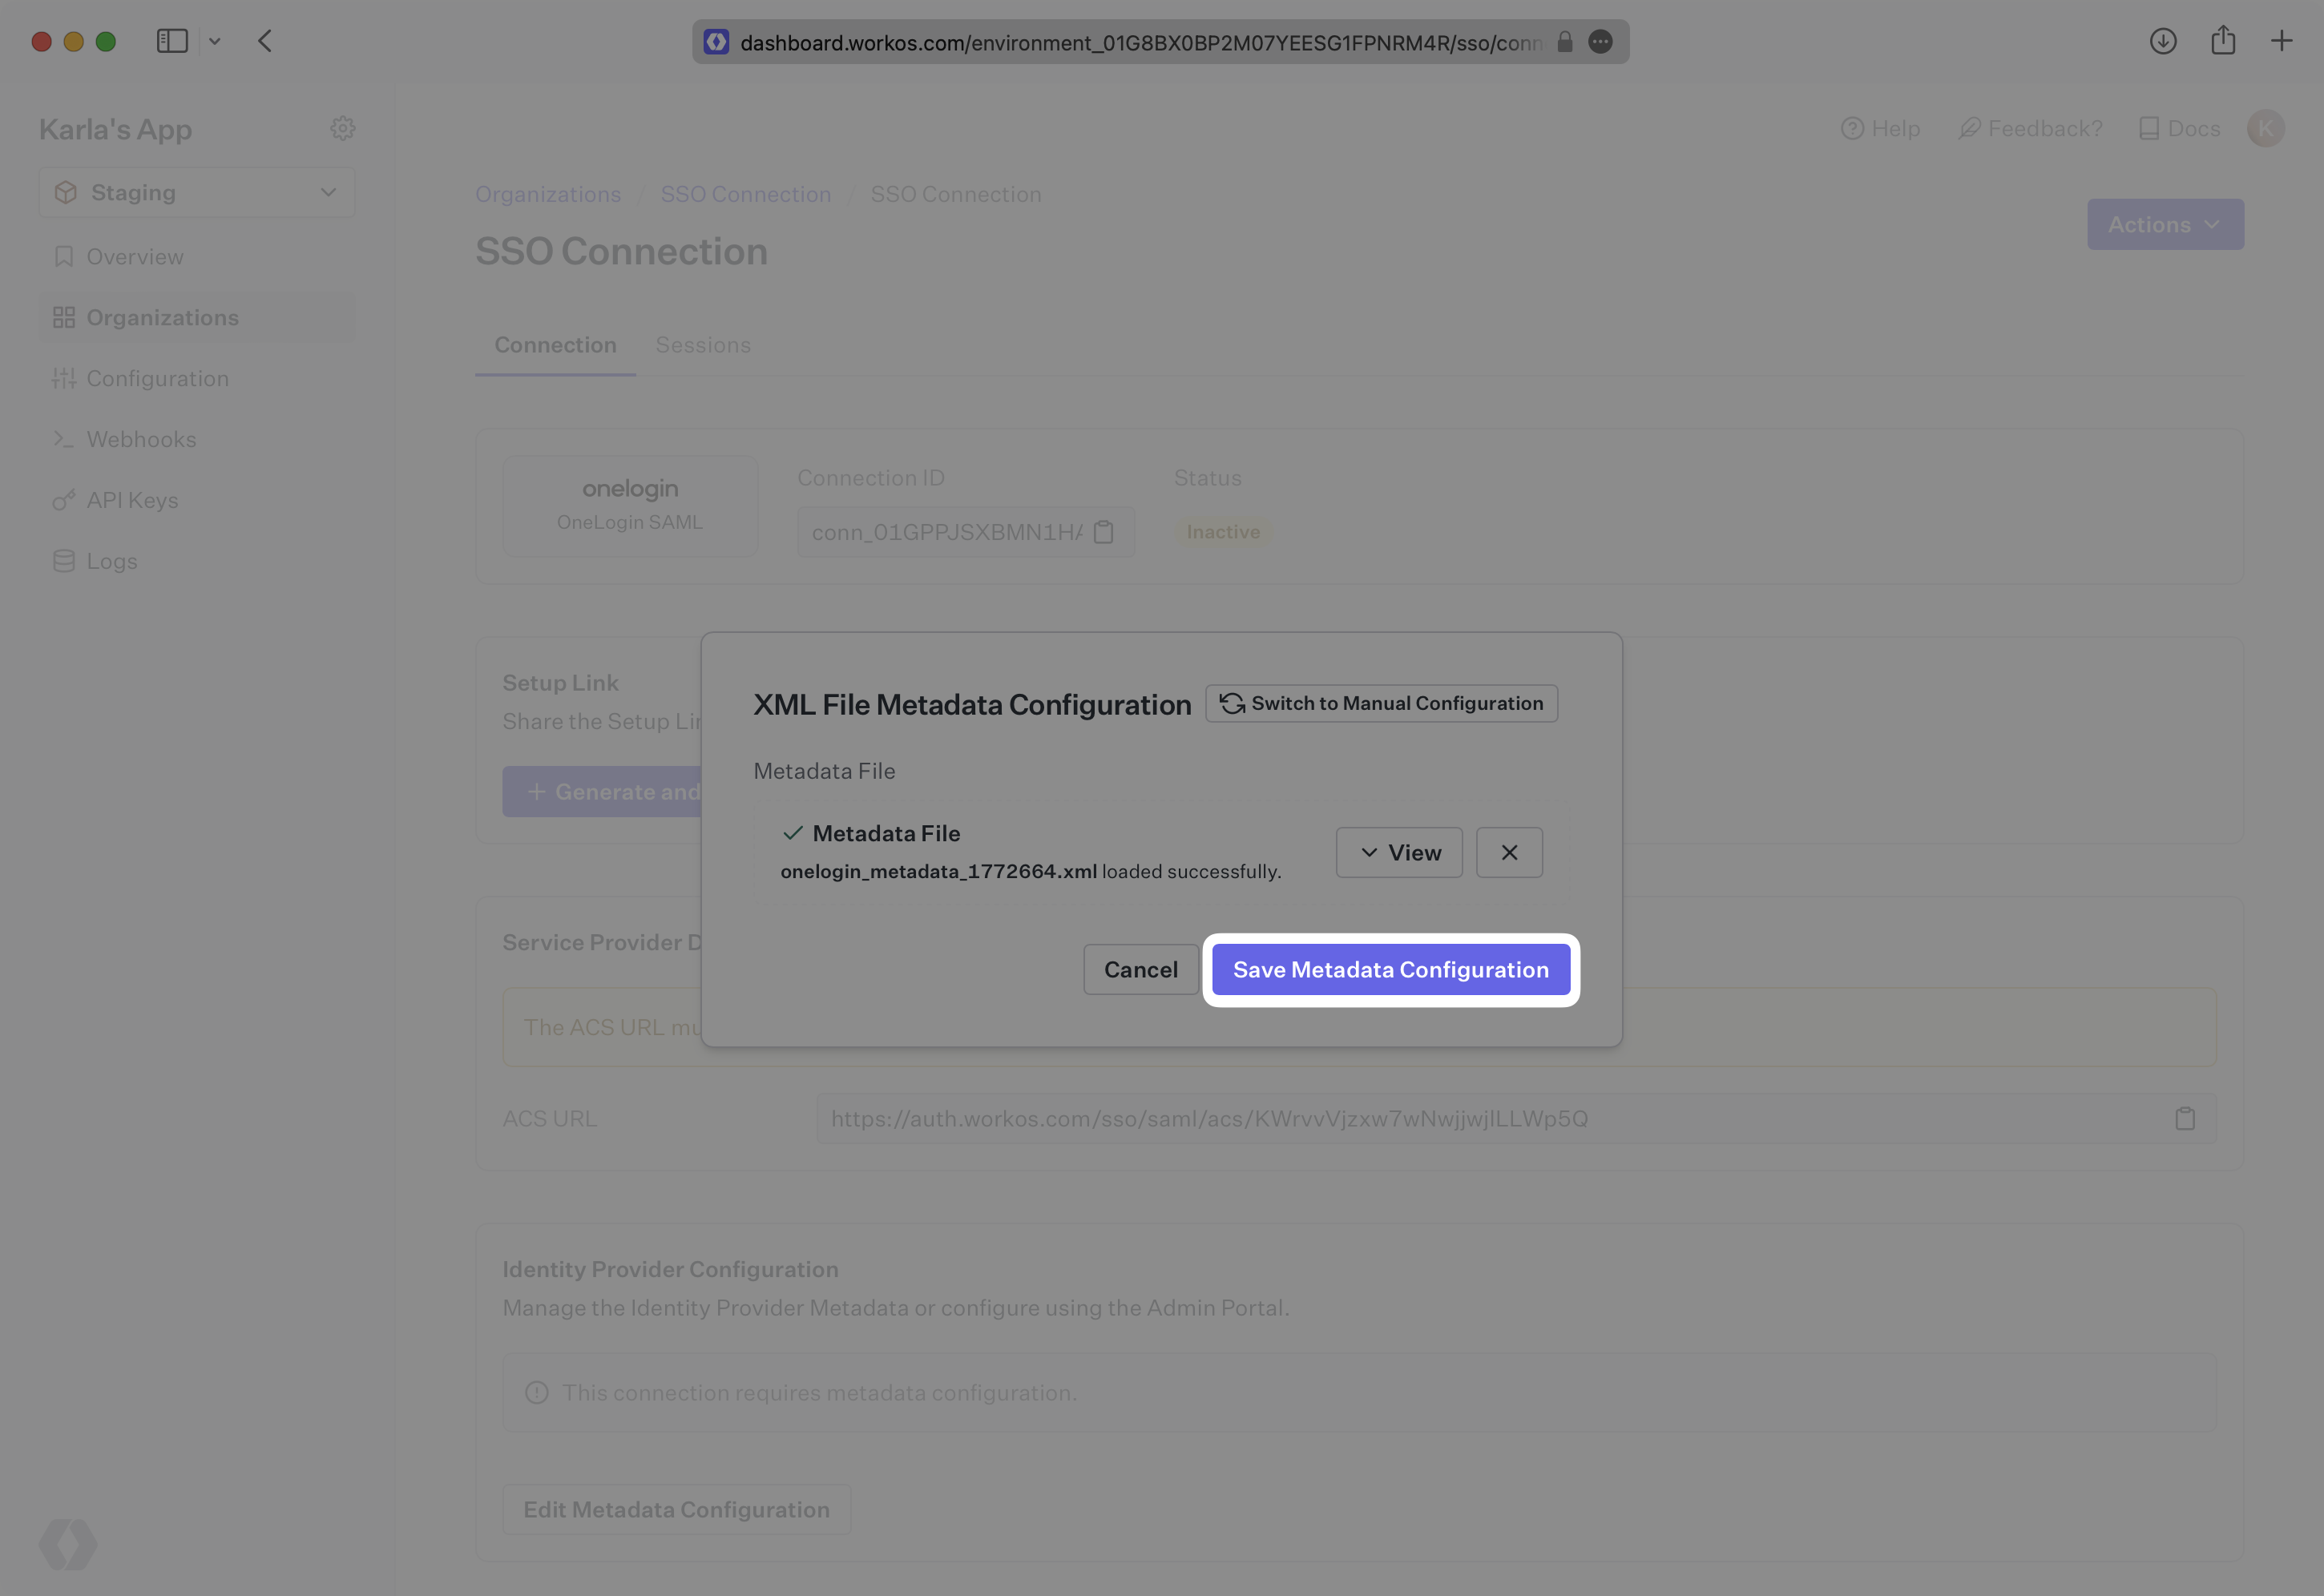
In the Connection Settings of the WorkOS Dashboard, click “Edit Metadata Configuration”.
In the modal that pops up, upload the OneLogin Metadata file and then select “Save Metadata Configuration”.
Once the file has uploaded, your Connection will then be linked and good to go!