OneLogin SCIM
Learn about syncing your user list with OneLogin SCIM.
This guide outlines how to synchronize your application’s OneLogin directories using SCIM.
To synchronize an organization’s users and groups provisioned for your application, you’ll need to provide the organization with two pieces of information:
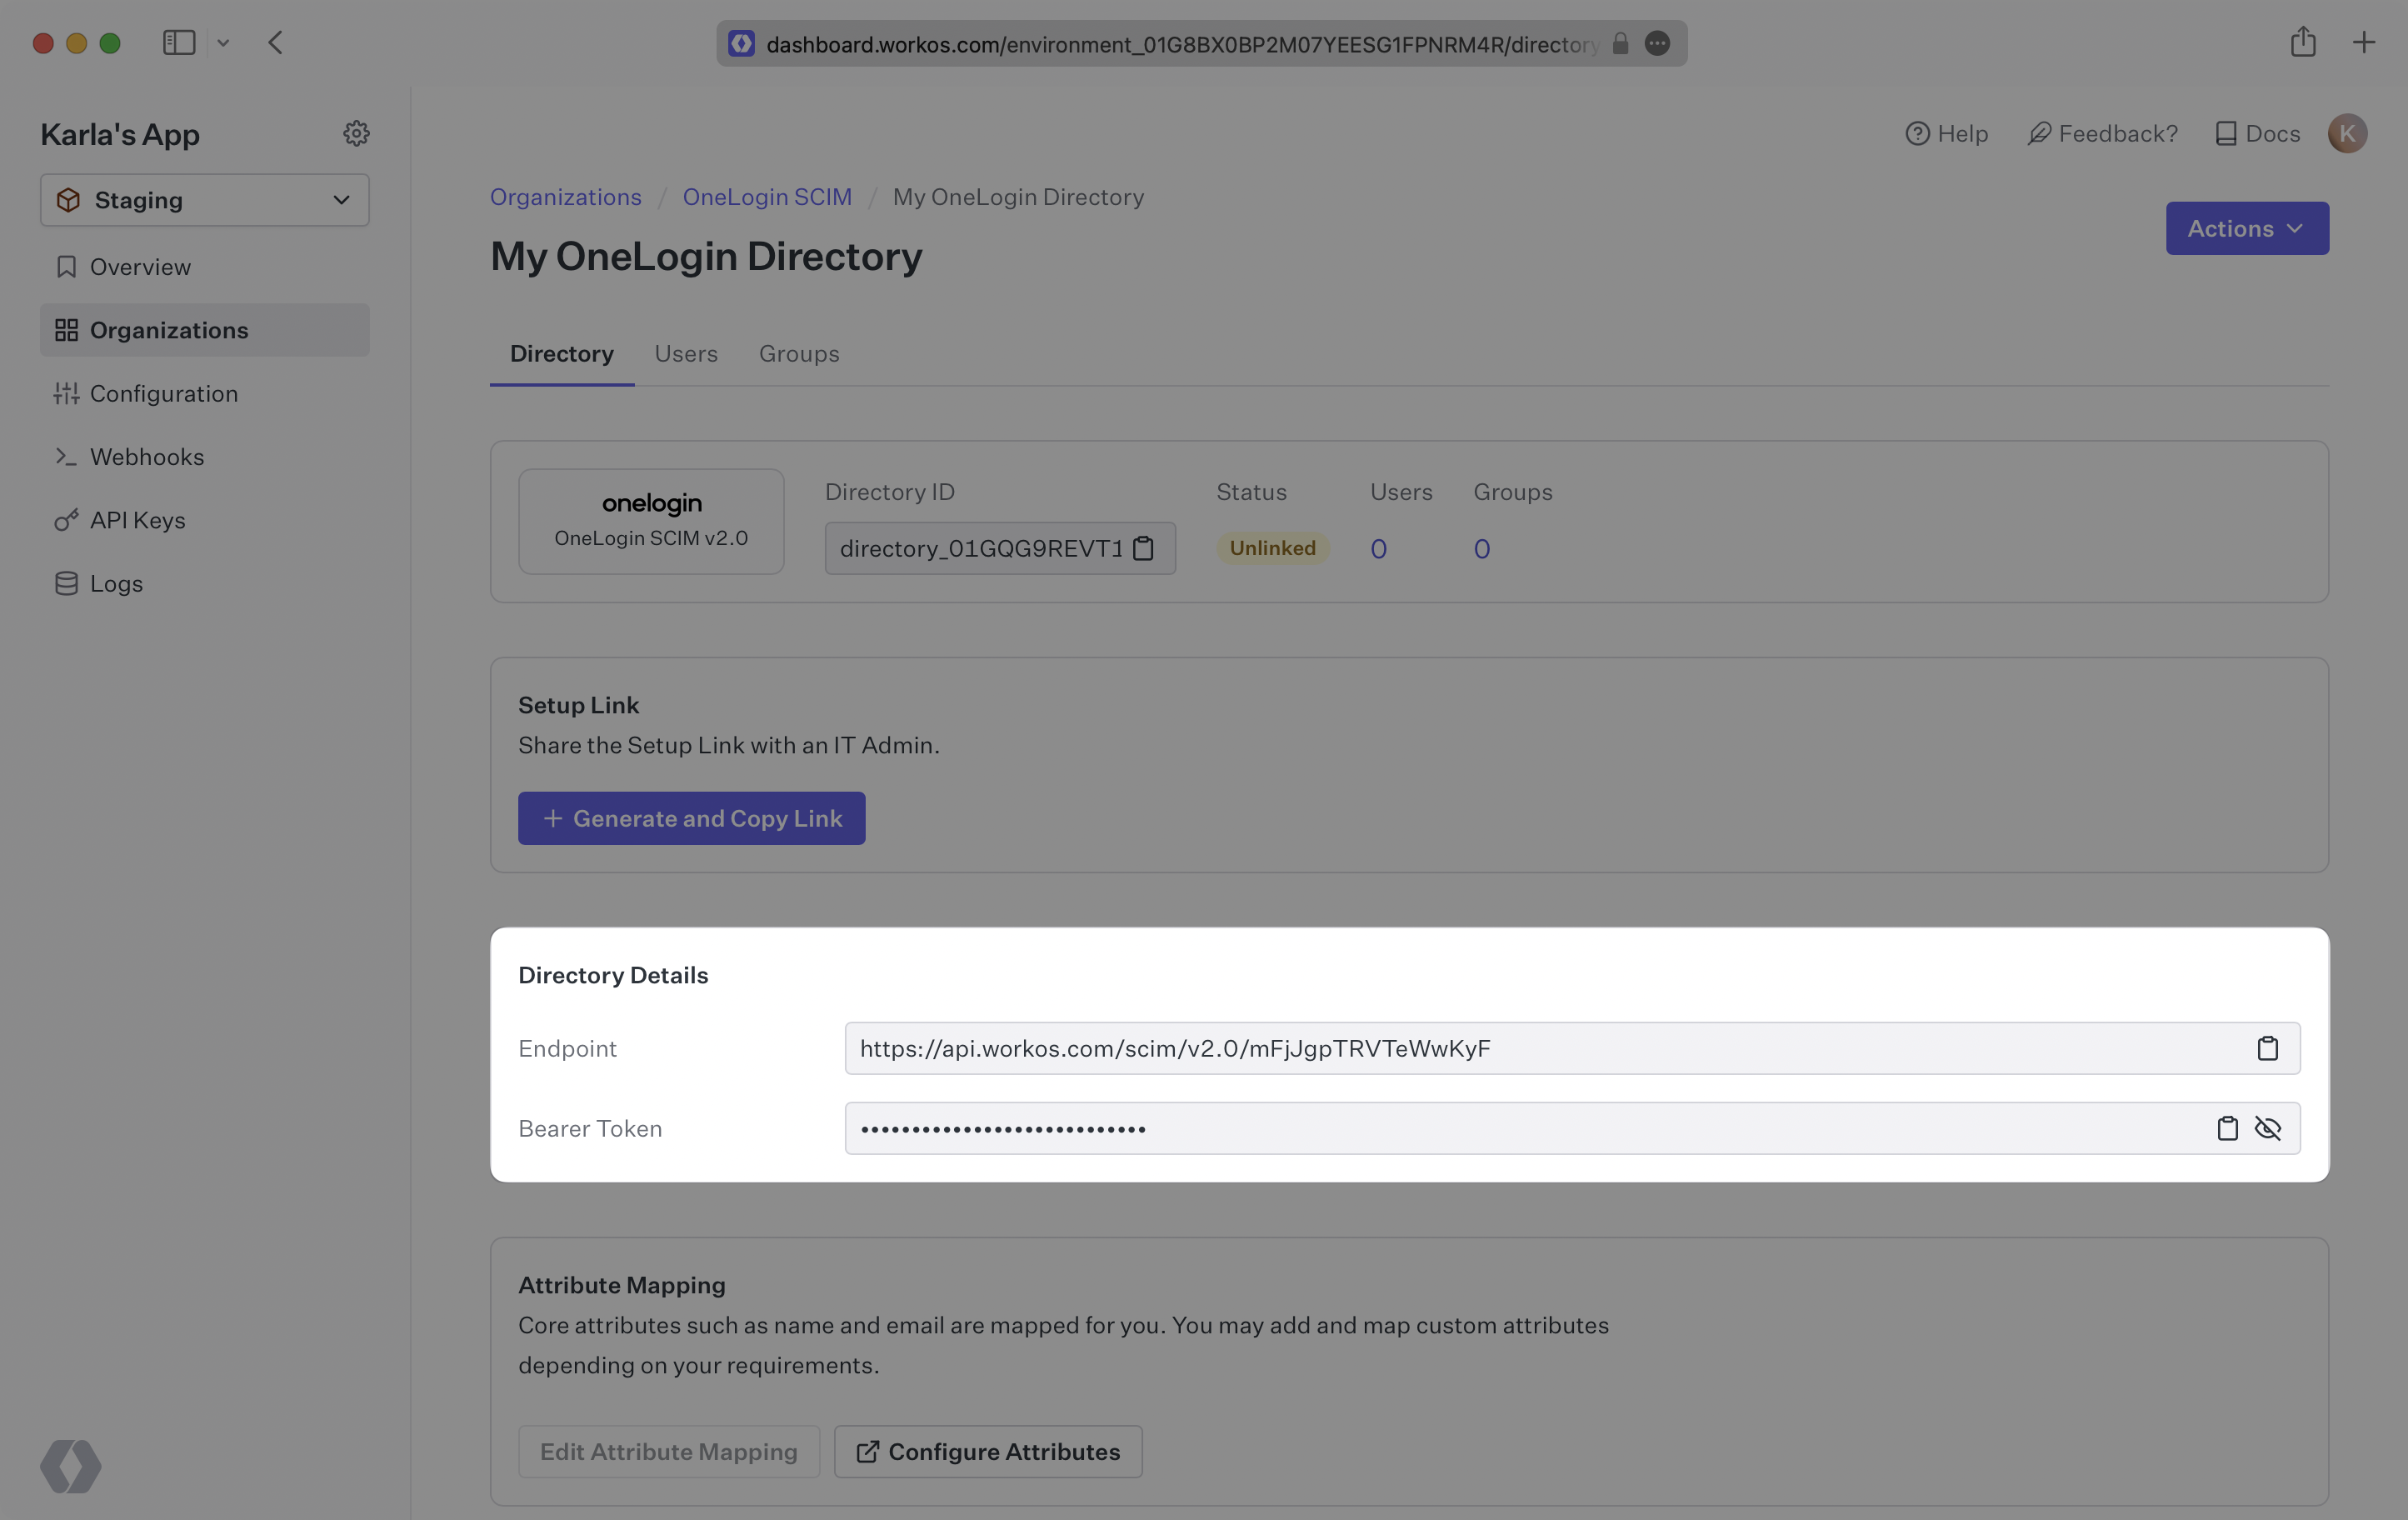
- An Endpoint that OneLogin will make requests to.
- A Bearer Token for OneLogin to authenticate its endpoint requests.
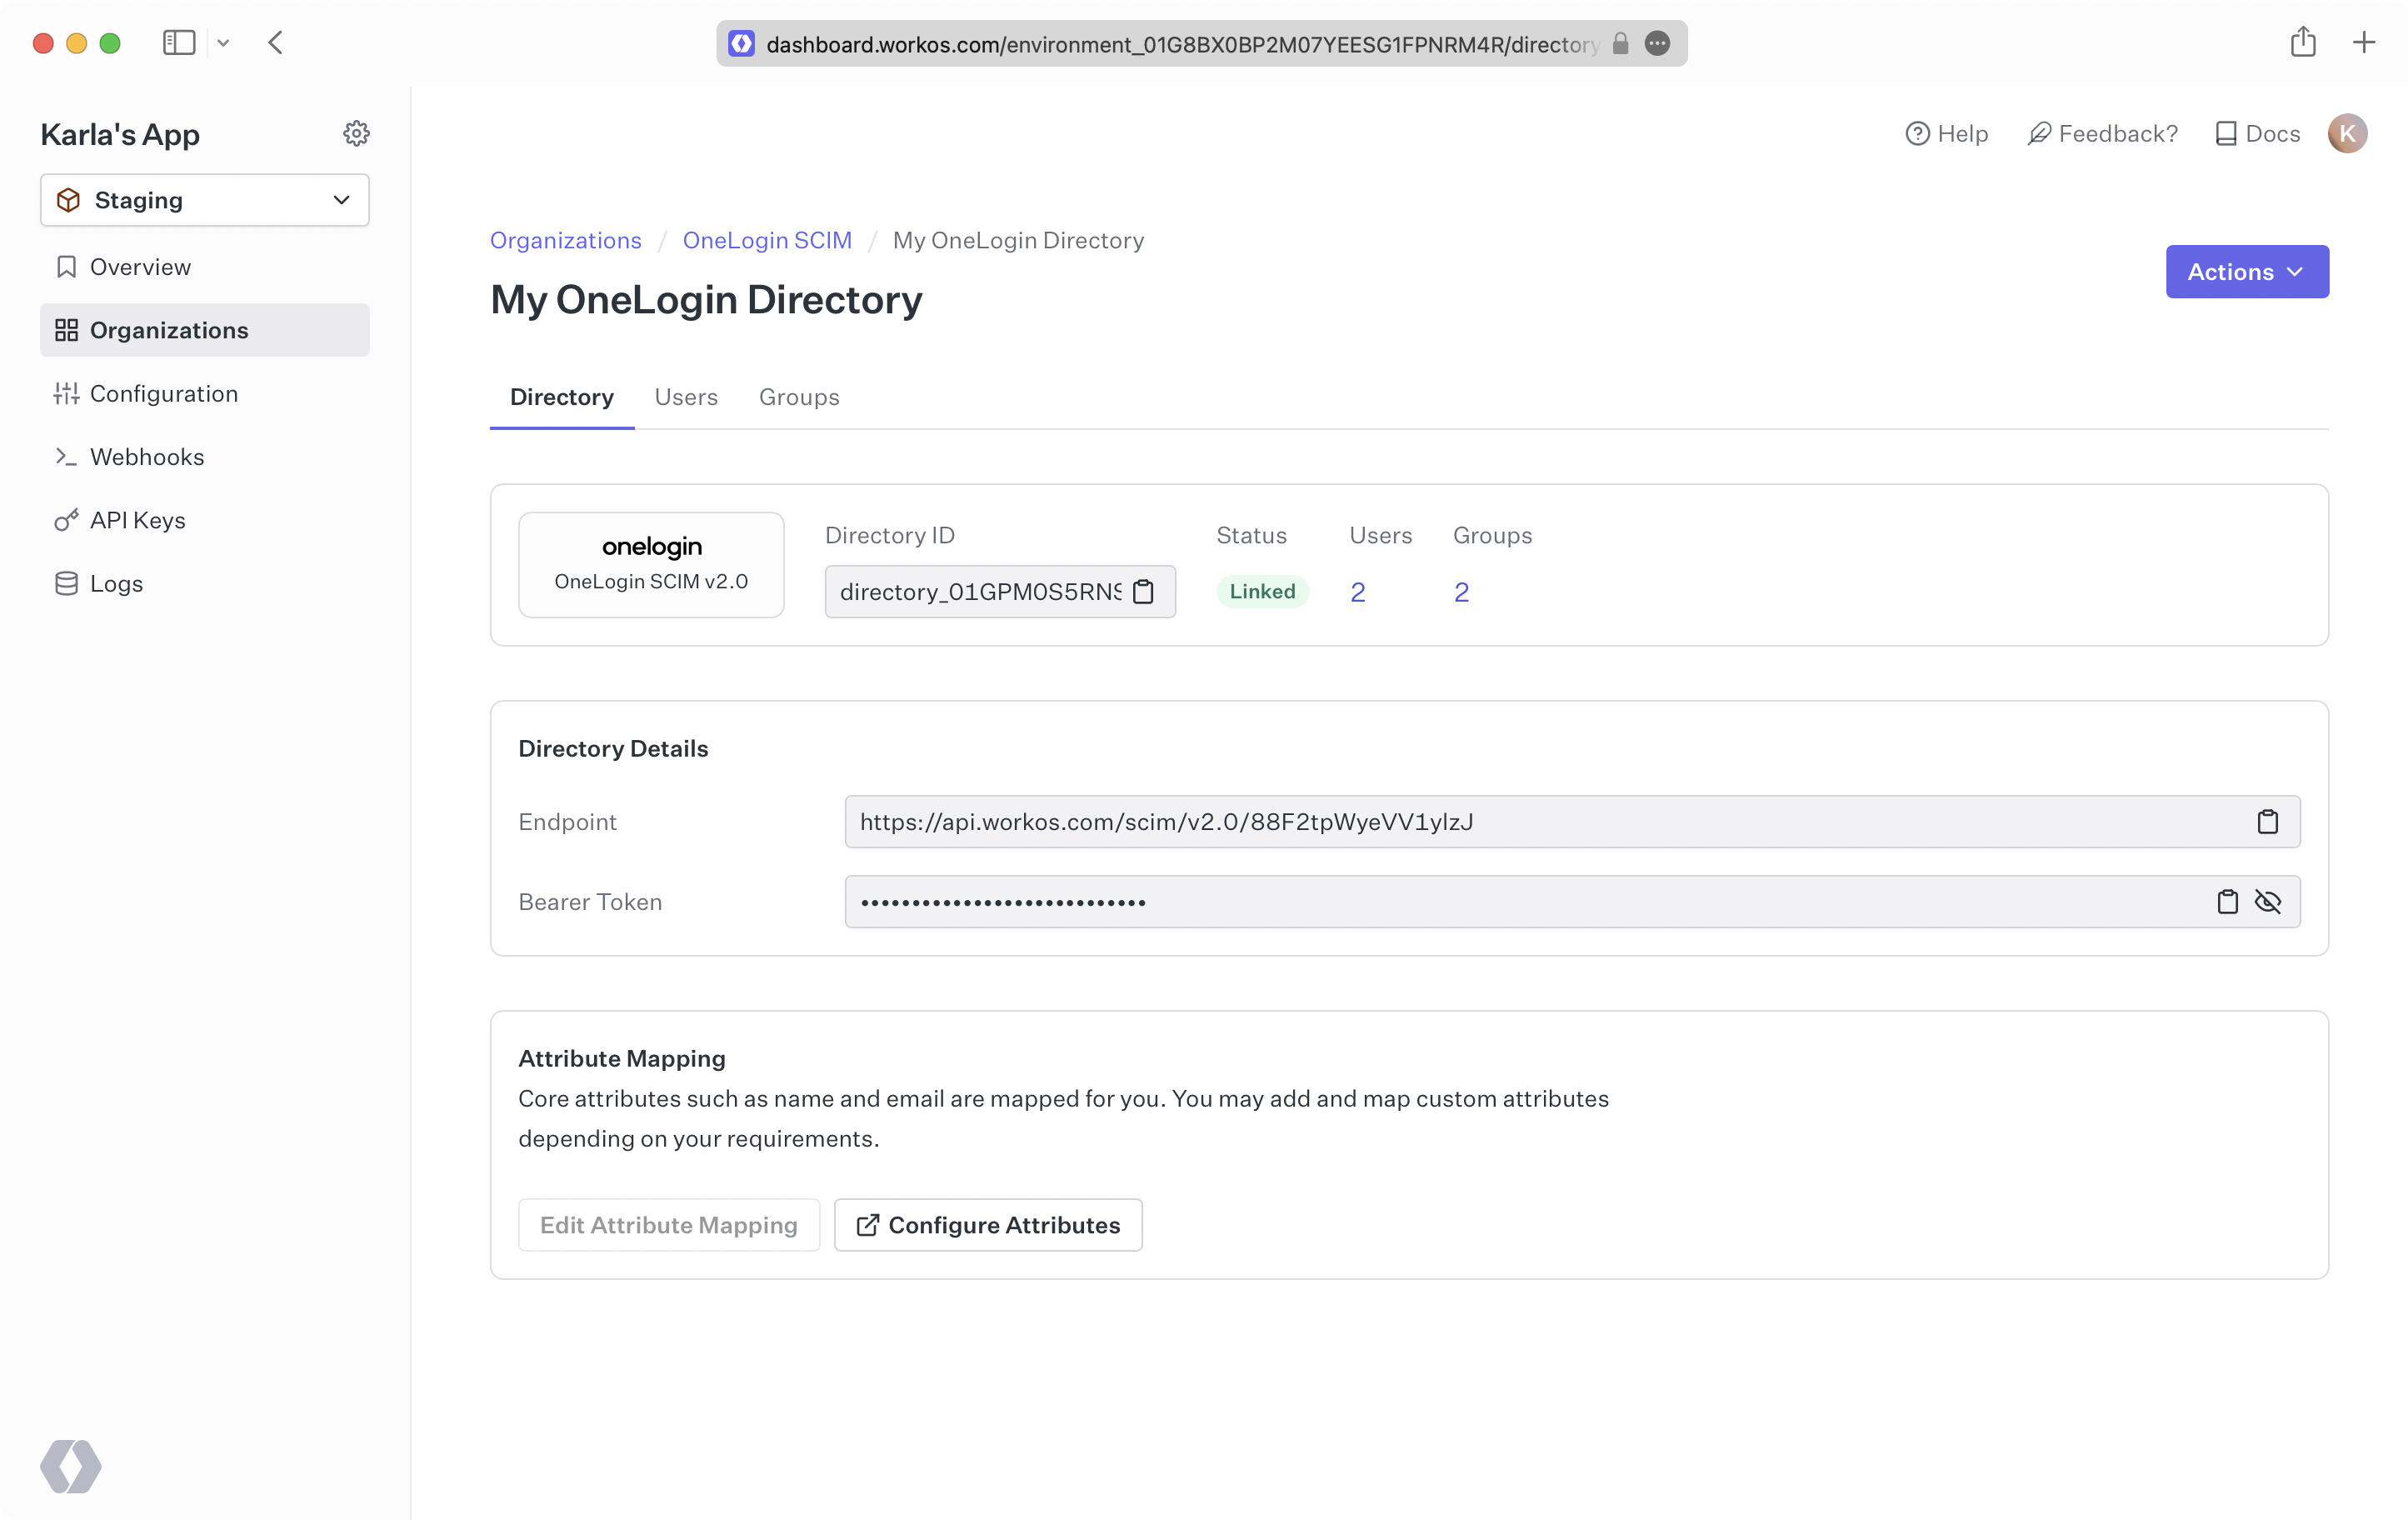
Both of these are available in your Endpoint’s Settings in the WorkOS Dashboard.
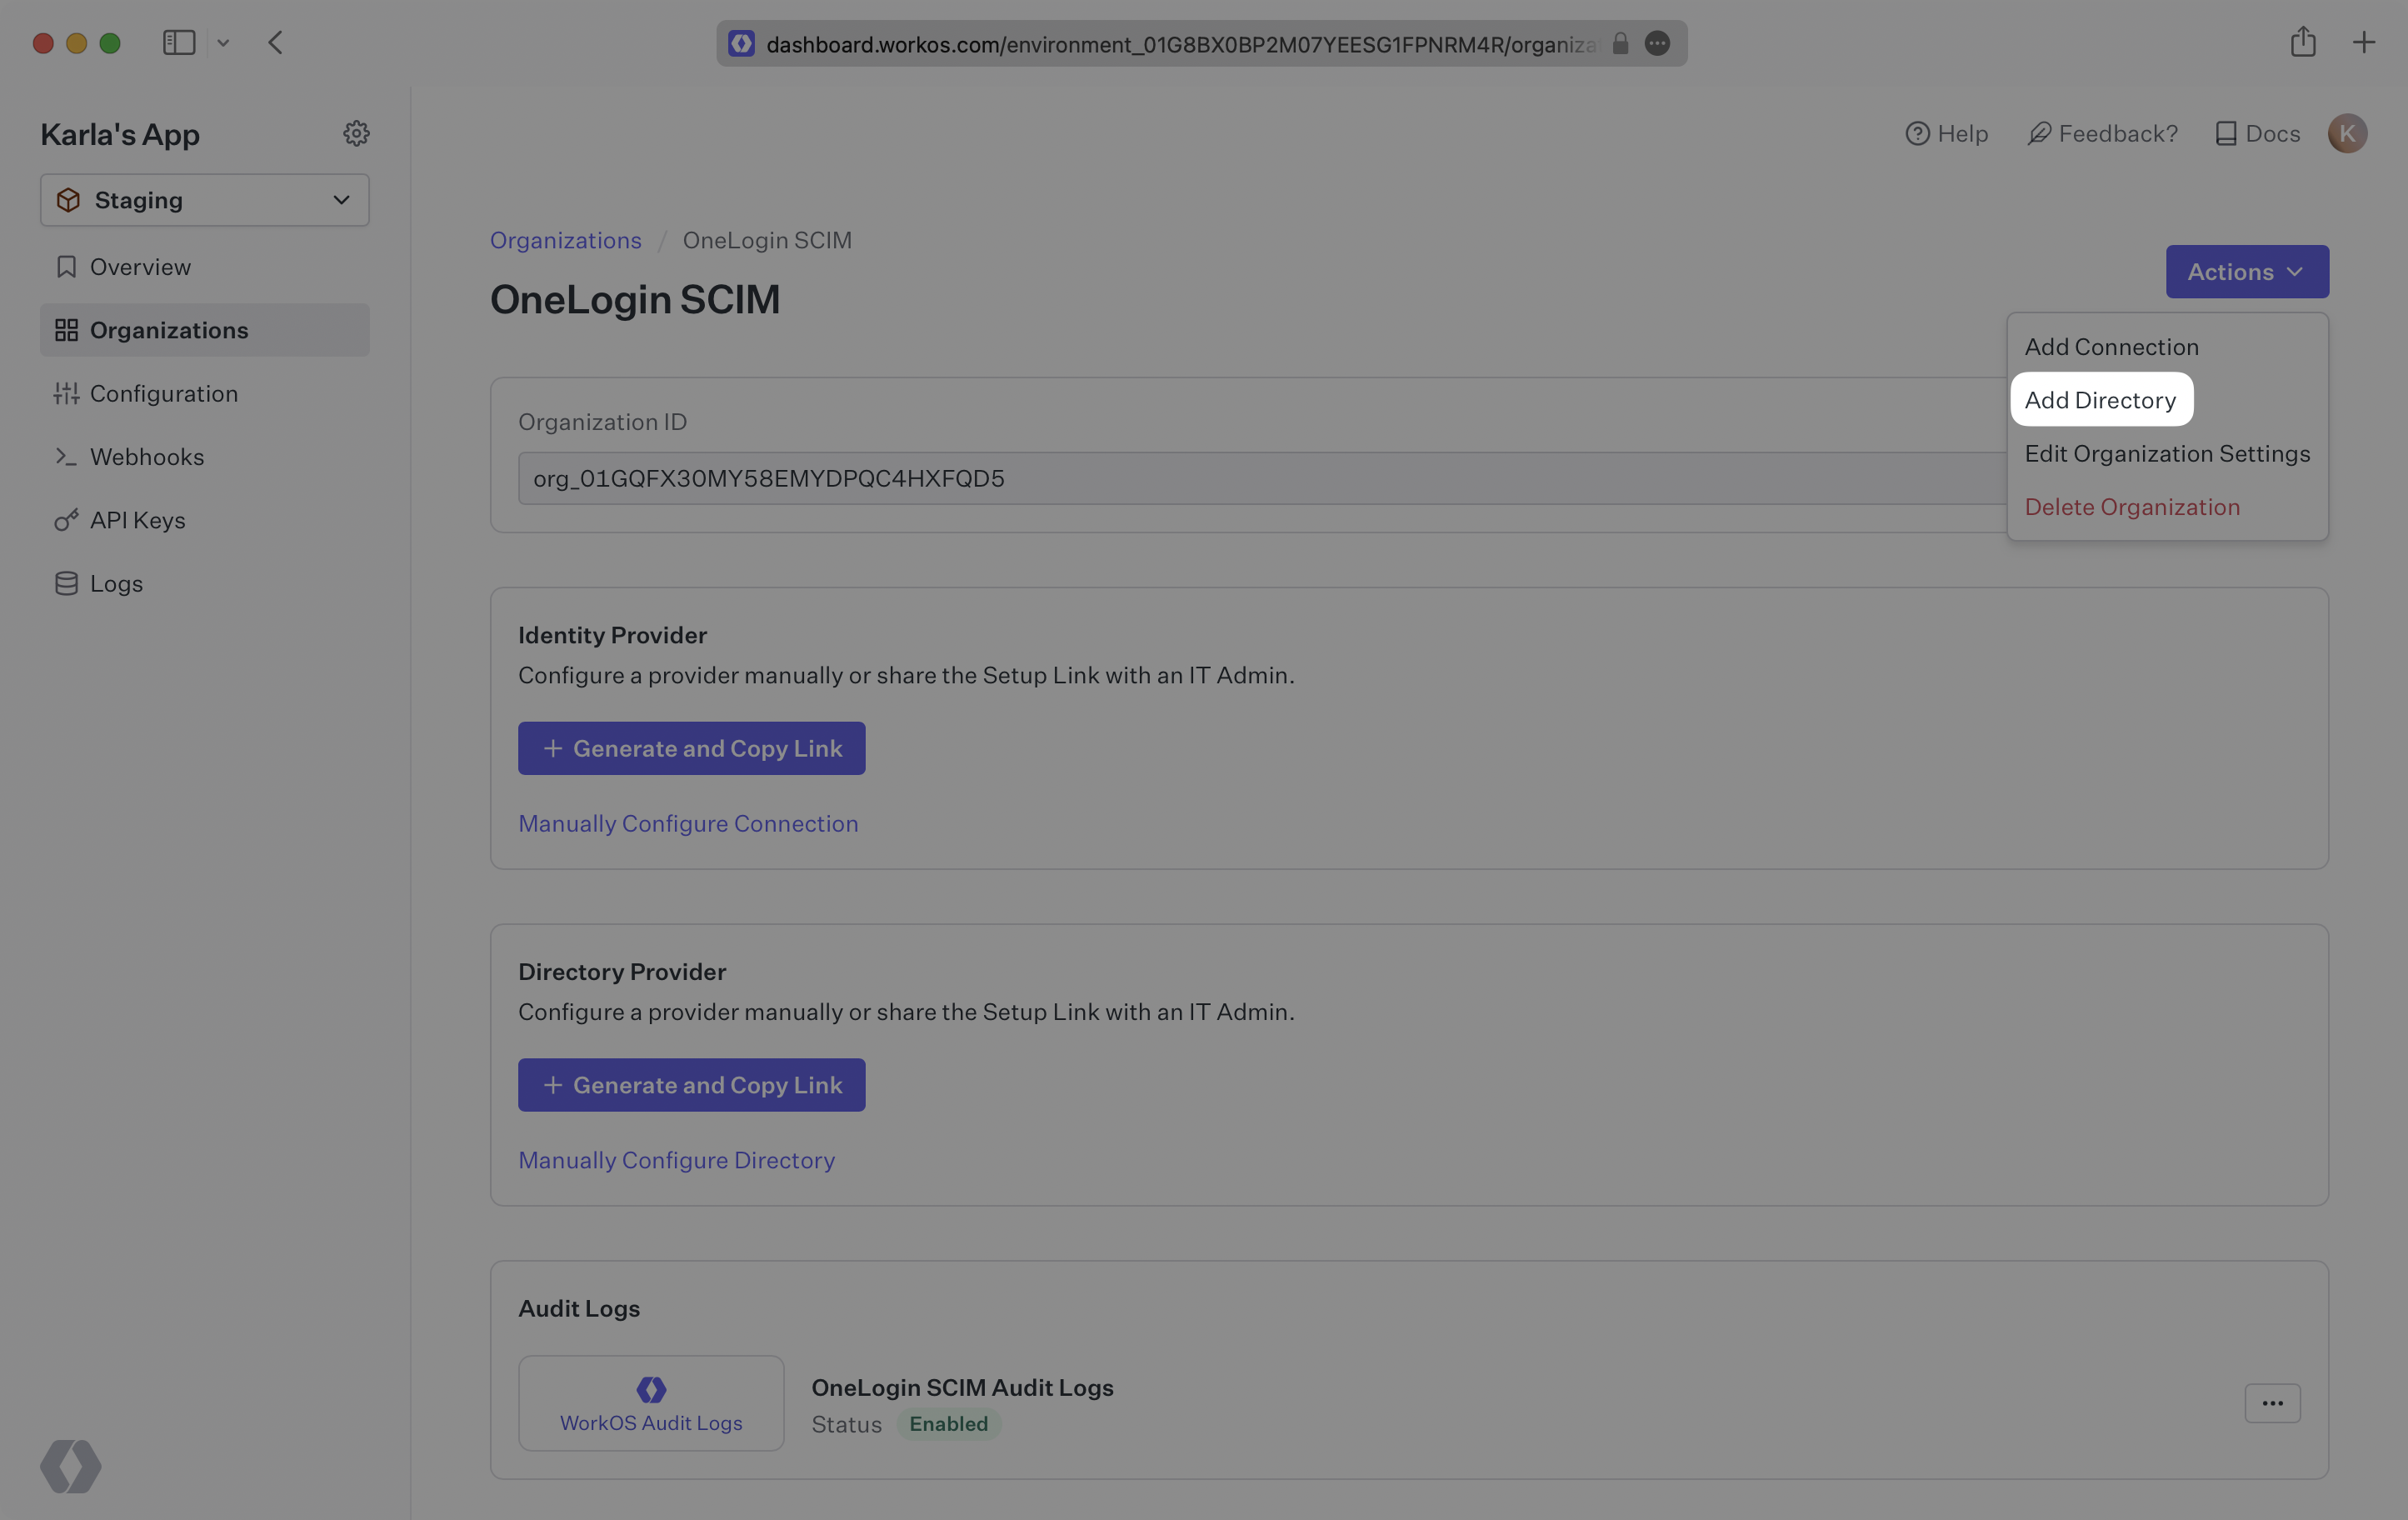
Login to your WorkOS Dashboard and select “Organizations” from the left hand navigation bar.
Select the Organization you’ll be configuring a new Directory Sync for.
Click “Add Directory”.
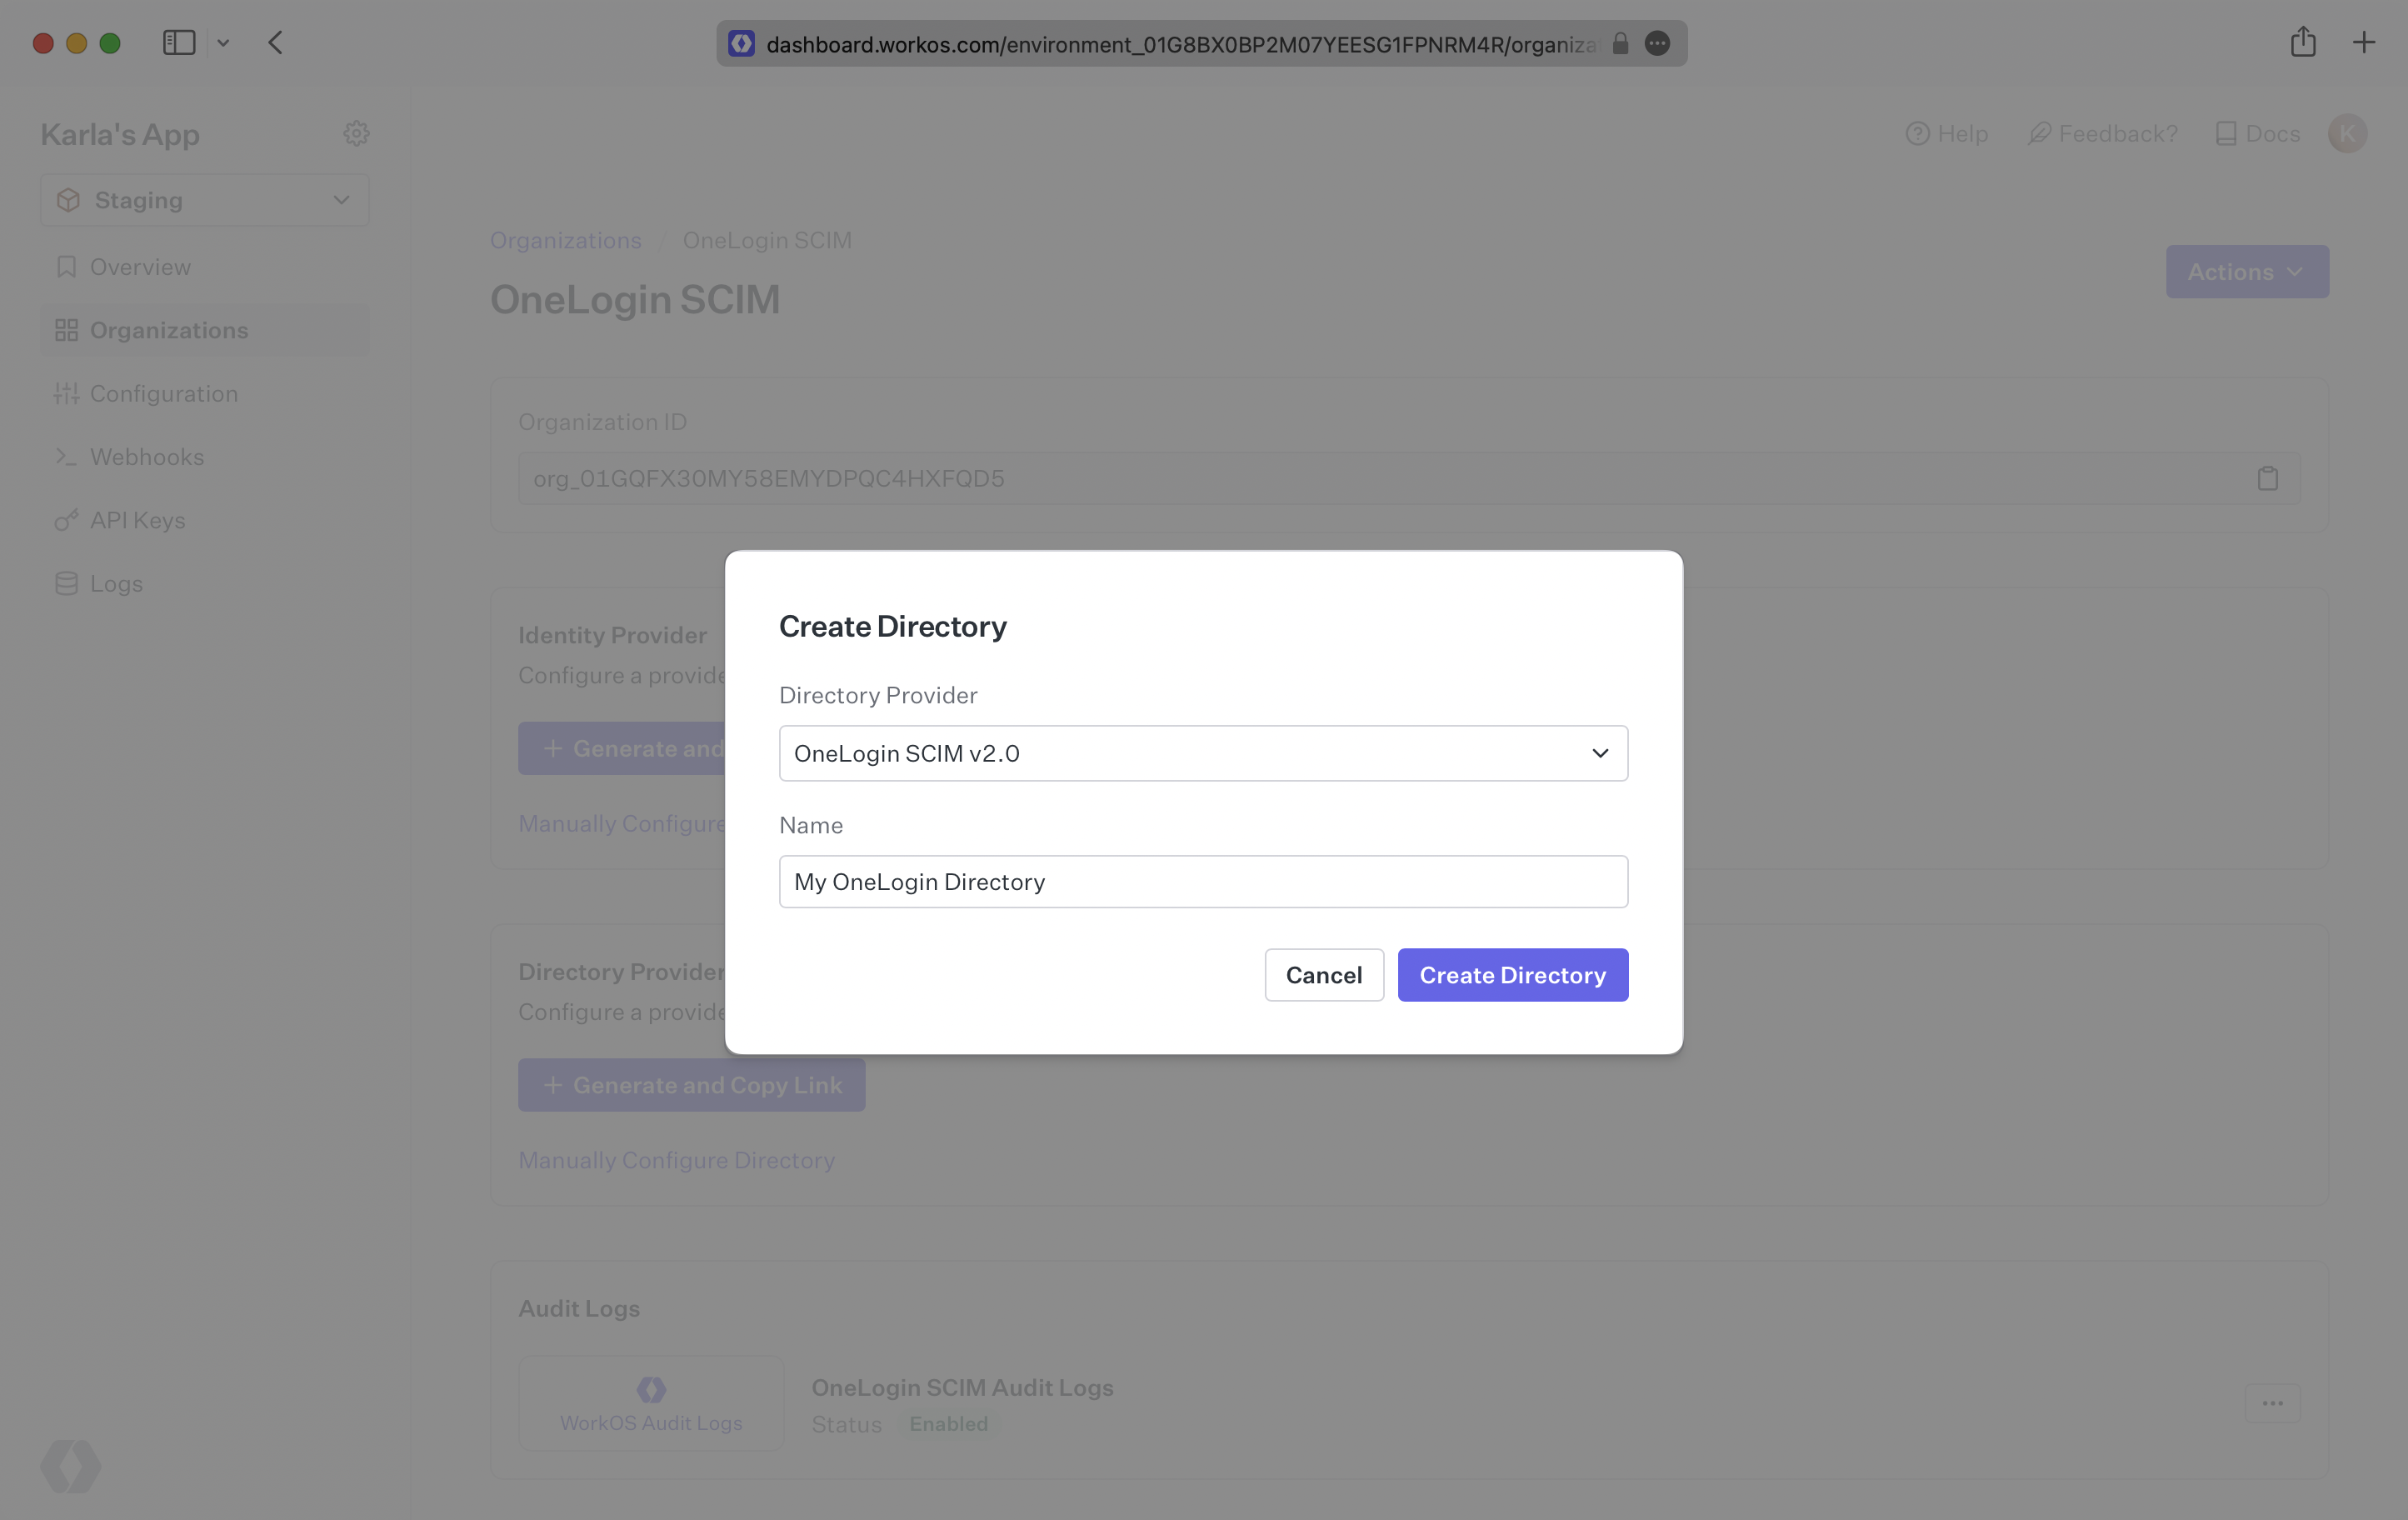
Select “OneLogin” from the dropdown and enter the organization name.
Then, click “Create Directory.”
Your OneLogin directory sync has now been created successfully with an Endpoint and Bearer Token.
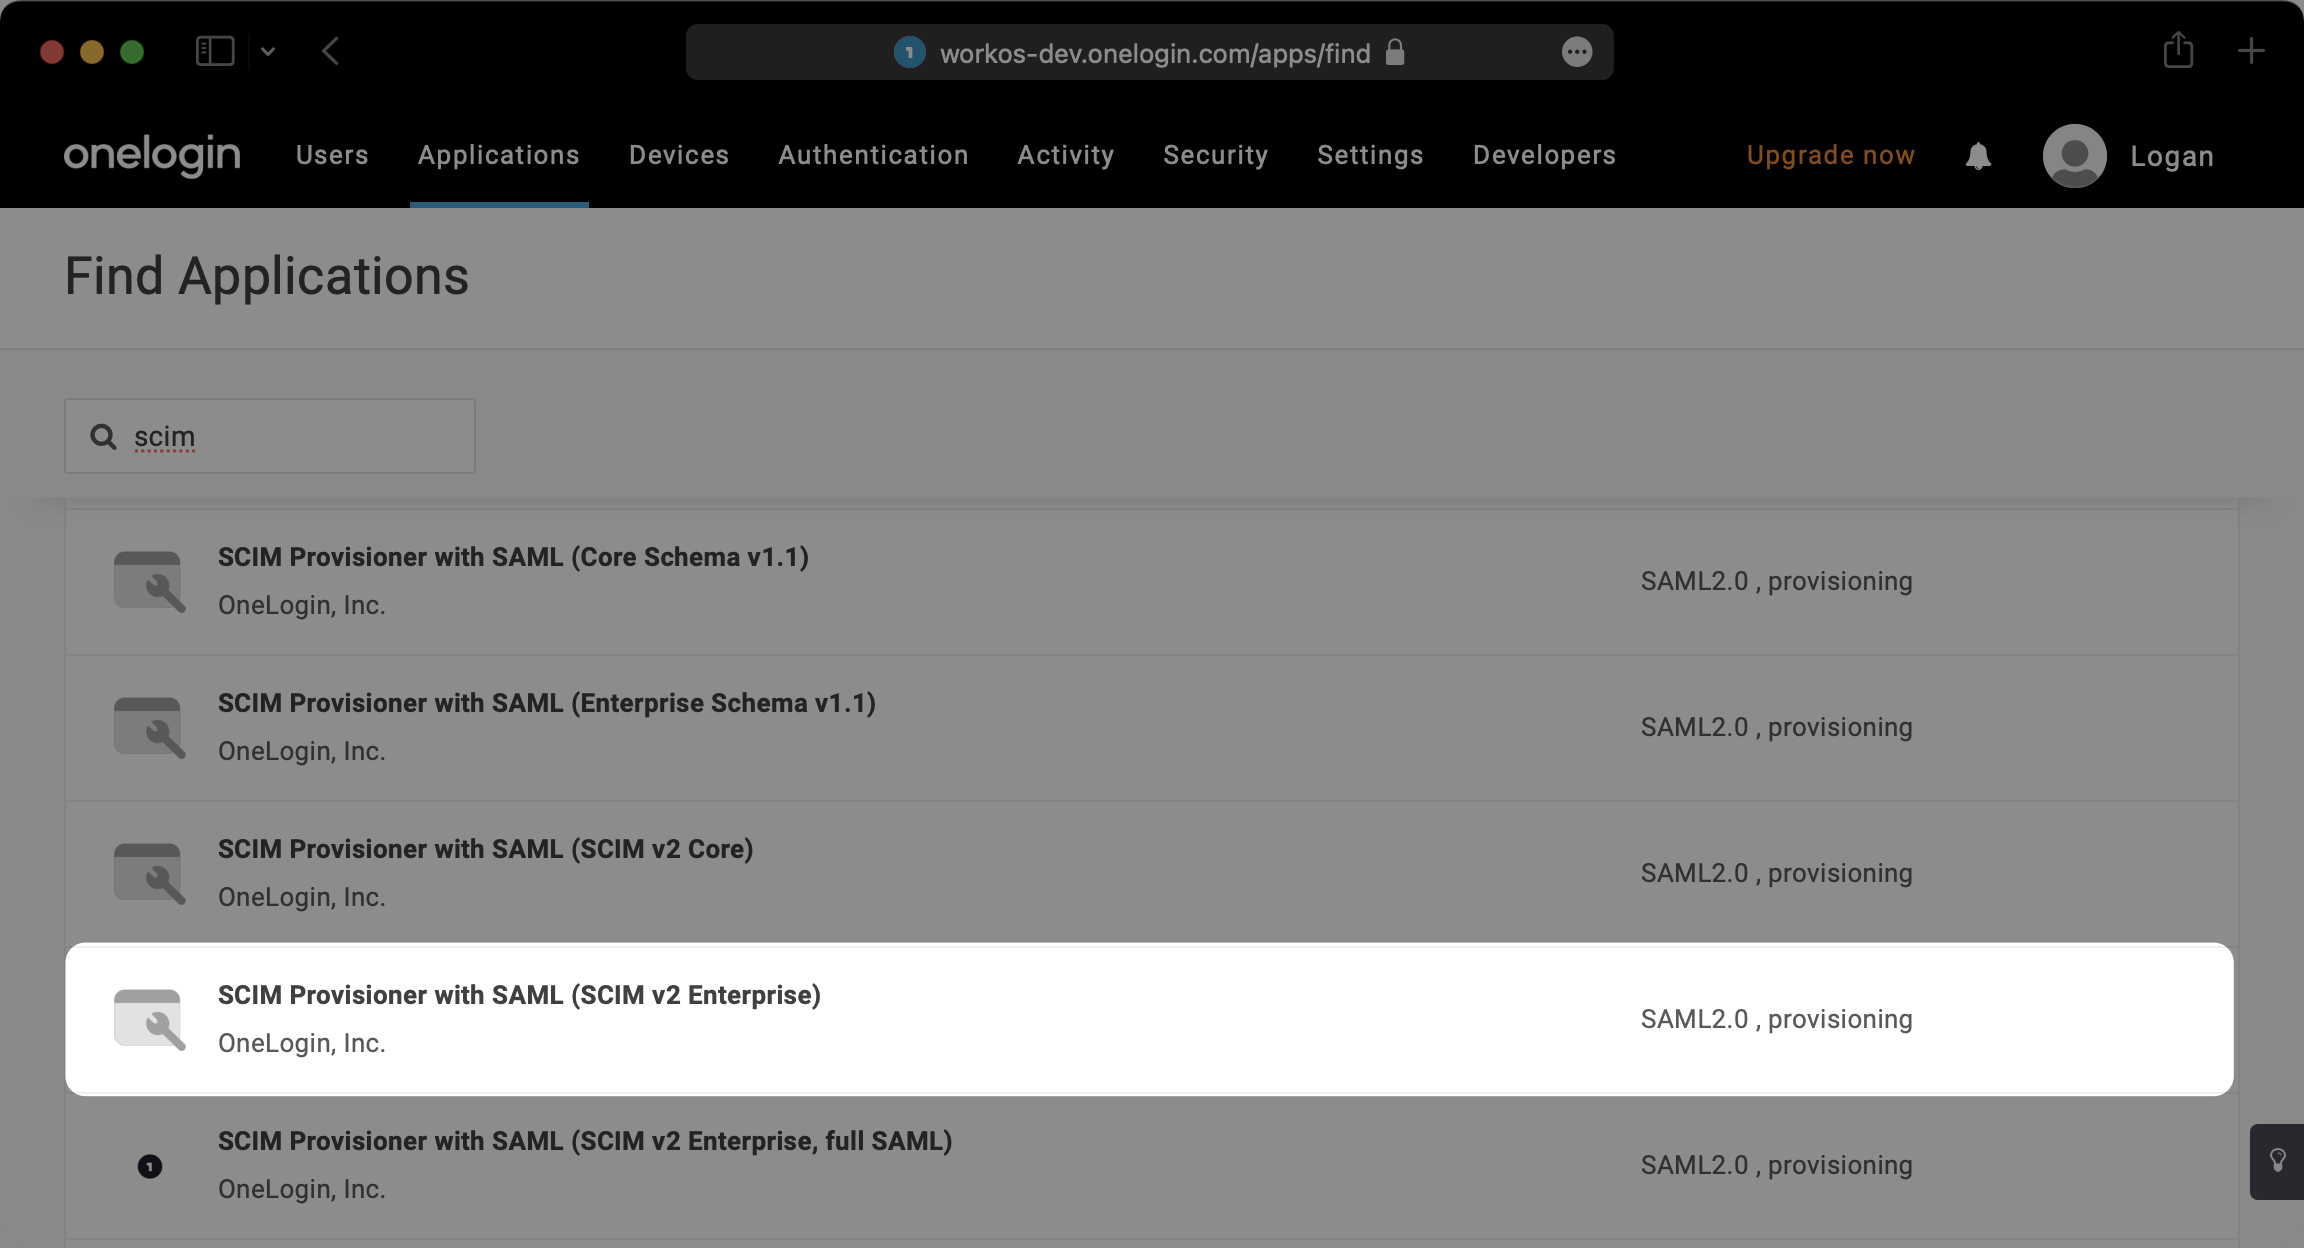
Log in to the OneLogin admin dashboard, select the “Applications” tab at the top. If the application has already been created, select it and move to step 3. Otherwise, select “Add App”.
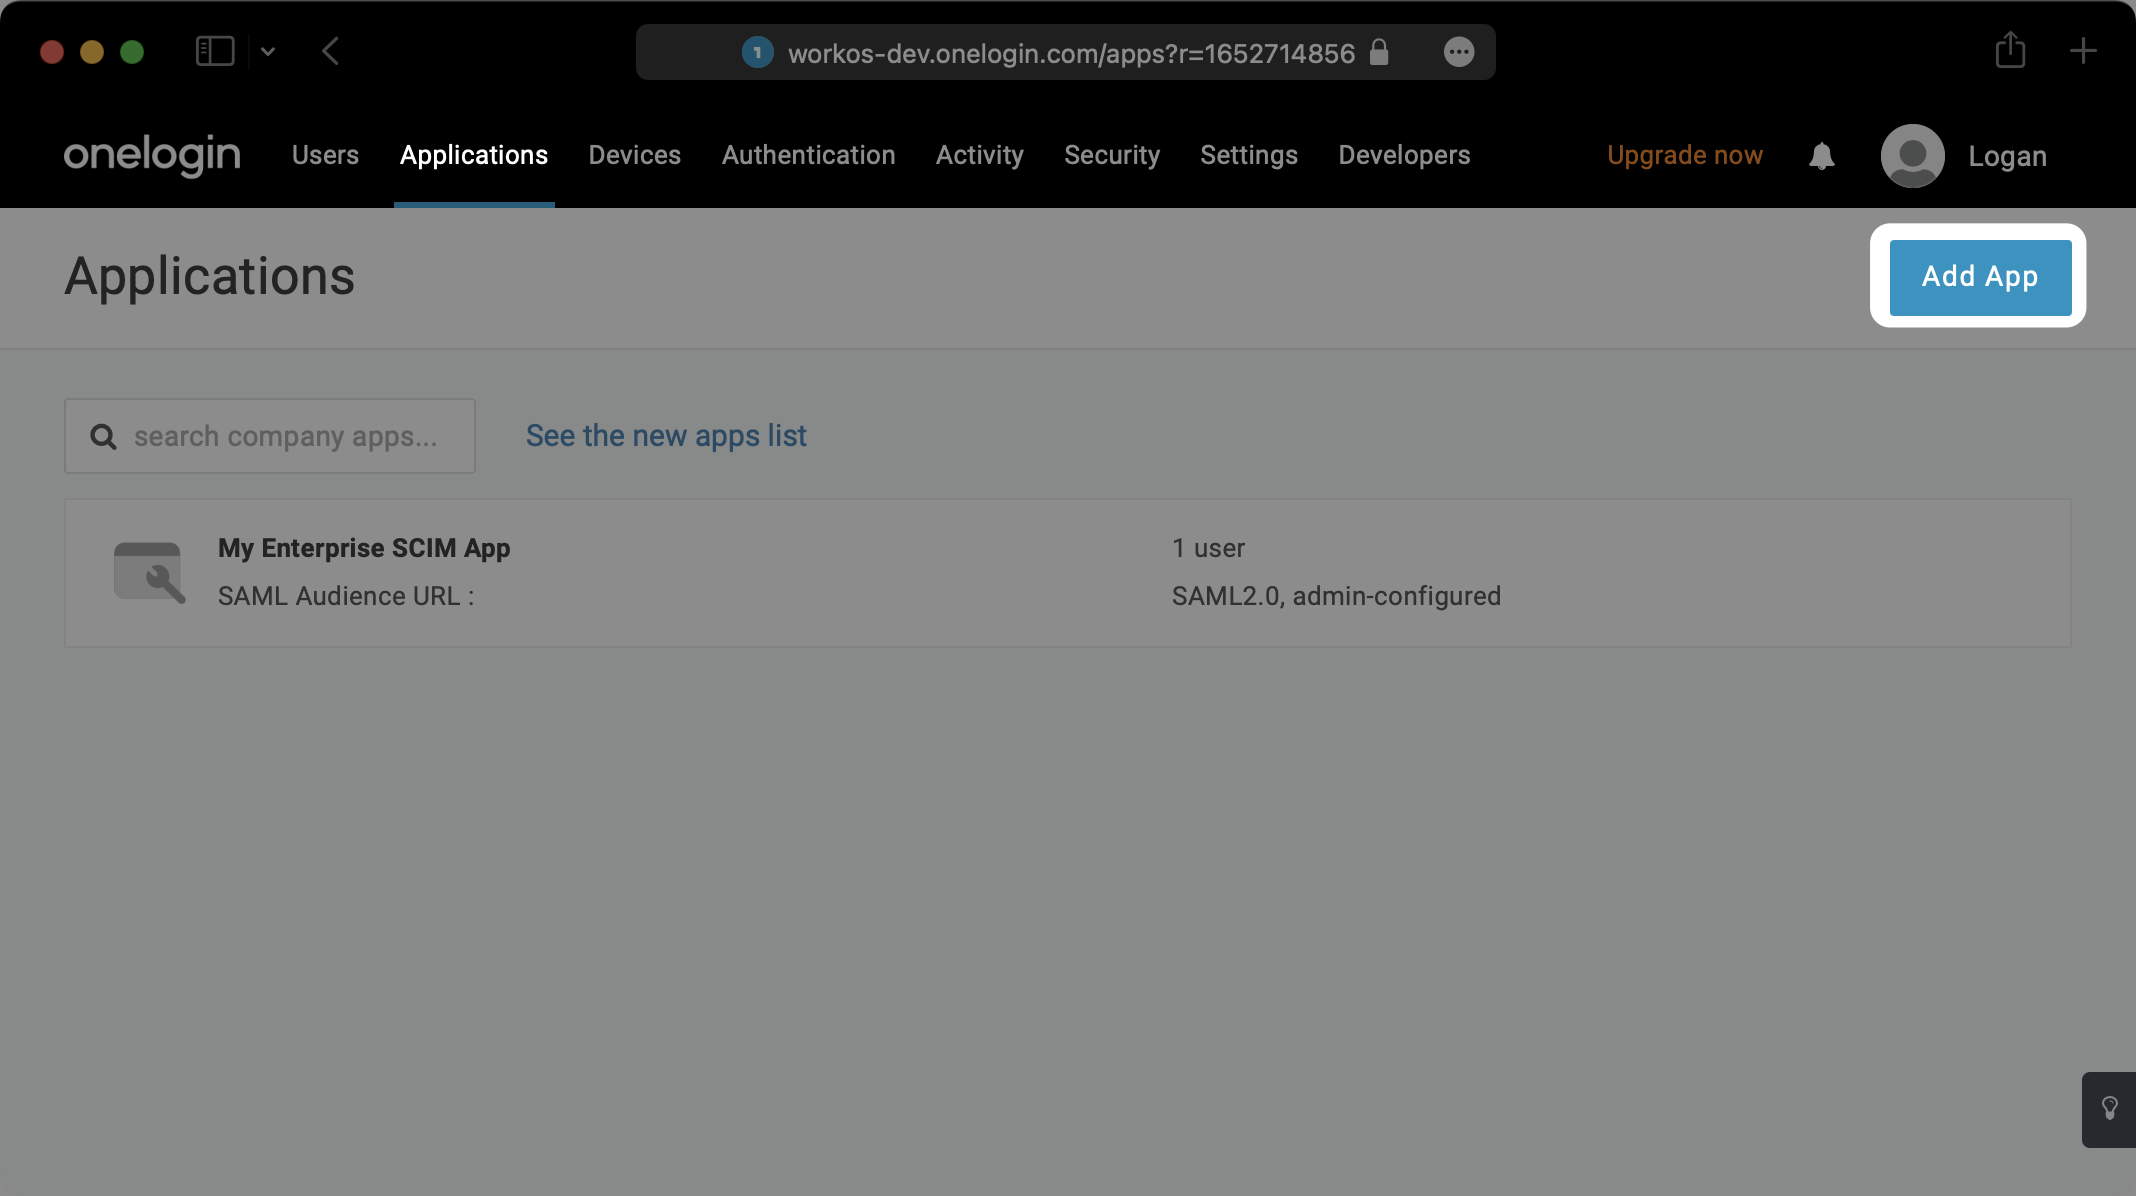
Search for “SCIM” in the text field and select the Application with type “SCIM Provisioner with SAML (SCIM V2 Enterprise)”.
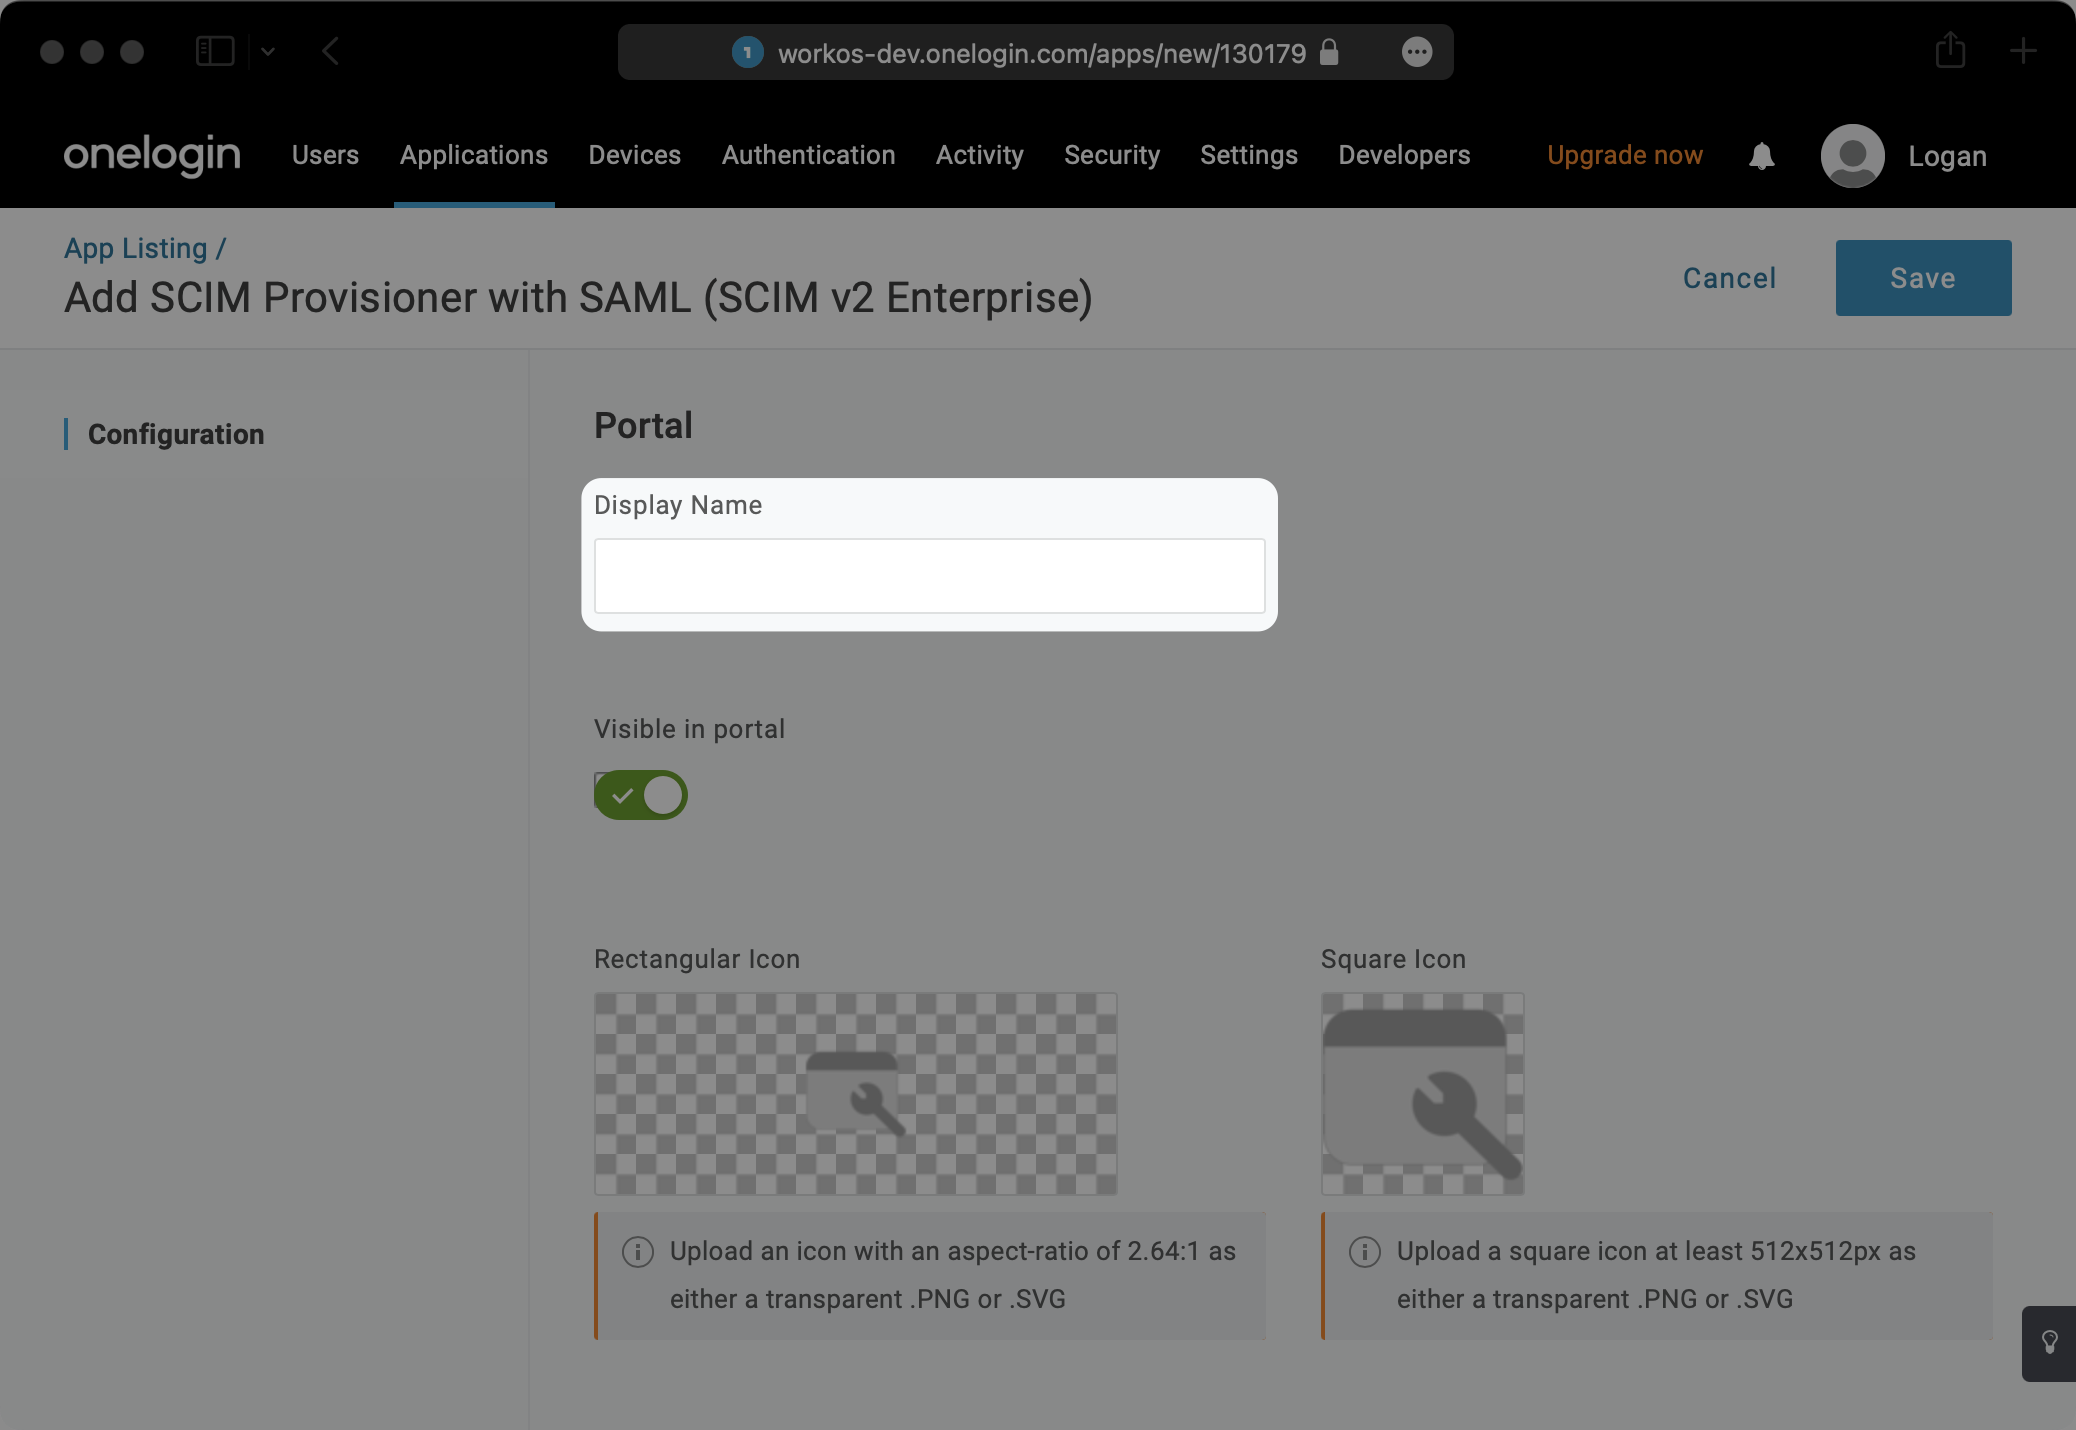
Give your Application a descriptive Display Name and hit “Save”.
Within the SCIM Application, select the “Configuration” tab on the left.
Copy and paste the Endpoint from your WorkOS Dashboard into the “SCIM Base URL” field.
Then, copy and paste the Bearer Token from your WorkOS Dashboard into the “SCIM Bearer Token” field.
Hit “Enable” under “API Status” and then hit “Save”.

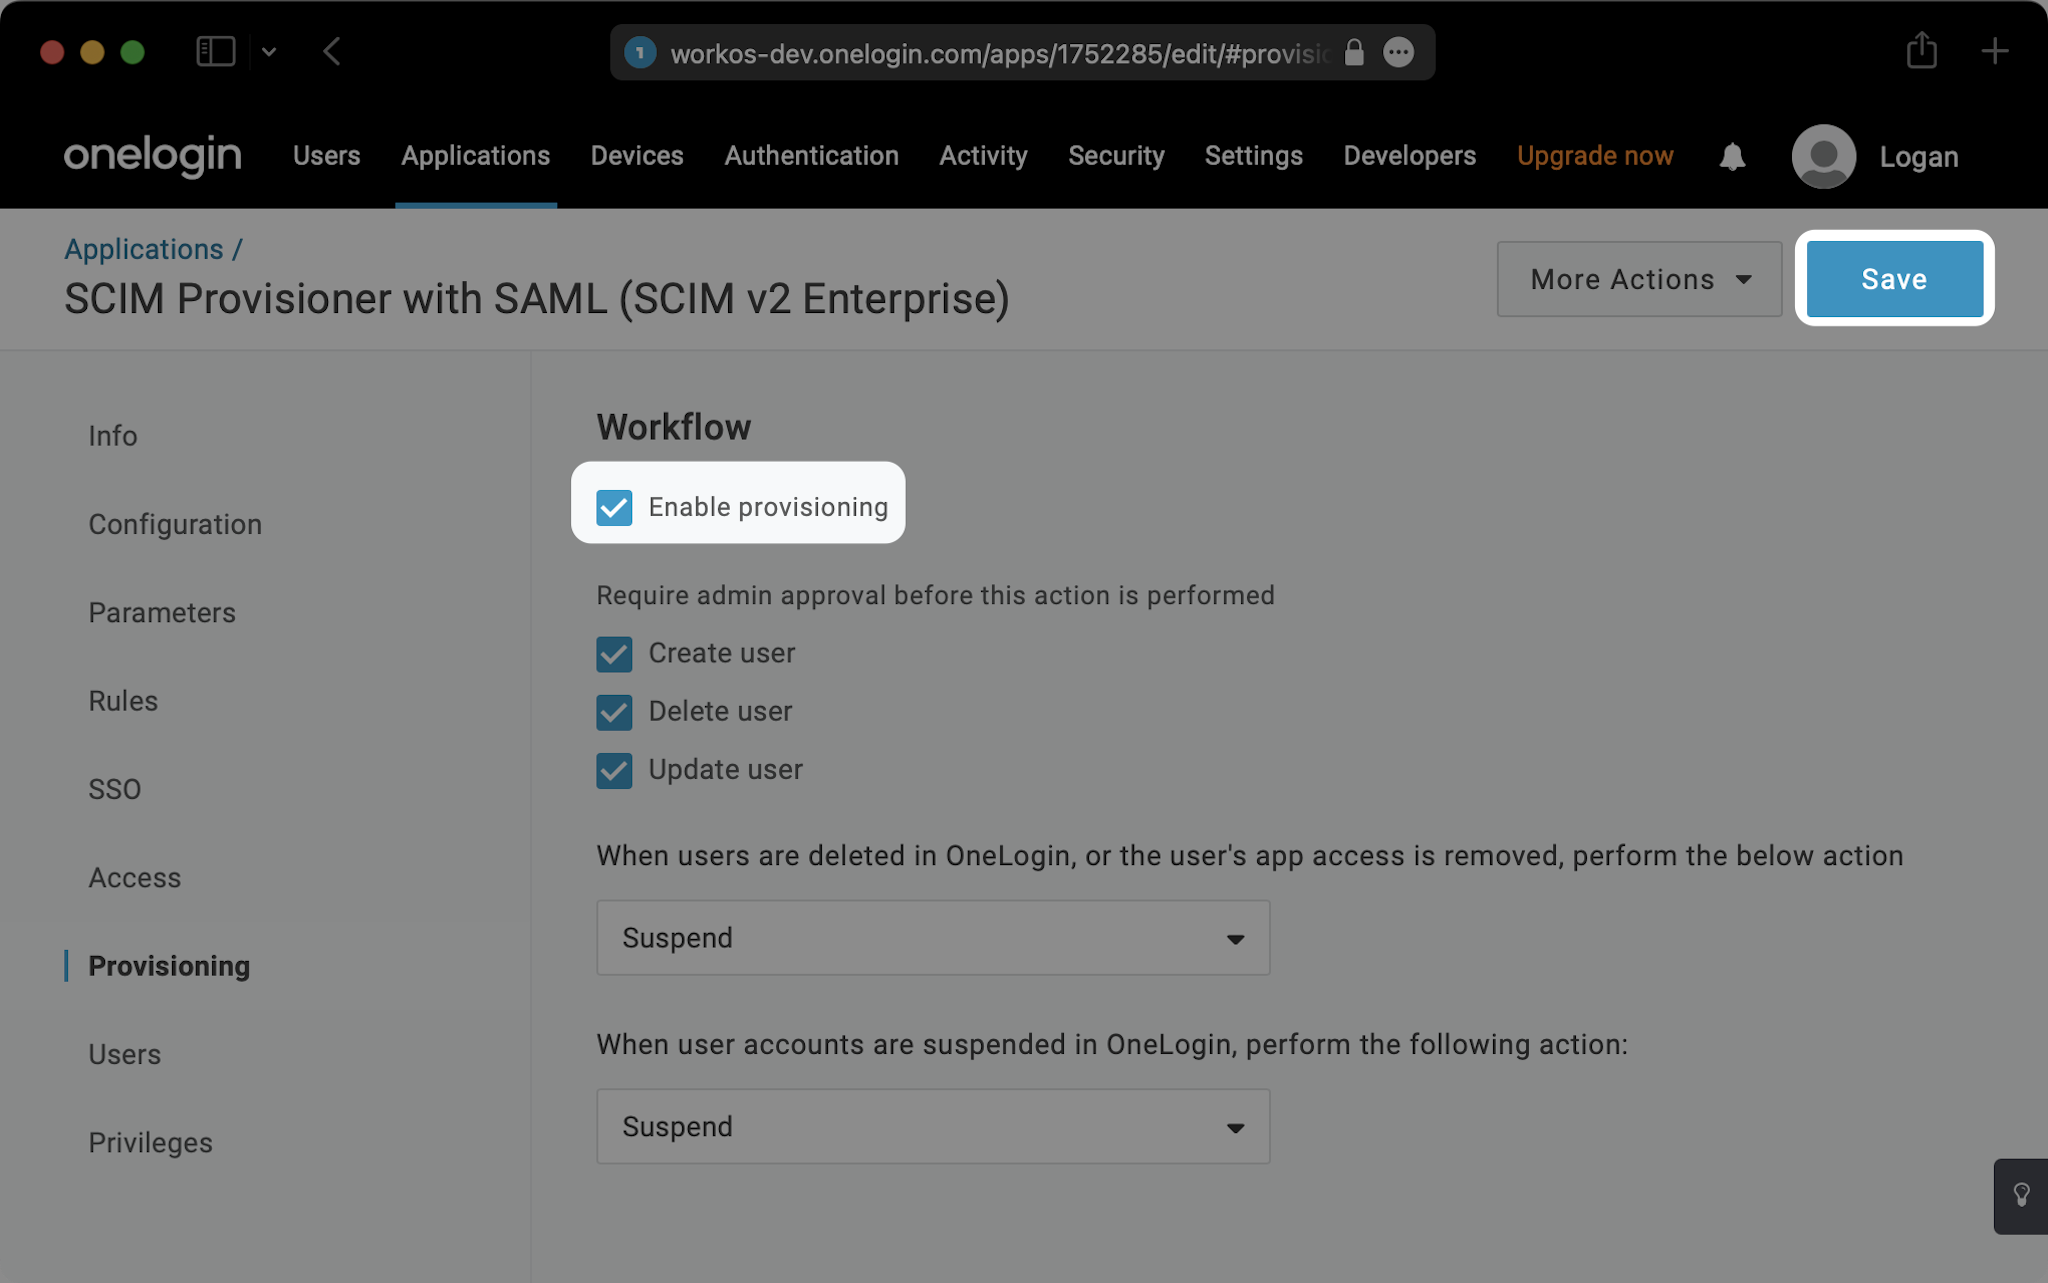
Select the “Provisioning” tab on the left. Check the “Enable provisioning” box and hit “Save”.
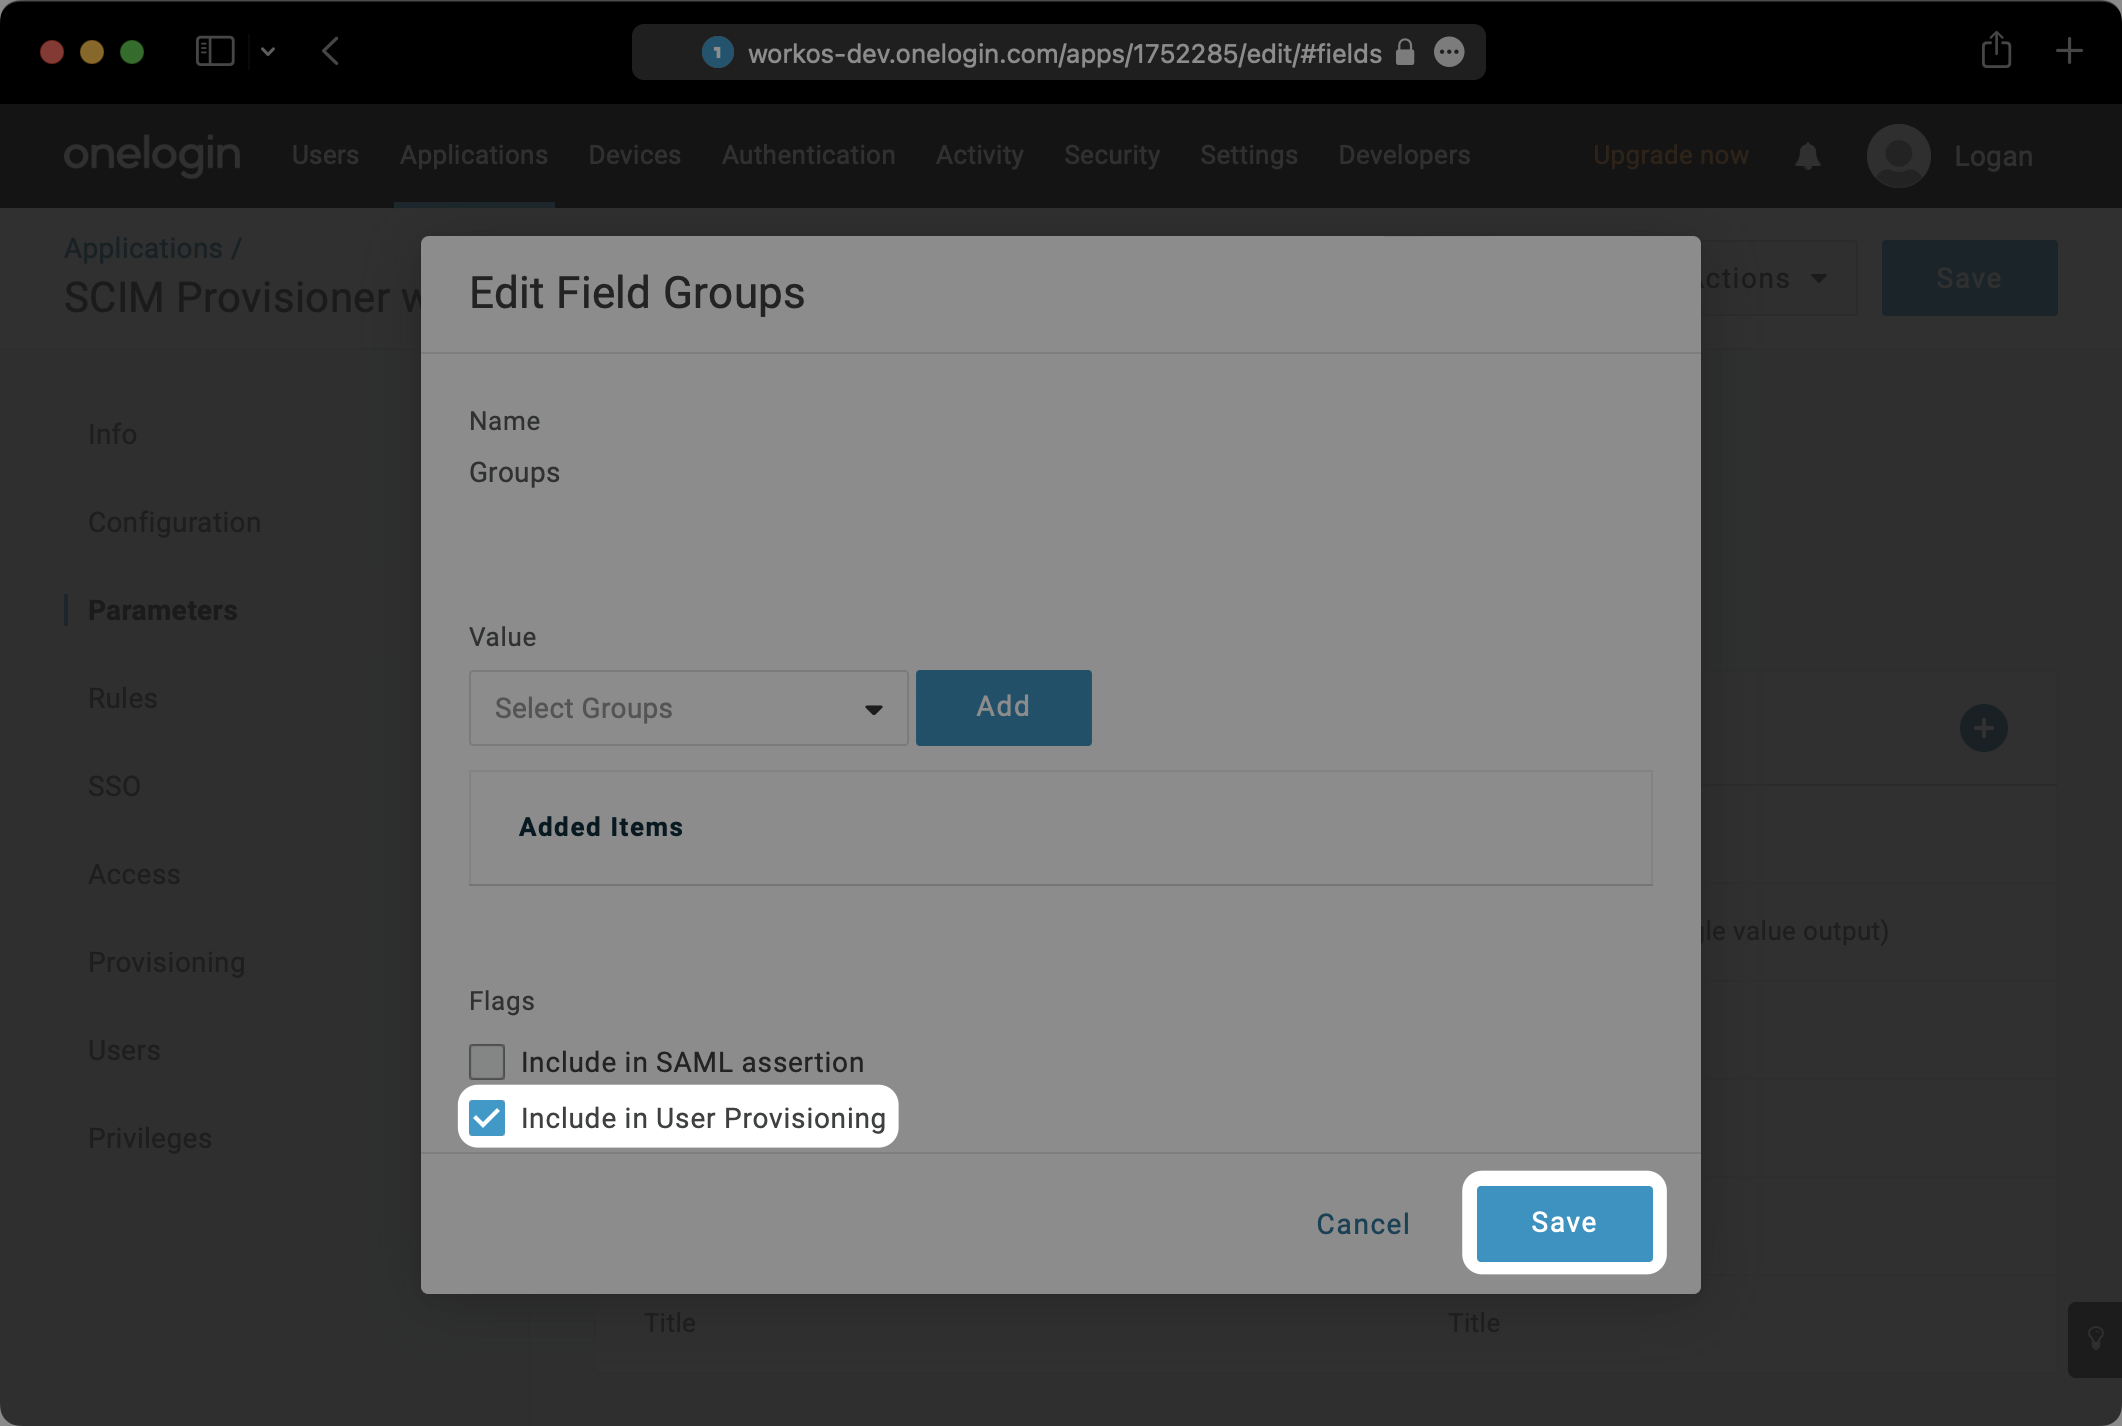
Select the “Parameters” tab on the left. Then select “Groups”.
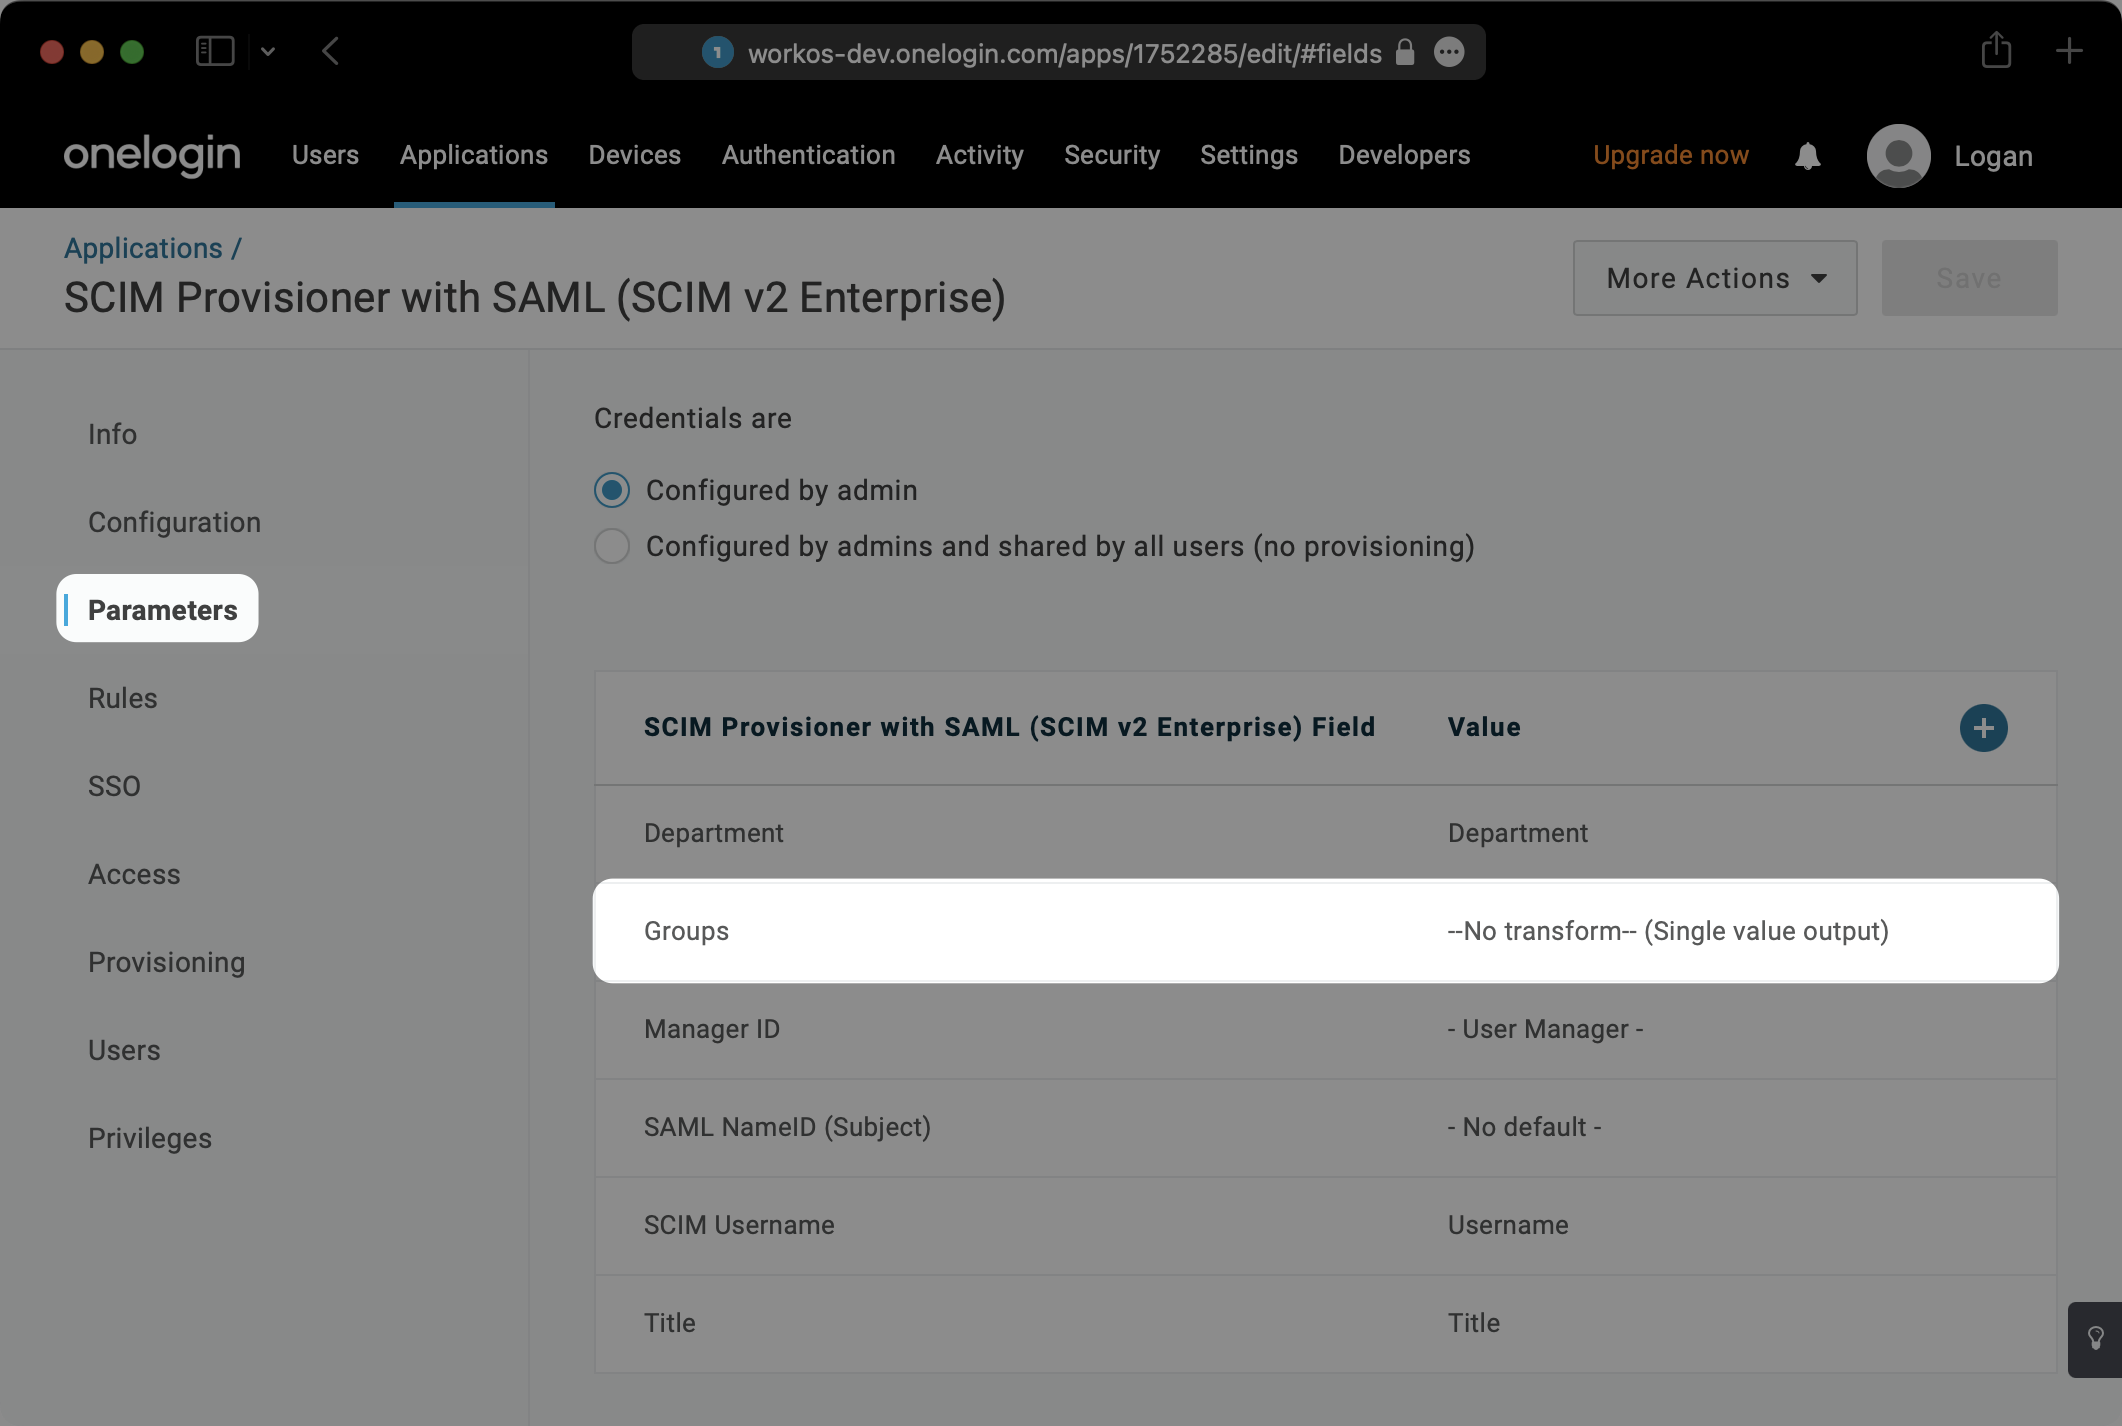
In the modal that pops up, check the box next to “Include in User Provisioning” and hit “Save”.
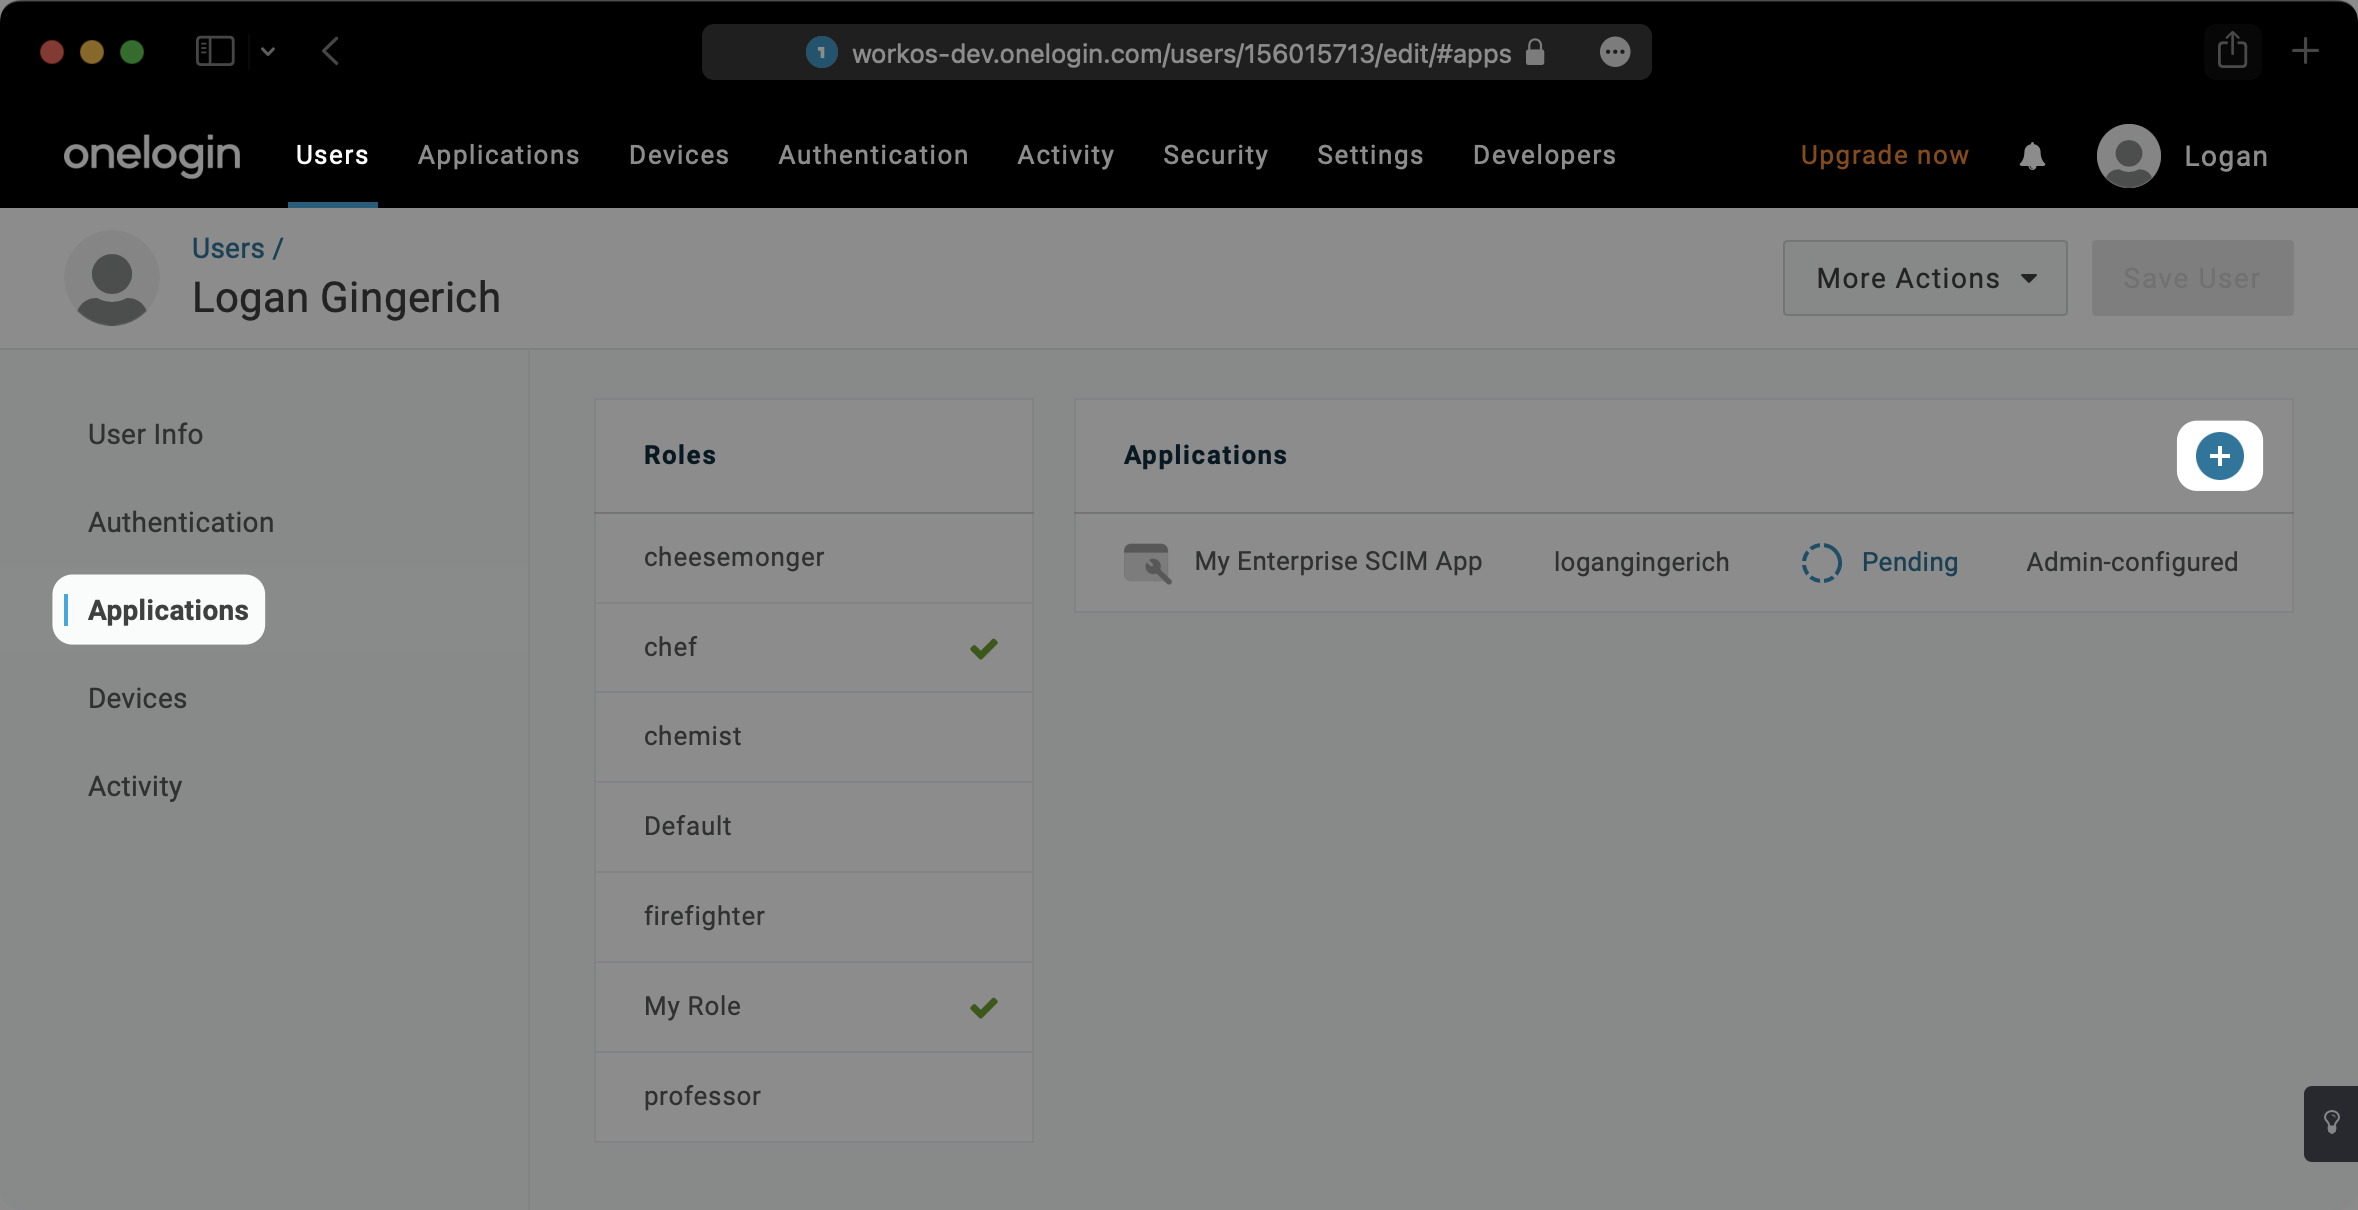
In order for your users and groups to be synced, you will need to assign them to your OneLogin Application. Select “Users” from the top navigation menu.
Next, find a user you’d like to provision to the SCIM app. Within that user profile, select the “Applications” tab on the left. Then, click the “+” symbol.
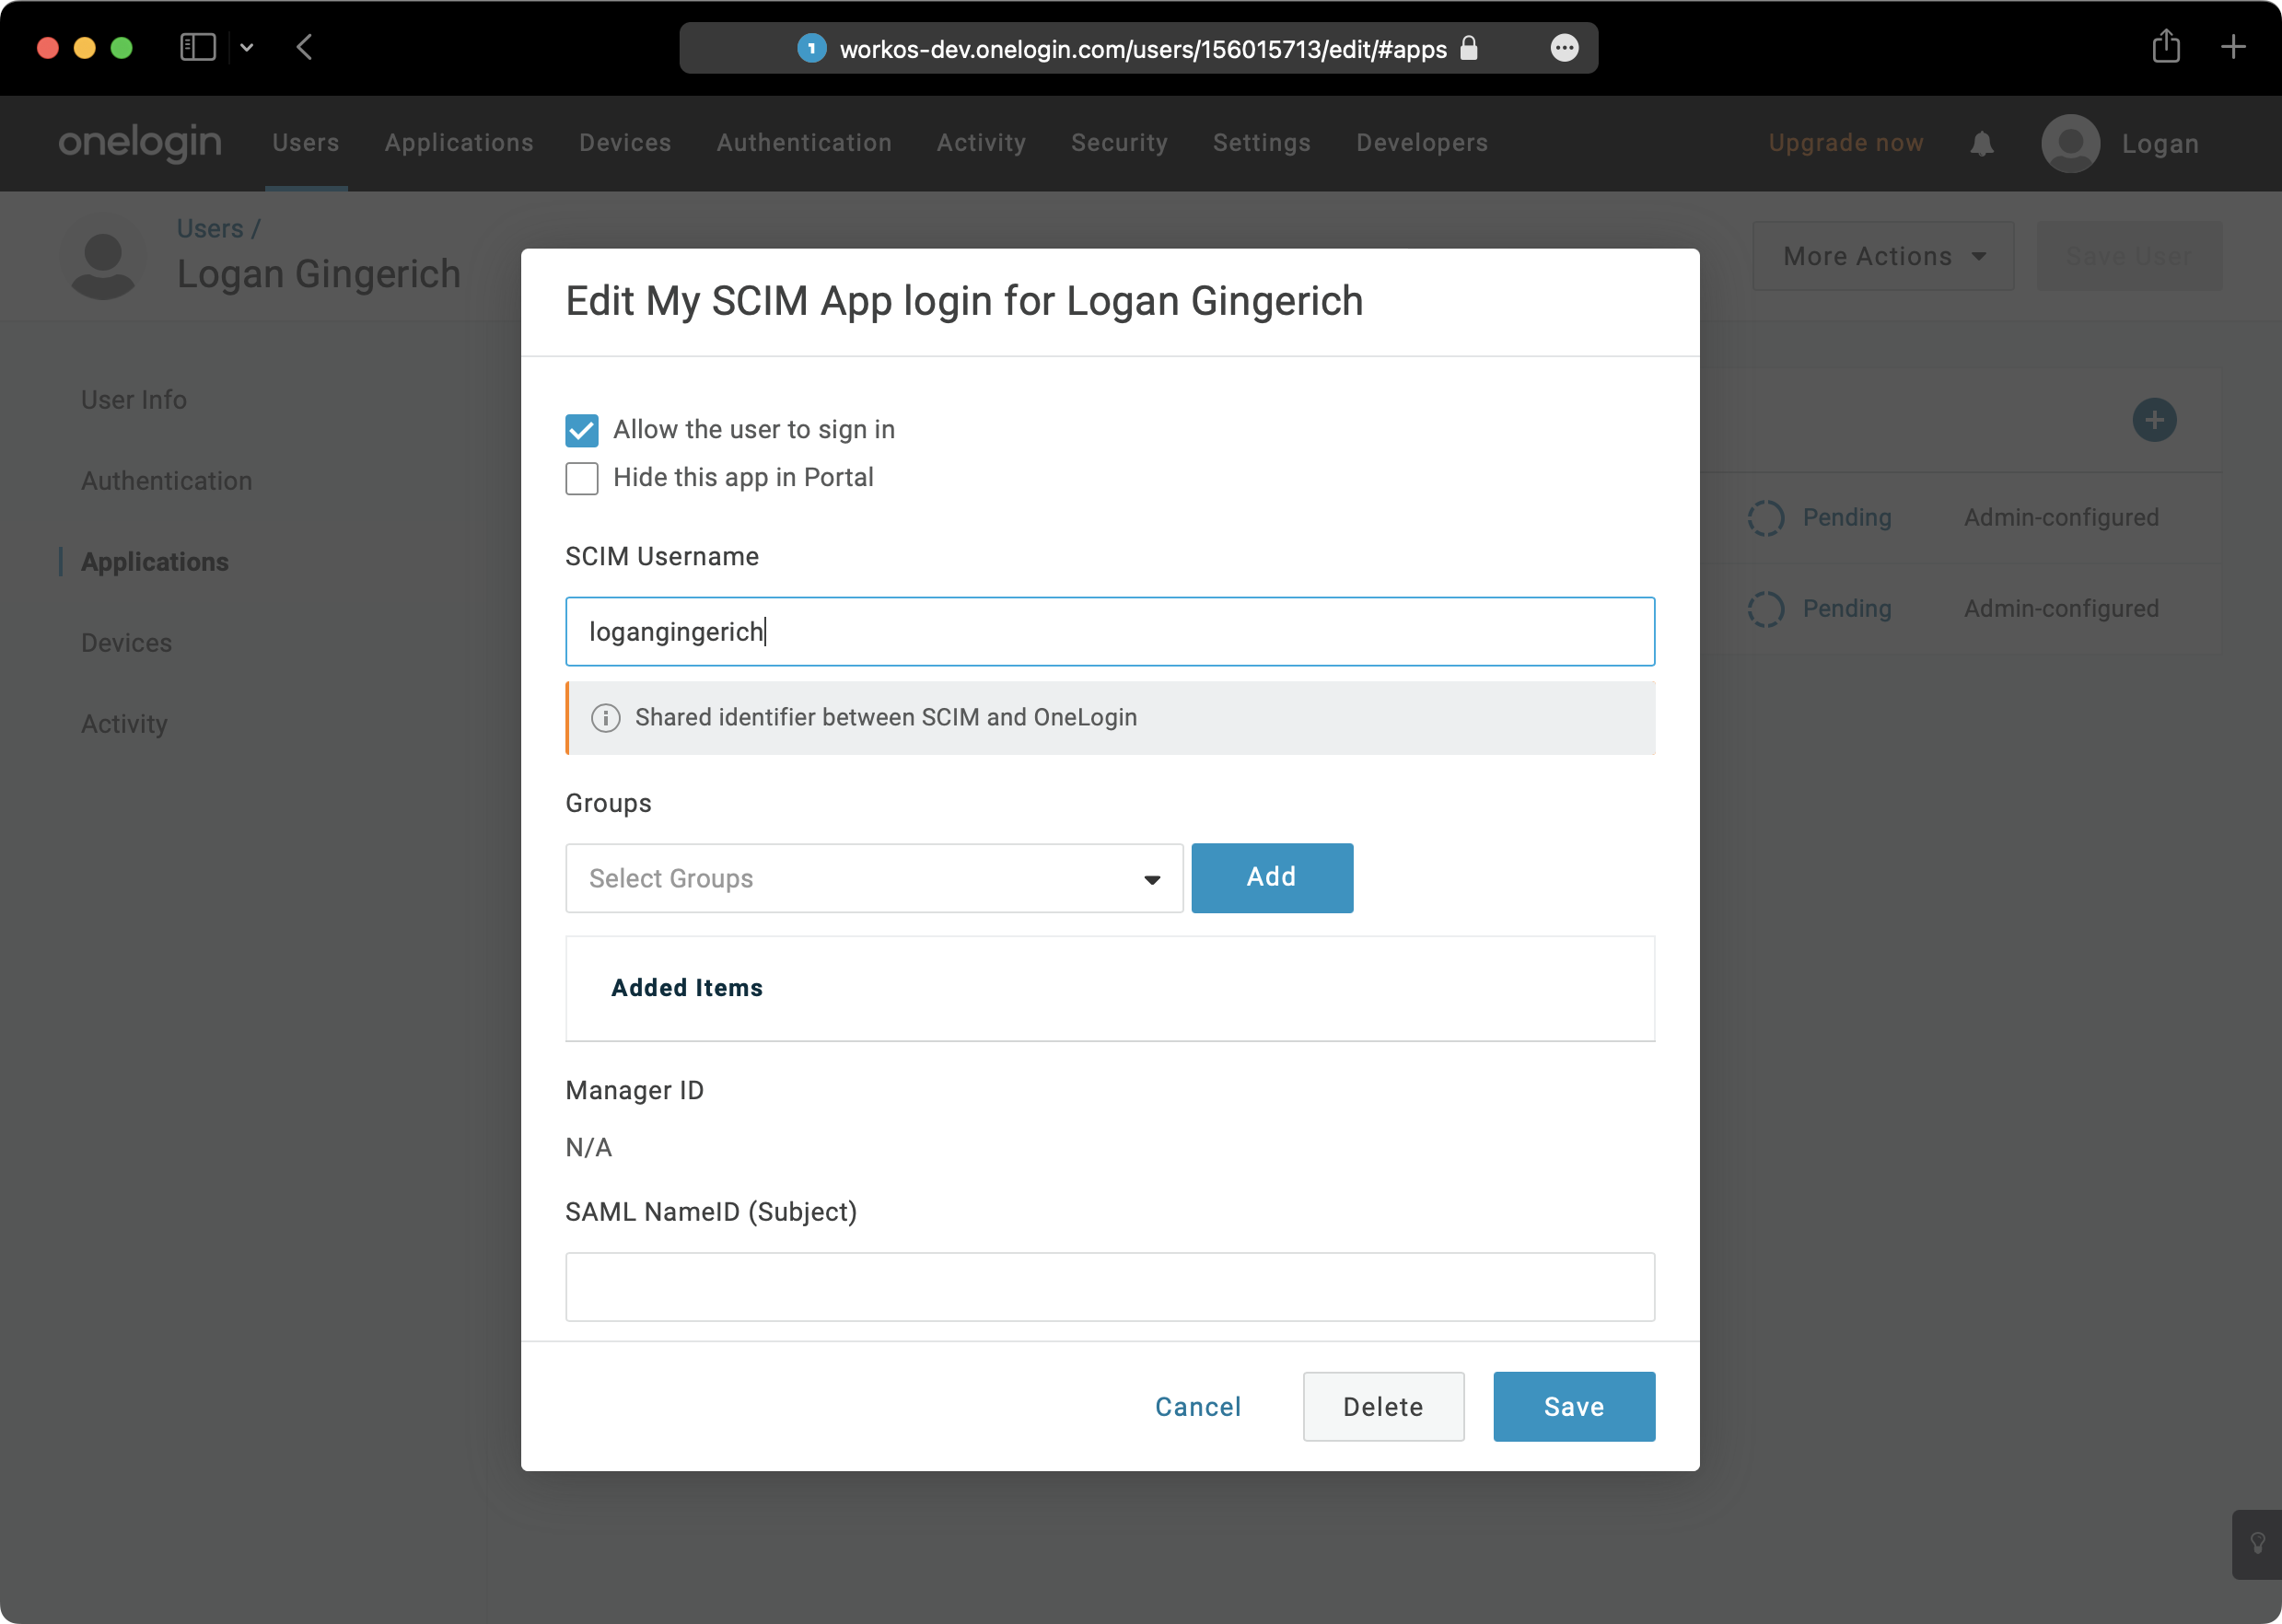
Select the appropriate app and hit “Continue”.

Select “Save” in the next modal to confirm the change.
There are many ways to provision groups in OneLogin. Below is one method that we recommend, but other methods can be used.
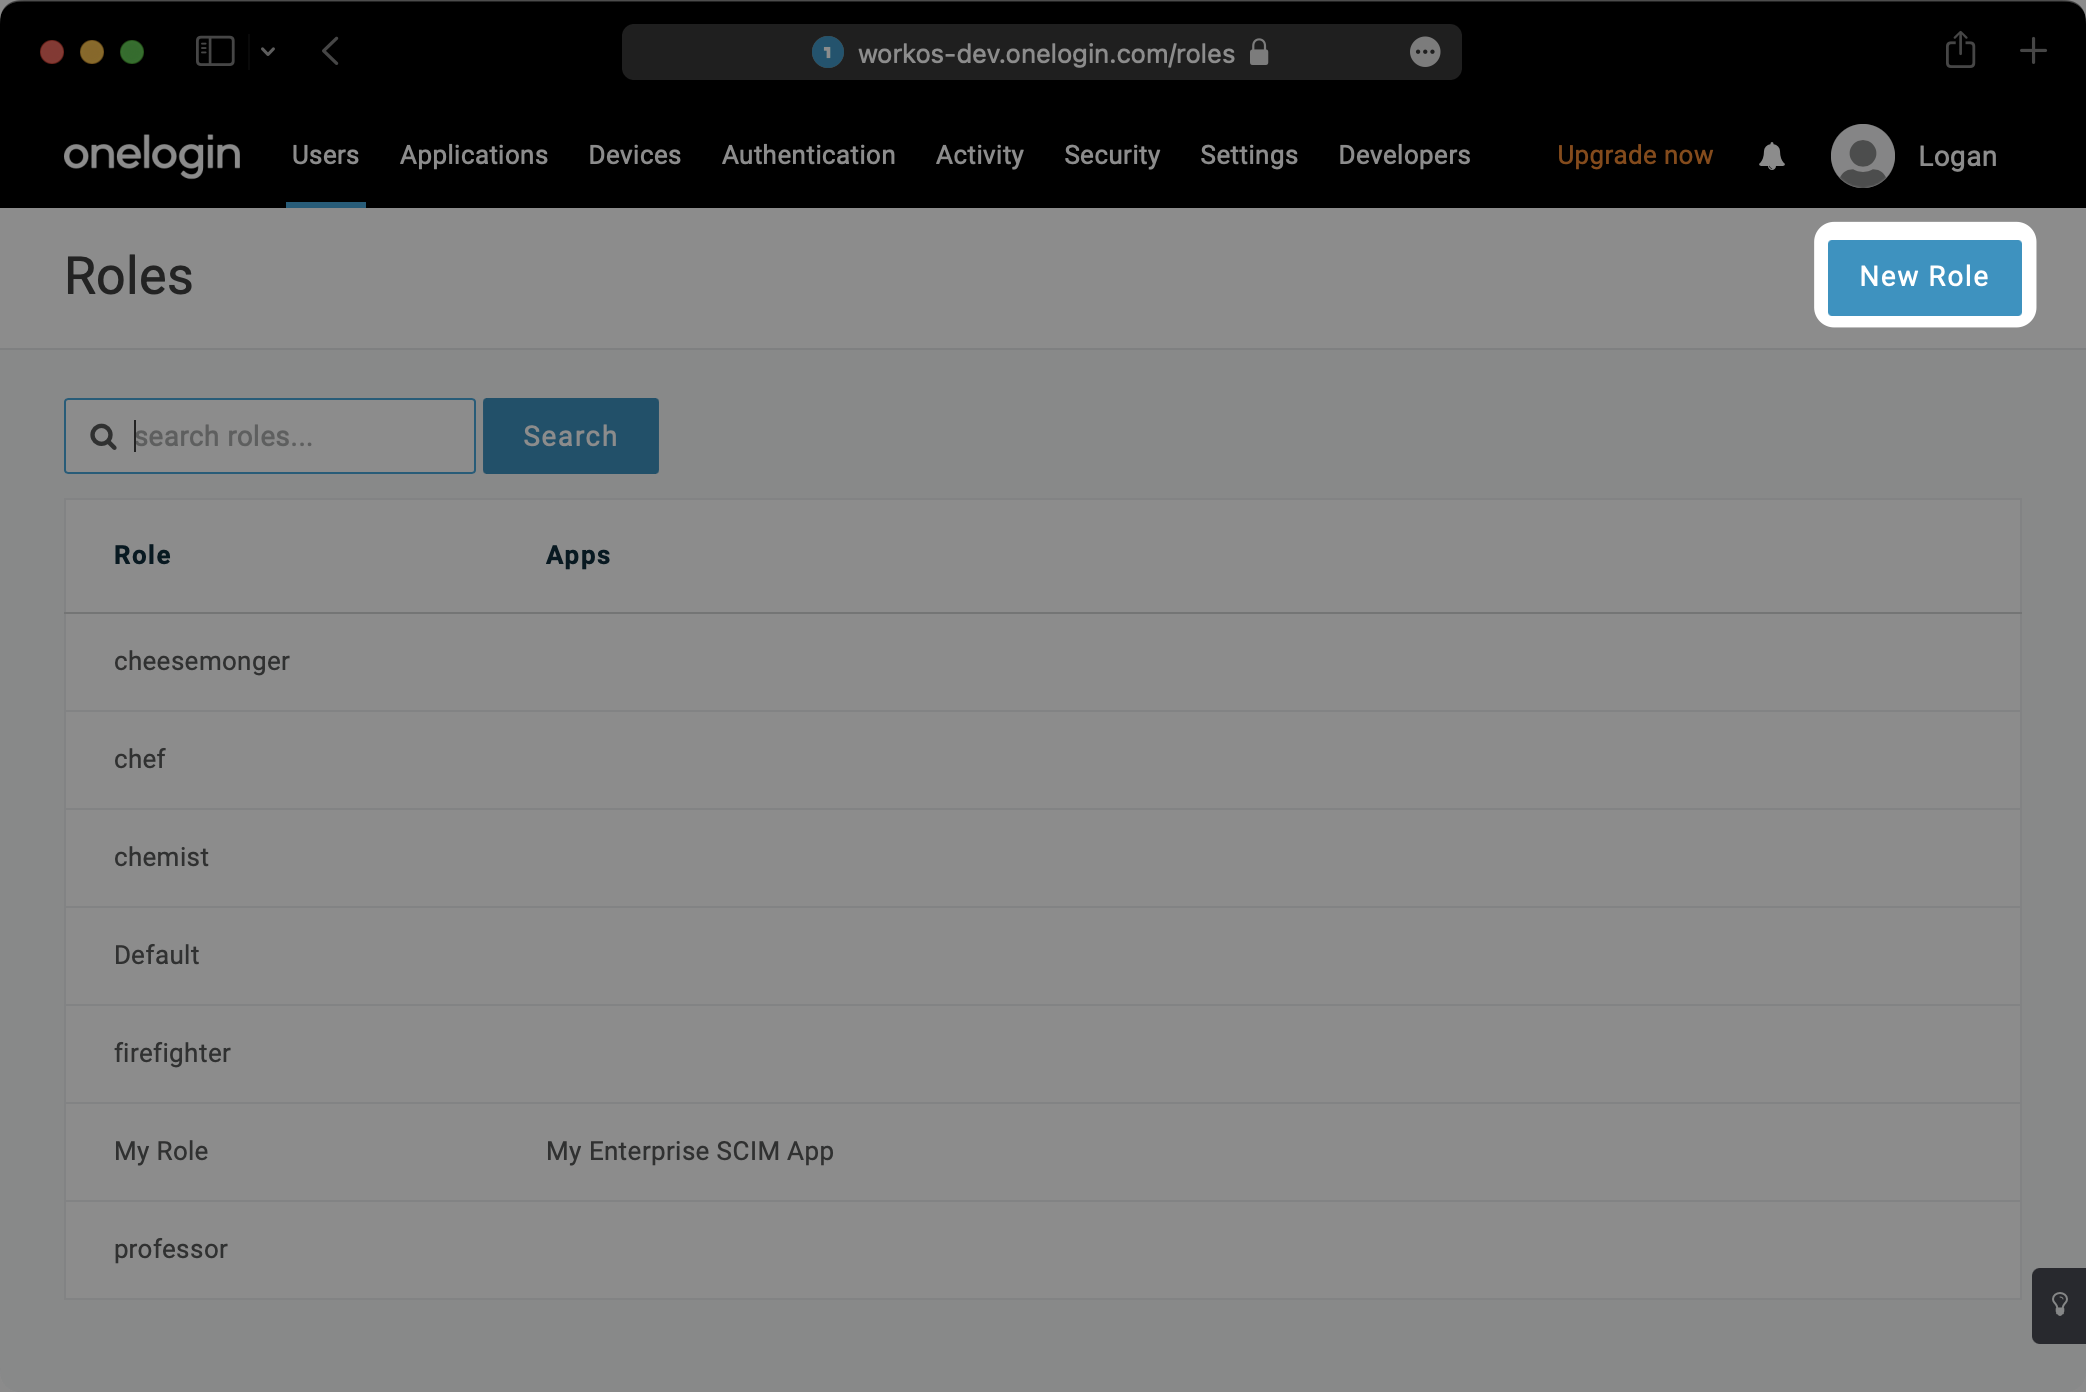
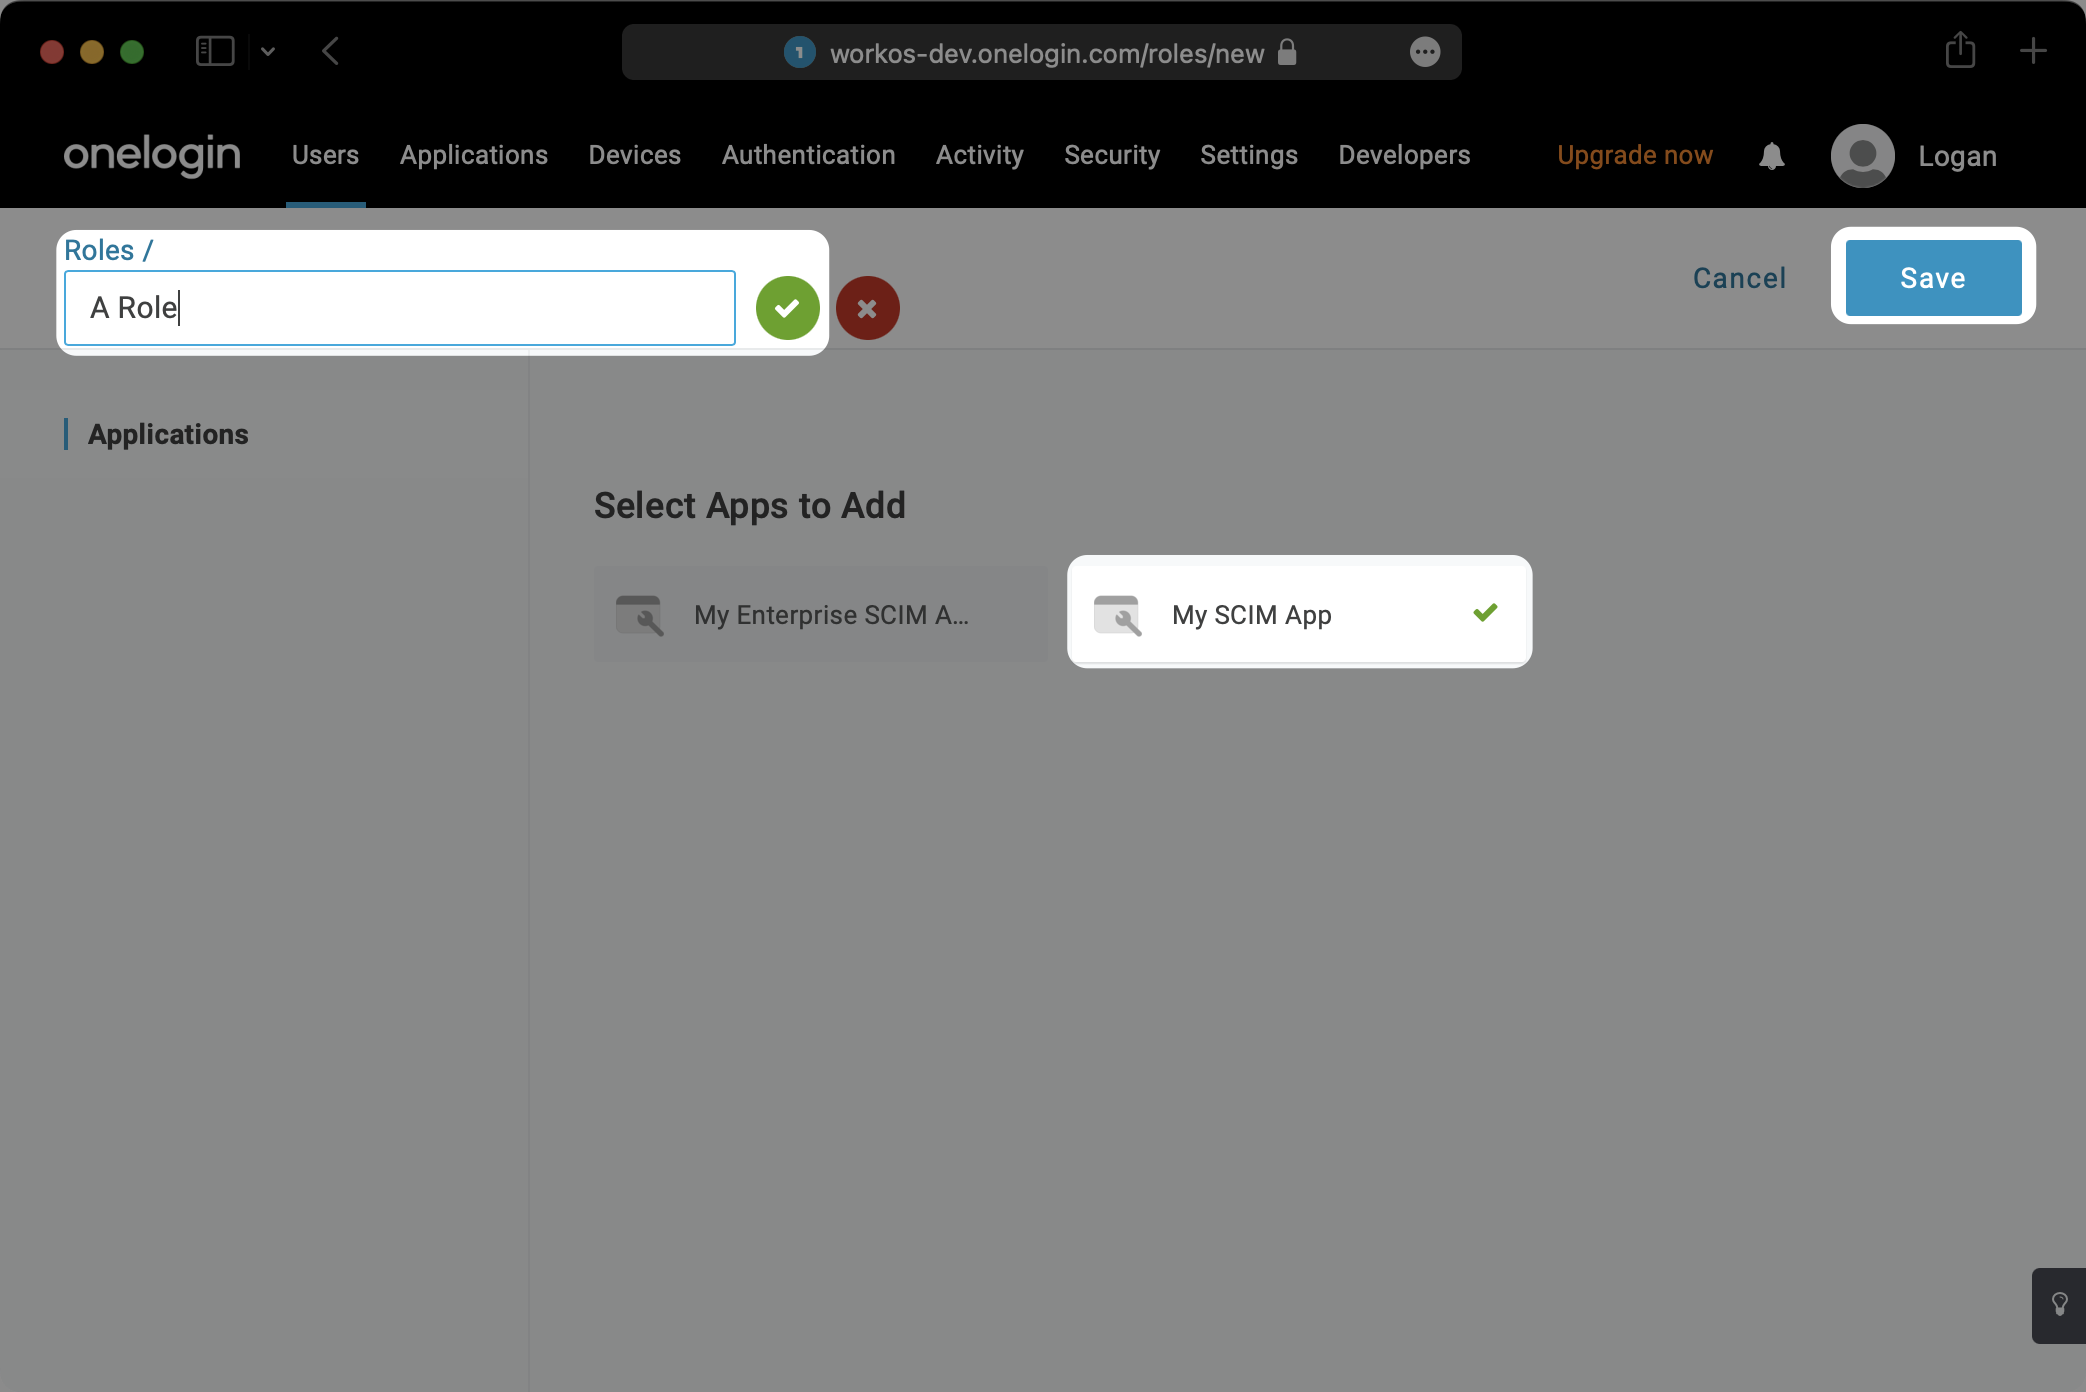
In the top navigation, Select “Users” and then “Roles” from the dropdown. Select “New Role”.
Give the Role a name (this will be the name of the group), select the appropriate SCIM application, and hit “Save”.
Click the “Users” tab for the role. Search for any users you’d like to assign to that role and hit “Add To Role”. Then hit “Save”.
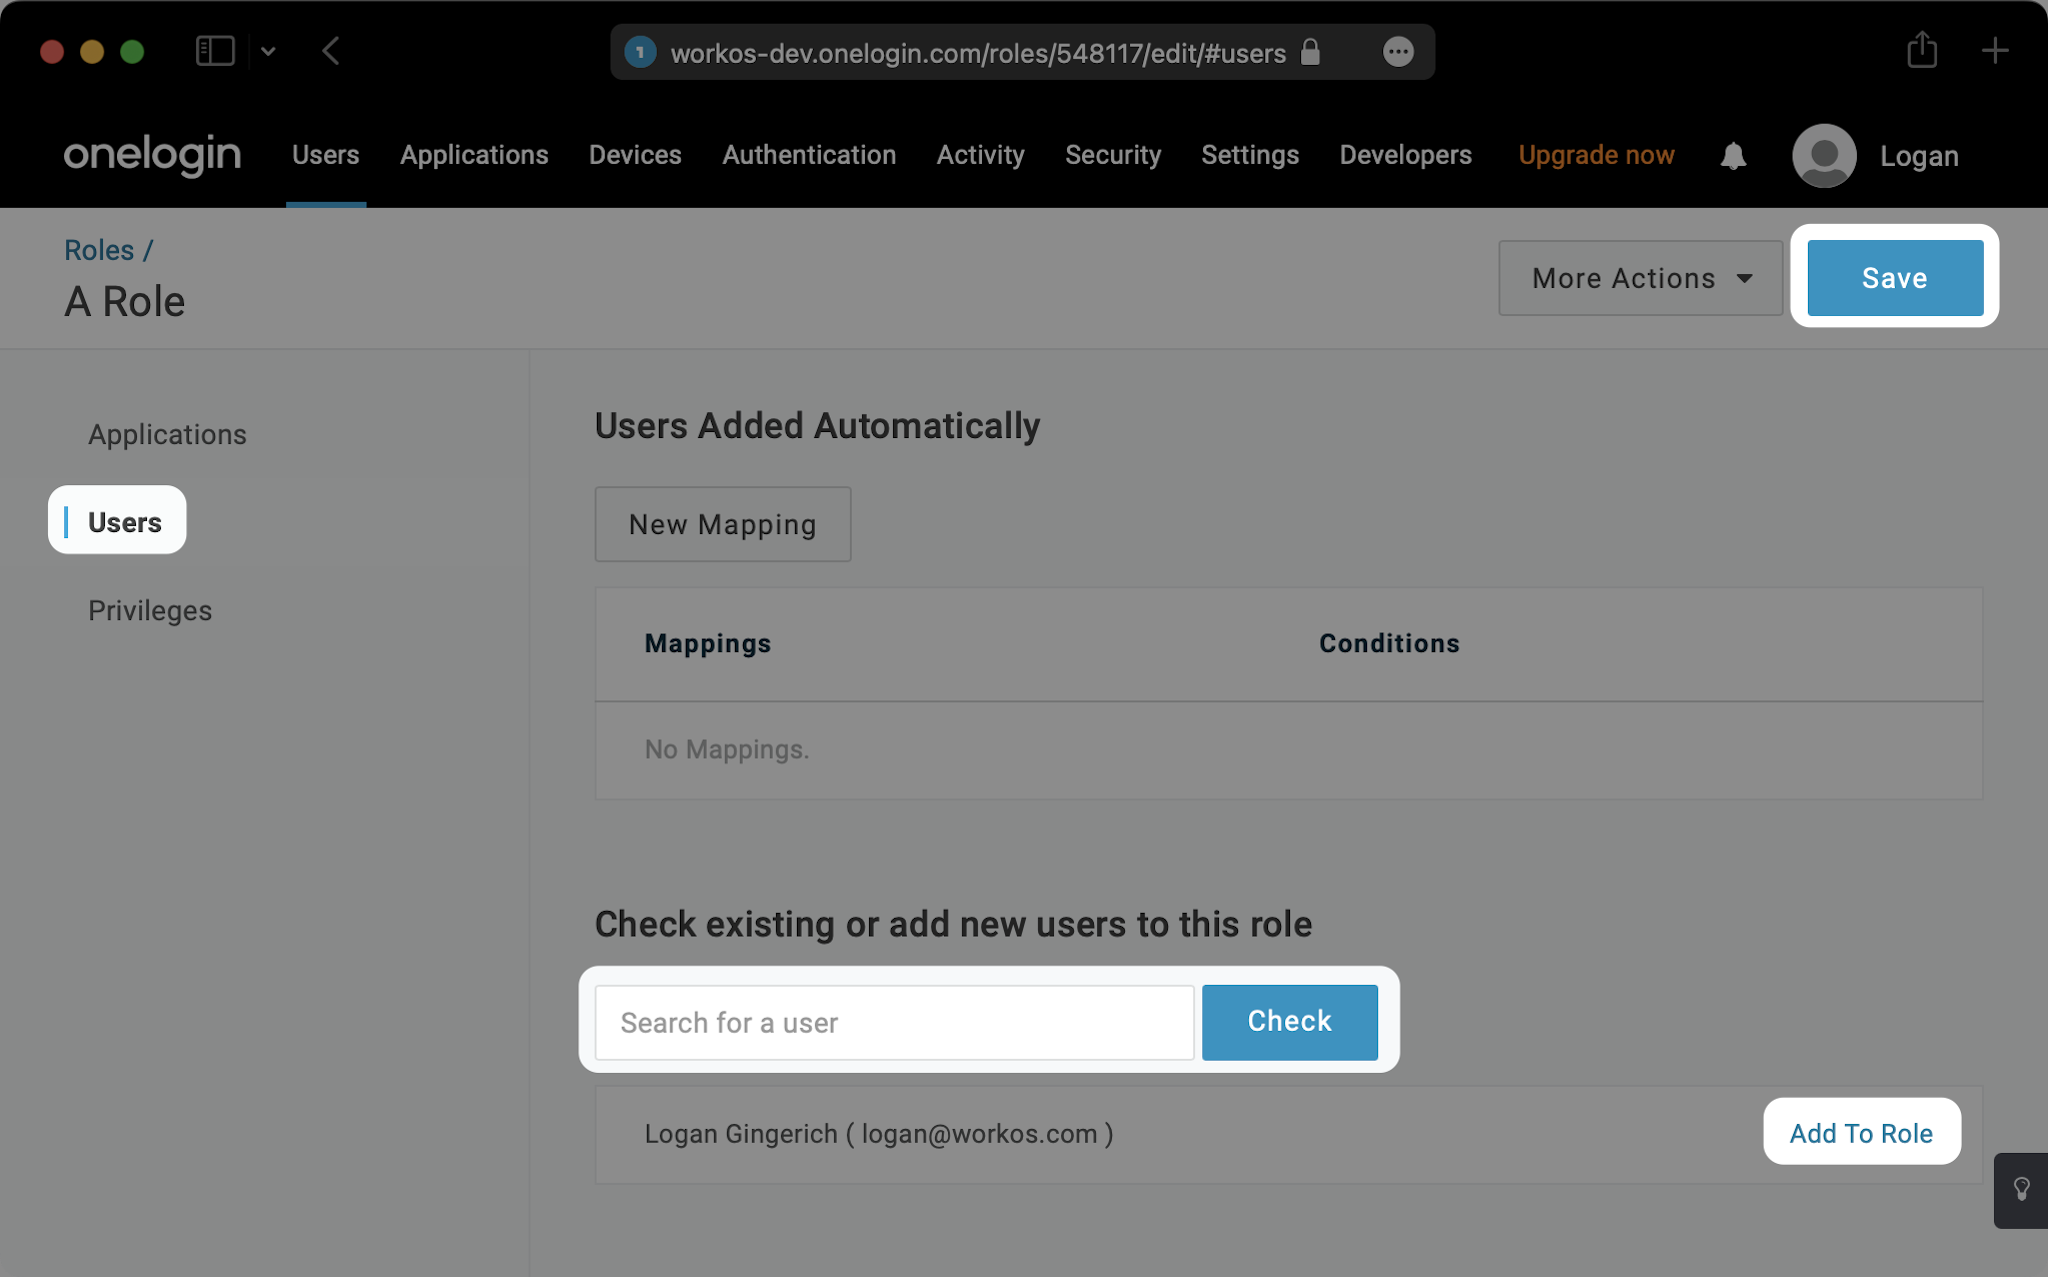
Click “Save” in the next modal to confirm.

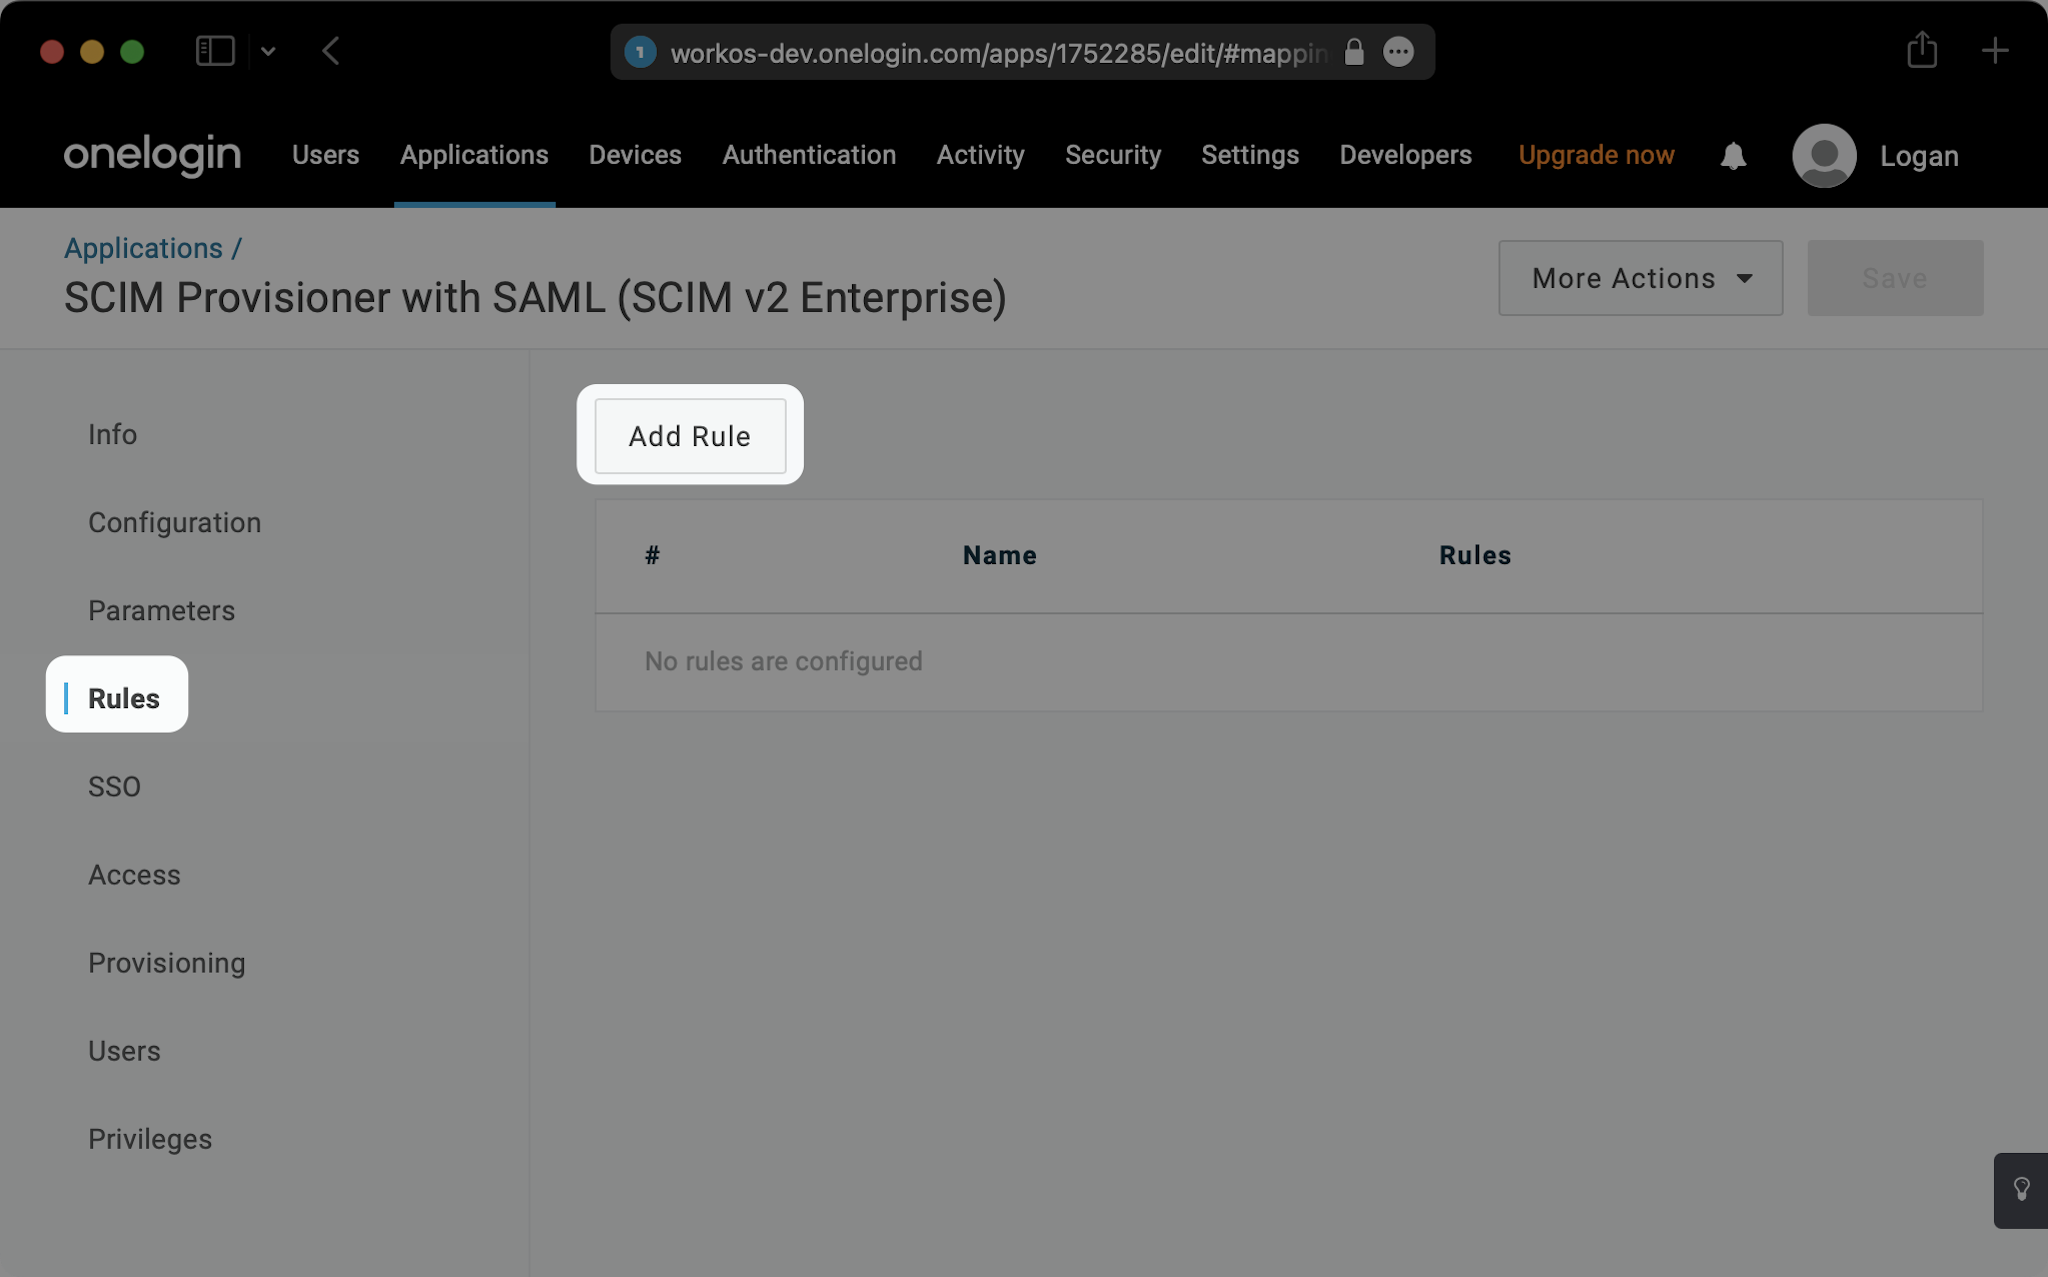
Navigate back to your SCIM app and click on the “Rules” tab on the left. Then, hit “Add Rule”.
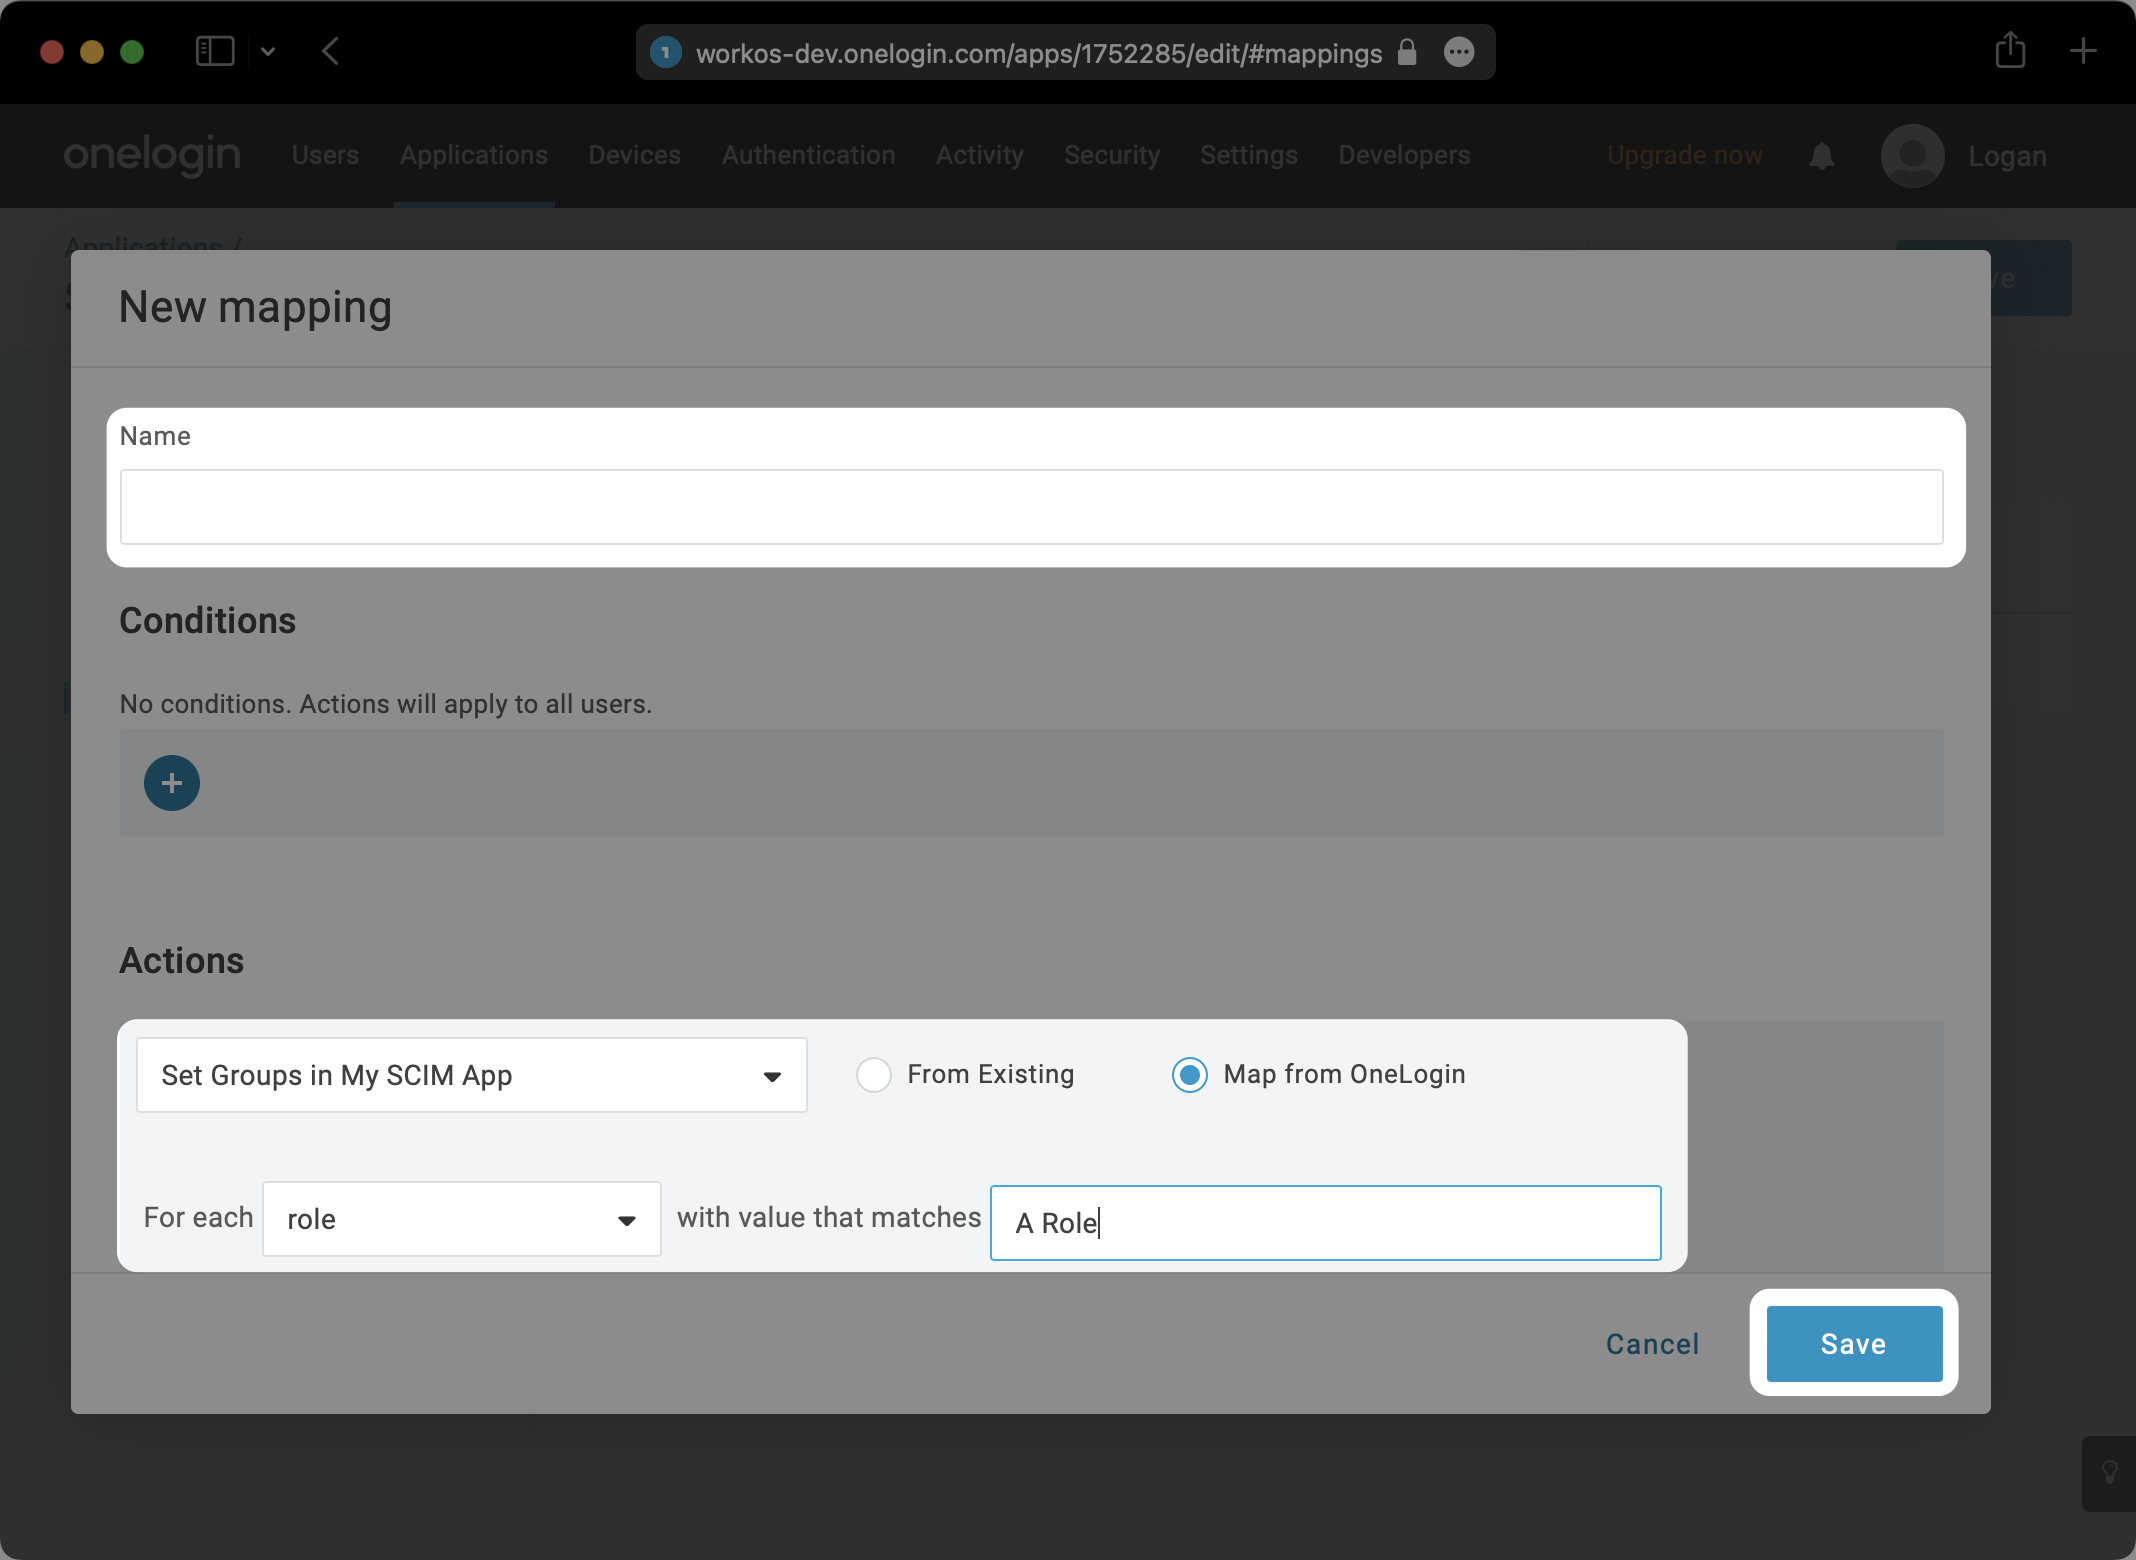
Give your Rule a name. Under “Actions”, select “Set Groups in your-app-name”. Then, set it to “For each role with value that matches your-role-name”. Hit “Save”.
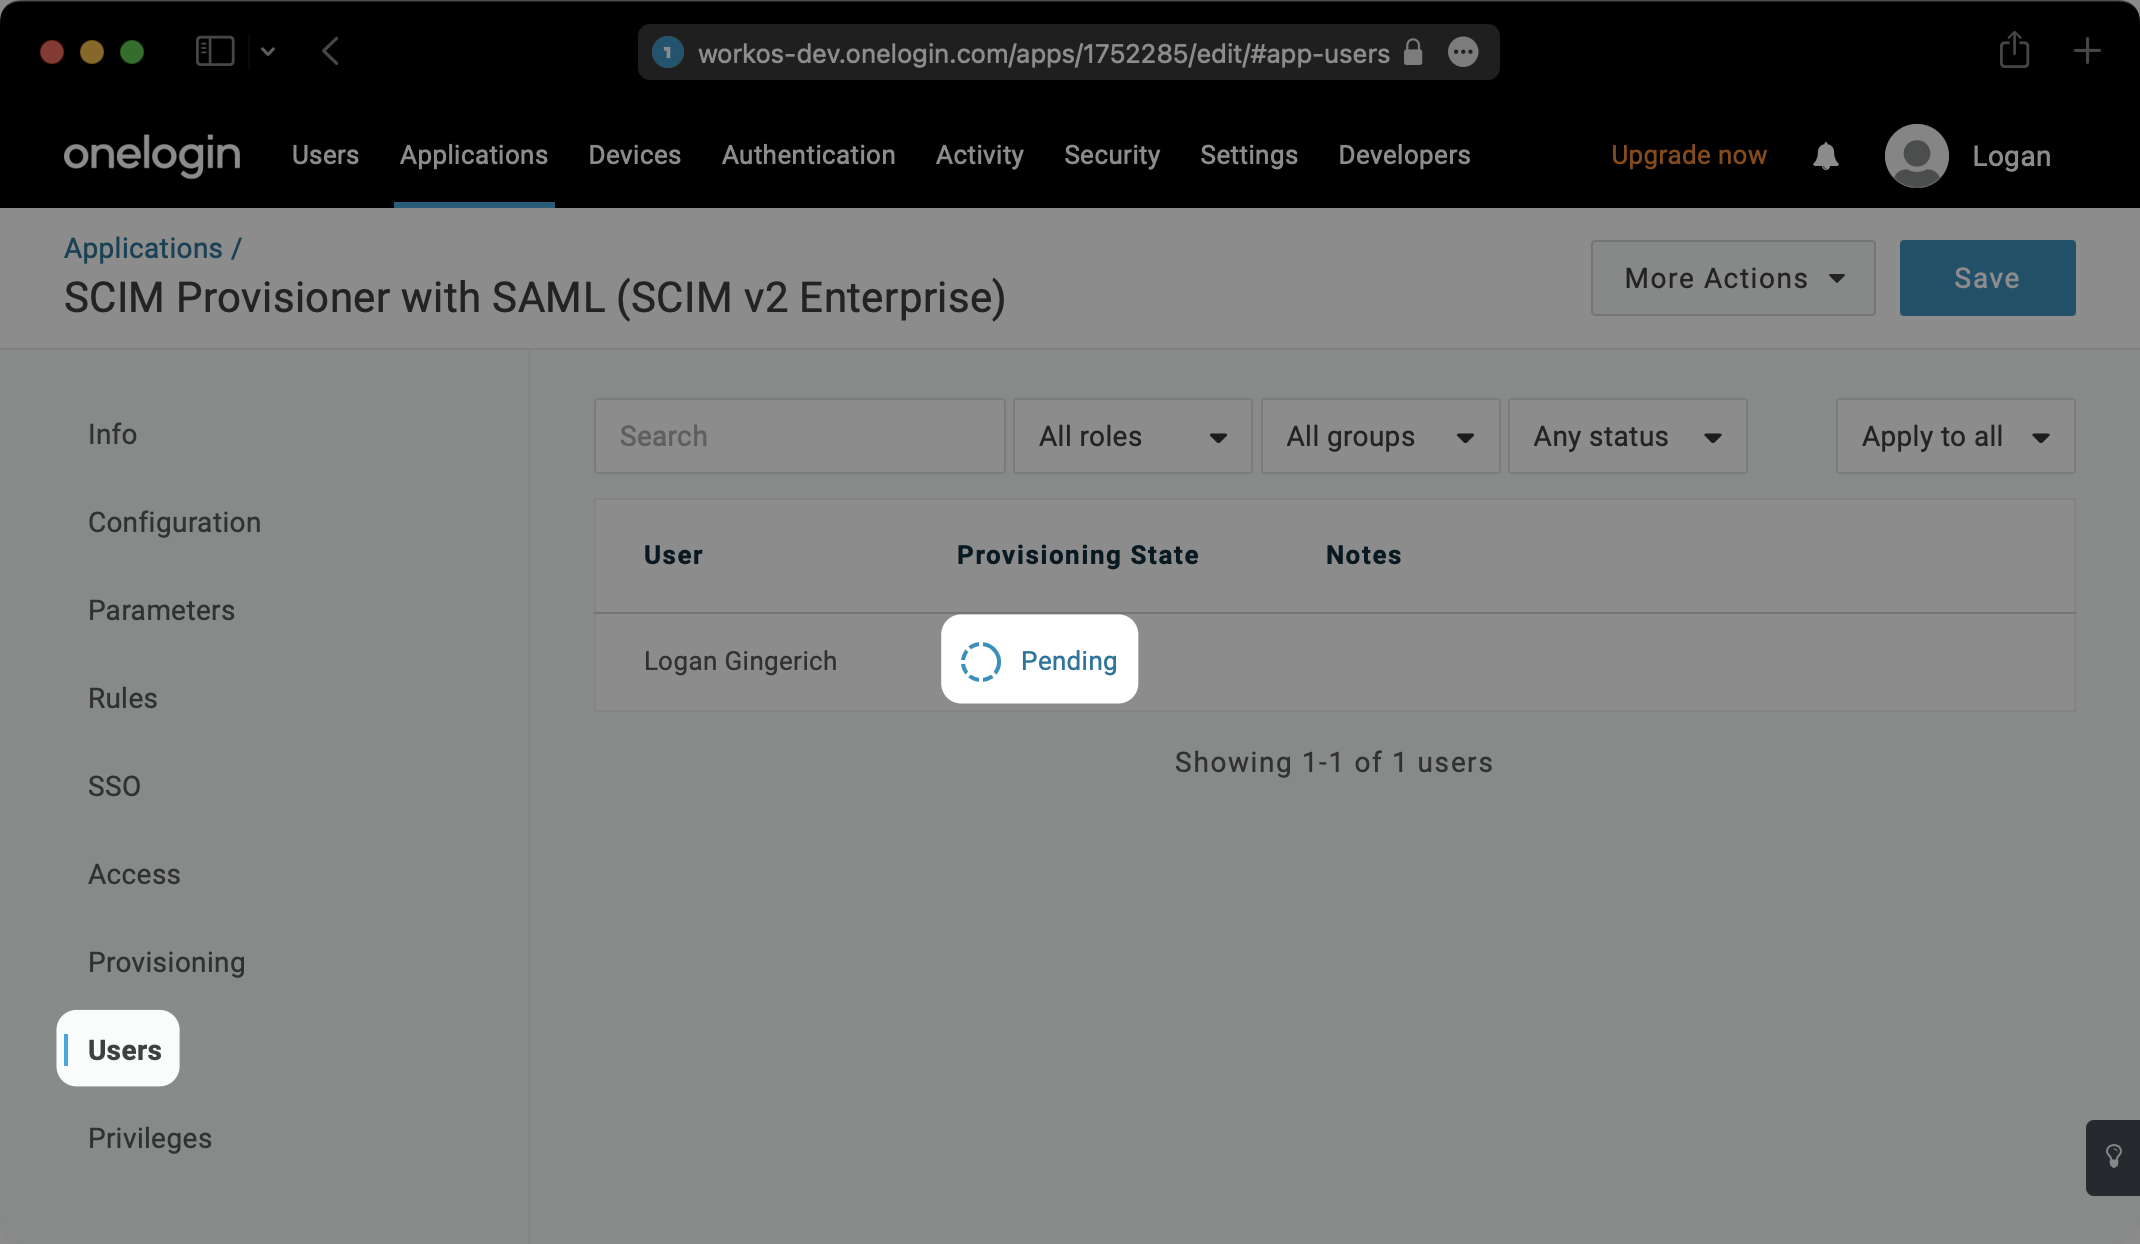
Within your SCIM app under the “Users” tab, you may then need to click on any “Pending” notifications to confirm the update for users.
Begin provisioning users and groups and witness realtime changes in your WorkOS Dashboard.
A detailed guide to integrate the WorkOS API with your application can be found here
When a group is removed, I don’t see a dsync.group.deleted or dsync.group.user_removed events – is this expected?
It is a known issue with OneLogin SCIM that when a group is removed from the application, any user that is only provisioned through that group will be “inactive” but otherwise no indication is received that the group has changed.
The users of the group must be cleaned up before the group itself is removed from the SCIM application.