PingFederate SCIM
Learn about syncing your user list with PingFederate SCIM.
The PingFederate SCIM Connector can be used to enable a directory sync connection with WorkOS. Follow the steps below to set up this integration.
To synchronize an organization’s users and groups provisioned for your application, you’ll need two pieces of information:
- An Endpoint that PingFederate will make requests to
- A Bearer Token for PingFederate to authenticate it’s endpoint requests
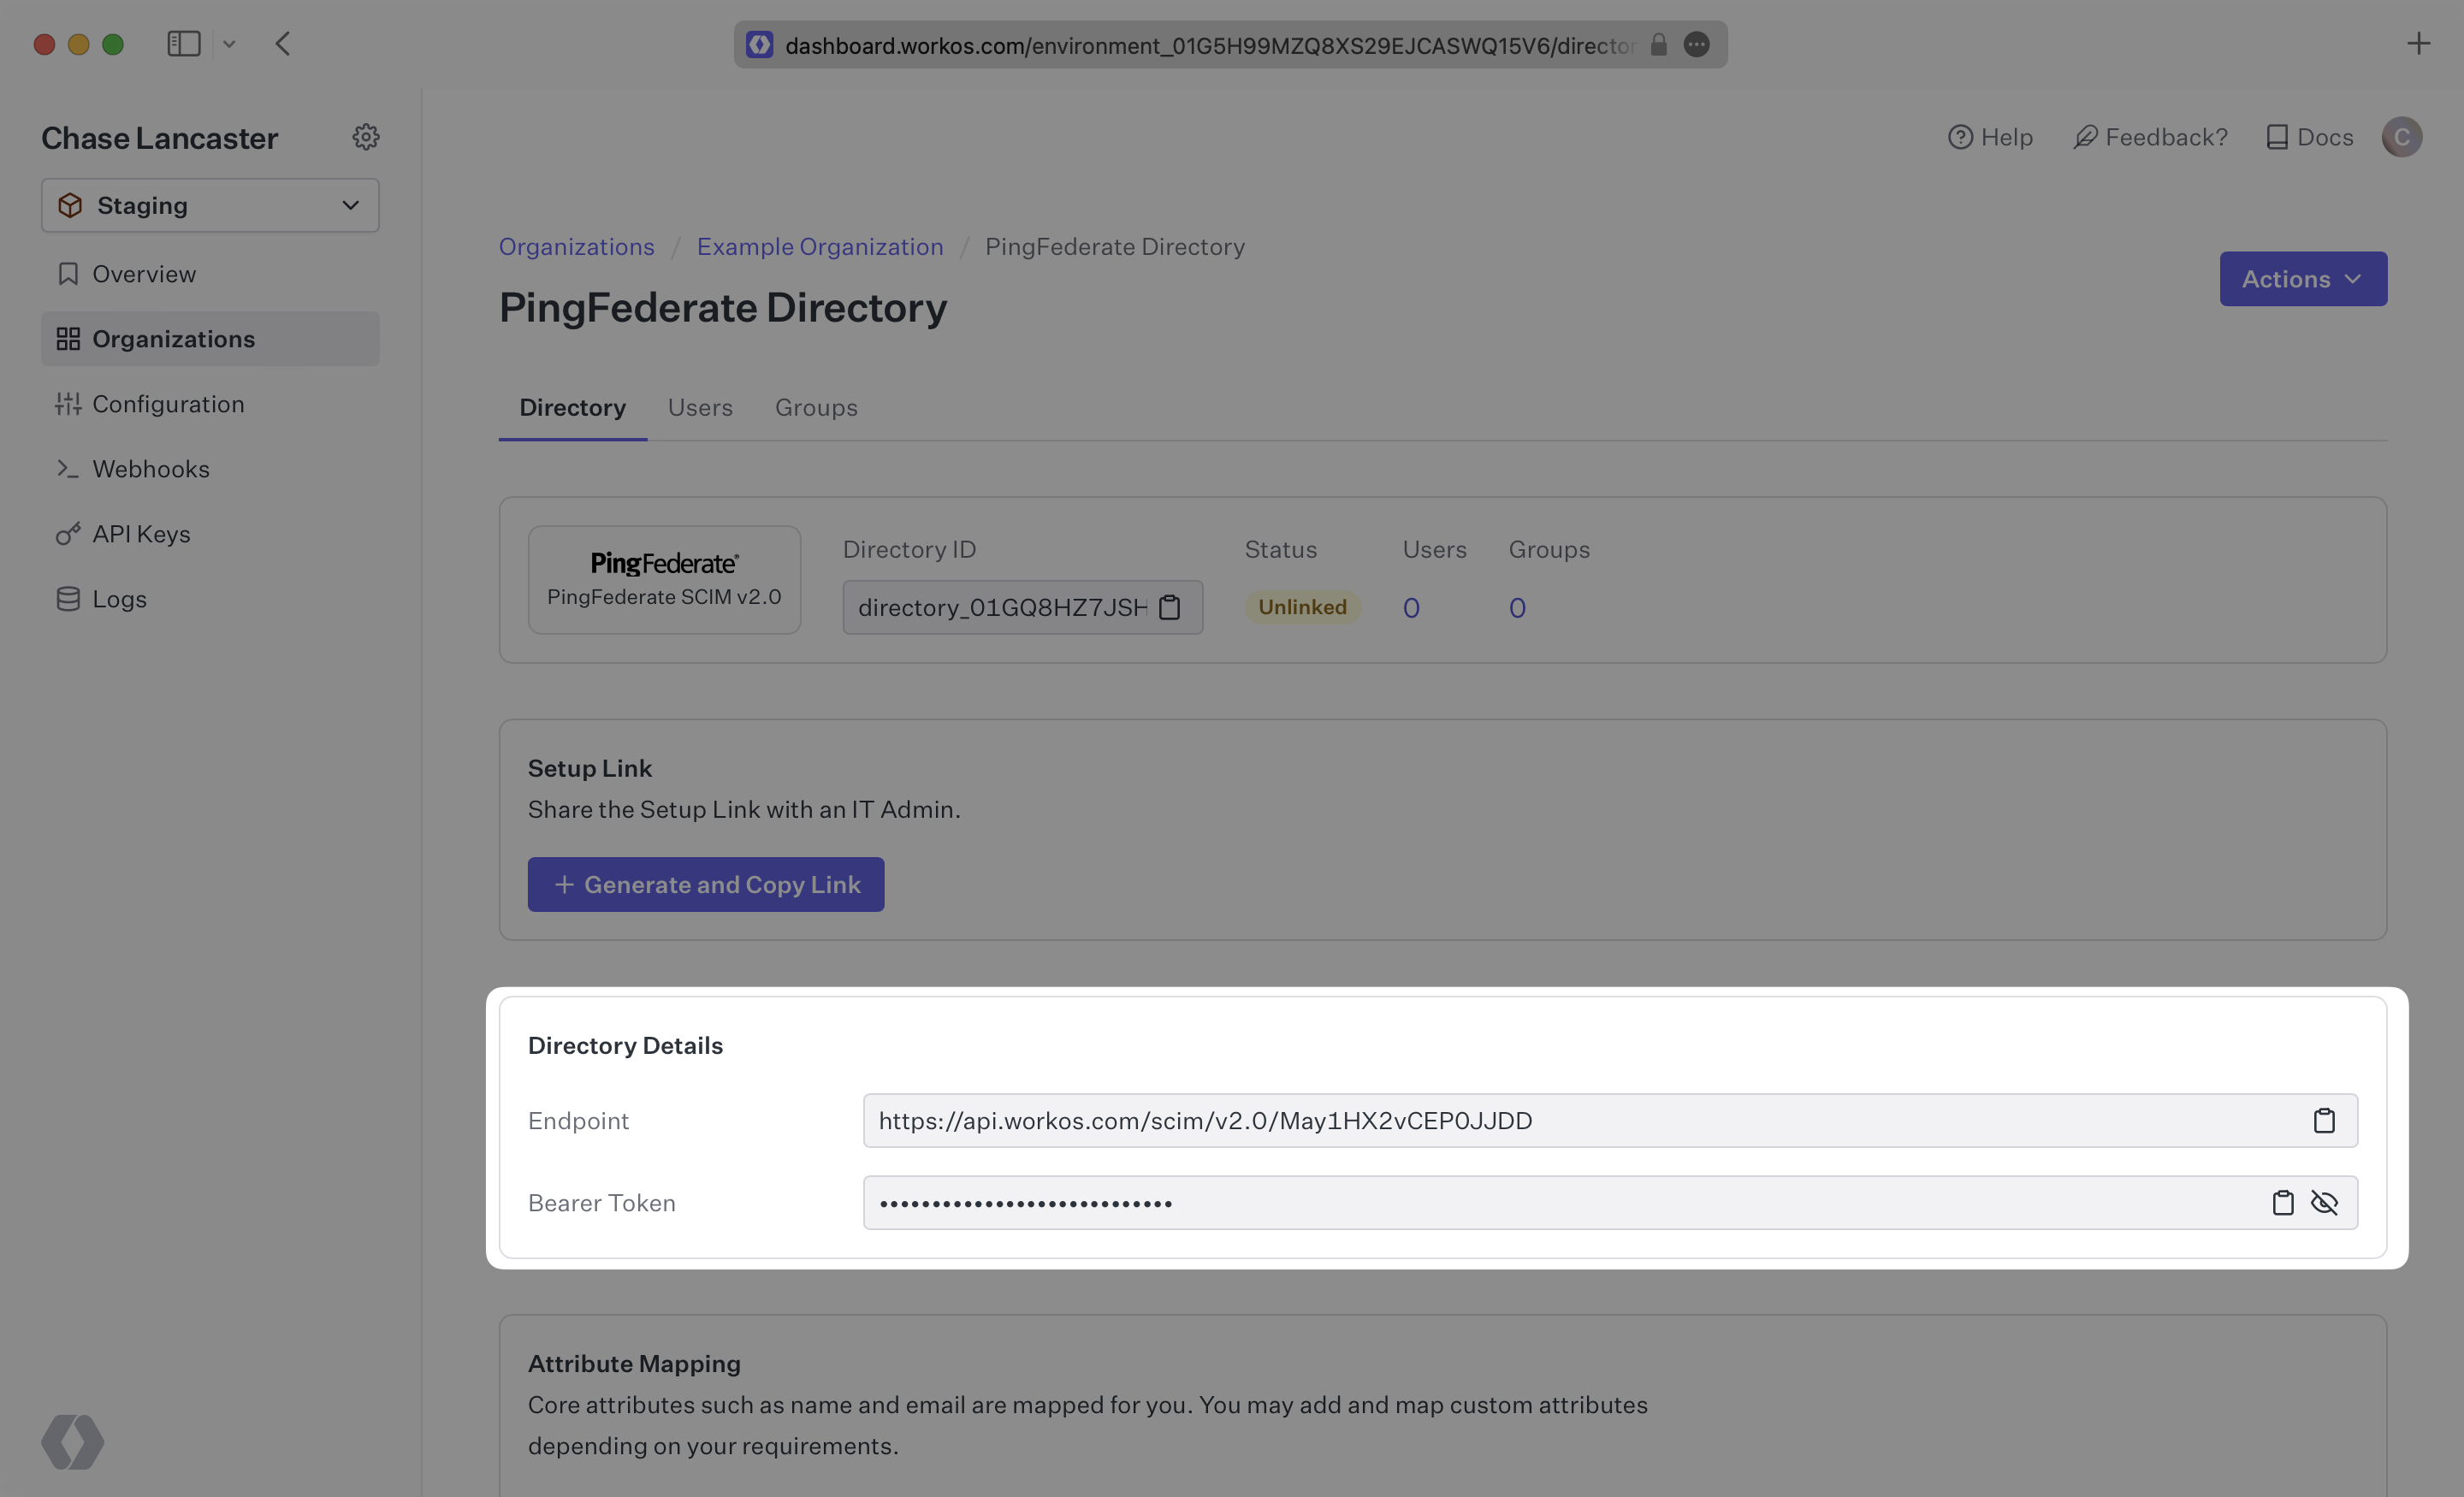
After completing step 1 below, both of these are available in your Endpoint’s Settings in the WorkOS Dashboard.
The rest of the steps after the first will need to be carried out by the organization when configuring your application in their PingFederate instance.
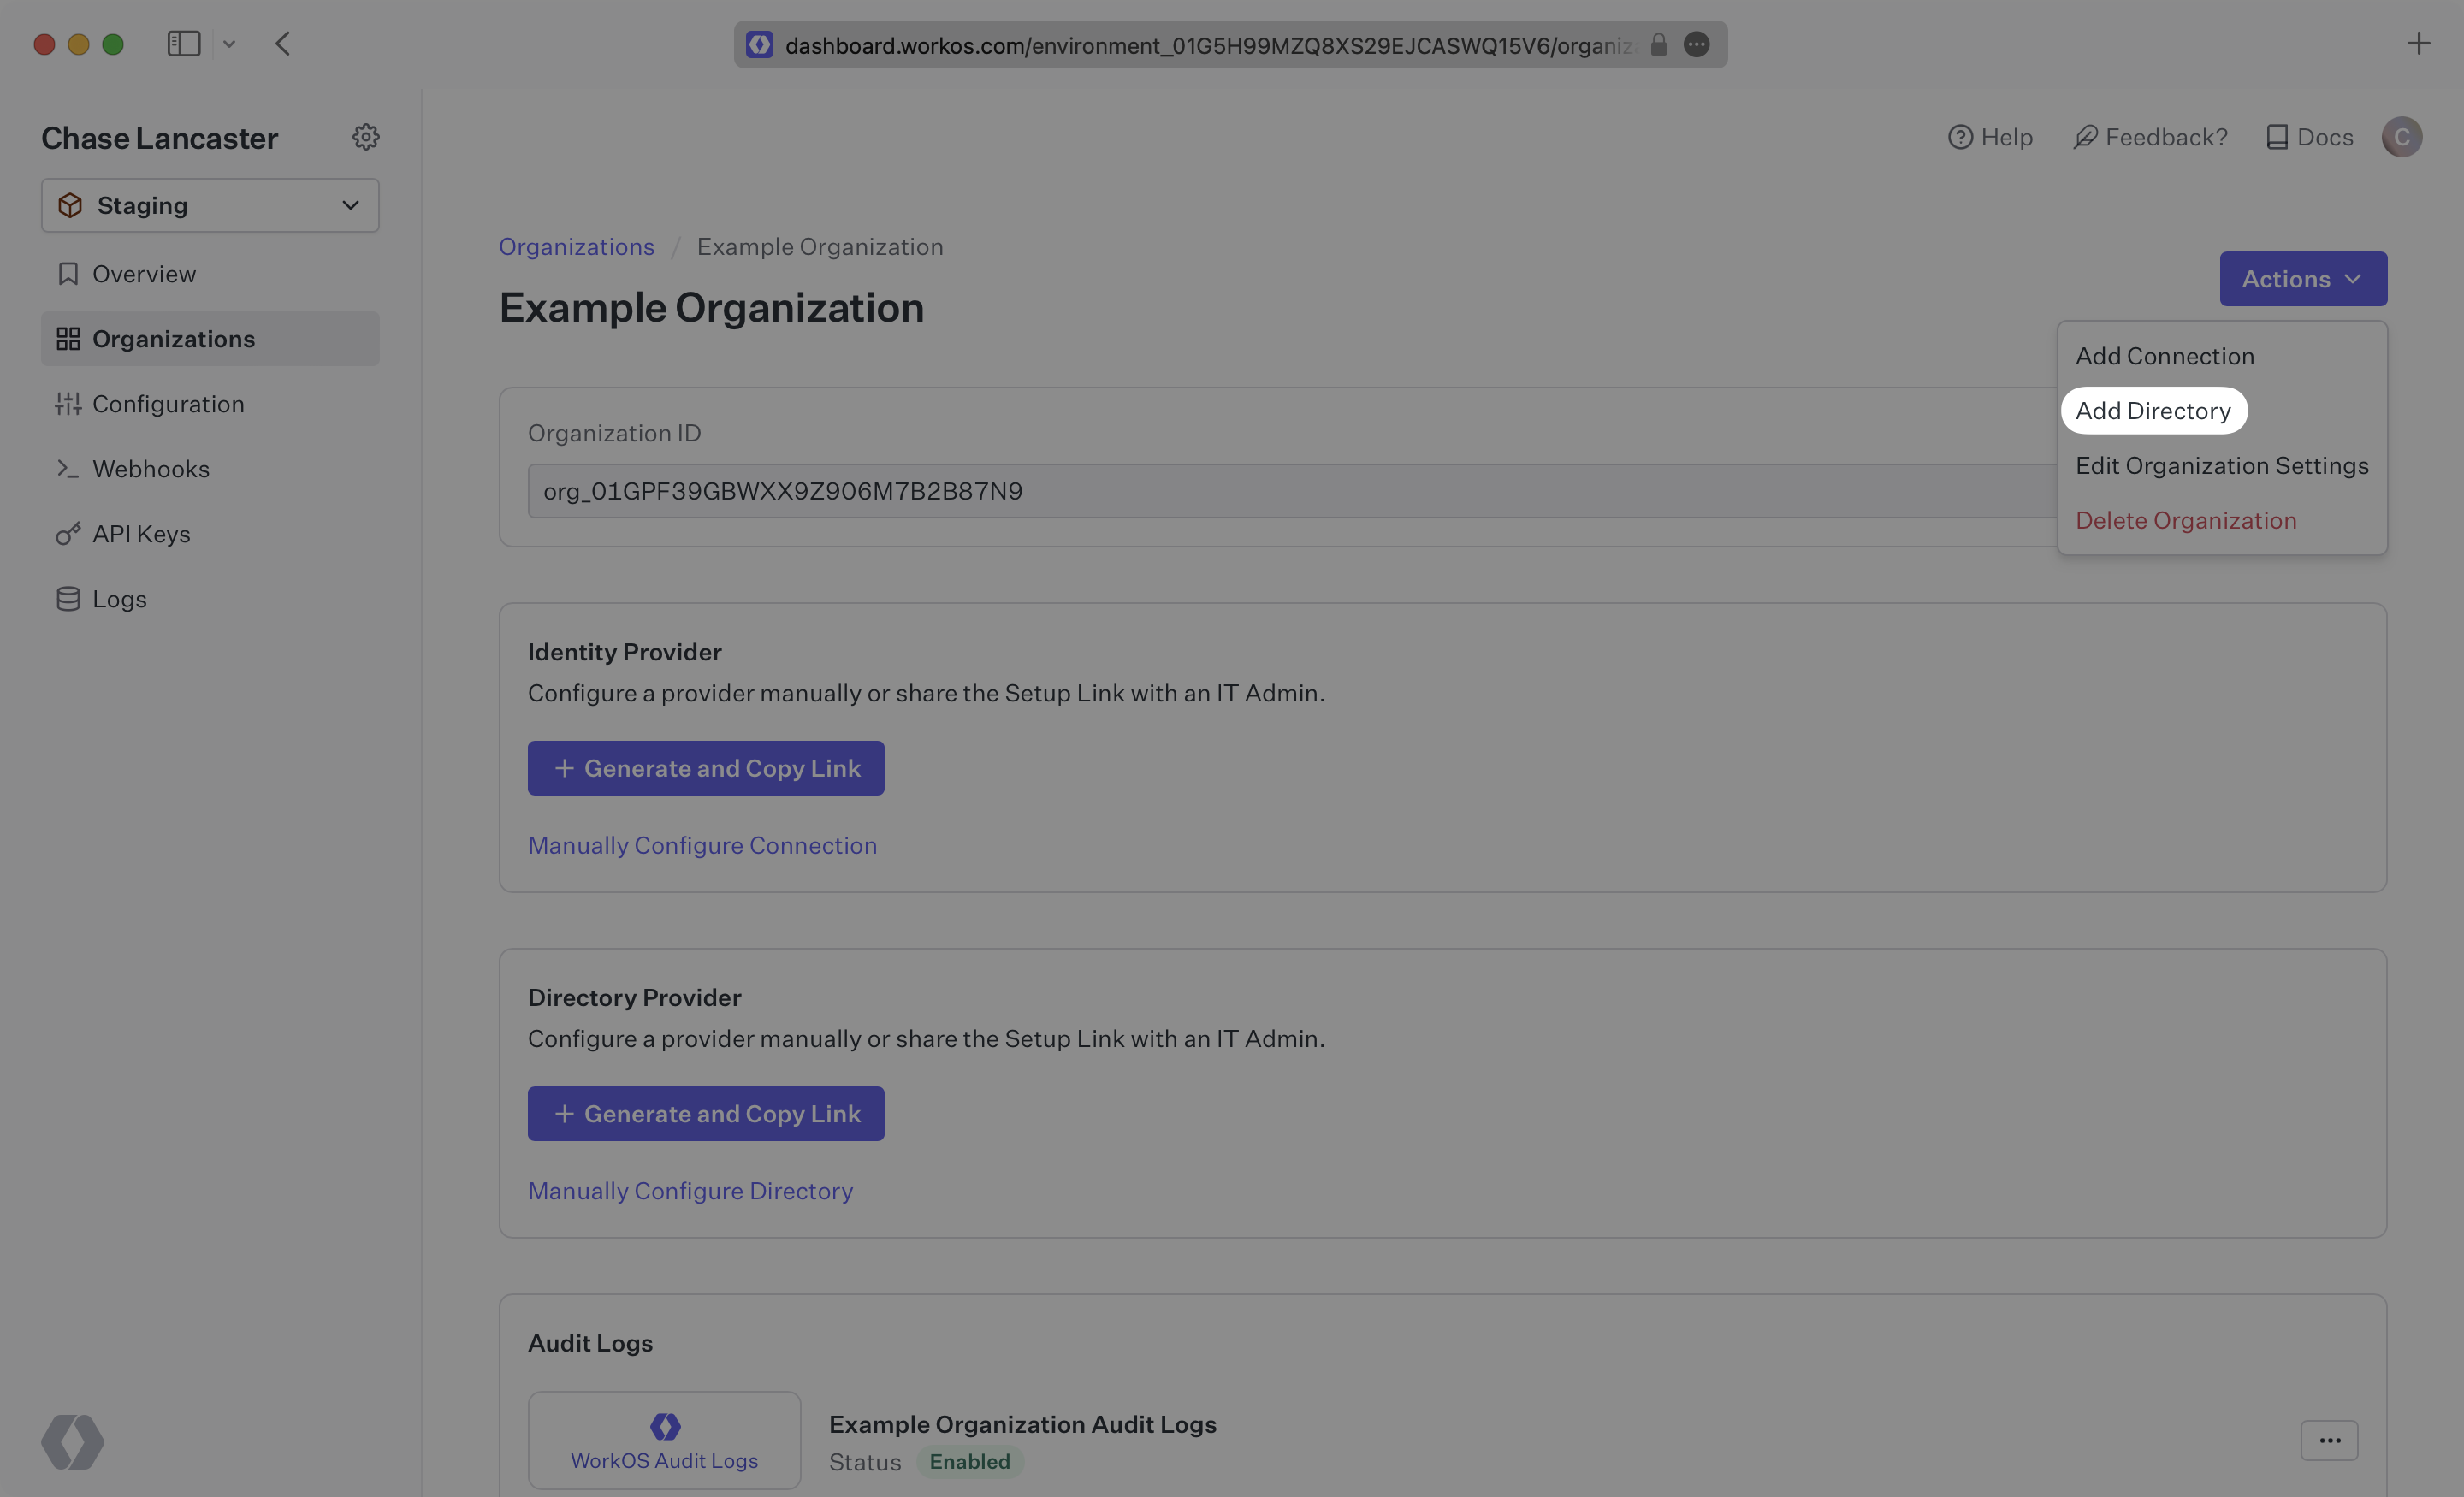
Login to your WorkOS Dashboard and select “Organizations” from the left hand navigation bar.
Select the organization you’ll be configuring a new Directory Sync with.
Click “Add Directory”.
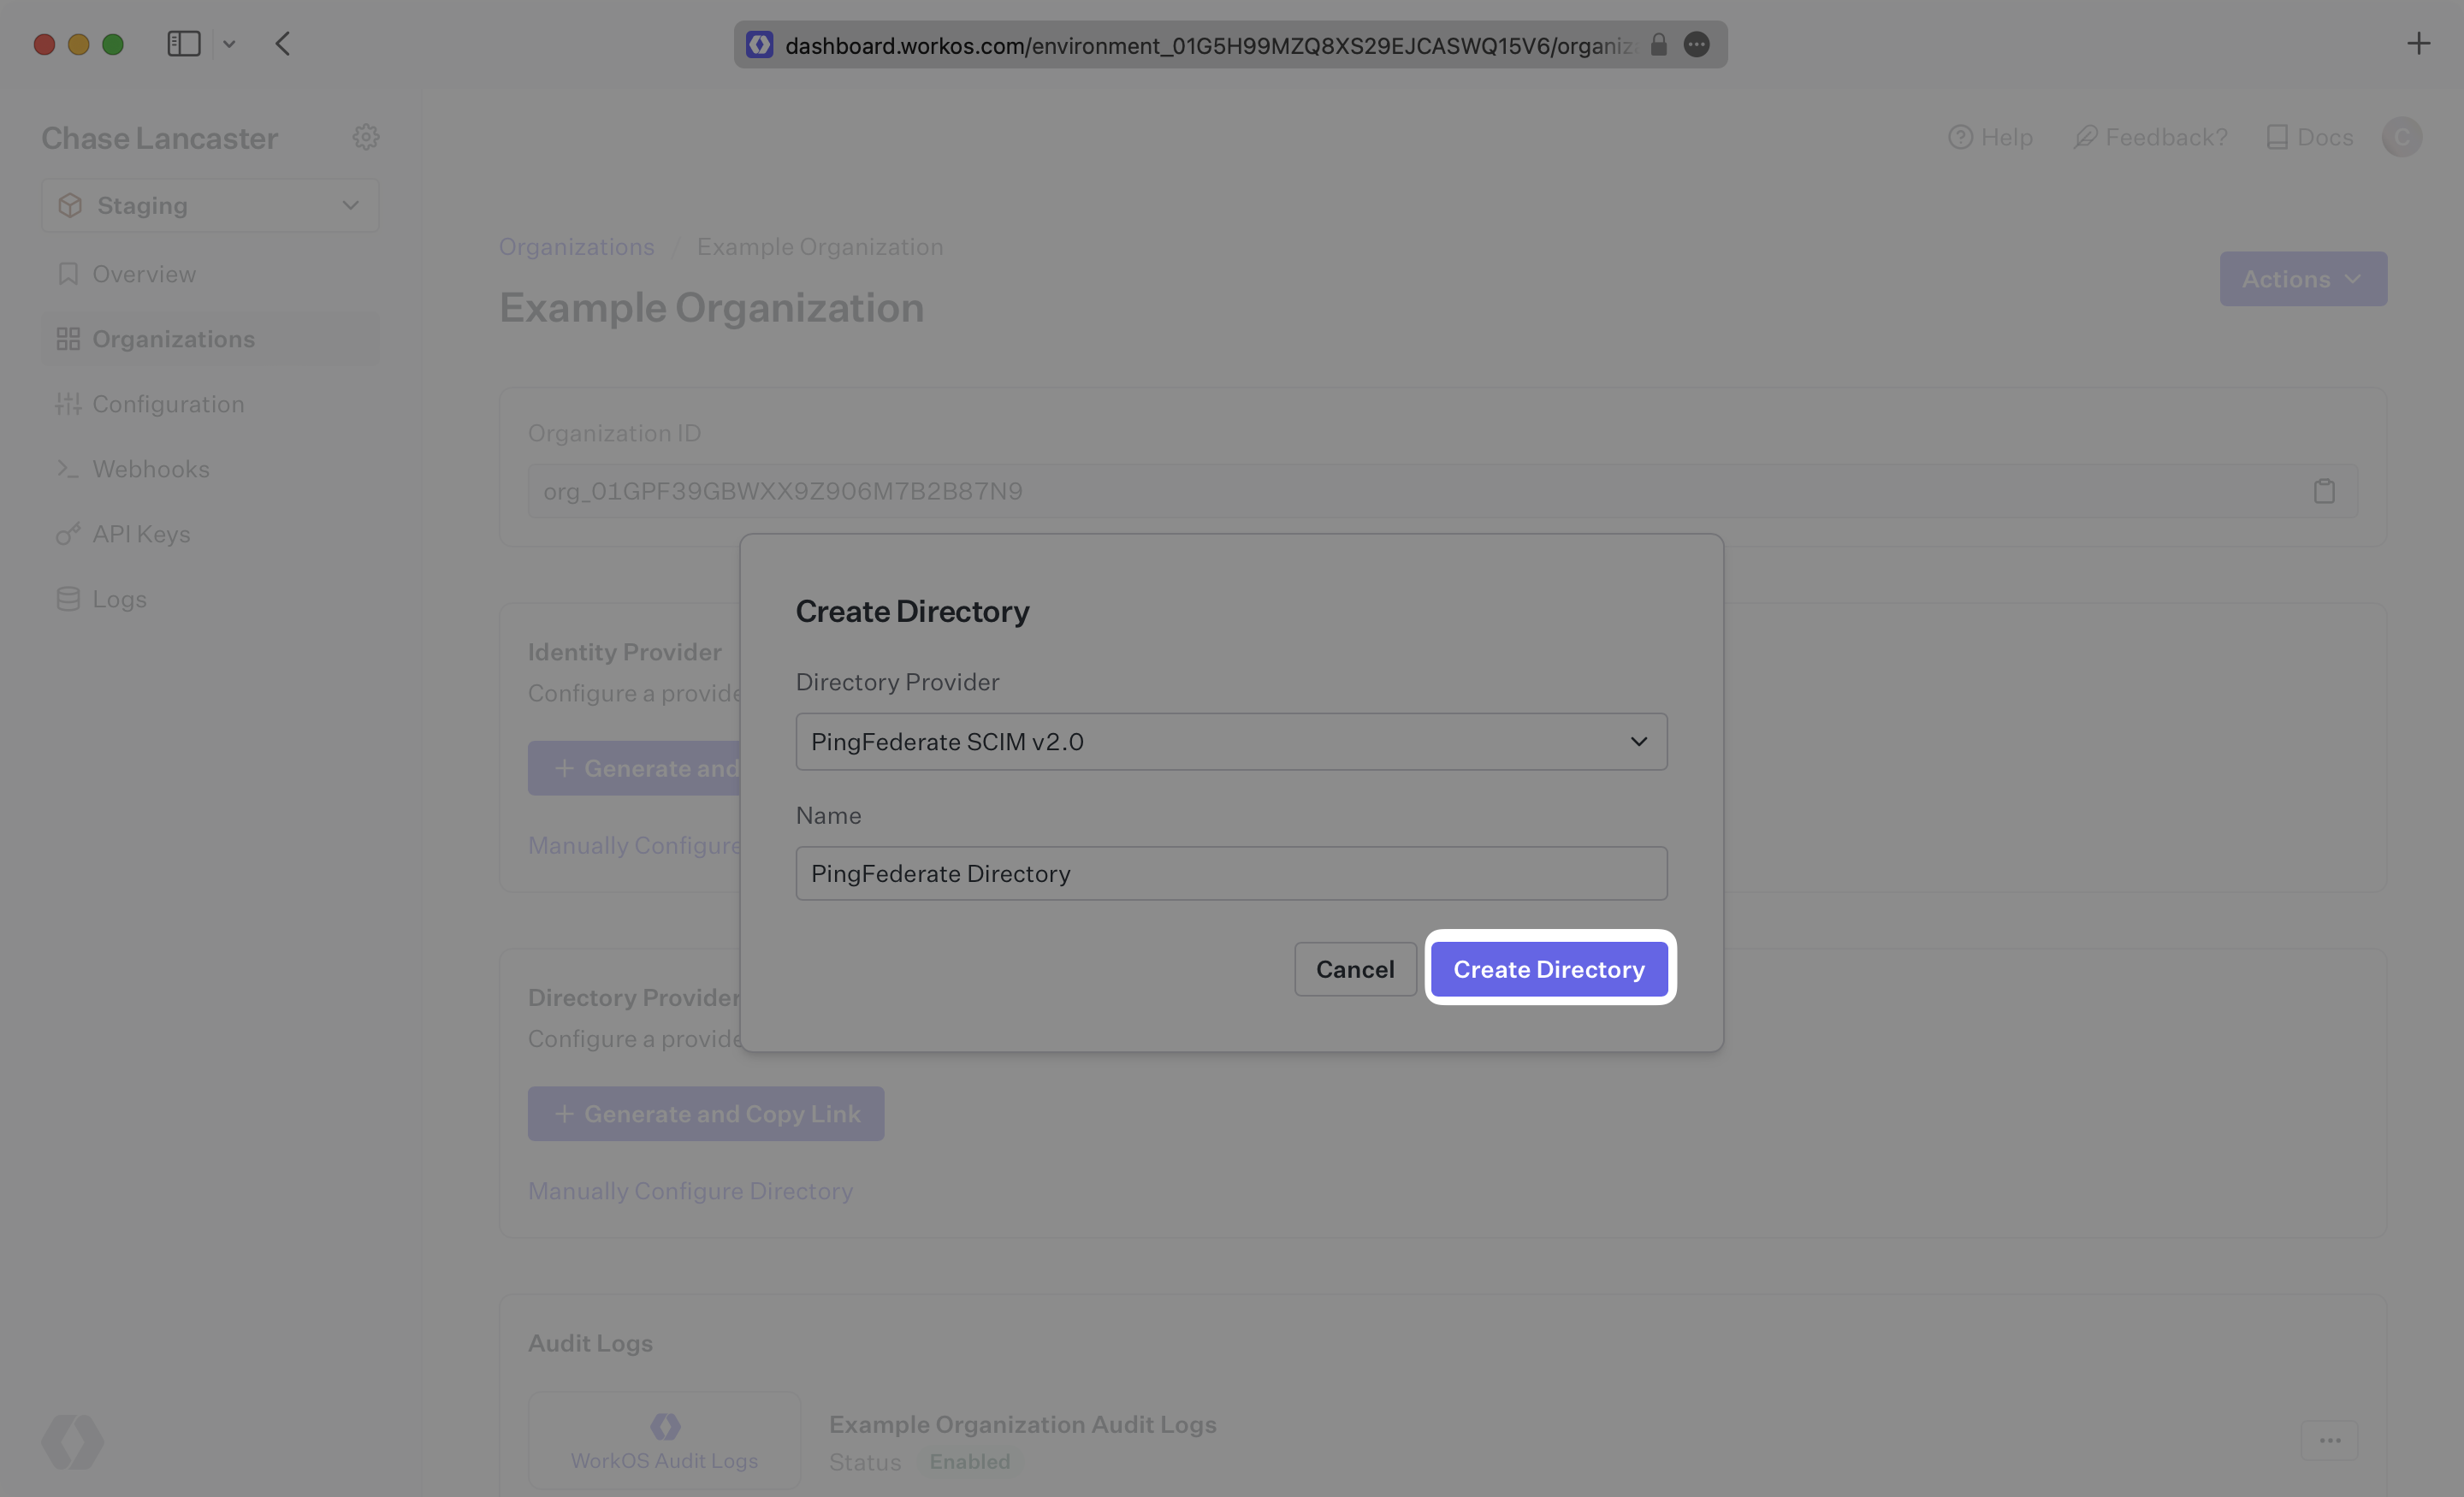
Select “PingFederate“ from the dropdown, and give the connection a descriptive name. Click “Create Directory”.
Save the Endpoint and Bearer Token, you’ll need those in the next section when you configure the SCIM Connector application in PingFederate.
We have support for custom labeled URLs for Directory Sync endpoints. Contact us for more info!
This step will take place in PingFederate. First, download and install the SCIM Connector following the setup guide from PingFederate.
Next, deploy the SCIM Connector files to your PingFederate directory following the provider’s documentation.
Finally, enable provisioning in PingFederate using the documentation from PingFederate.
Once that setup has been completed, continue on to step 3.
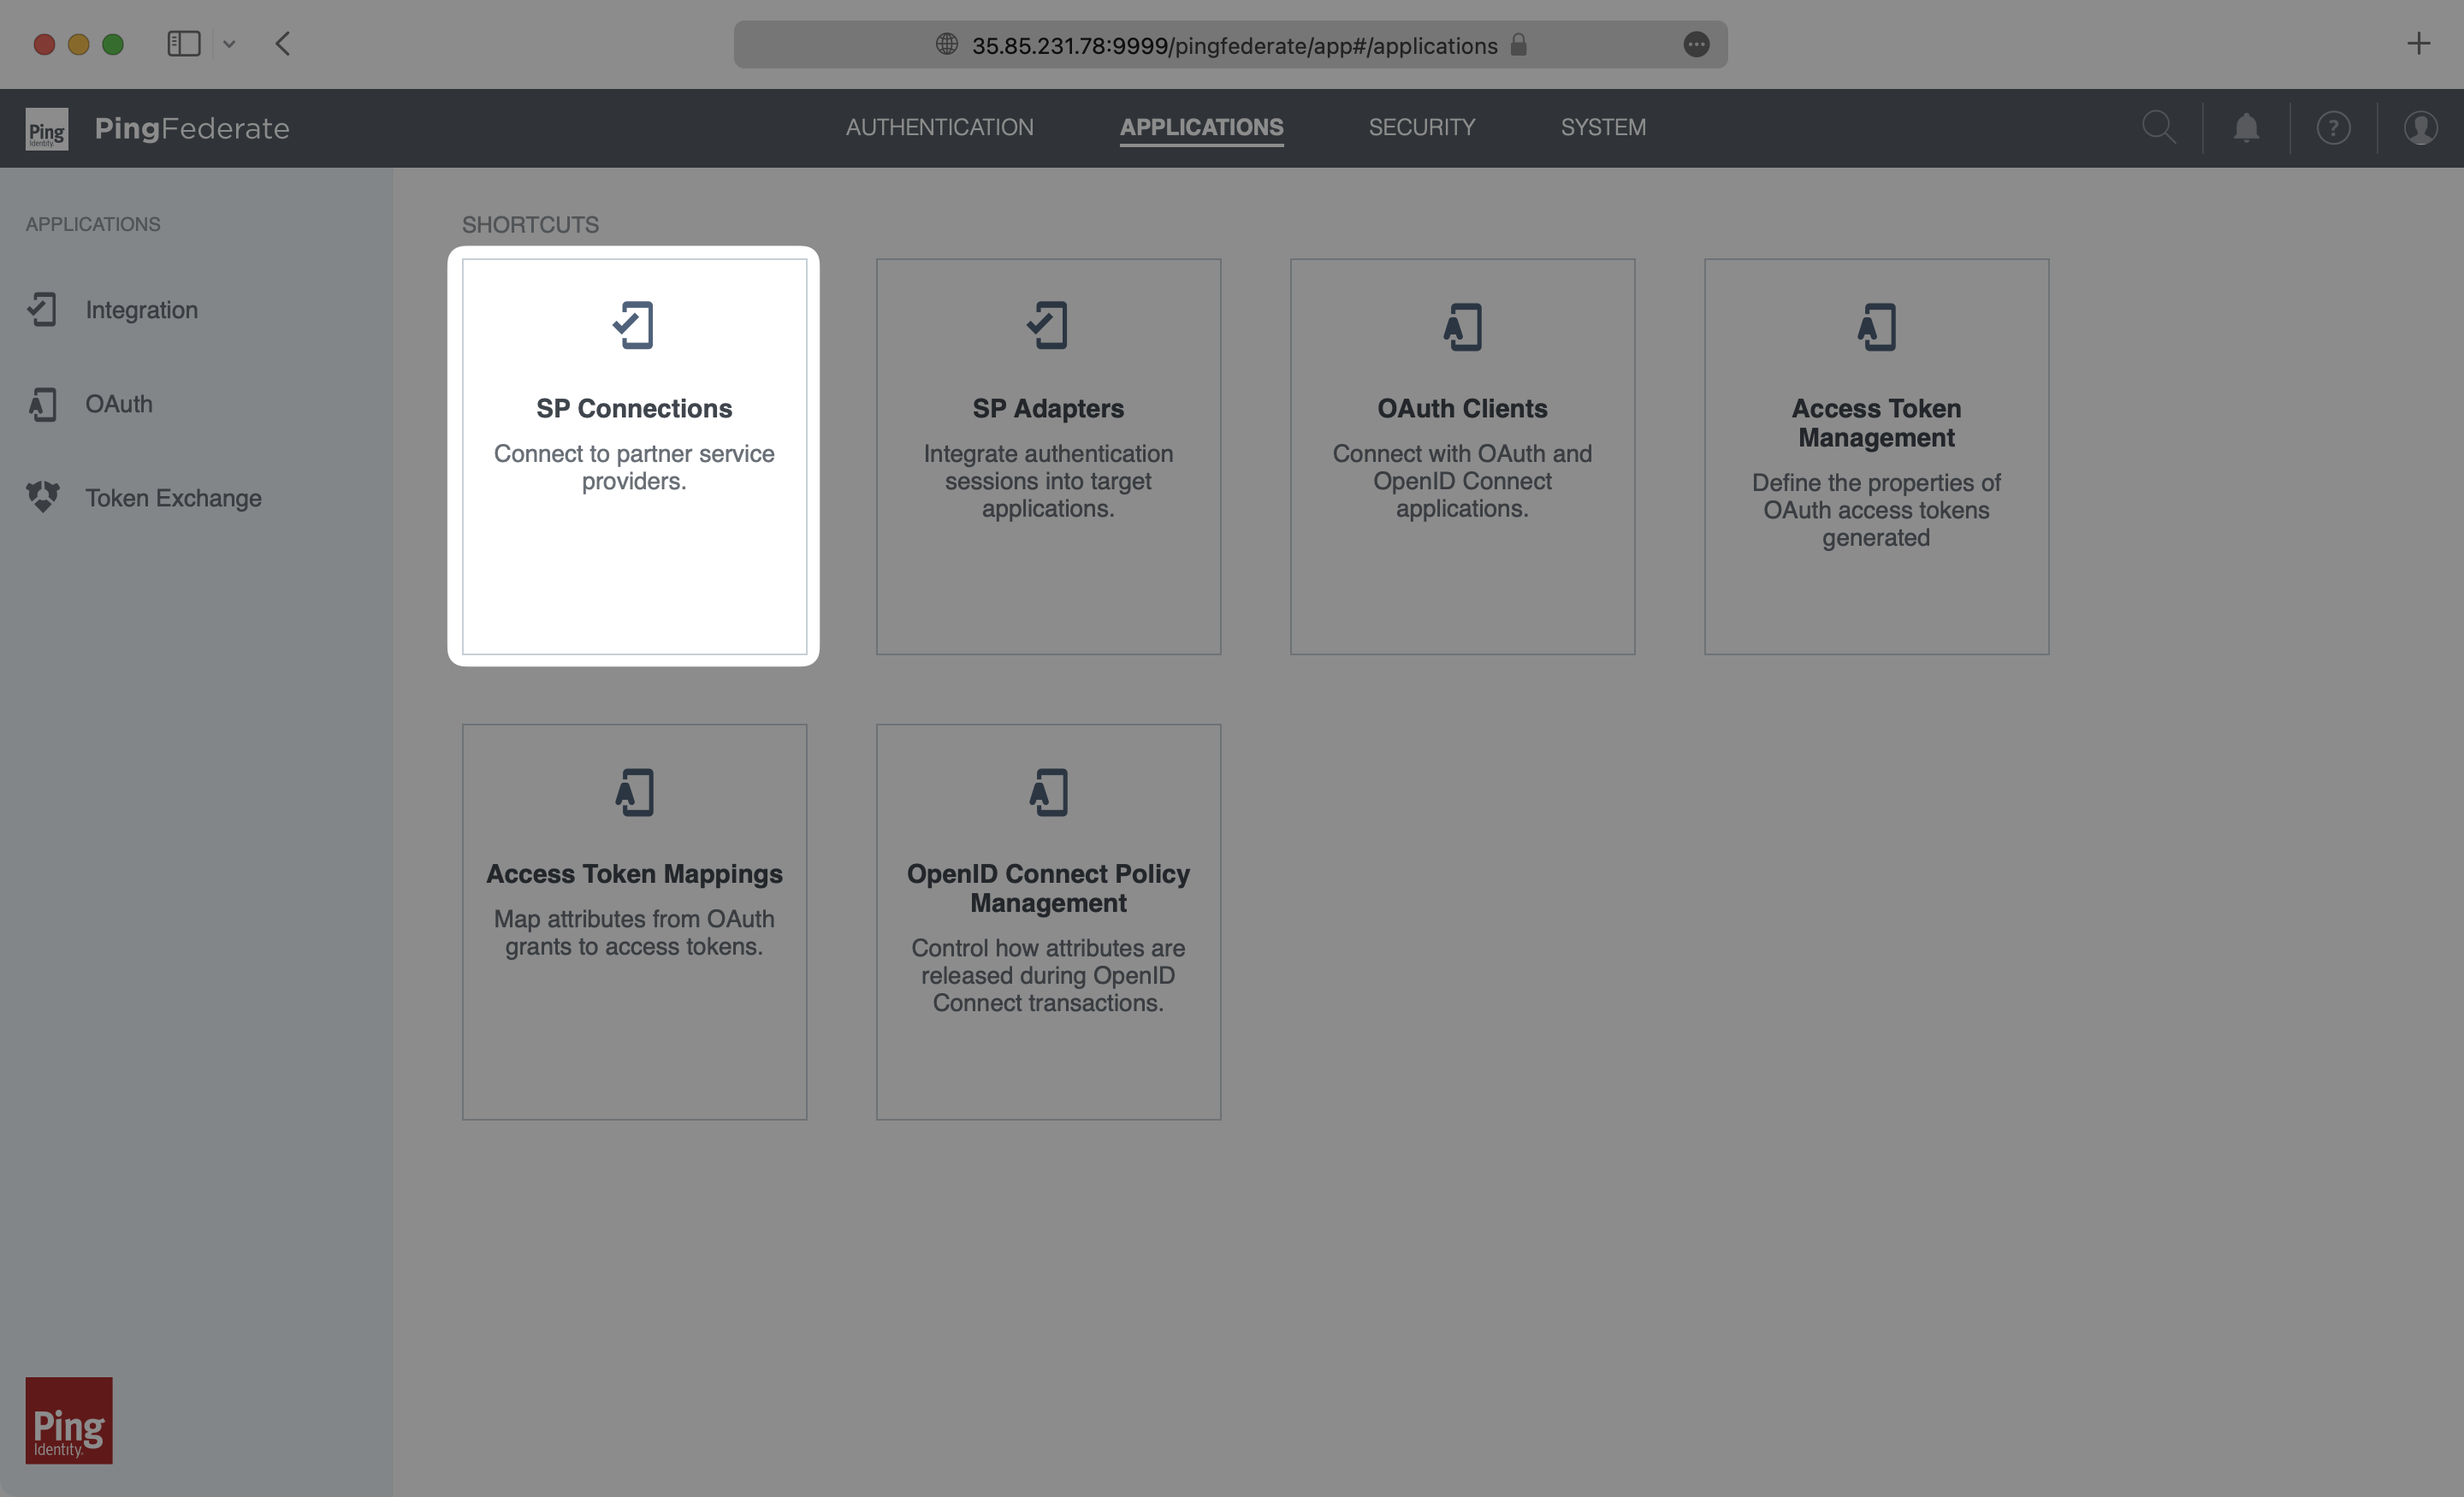
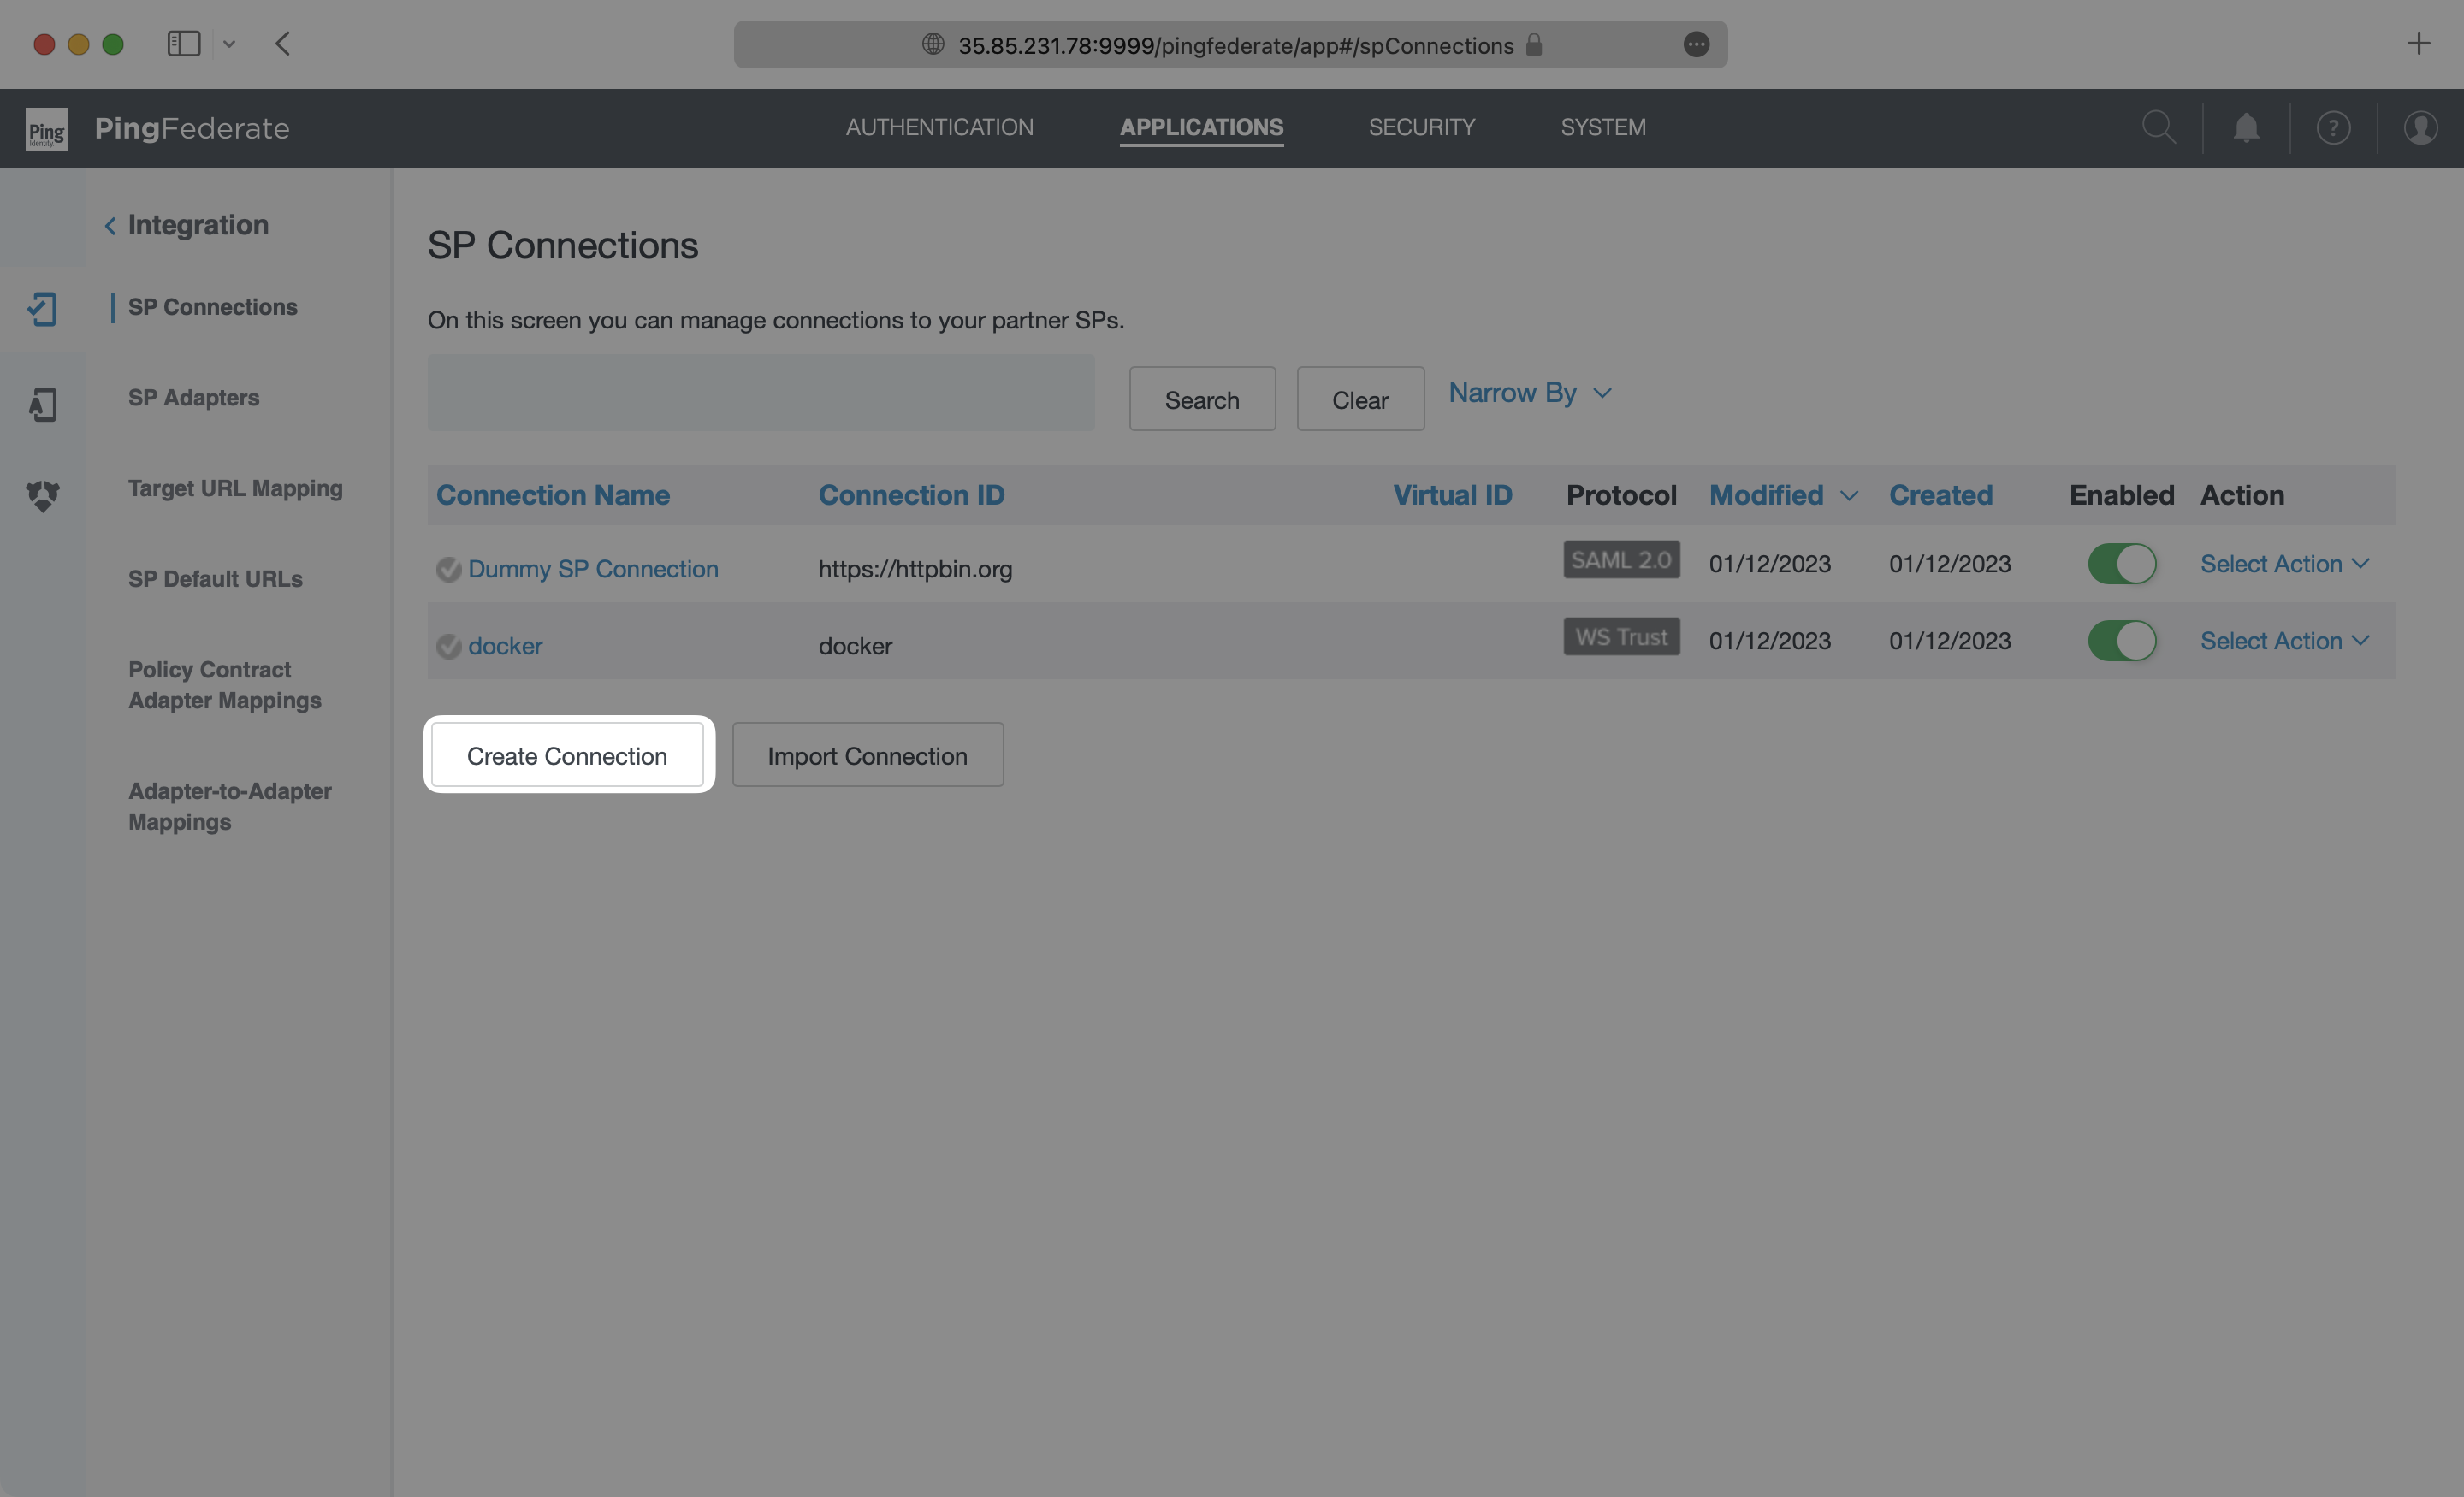
Log in as an admin to your PingFederate instance, and select “Applications” → “SP Connections”.
Select “Create Connection”.
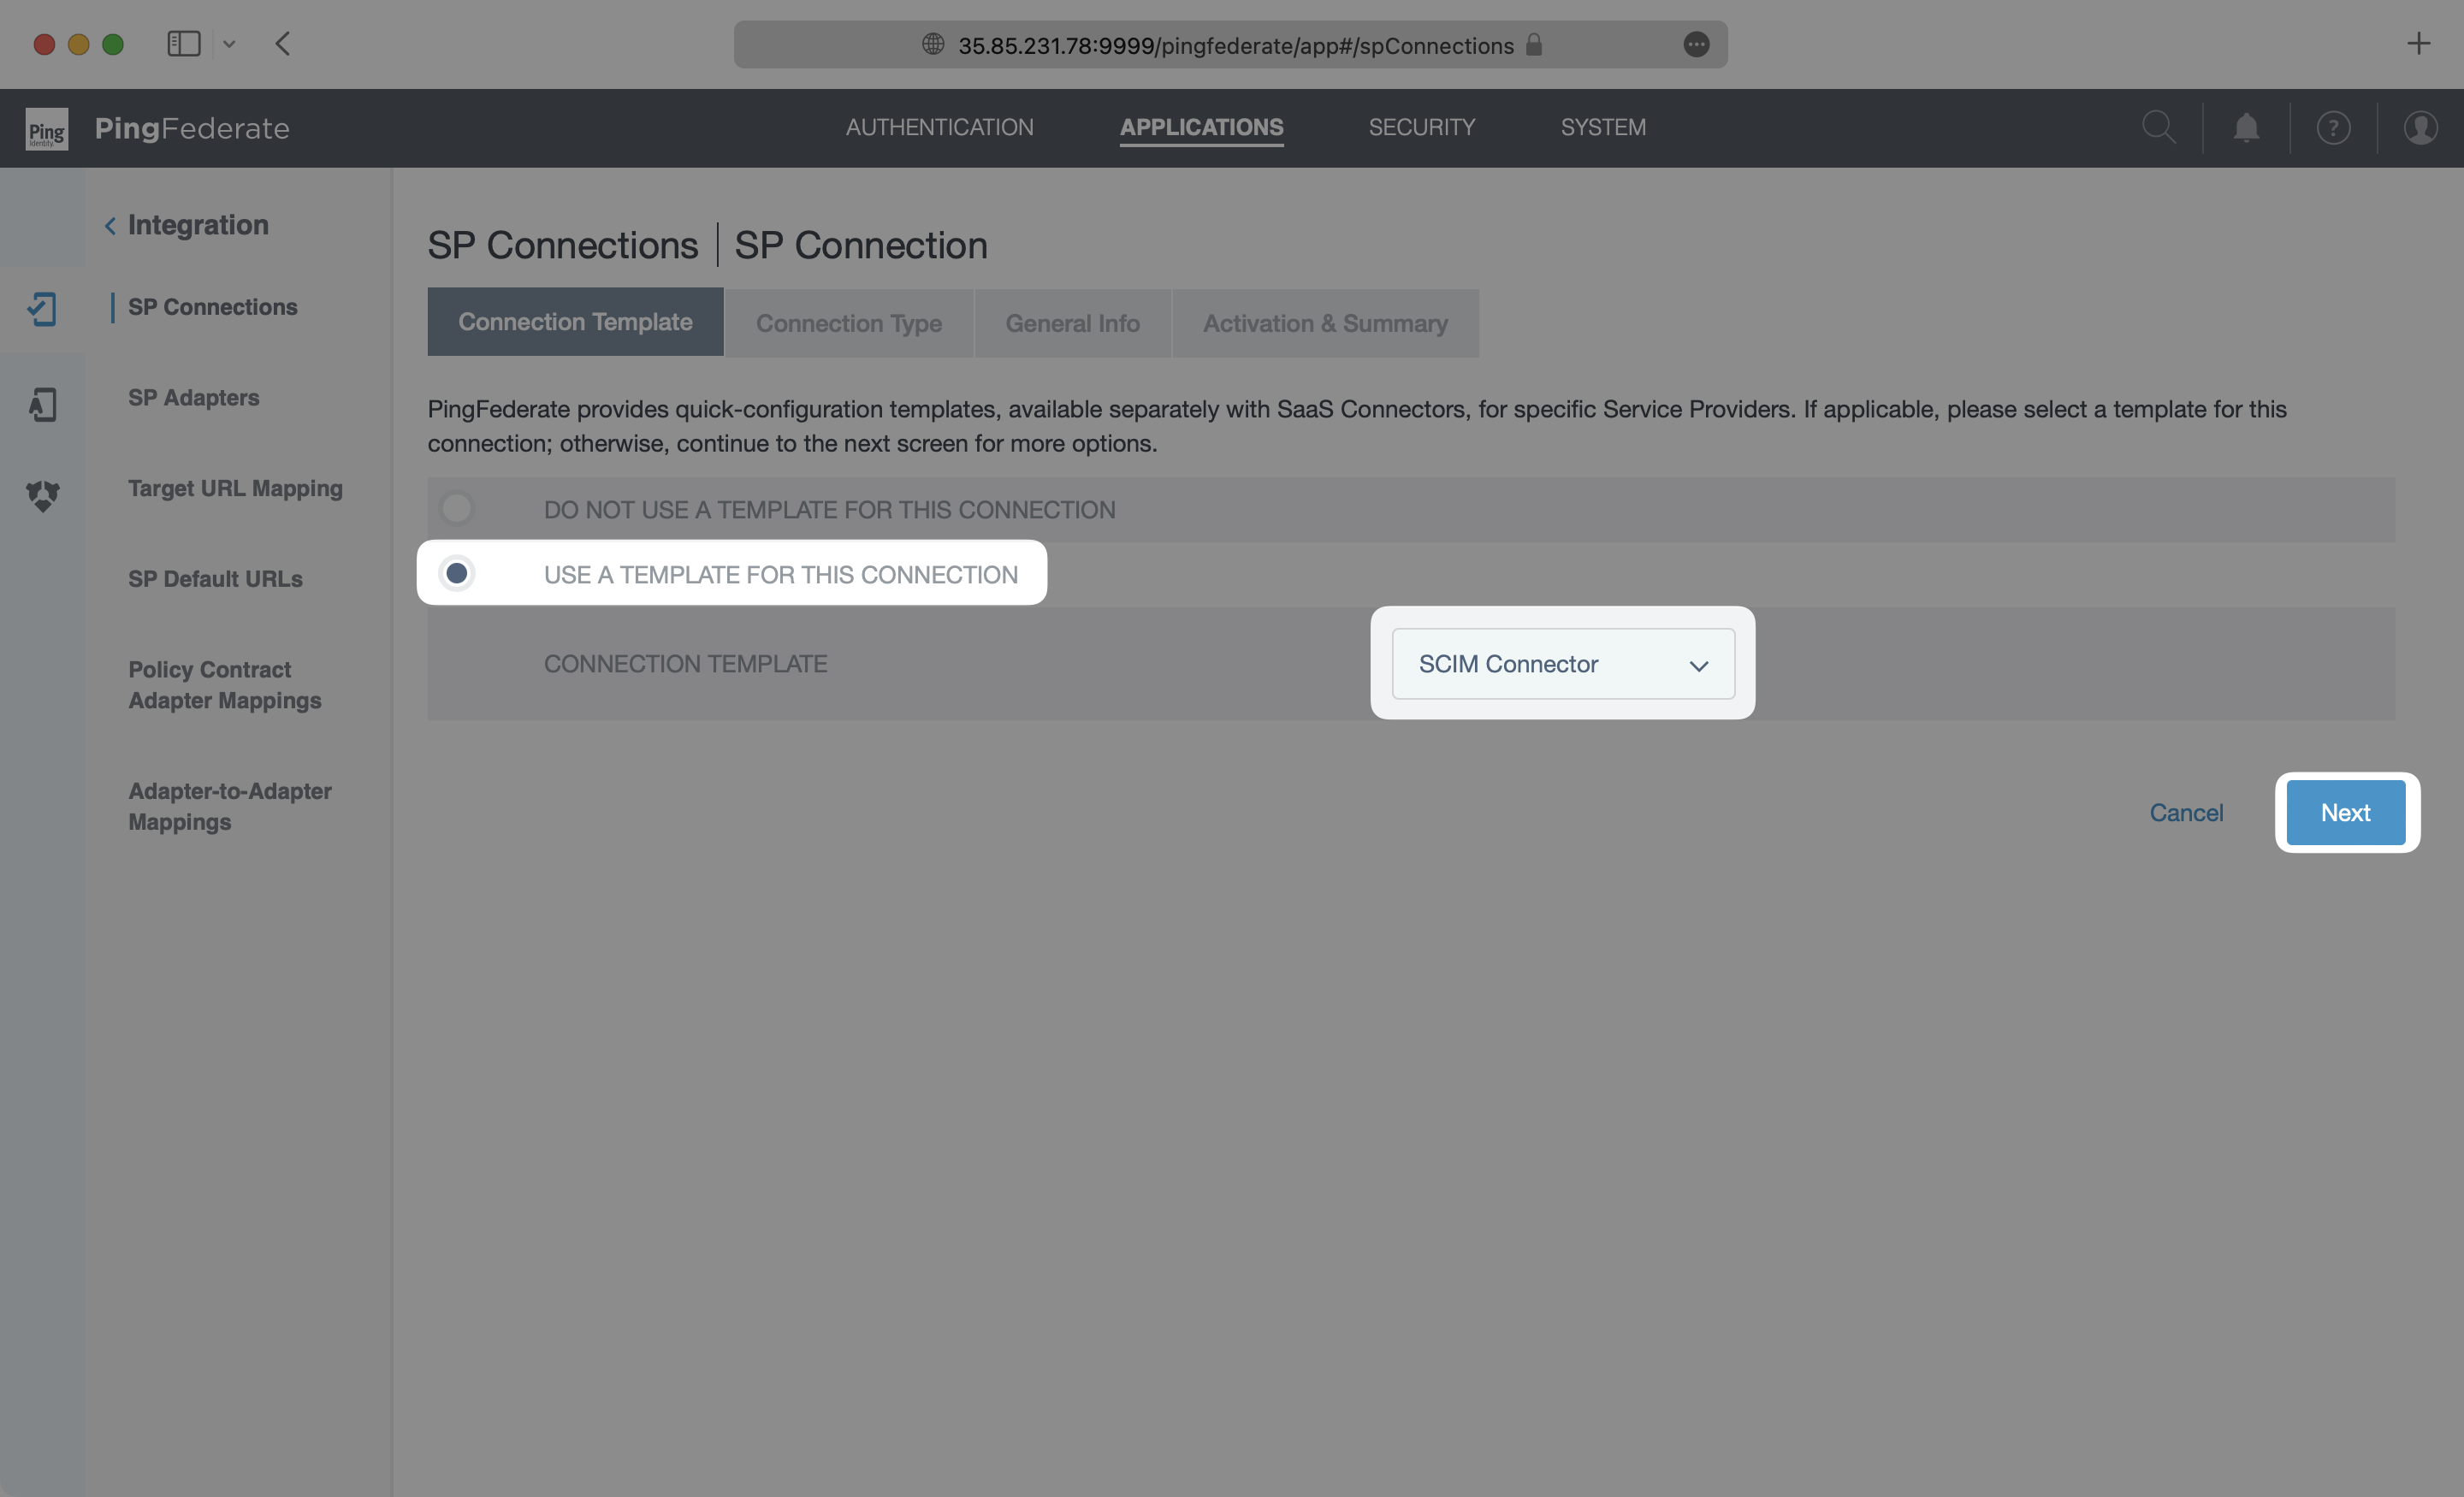
On the Connection Template page, select “Use a Template for this Connection” and then select “SCIM Connector” from the dropdown list. If you don’t see the SCIM Connector option, go back to the Install SCIM Connector in PingFederate step. Click “Next”.
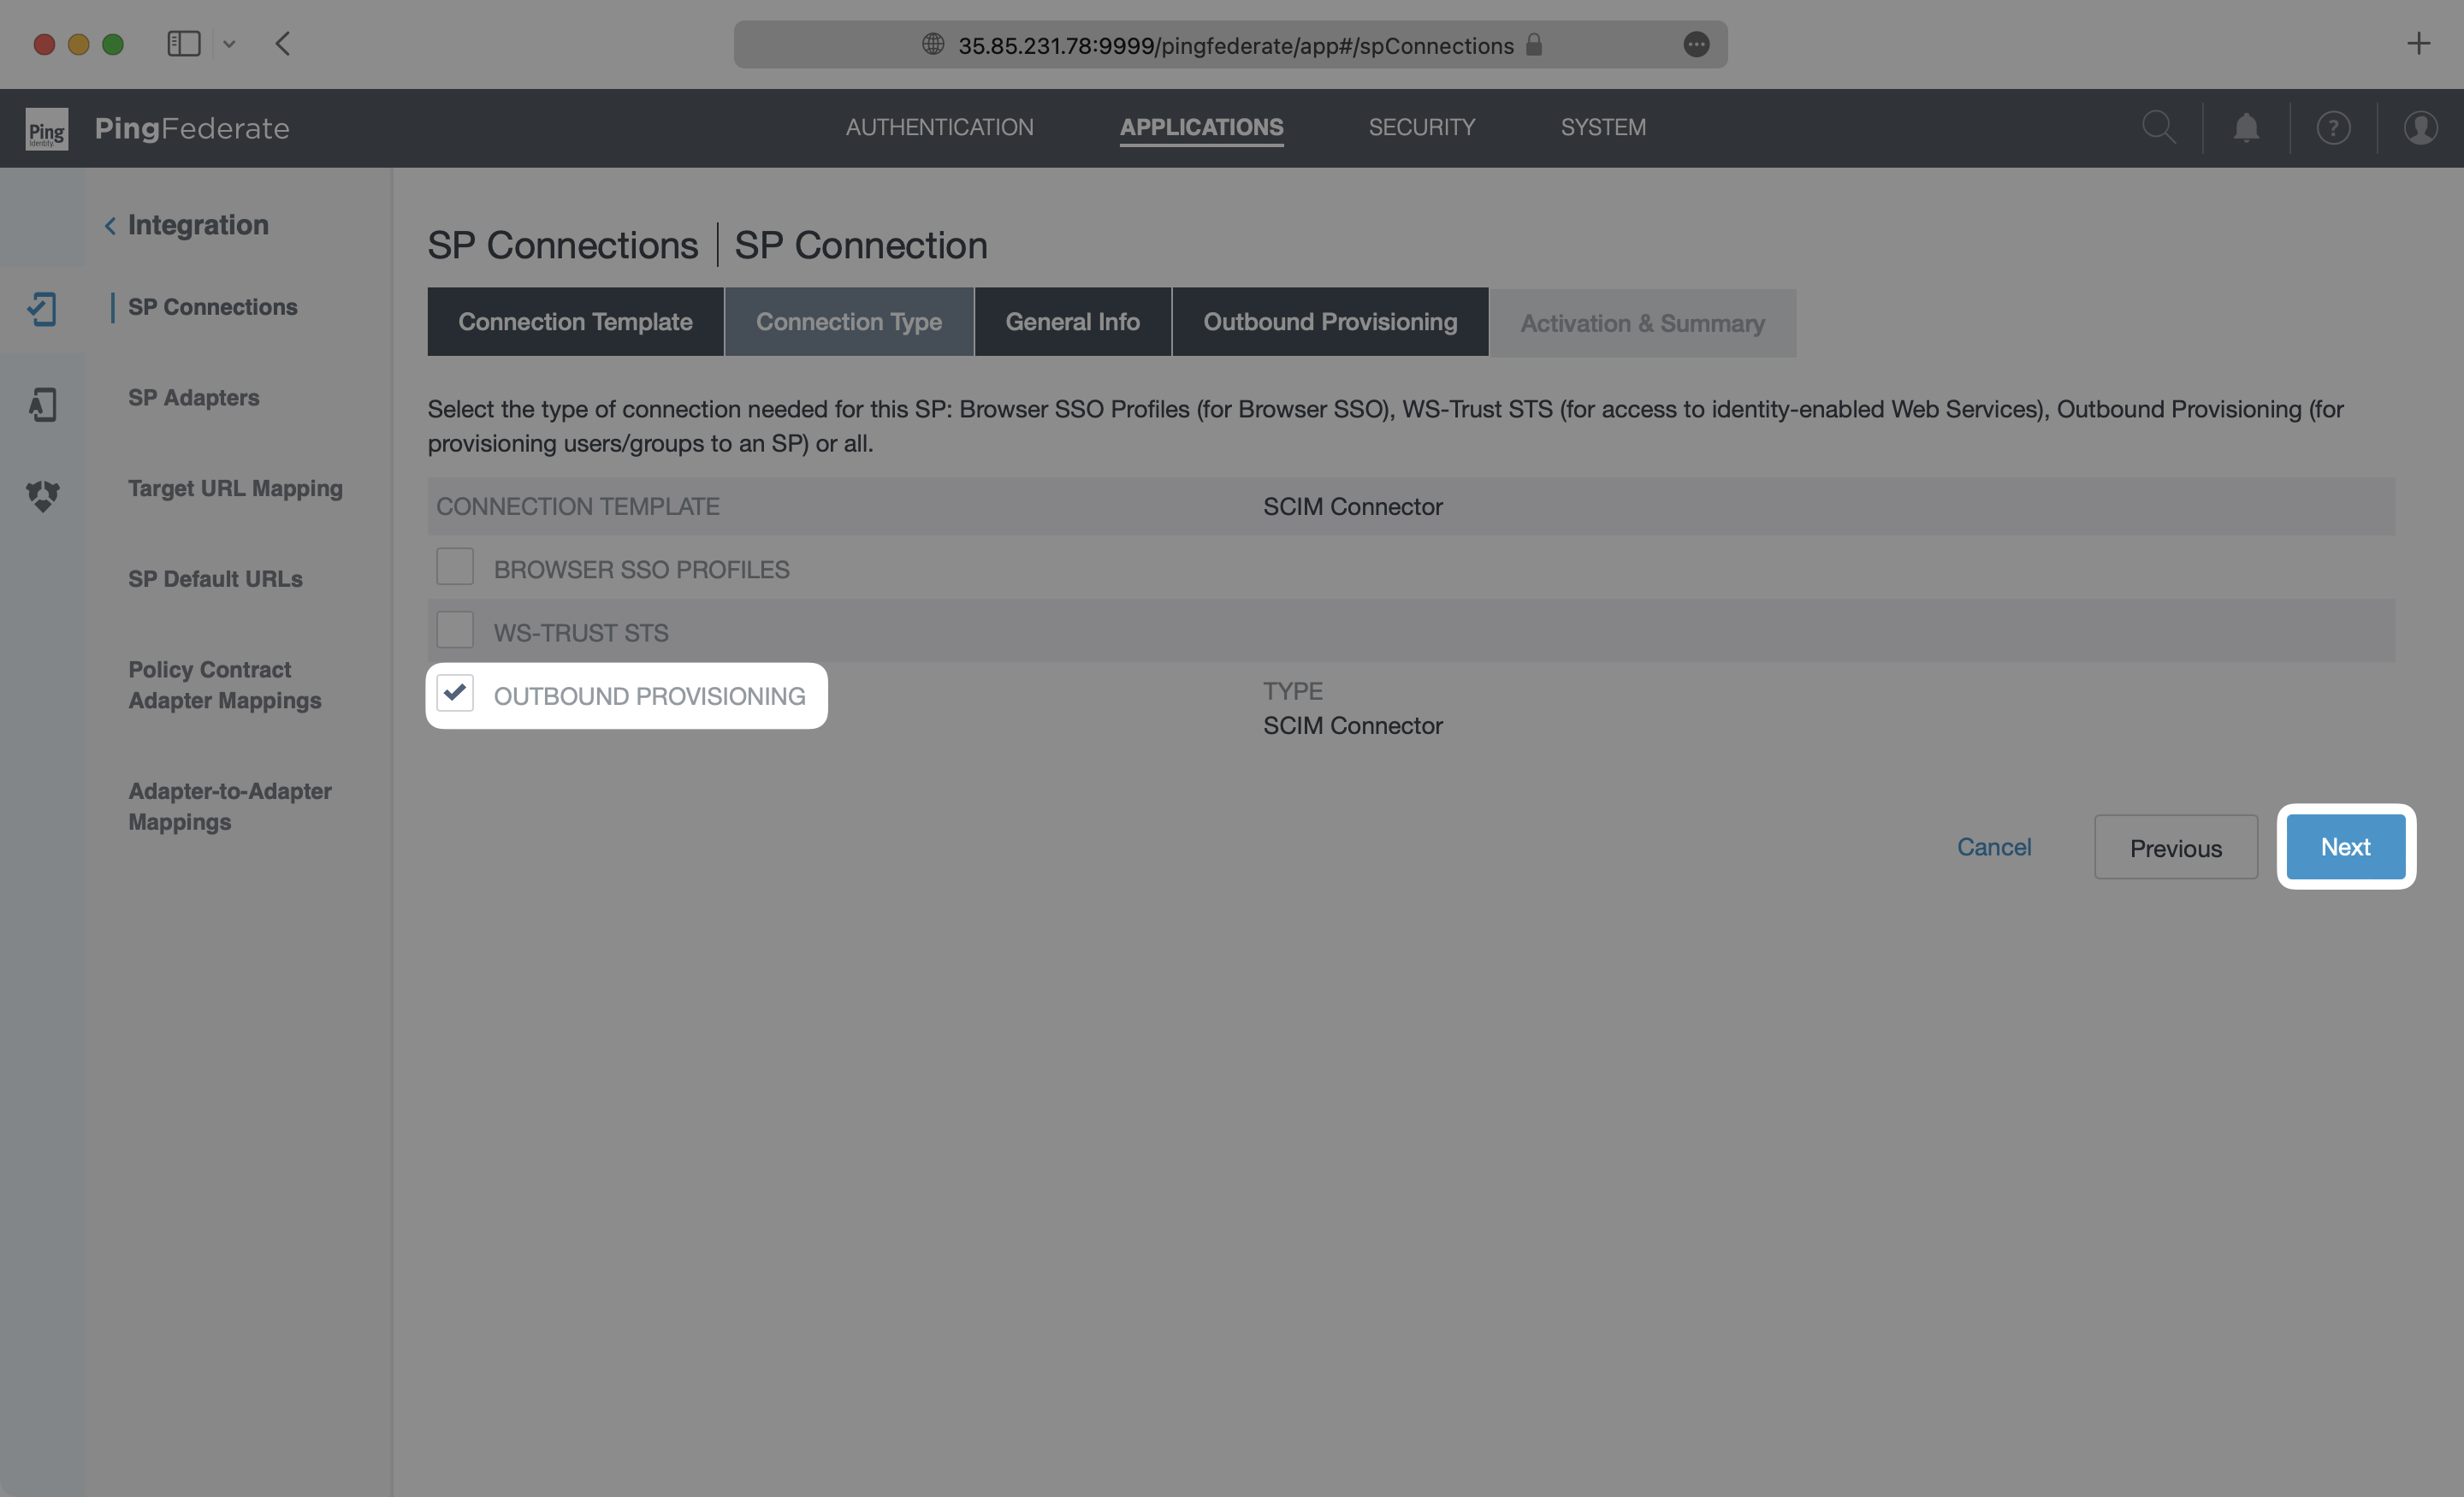
On the Connection Type page, make sure Outbound Provisioning is checked with the SCIM Connector Type. Click “Next”.
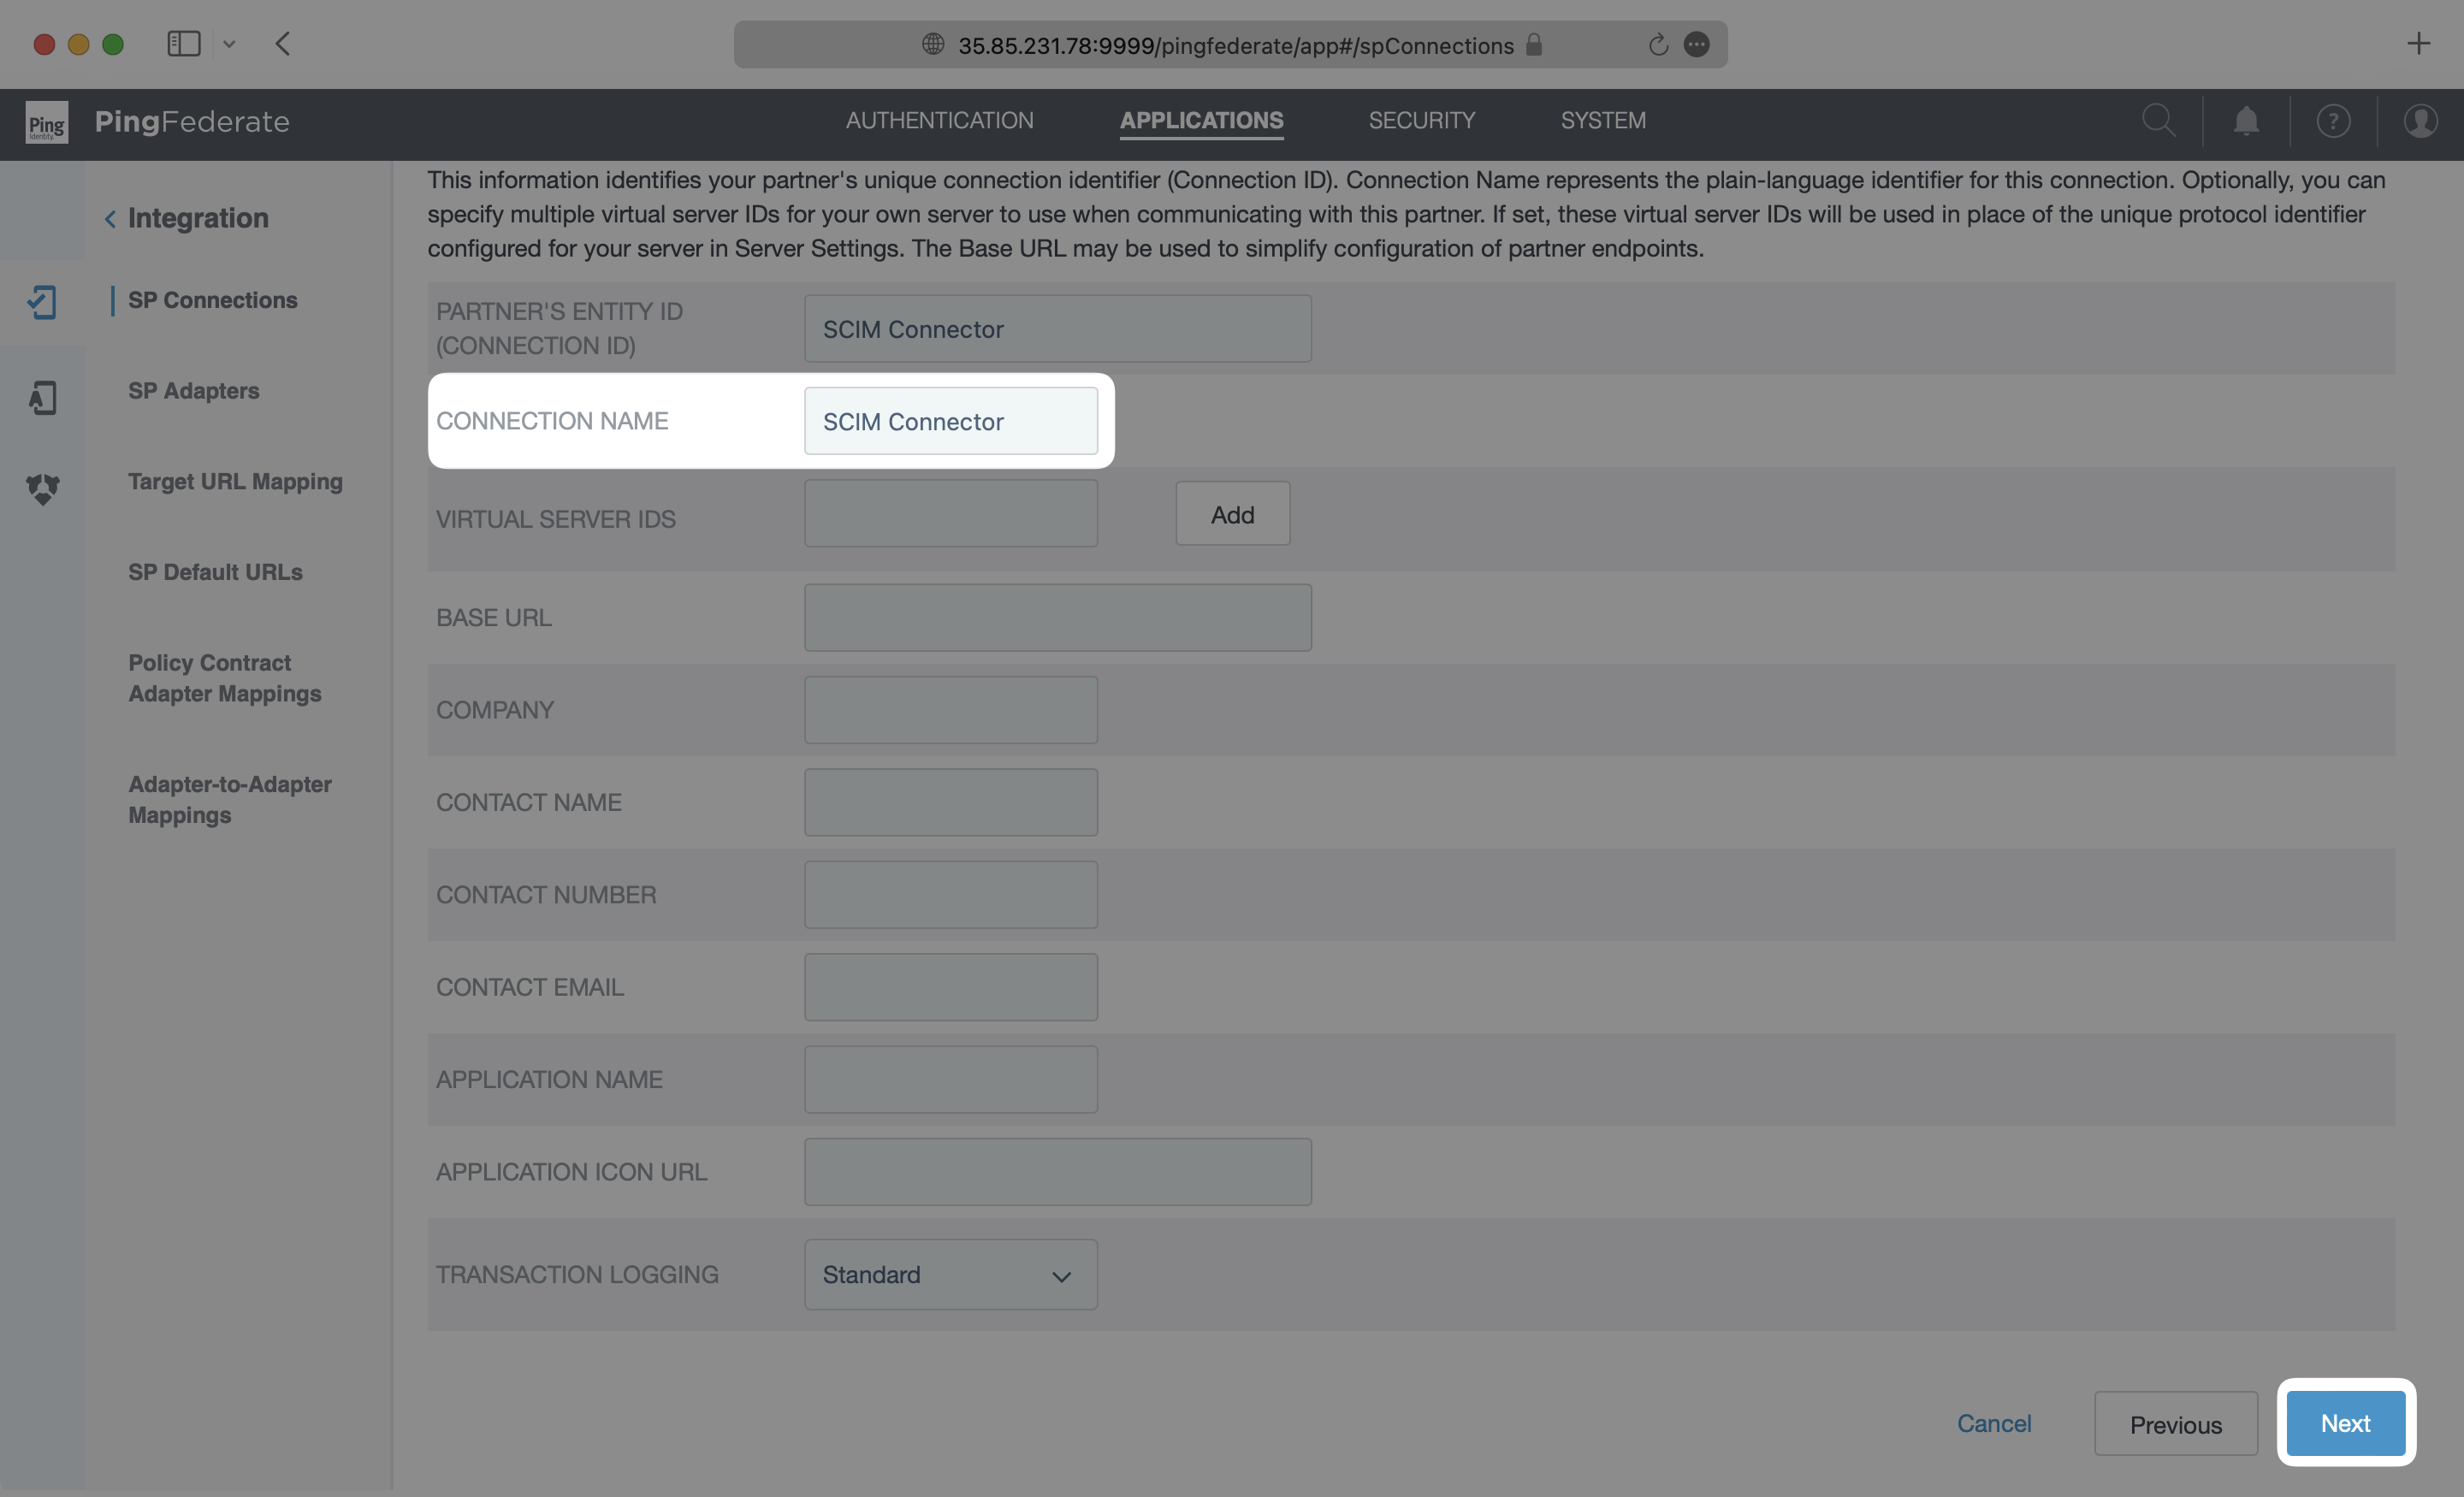
On the General Info page, give this connection a descriptive name, and click “Next”.
On the Outbound Provisioning page, select the “Configure Provisioning” button.

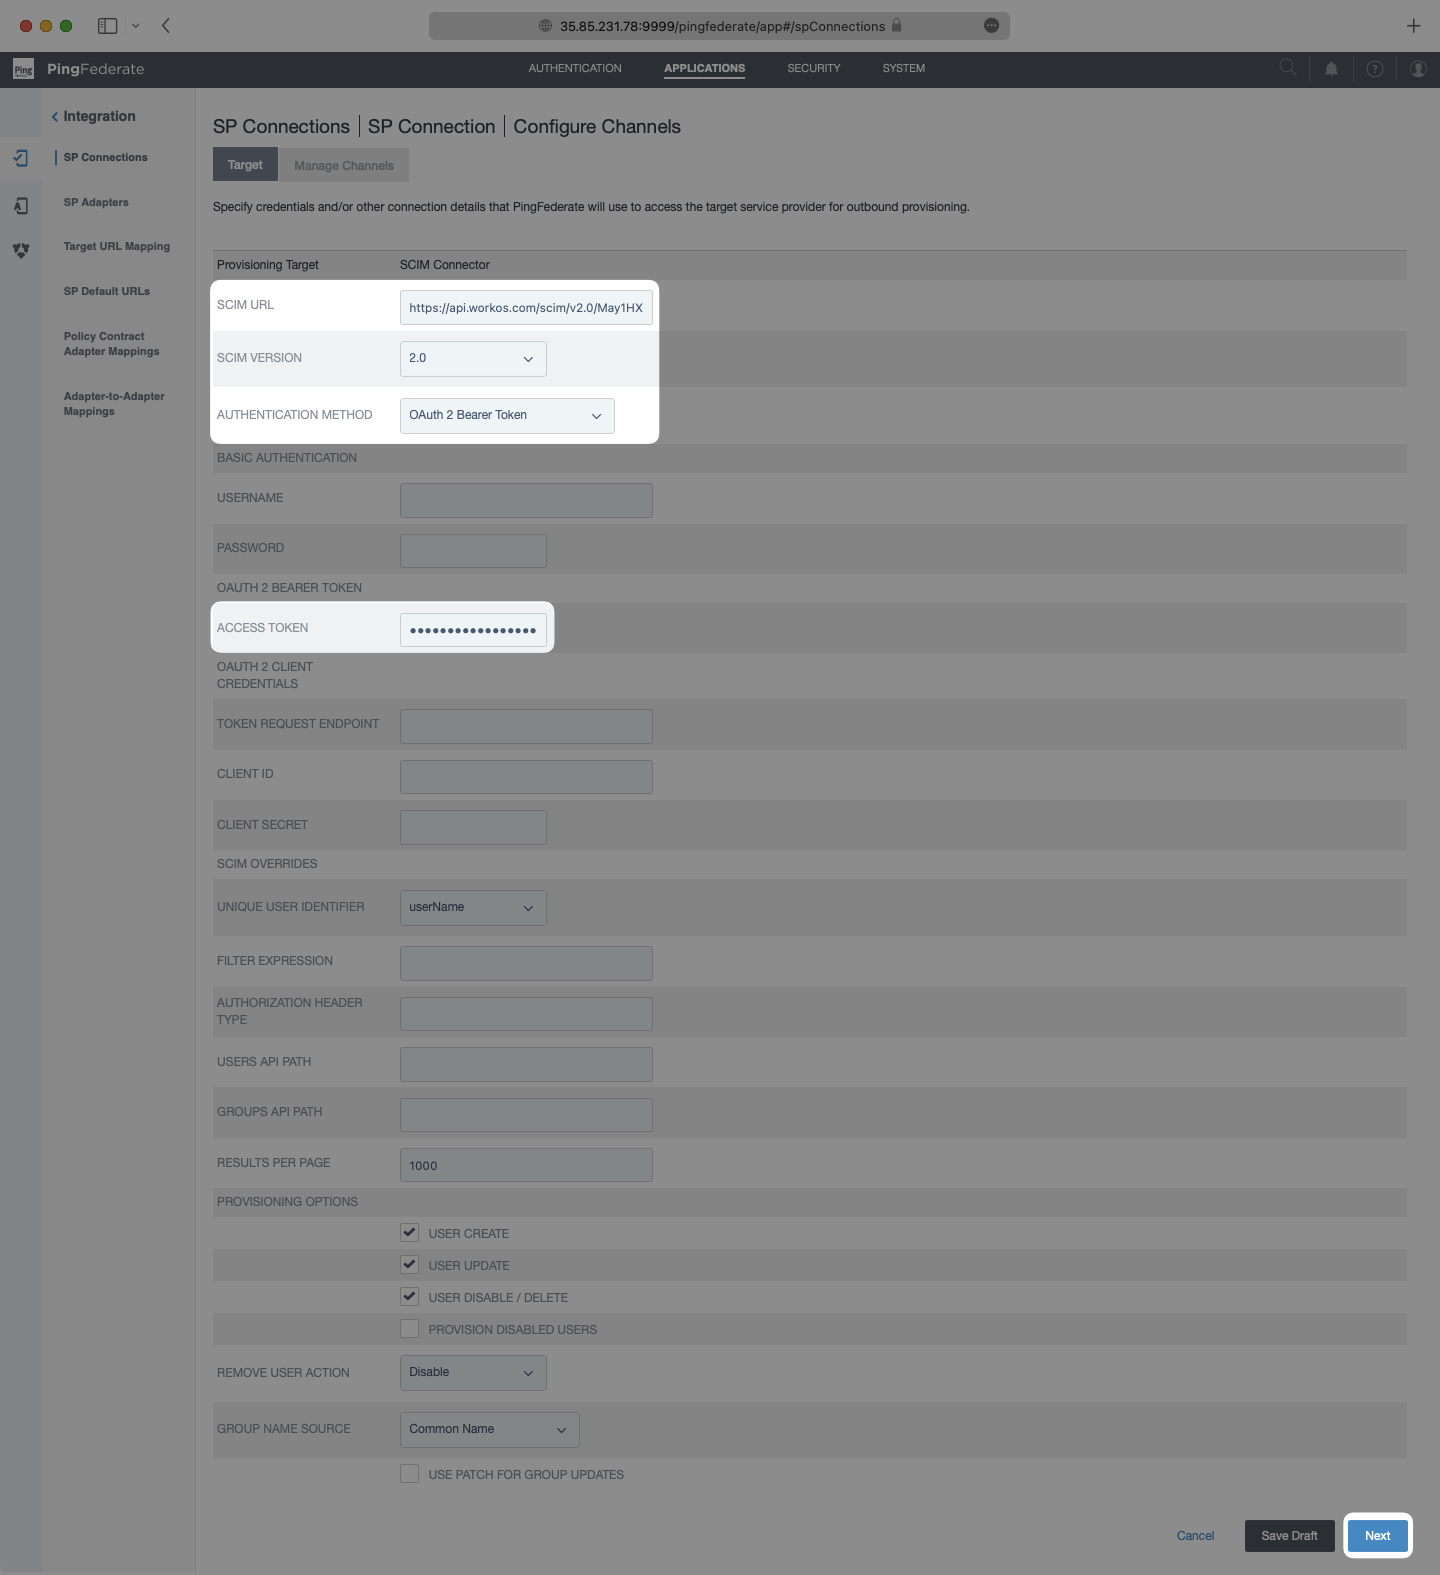
On the Target page, paste in the Endpoint from your WorkOS Directory Sync Connection in the SCIM URL field. Make sure SCIM Version is set as 2.0 and the Authentication Method is set as OAuth 2 Bearer Token. Paste in the Bearer Token from your WorkOS Directory Sync Connection in the Access Token field. Select “Next”.
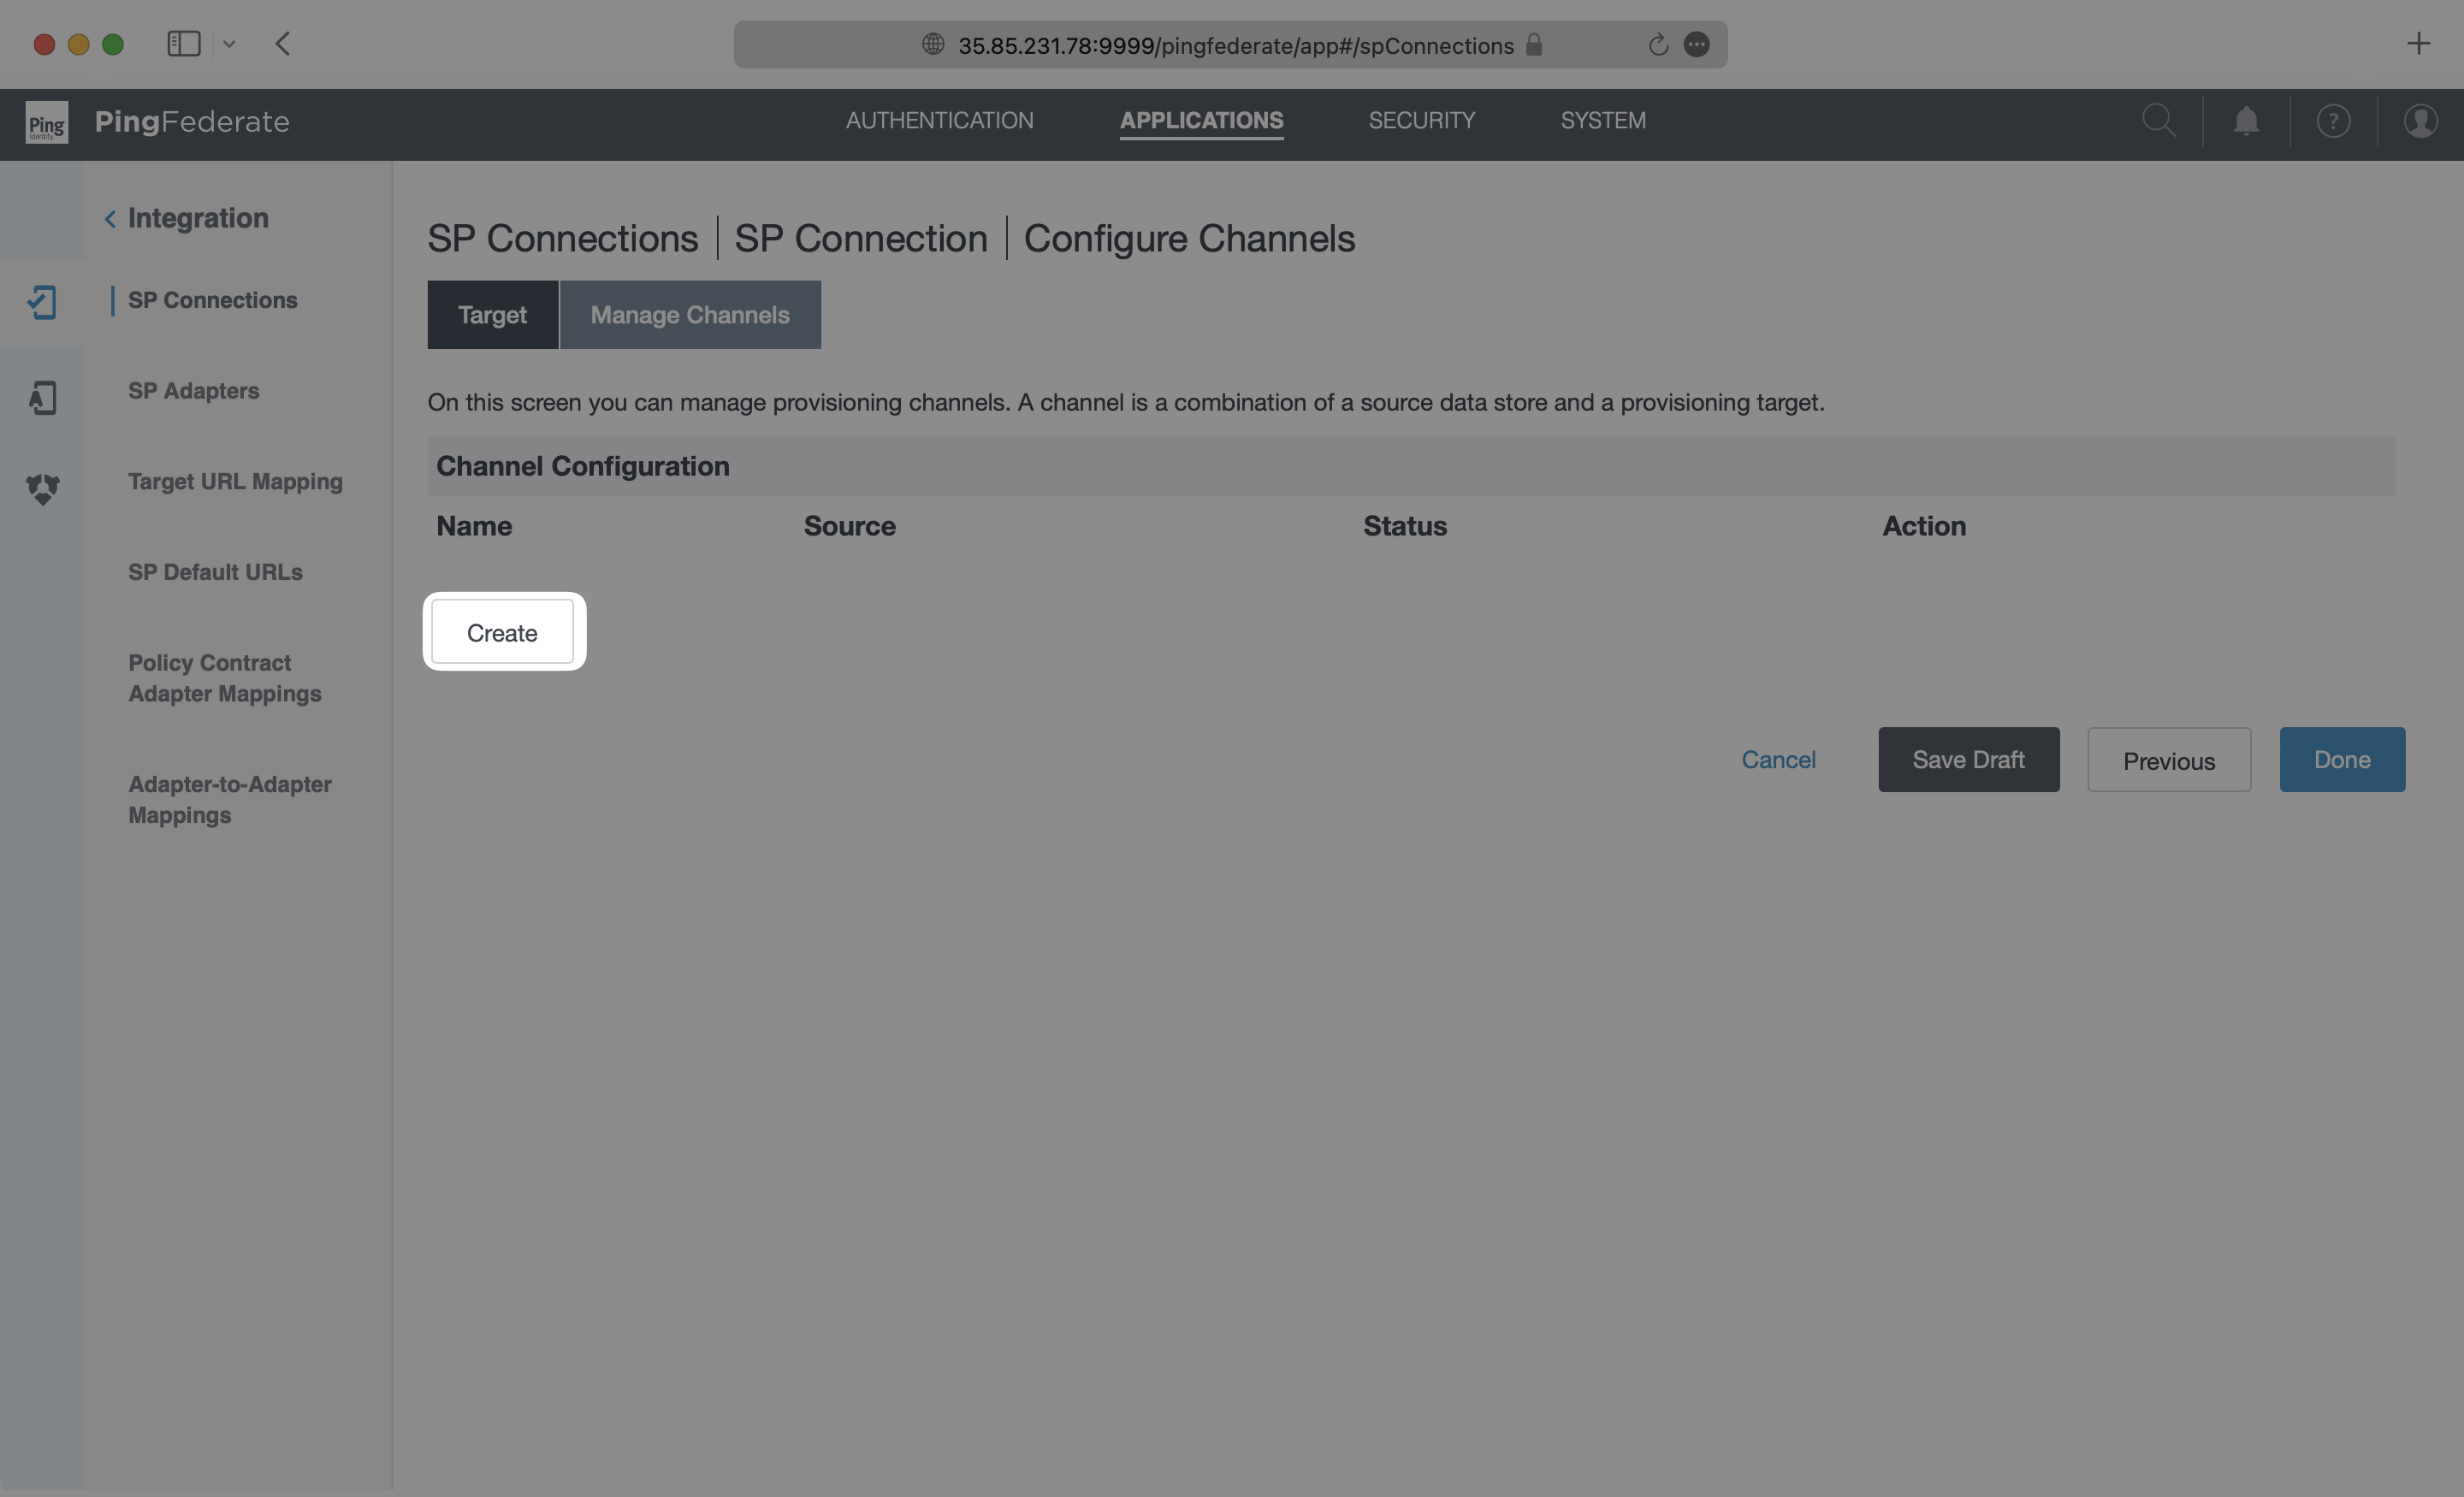
On the Manage Channels page, select “Create”.
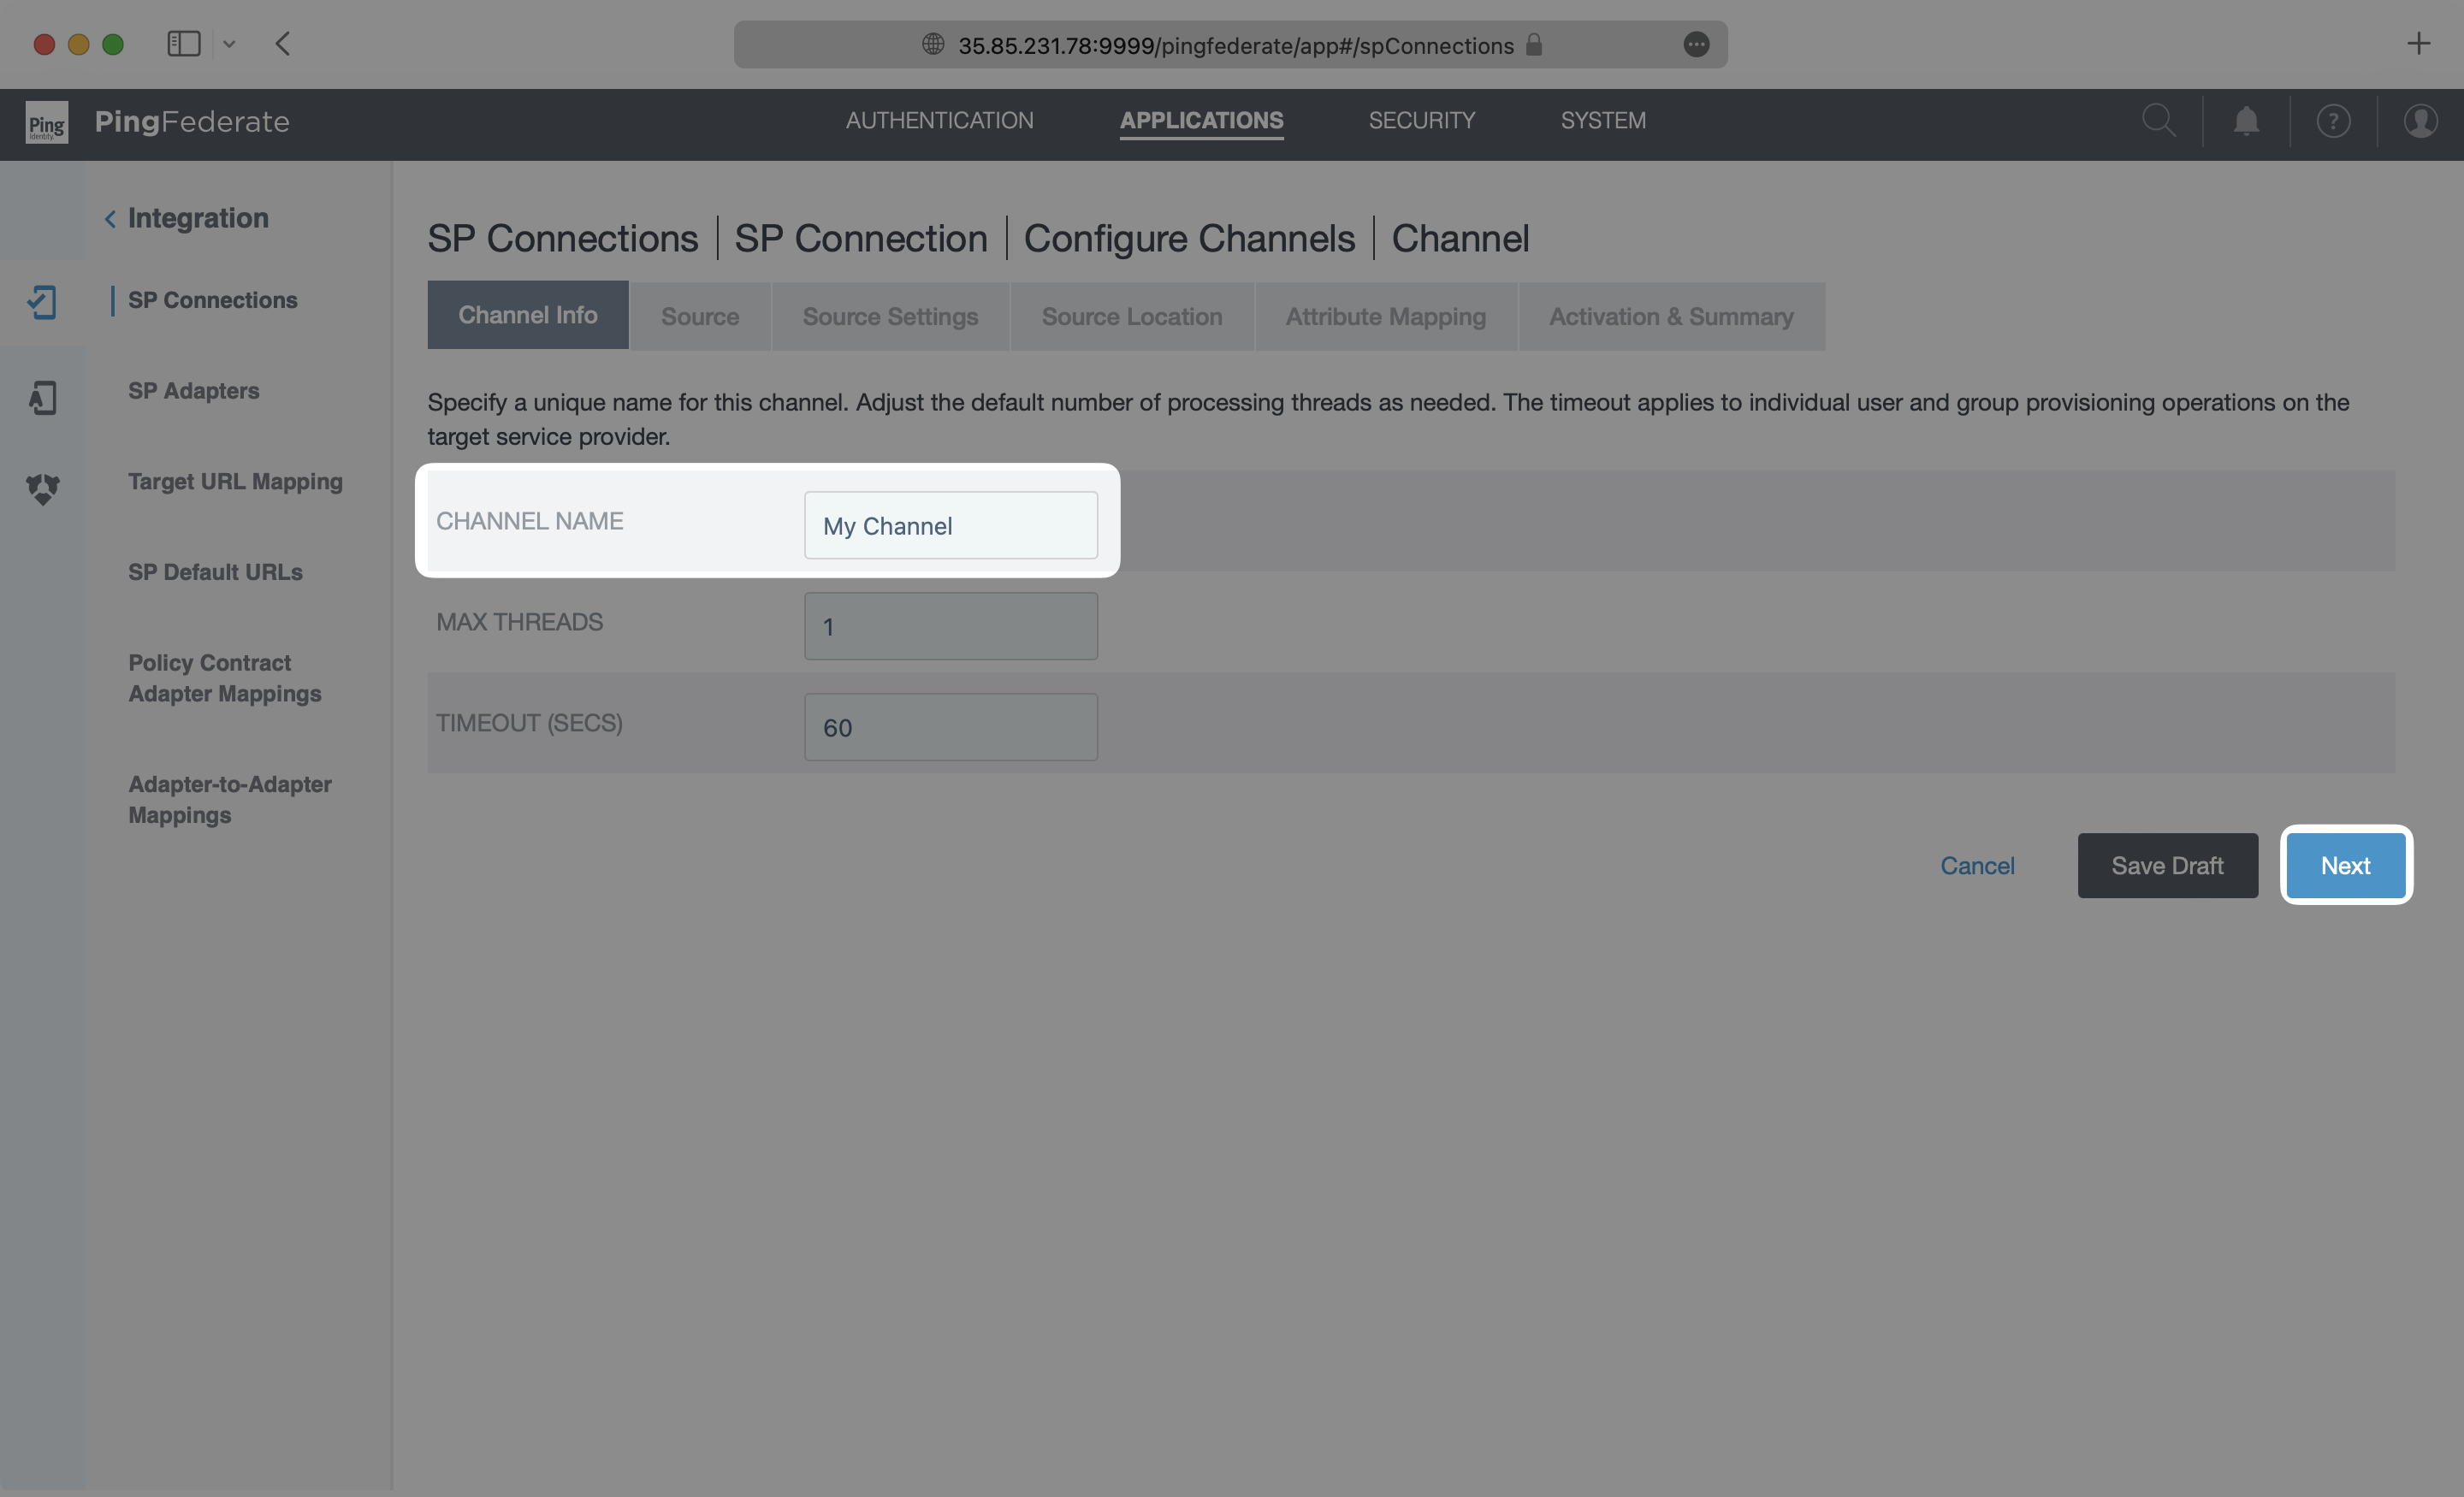
On the Channel Info page, add a descriptive name and click “Next”.
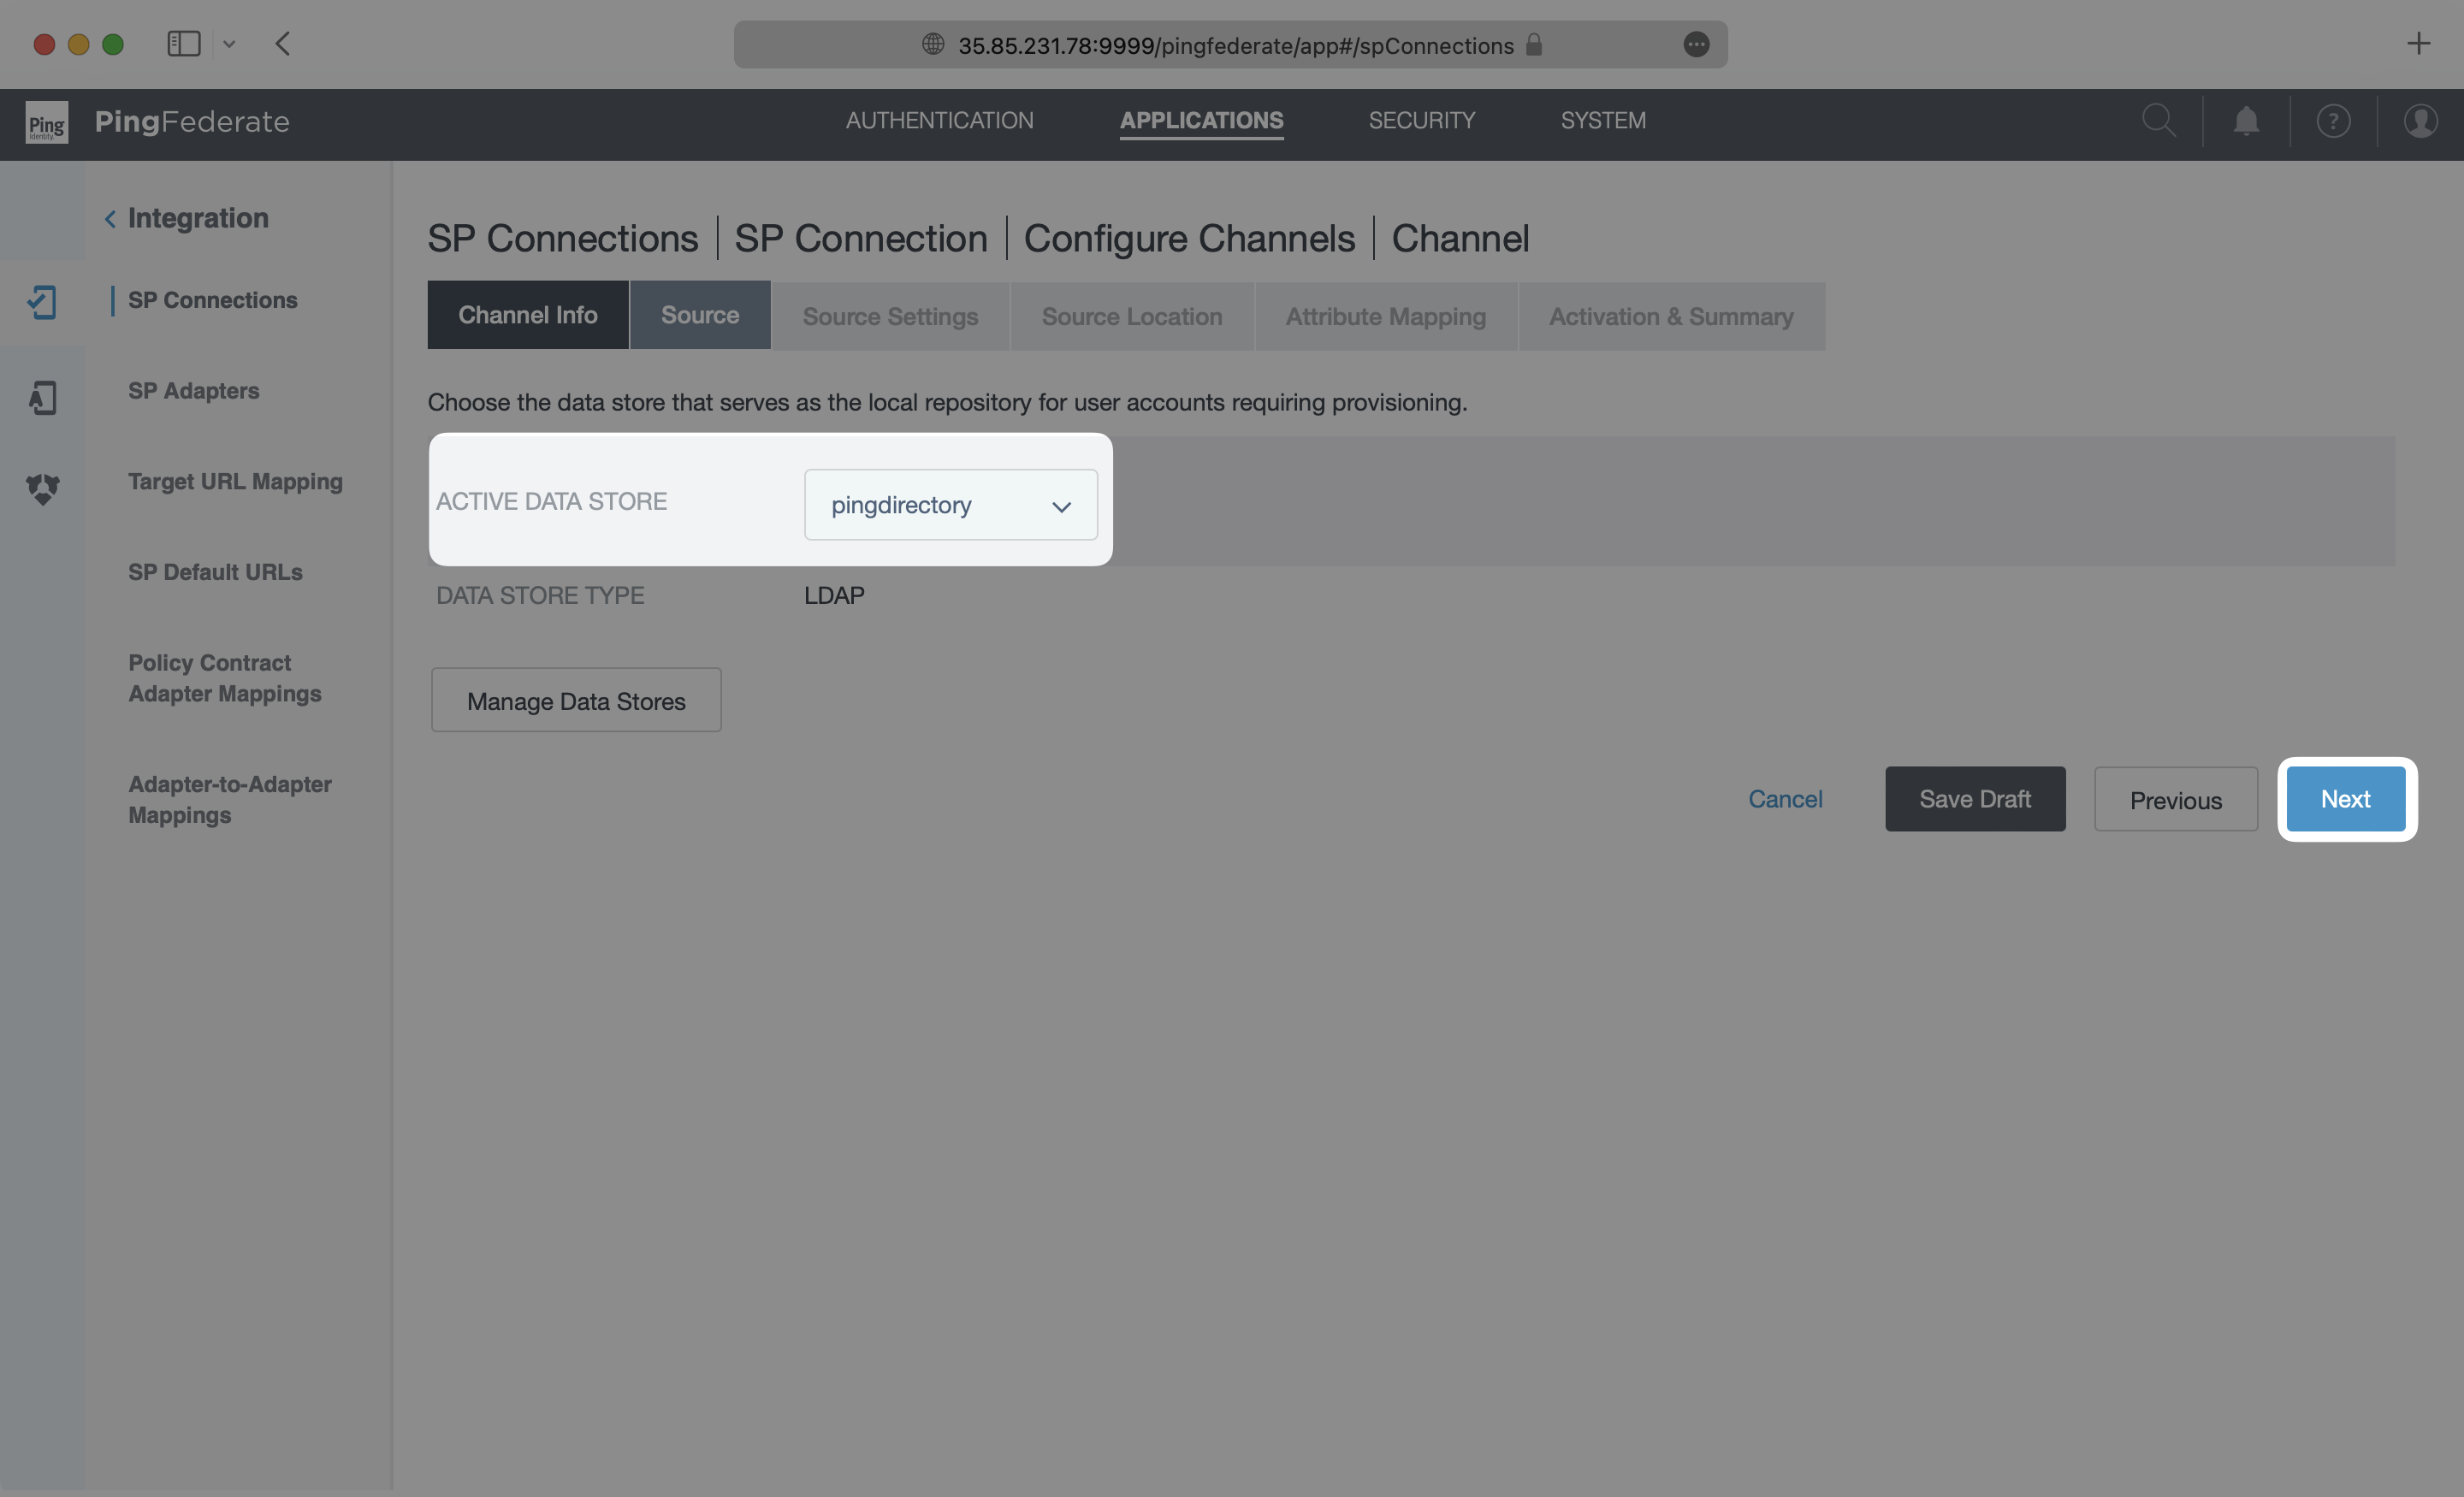
Select an “Active Data Store” from the dropdown menu. In this example, This example uses a PingDirectory LDAP instance, but this may be different depending on the type of data store used in each case. Please refer to the PingFederate documentation for specific settings on your type of data store. Click “Next”.
On the Source Settings page, make any modifications needed for your data store. In this example, the default values for the LDAP data store did not need to be modified, so the default settings were used. After configuring the source settings specific to your use case, click “Next” to go to the Source Location page.

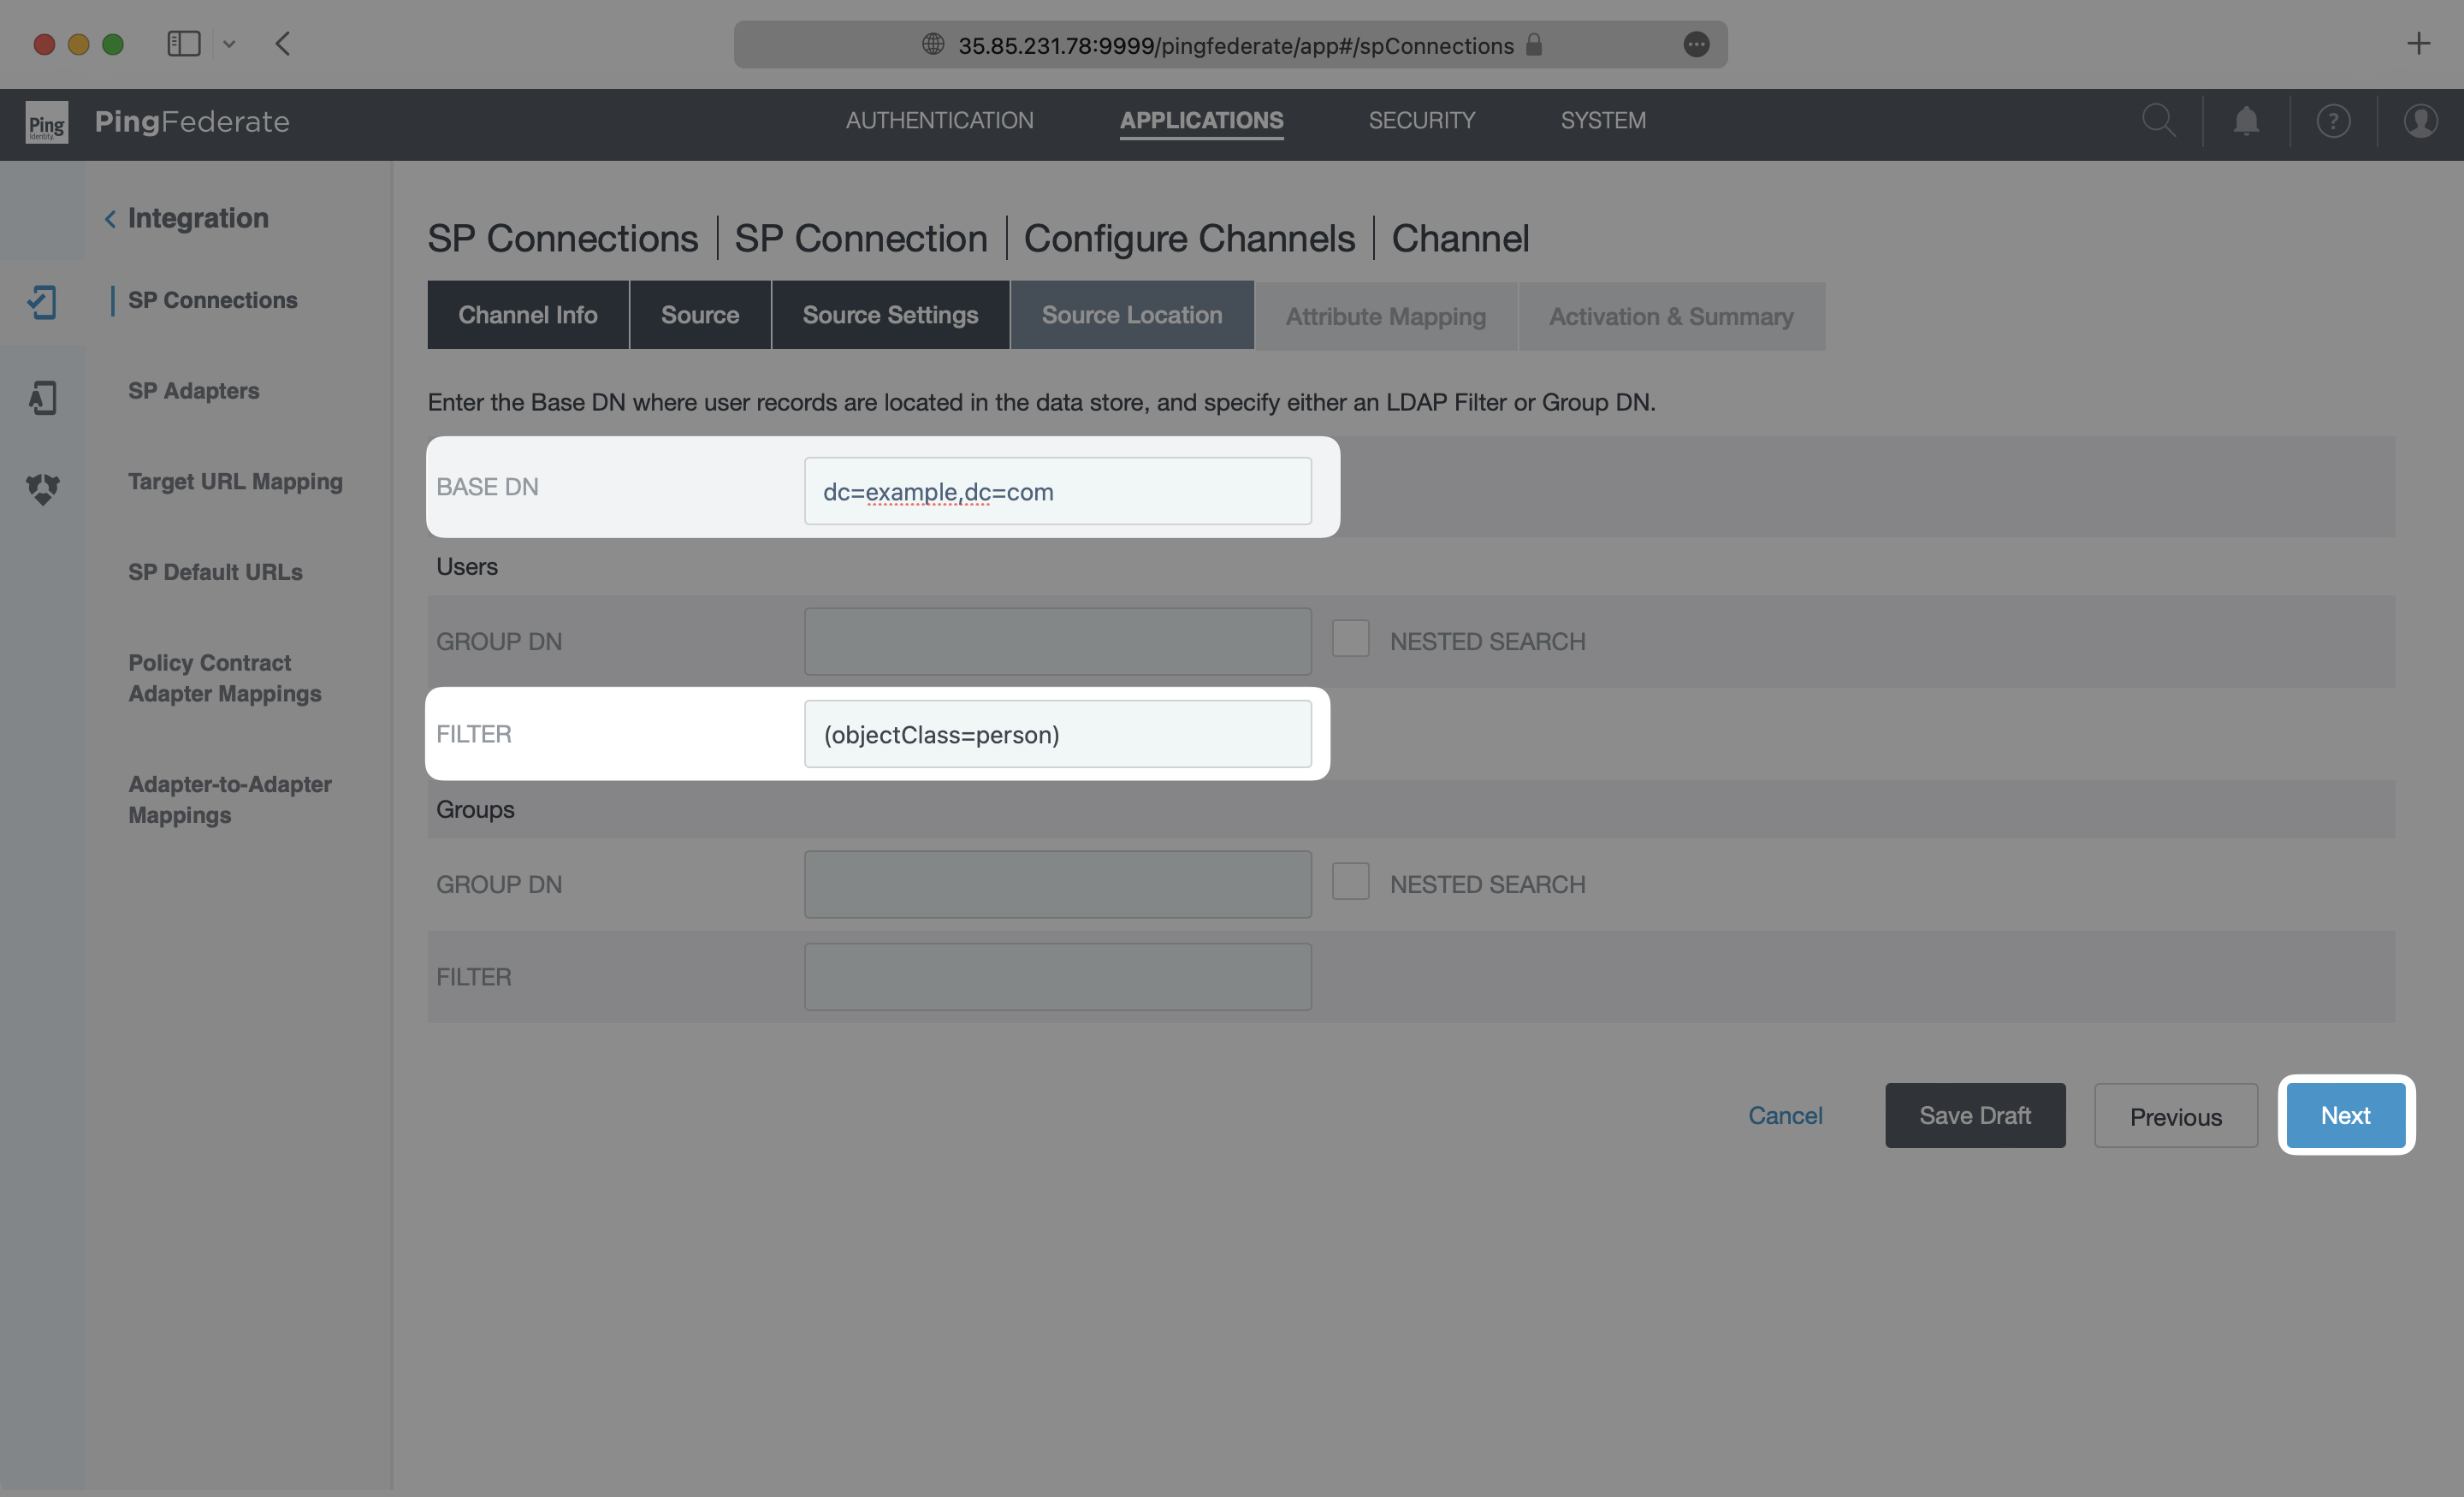
On the Source Location page, input a Base DN and either a Group DB or Filter for the Users. This tells your application where to look for the users to sync from your active data store. The setup used in each case may be different depending on the type of data store being used and which users and groups are to be provisioned. Please reference PingFederate documentation for specific steps. When this is complete, click “Next”.
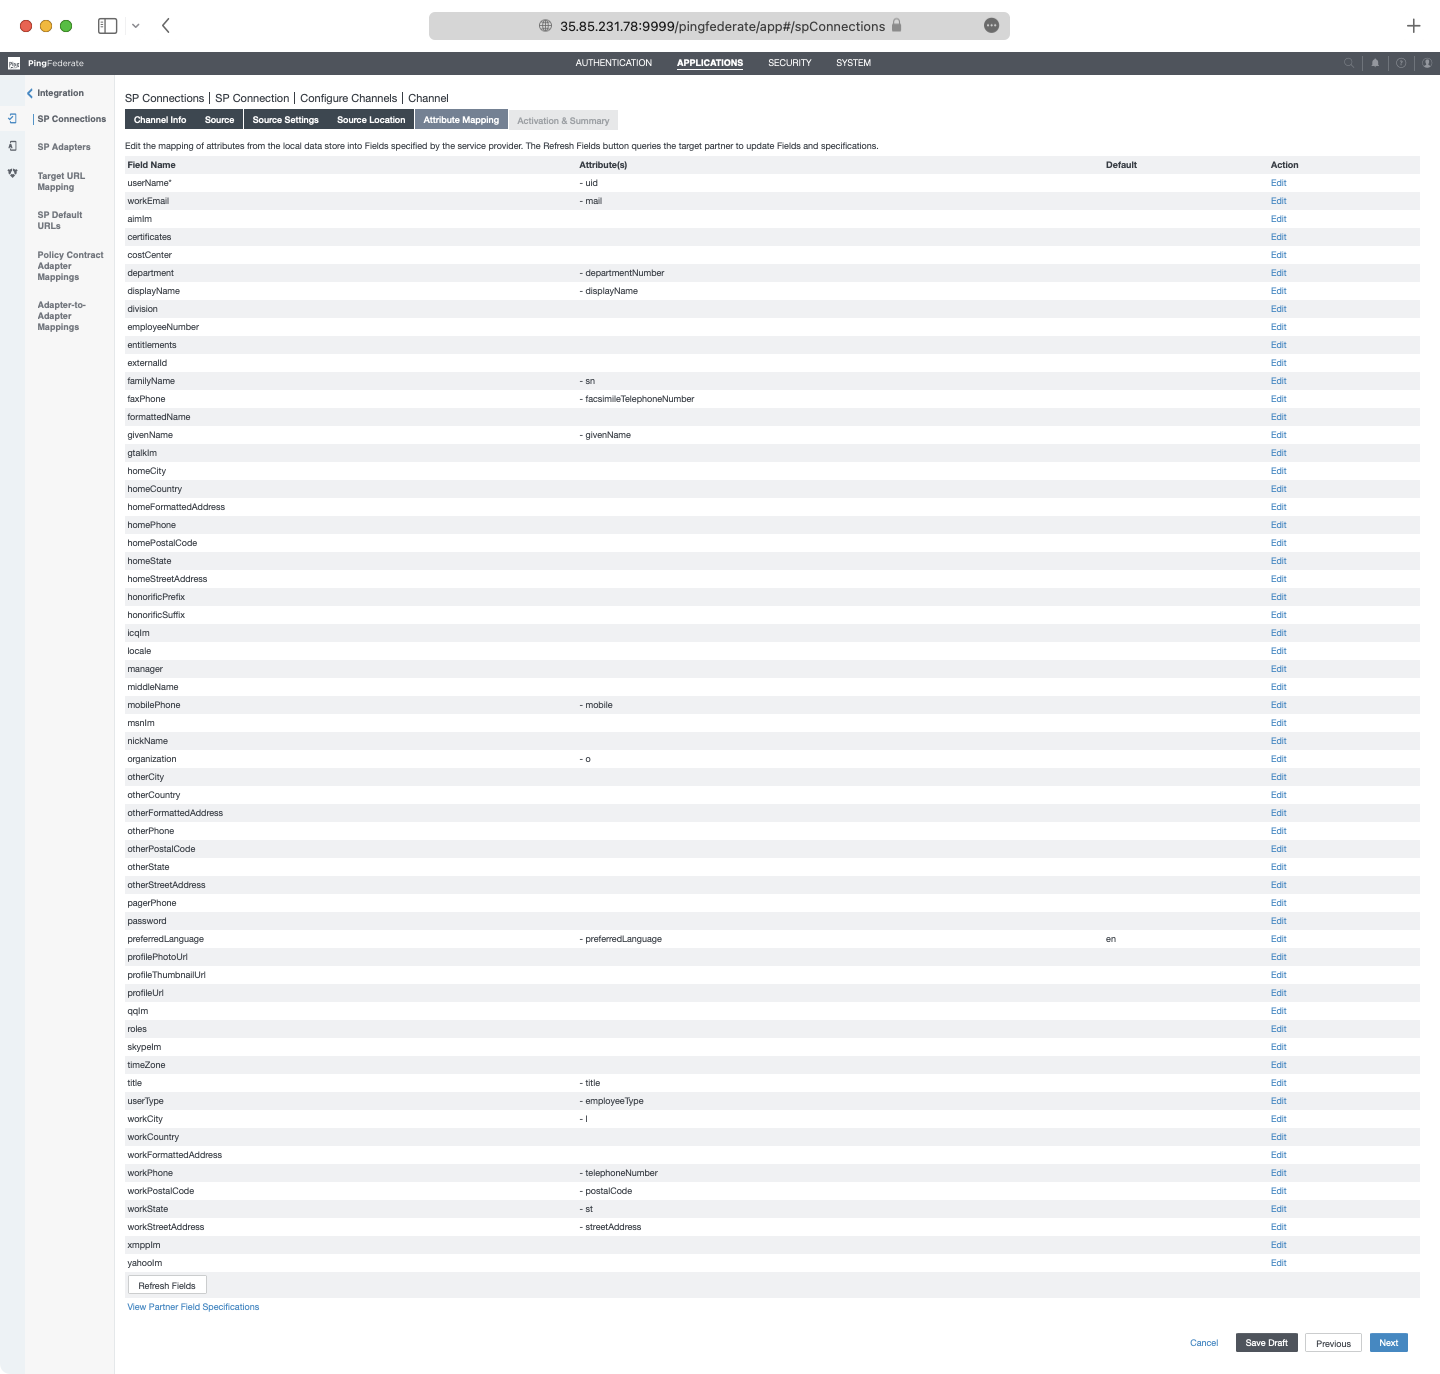
On the Attribute Mapping page, configure the mapping of attributes in the data store to the SCIM attributes. The exact configuration will depend on the specific setup in each unique situation. For this PingDirectory LDAP example, the default settings are used. When finished, Click “Next”.
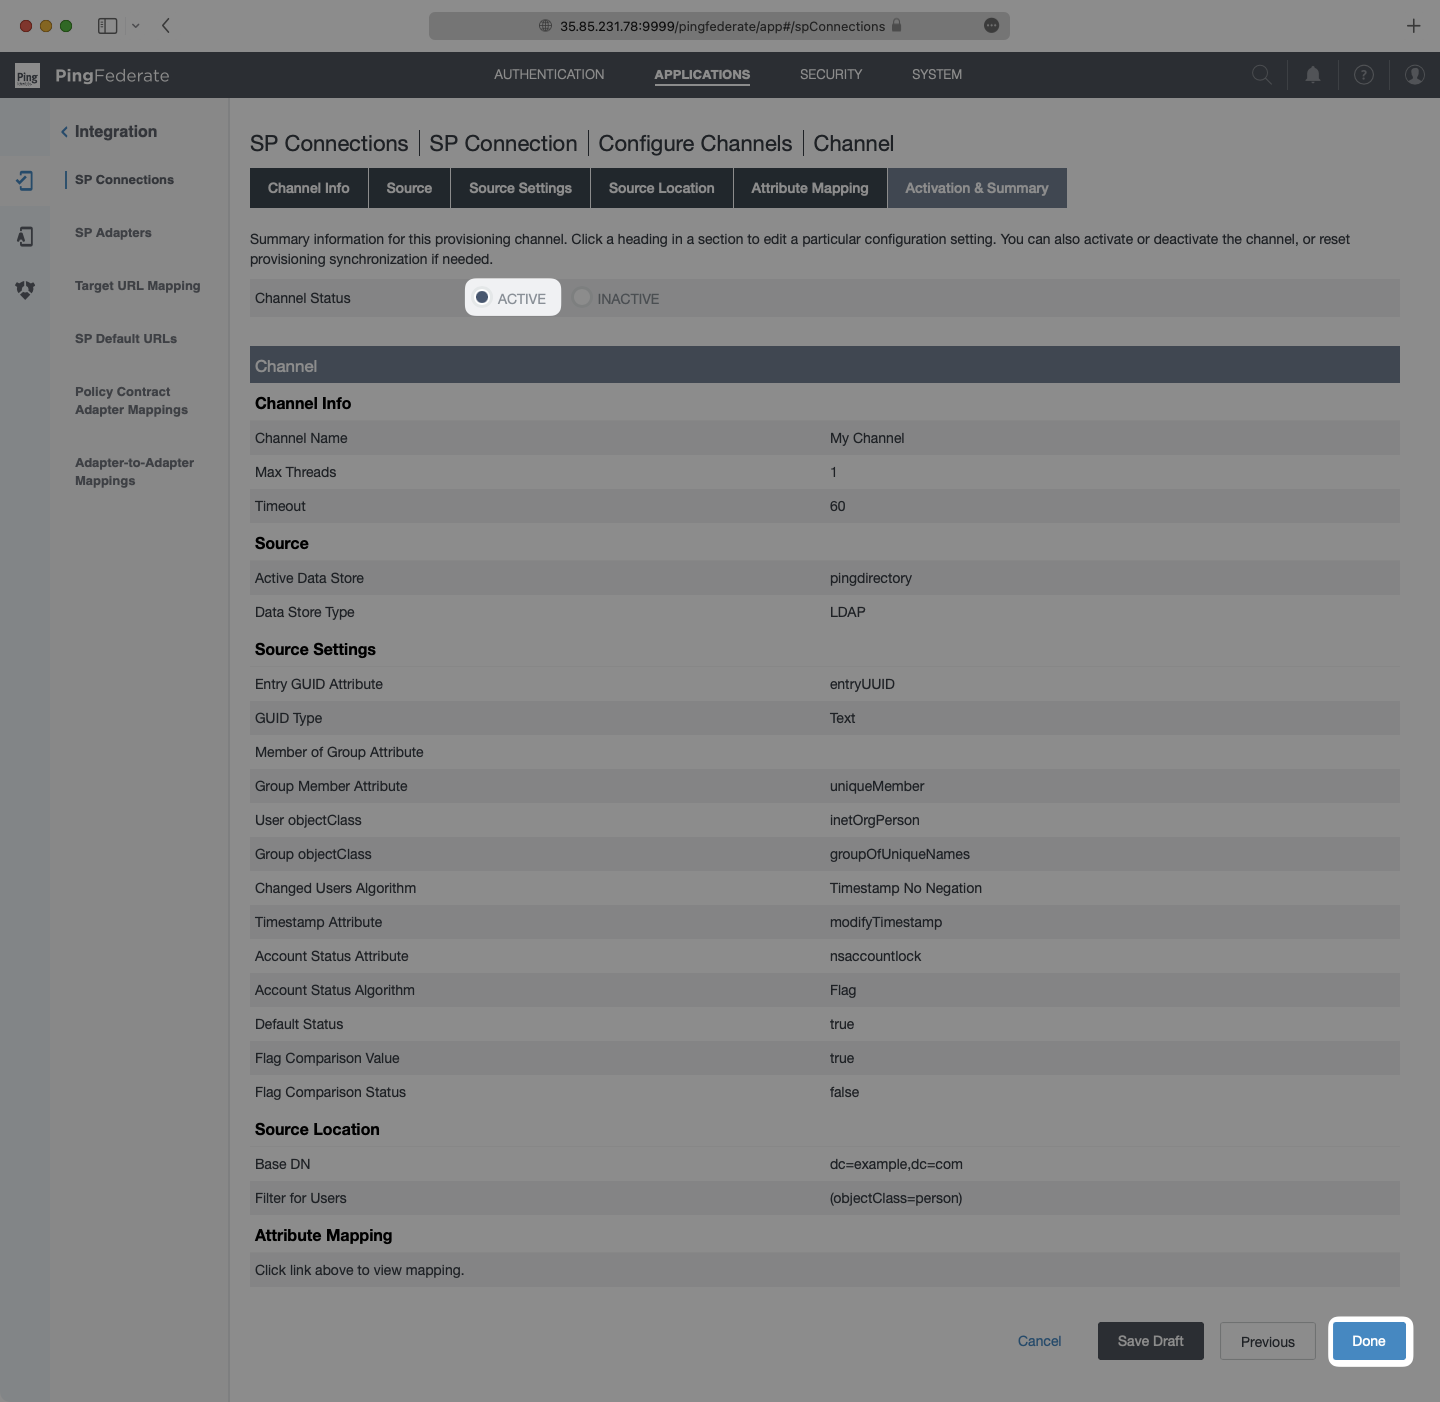
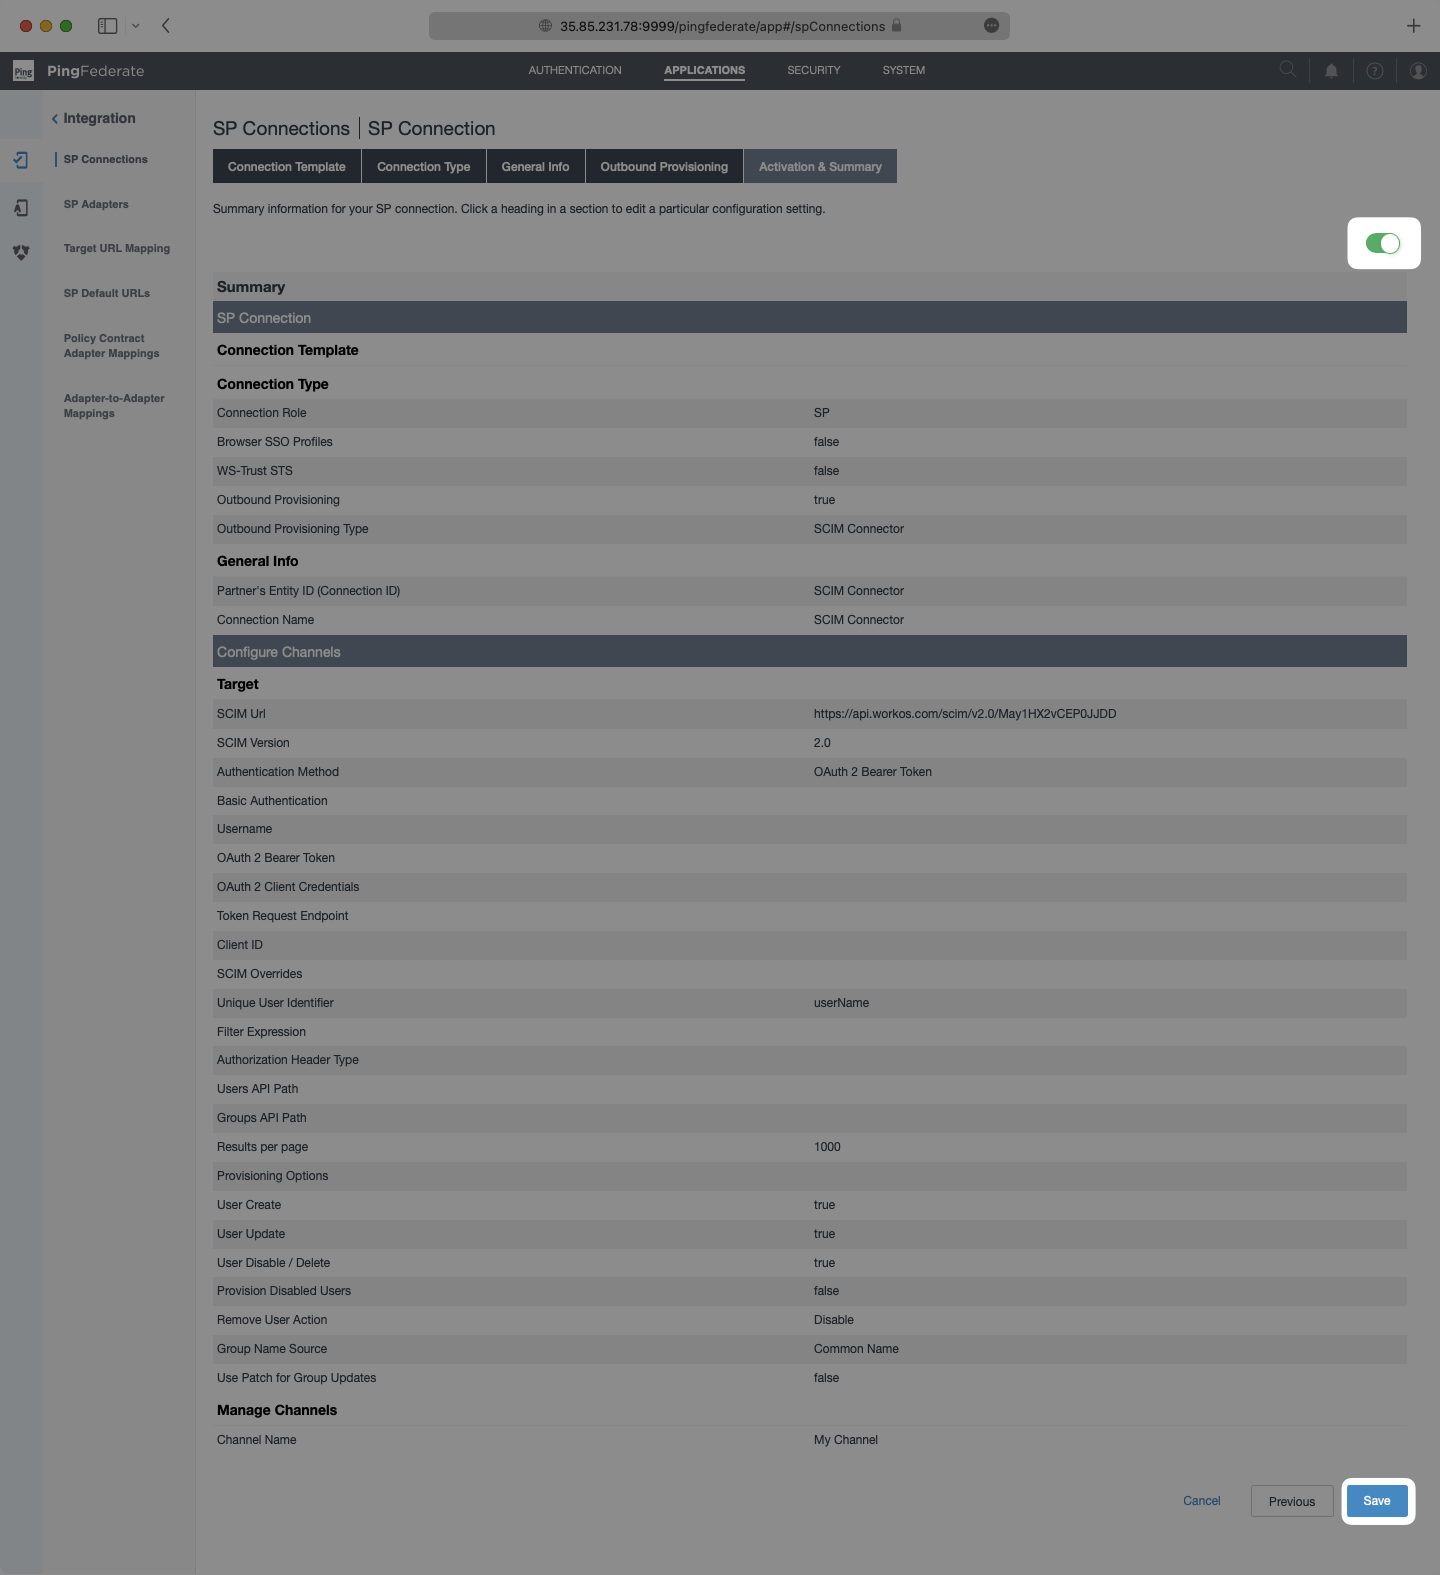
On the Activation & Summary page, check that the settings are complete, then toggle the “Channel Status” to “Active” and select “Done”.
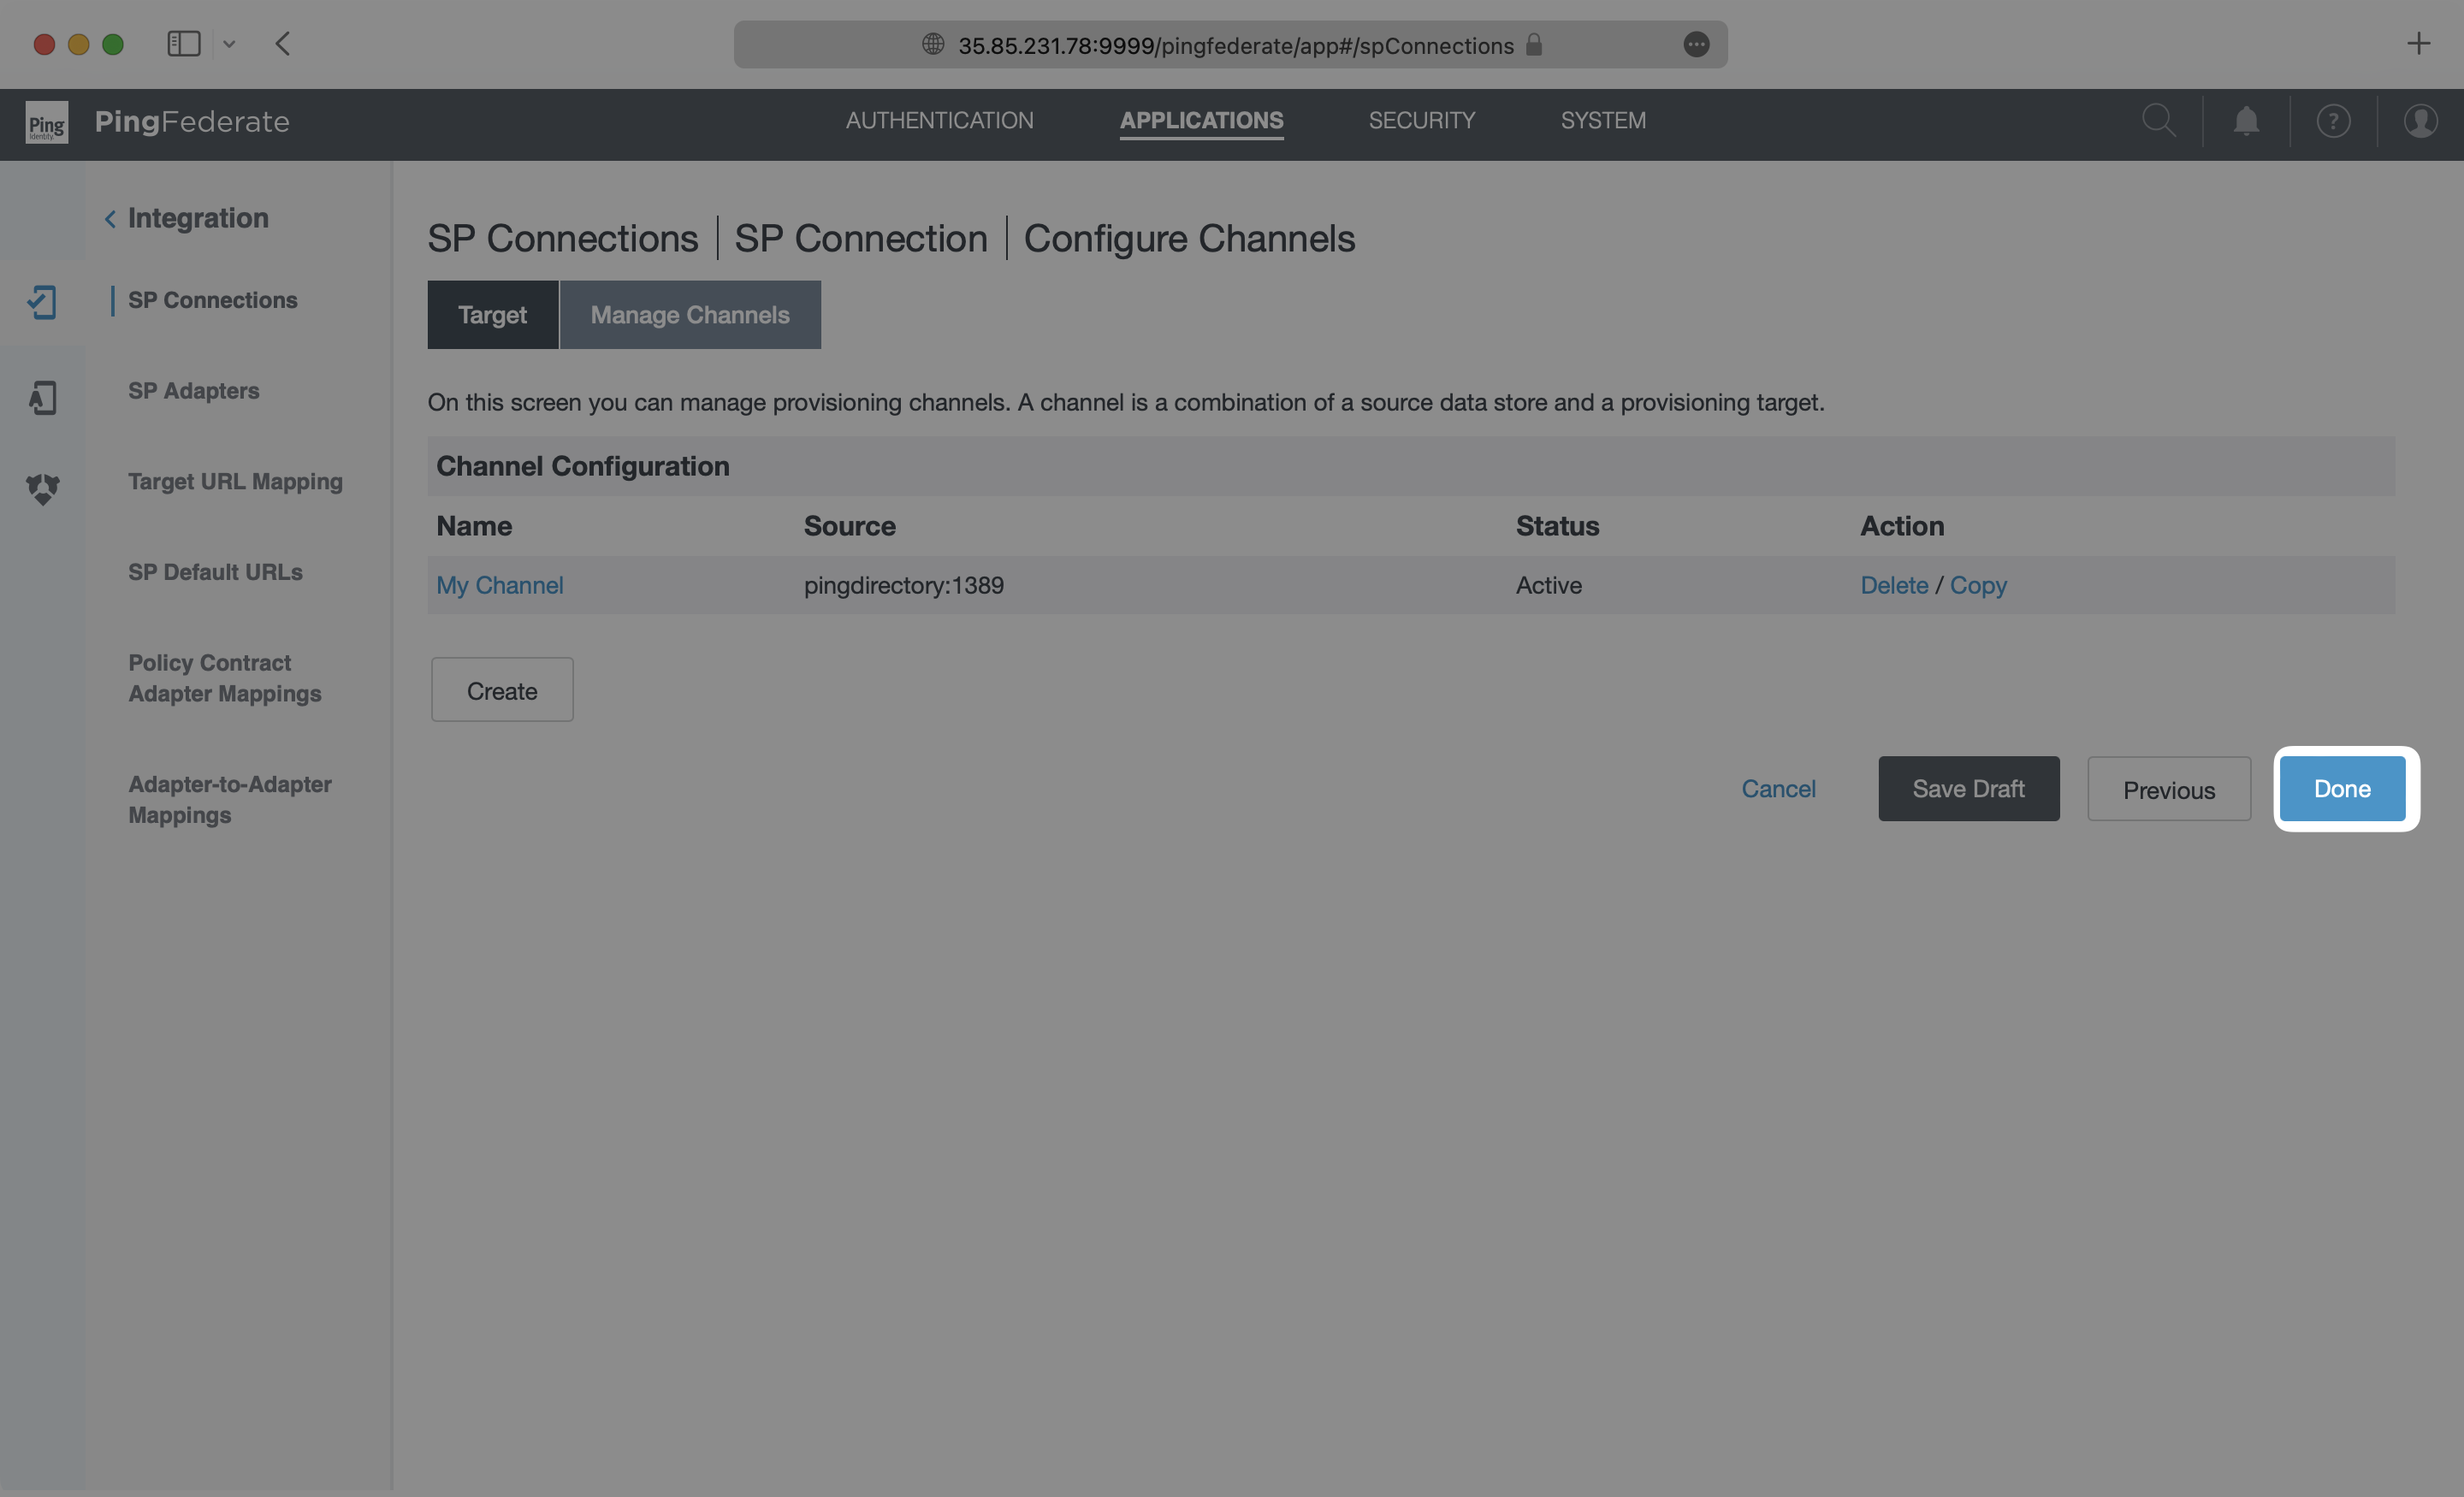
You are directed back to the Manage Channels page, where you can select “Done”.
You’re then directed to the Outbound Provisioning page, where you can select “Next”.
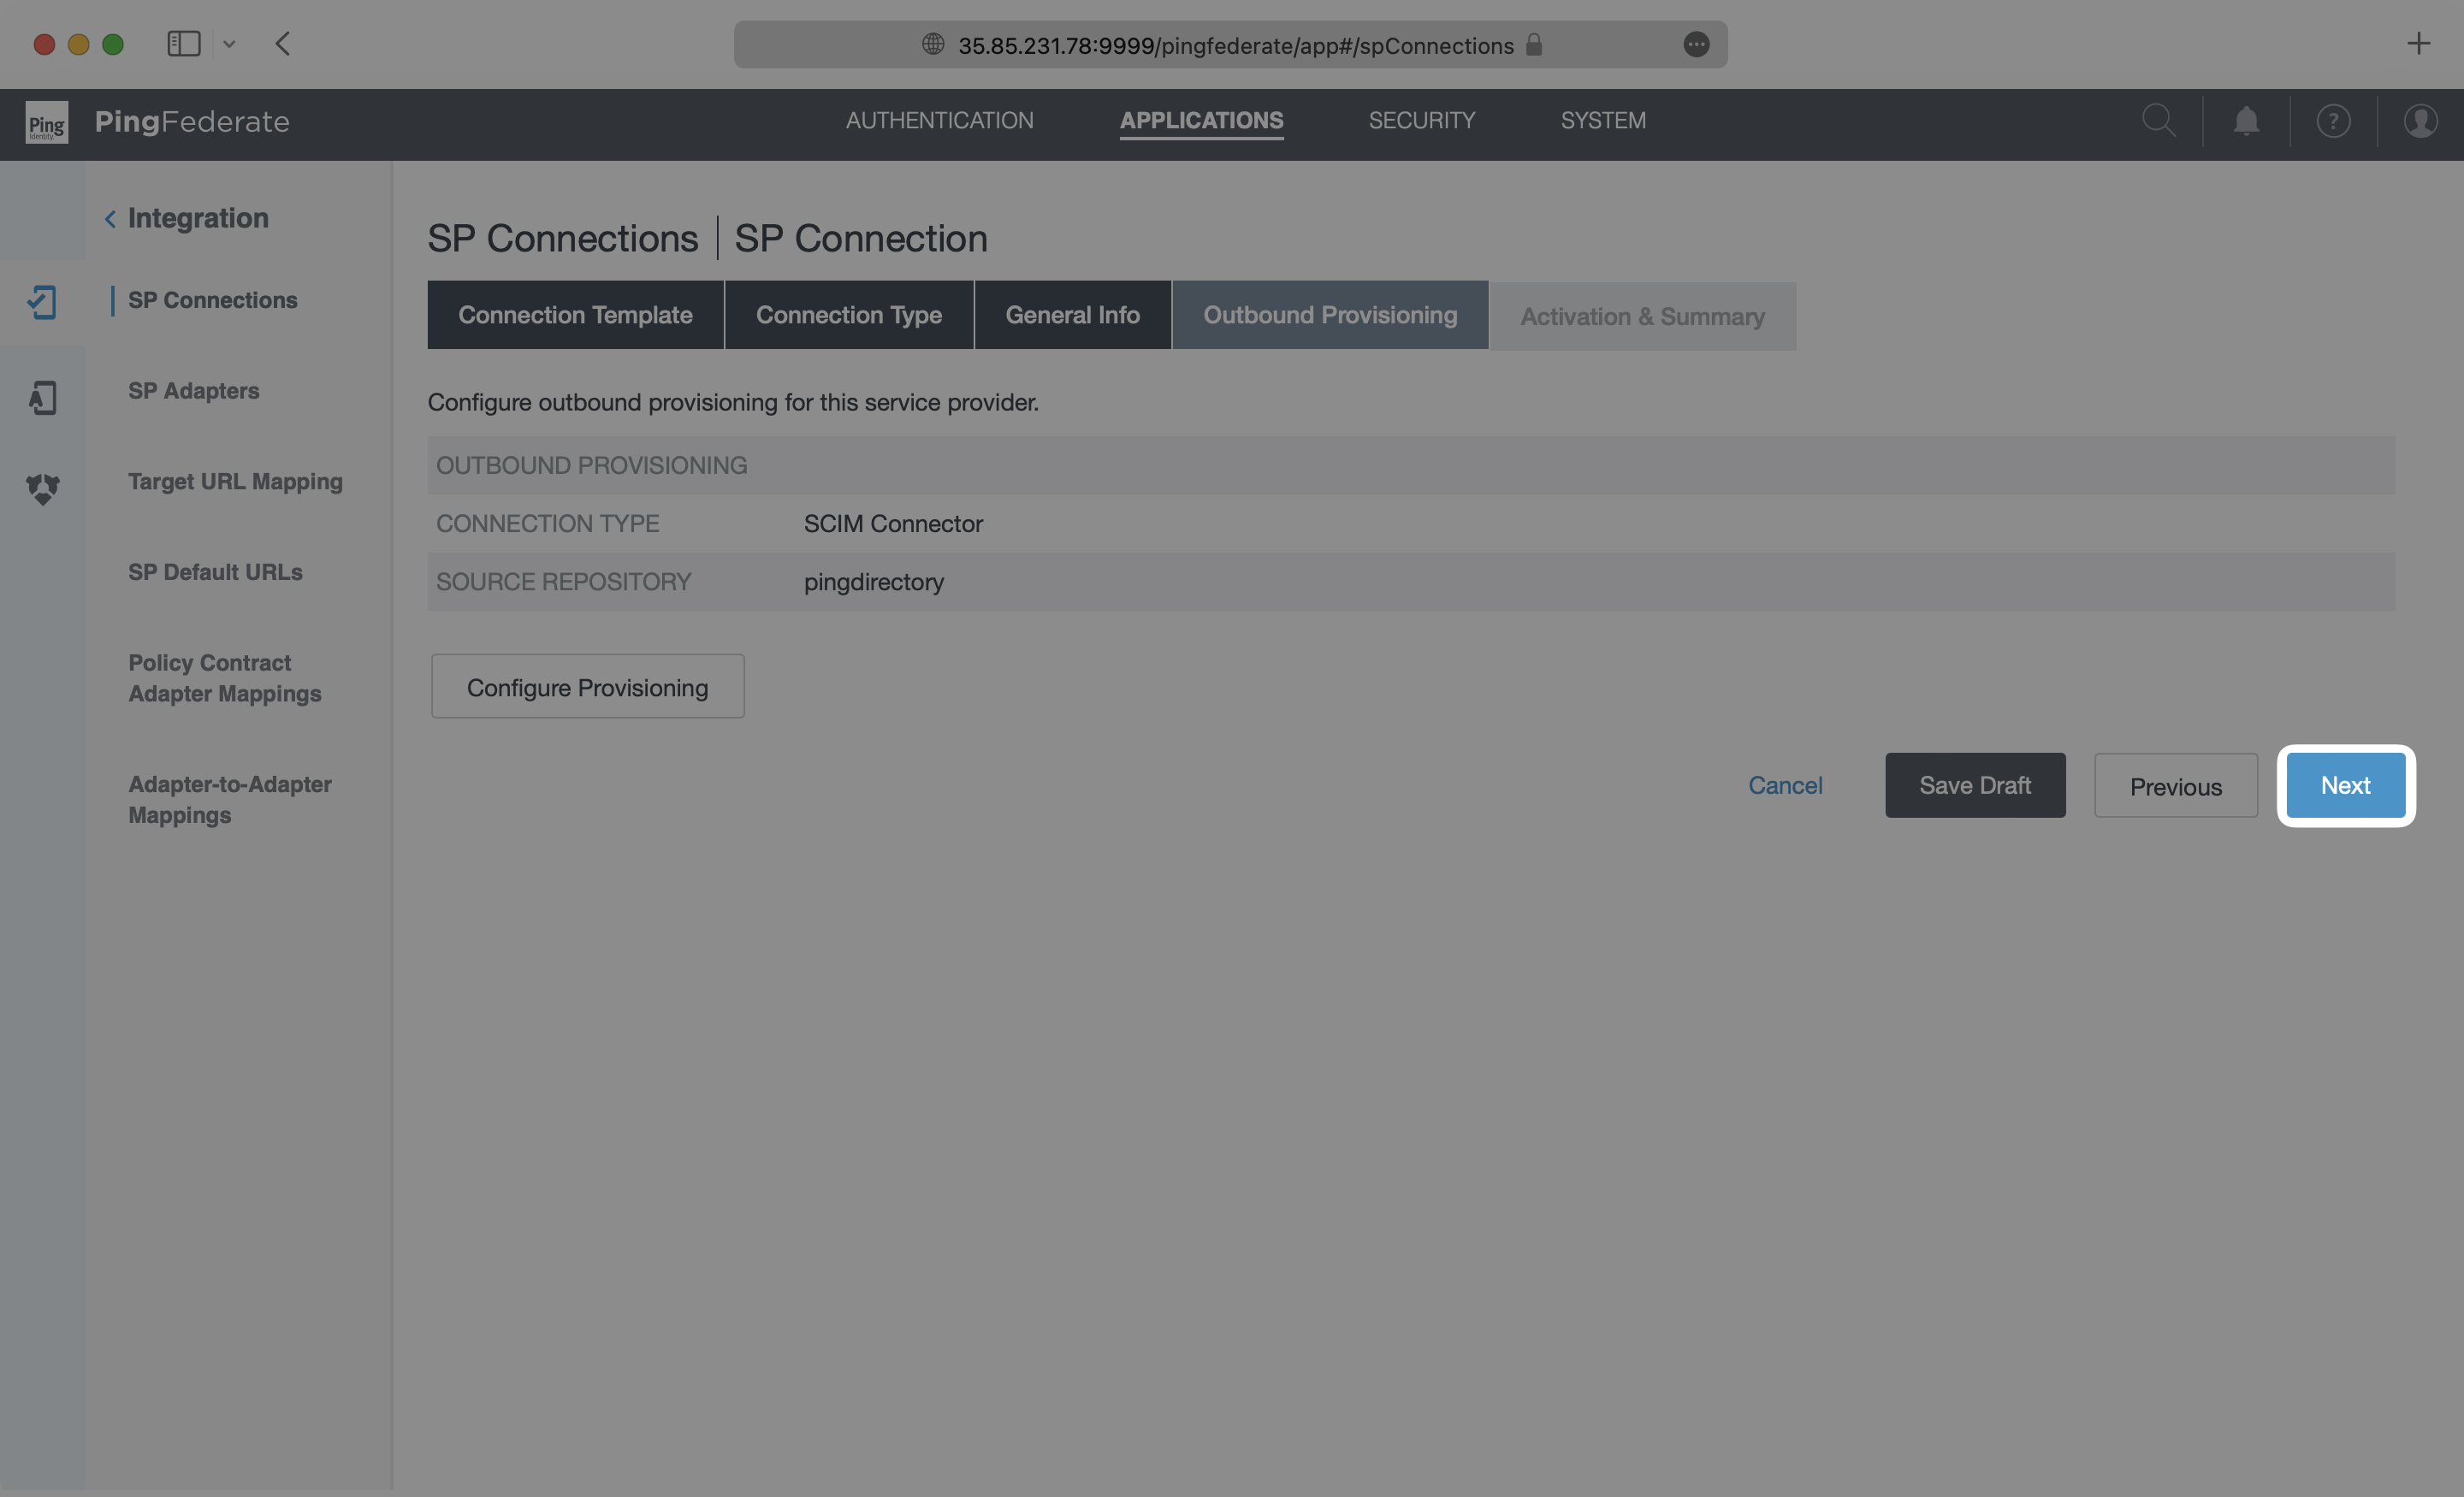
On the Activation & Summary page, turn on provisioning with the toggle at the top, and then select “Save”.
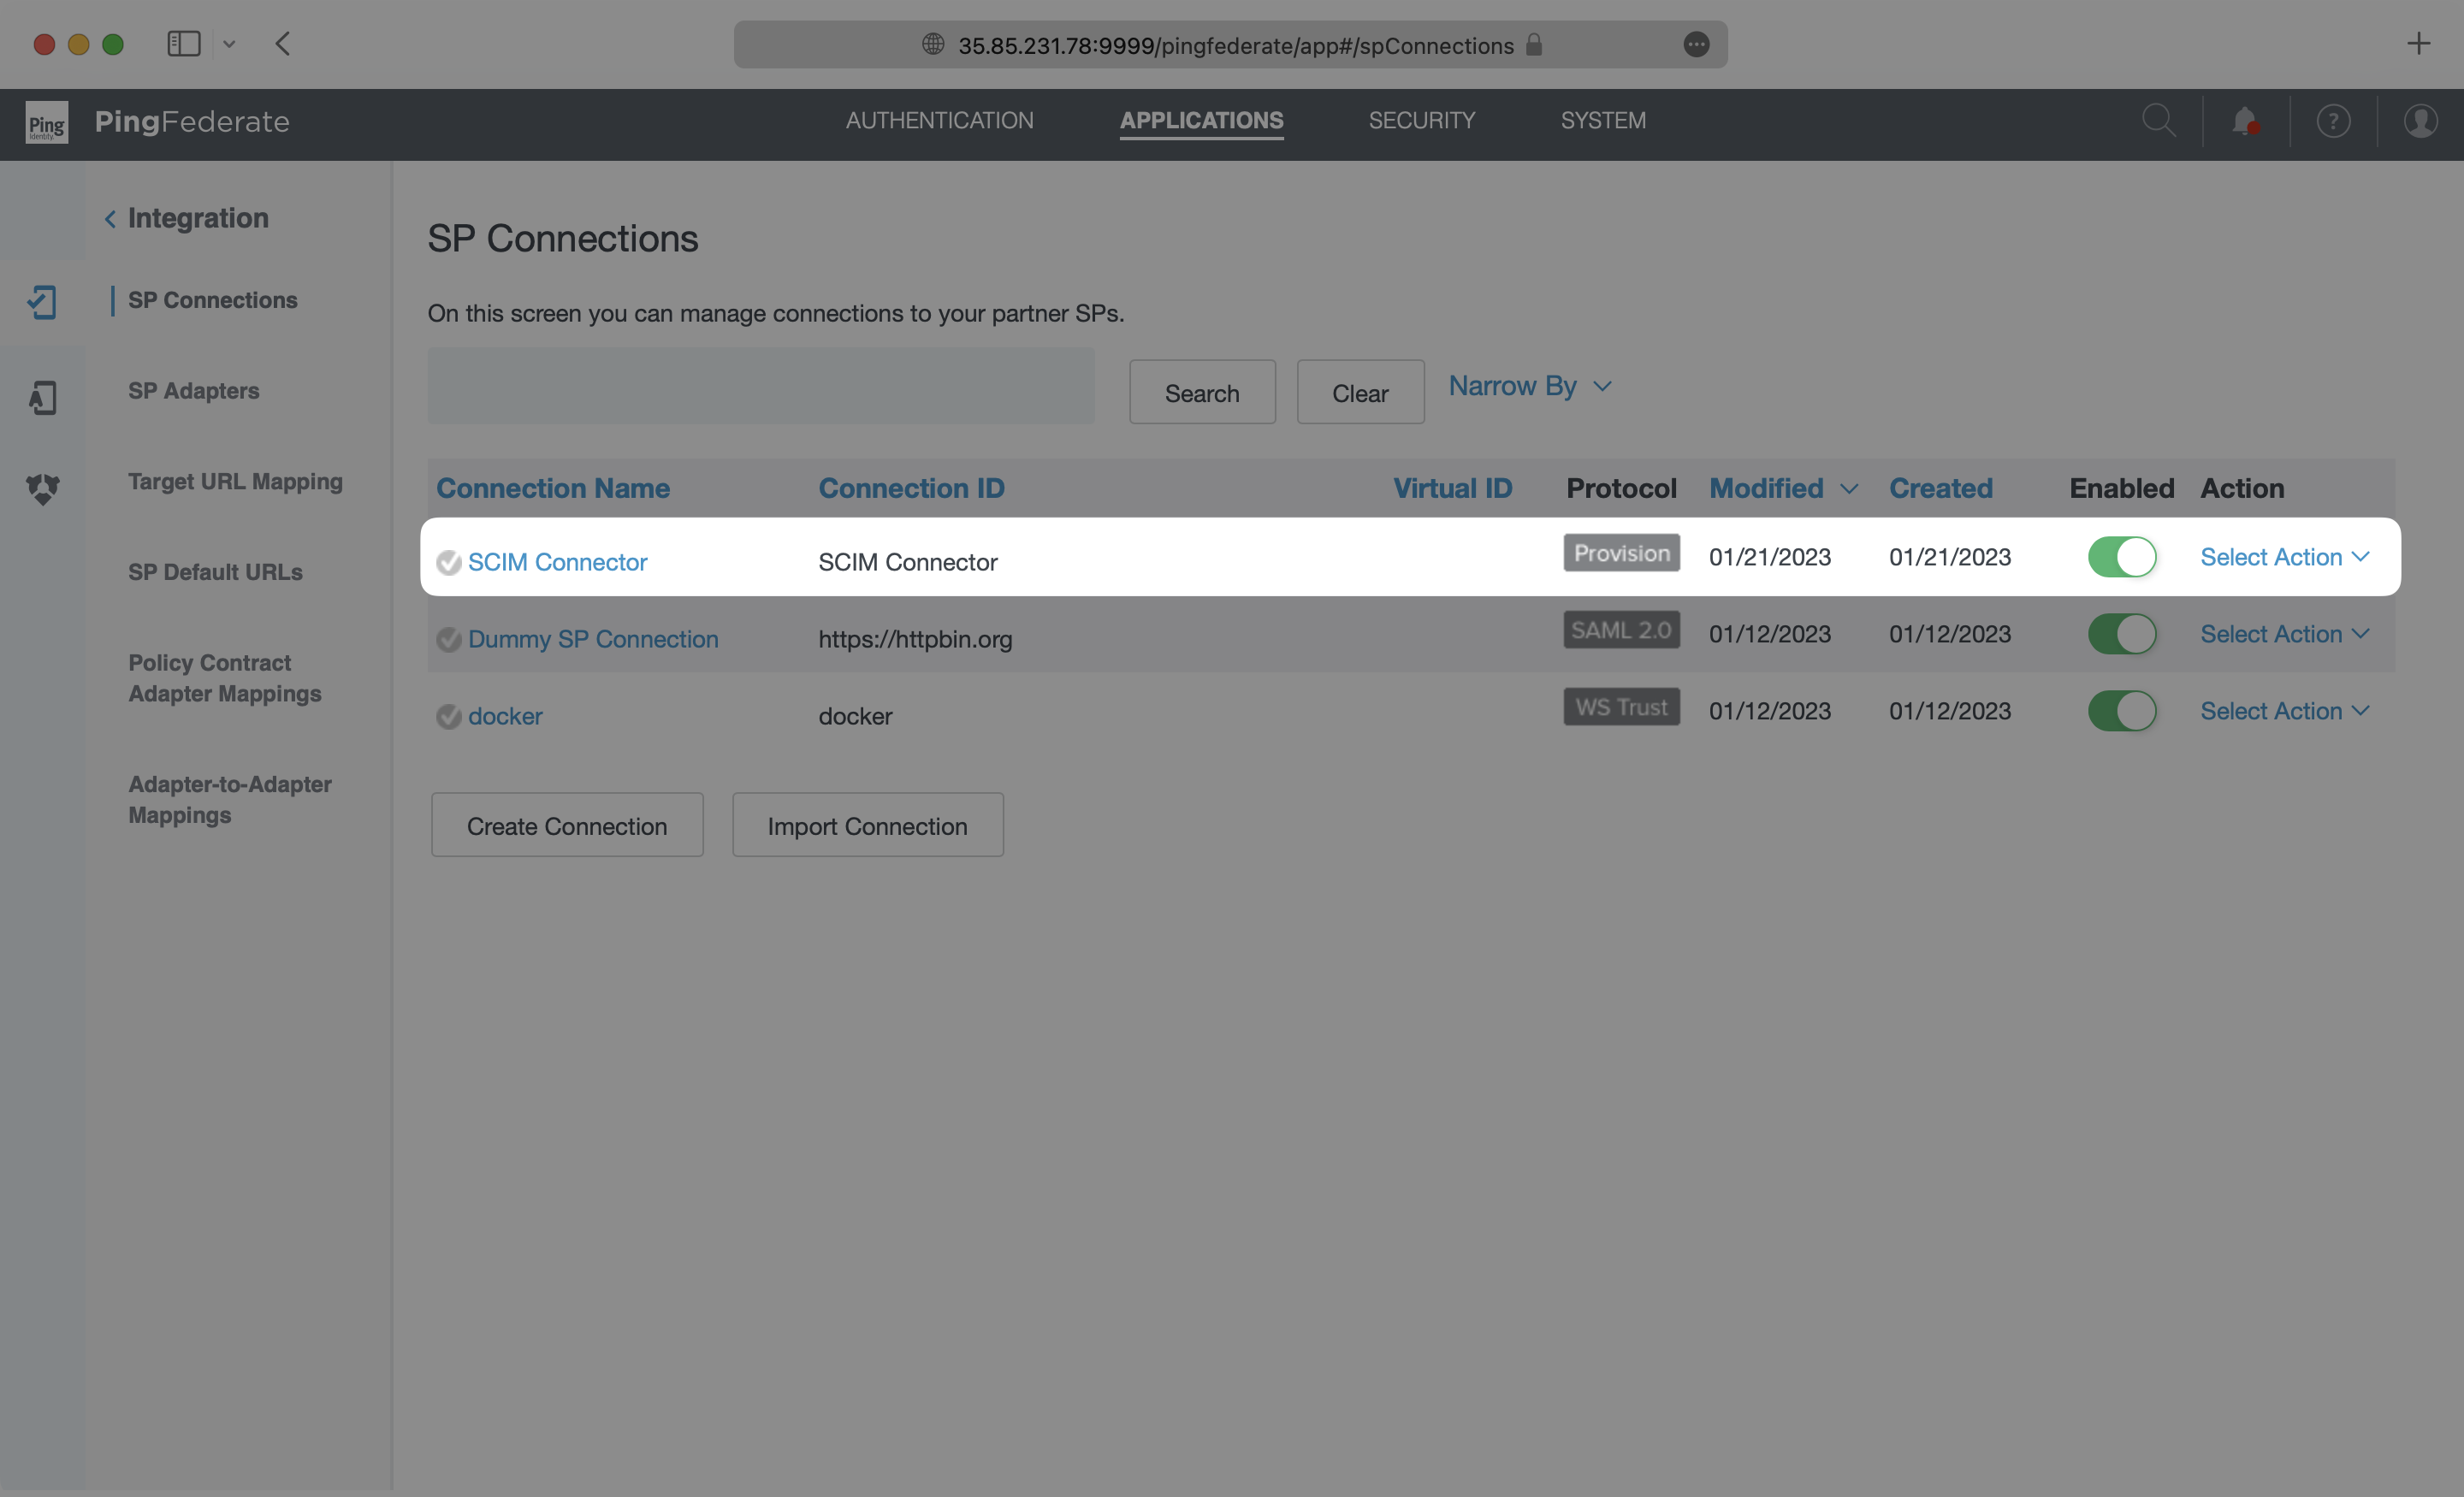
You’ll now see your SCIM application listed in the SP Connections page.
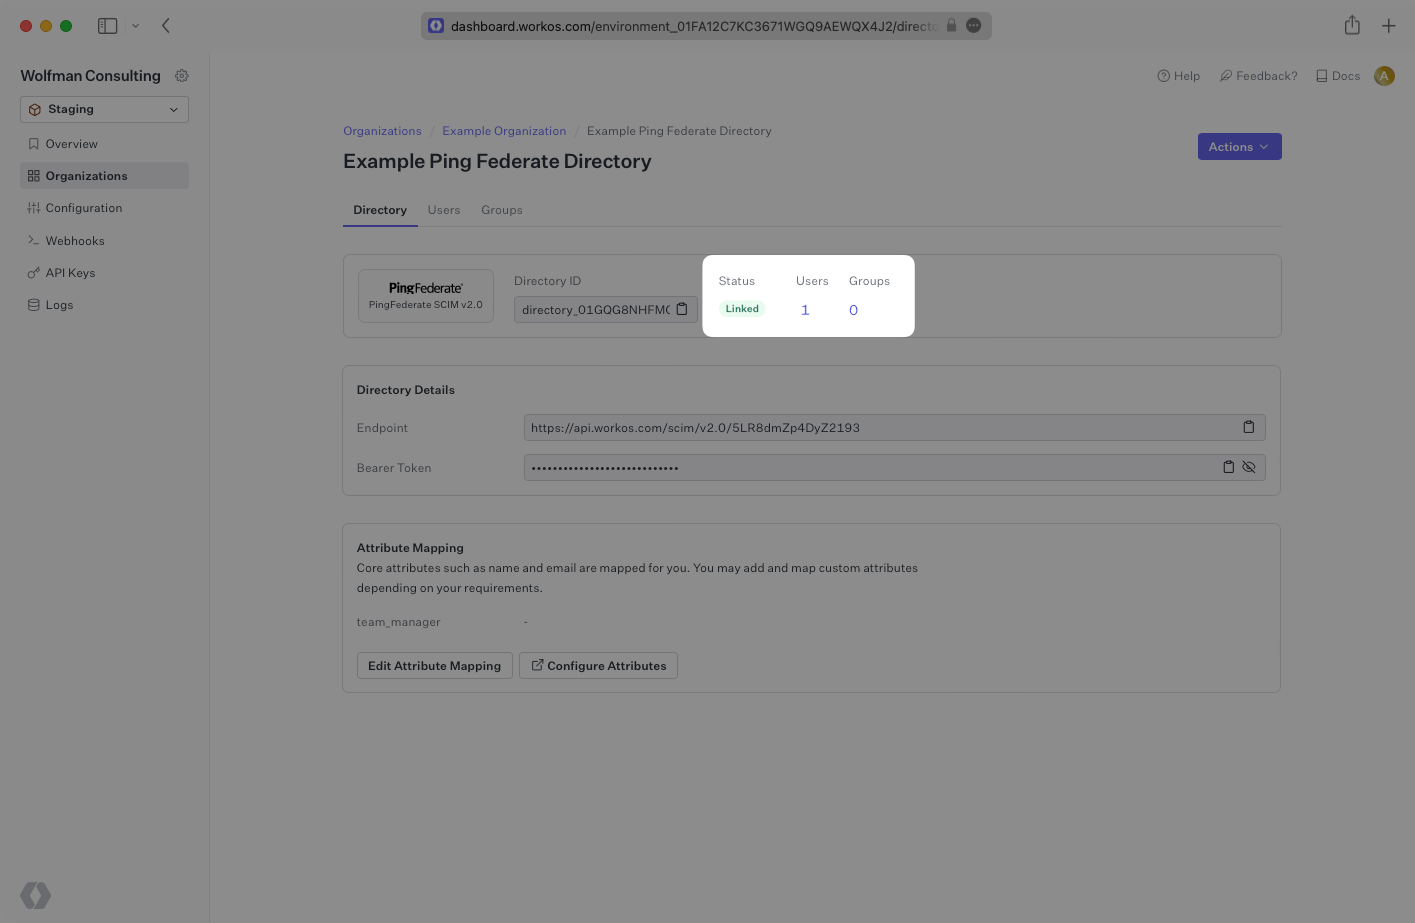
The provisioning will automatically begin when the connection is activated through outbound requests from Ping Federate. It may take a few minutes for this process to start. Once it is synced, you’ll see a Linked status in the Directory settings in the WorkOS Dashboard.
A detailed guide to integrate the WorkOS API with your application can be found here