Rippling SCIM
Learn about syncing your user list with Rippling SCIM v2.0.
This guide outlines how to synchronize your application’s Rippling directories using SCIM.
To synchronize an organization’s users and groups provisioned for your application, you’ll need to provide the organization with two pieces of information:
- An Endpoint that Rippling will make requests to.
- A Bearer Token for Rippling to authenticate its endpoint requests.
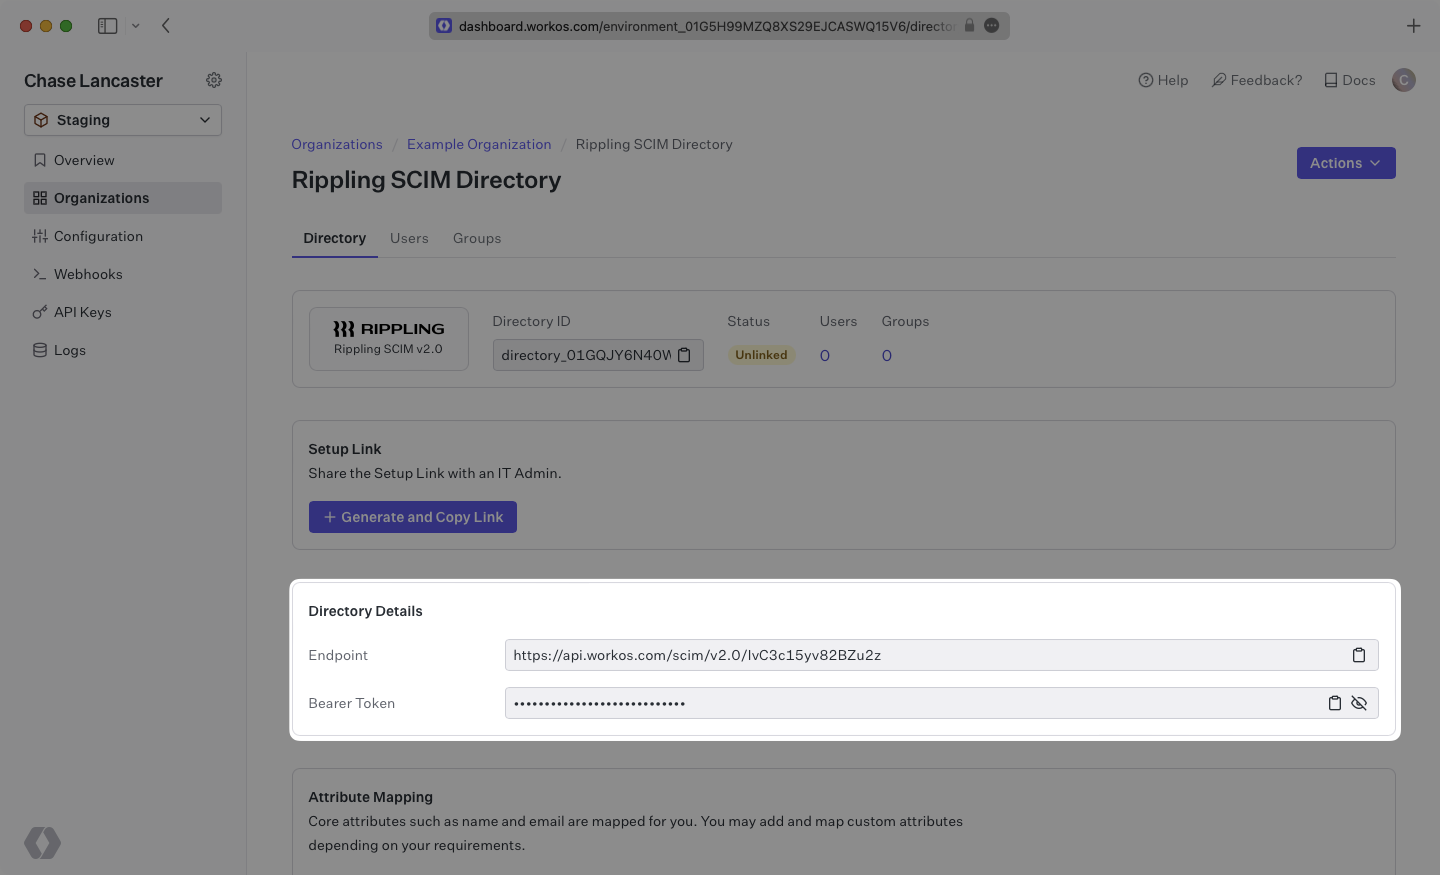
Both of these are available in your Endpoint’s Settings in the WorkOS Dashboard.
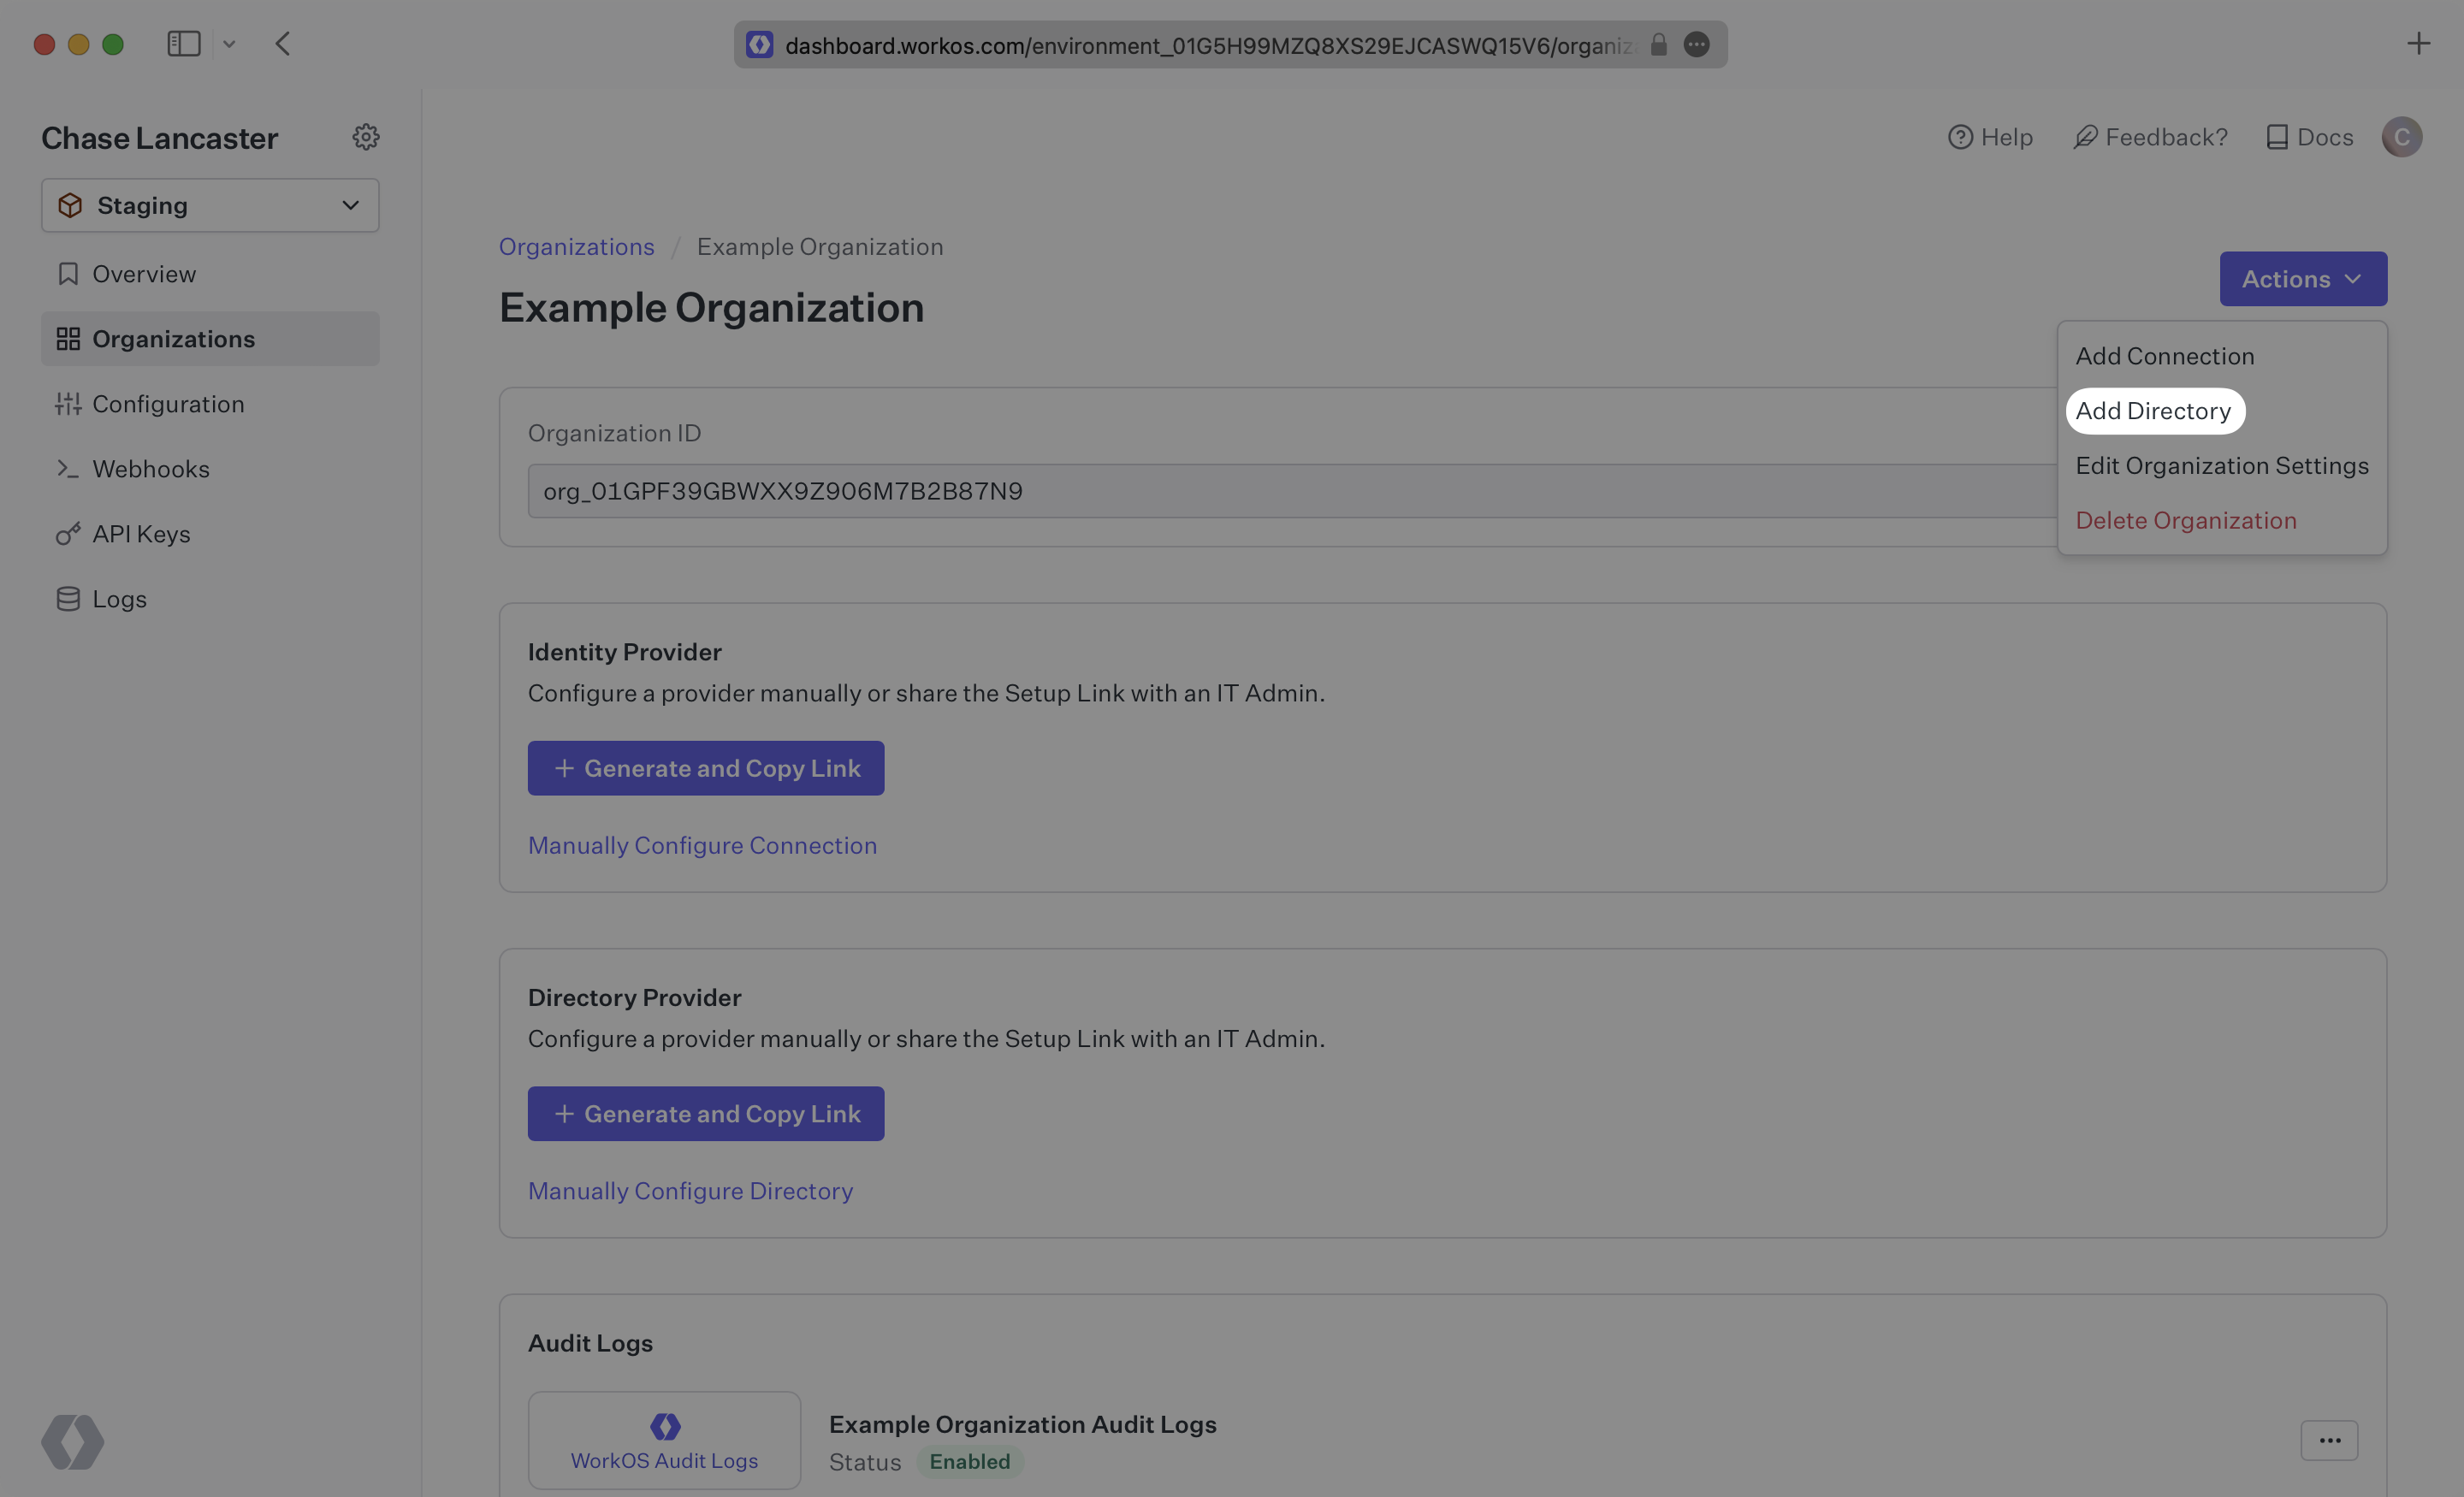
Login to your WorkOS Dashboard and select “Organizations” from the left hand navigation bar.
Select the organization you’ll be configuring a new Directory Sync for.
Under “Actions” click “Add Directory”.
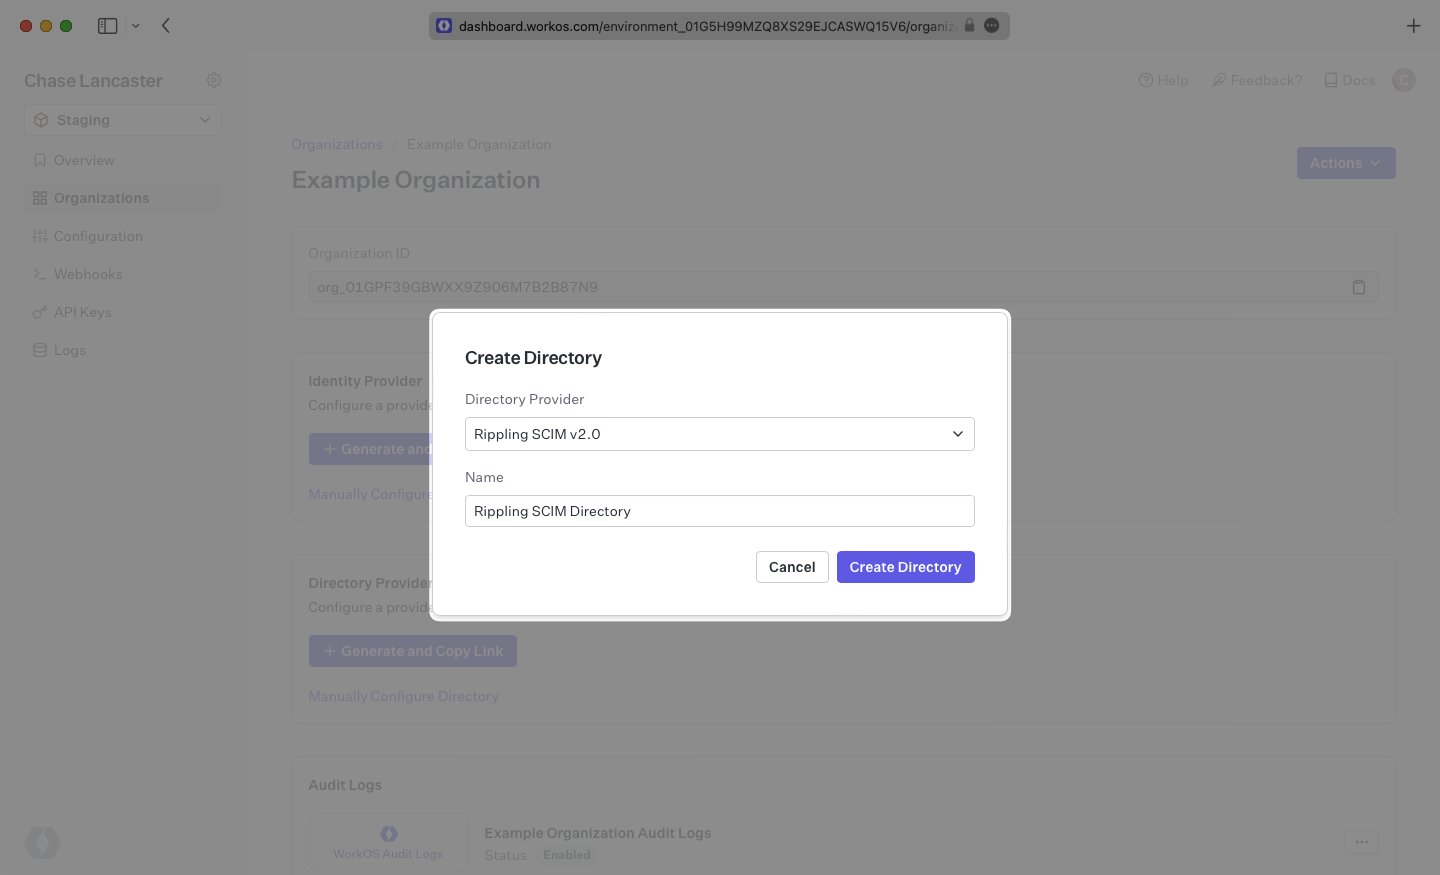
Select “Rippling” from the dropdown, and enter the organization name.
Then, click “Create Directory.”
Your Rippling directory sync has now been created successfully with an Endpoint and Bearer Token.
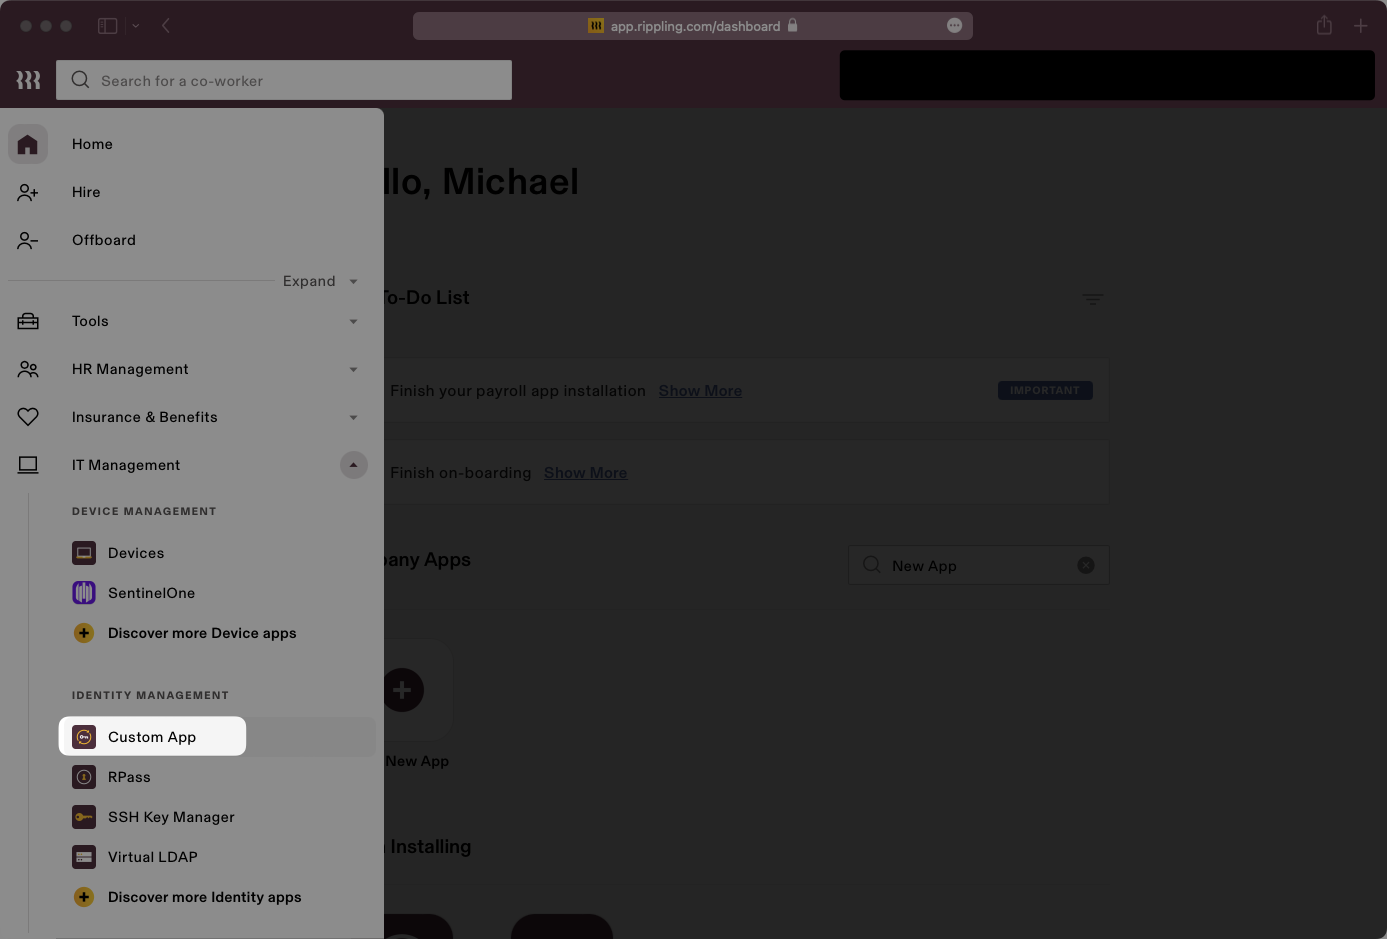
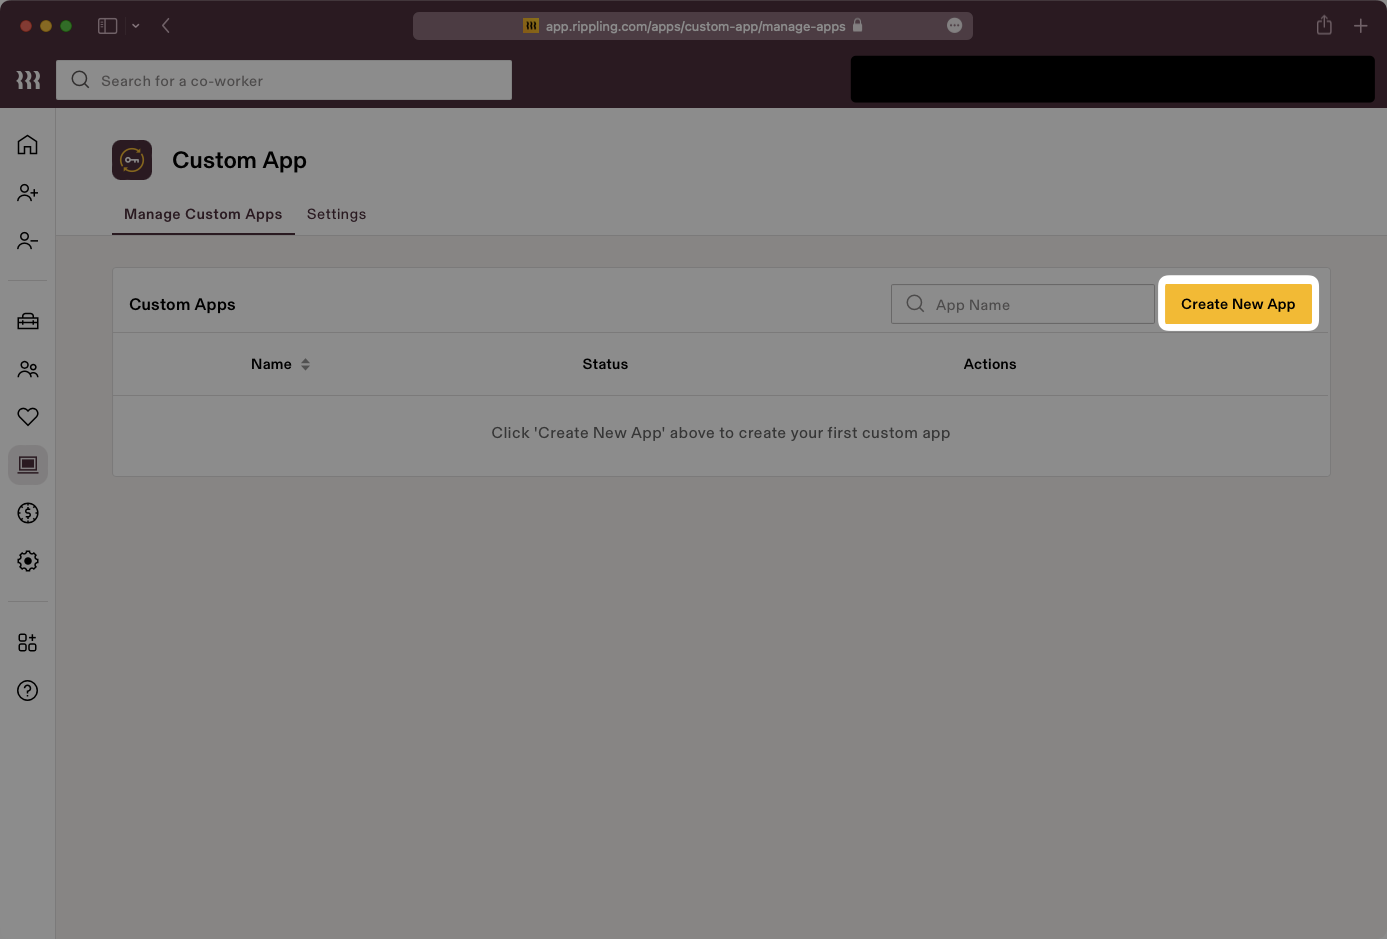
Log in to the Rippling admin dashboard and select the “Custom App” option in the menu under the “Identity Management” category.
Select “Create New App” in the Custom App page.
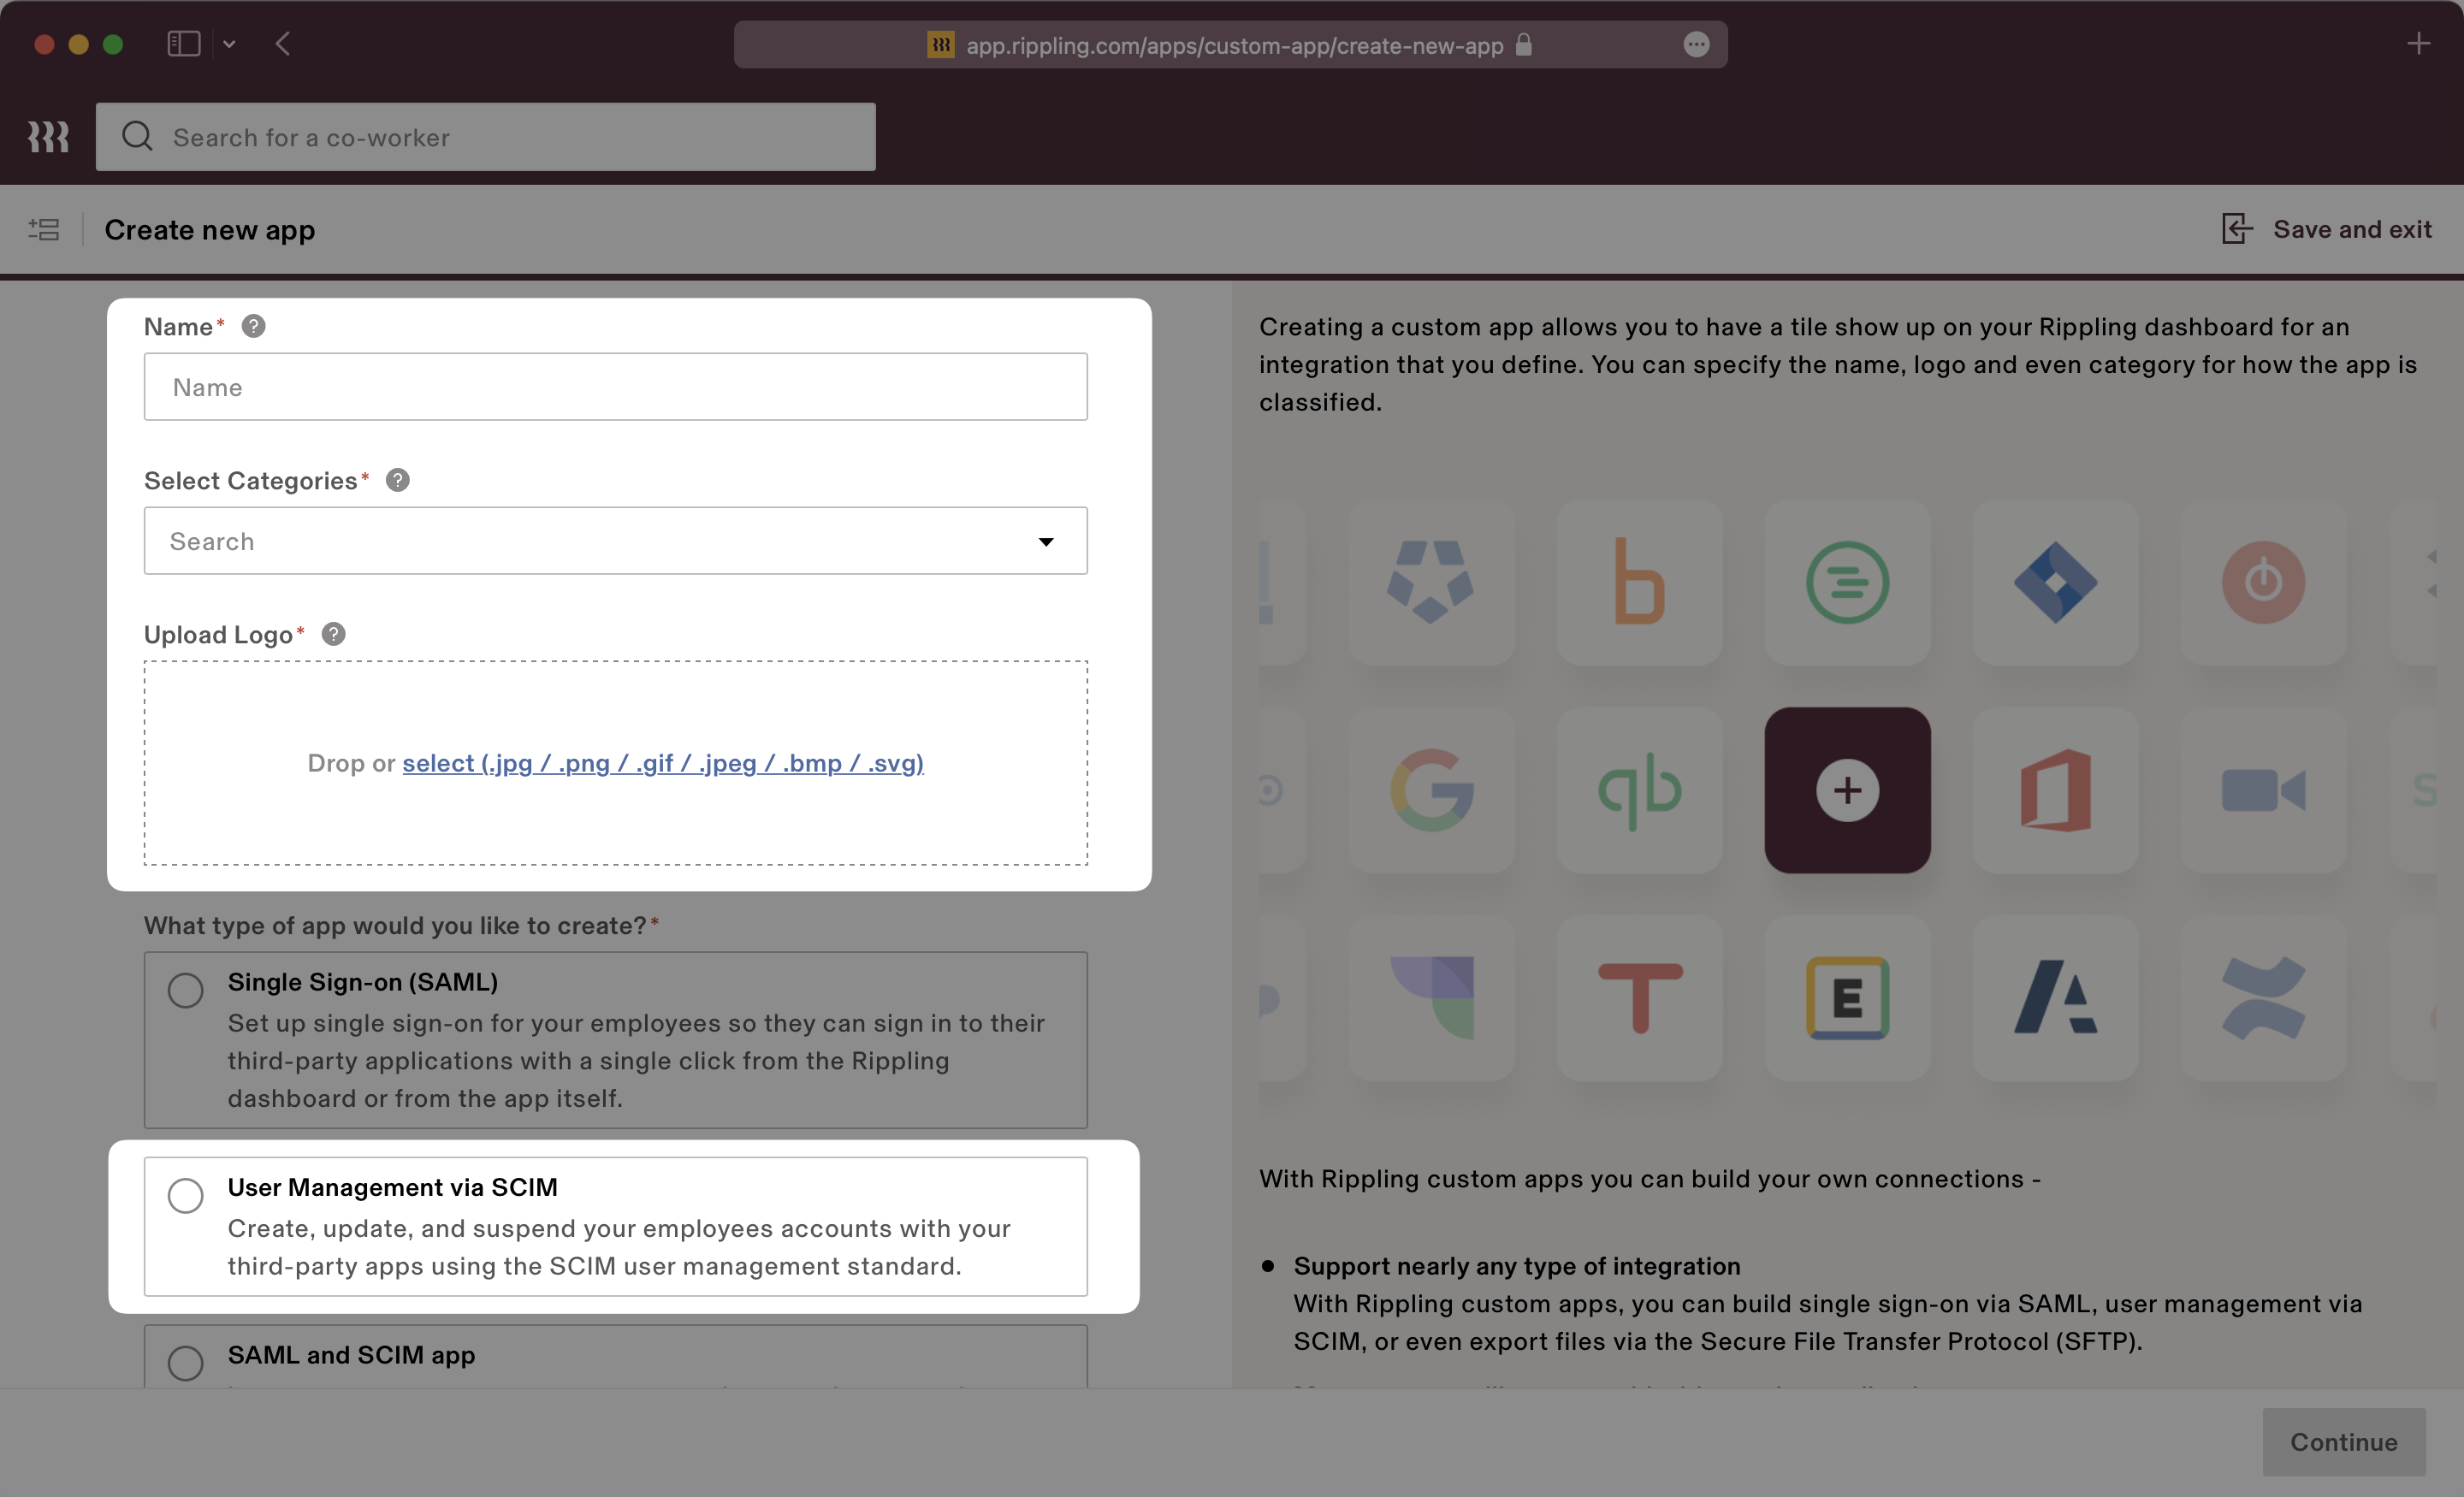
Fill out the application’s name, select categories, upload an image for the logo, and check the “User Management via SCIM” box. Click “Continue” and the next page will populate more option fields regarding SCIM setup.
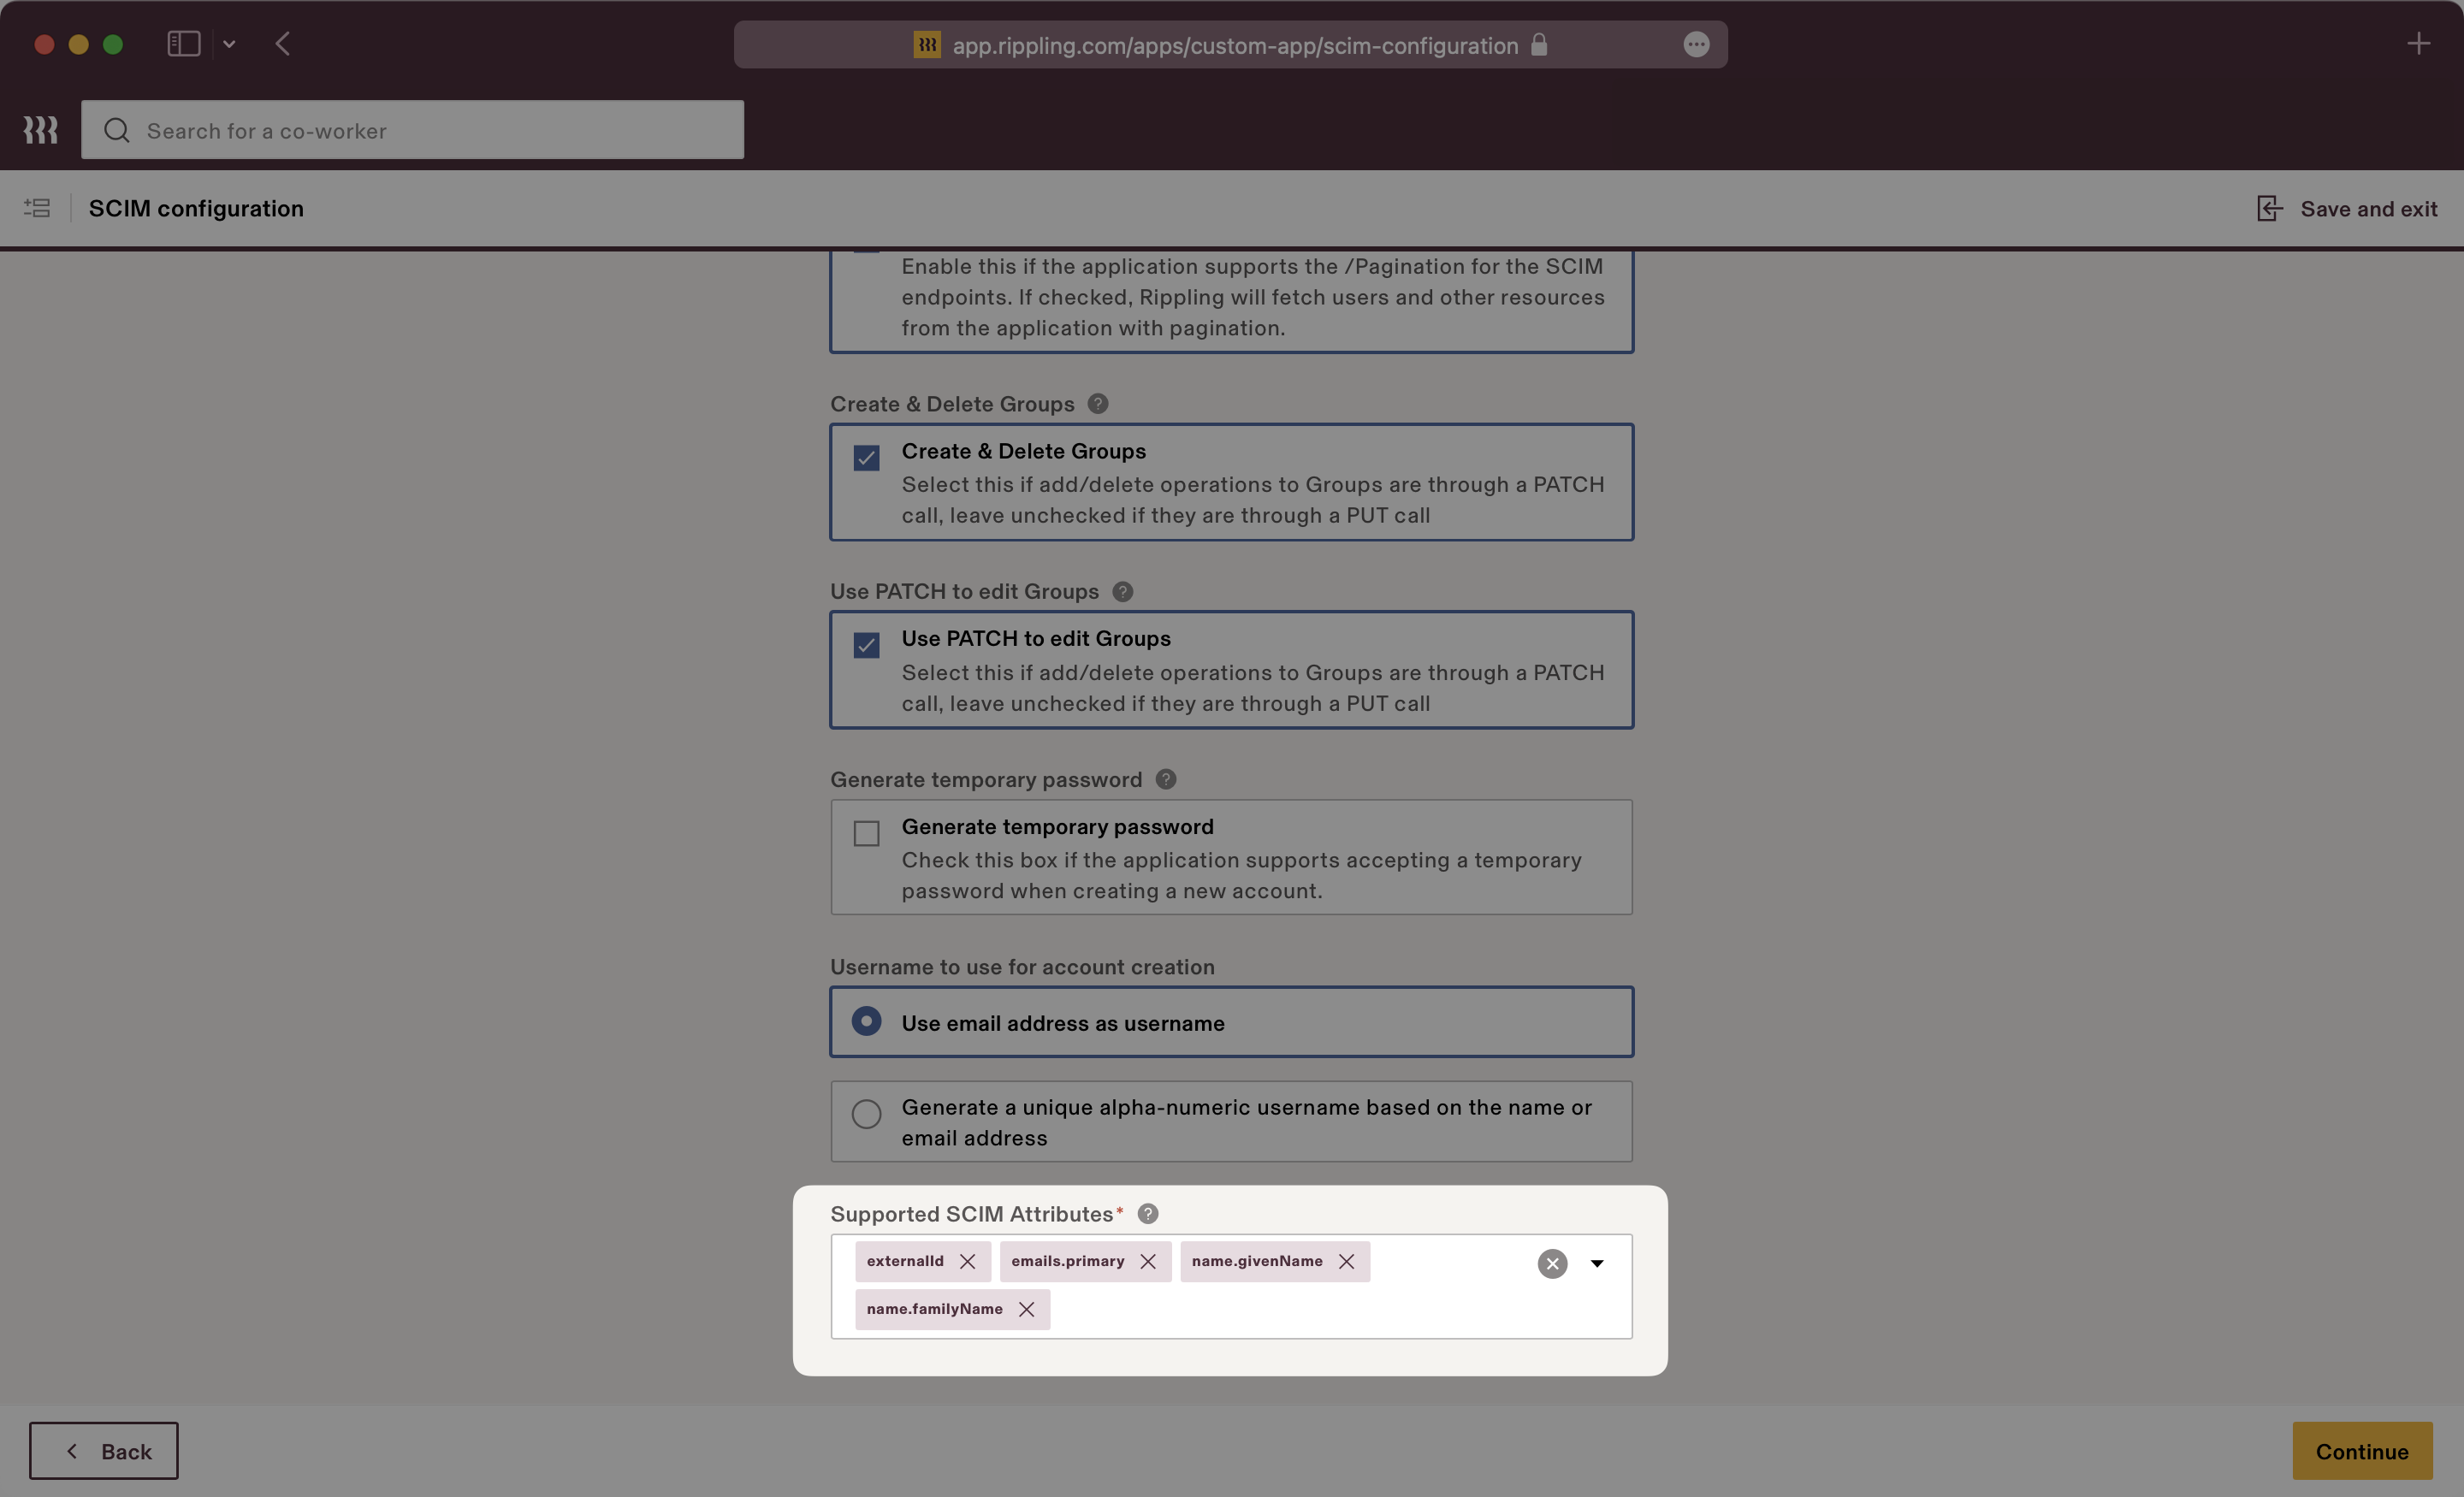
Set the SCIM version to 2.0.
Fill in the endpoint into the “SCIM Base URL” field.
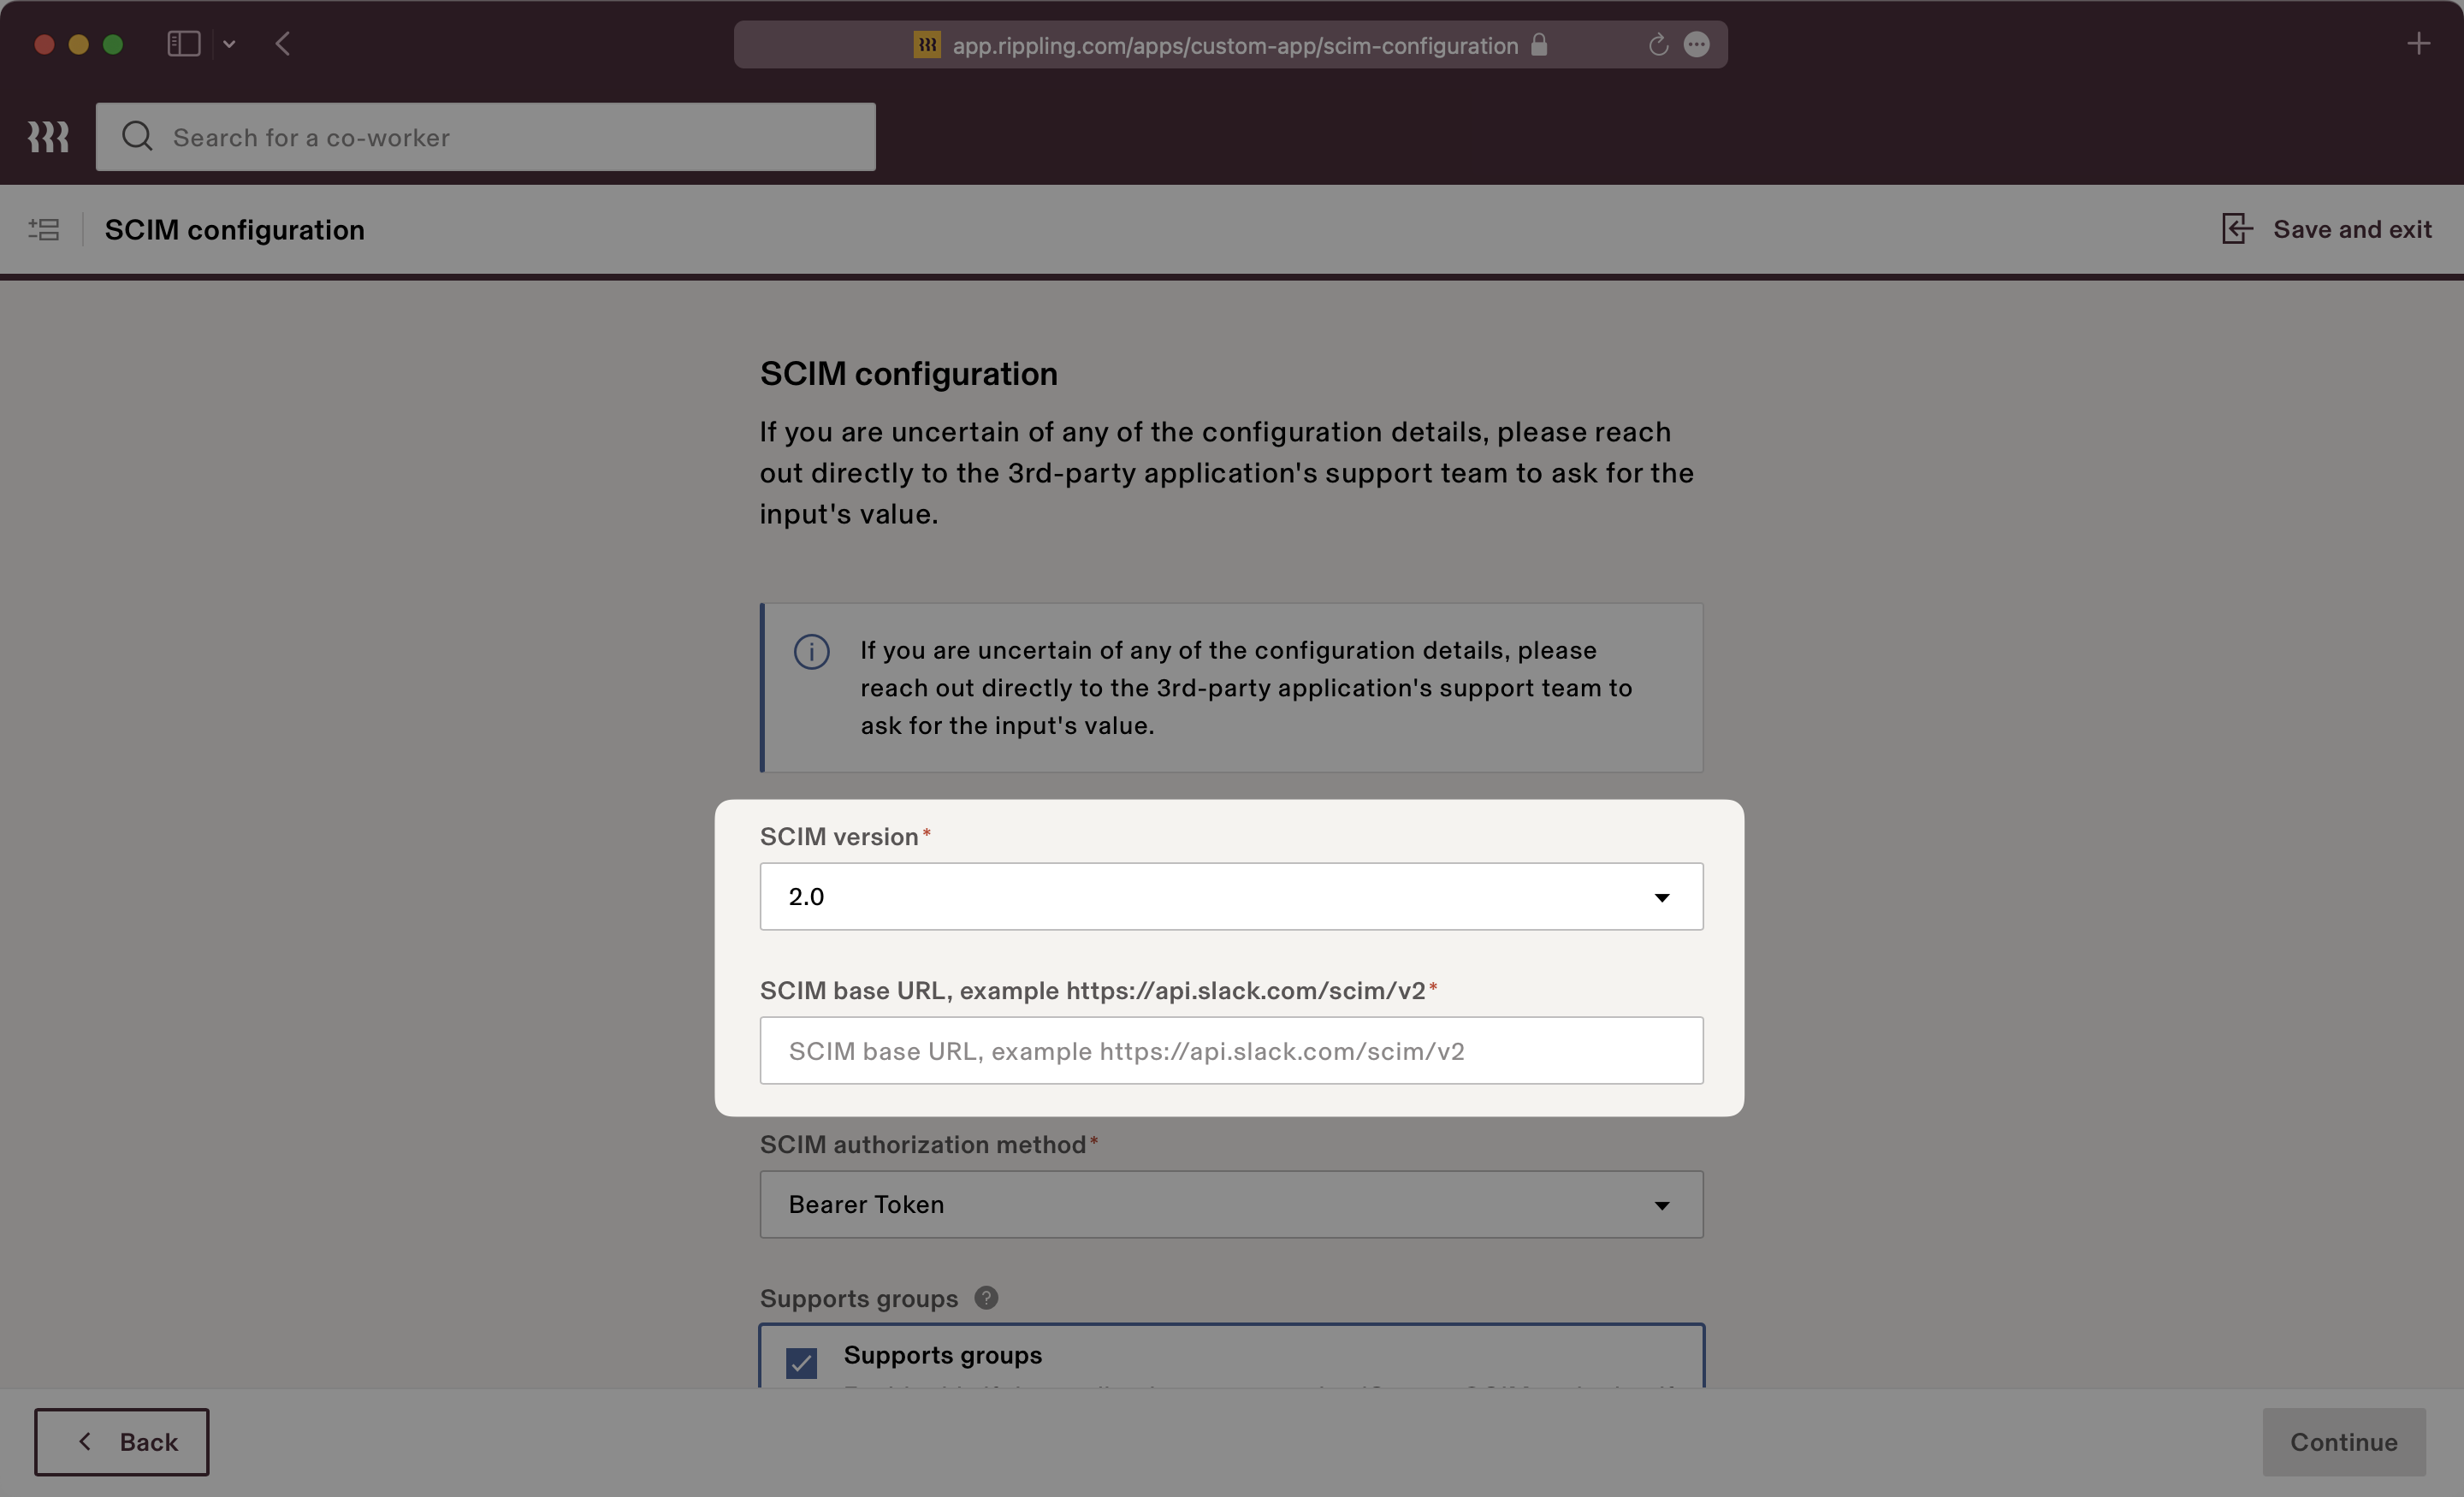
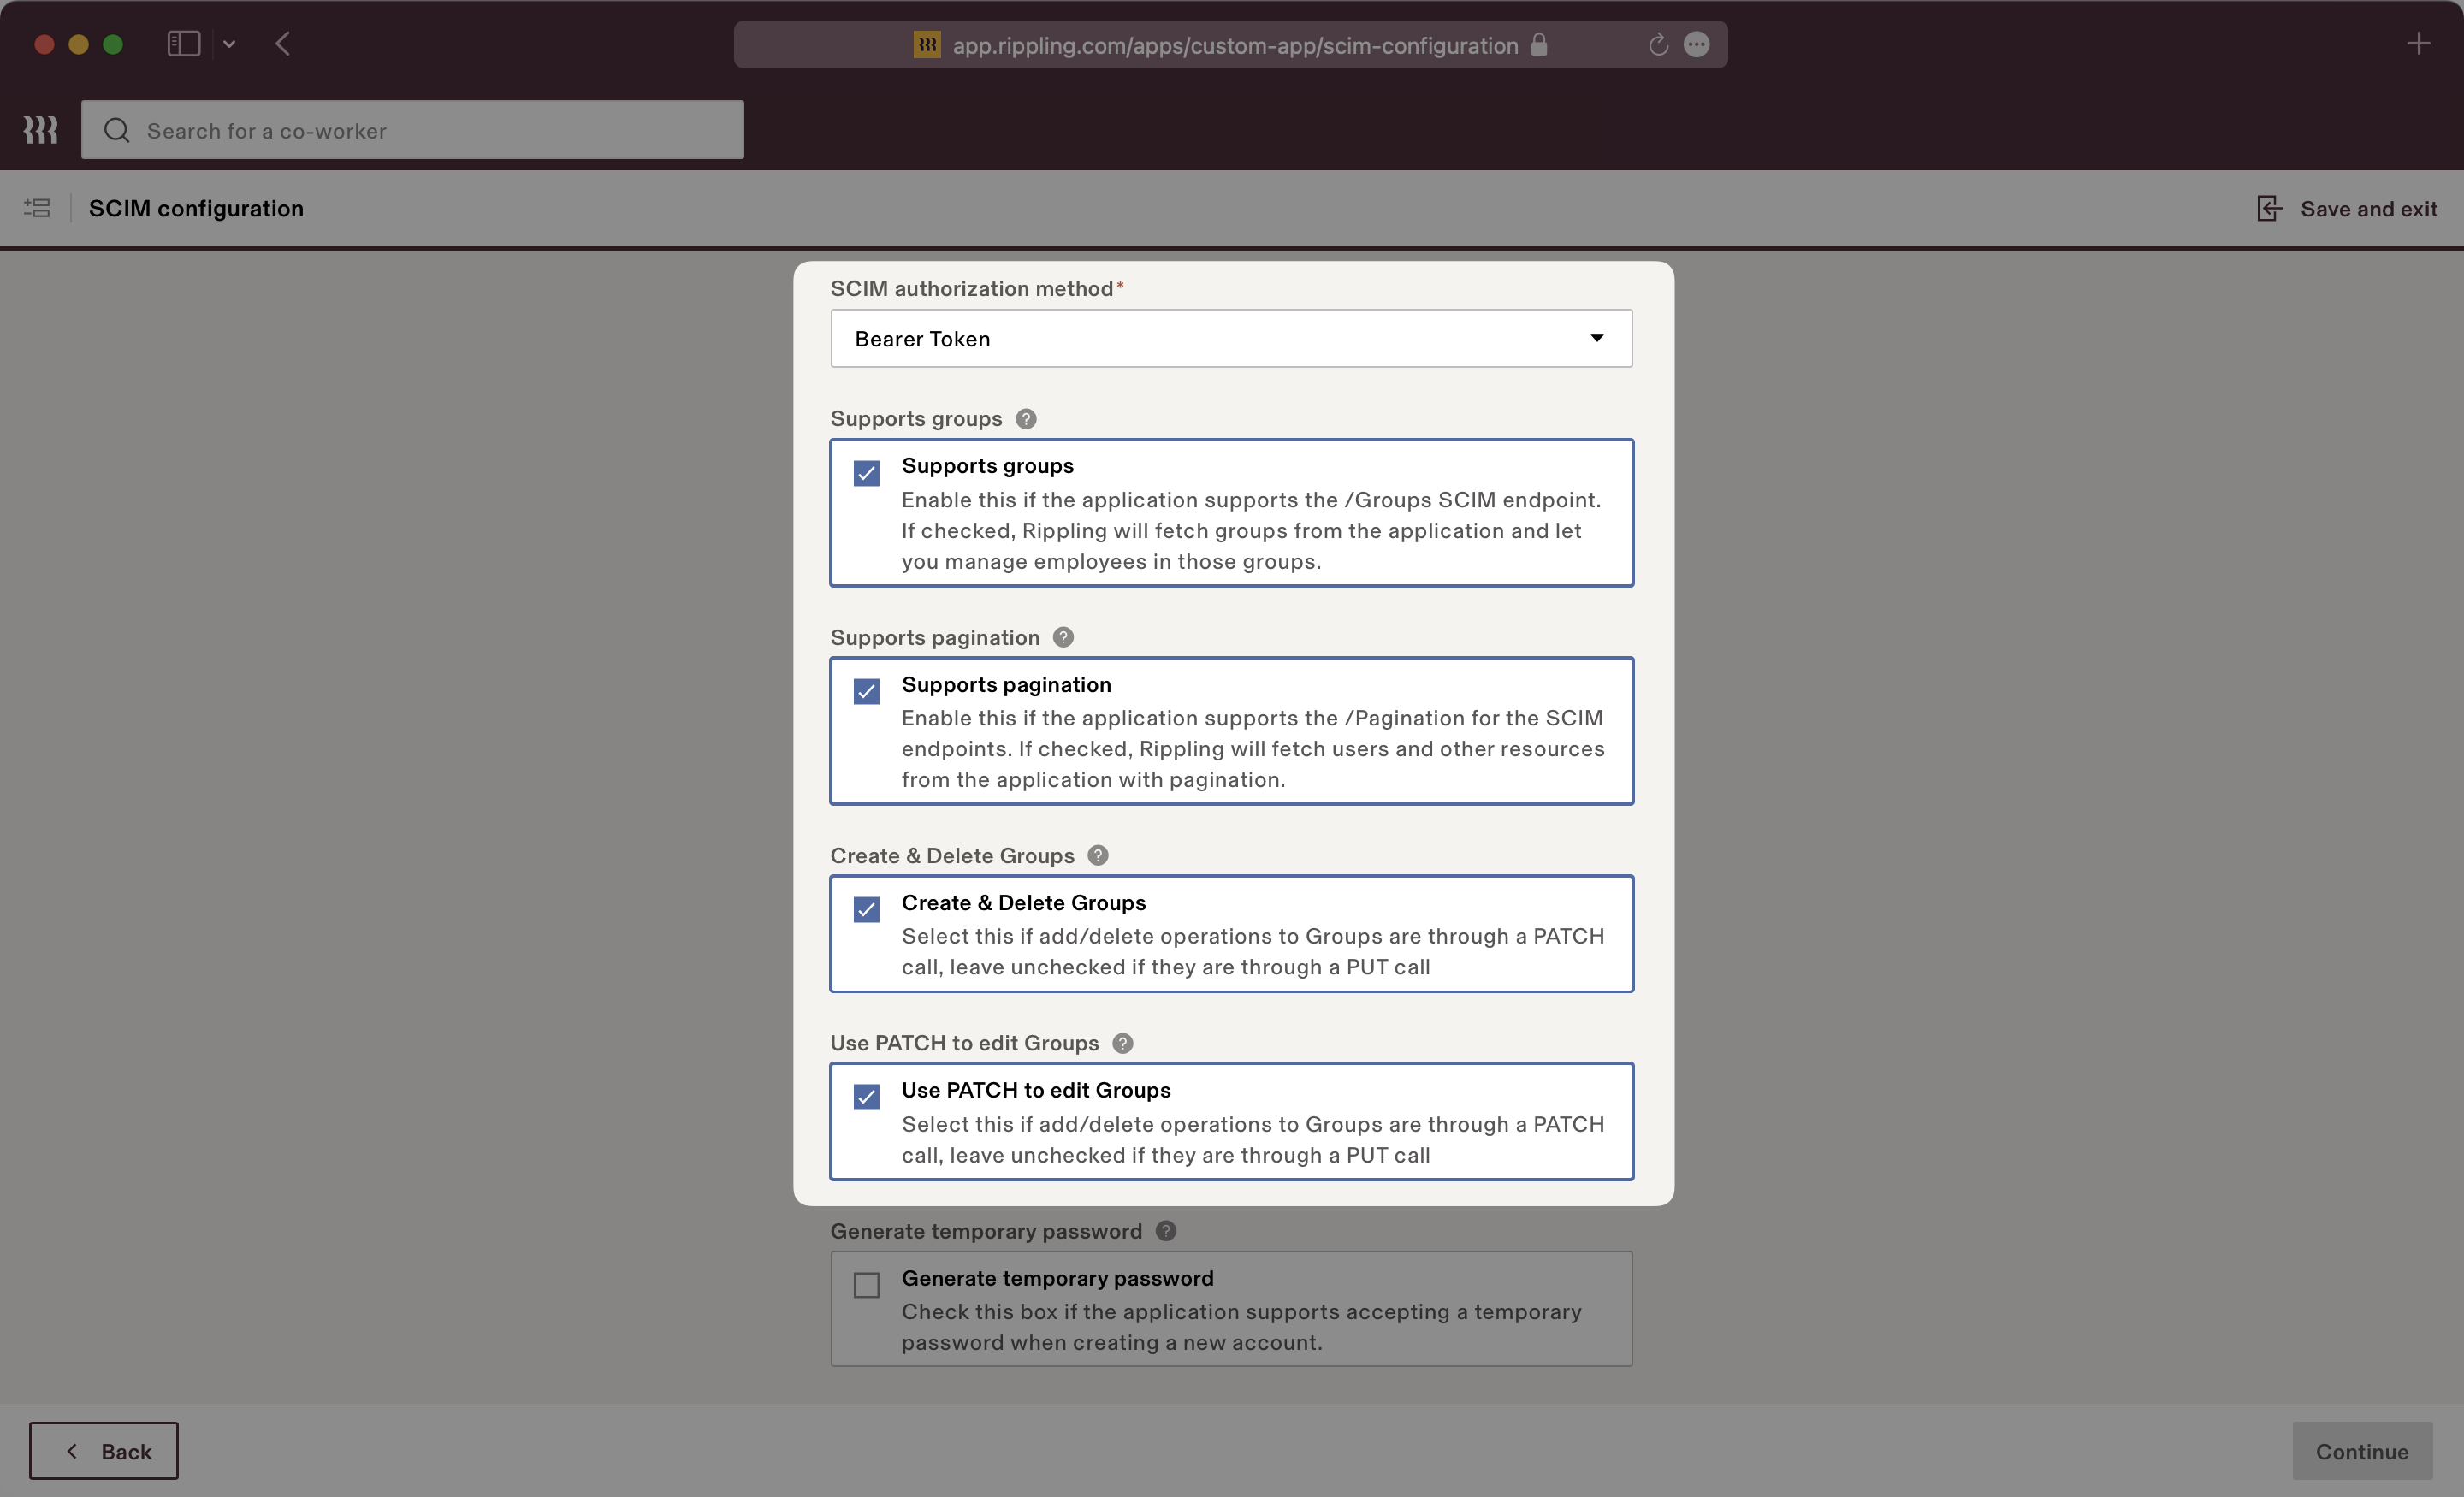
Set the SCIM authorization method to “Bearer Token” in the “SCIM Authorization Method” dropdown list. Check off features for groups, pagination, delete groups and PATCH groups.
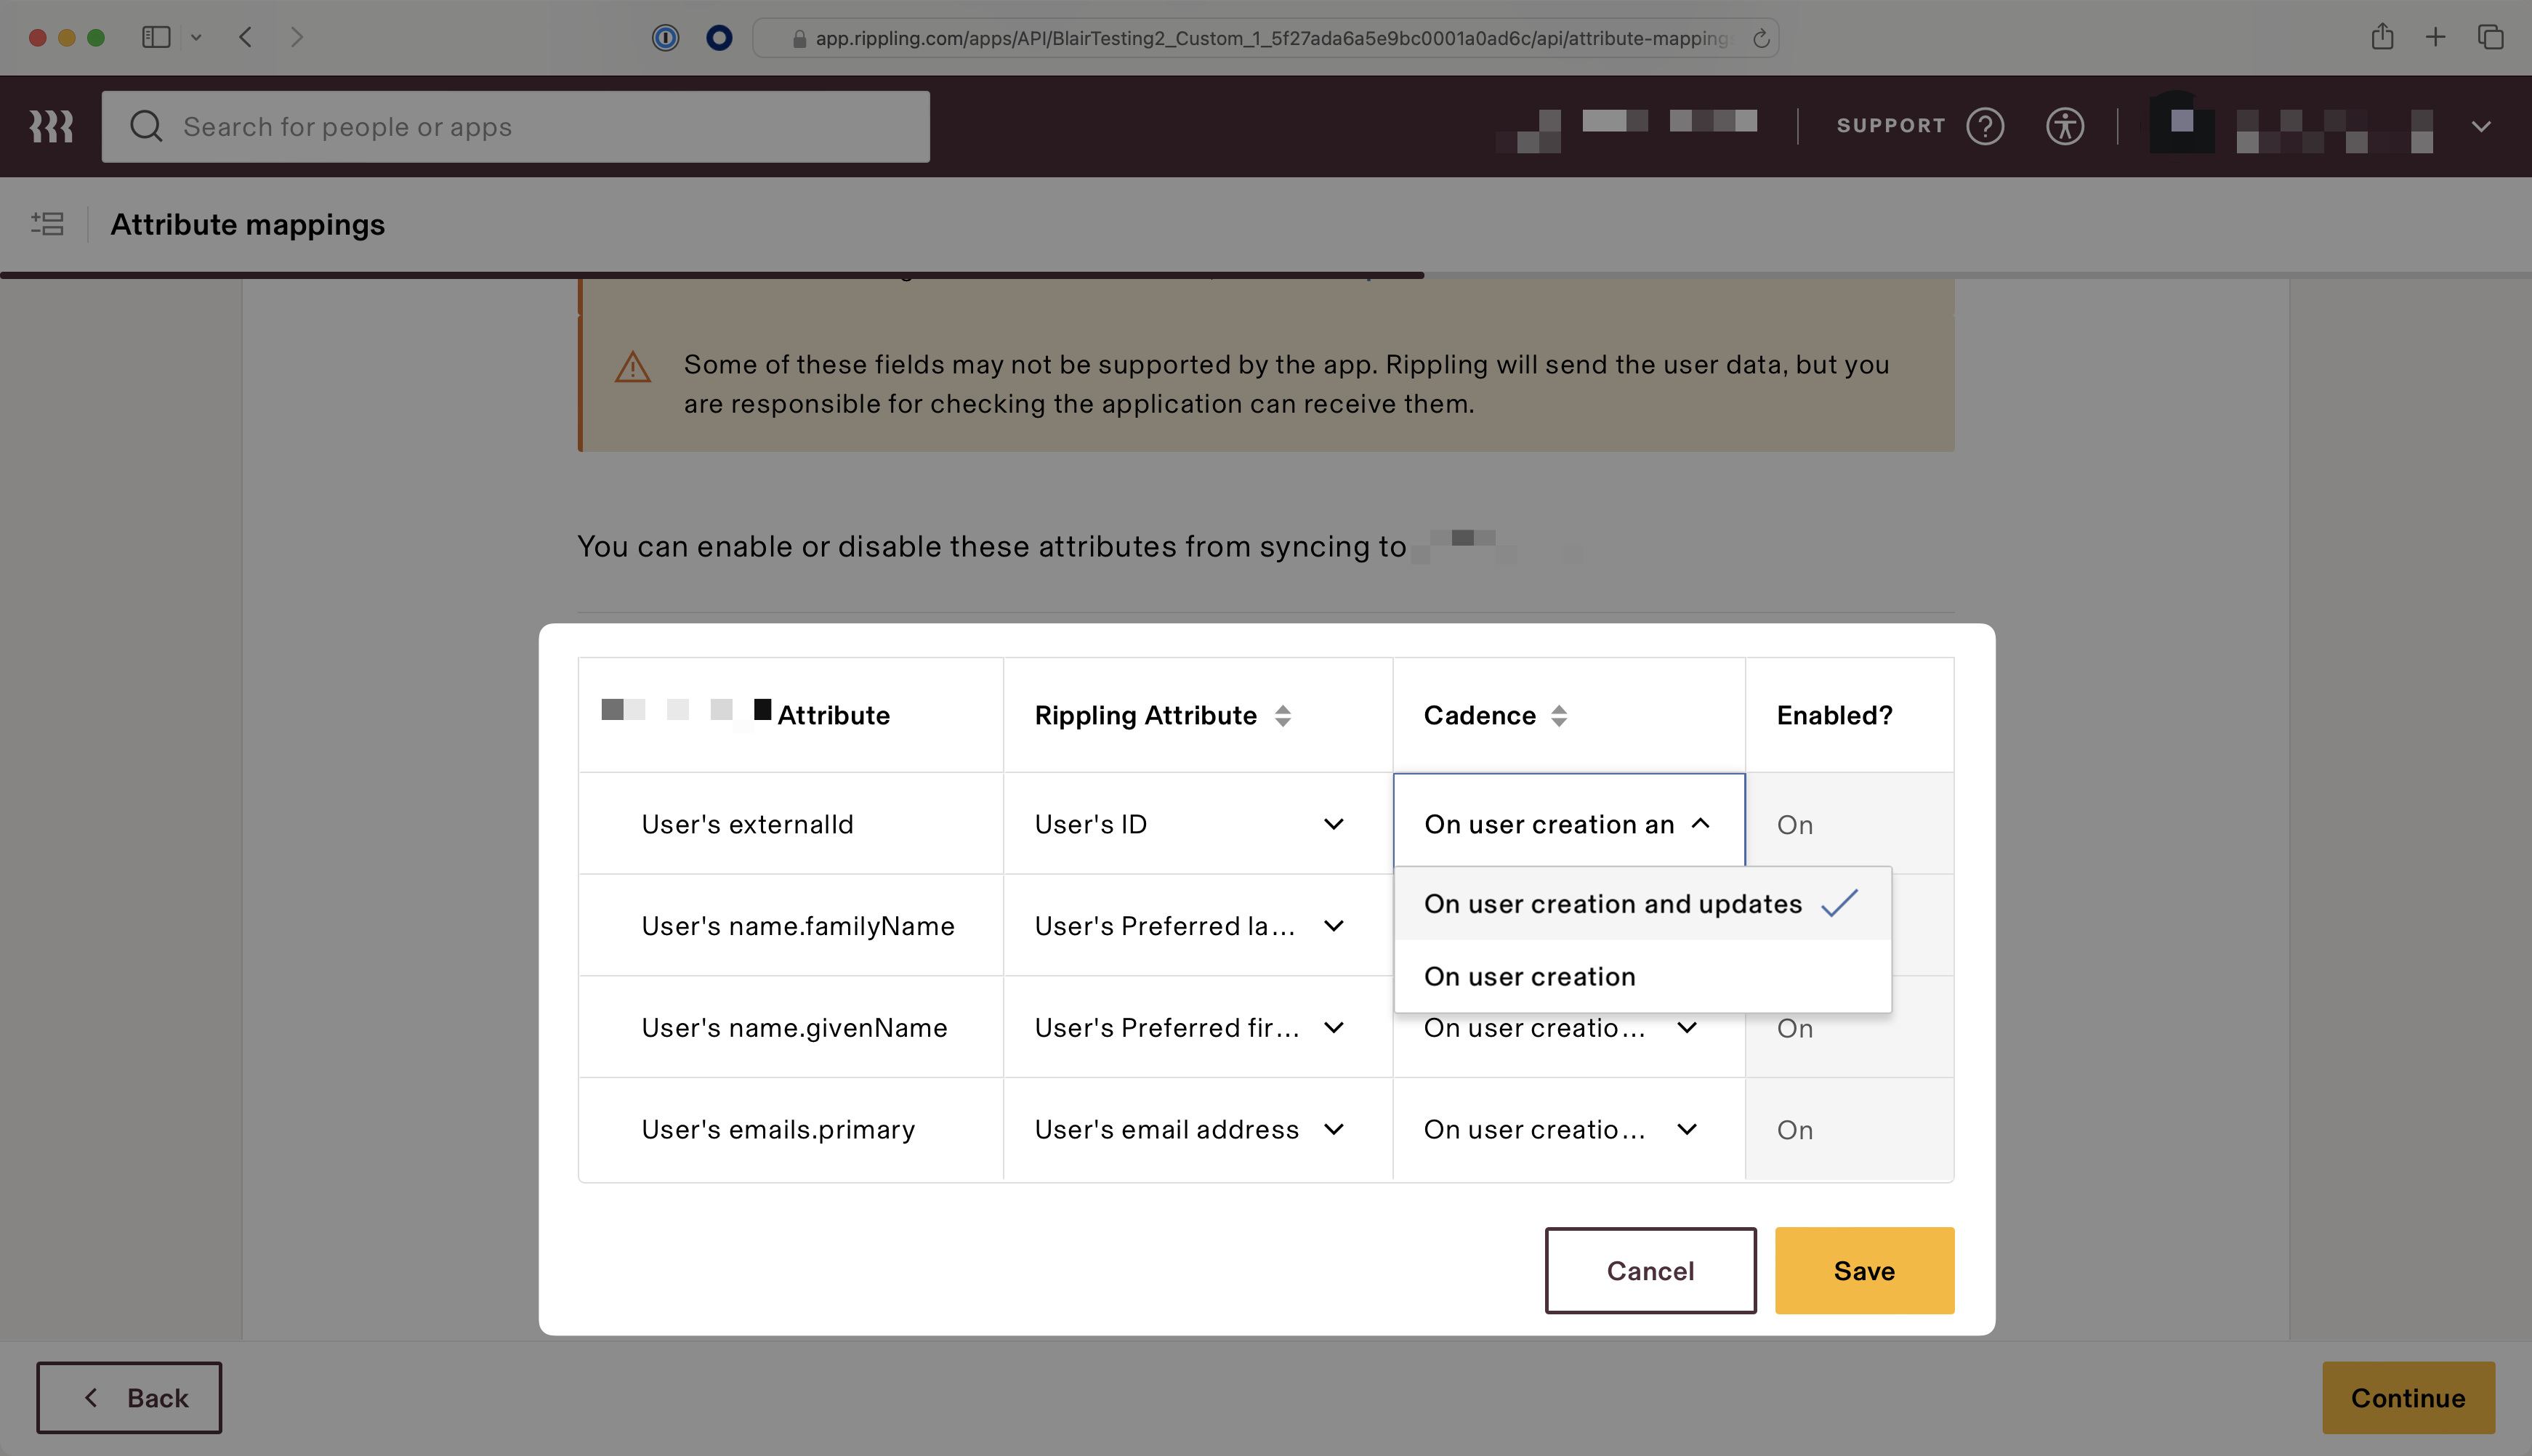
Add SCIM attributes externalId, emails.primary, name.givenName, name.familyName to the “Supported SCIM Attributes” input box. If you have additional custom attributes, add the appropriate corresponding Rippling values of the custom attributes. Click “Continue” to move to the next step.
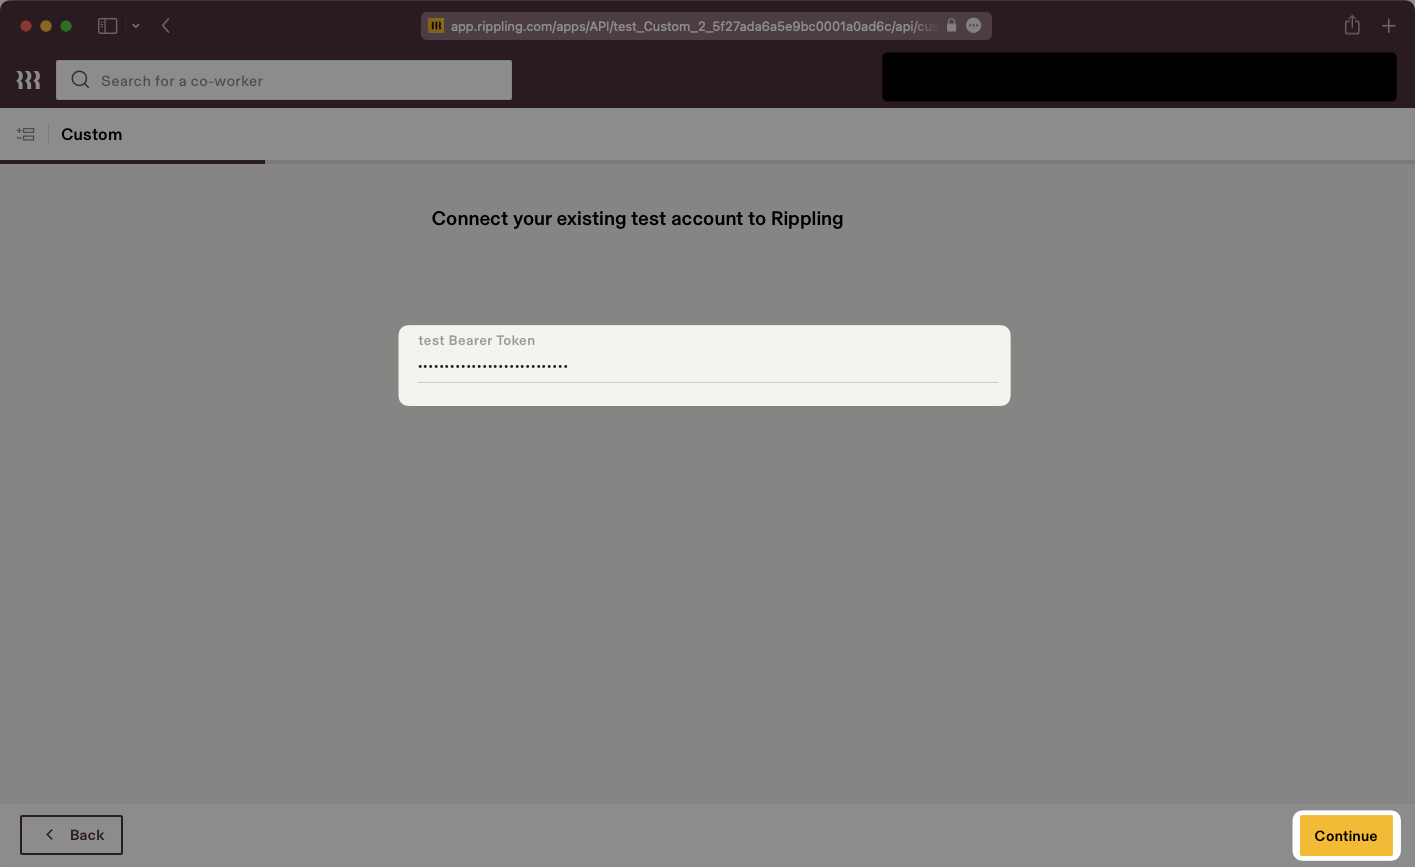
Rippling will then prompt you to install the app. Click “Install now” and proceed through the next step. Then, copy and paste the Bearer Token into the “Bearer Token” field and click “Continue”.
After entering the Bearer Token, the following two pages “App Access Rules” and “Provision Time”, can be filled out by your own preference. You should then arrive at the “Account Matching” page.
In order for your users and groups to be synced, you will need to assign them to your Rippling Application. Match the Rippling users to the account, or create a new application account for the user(s).

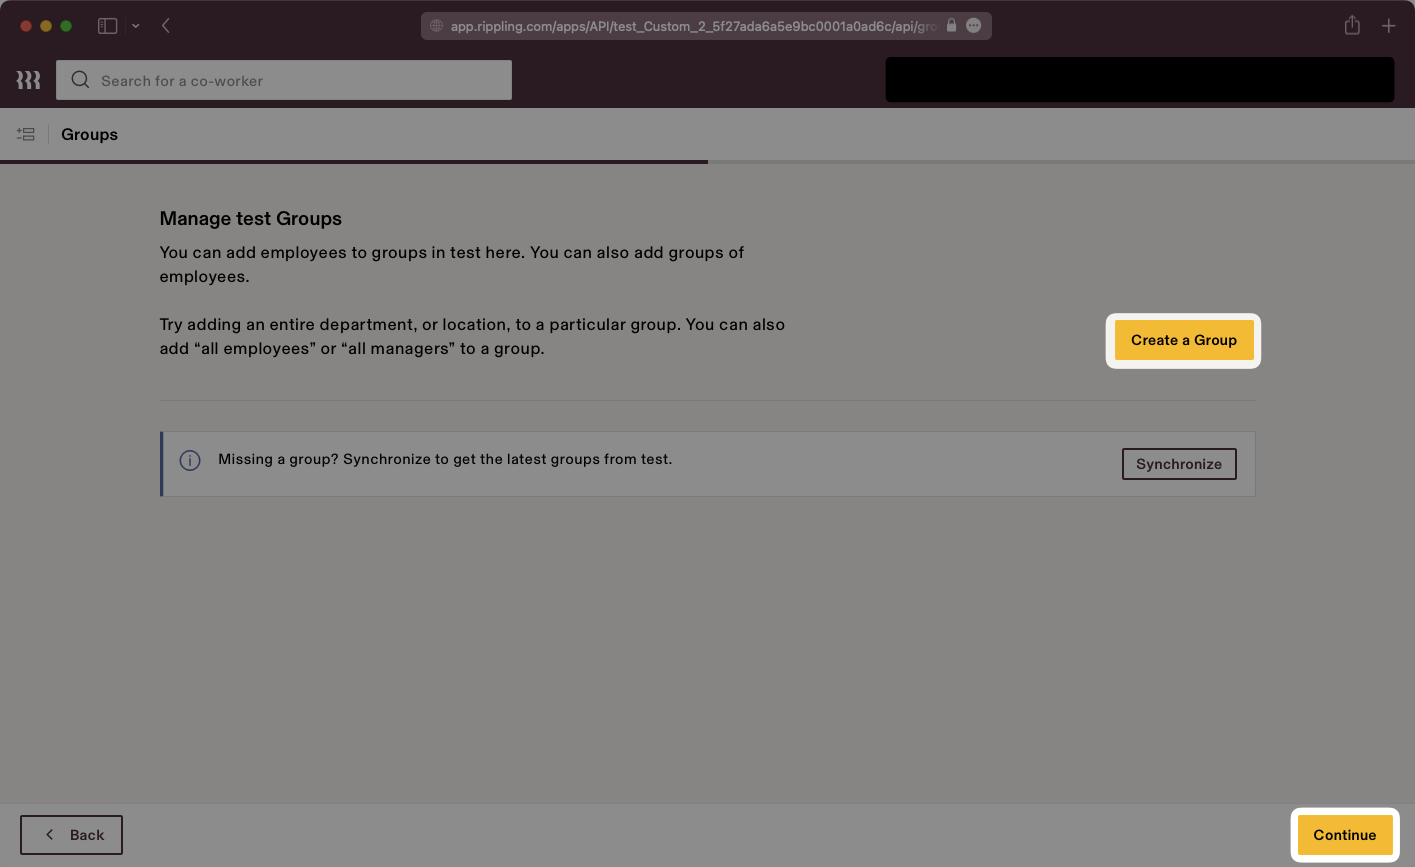
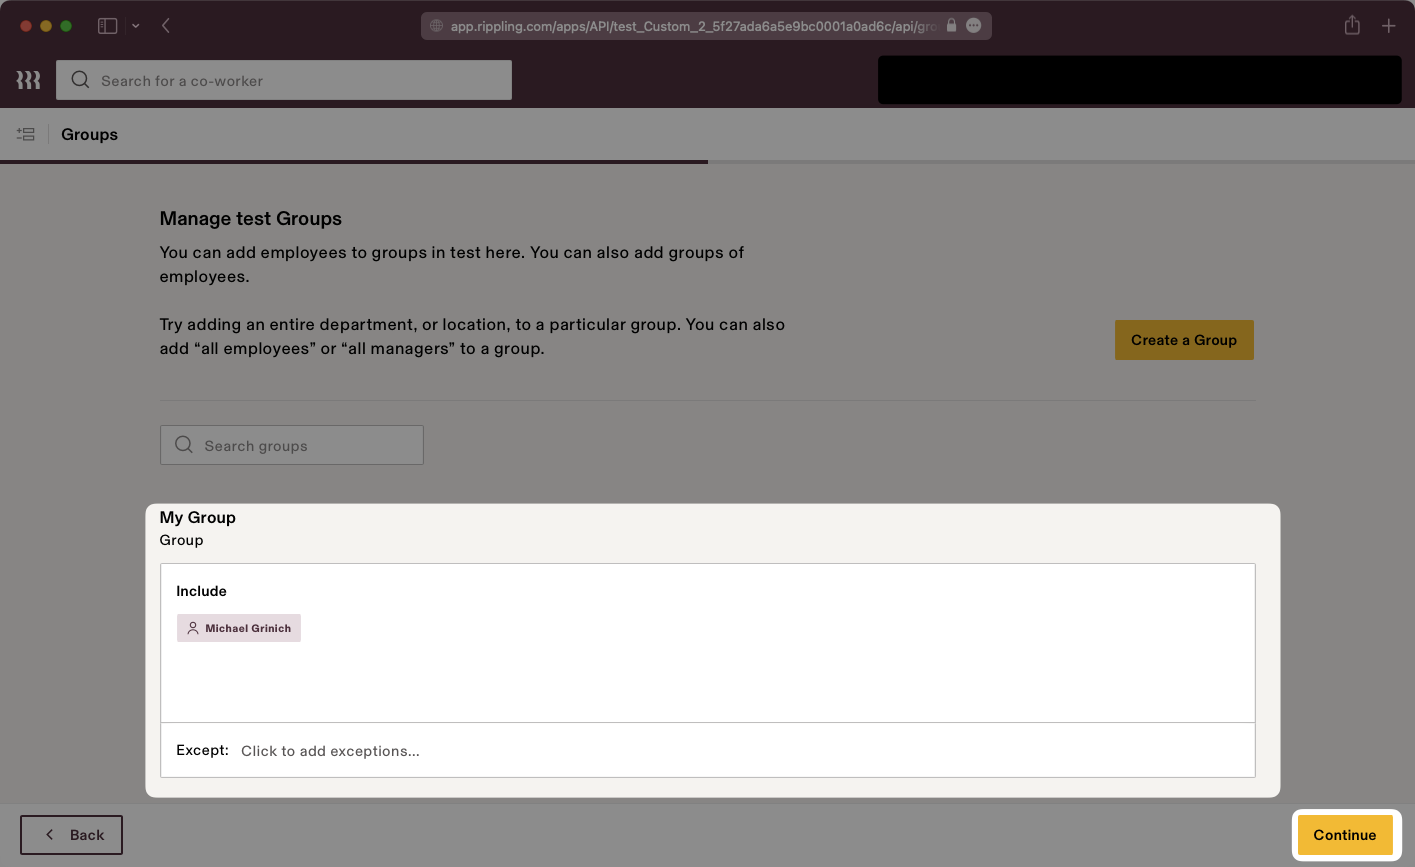
Create groups for the application as needed.
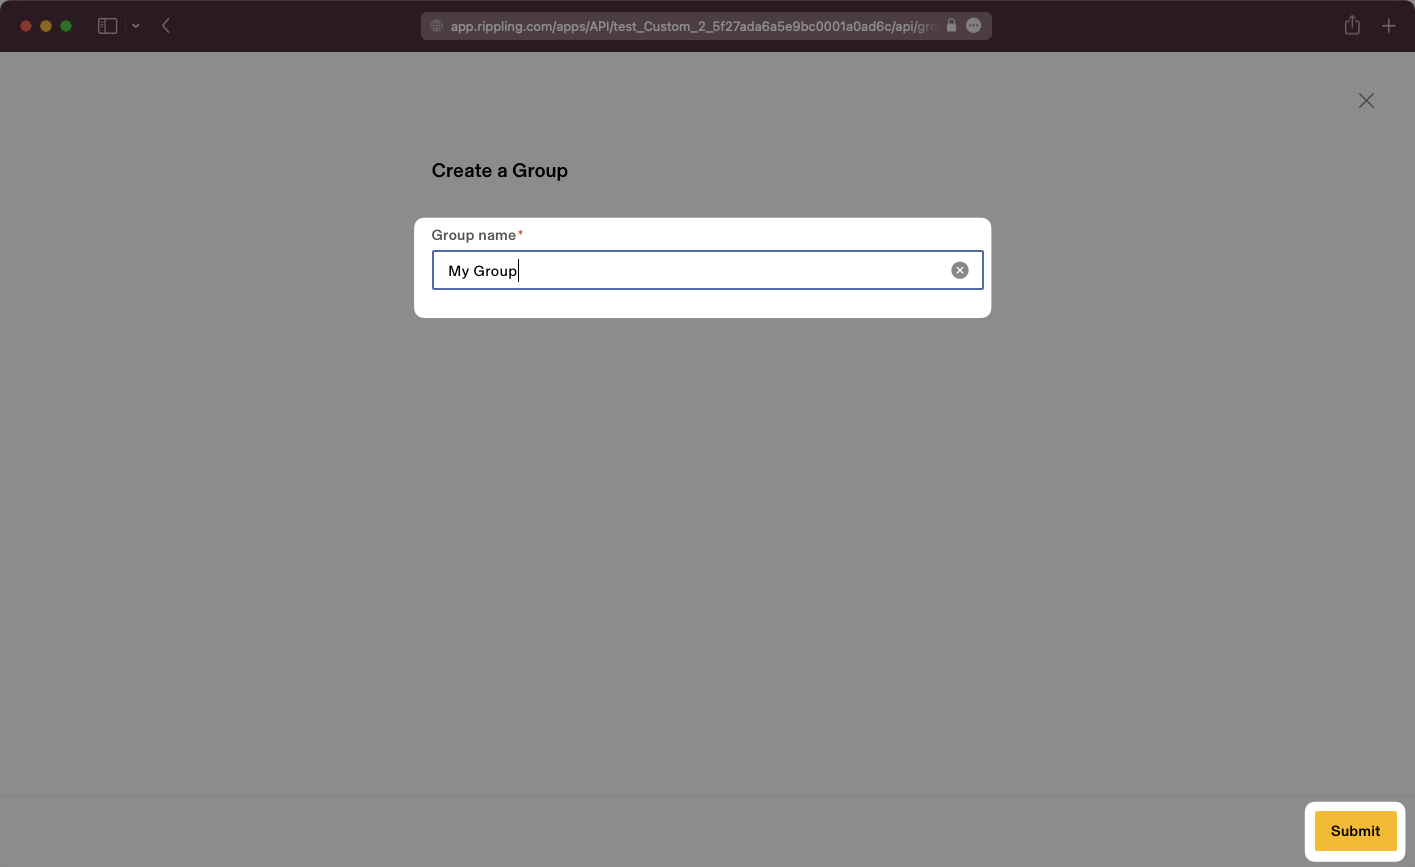
Name the group.
Assign Rippling users/groups to the newly created application group.
Make sure all attributes previously added are enabled, and that their cadence is set to “On user creation and updates”. Then, click “Save” and “Continue” to finish setup.
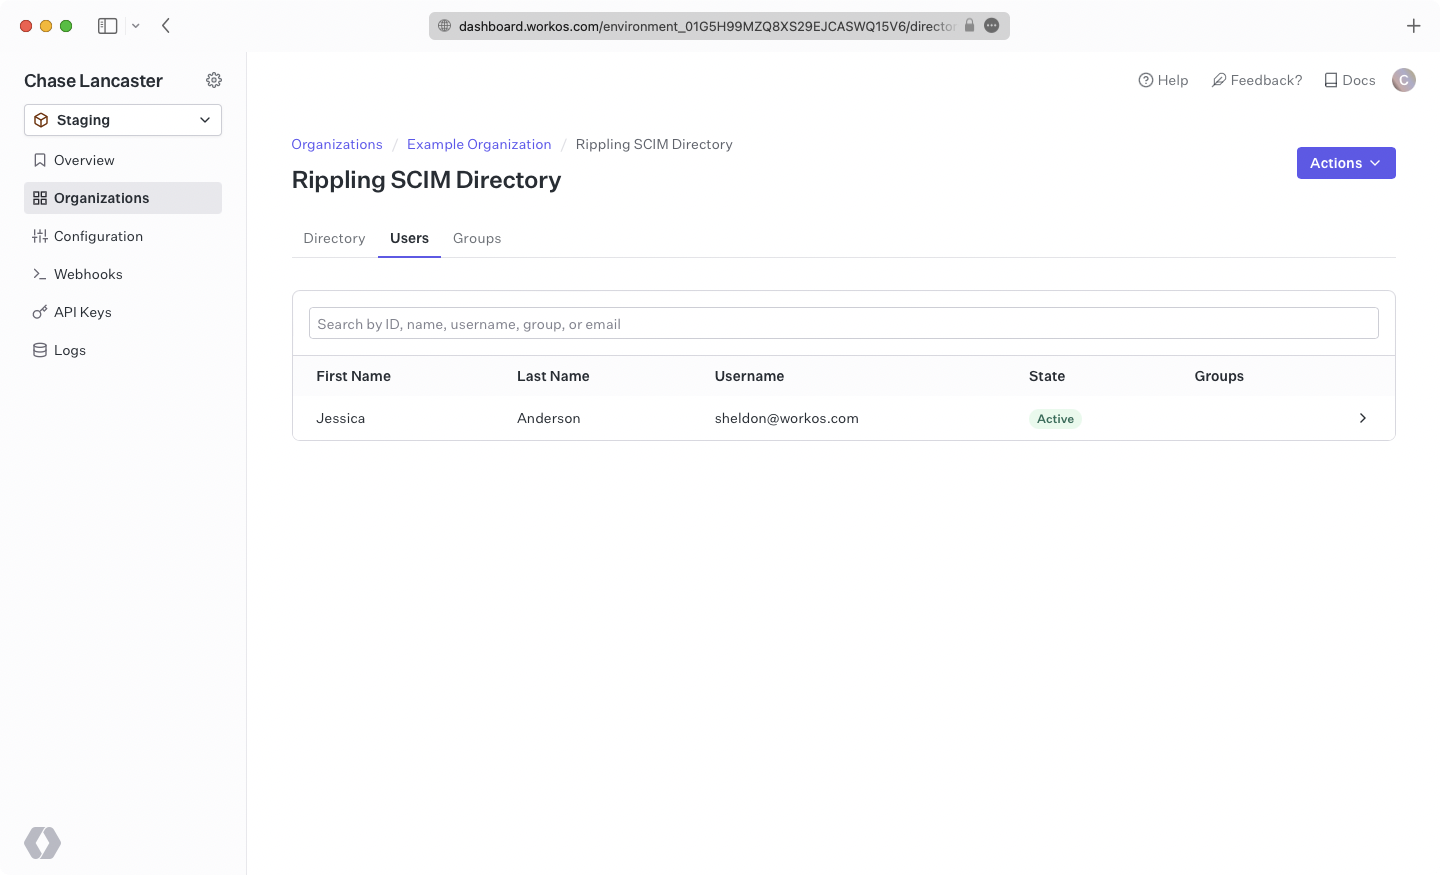
In your WorkOS dashboard, you should now see the users and groups synced over.
A detailed guide to integrate the WorkOS API with your application can be found here
Can I add additional custom fields to this SCIM integration?
Yes, however Rippling allows only a limited set of custom fields in SCIM applications.
addresses.home.countryaddresses.home.formattedaddresses.home.localityaddresses.home.postalCodeaddresses.home.regionaddresses.home.streetAddressaddresses.work.countryaddresses.work.formattedaddresses.work.localityaddresses.work.postalCodeaddresses.work.regionaddresses.work.streetAddressdepartmentdisplayNameemails.primaryemployeeNumberexternalIdmanager.displayNamemanager.emailmanager.managerIdname.familyNamename.formattedname.givenNamephoneNumbers.mobilephoneNumbers.workphotos.phototitleuserType