Salesforce SAML
Learn how to configure a connection to Salesforce via SAML.
Each SSO Identity Provider requires specific information to create and configure a new connection. And often, the information required to create a connection will differ by Identity Provider.
To create an Salesforce SAML connection, you’ll need three pieces of information: an ACS URL, an SP Entity ID, and a Metadata URL.
WorkOS provides the ACS URL and SP Entity ID. It’s readily available in your Connection Settings in the WorkOS dashboard.
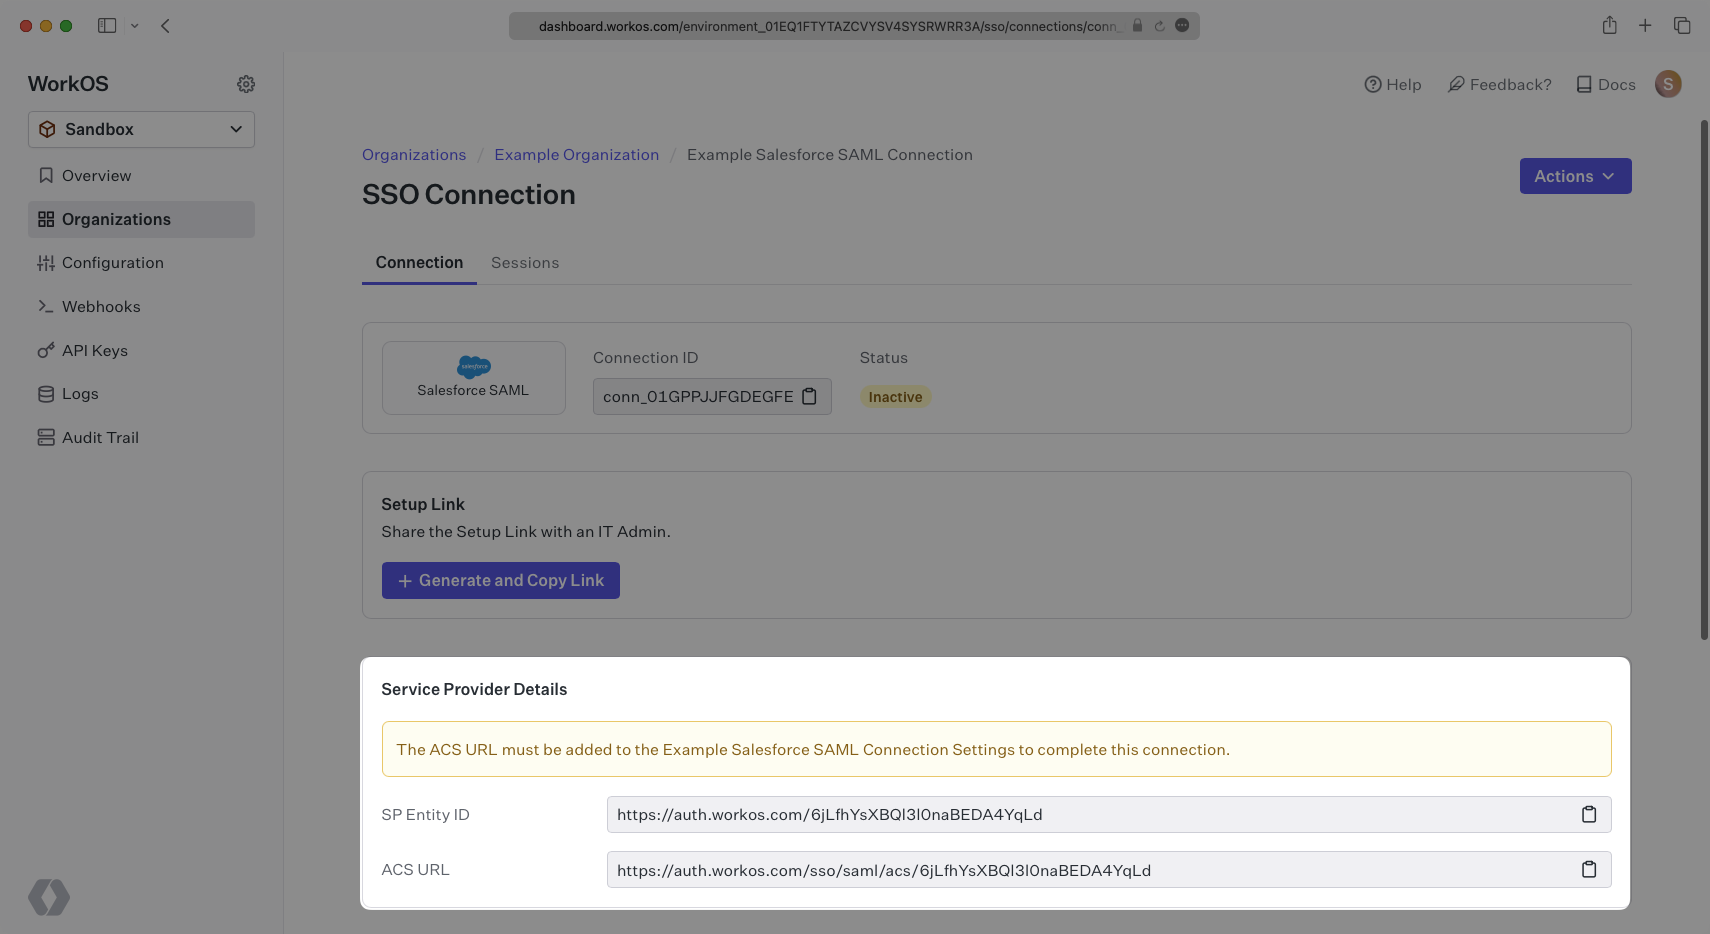
The ACS URL is the location an Identity Provider redirects its authentication response to. In Salesforce’s case, it needs to be set by the organization when configuring Salesforce as an Identity Provider.
The Entity ID is a URI used to identify the issuer of a SAML request, response, or assertion. In this case, the entity ID is used to communicate that WorkOS will be the party performing SAML requests to the organization’s Salesforce instance.
Specifically, the ACS URL and SP Entity ID will need to be set in the Connected Apps setup in Salesforce.
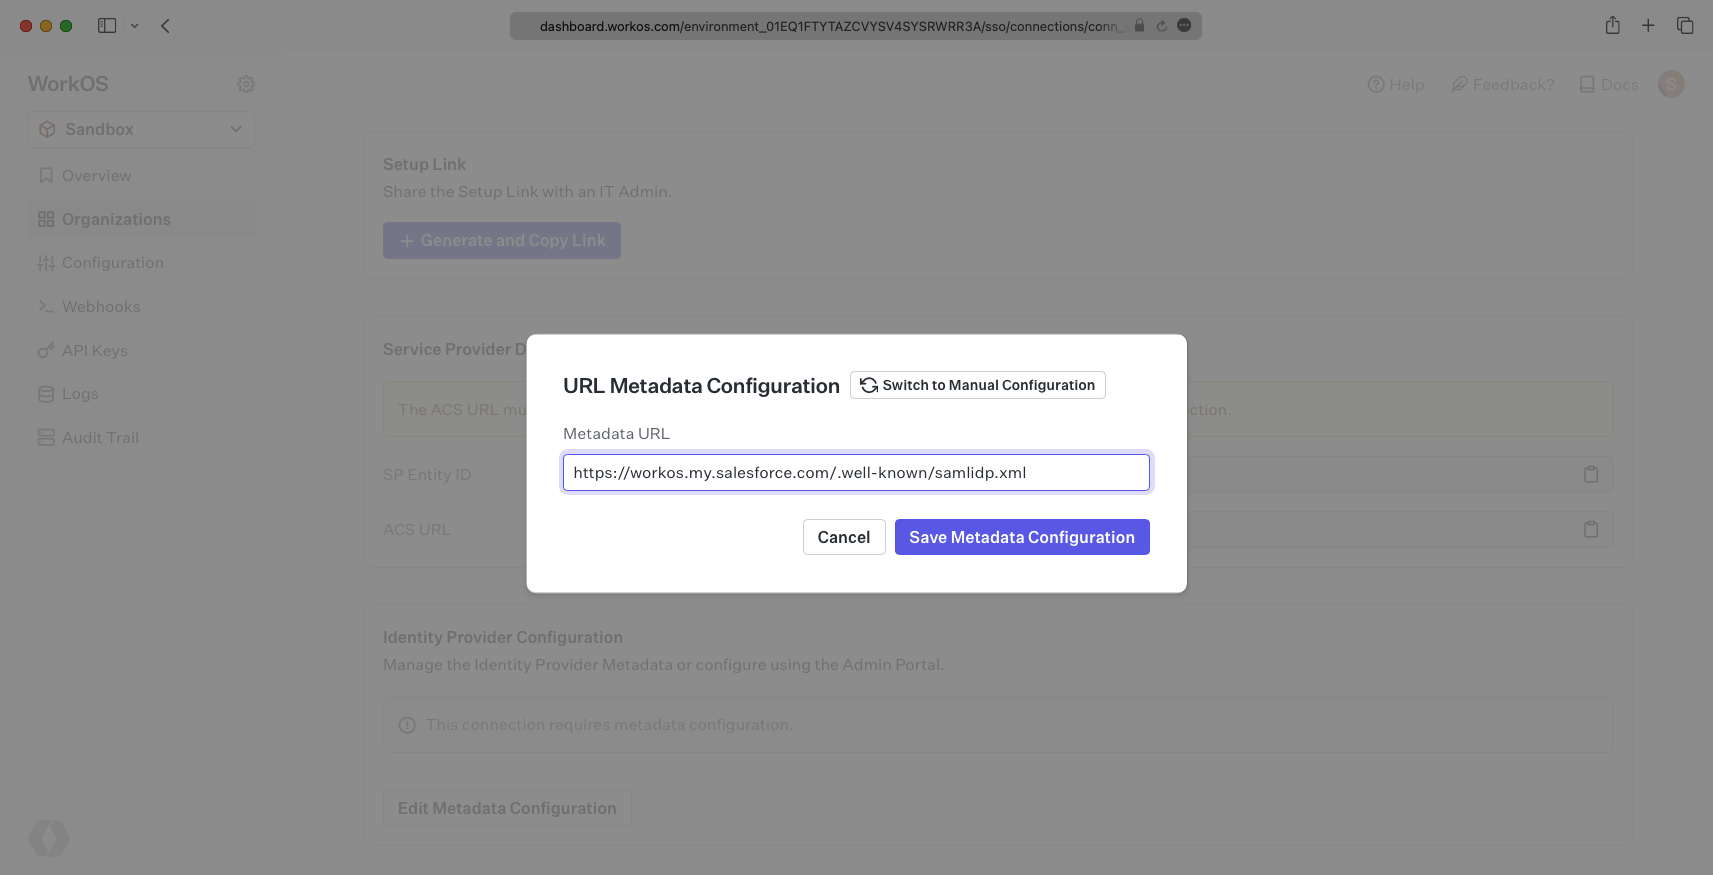
In order to integrate you’ll need the Salesforce Metadata URL. Normally, the this will come from the organization’s IT Management team when they set up your application’s SAML client in their Salesforce instance. But, should that not be the case during your setup, here’s how to obtain it.
Log in to your Salesforce Account, click the Settings cog icon on the top right, and select “Setup”.
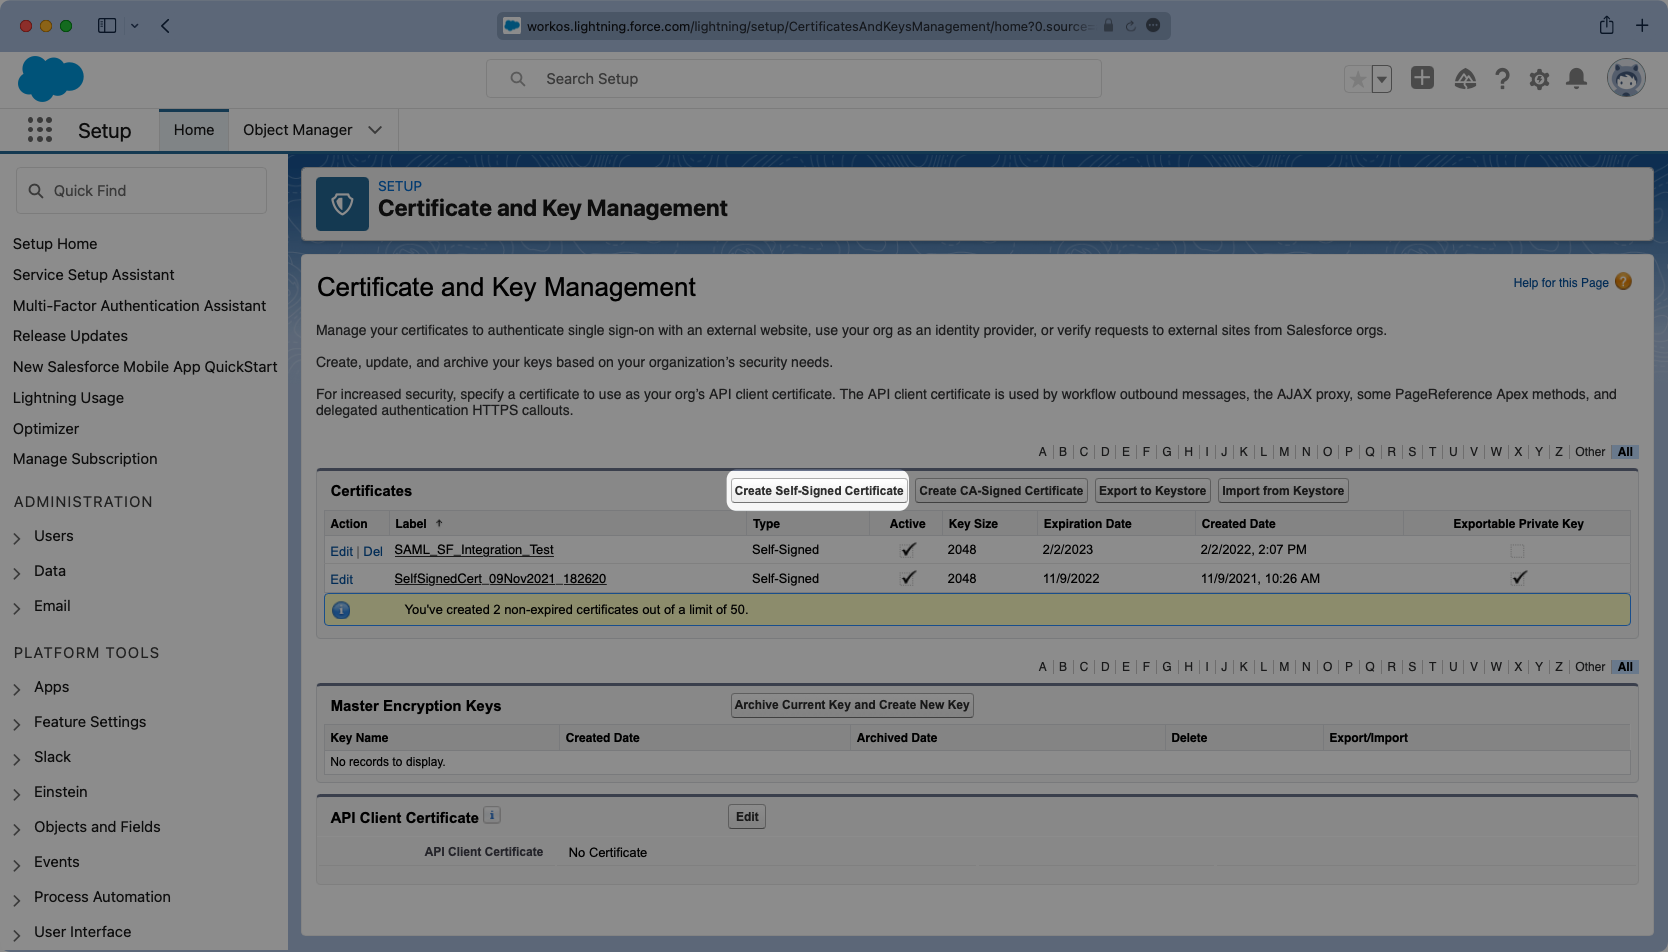
Once in setup mode you can use the search bar to easily navigate around between settings pages. The first page to navigate to is the “Certificate and Key Management” page.

Once in setup mode you can use the search bar to easily navigate around between settings pages. The first page to navigate to is the “Certificate and Key Management” page. If a key does not exist that you would like to use, click “Create Self-Signed Certificate” to generate a new one.
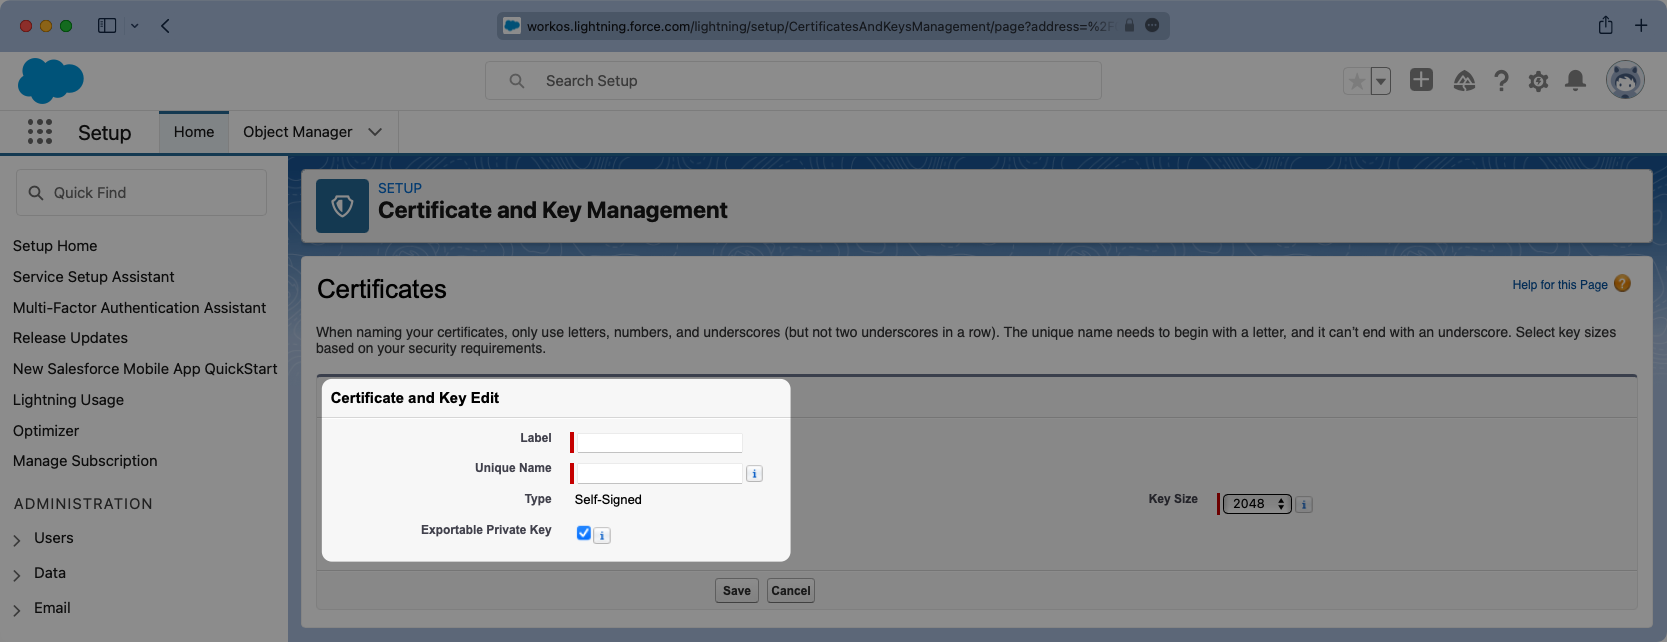
Give the Certificate a meaningful label and unique name and select the Key Size you’d like to use. It’s not necessary to have an Exportable Private Key, but if you are using a key-certificate store you can choose this option.
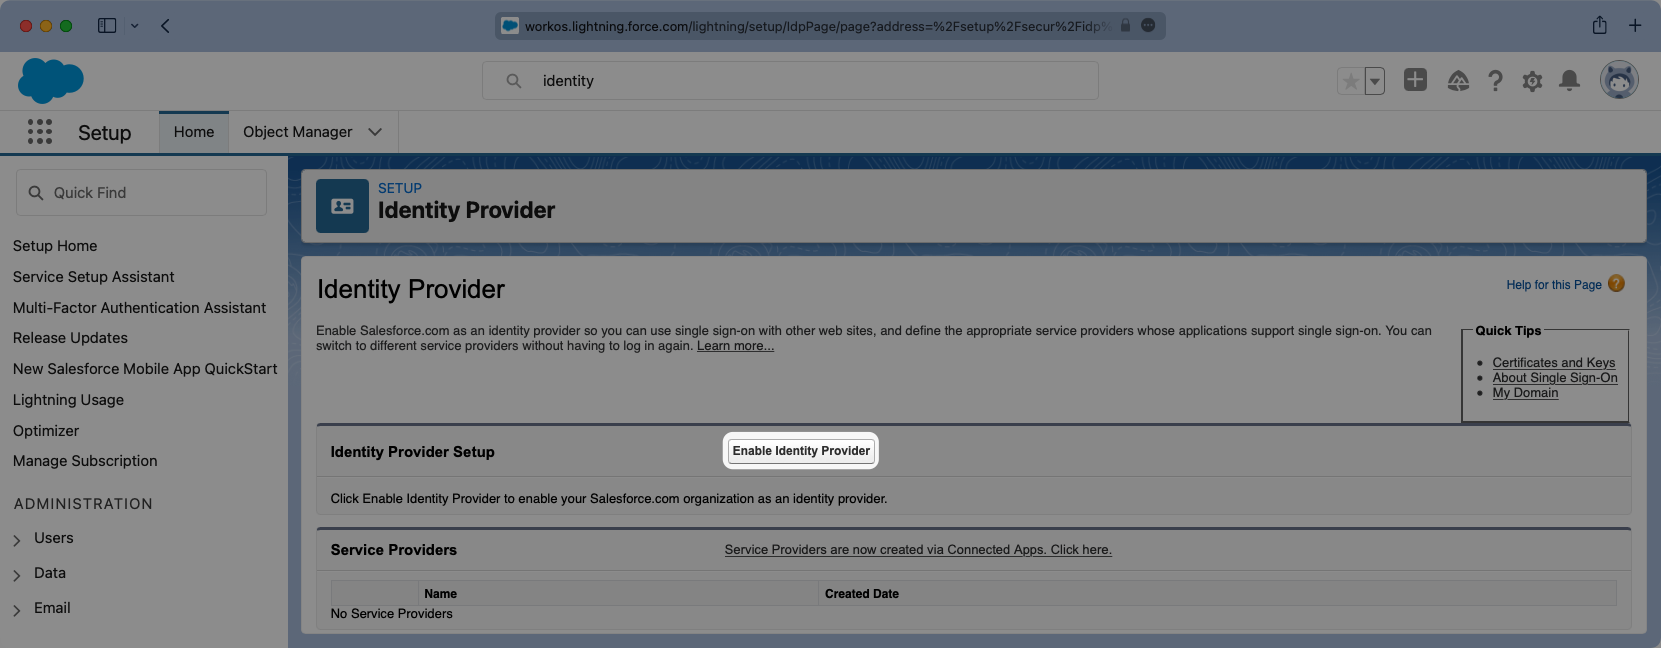
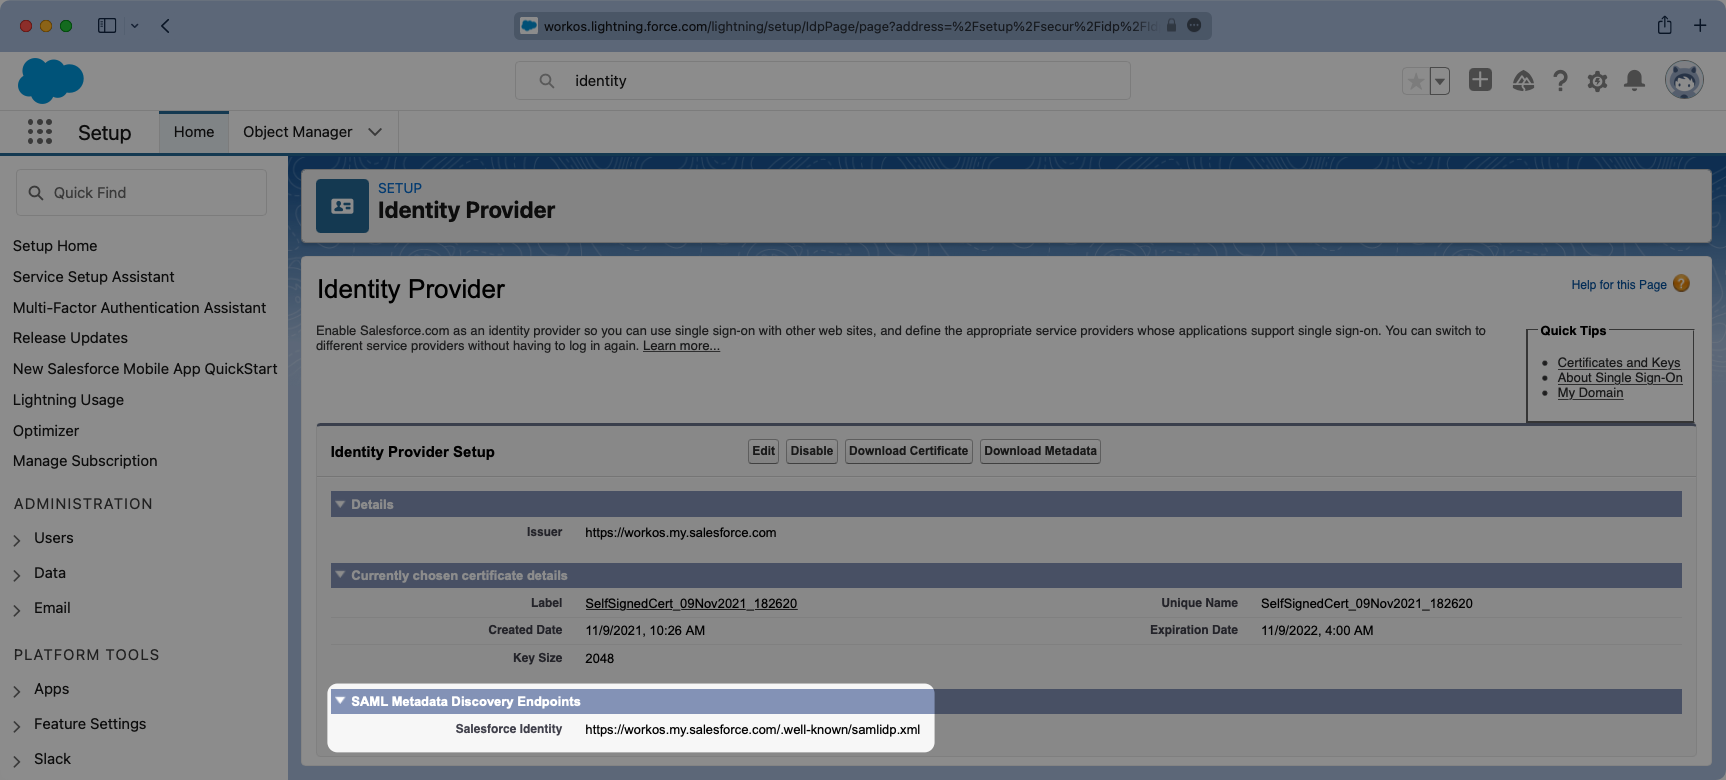
From the setup search bar browse to the “Identity Provider” portal in Salesforce.
If it has not already been done, select “Enable Identity Provider”.
You will need to select the correct certificate from the previous step.
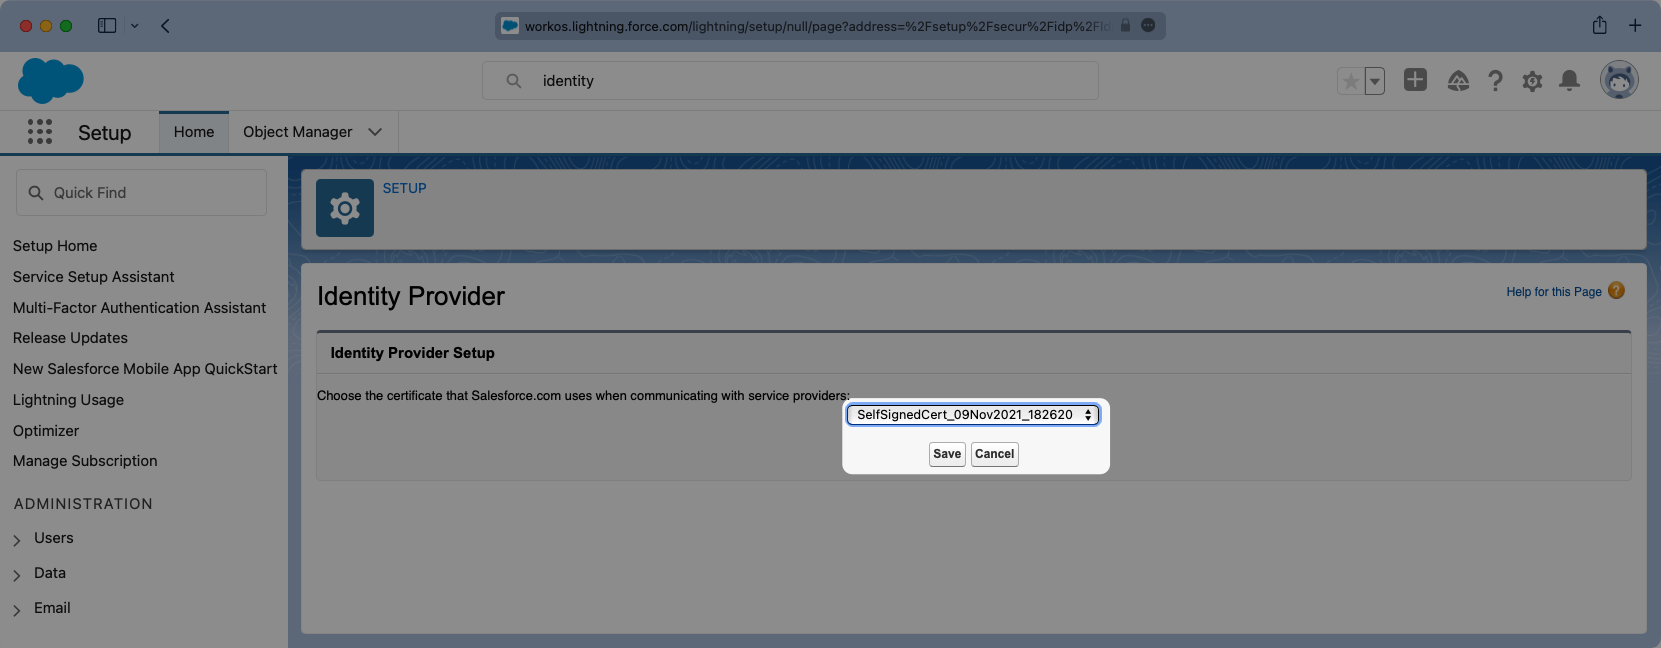
Additionally this page will display the Metadata URL. You will need to copy this URL and in a later step it will be uploaded into WorkOS.
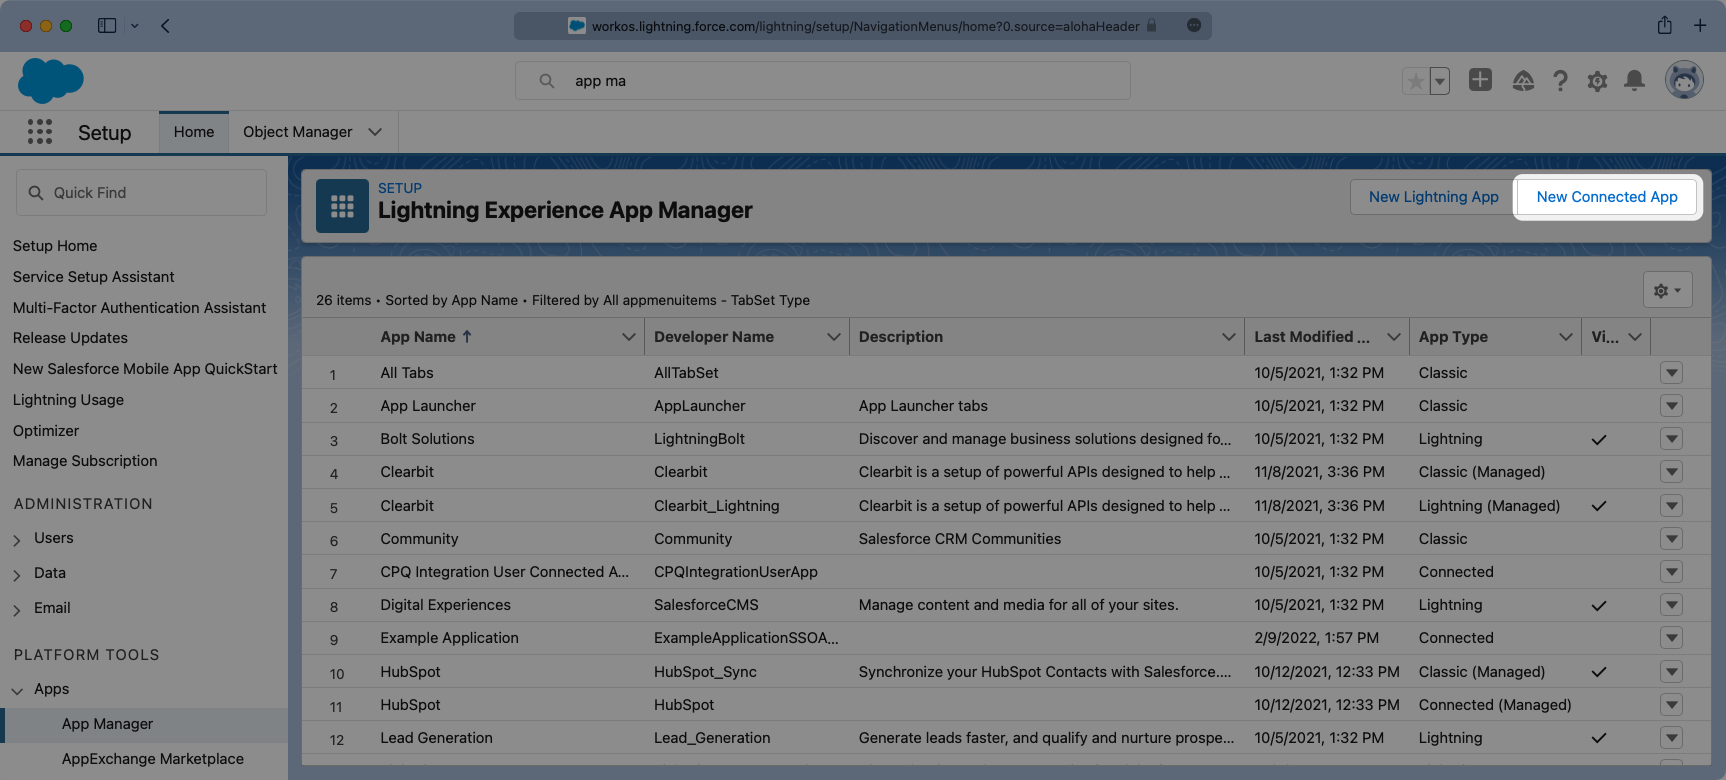
Next from the setup search bar browse to the “App Manager” portal. Once here you will want to select the option for “New Connected App”.
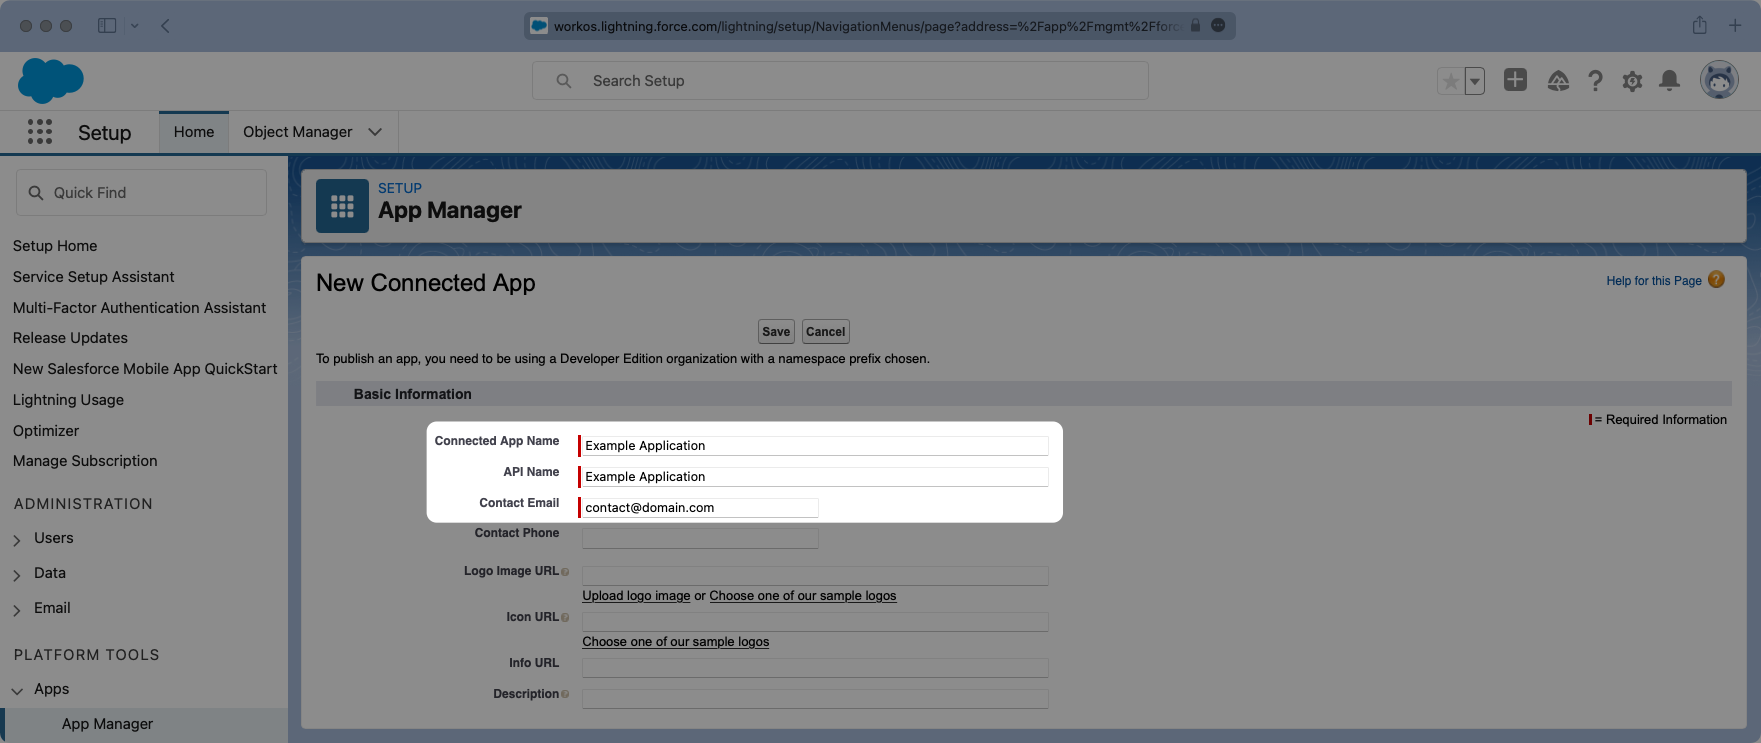
Give the App and API a meaningful name and set a contact email that corresponds to who you’d reach out to for support should there be an issue. You can always opt to use support@workos.com.
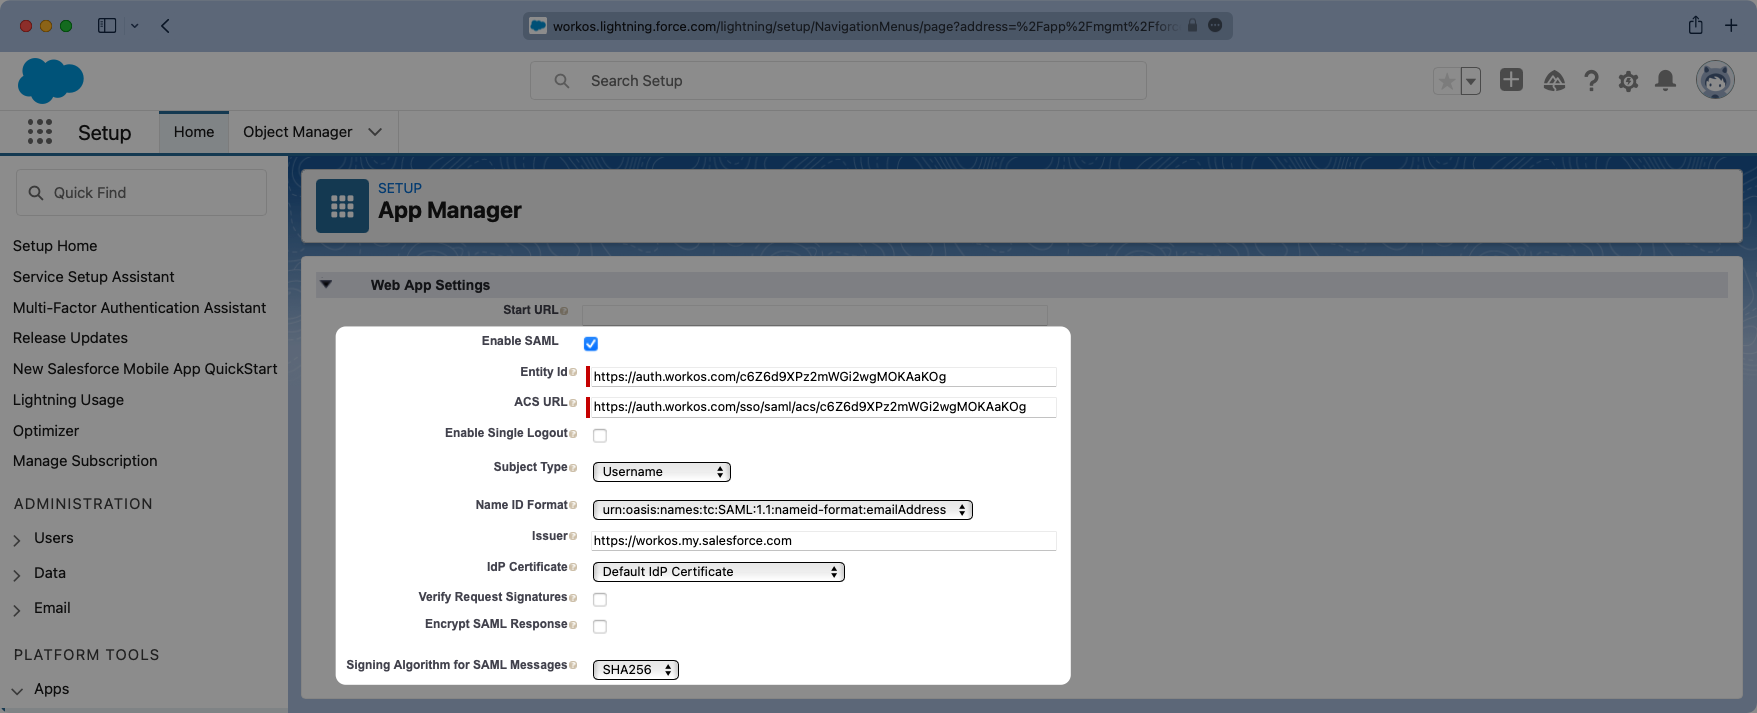
Scroll down further to the “Web App Settings” and check the box for “Enable SAML”. Enter the Entity ID and ACS URL into their respective places within the Settings.
The “Subject Type” should be set to “User ID” and the “Name ID Format” should be set to urn:oasis:names:tc:SAML:1.1:nameid-format:emailAddress. The “Issuer” should populate correctly with your Salesforce subdomain. For the IdP Certificate, select the certificate that matches the one previously used when enabling the Identity Provider, and for the “Signing Algorithm for SAML Messages” choose “SHA256”.
Save the configurations and you should now see the new Connected App listed under “App Manager”.
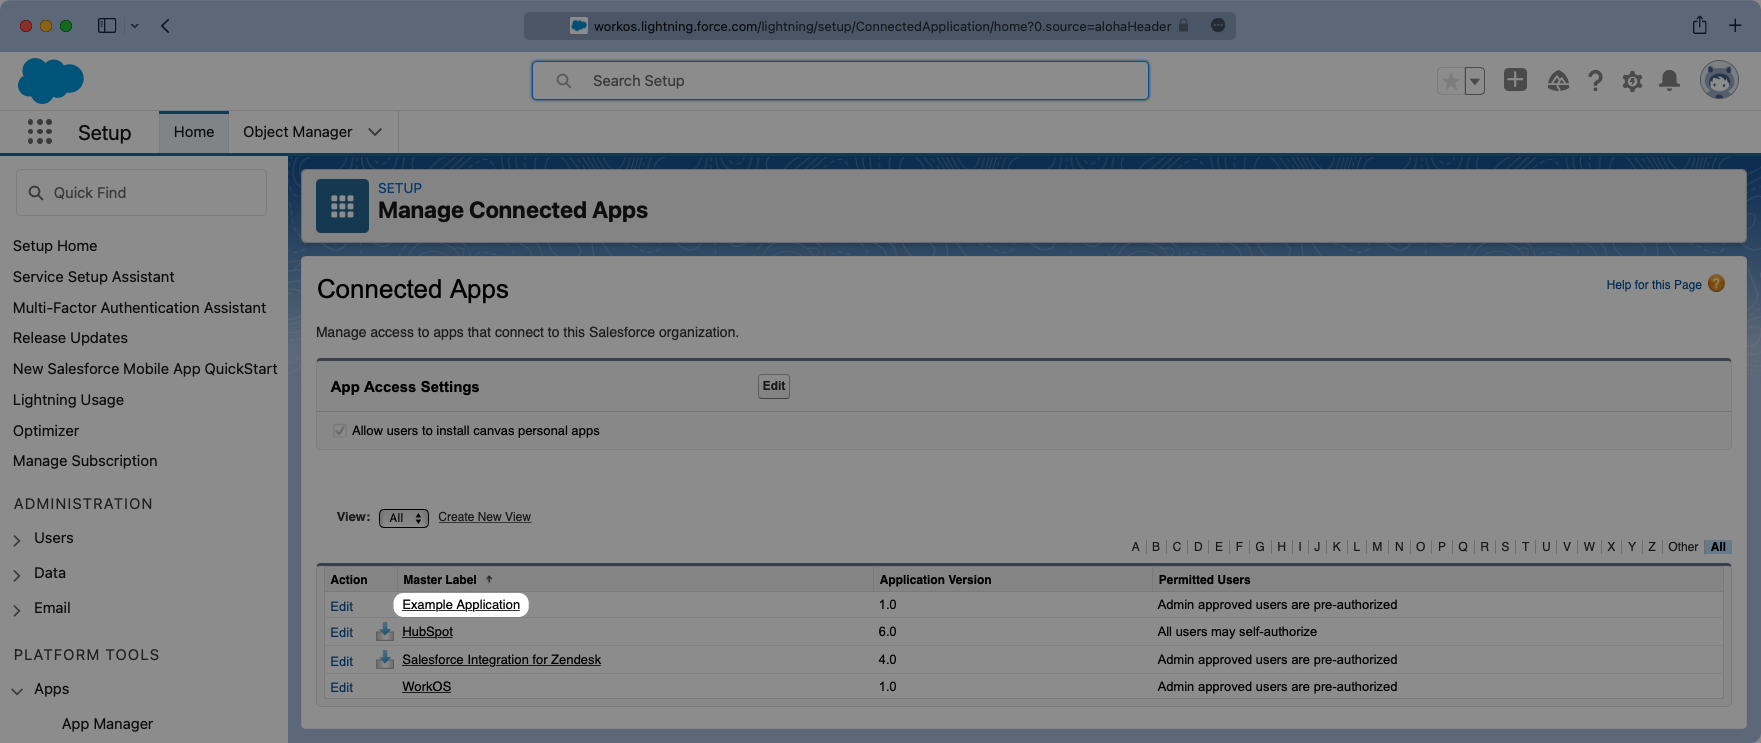
In the Setup search bar browse to the “Manage Connected Apps” portal. Click on your application and this will open the view where you can configure the attribute mapping, and later on the user profile access permissions.
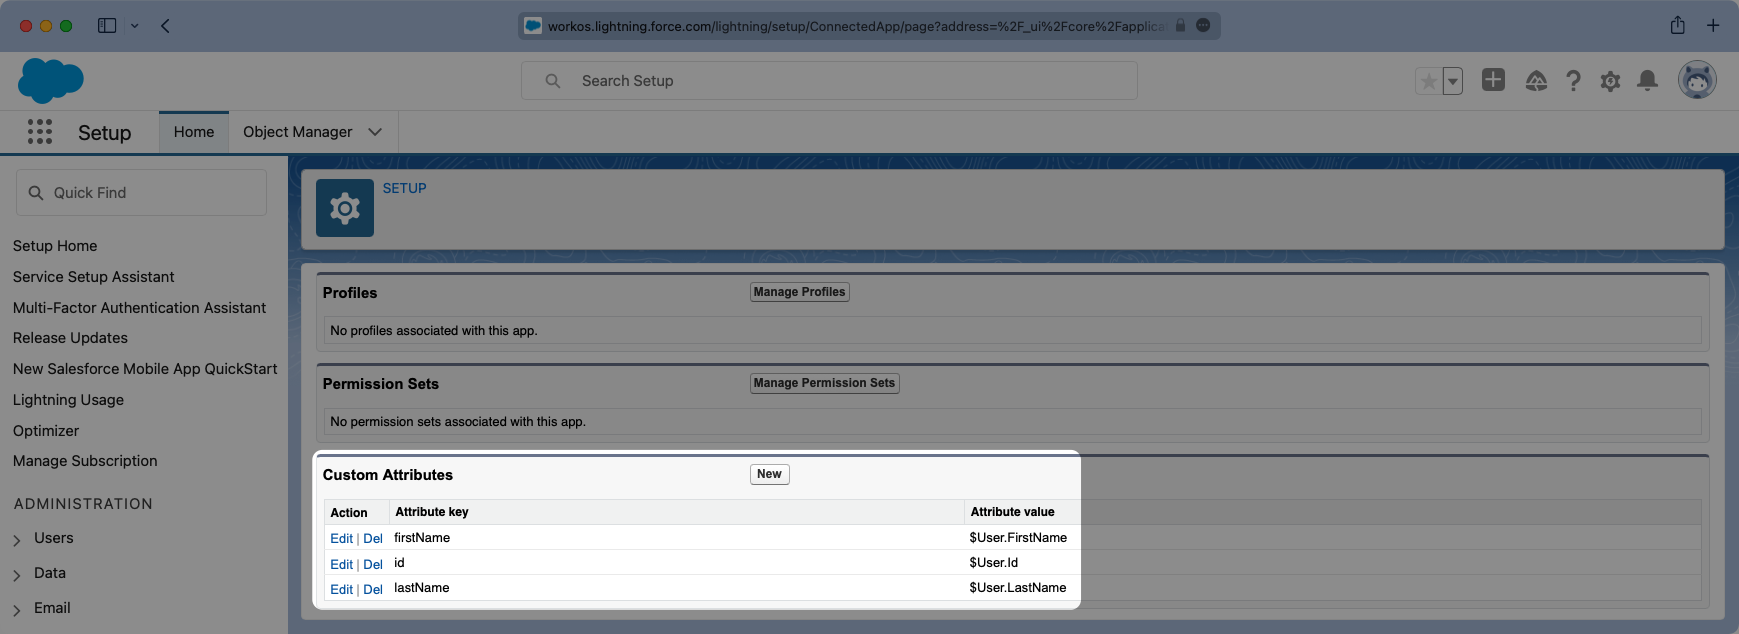
Viewing the app, scroll down to the “Custom Attributes” section and select “New”.

Salesforce automatically includes email as an Attribute so we will need to add three fields:
idfirstNamelastName
Configure the fields so the mapping matches the following:
With identity provider role assignment, users can receive roles within your application based on their group memberships. To return this information in the attribute statement, create a new custom attribute with a key of groups. Map this attribute to a value that contains a user’s group membership or role information, such as $UserRole.Name in the example below.
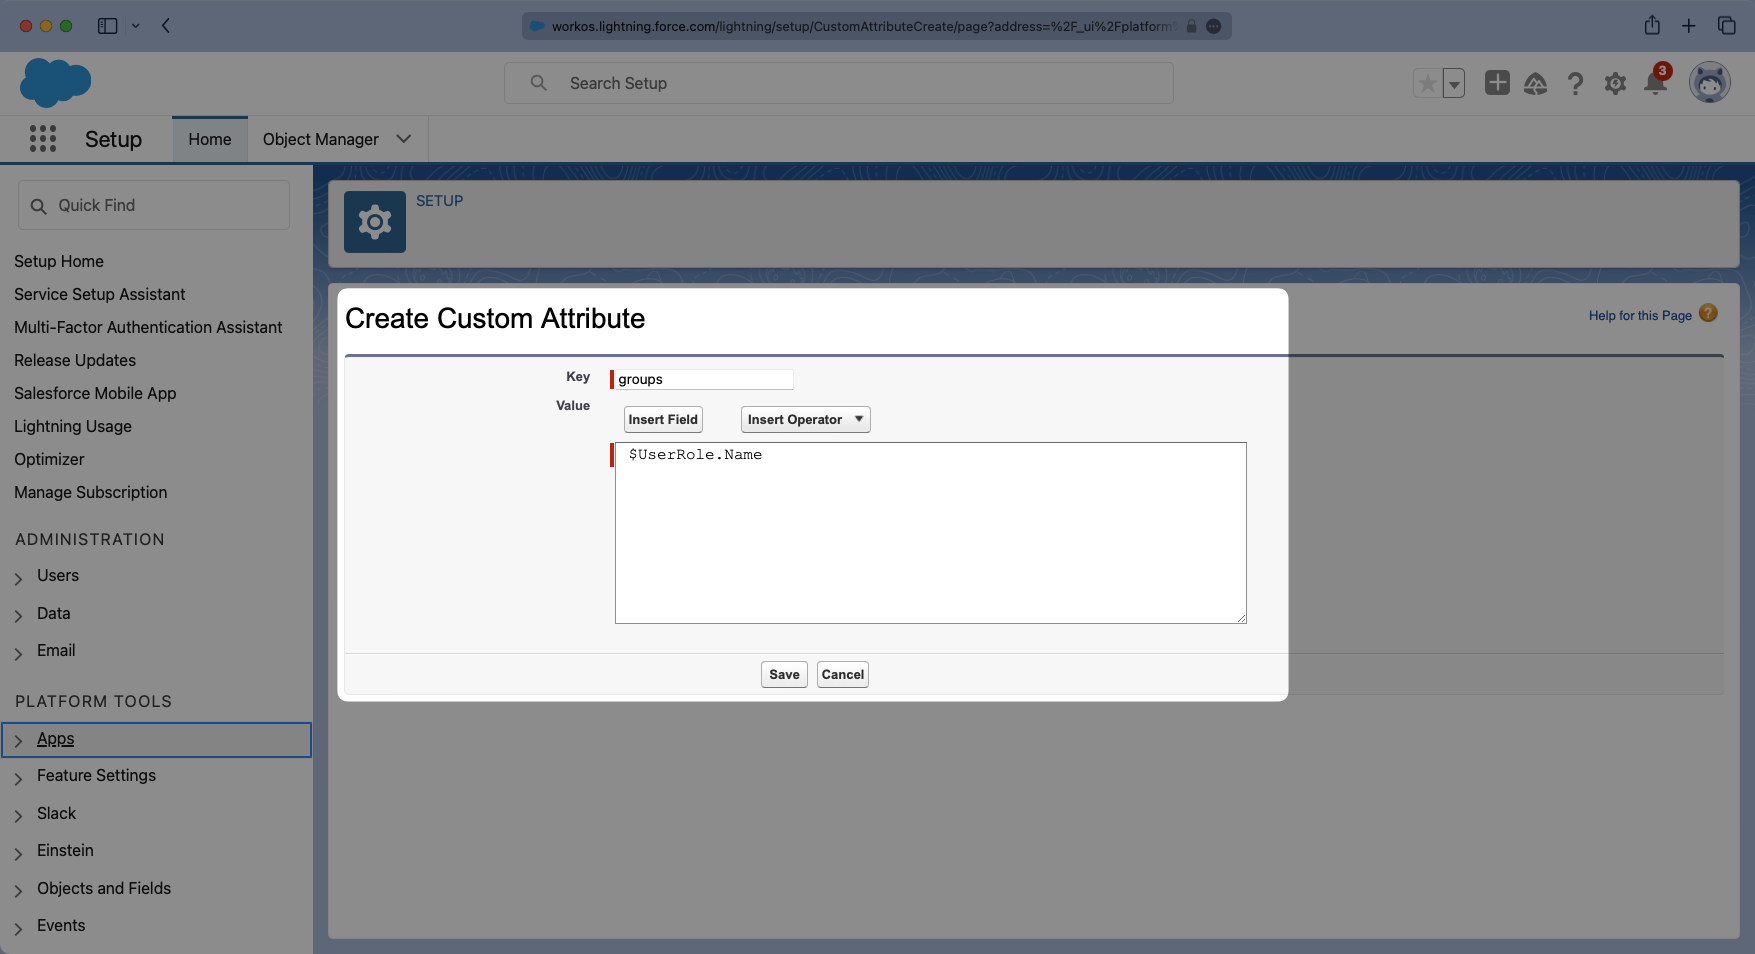
Finish role assignment set-up by navigating to the SSO connection page in the Organization section of the WorkOS Dashboard. Create SSO groups by referencing the group IdP ID. Then, assign roles to these SSO groups so group members are automatically granted roles within your application.
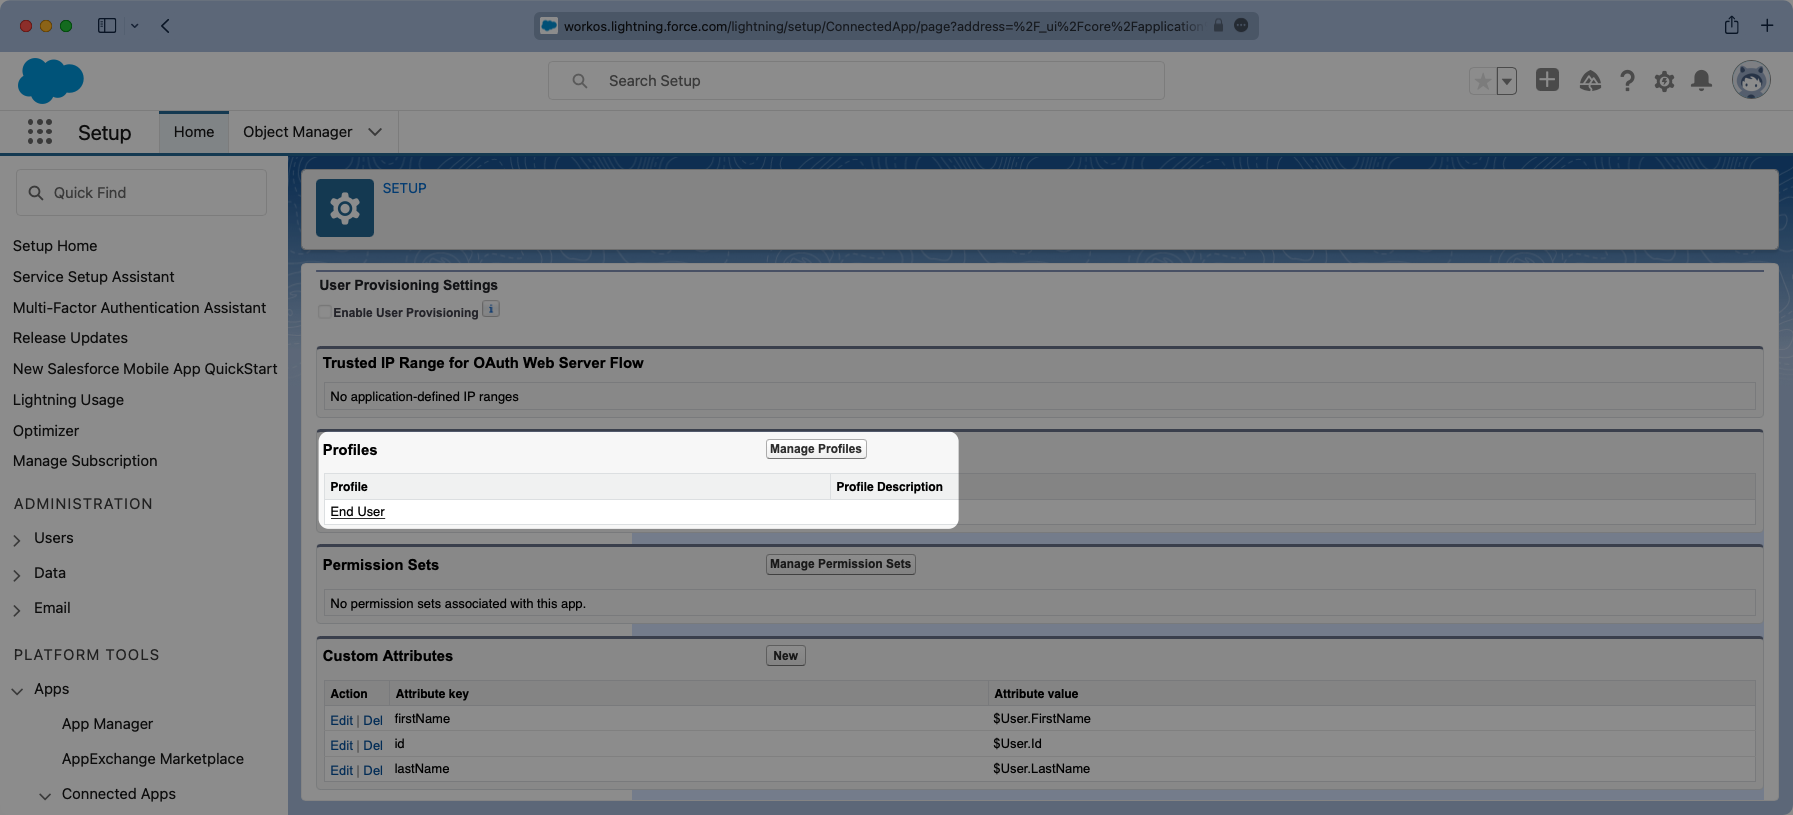
Similarly, viewing the app, there is a “Manage Profiles” section for granting access to control who can log into the application. Select “Manage Profiles” and grant access to the appropriate profiles that should have access to the application in the “Application Profile Assignment” wizard. Select “Save” when complete.
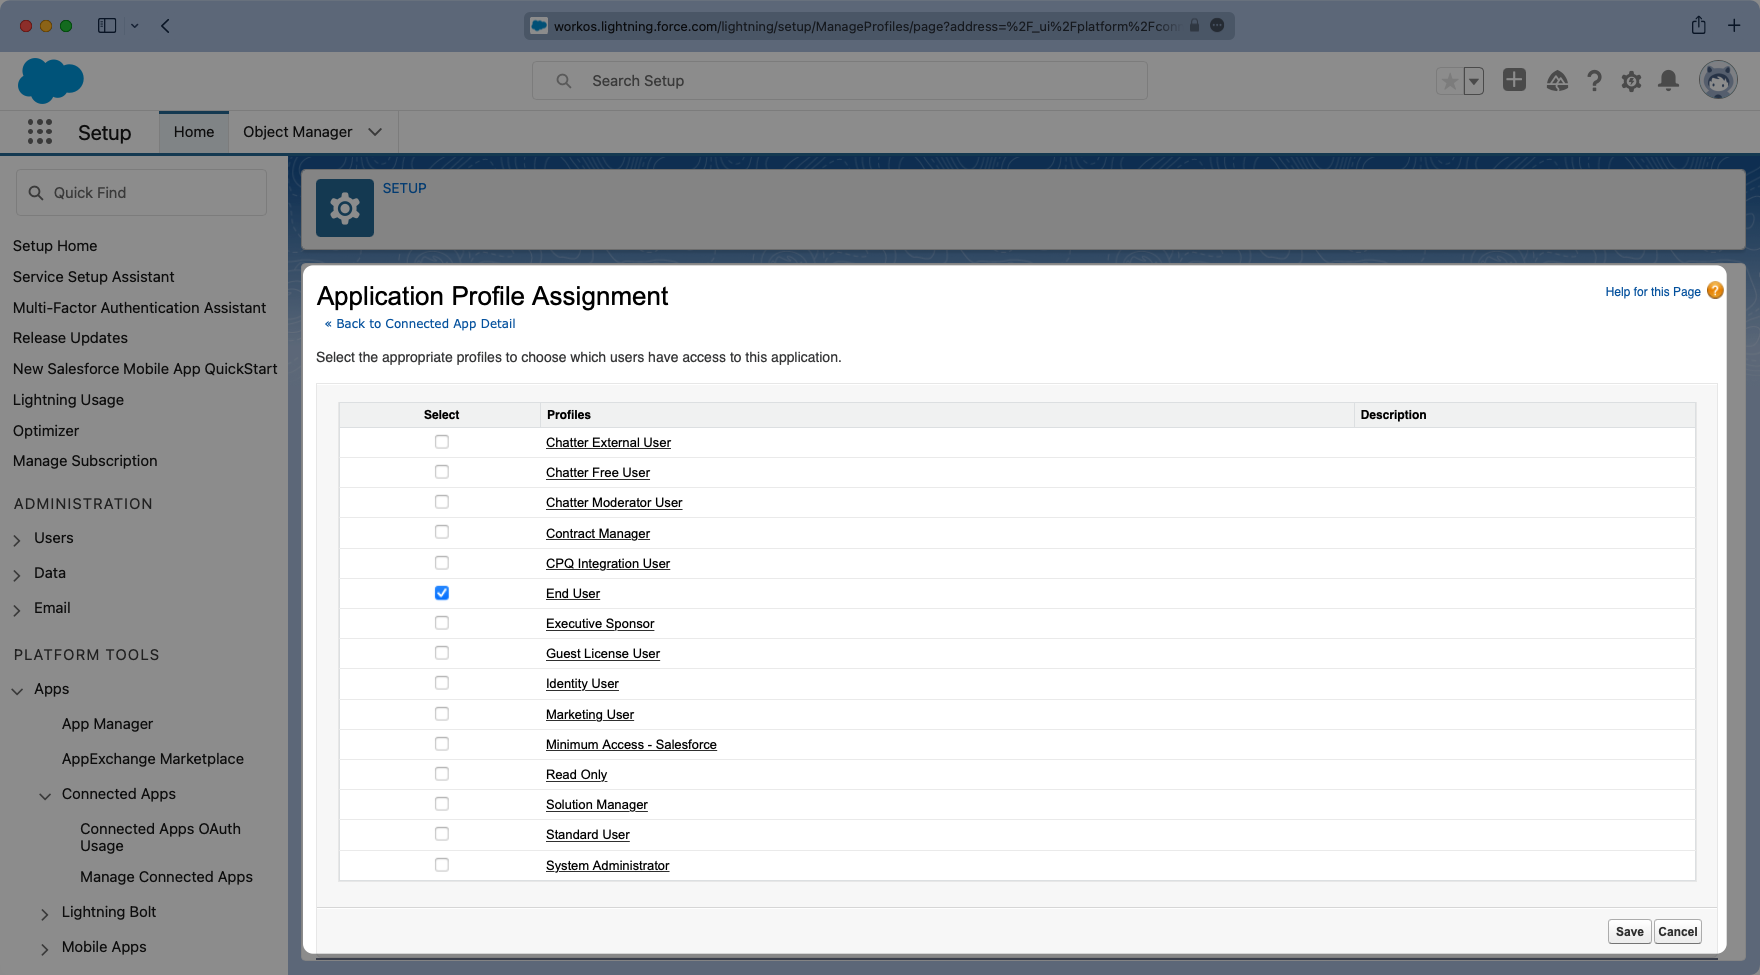
Here is an example of a successfully configured “Connected Application” allowing access to anyone with an “End User” Profile.