SCIM
Learn about syncing users with a custom SCIM provider
To set up a SCIM v2.0 directory sync connection, you’ll need to provide the organization’s IT team with specific configuration details from WorkOS. This allows their SCIM server to synchronize users and groups with your application.
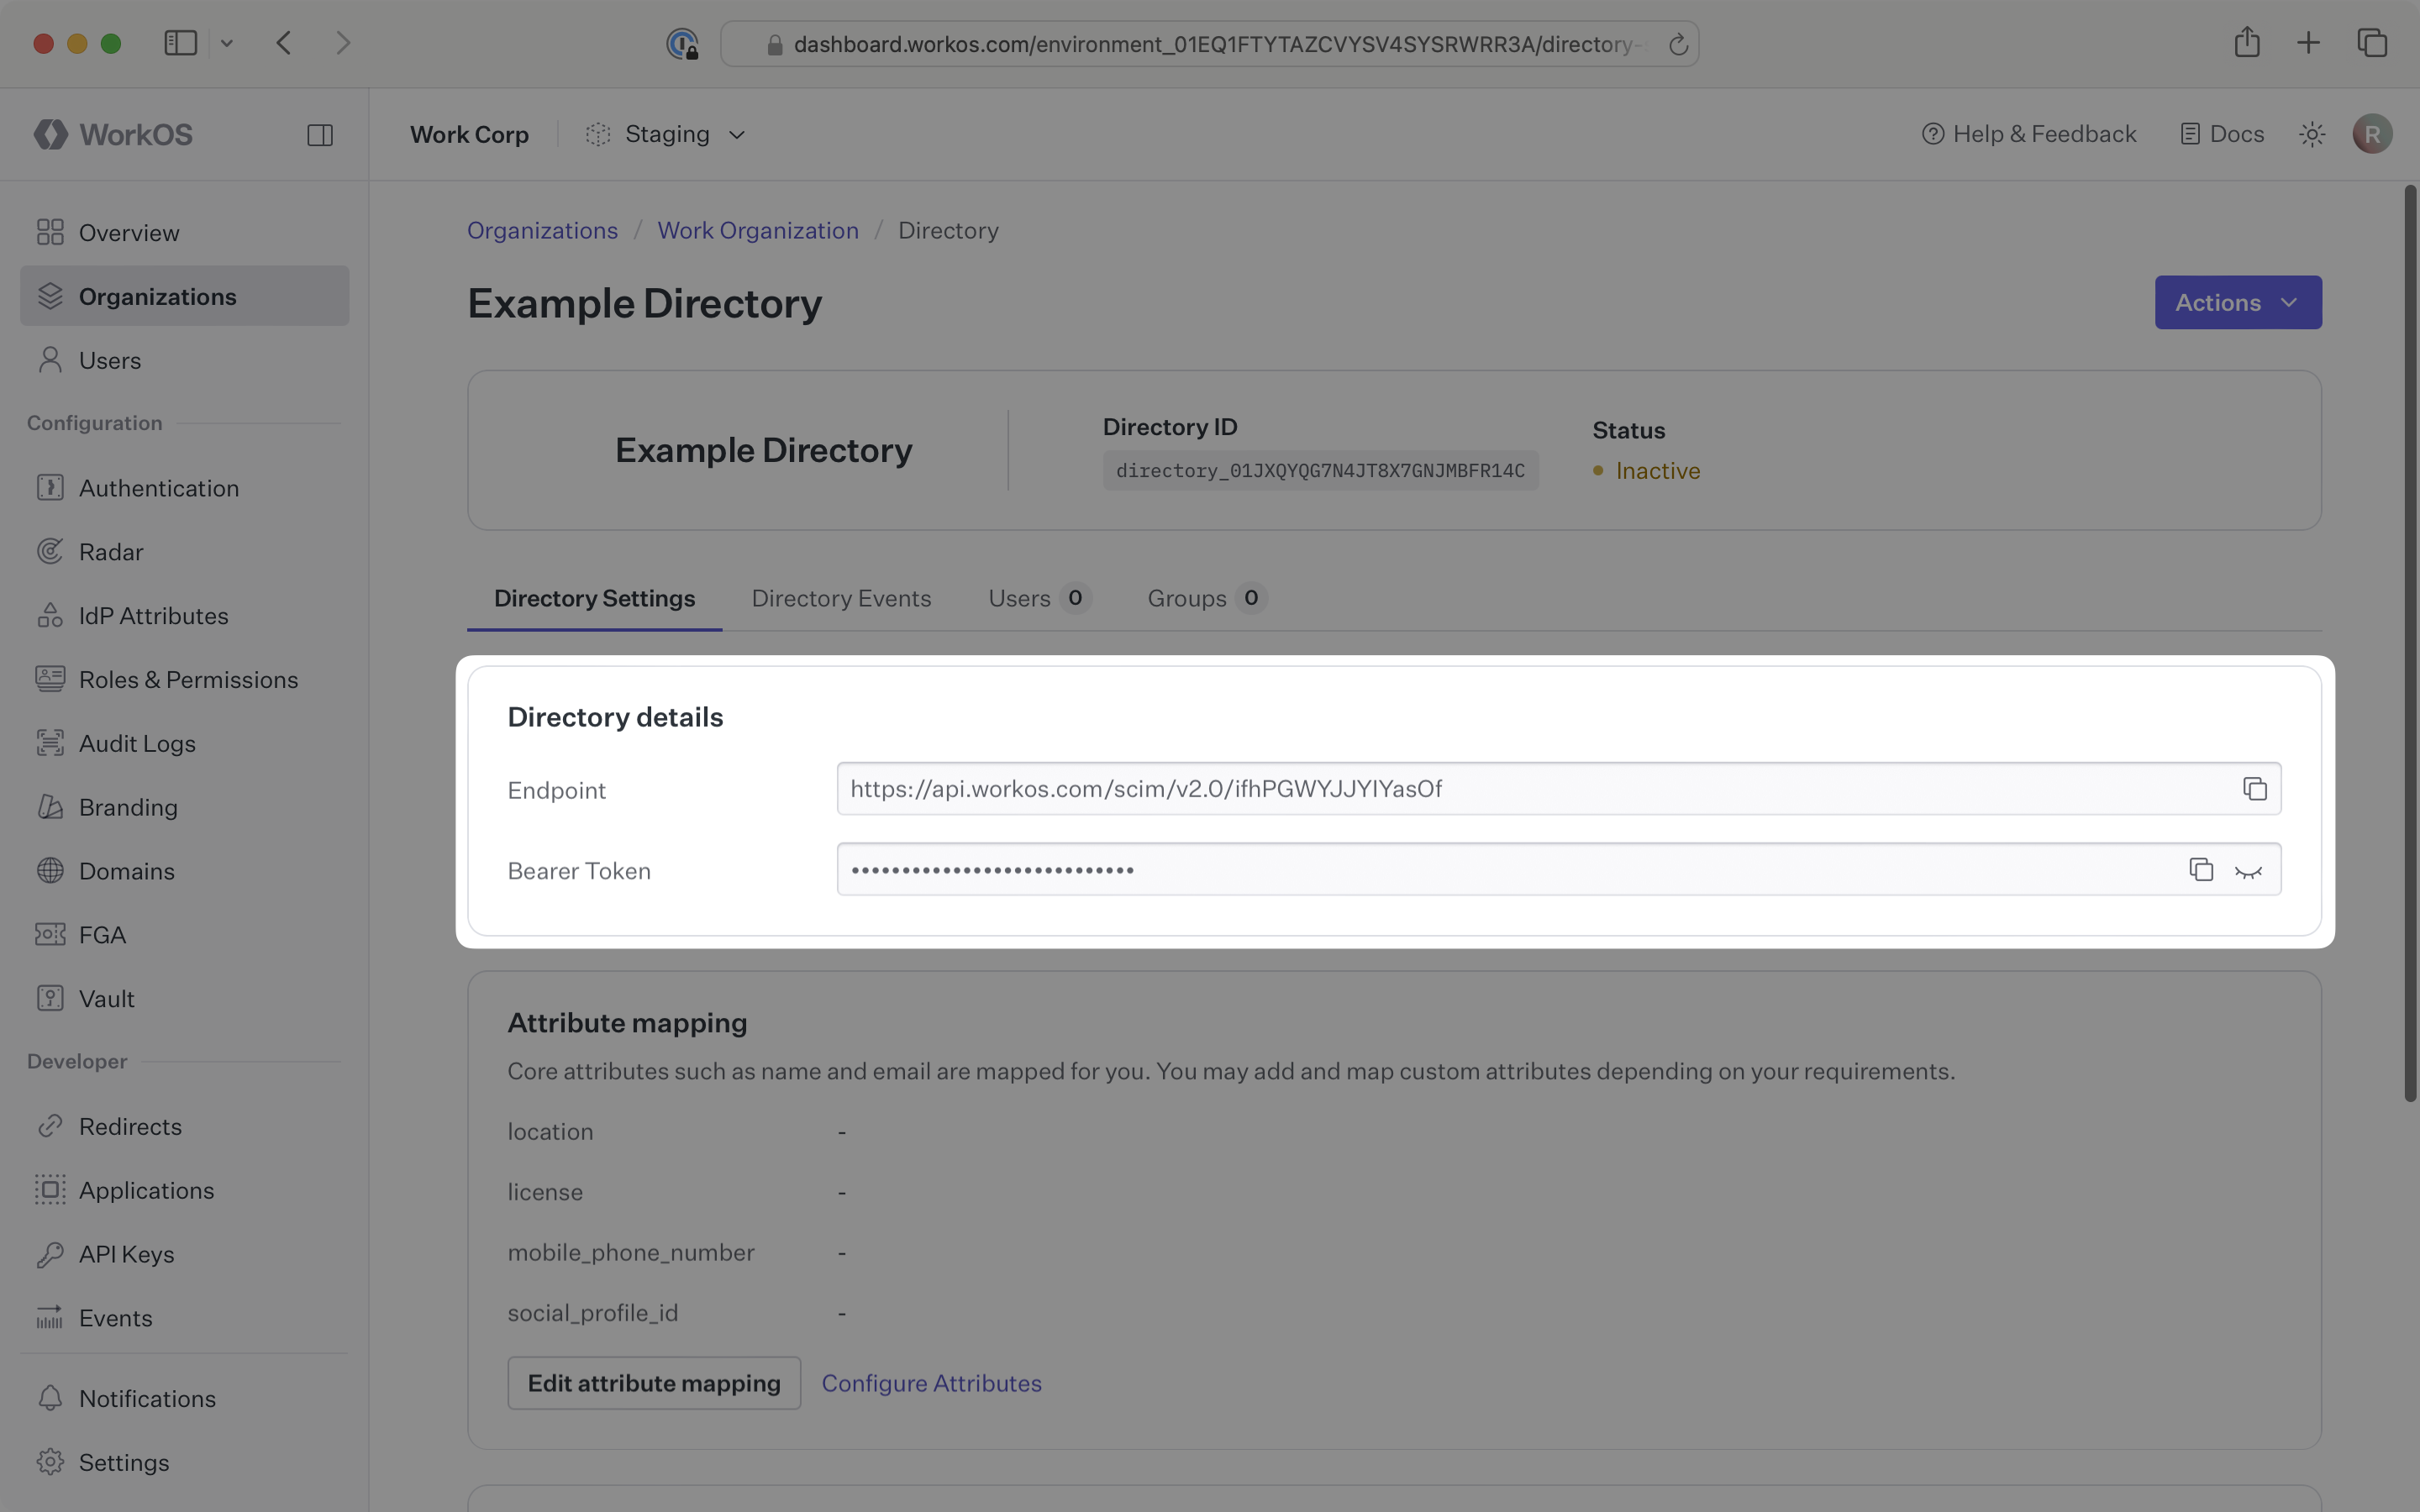
When setting up a SCIM directory sync connection, WorkOS provides two key pieces of information that you’ll need to share with the organization:
- Endpoint: The URL where the SCIM server will send requests
- Bearer Token: Authentication credentials for the endpoint requests
Both of these are available in the Directory details section of the directory sync connection in the WorkOS Dashboard. The endpoint is shown as soon as the directory is created, and bearer tokens are generated on demand from the Bearer tokens card on the same page.
These settings enable the organization’s SCIM server to securely send user and group data to your application through WorkOS.
The organization’s IT team will handle the SCIM server configuration on their end. You simply need to provide them with the endpoint URL and bearer token from the WorkOS Dashboard.
Typically, the organization’s IT team will use these values to configure your application within their SCIM server or identity provider admin dashboard.
Login to the WorkOS Dashboard.
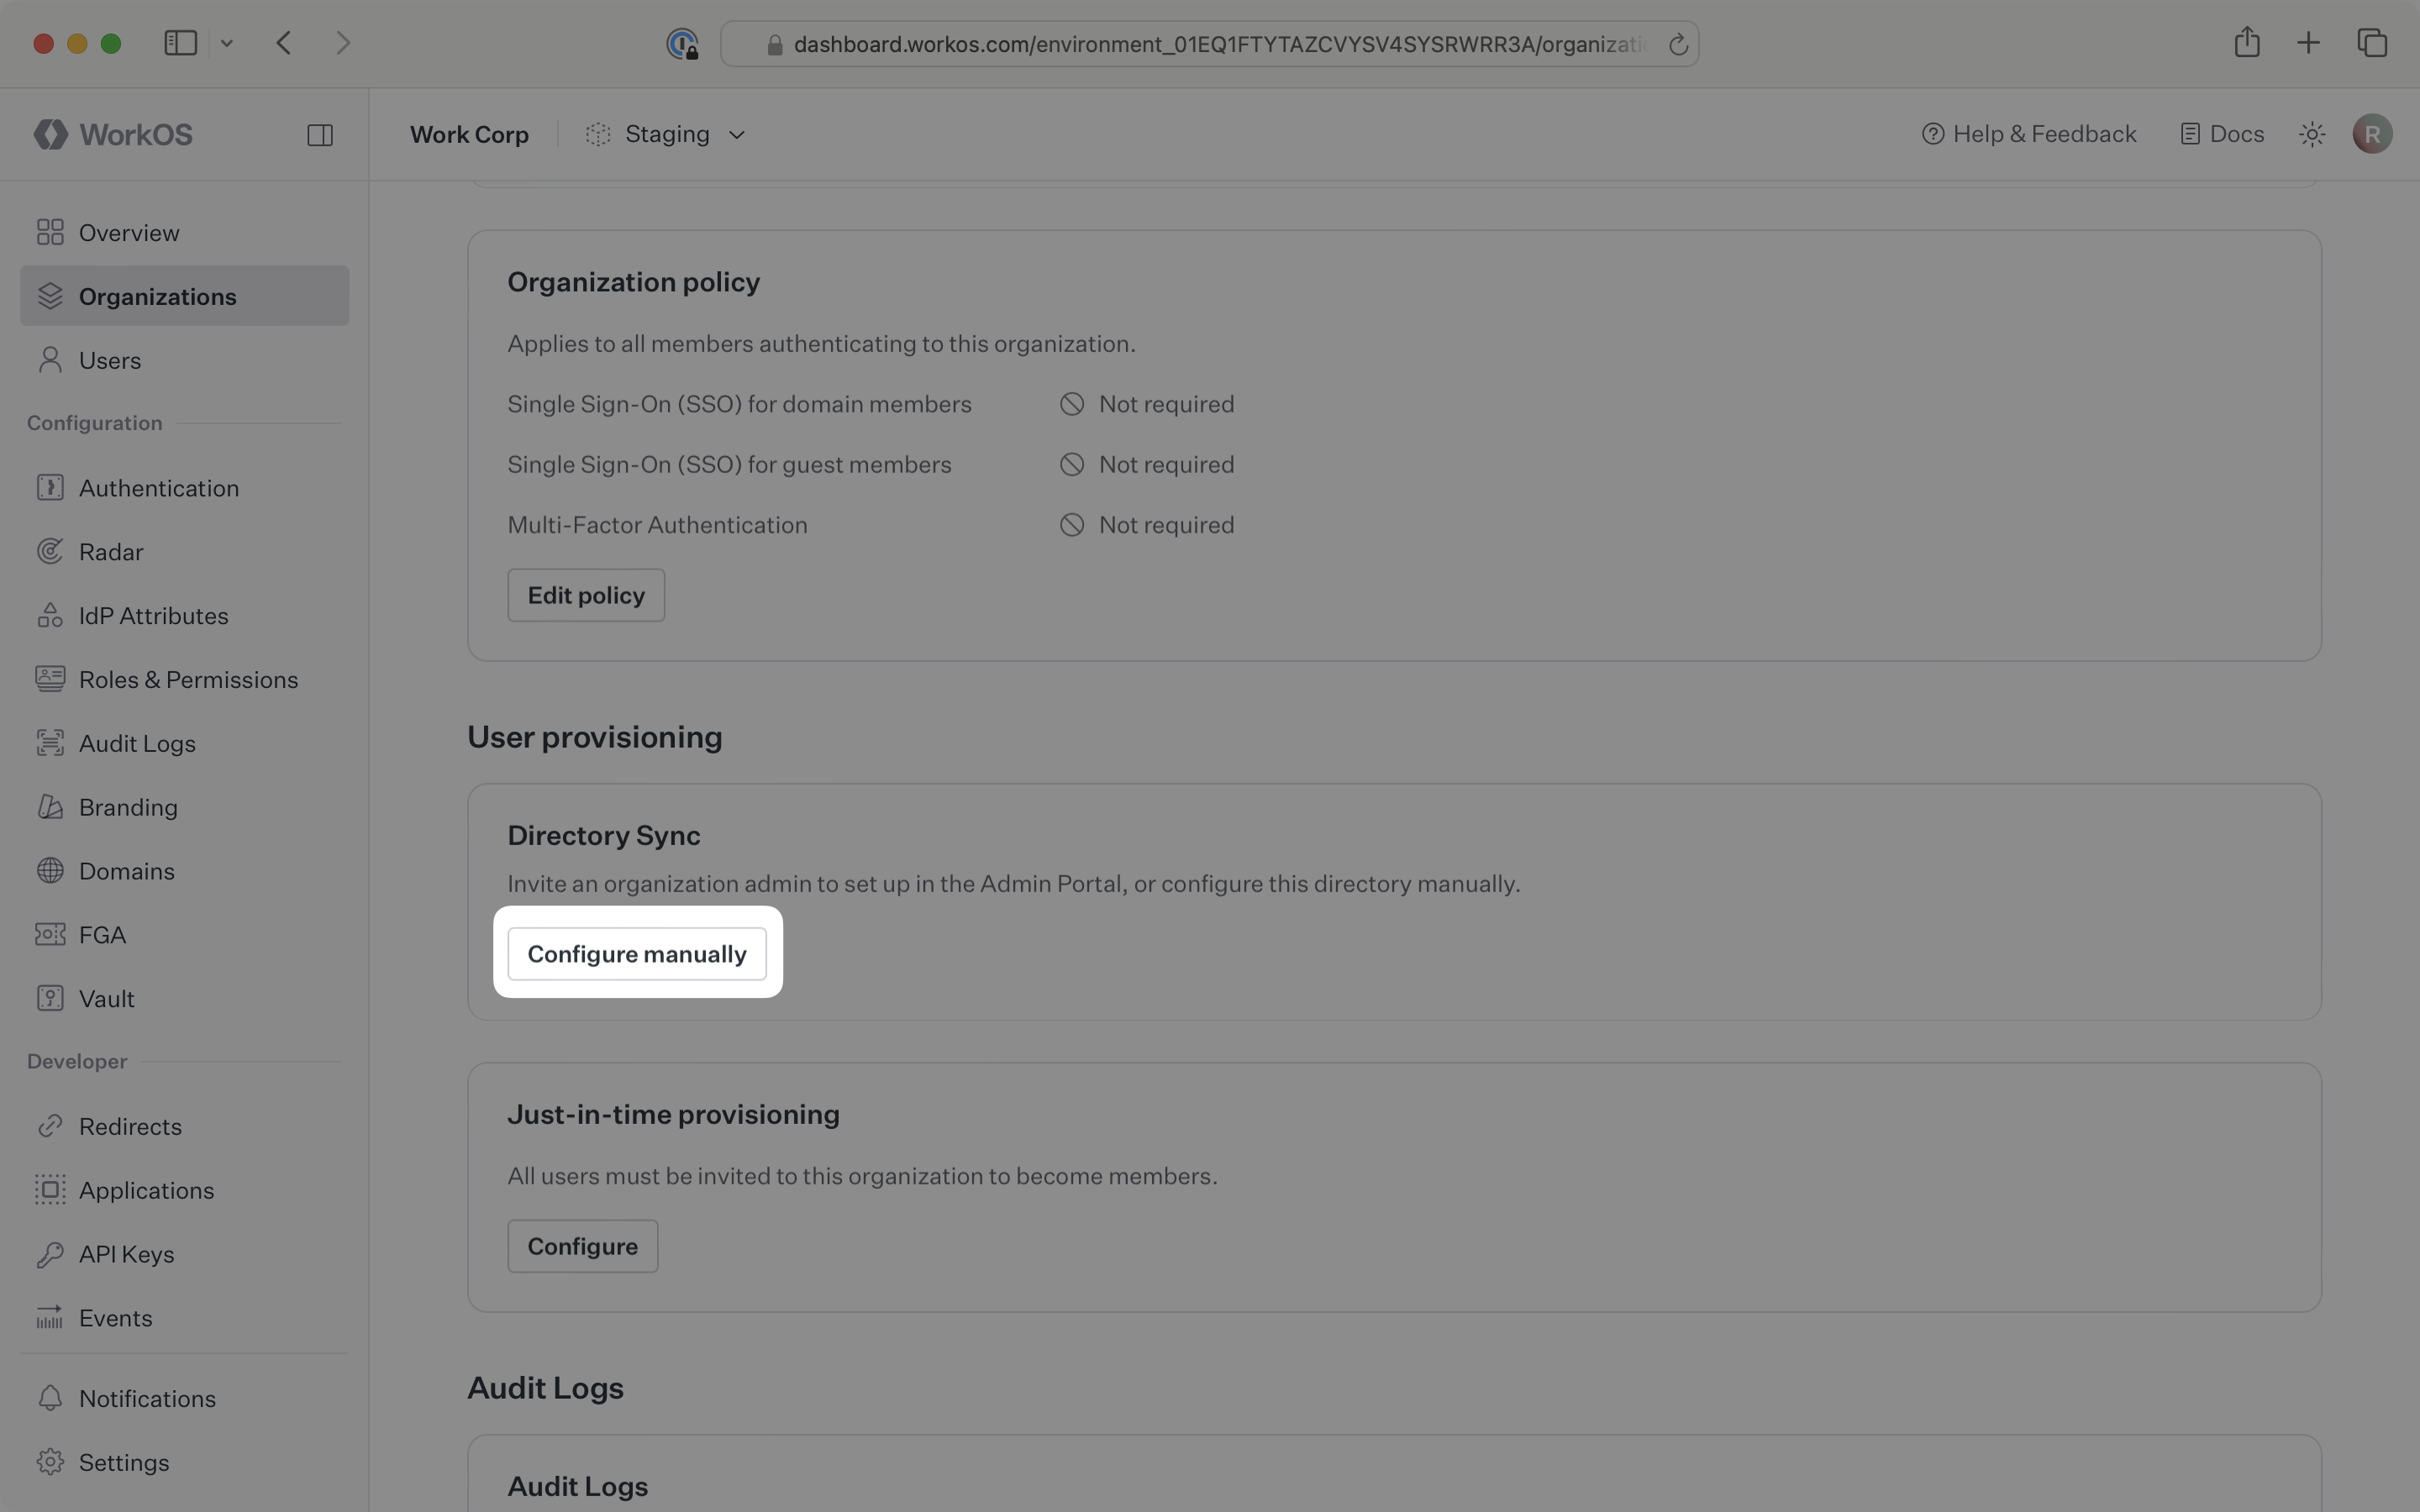
In the left navigation menu, select the Organizations tab. Select the appropriate organization for which you will enable a SCIM directory sync connection.
On the organization’s page, scroll down to the Directory Sync section. Click Configure manually.
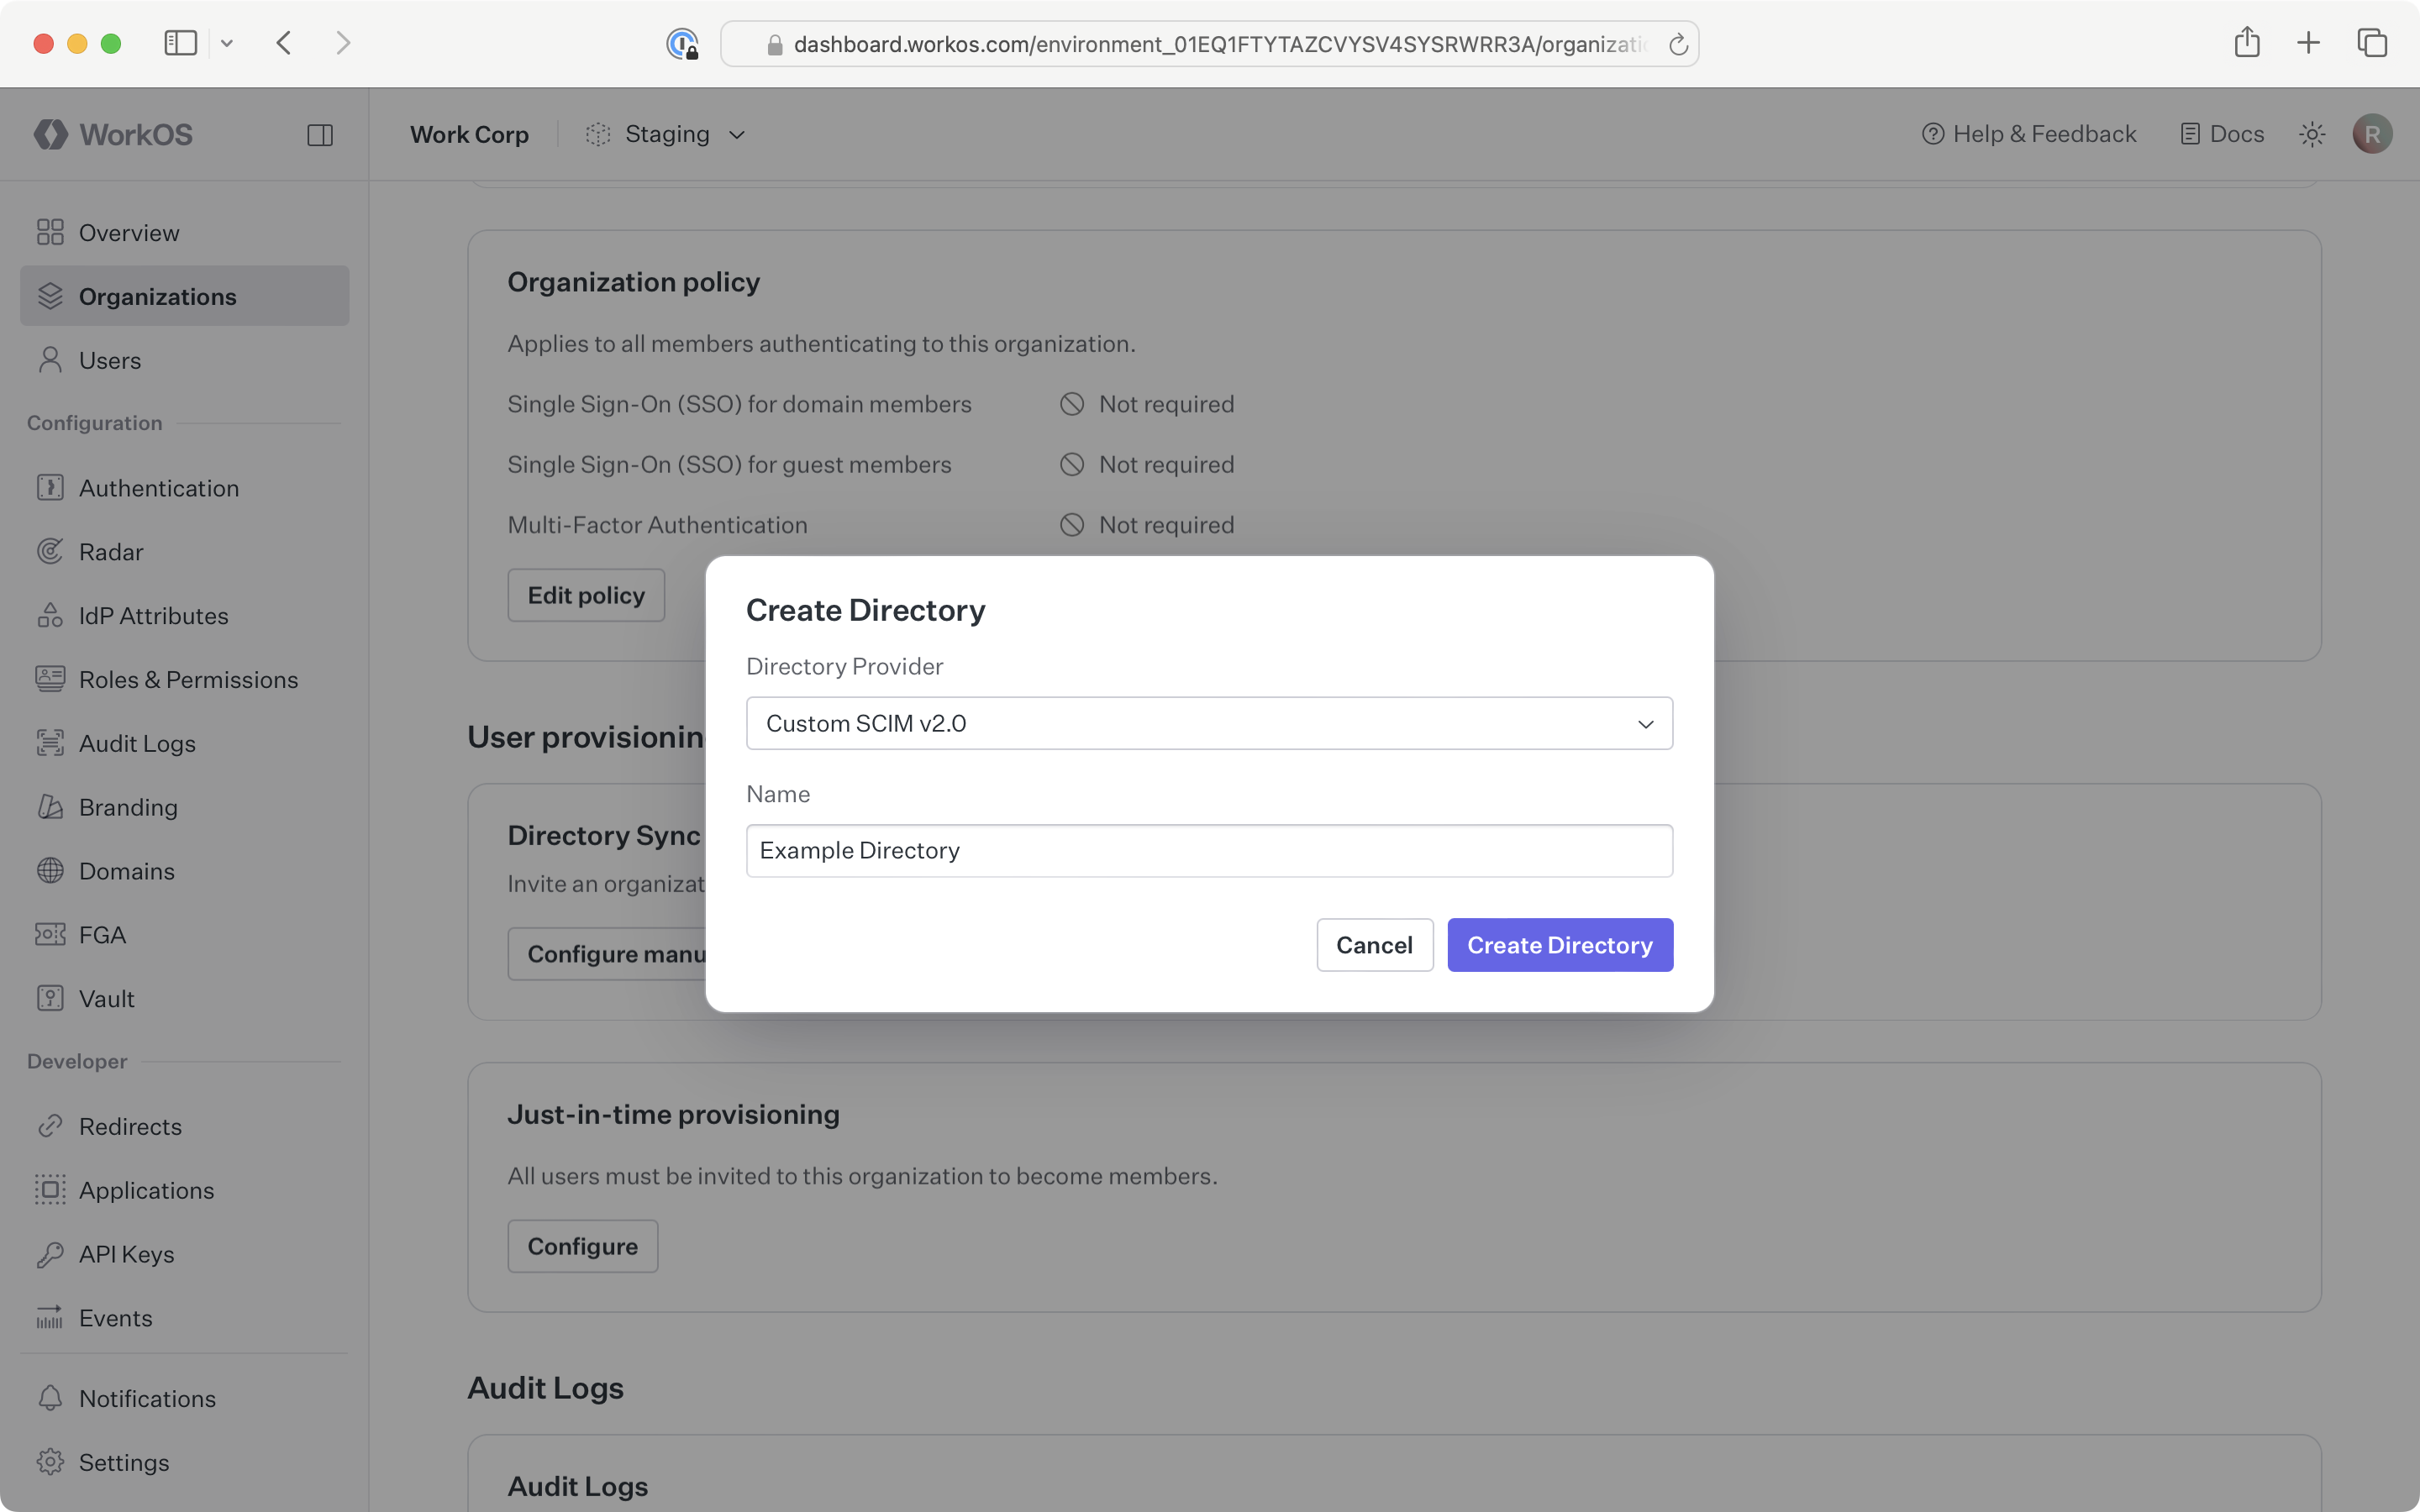
Select Custom SCIM v2.0 as the directory type. Input an appropriate name for the connection. Click Create Directory.
The directory sync connection will now display the endpoint for the SCIM server. To create a bearer token, click Generate token on the Bearer tokens card. The token is shown once at creation time – copy it before closing the dialog.
Copy the Endpoint from the Directory details section and the bearer token you generated in the previous step.
Provide these values to the organization’s IT team so they can configure the application within their SCIM server or identity provider admin dashboard:
- Endpoint URL: The destination where their SCIM server will send user and group data
- Bearer Token: Authentication credentials for secure communication
Once the organization has configured these values in their SCIM server, your application will be ready to receive real-time user and group synchronization.
Now, whenever the organization assigns users or groups to your application in their directory, you’ll receive real-time dashboard updates based on changes in their system.
A detailed guide to integrate the WorkOS API with your application can be found here