How to add Sign in with Vercel to your app using WorkOS
Add a 'Continue with Vercel' button to your Next.js app in minutes using WorkOS AuthKit.
If your users are developers, chances are they already live inside Vercel. They deploy there, manage their teams there, and keep their credentials there. Making them create yet another account to use your app is friction you don't need.
Vercel now ships Sign in with Vercel, a standard OAuth 2.0 / OpenID Connect provider that lets users authenticate with their existing Vercel identity. And WorkOS makes it trivial to wire that up: a few clicks in two dashboards, a handful of environment variables, and you're done, with AuthKit's hosted UI automatically showing a polished "Continue with Vercel" button, no custom UI work required.
In this guide, we'll walk through the entire integration end-to-end:
- Creating and configuring a Vercel OAuth application.
- Enabling Vercel OAuth in the WorkOS Dashboard.
- Setting up AuthKit in a Next.js app.
We chose Next.js for this tutorial as a natural fit; it's the framework Vercel was built around, and the @workos-inc/authkit-nextjs SDK makes the integration clean and straightforward. If you use a different language or framework, do not despair. Most of the steps remain the same, and you can refer to the docs for code samples in your language of choice.
Let’s start building.
Prerequisites
Before we begin, you'll need:
- A WorkOS account (free for up to 1 million users at workos.com).
- A Vercel account with access to team Settings.
- A Next.js app (or create a fresh one with
npx create-next-app@latest).
!!Want to skip the manual setup? The CLI Installer detects your framework, installs the SDK, configures your dashboard, and writes the integration code, all with a single command. Check it out.!!
Step 0: Get the Redirect URI
Before we start with setting up a Vercel OAuth, we need one piece of information from the WorkOS dashboard: the Redirect URI. This is the endpoint where Vercel will send authentication responses after successful login.
- Go to the WorkOS dashboard > Authentication > Providers.
- Locate the Vercel section and click Enable.
- Copy the Redirect URI. We will use it in the next step.
Step 1: Create a Vercel OAuth application
Now we are ready to create a Vercel OAuth app. This is what issues tokens on behalf of your users and shows them the Vercel consent screen.
- Log in to Vercel and navigate to your Team Settings.
- In the left navigation, scroll down and select Apps, then click Create.
- Give your app a name (this is what users will see on the consent screen), optionally add a logo, and click Save.

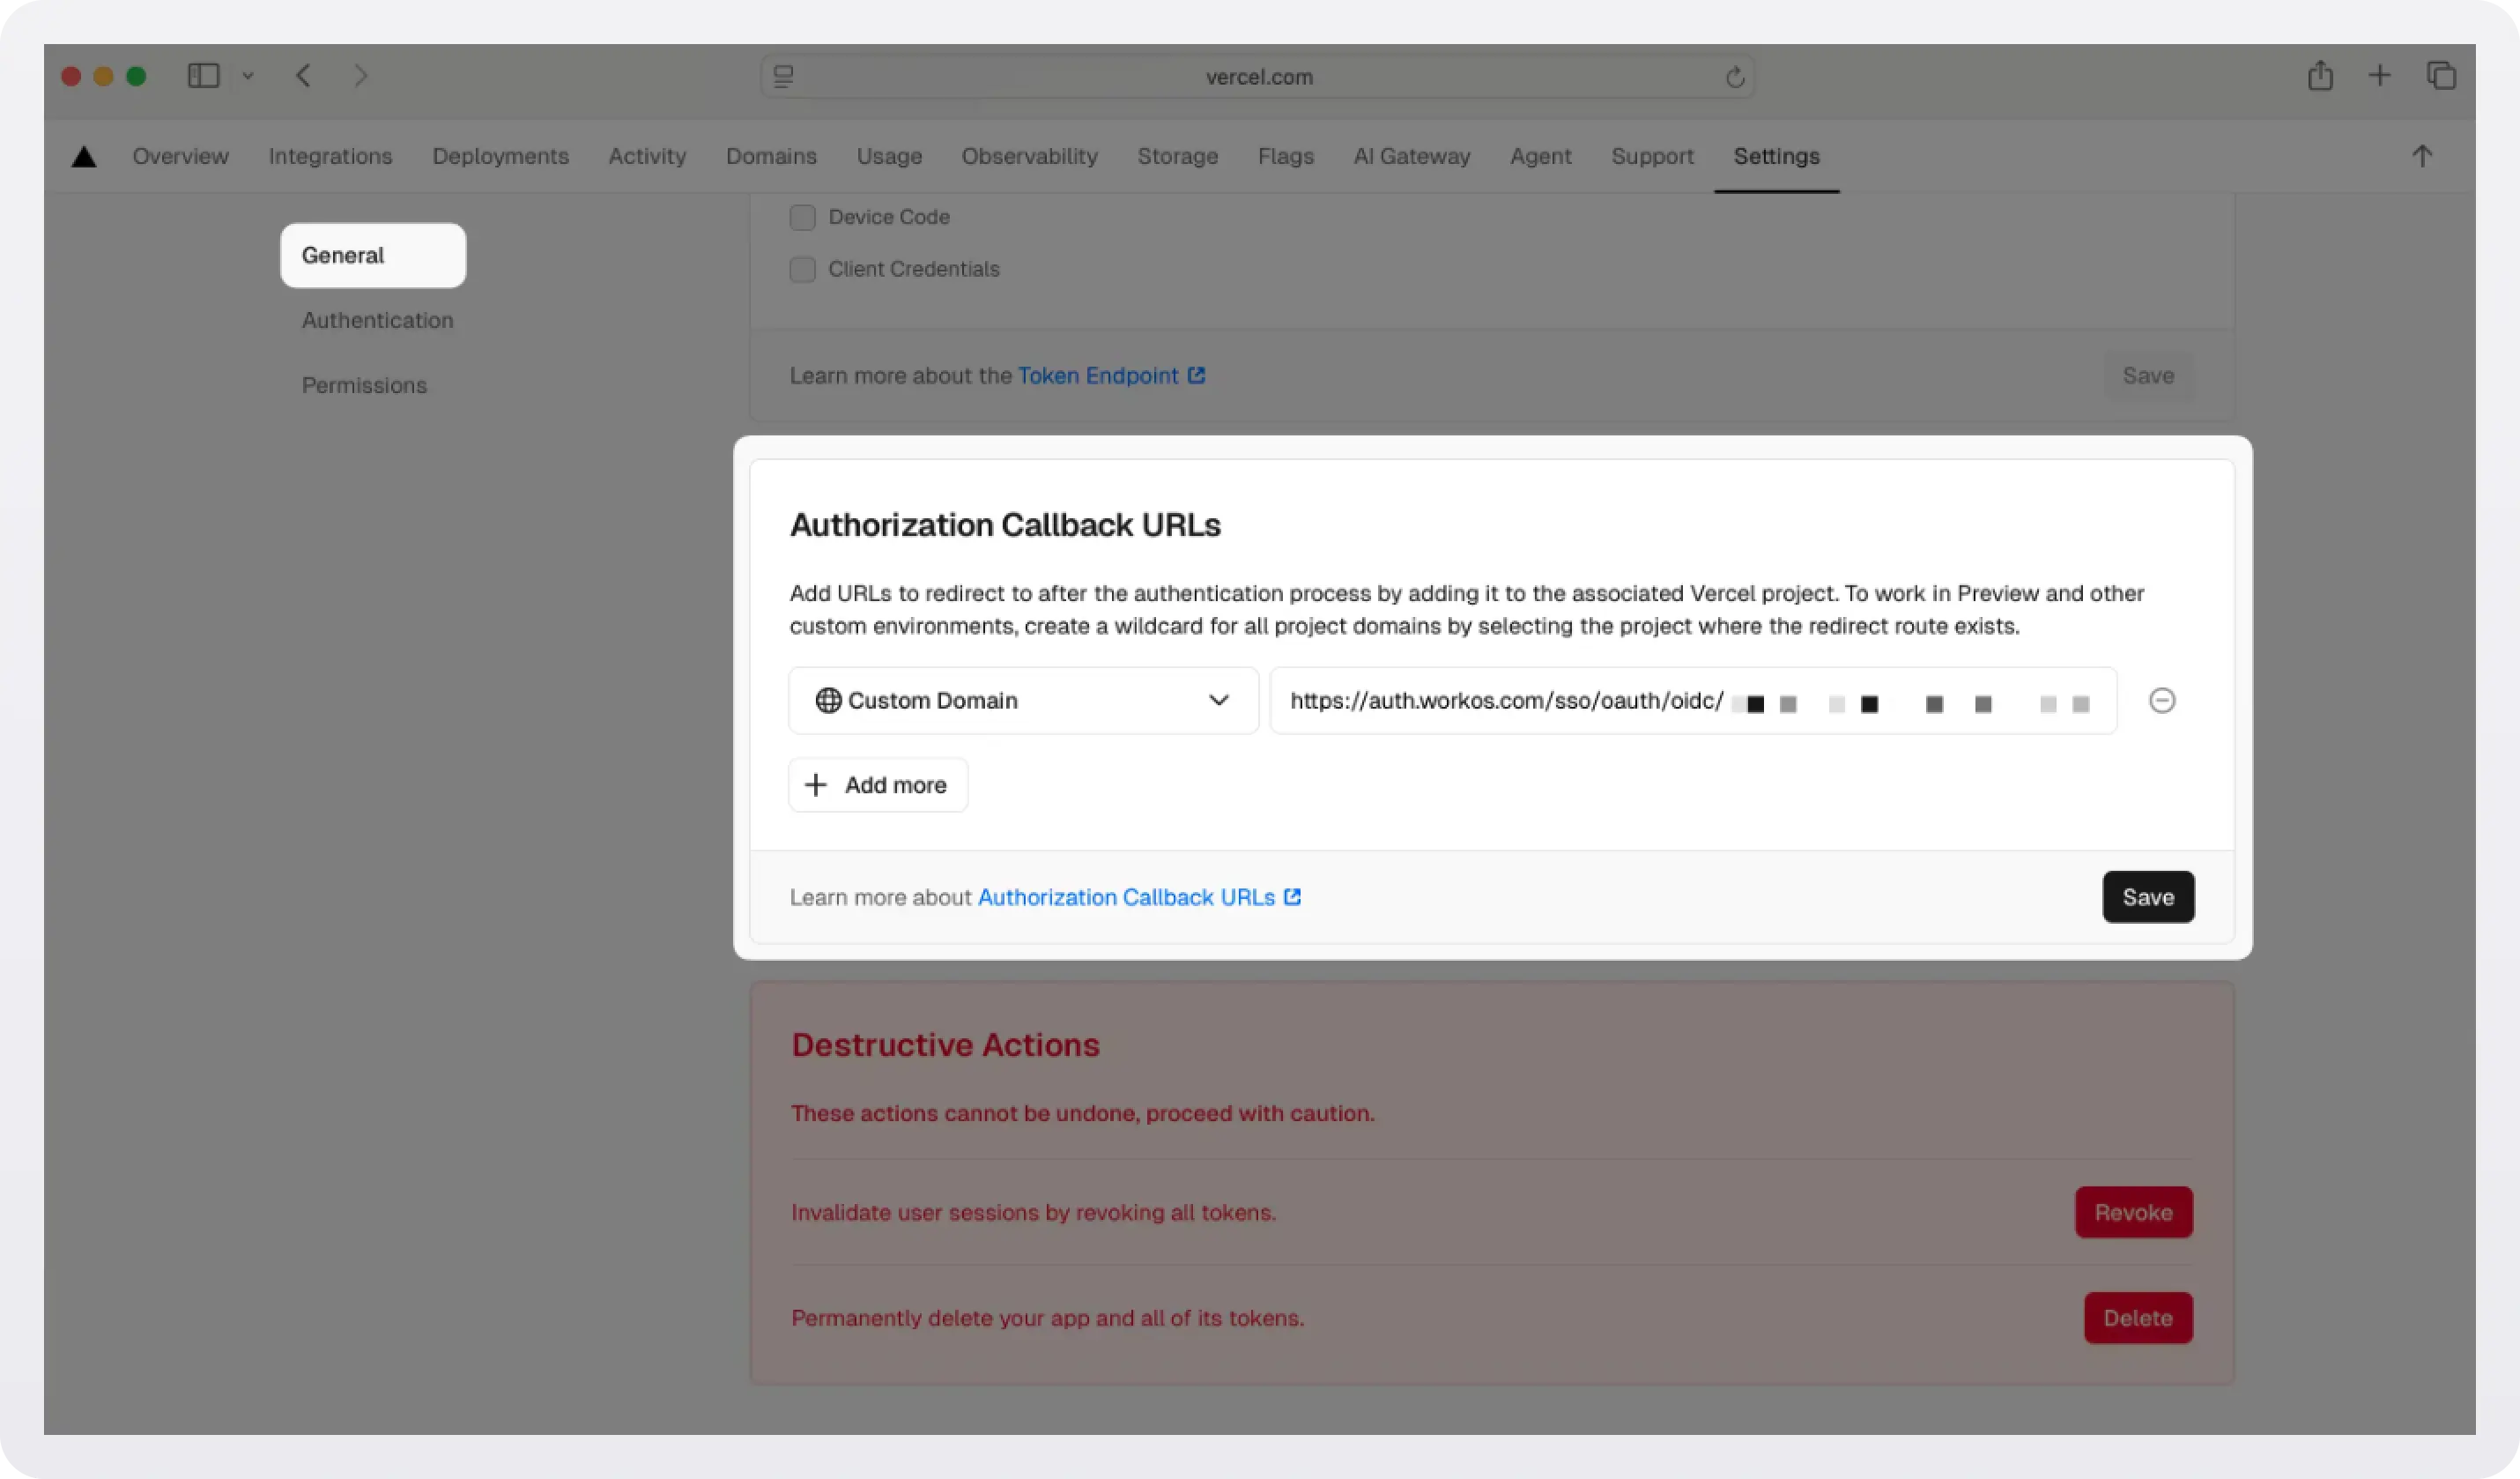
With the app created, navigate to its General tab and scroll down to Authorization Callback URLs. You'll need to paste in the Redirect URI you copied from the WorkOS dashboard in the previous step.
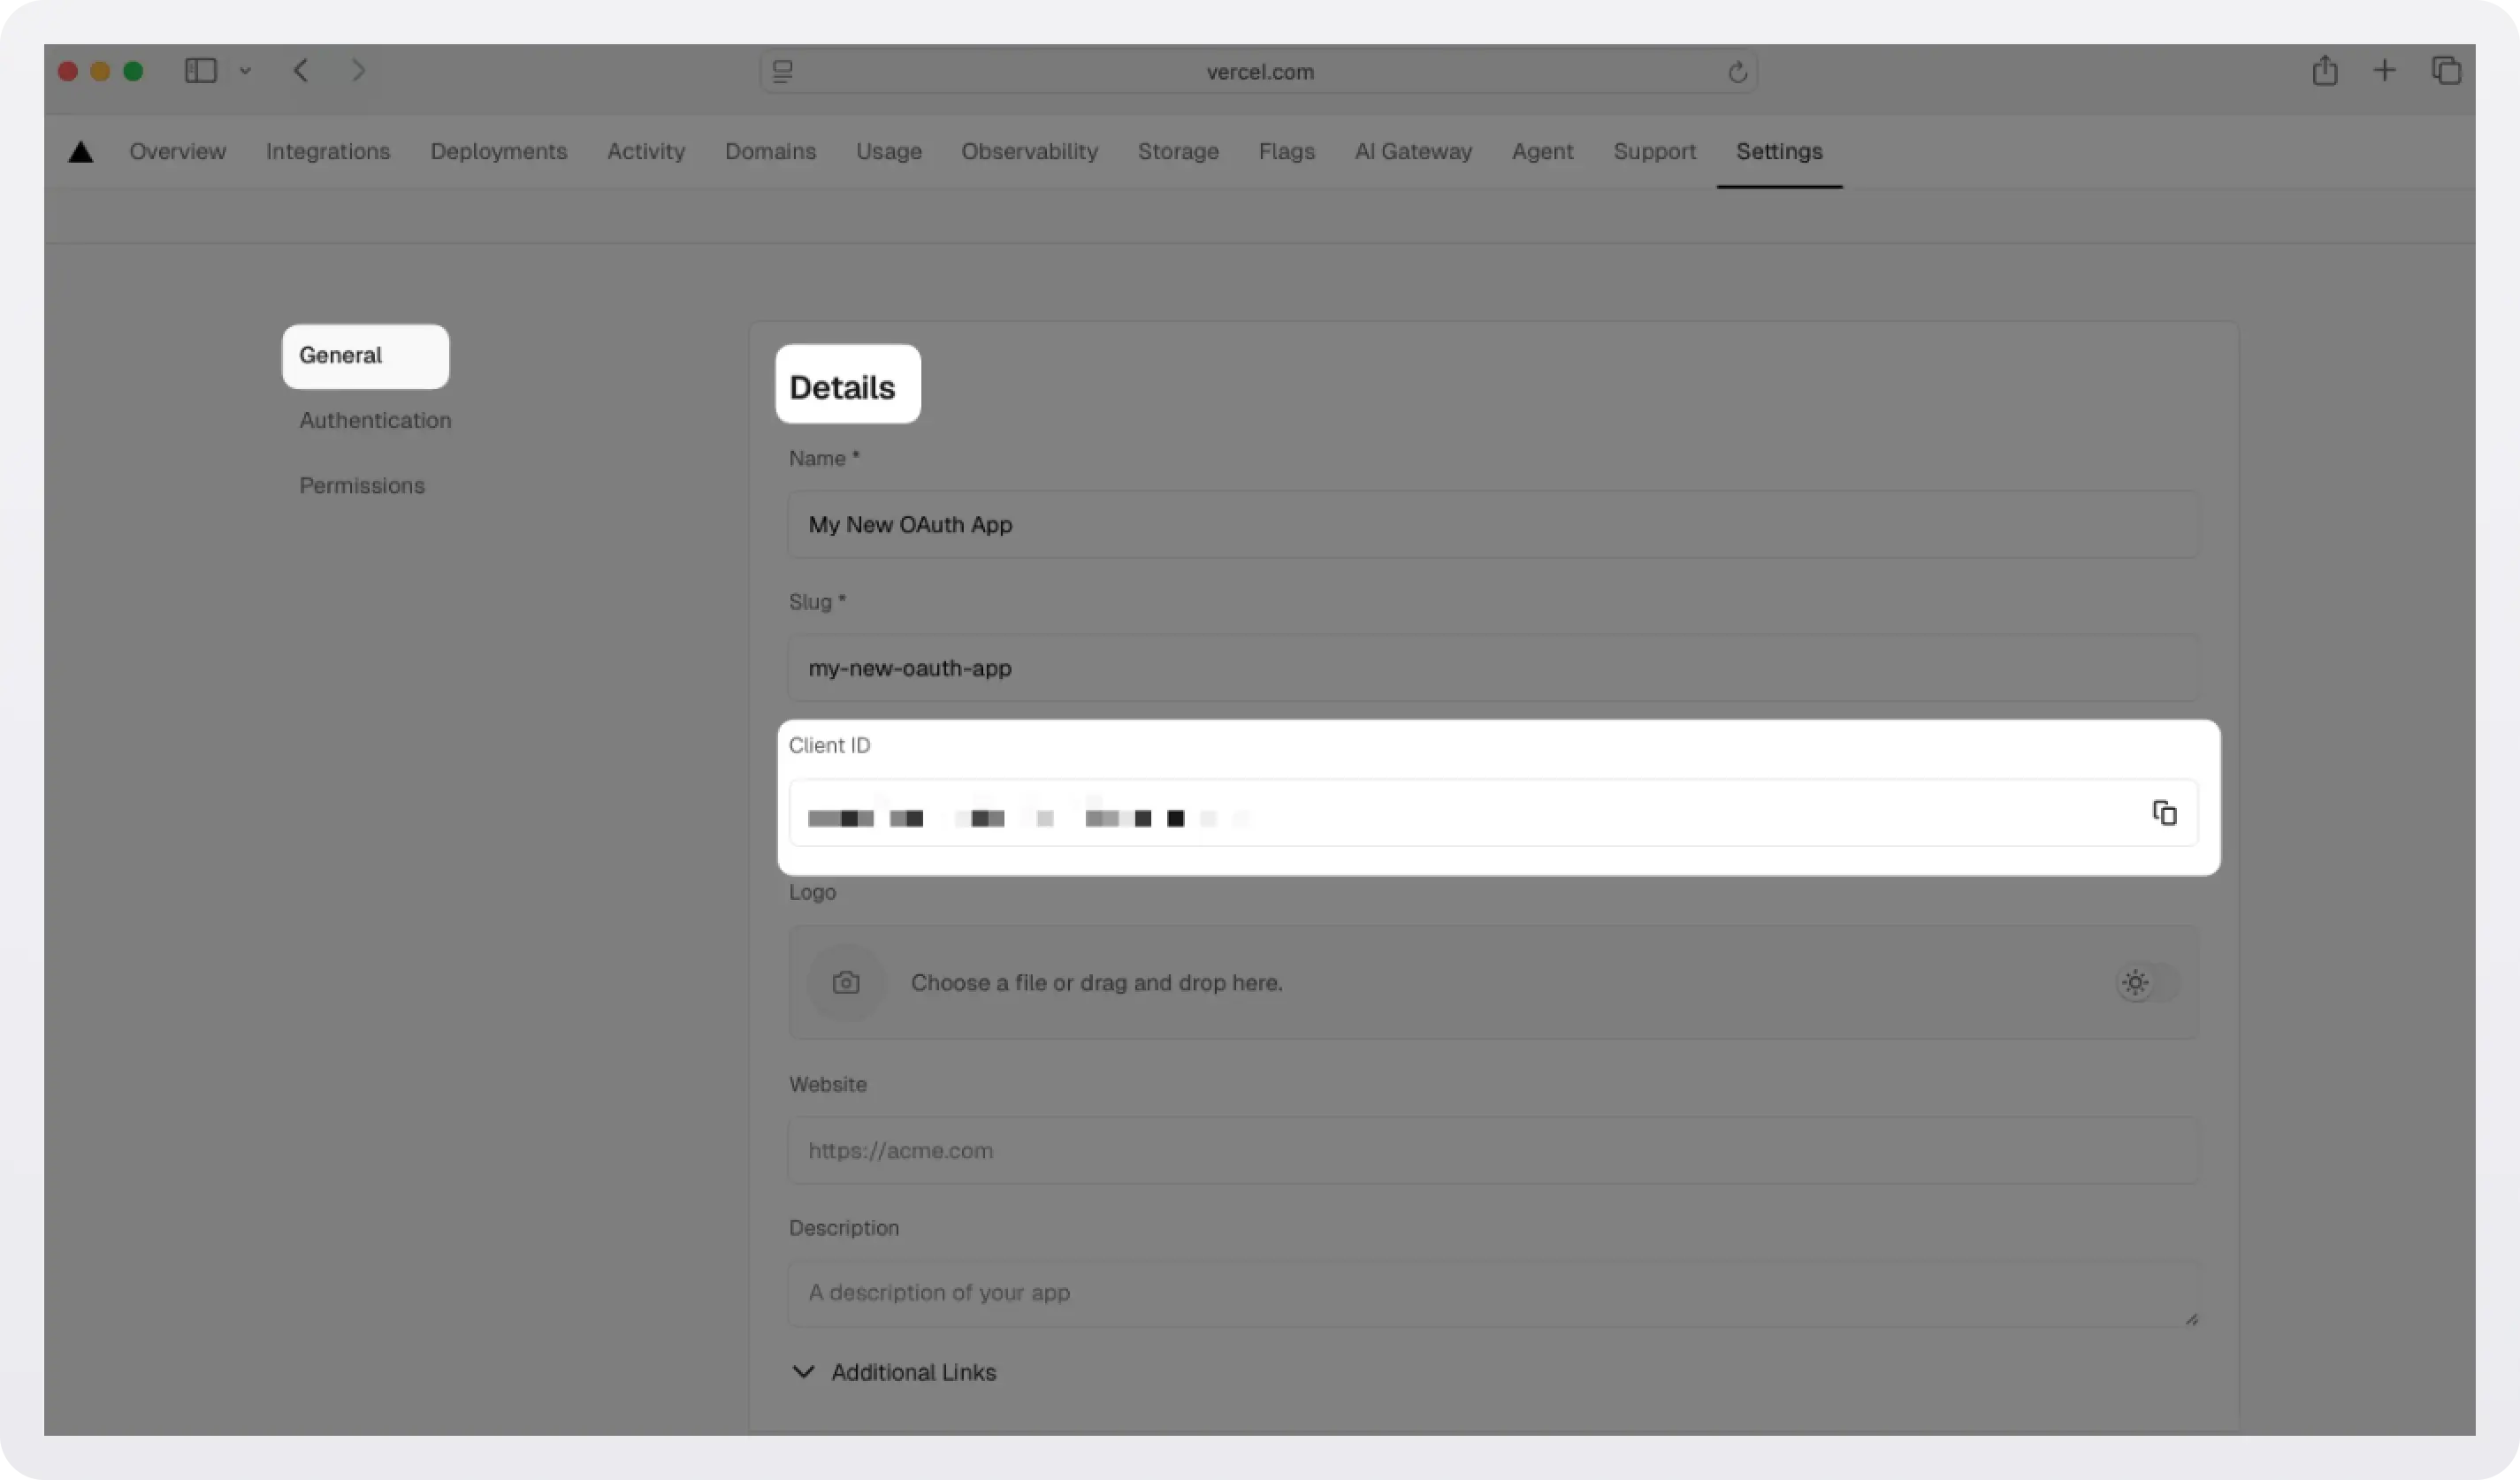
While you are there, copy your Client ID from the Details section. We will configure it at the WorkOS dashboard in the next step.
Select the Authentication tab. Under Client Authentication Methods, make sure client_secret_post is selected. WorkOS requires this method.
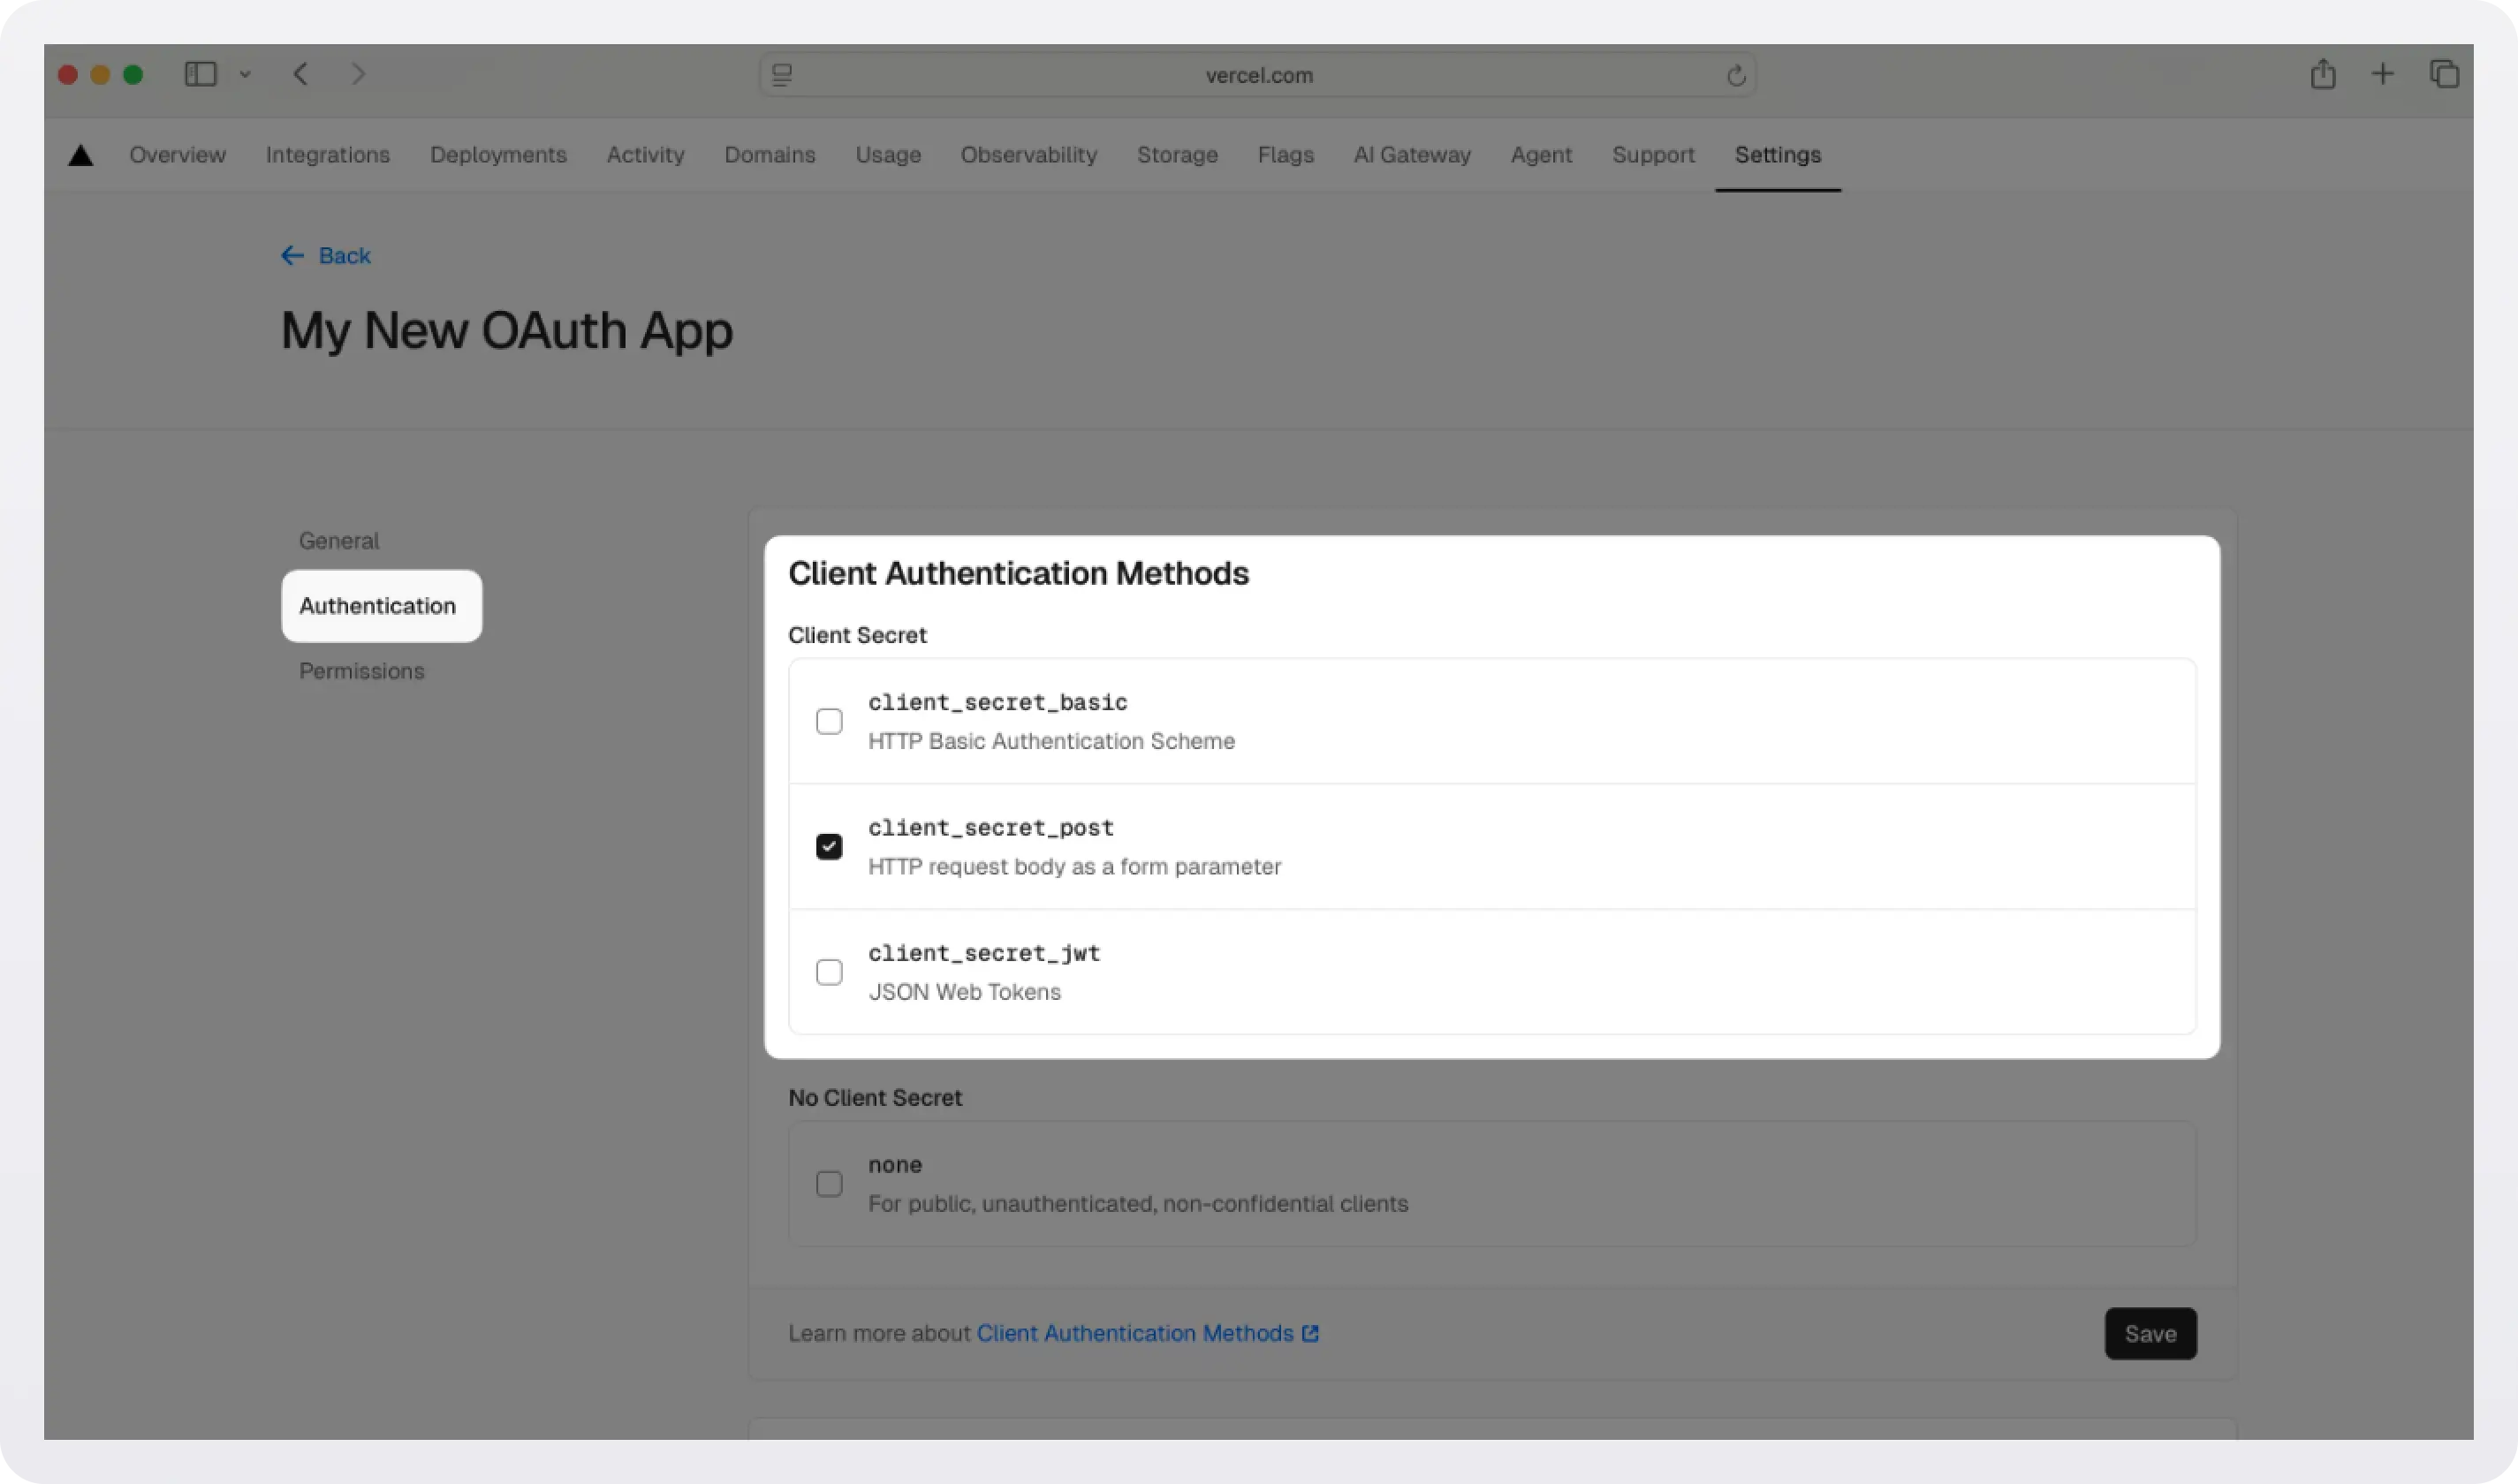
While you're here, scroll down to Client Secrets and click Generate to create a new client secret. Copy this value immediately; Vercel only shows it once. If you lose it, you'll need to generate a new one. We will configure this value at the WorkOS dashboard in the next step.

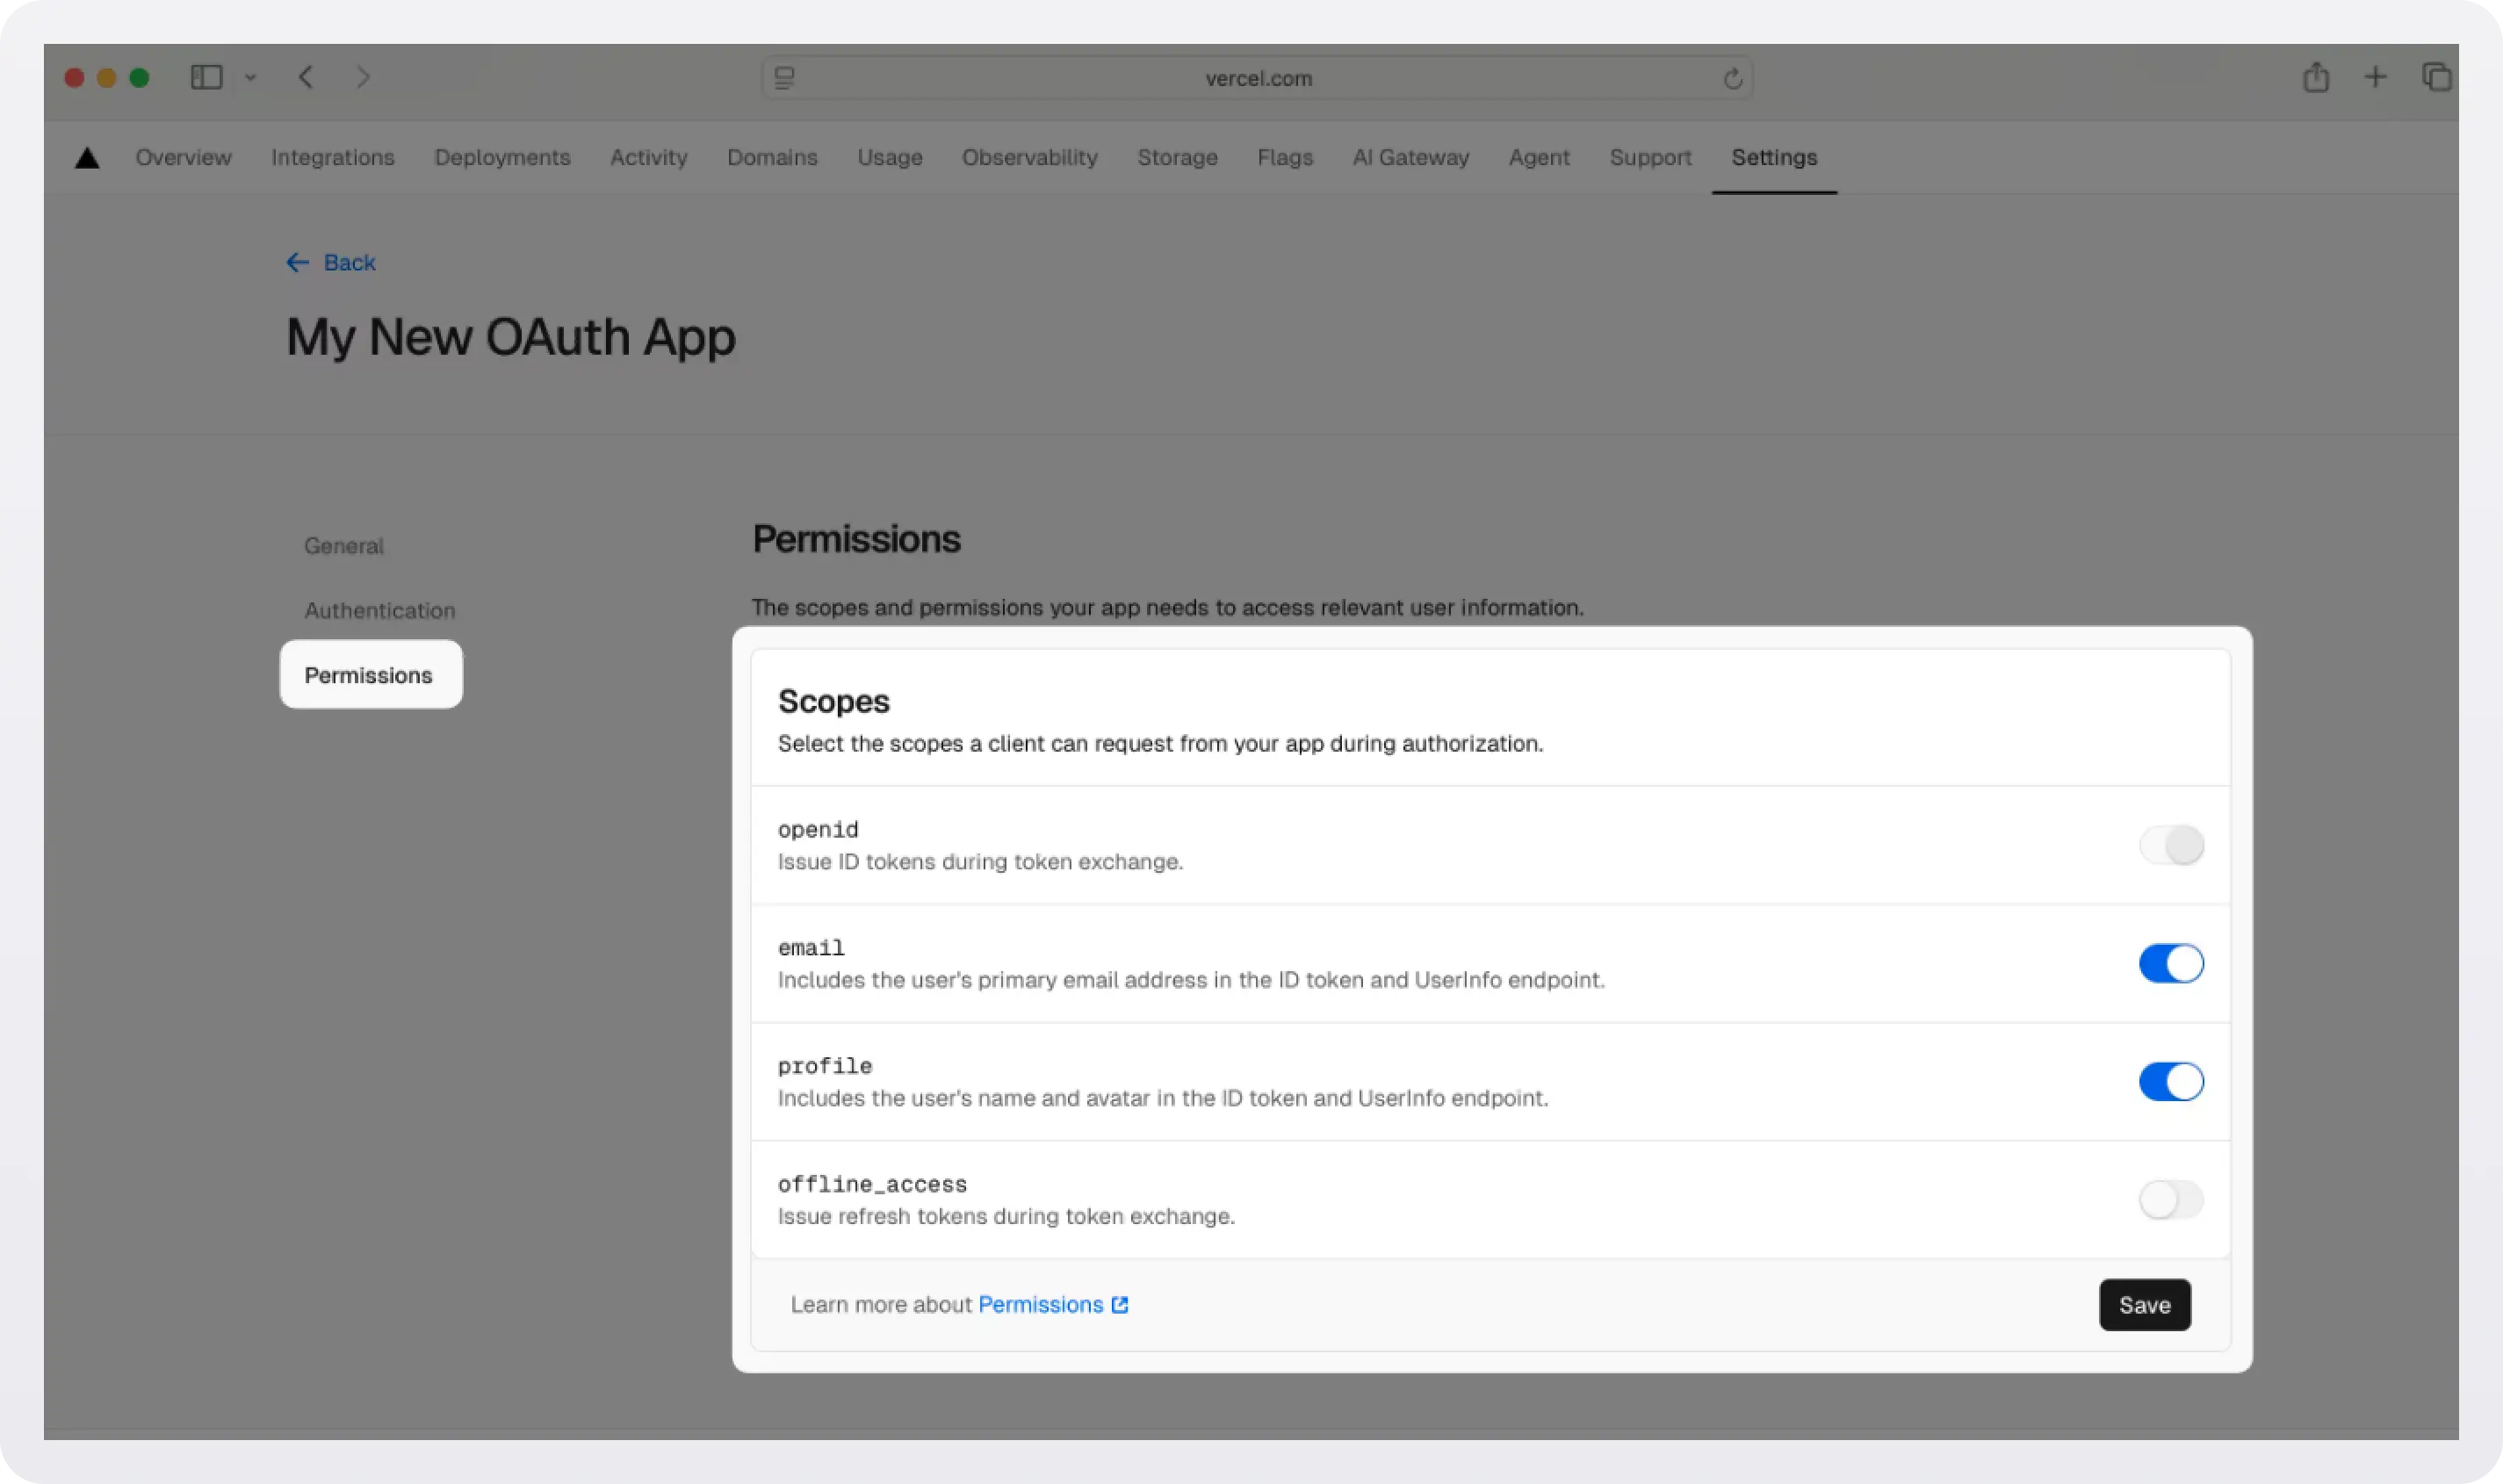
Select the Permissions tab. In the Scopes section, enable the openid, email, and profile scopes to allow the application to read basic user profile information. Click Save.
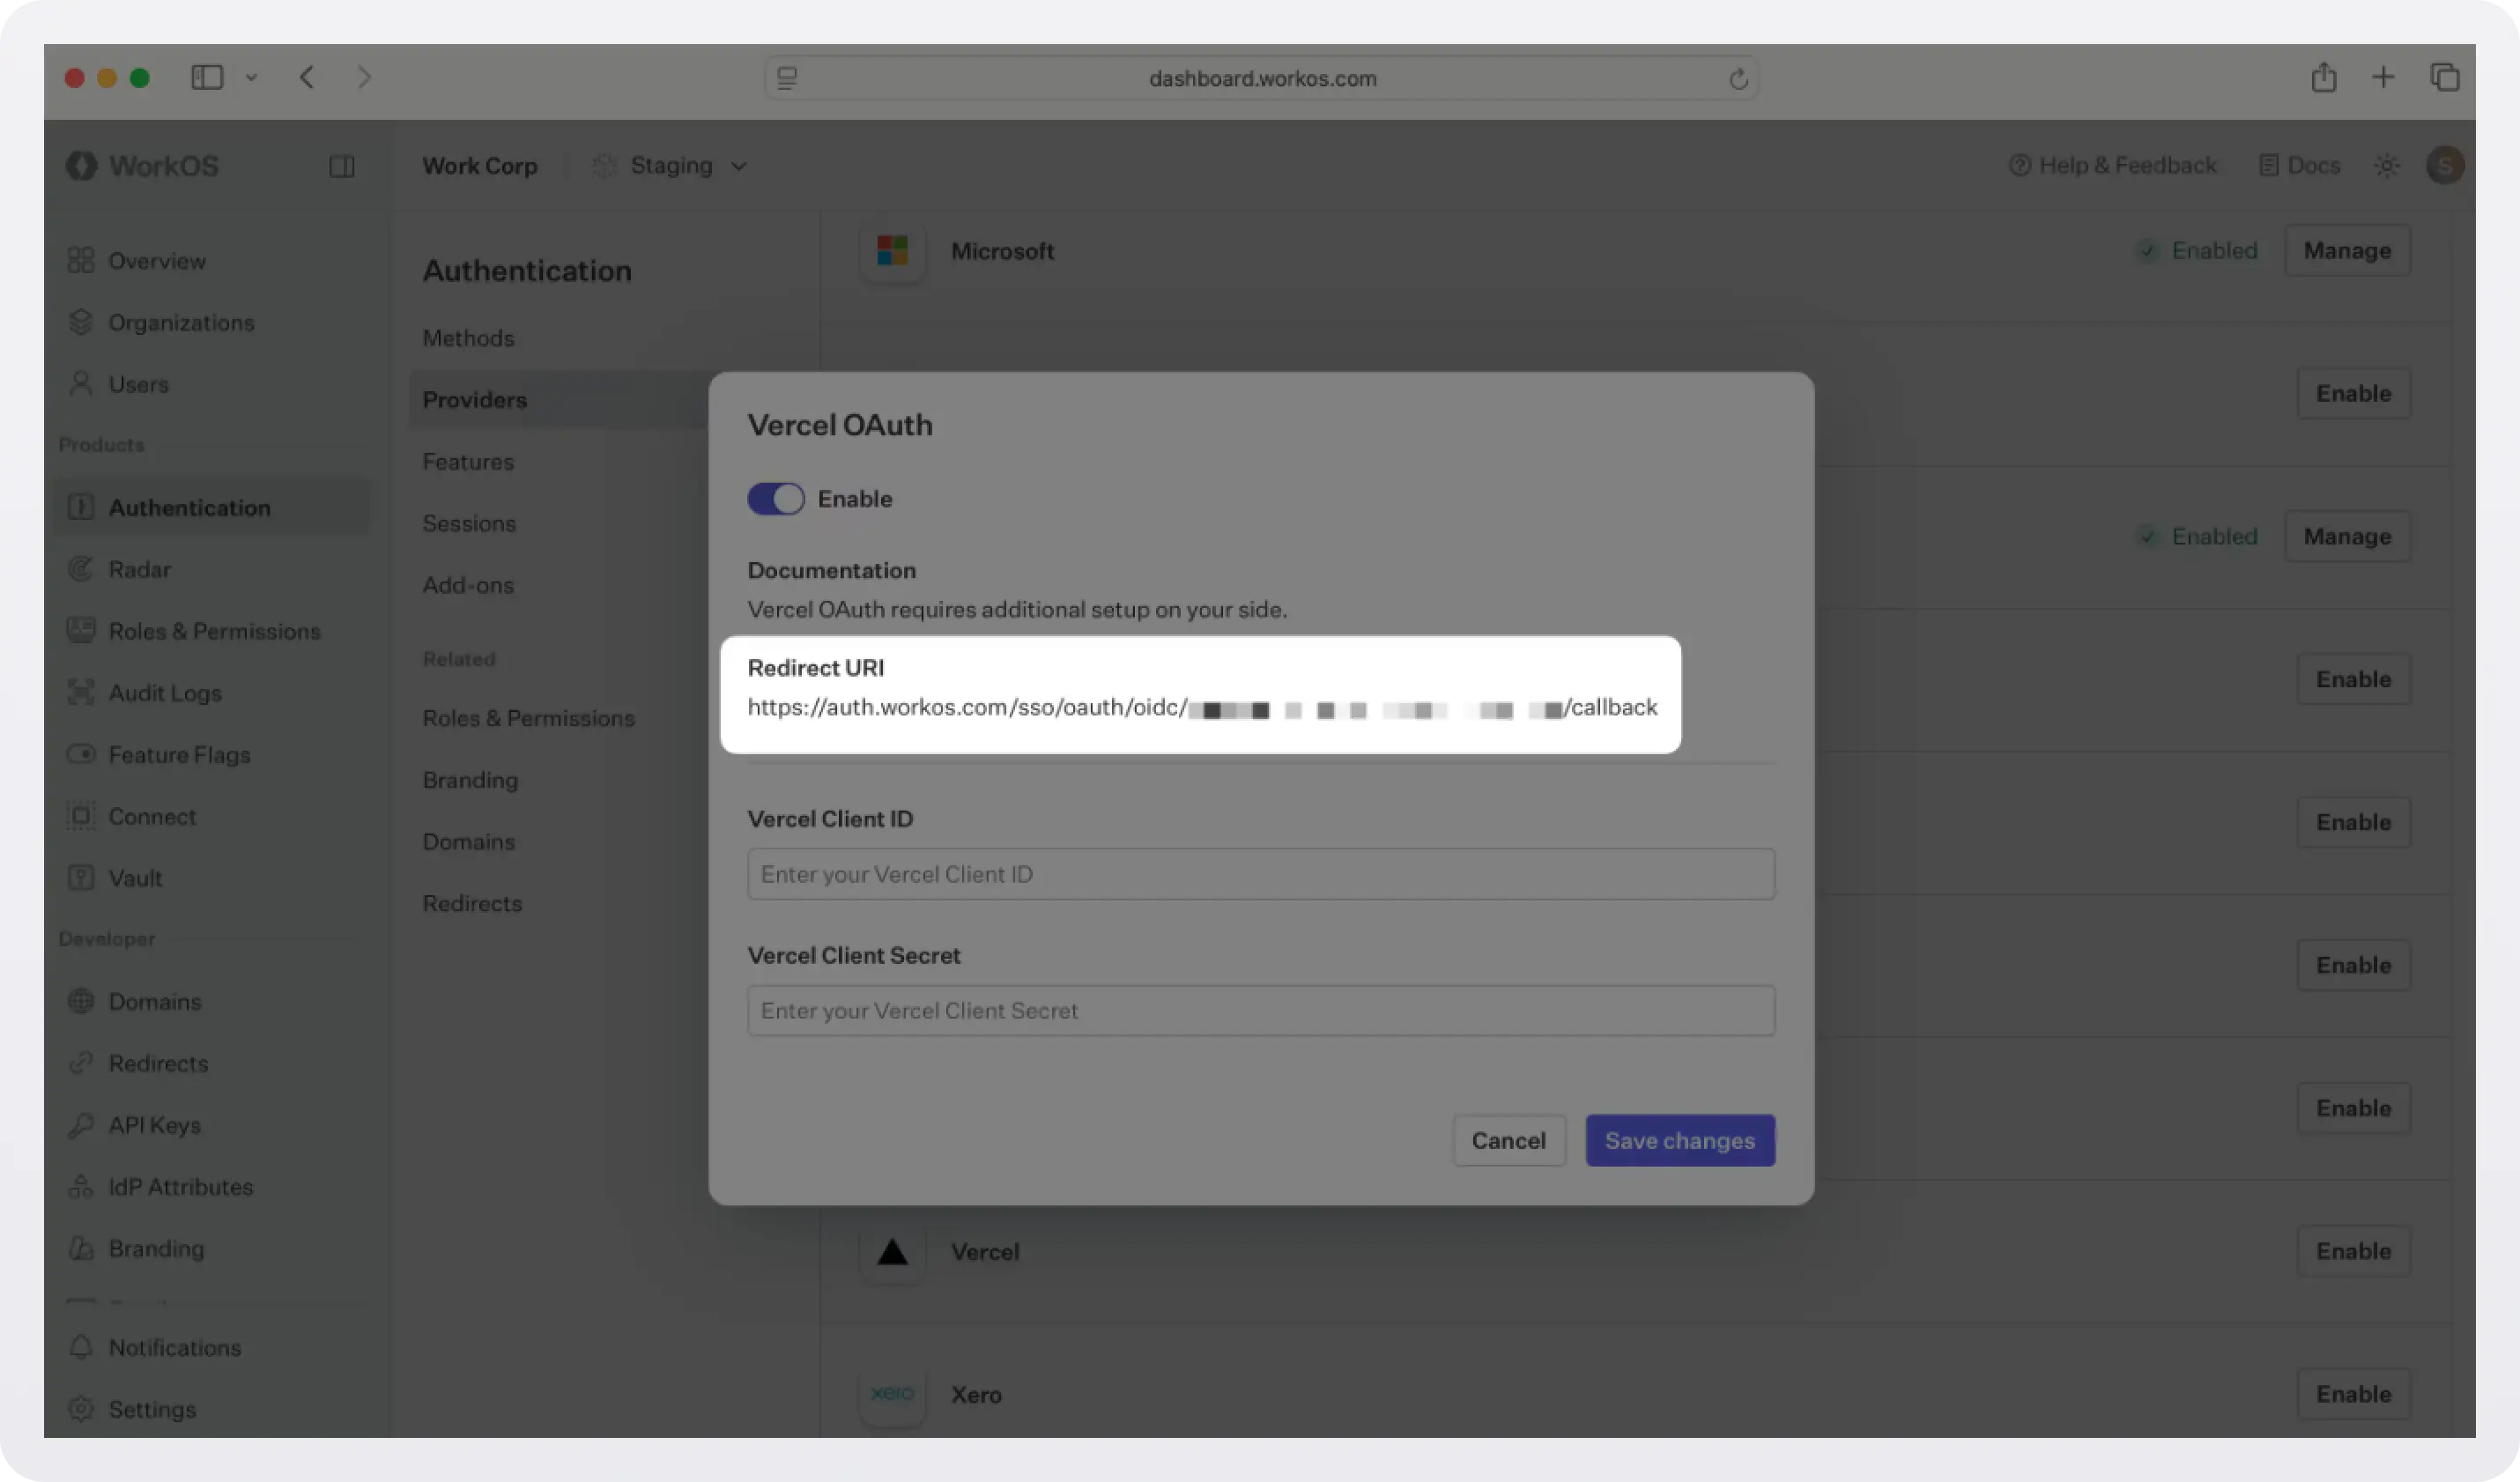
Step 2: Enable Vercel OAuth in WorkOS
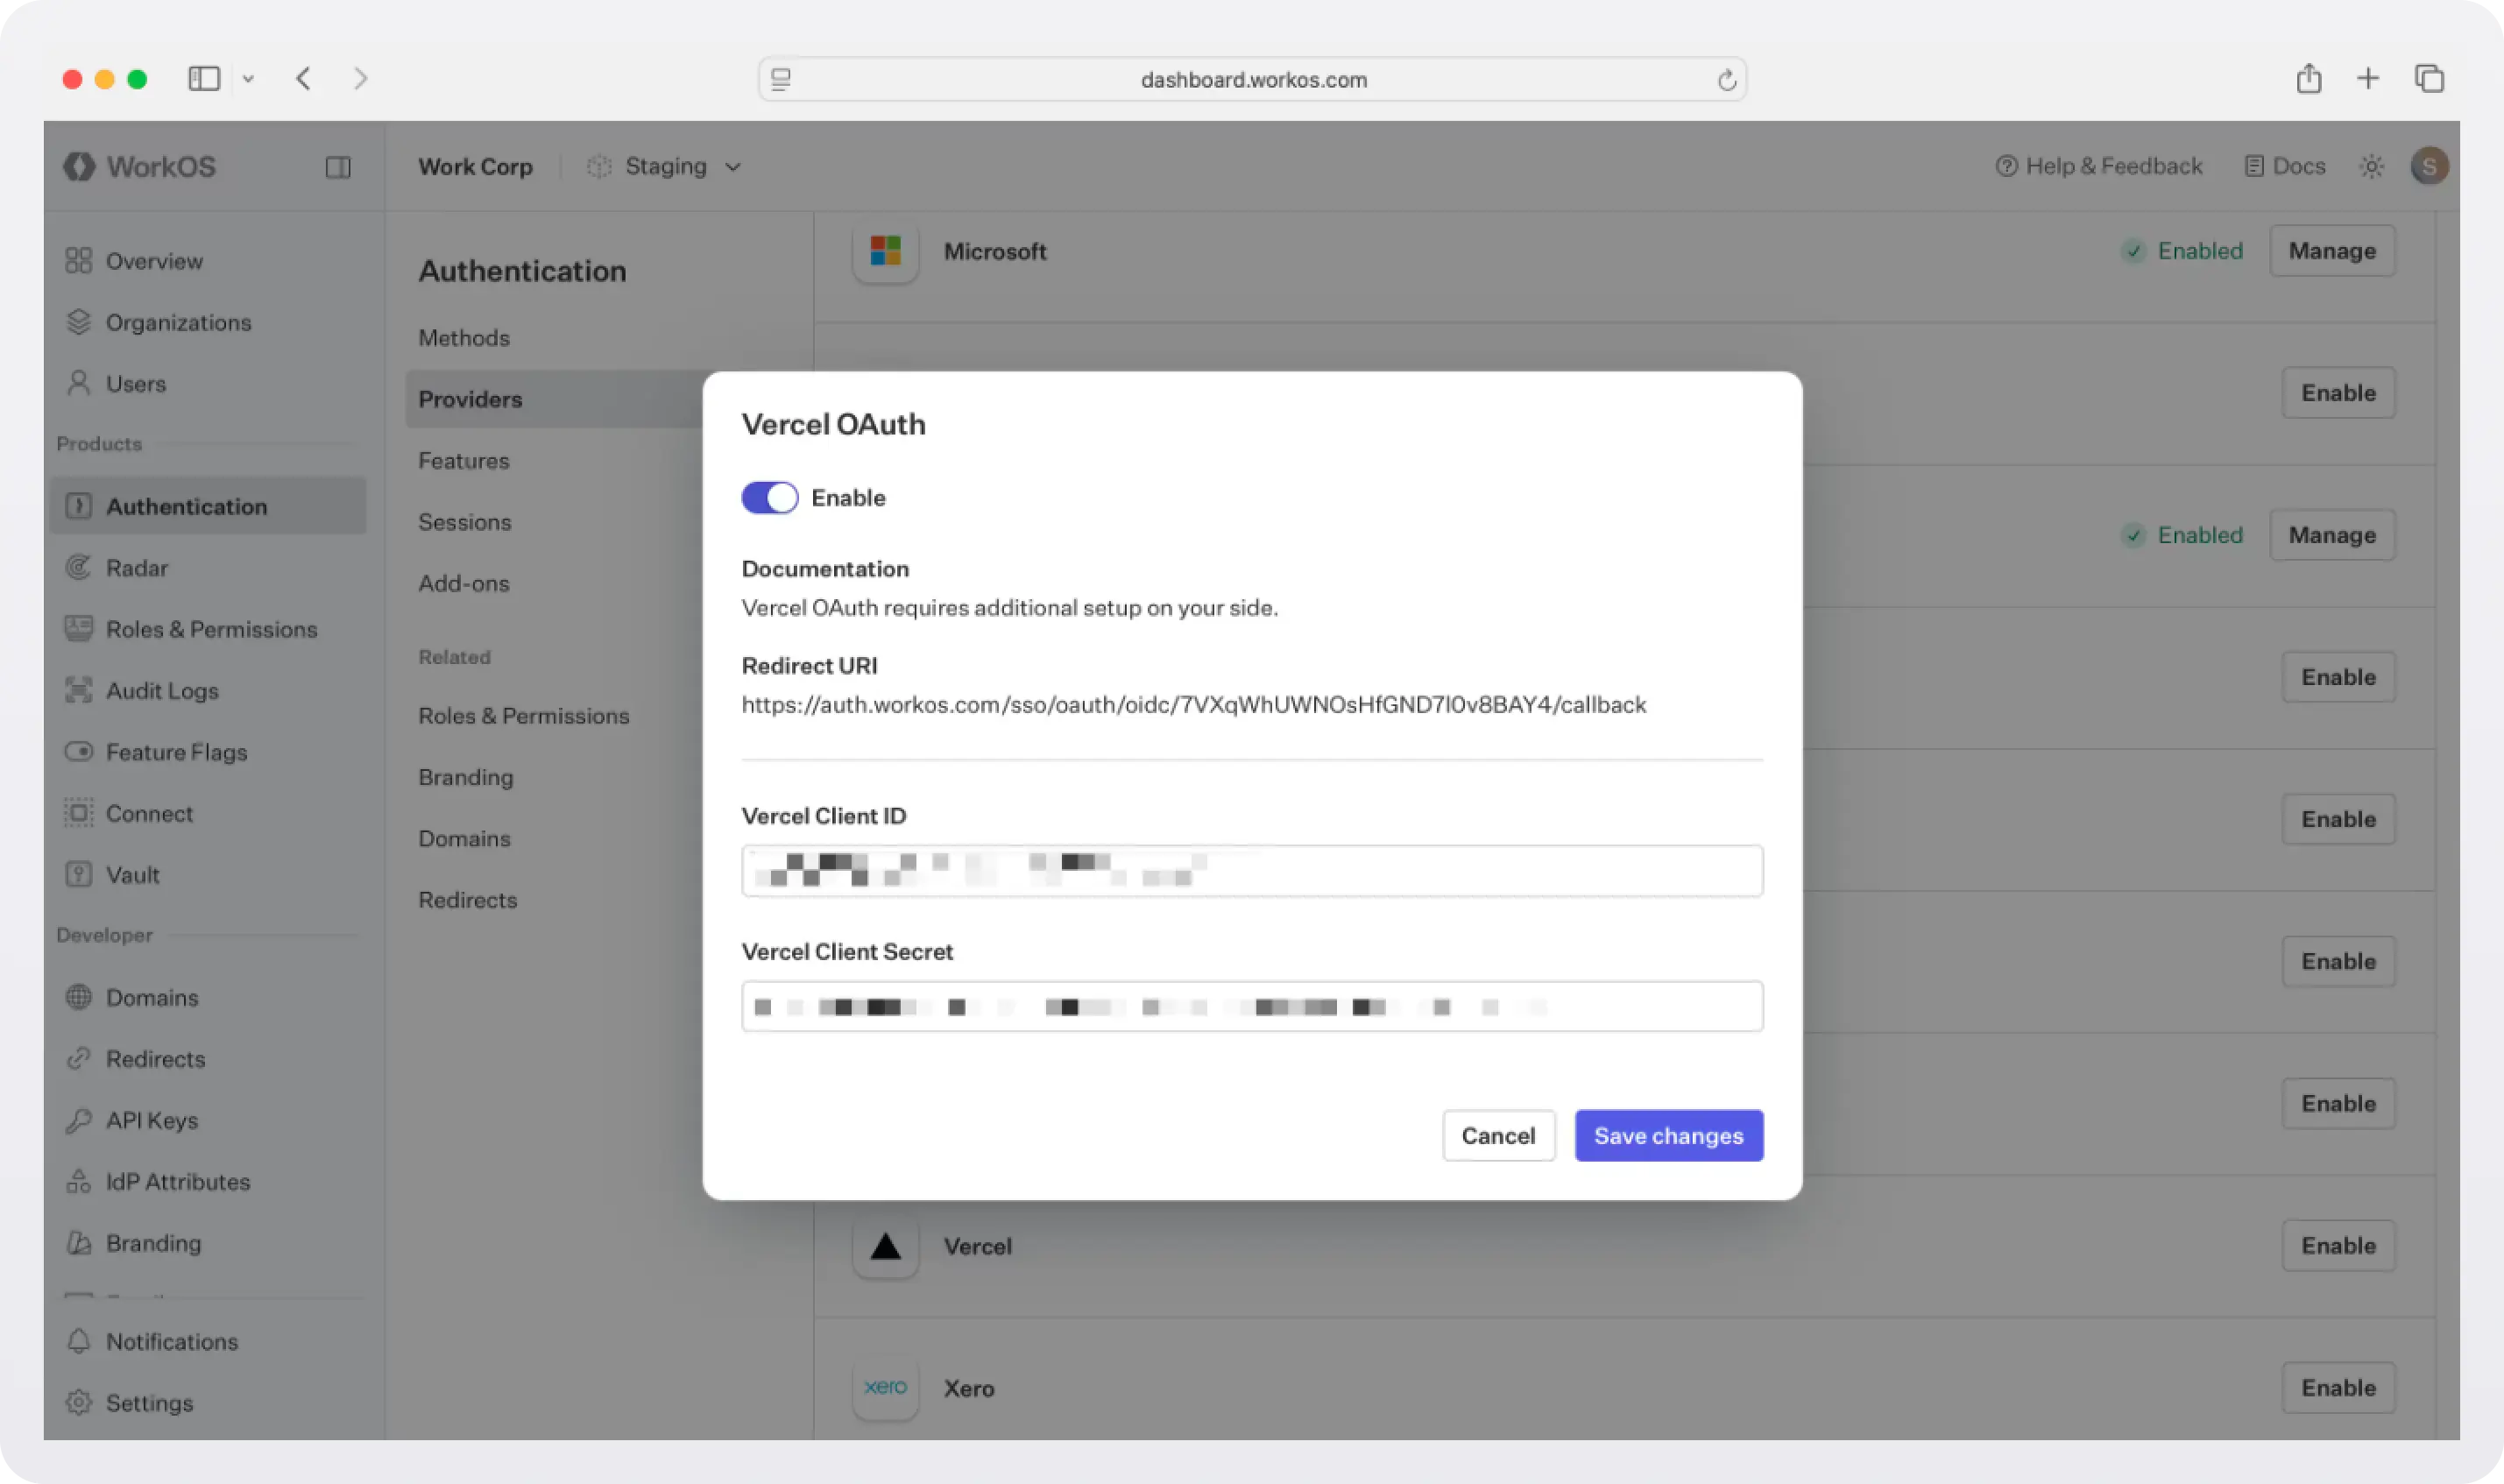
With your Vercel app configured, head to the WorkOS dashboard > Authentication > Providers.
Scroll down to find the Vercel section and click Manage.
Paste your Vercel Client ID and Vercel Client Secret into their respective fields in the dialog. Click Save changes.
That's it for the dashboard work. WorkOS now knows how to redirect users to Vercel, exchange the authorization code for tokens, and normalize the user profile. If you're using AuthKit's Hosted UI, a "Continue with Vercel" button will automatically appear on your login page, no additional configuration needed.
If you are building your own authentication flows outside of AuthKit’s hosted UI, you will use the provider query parameter in the Get Authorization URL API endpoint to support global Vercel OAuth for any domain. The provider query parameter should be set to VercelOAuth. For step-by-step instructions, follow our SSO docs.
If you prefer to use AuthKit, keep reading for instructions on setting it up in your app.
Step 3: Set up AuthKit in your app
If you are not already using WorkOS, you need to wire up the authentication flow in your Next.js application.
The easiest way is to run our CLI Installer. It detects your framework, installs the SDK, configures your dashboard, and writes the integration code, all with a single command:
If you prefer to do it all manually, follow these steps:
- Install the SDK: For a Next.js integration, use the
authkit-nextjslibrary:npm install @workos-inc/authkit-nextjs. - Set secrets: To make calls to WorkOS, you must provide the API key and the client ID. Get these values from the WorkOS dashboard, store them as managed secrets, and pass them to the SDKs either as environment variables or directly in your app’s configuration.
- Configure your app’s URLs: Configure the following URLs in the WorkOS dashboard > Redirects:
- Redirect URI: The callback endpoint that WorkOS will redirect to after a user has authenticated. We recommend using
http://localhost:3000/callbackas the default here. - Sign-in endpoint: Sign-in requests should originate from your application. In some instances, requests may not begin at your app. For example, some users might bookmark the hosted sign-in page or they might be led directly to the hosted sign-in page when clicking on a password reset link in an email. In these cases, AuthKit will detect when a sign-in request did not originate at your application and redirect to your application’s sign-in endpoint. This is an endpoint that you define at your application that redirects users to sign in using AuthKit.
- Sign-out endpoint: The URL users will be redirected to when they sign out of your app.
- Redirect URI: The callback endpoint that WorkOS will redirect to after a user has authenticated. We recommend using
- Add AuthKit to your app: Add the code that adds the middleware, creates the callback and sign-in routes, display user information, and protect specific routes.
For step-by-step instructions, follow the quickstart.
Step 4: Test the flow
Start your development server:
Navigate to http://localhost:3000. Click Sign in and you'll be redirected to AuthKit's hosted UI. You should see a "Continue with Vercel" button. Click it, authorize the app in the Vercel consent screen, and you'll be redirected back to your app as an authenticated user.
You can also verify that the integration worked by checking the WorkOS dashboard > Users. The user who just signed in will appear there.
What you've built
In a few steps, you've gone from zero to a working "Sign in with Vercel" flow:
- A Vercel OAuth application that issues tokens for your users.
- WorkOS configured to act as the identity hub, normalizing Vercel profiles into a consistent user object.
- AuthKit's hosted UI automatically showing the Vercel sign-in option.
- A Next.js app with encrypted session management, route protection, and user profile access; all handled by the @workos-inc/authkit-nextjs SDK.
The real win here is that your developer users don't have to create yet another account. They click "Continue with Vercel", authorize in one click, and they're in, with the same identity they use to manage their deployments.
And because WorkOS handles the OAuth plumbing, you can add more providers (Google, GitHub, Microsoft, and more) the exact same way, with no changes to your application code required.