How to deploy Laravel apps with enterprise-ready authentication
Learn how to set up a Laravel 12 project with WorkOS AuthKit and deploy it seamlessly to Laravel Cloud, leveraging zero-config hosting and enterprise-grade authentication features.
Laravel Cloud is a new platform that makes it incredibly easy to deploy and manage Laravel applications in a scalable, serverless environment. Whether you're building a small project or an enterprise-grade app, Laravel Cloud simplifies deployment with zero-config hosting, automatic scaling, and seamless integration with Laravel's ecosystem.
When it comes to enterprise-ready authentication, WorkOS AuthKit is the key. It provides a secure, polished authentication system that integrates effortlessly with Laravel, offering features like social logins, passkeys, Magic Auth, and SSO. In this guide, we'll set up a Laravel 12 project with WorkOS AuthKit, using the React Starter Kit and deploy it to Laravel Cloud in just a few steps!
Step 1: Install Laravel 12 with WorkOS AuthKit
Start by creating a new Laravel project and selecting the React starter kit with WorkOS:
During setup, you'll be prompted to name your app first. Then, choose a starter kit. Select React, then WorkOS as the authentication provider. Finally, pick a testing framework like Pest, for example. If you haven't already, create your WorkOS account.
Step 2: Configure WorkOS in Laravel
To connect Laravel with WorkOS, update your .env file with your WorkOS credentials:
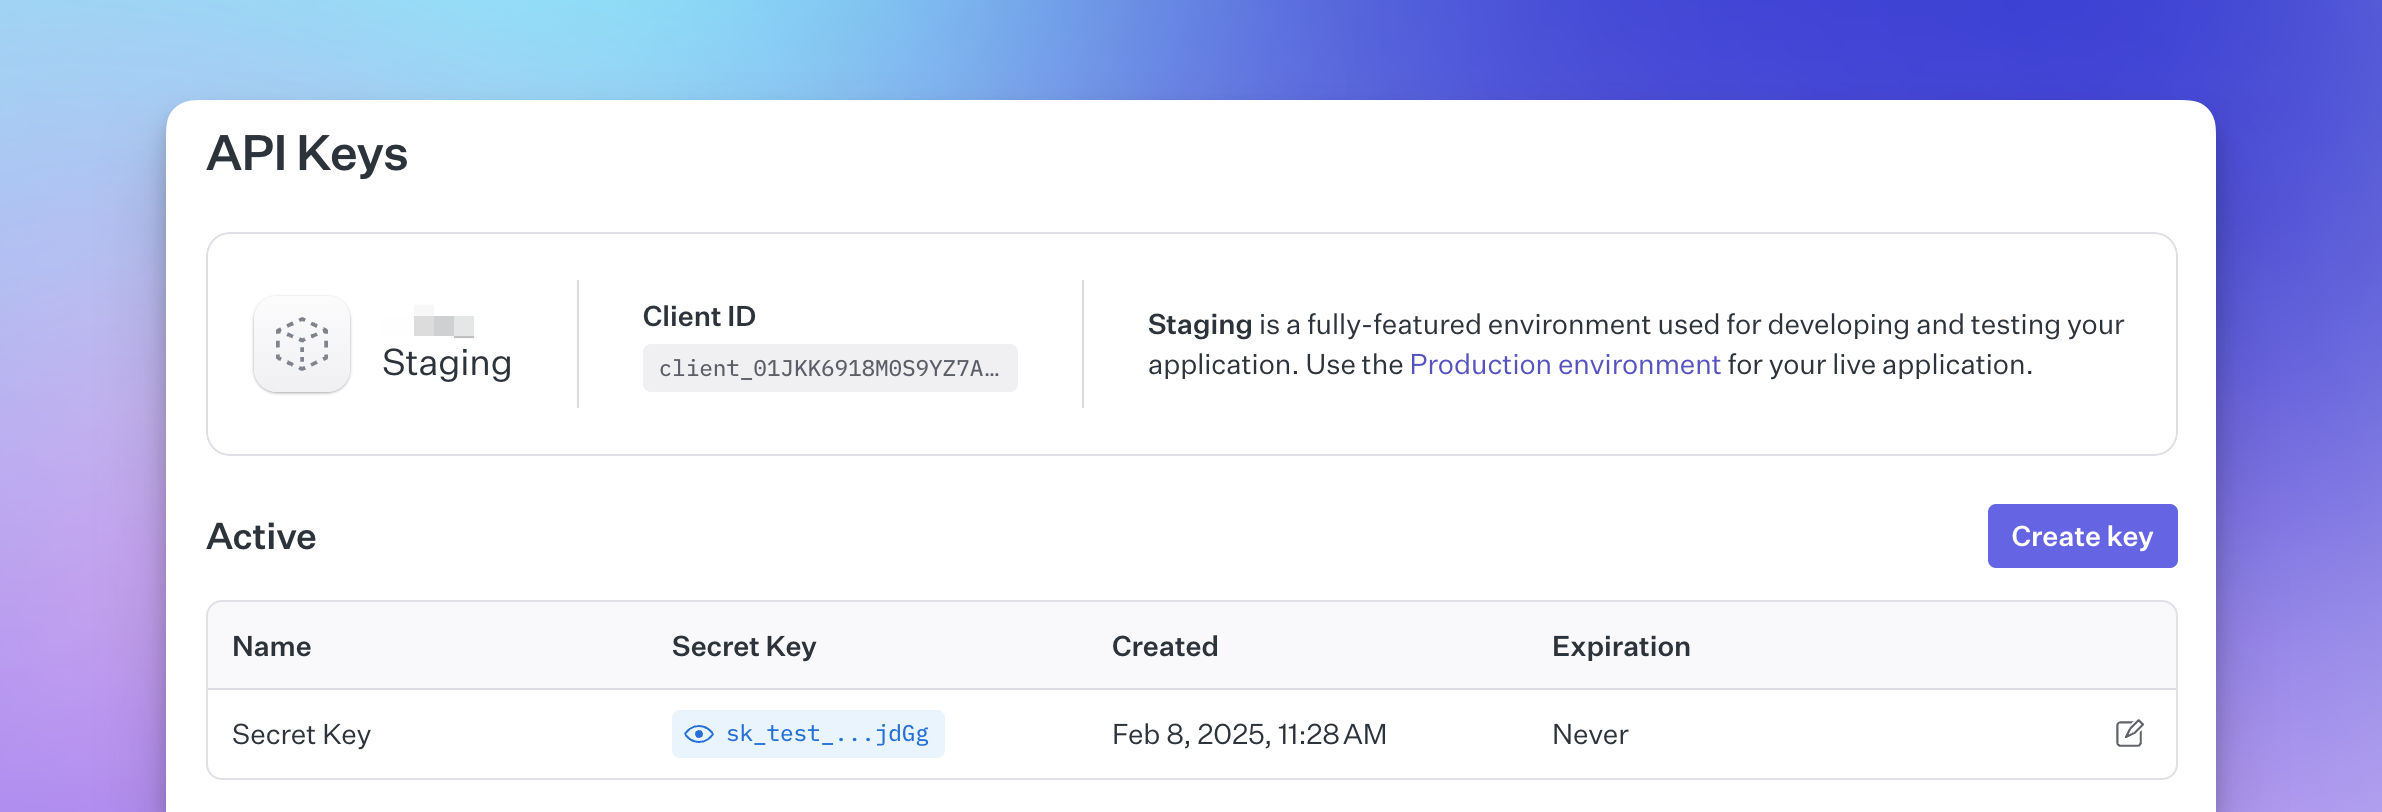
Replace your-client-id and your-api-key with the values from the API Keys section of your WorkOS dashboard.
The redirect URL should point to the authentication route of your app. To start it will be pre-populated with the string http://localhost:8000/authenticate.
Step 3: Set Up Redirects in WorkOS
In your WorkOS dashboard, configure the following URLs under Redirects:
- Sign-in callback:
http://localhost:8000/authenticate - Homepage URL:
http://localhost:8000/ - Logout redirect URL:
http://localhost:8000/
This ensures that users are redirected appropriately after authentication.
Step 4: Choose Authentication Methods
WorkOS AuthKit supports multiple authentication methods, including:
- Social login (Apple, GitHub, Google, etc.)
- Passkeys
- Magic Auth
- SSO (Entra ID, Okta, Google Workspace, etc.)
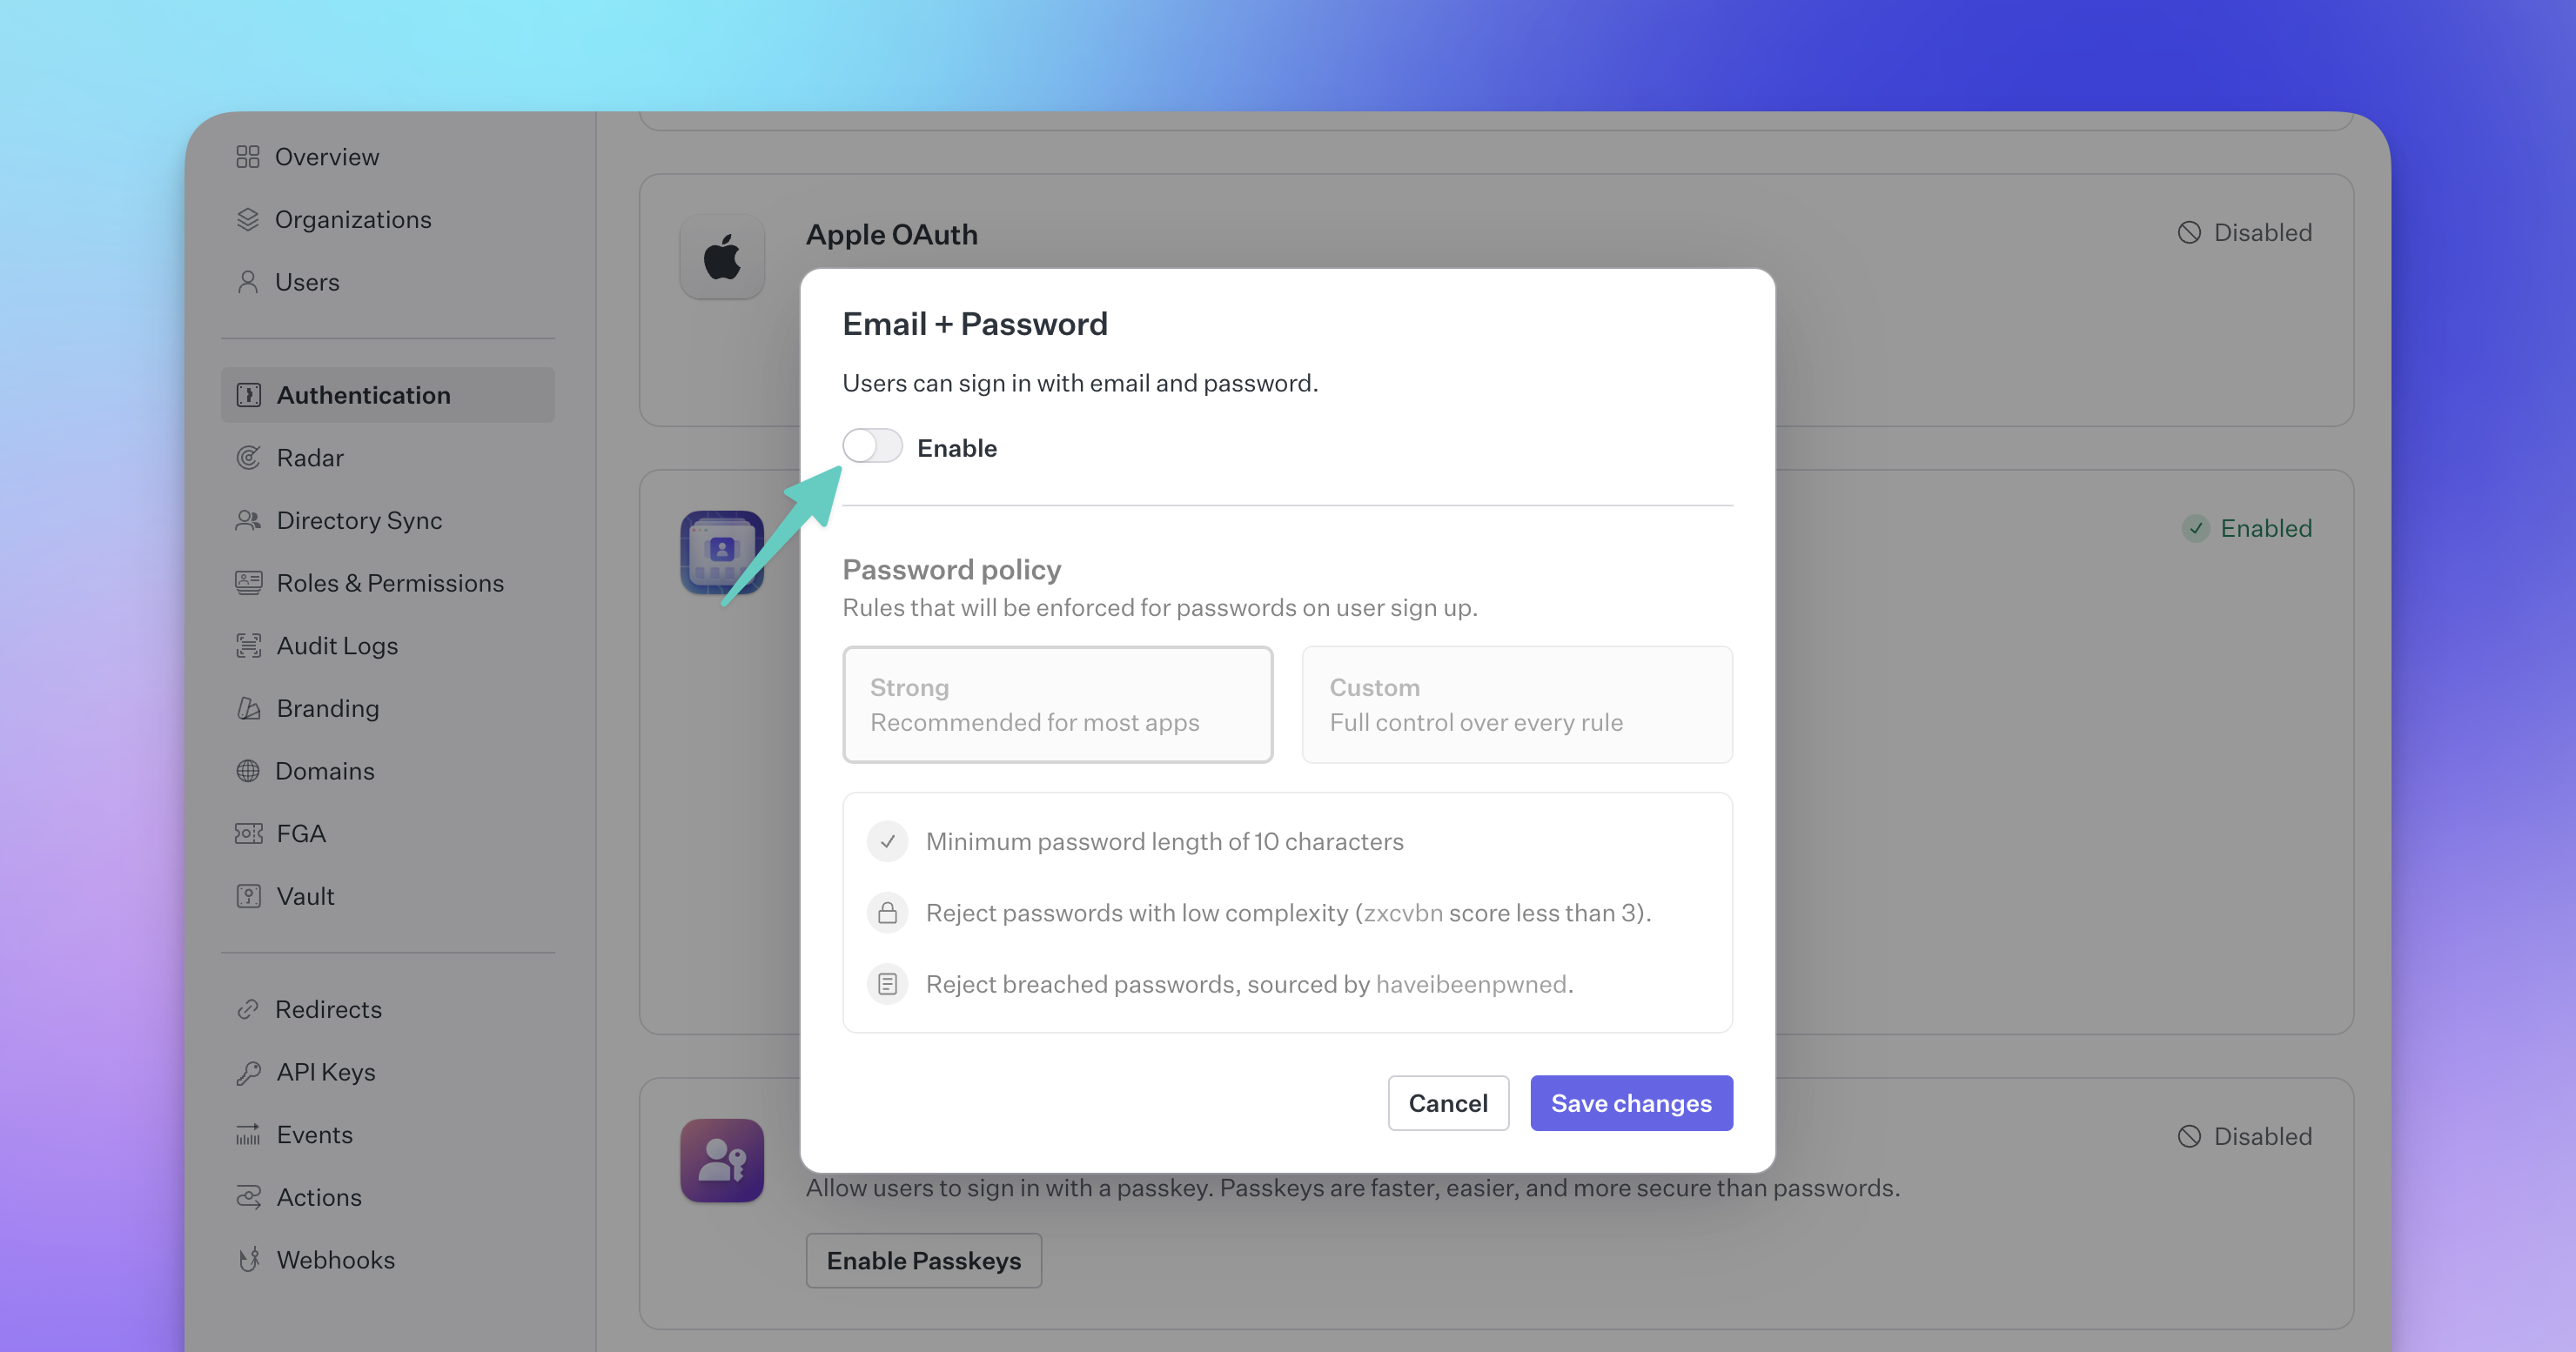
To enhance security, it's recommended to disable "Email + Password" login in WorkOS AuthKit settings and rely on these modern authentication methods instead. To do so, navigate to the Authentication section of the WorkOS Dashboard, click on the "Configure Email + Password" button and simply disable it via the toggle.
Step 5: Sync AuthKit Session Timeout
For consistent session management, ensure your Laravel session timeout matches the WorkOS inactivity timeout. By default this is set to 120 minutes (2 hours). You can find this in your .env file under SESSION_LIFETIME.
Within the WorkOS Dashboard, find the Sessions configuration and click on the “Configure session lifetime” button. From there, update the “Inactivity timeout” value to 120 minutes.

Step 6: Deploy to Laravel Cloud
After connecting your project to a source control provider, like GitHub, you can add the app to Laravel Cloud by clicking on their “+ New application button”. After filling out the form and connecting the project from your source control provider, your app is successfully created. There are a few additional configurations to set up from here:
- Create a database by following the prompts and accept the defaults
- Copy the Laravel Cloud domain from the Settings > Domains tab
- Update the Redirect URIs in the WorkOS dashboard to include the public Laravel Cloud domain URL as an additional authenticate route.
The updated Redirect URI should look as follows:
After, change the homepage URL as well for when a user logs out. This will be the same URL as above, without the /authenticate. Next, go to Settings > General in Laravel Cloud and update the “Custom environment variables” to include the WorkOS keys that were configured in Step 2, except this time the APP_URL will be the Laravel Cloud domain string.
Finally, the application can be deployed and subsequently visited!
Get started
By using WorkOS AuthKit, you can quickly add enterprise-grade authentication features to your Laravel applications, saving time and development effort. This allows you to focus on building the core functionality of your application while providing a secure and seamless authentication experience for your users.
Ready to get started? Check out WorkOS AuthKit Authentication Starter Kit in the Laravel docs. More of a visual learner? Follow along this visual walkthrough: