Launch Week Day 1: Sessions
Session management is the mechanism for securely handling interactions between a user and an application within a specific time frame. Sessions are now available to all WorkOS users for free.
Session management is the mechanism for securely handling interactions between a user and an application within a specific time frame. It’s an important tool for balancing UX with security and is the reason why you don’t have to re-authenticate every time you ask a question in ChatGPT or log in repeatedly when using Figma in your browser.
Great session management should handle security concerns for you. It should only take a few lines to wire into your app, provide easy-to-use hooks to gracefully update the UI when a session is nearing its end, and support revocation from the server to quickly log out users or change their roles in near real-time.
It can be challenging to implement all of this yourself, which is why we are launching our carefully crafted Sessions through AuthKit and User Management. Best of all, Sessions are free for all customers.
Integrating Sessions
Next.js
The quickest way to integrate is by using the new Next.js library we’ve shipped alongside this update.
Simply import the library, set your environment variables and you’ll be able to get the user and the sign in URL on the fly:
Alongside the above you’d specify the callback logic from within your callback route:
Plus some Next.js middleware:
With just a few lines of code you can get the full session experience in your Next.js application.
Under the hood
WorkOS Sessions work by using an `accessToken` and `refreshToken` to validate that the user is still logged in. If you’ve integrated AuthKit, then you might be familiar with the Authenticate with code API endpoint, which is used to match the code returned in the callback URL with the user that’s trying to log in.
Now, with Sessions, in addition to the user and the organization ID, you’ll also get an access and refresh token specifically used for Sessions:
The access and refresh tokens can then be encrypted and set within a cookie if you aren’t using the Next.js library. Alternatively you could persist the refresh token in a backend database if you prefer to not store it in a cookie.
The access token is a JSON Web Token (JWT) minted (i.e. created and signed) by WorkOS, meaning you can verify whether it’s still valid later using a library for JSON Object Signing and Encryption (JOSE).
If the access token has expired, you can use the refresh token to generate a new access token.
Bear in mind that the refresh token is single use, meaning you get a new refresh token alongside your new access token.
All the above is taken care of for you by the Next.js library we’ve shipped alongside session management, ensuring that your session management is secure by default.
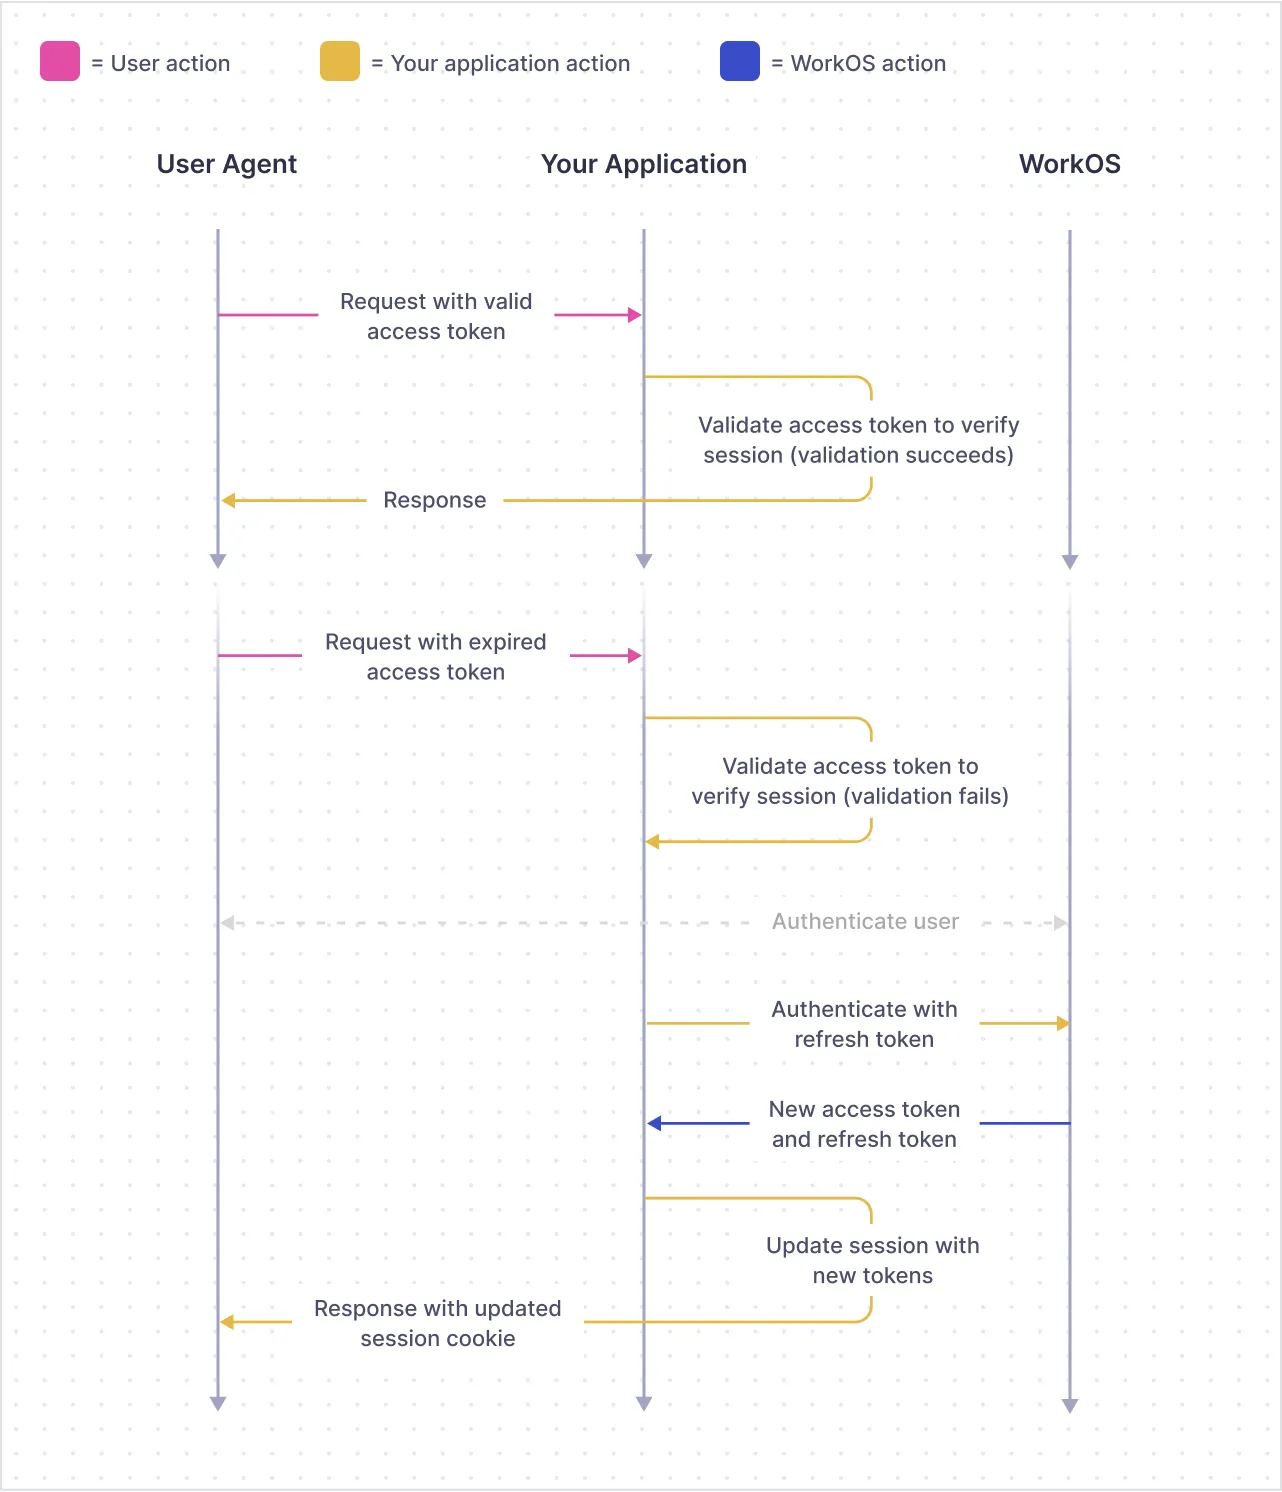
The following diagram shows how the flow works with a valid access token versus an expired access token
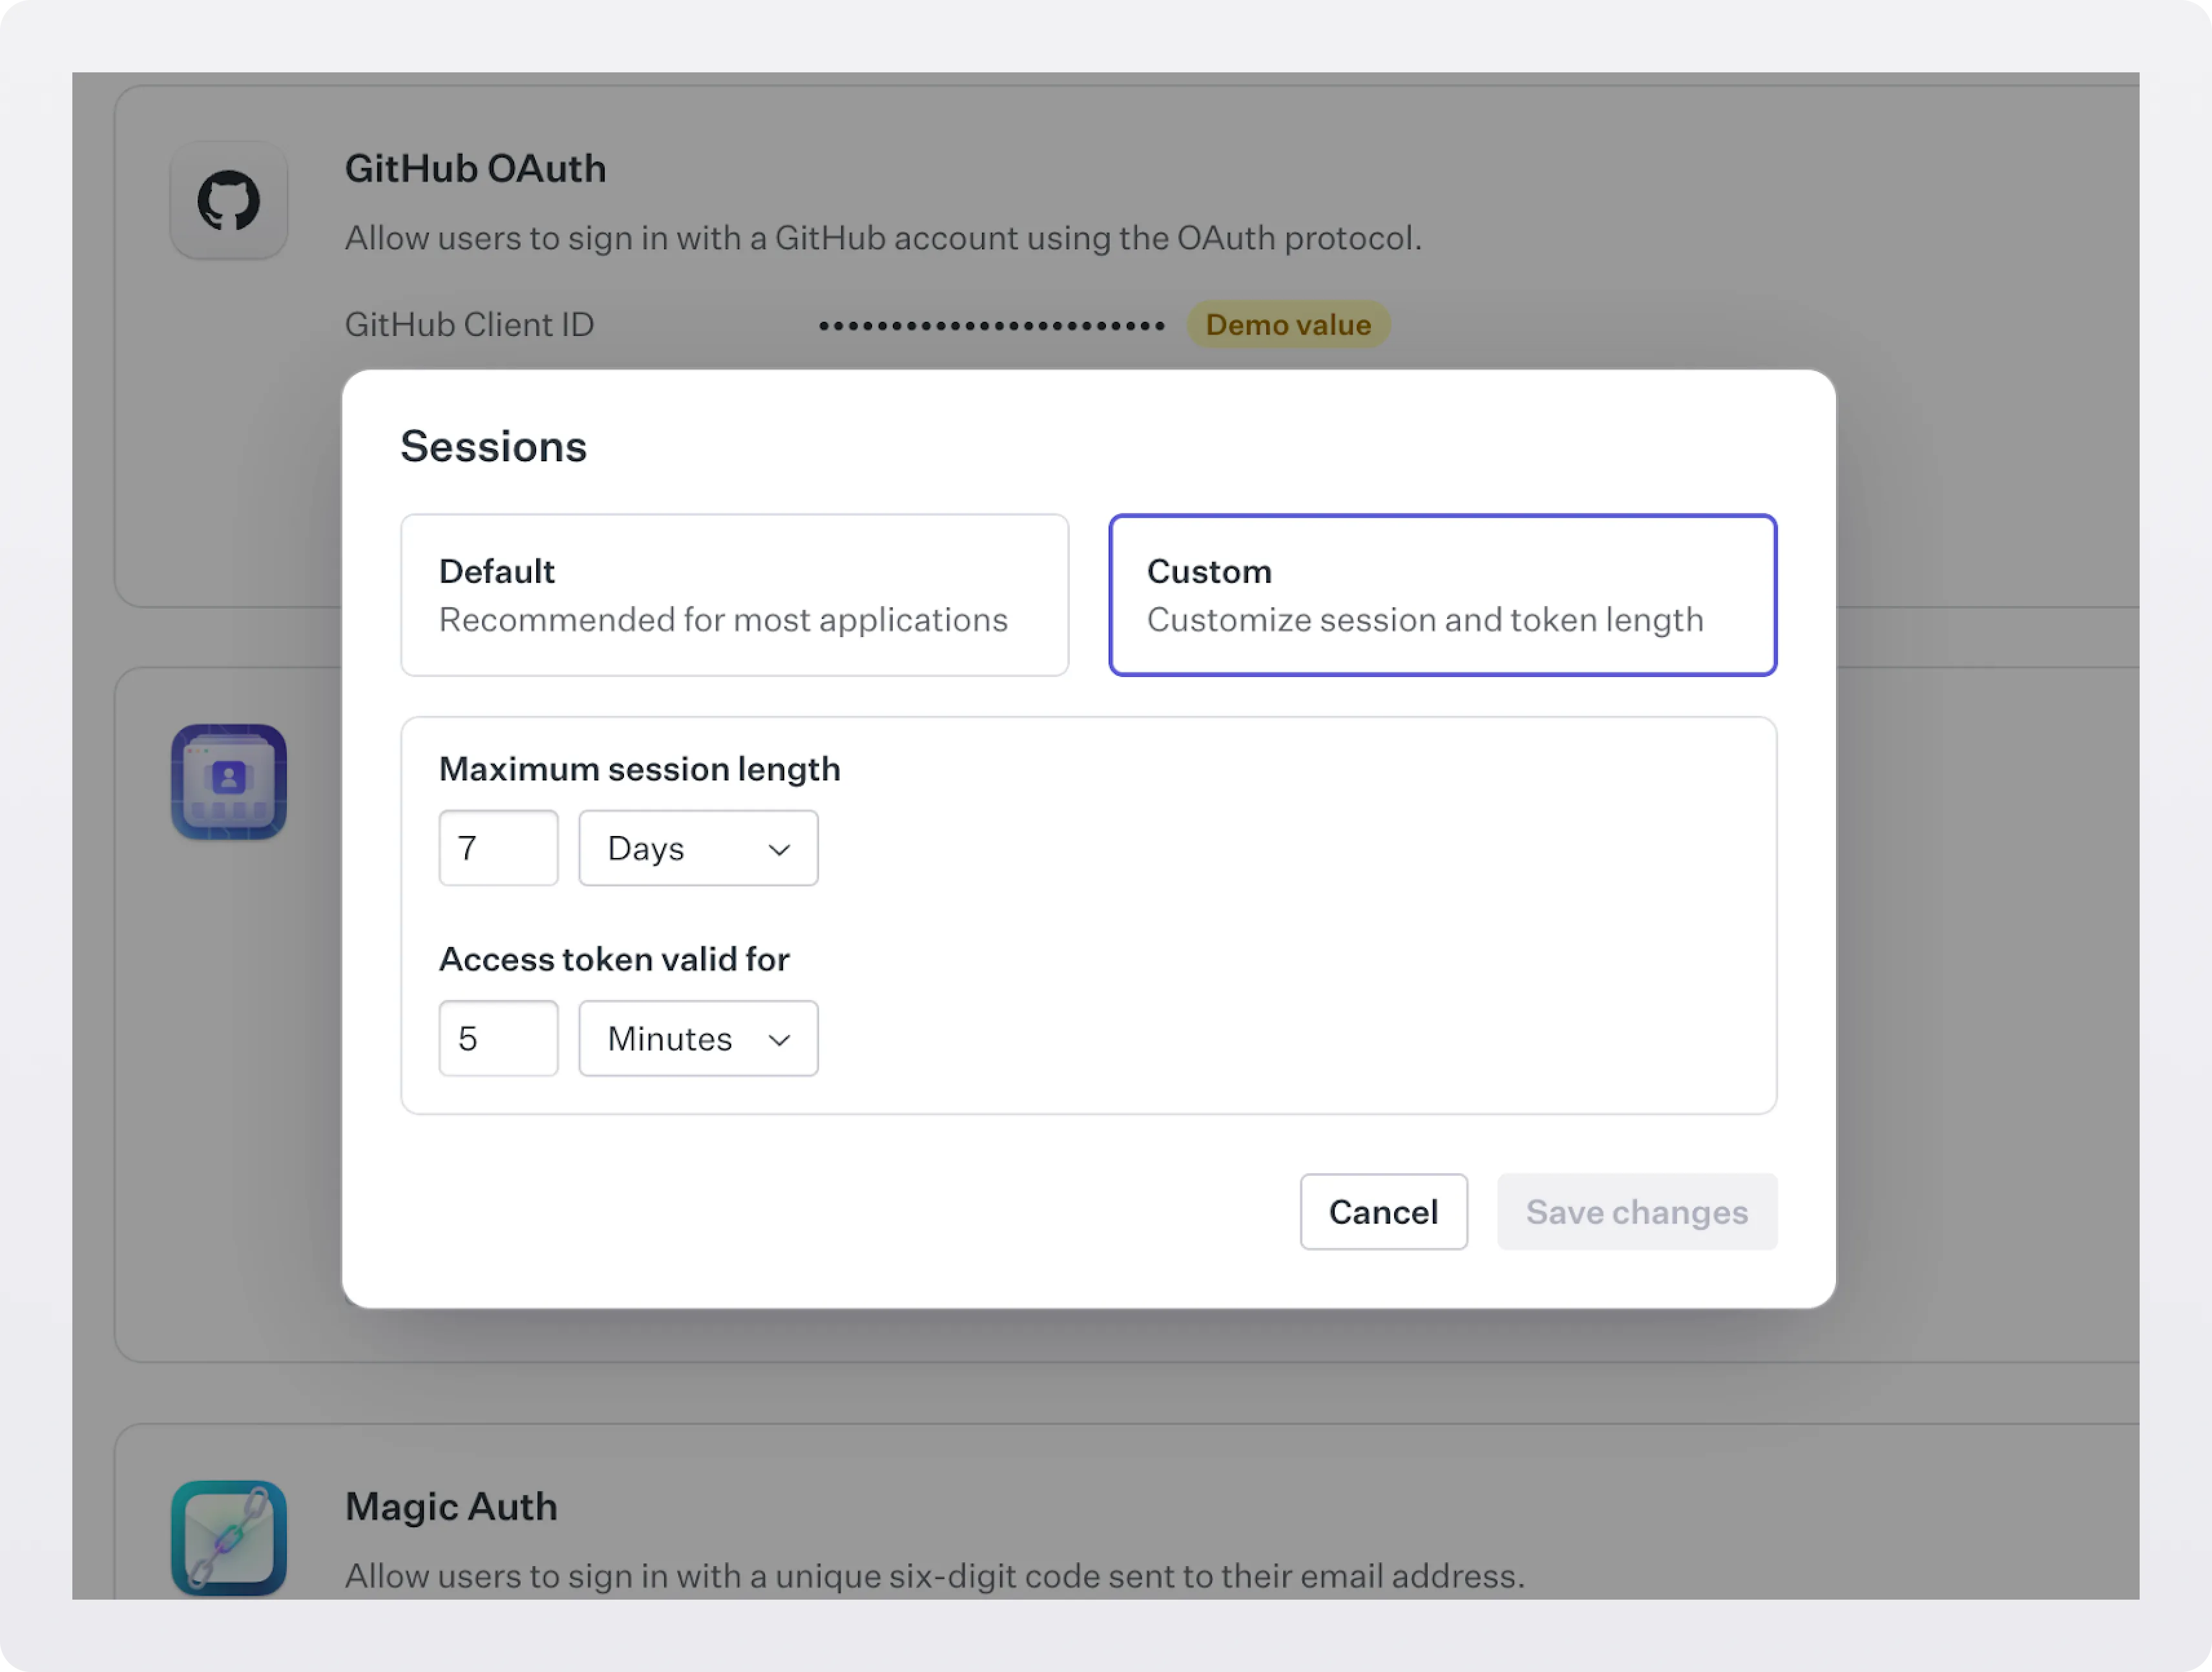
Once implemented, Sessions reduce the amount of times your users need to sign in manually. Additional configuration can be set via the WorkOS dashboard, for instance setting the session lifetime period.
Using Sessions in your application means you can expire them in the event that a user is deleted or removed from an organization.
For more information and code examples you can view the documentation for Sessions.
Coming soon
We’re not done yet with Sessions however, there’s more goodness in the pipeline. Upcoming changes include:
- Real-time changes
- Inactivity timeouts
- Client SDKs
- PKCE support
This is just day one of Launch Week, and we have many more things we can’t wait to show you. Check in tomorrow to see how we plan to enhance Sessions with access information.
If you like what you see and are interested in solving engineering problems like this, check out WorkOS careers.