Secure authentication for frontend apps with PKCE
Learn what PKCE is, why it's essential for securely authenticating users in mobile and single-page apps, and how you can keep your users safe by using AuthKit and WorkOS.
Some applications cannot securely hold sensitive information. These include native apps, which can be decompiled, and single-page apps, which have their entire source code available to the browser. In the authentication world, we call these applications public clients. They need a special flow to authenticate securely. Enter PKCE.
PKCE (pronounced “pixy”) is an authentication flow that builds on top of the Authorization Code. It ensures that the application that starts the authentication flow is the same one that finishes it and that access to resources is protected at all times. If you are developing a public client and you use OAuth, you need to use PKCE.
In this post, we will talk about the problem that single-page apps introduce in authentication, how PKCE can help address these security considerations, and how you can implement it with WorkOS using AuthKit and our SDKs.
The challenge with frontend apps
The challenge with public clients like single-page apps is that they are open to code interception attacks. Let’s see what this looks like.
During the Authorization Code flow, the user authenticates with the Authorization Server (in our case WorkOS), which, after successful authentication, issues an authorization code and returns it to the client. That code can be exchanged for an access token. A code interception attack occurs when a malicious client intercepts the authorization code and uses it to get the access token. This can lead to data leaks or breaches.
The Authorization Code flow works around this problem by having the app authenticate (using the client ID and client secret) when exchanging the code for a token. This way, even if a malicious actor has intercepted the code, they cannot exchange it for a token because they don’t have the client secret, which acts as the client’s password. However, we cannot use this method with public clients since they cannot securely hold the client secret.
To work around this problem, PKCE introduces some new parameters to the normal flow.
How PKCE works
The new parameters that PKCE introduces are the code verifier, the code challenge, and the code challenge method:
- The code verifier is a cryptographically random string the application creates when a user requests to log in. It’s important not to hard-code this value and to generate a new one for each authorization request. If not, you are exposing yourself to replay attacks.
- The code challenge is a hash of the code verifier.
- The code challenge method is the hashing algorithm used to generate the code challenge. This should be SHA-256.
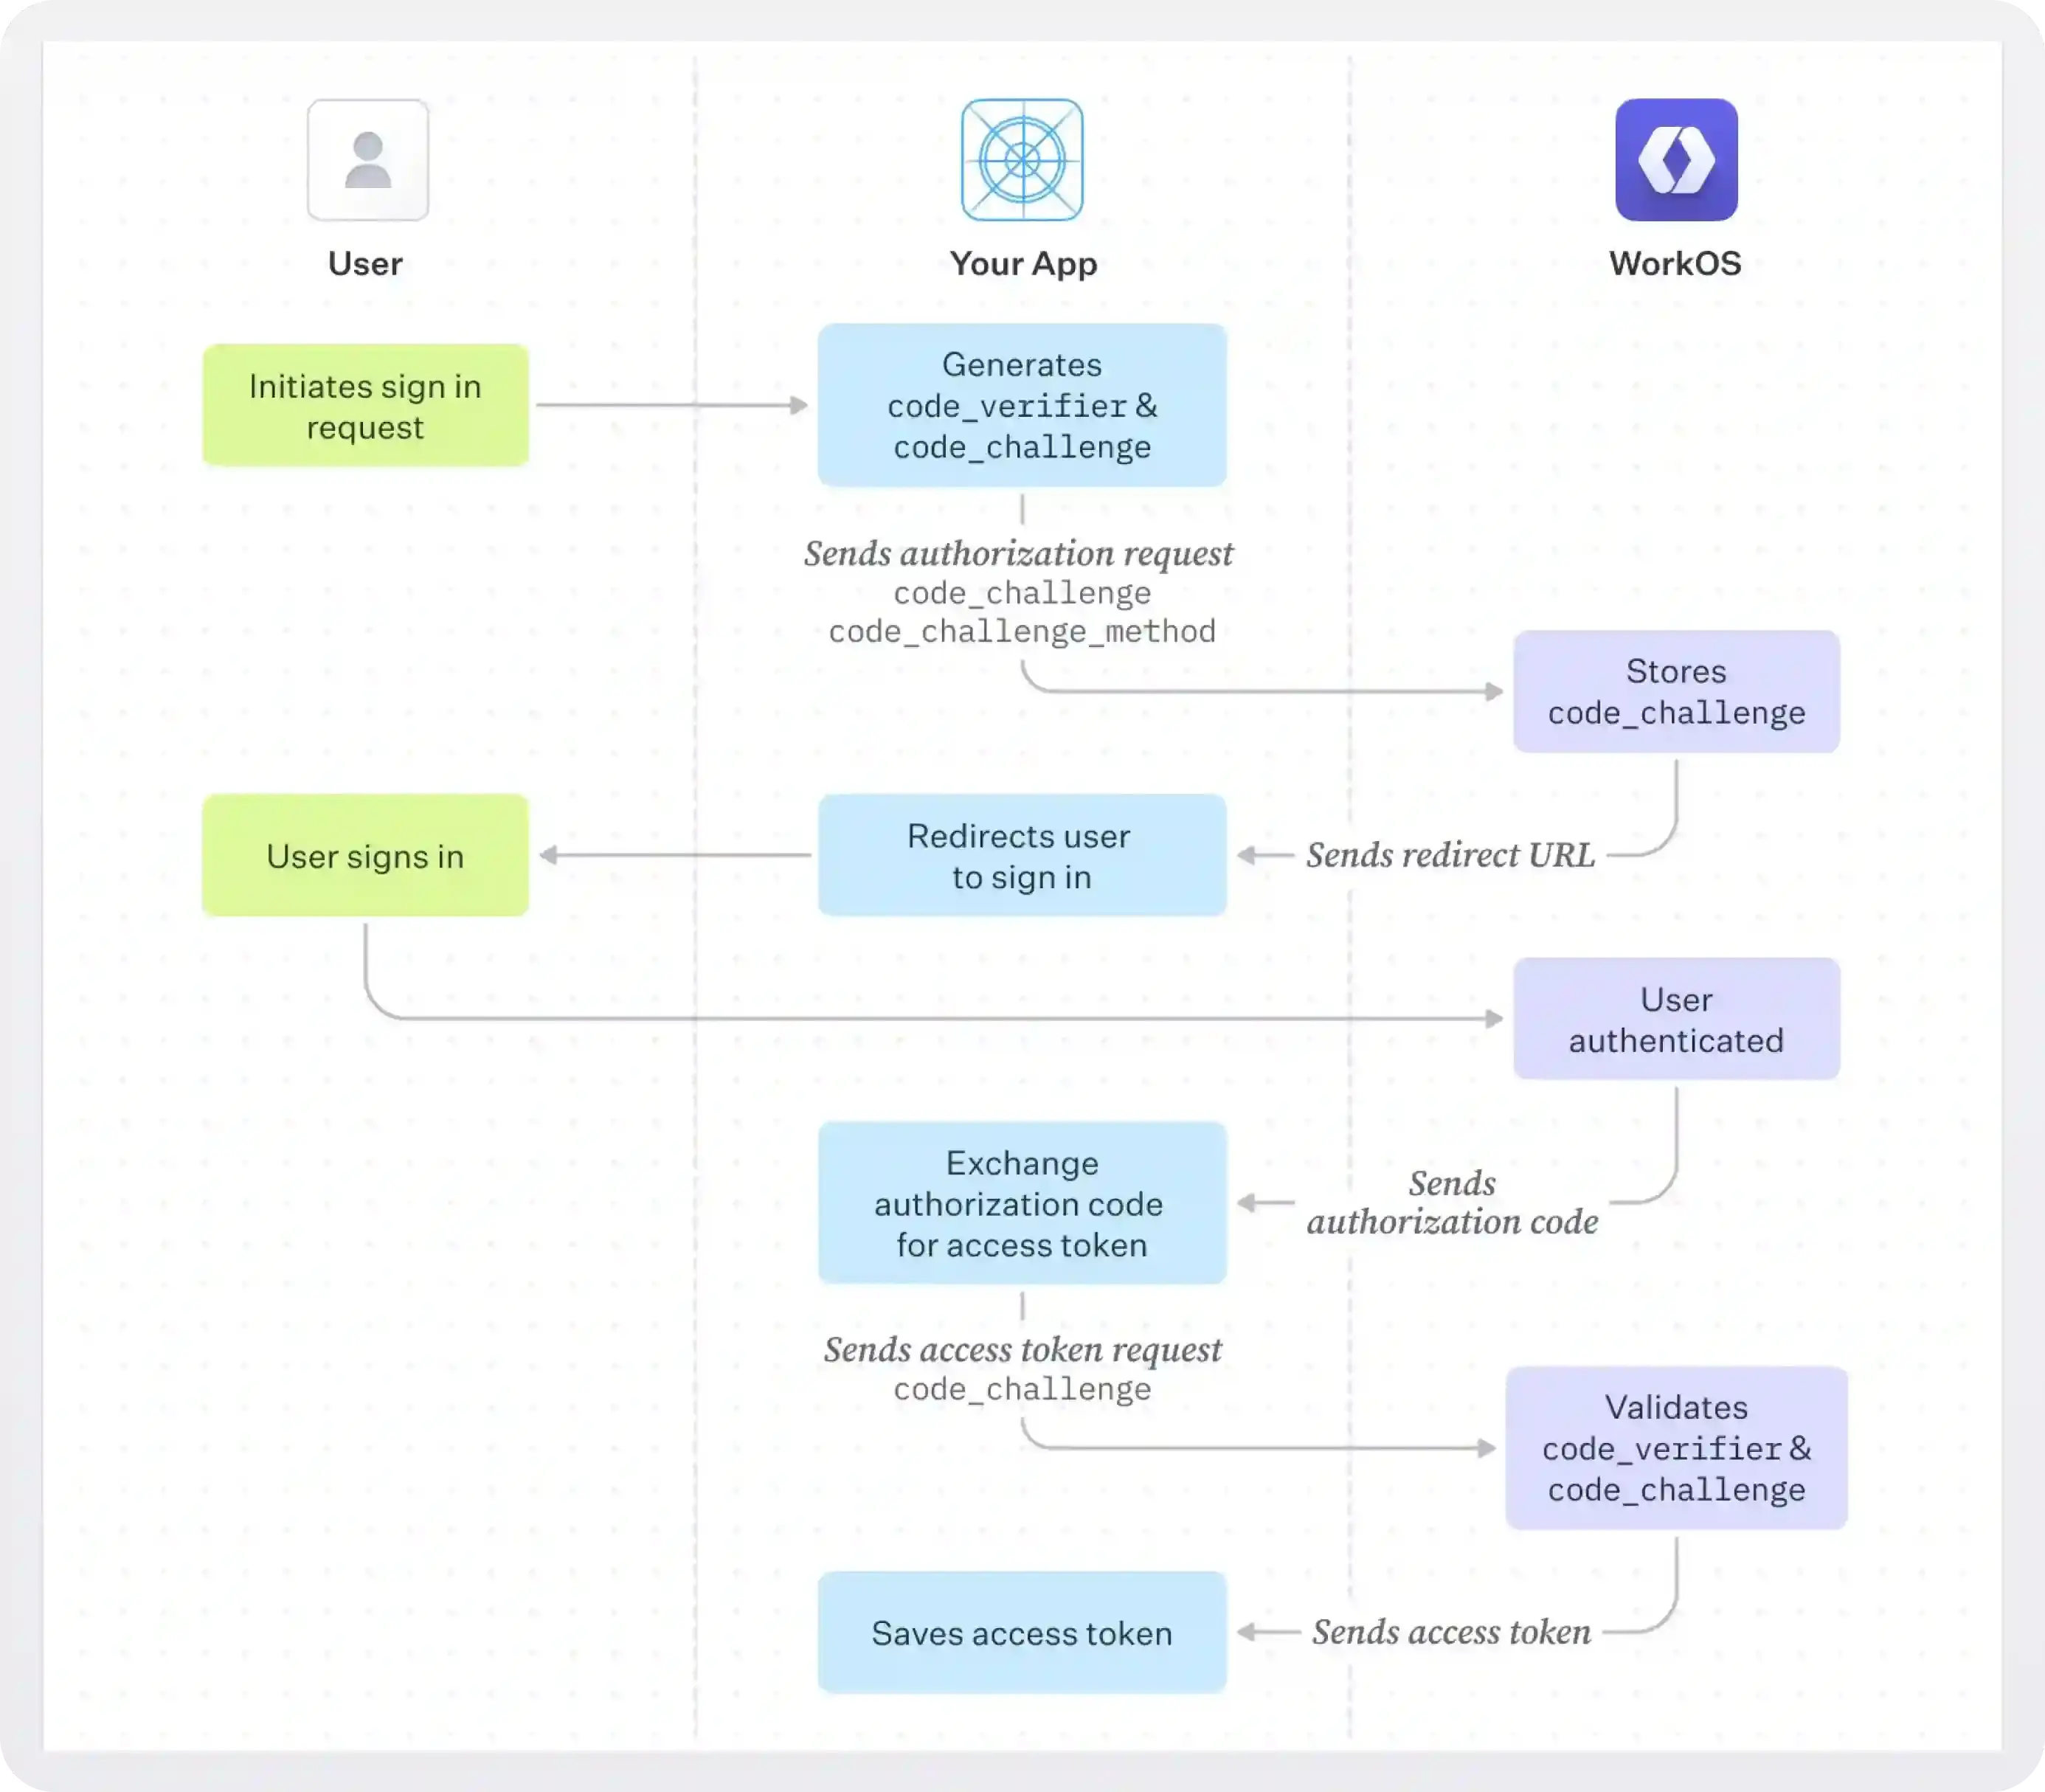
Let’s see now how a PKCE flow works from start to finish:
- Everything starts when a user clicks login. At this point, the application generates the code verifier, stores it locally, hashes it using the code challenge method (SHA-256) to generate a code challenge, and sends a request to the Authorization Server. The request includes the code challenge and the code challenge method.
- The Authorization Server stores the code challenge and proceeds with user authentication. Once the user authenticates, the authorization server generates an authorization code and returns it to the calling application.
- The application can now exchange the authorization code for an access token. To do so, it sends a request to the Authorization Server that includes the authorization code and the code verifier generated in the first step.
- The Authorization Server hashes the code verifier and compares it to the stored code challenge. If they match, an access token is issued; otherwise, an error occurs. The access token can then be used for secure API calls.
This effectively solves the code interception attack problem since the malicious application would need not only the authorization code but also the code verifier to get an access token. Intercepting the code challenge won’t help either since SHA256 is a one-way hashing algorithm that cannot be decrypted.
Implement PKCE with React
Let’s see now how we can implement this with our React SDK (you can also use our JavaScript SDK).
The SDK abstracts the PKCE nuances while keeping the authentication process secure. It will generate the code verifier and code challenge in the background, so we don’t need to do that explicitly. We only need to set the client ID (which is your WORKOS_CLIENT_ID) and the API Hostname.
The useAuth hook returns user information and helper functions:
isLoading: Returns true while user information is being obtained from fetch during initial load.user: The WorkOSUserobject for this session. For details on the information this object contains see the API Reference.getAccessToken: Returns an access token. If the access token has expired it will fetch a new one.signIn: Redirects the user to the sign-in page. Takes an optionalstateargument (an arbitrary string that can be used to help restore application state between redirects; if included, the redirect URI received from WorkOS will contain the exact state value that was passed).signUp: Redirects the user to the sign-up page. Takes an optionalstateargument.signOut: Ends the session.
That’s it! For more details on how to configure your app and start authenticating users, check our React Quickstart.