How to test WorkOS webhooks locally with ngrok
In this step-by-step tutorial, learn how to configure and validate your WorkOS webhooks from your development machine by using ngrok's secure, public URLs.
Ngrok is a tool that exposes local servers that are behind network address translations (NATs) and firewalls to the public internet over secure tunnels. This allows you to do cool things like:
- Run personal cloud services from your home
- Test websites without deploying
- Build and run webhook consumers on your development machine
With WorkOS integrations in mind, features like webhooks will require a secure `HTTPS` endpoint to be entered in the WorkOS dashboard as a target URL. However, when you’re developing on a localhost, the endpoint will be `HTTP` and not `HTTPS`. Ngrok makes it easy to set up a secure “relay” endpoint (HTTPS) that points at your localhost (HTTP) so you can receive the webhooks locally without having to deploy your project to the Internet.
After downloading ngrok you’ll be able to connect to the ngrok cloud service which accepts traffic on a public address. Traffic is relayed to the ngrok process that’s running on your machine, then onto the local address that you specified when starting the ngrok process.
Consuming WorkOS Webhooks with ngrok
To illustrate how to set up ngrok, we’ll use consuming WorkOS webhooks as a tangible example.
Download ngrok
1. Download ngrok via Homebrew
2. Verify the installation worked by checking the version in your terminal:
3. You can view all of the available ngrok commands by running this command in your terminal: `ngrok -h`
Create a secure public URL with ngrok
4. Next, you’ll use ngrok’s `http` command to create a new, secure, public URL for the same port that you’re using for your local web server. For example, if you want the ngrok `HTTPS` endpoint to send traffic to http://localhost:5000, you would use this command: `ngrok http 5000`
Which would output the following:
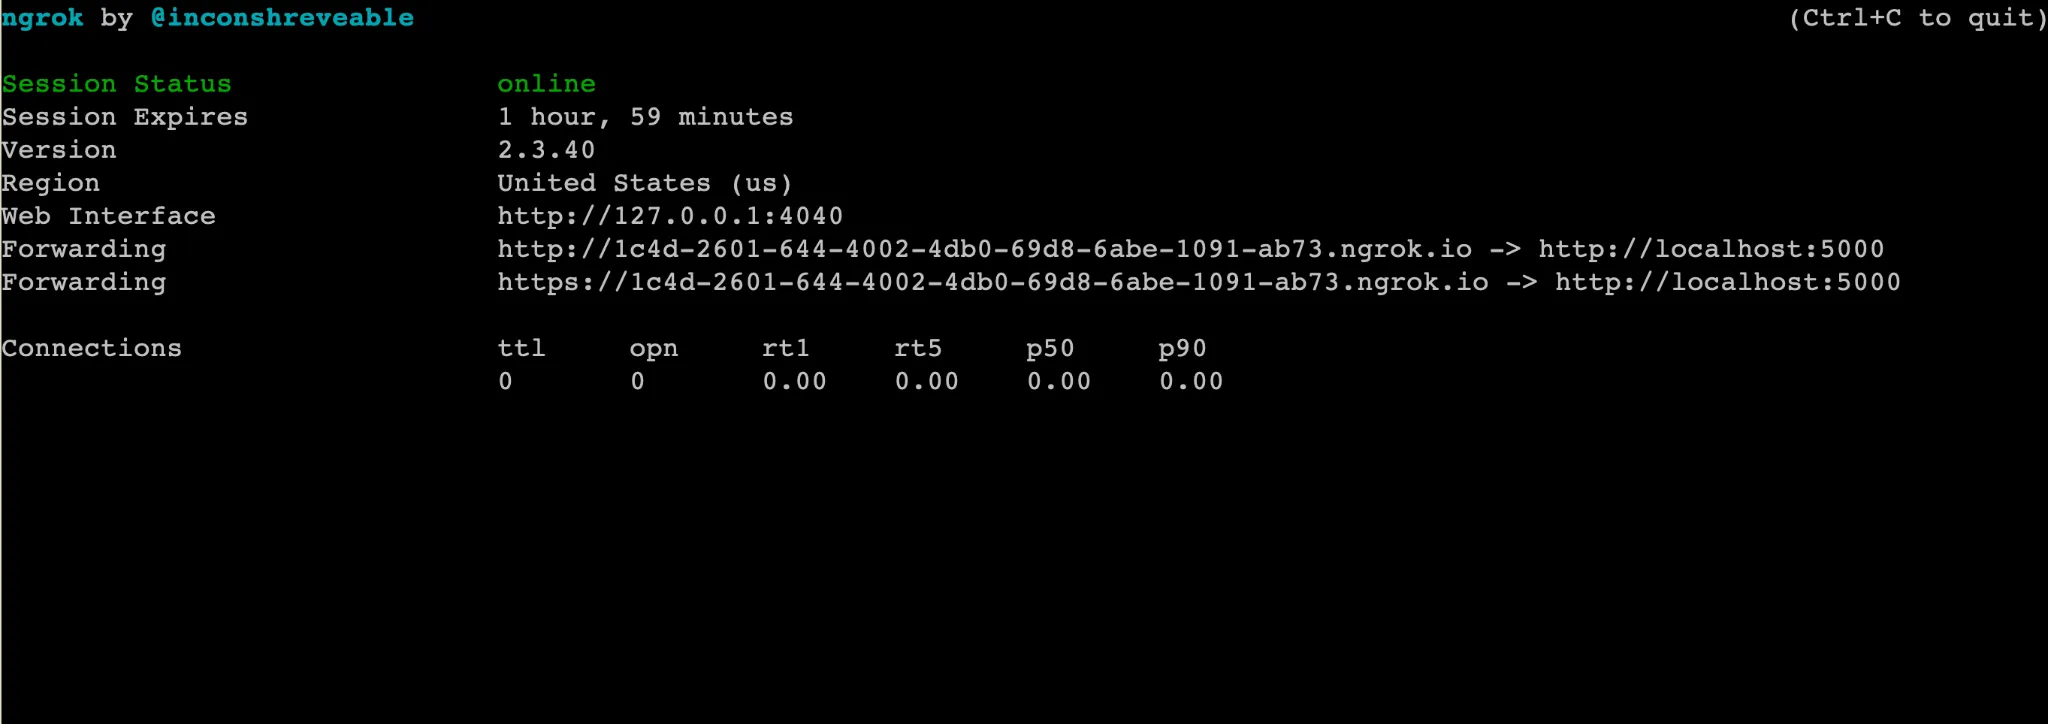
5. You’ll need to keep this terminal window open to persist the ngrok process. The two lines beginning with `Forwarding` in the screenshot above are important. The endpoints shown on those two lines with the random alphanumeric strings are the ngrok endpoints, and you’ll also see the localhost endpoints where your web server is running. Note that the only difference between the two `Forwarding` URLs is that one uses `HTTP` and the other uses `HTTPS`. For our example, you’ll need to use the `HTTPS` version which will be in the format of `https://[random-alphanumeric-string].ngrok.io`.
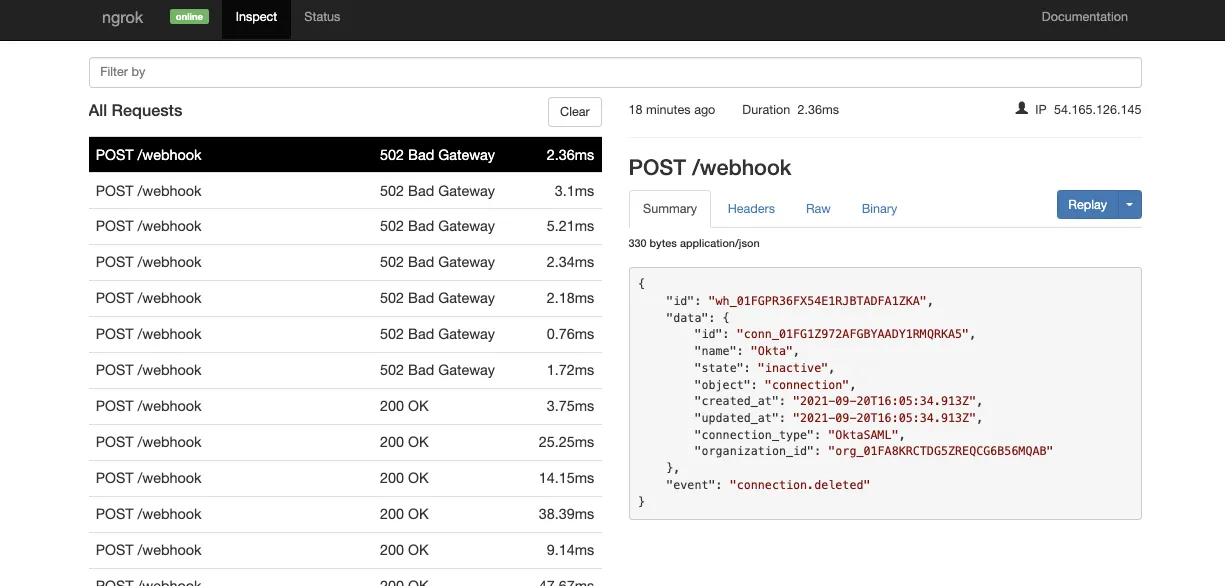
6. The ngrok web interface allows you to inspect traffic for a running ngrok process. Navigate to http://localhost:4040 and you can inspect the live requests as they come through. You can also use the Replay button to retry the same event again, directly from the dashboard as shown below:
Create a WorkOS webhook
7. Click on the Webhooks link in the left sidebar of your WorkOS Dashboard.
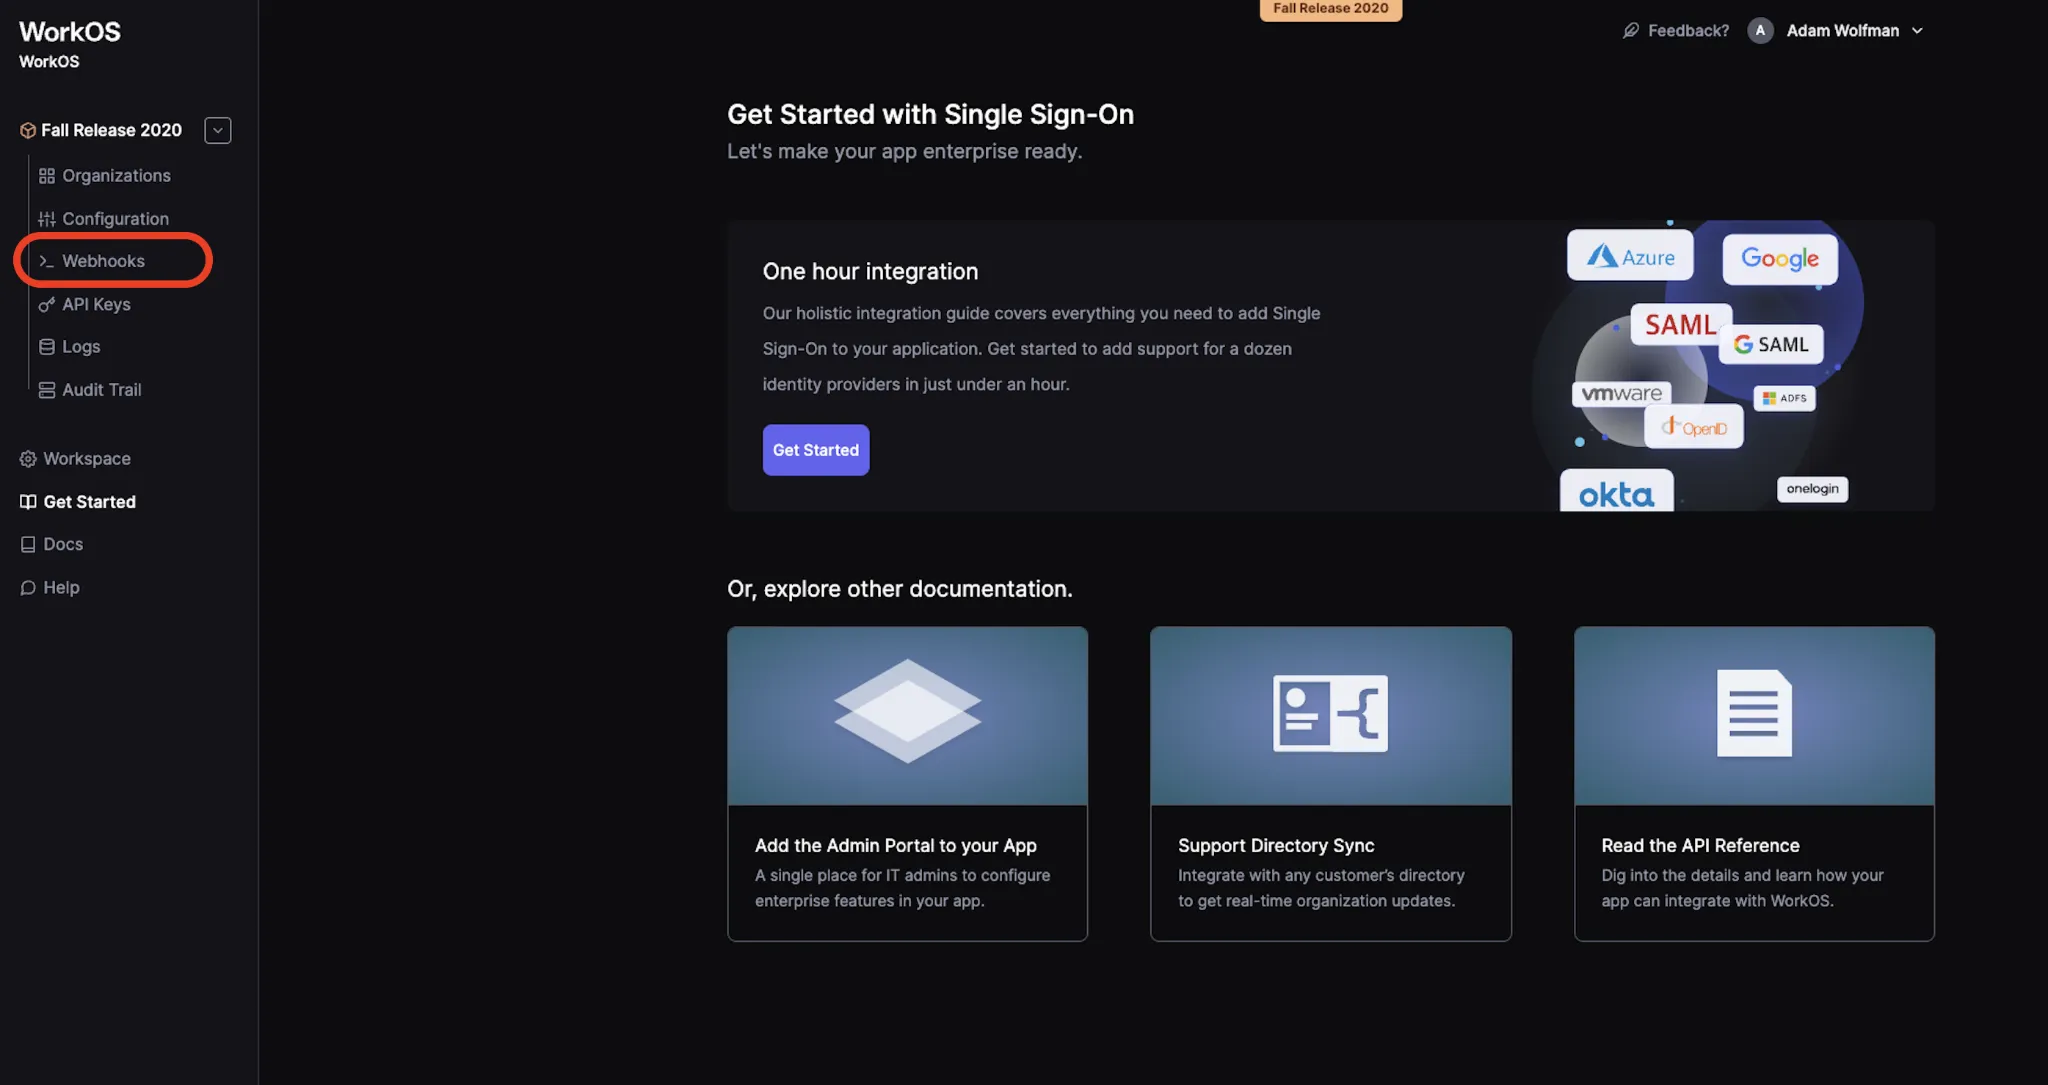
Then, click the Create Webhook button on the page that opens.
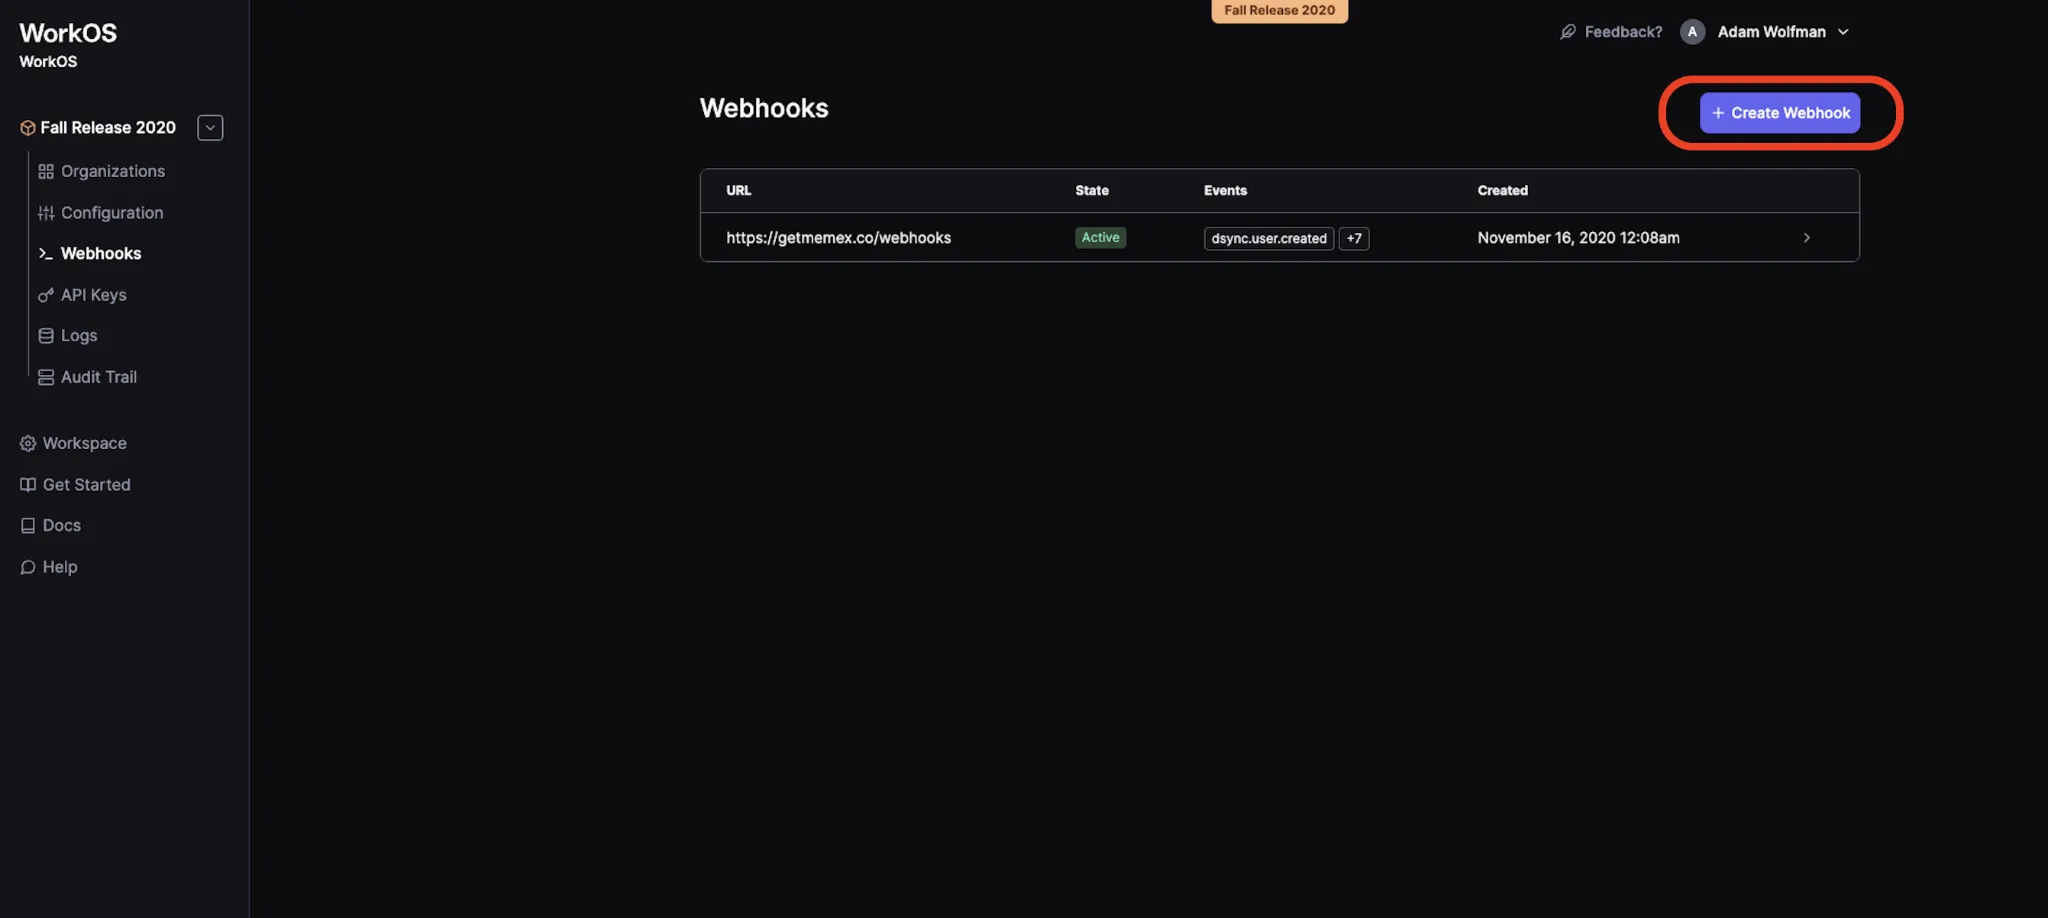
8. This will launch a modal where you can enter the ngrok endpoint from the last step, and also select which events you’d like your app to receive webhooks for.
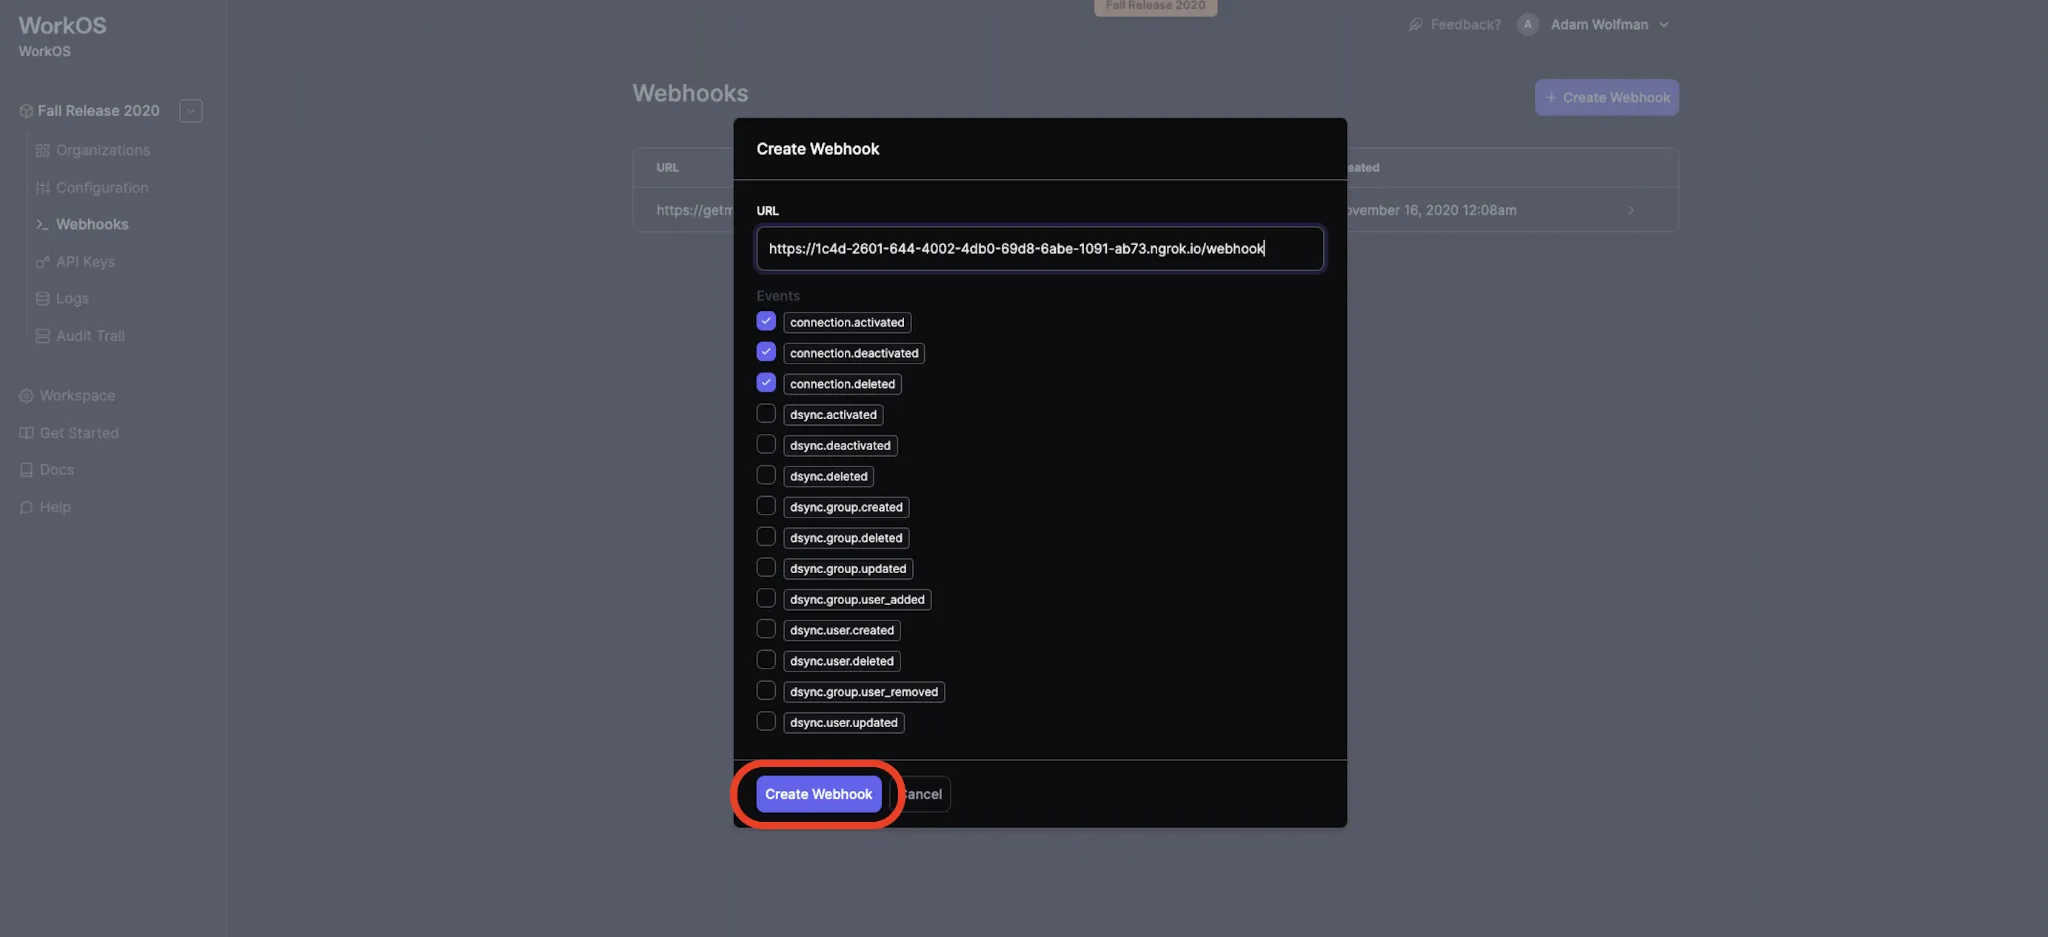
You will need to append to the URL the route your app is using to receive the webhooks. We recommend using `/webhook`.

After configuring the desired endpoint and webhook events, click the Create Webhook button and you’re good to go!
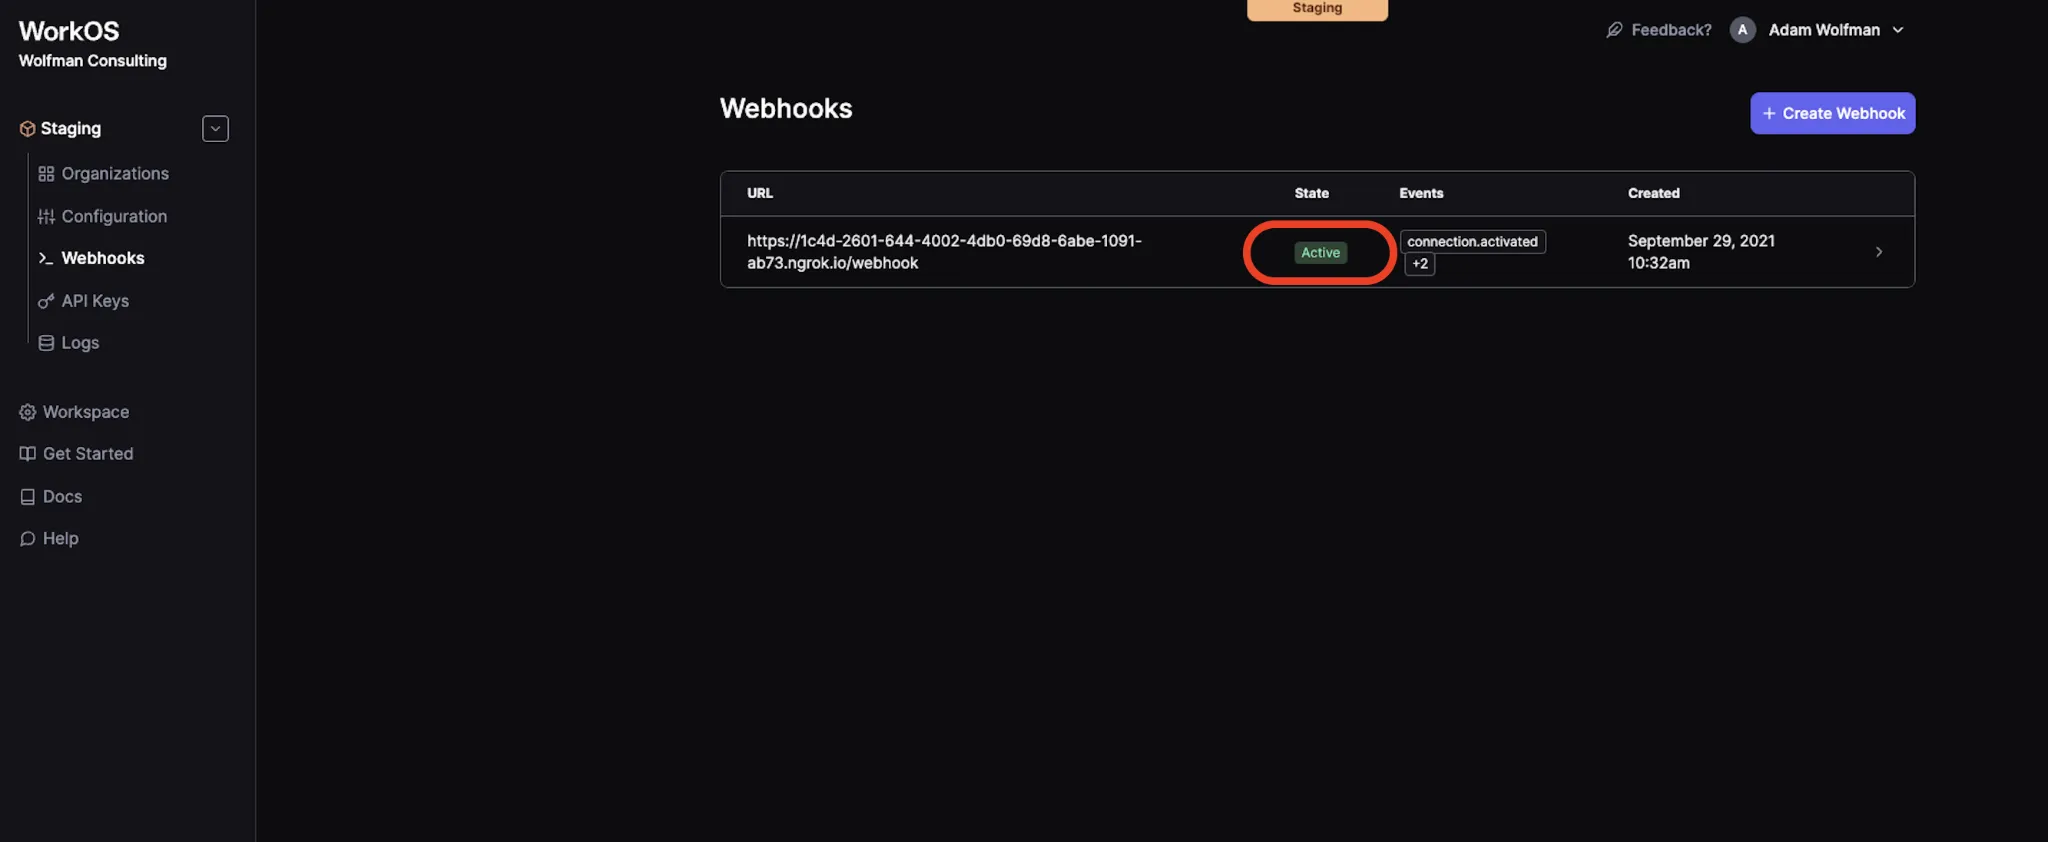
9. You can verify the webhook is set up correctly by viewing the State that appears on the WorkOS Dashboard Webhooks page.
Build a route in your application to accept webhooks
10. Now that you’ve registered the webhook endpoint and the route in WorkOS, you’ll need to build a route in your application to accept the webhook. The way in which this will be done will vary by app and language. Here’s an example using Python (Flask). Examples for other languages can be found in the WorkOS documentation .
In the code snippet above, the `webhook_handler` function always responds with an `HTTP` status of `200` so that WorkOS don't keep retrying delivery of the webhook.
Try it out!
11. The last step is to test the configuration that we’ve set up. You can do this from your WorkOS dashboard in the webhook settings by clicking on the Send Test Webhook button.
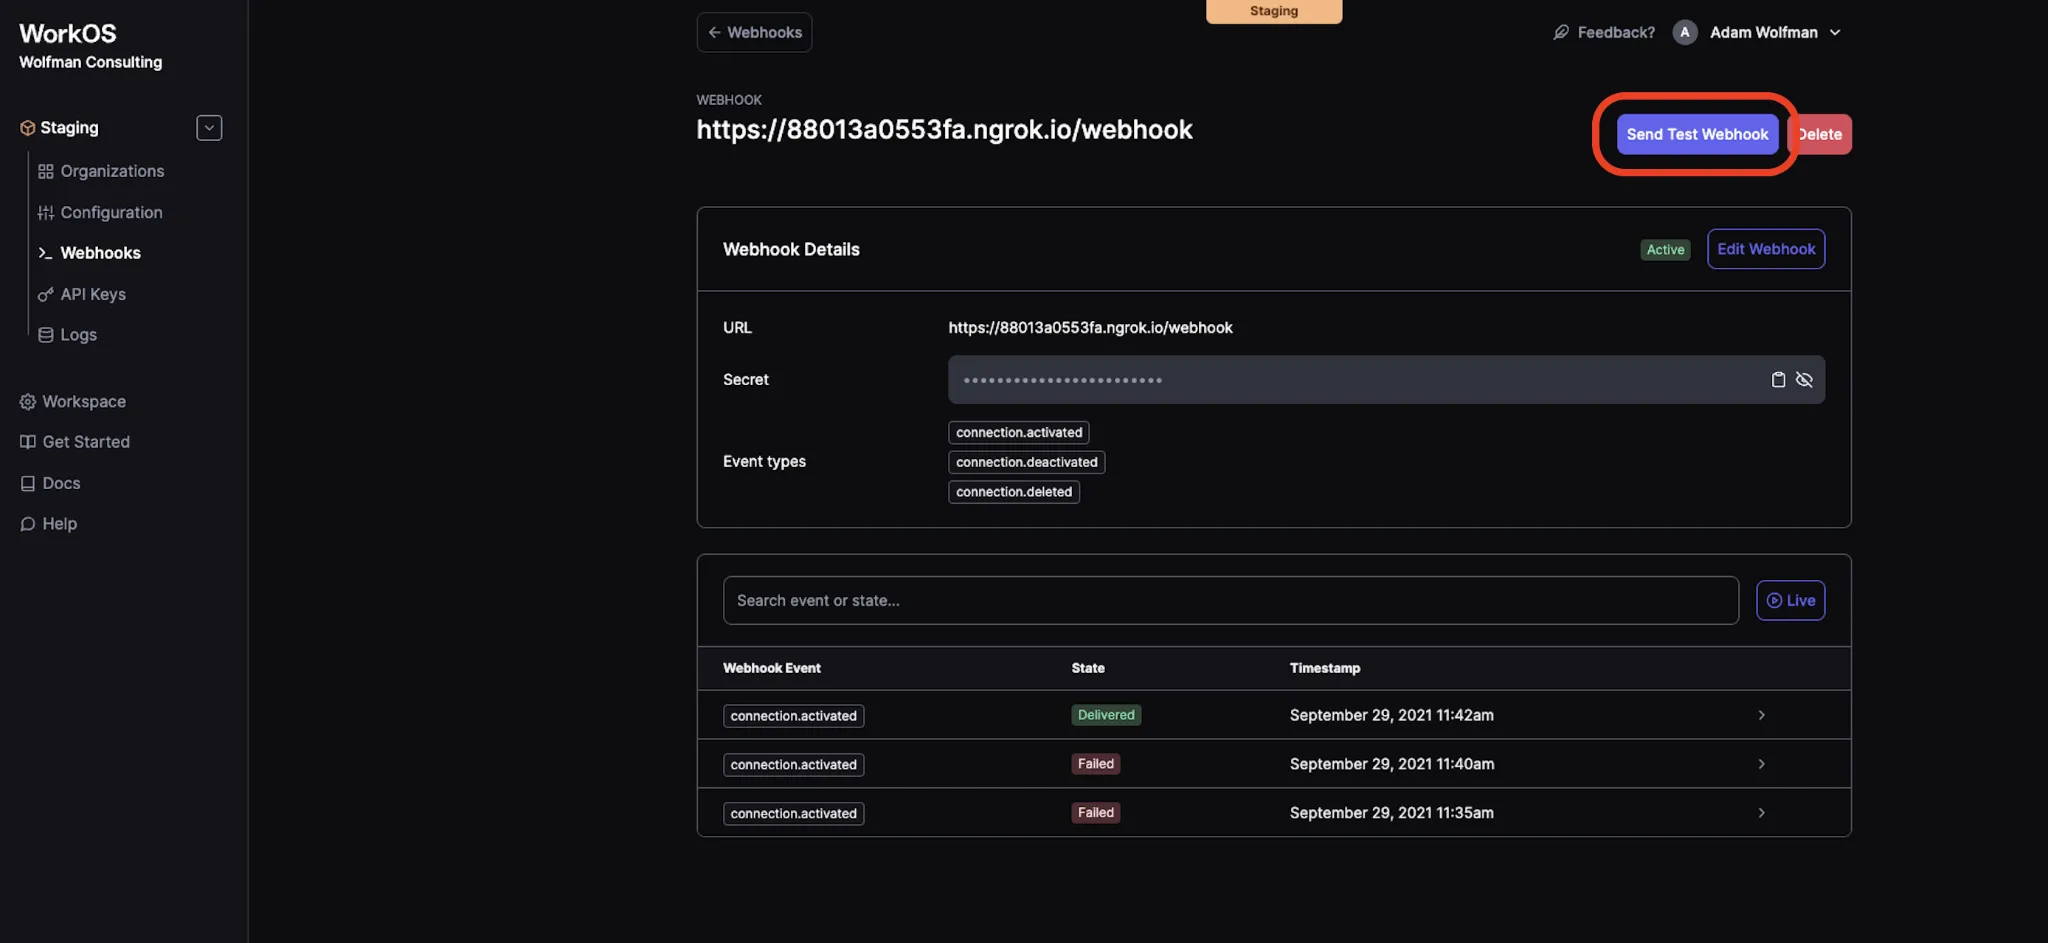
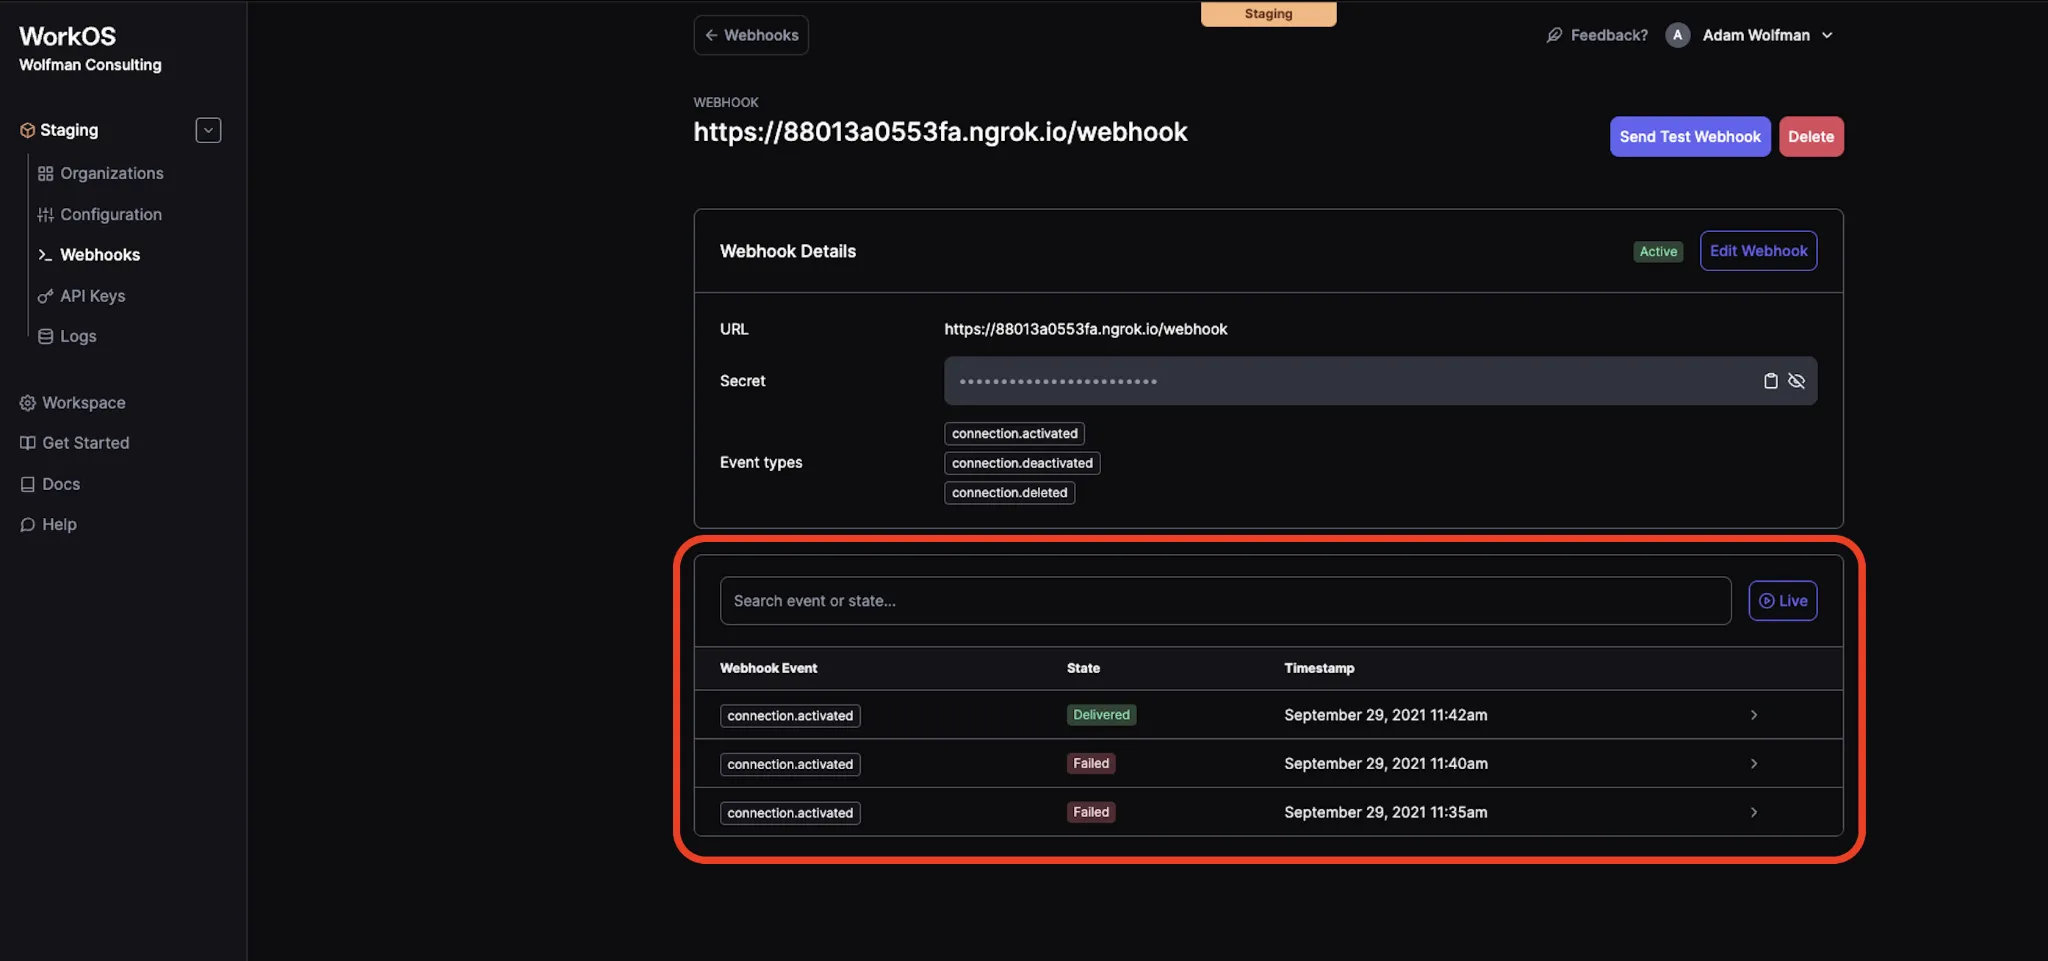
11. After you send a test webhook, you can view its status and details towards the bottom of the Webhooks page in the WorkOS dashboard. Click on an individual event to see even more details.

Use ngrok to test webhooks without deploying code
Without using a tool like ngrok, you would need to deploy your app in order to obtain a secure `HTTPS` endpoint to receive webhooks. However, with ngrok, setting up a relay endpoint is as easy as entering a few commands in your terminal!
Looking for more? Below are a few resources that might be useful.