Dashboard
Set up your account on the WorkOS Dashboard.
To edit your team’s support email address for Admin Portal emails sent to your customers, select the “Edit” button under team details.
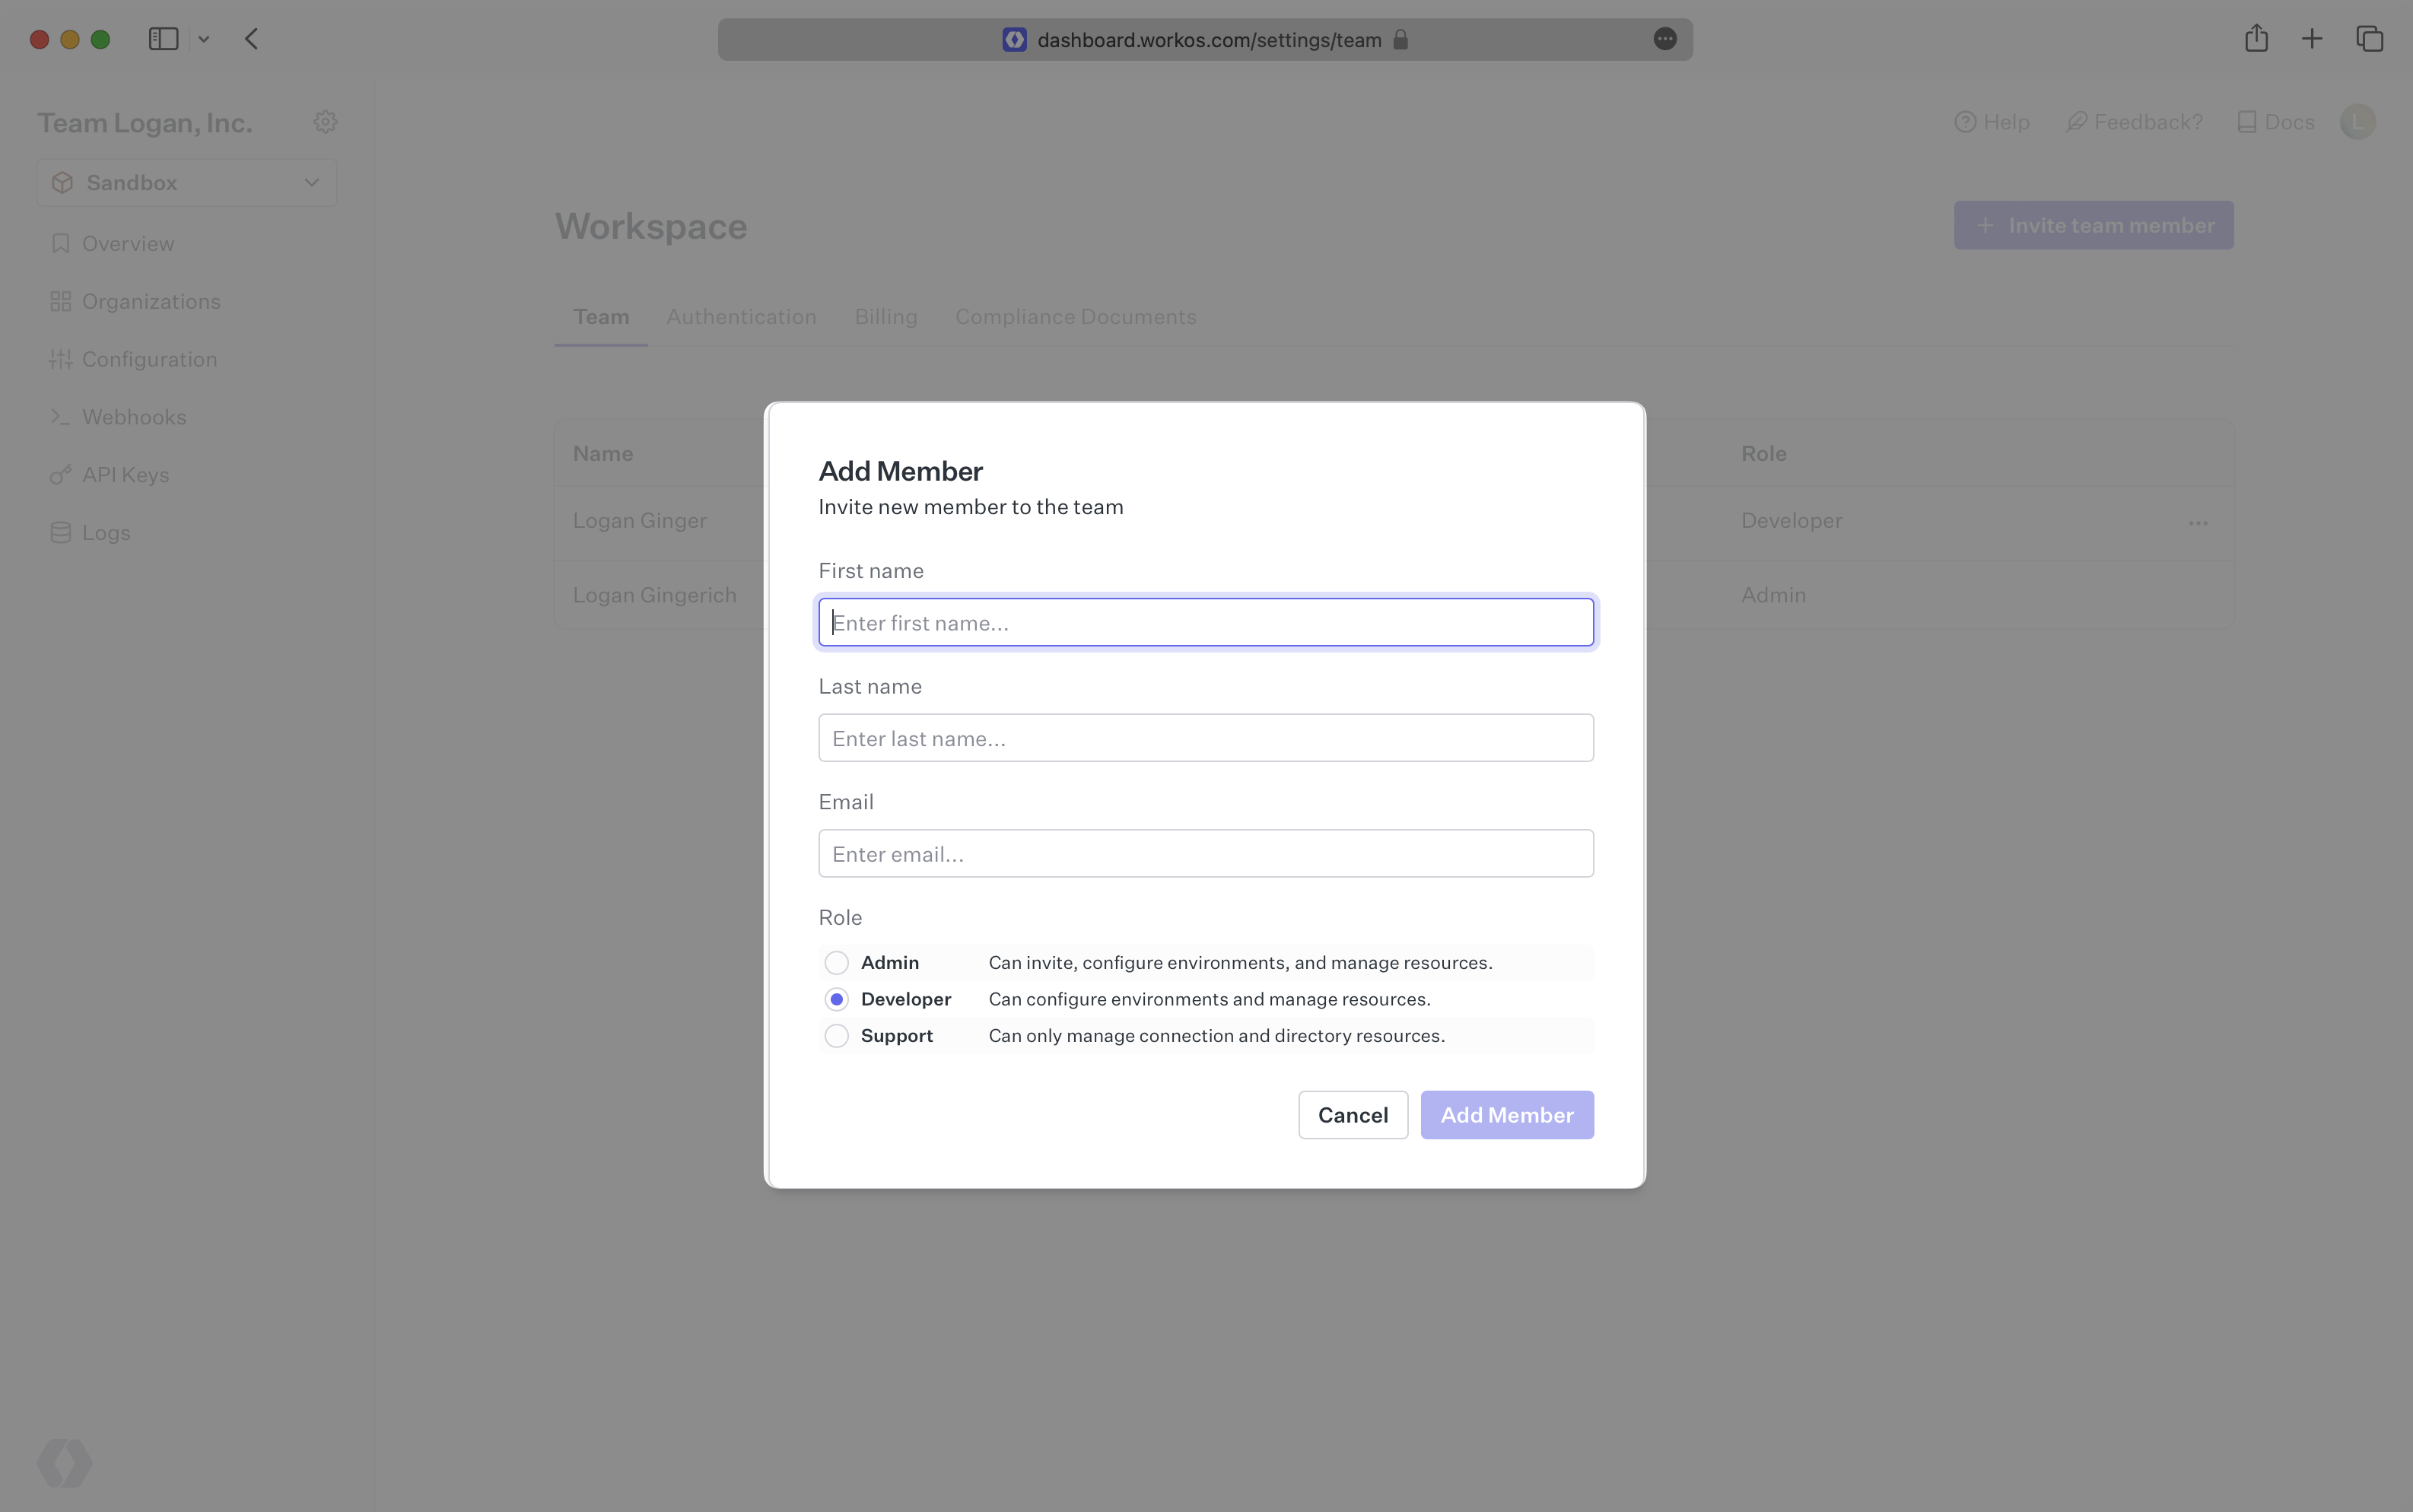
To invite members, select the “Invite team member” button under team members. When adding a member, you’ll be prompted to select a role for this new member. The following roles are available:
- Admin – Admins are able to invite members, change roles of existing members, and revoke access, in addition to capabilities available to a Developer.
- Developer – Developers are able to view and edit configuration for the Environment, including resources like API keys, Redirect URI’s, or OAuth credentials. In addition, they have all of the capabilities available to a Support user.
- Support – Support users are able to view and edit customer-level resources like Organizations, Connections, and Directories. Support users are not able to view or edit Environment-level settings, like API keys or OAuth credentials.
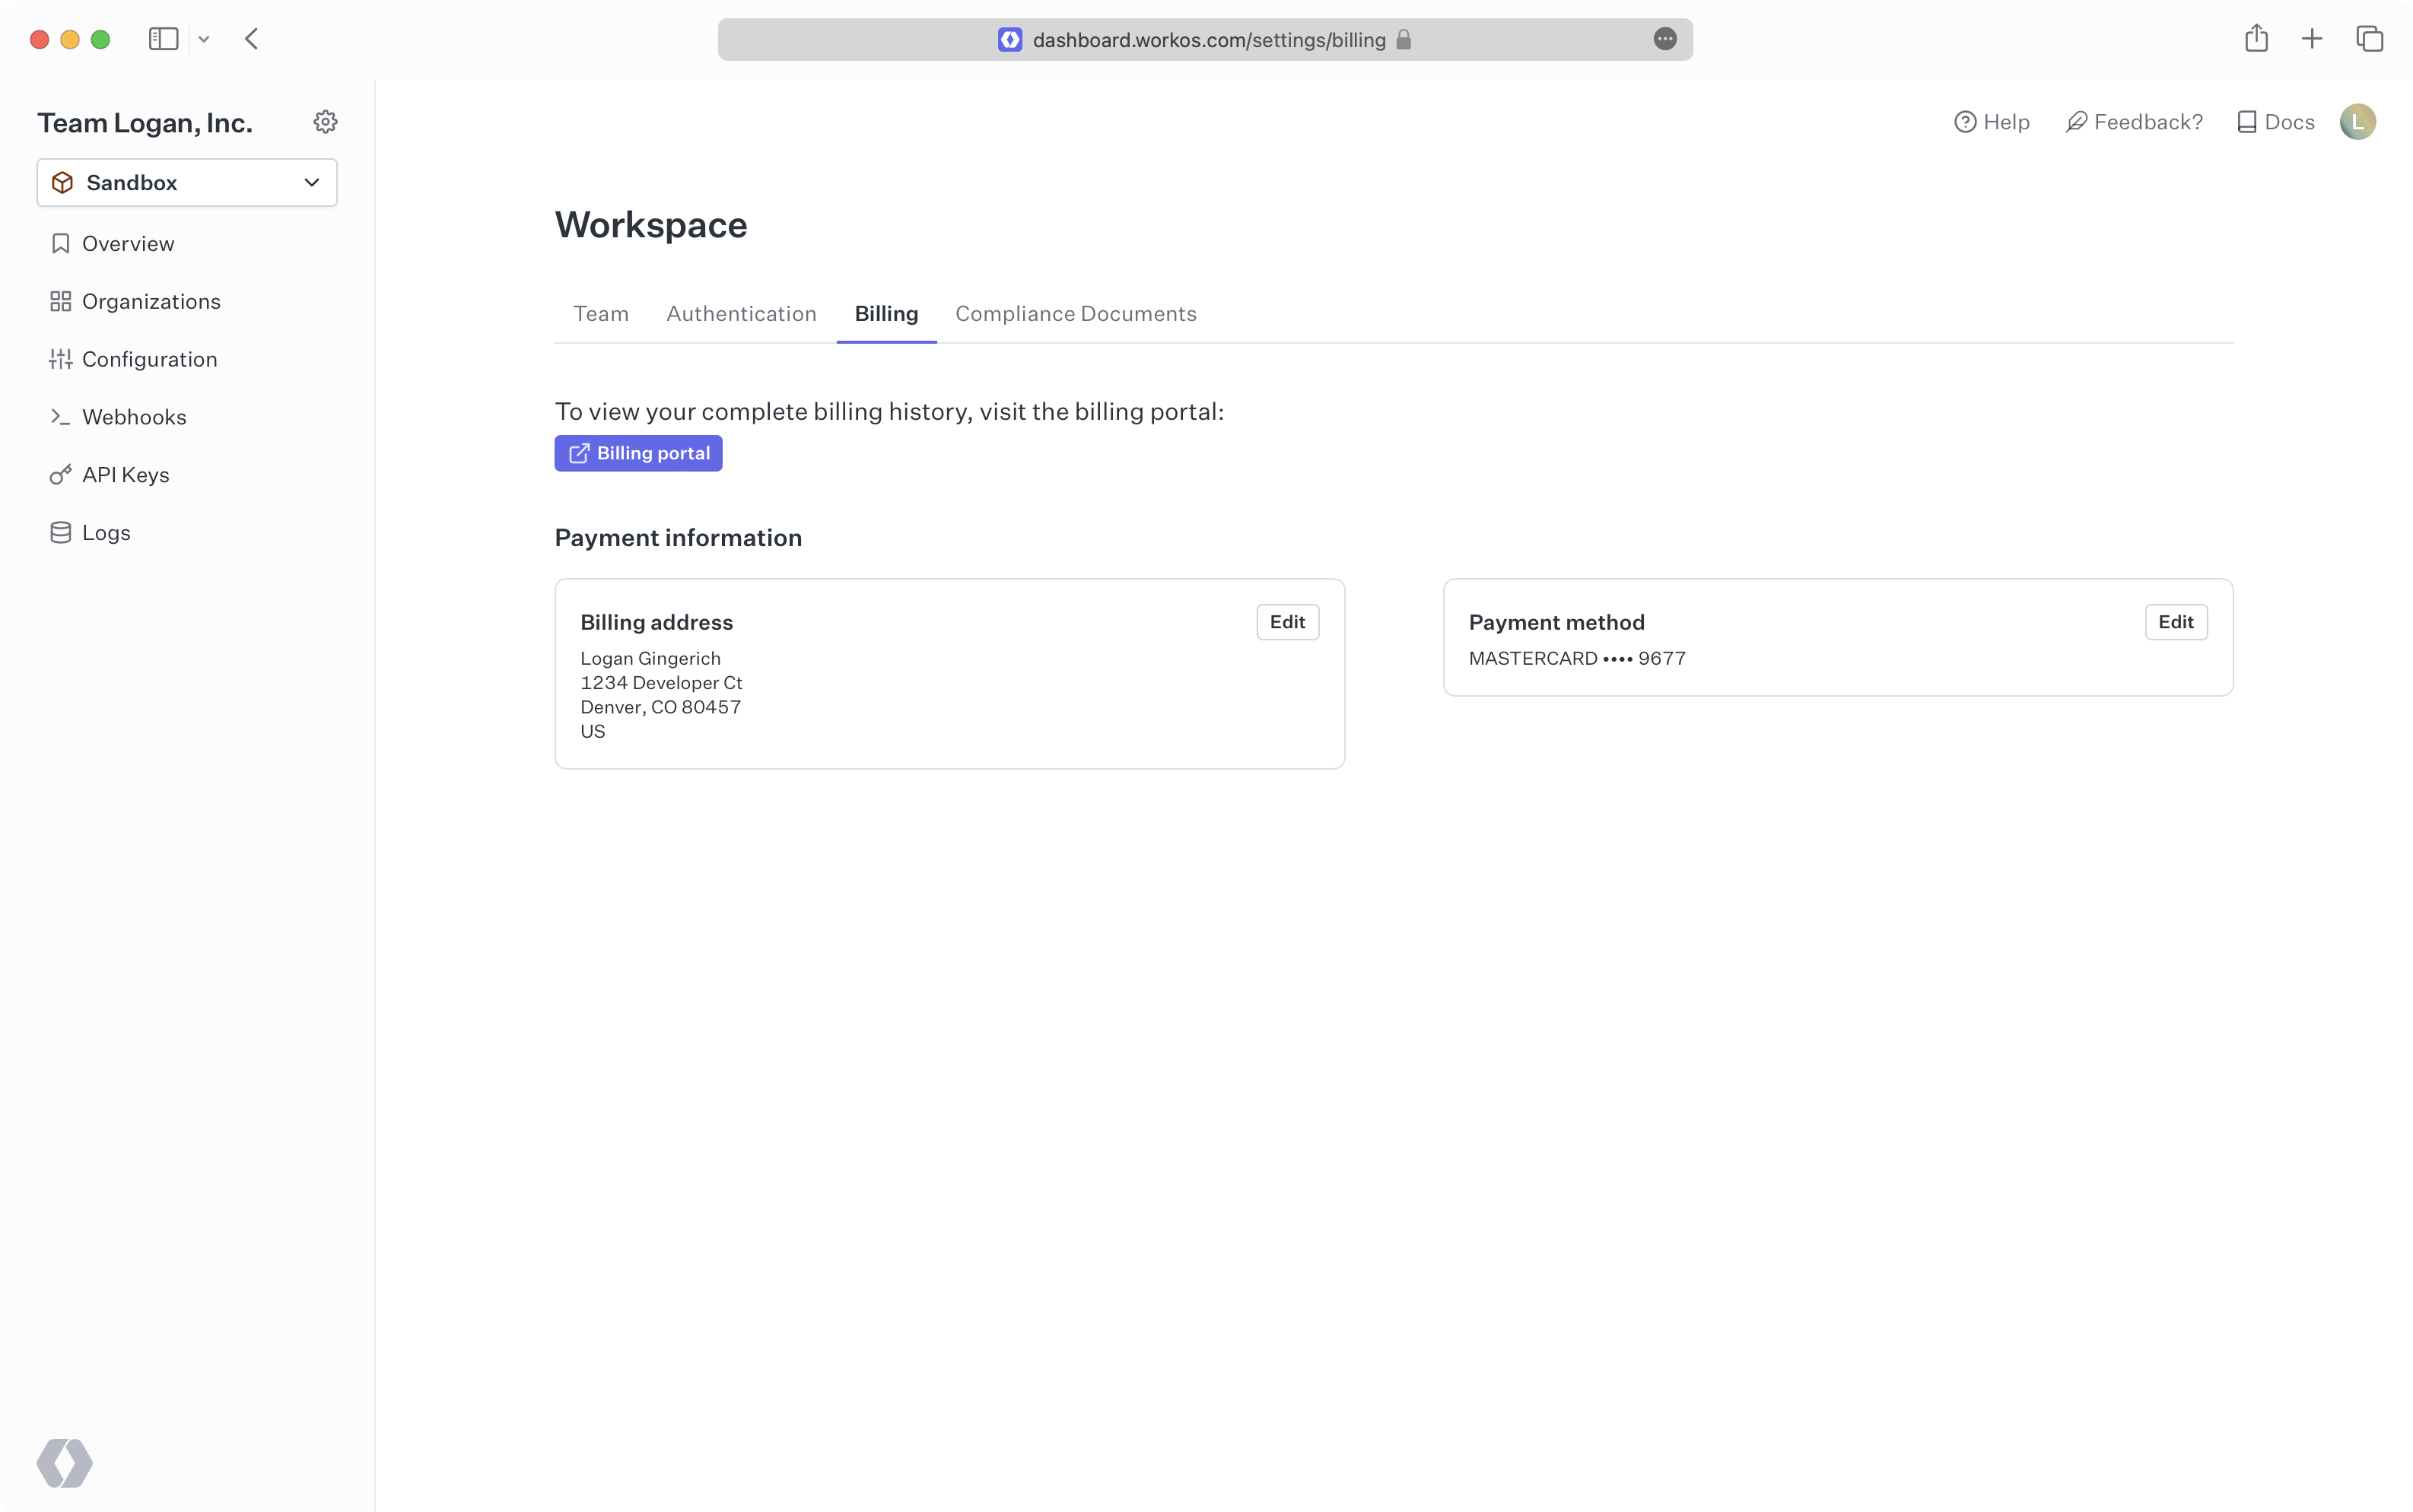
You can manage billing from your account settings page. Select the “Workspace” left menu option from the main dashboard, and then select the “Billing” tab.
If you don’t have billing set up, you can input your billing address and credit card information. This also unlocks access to your Production environment in the dashboard. If you have billing set up, you’ll be able to update your billing address and credit card information.
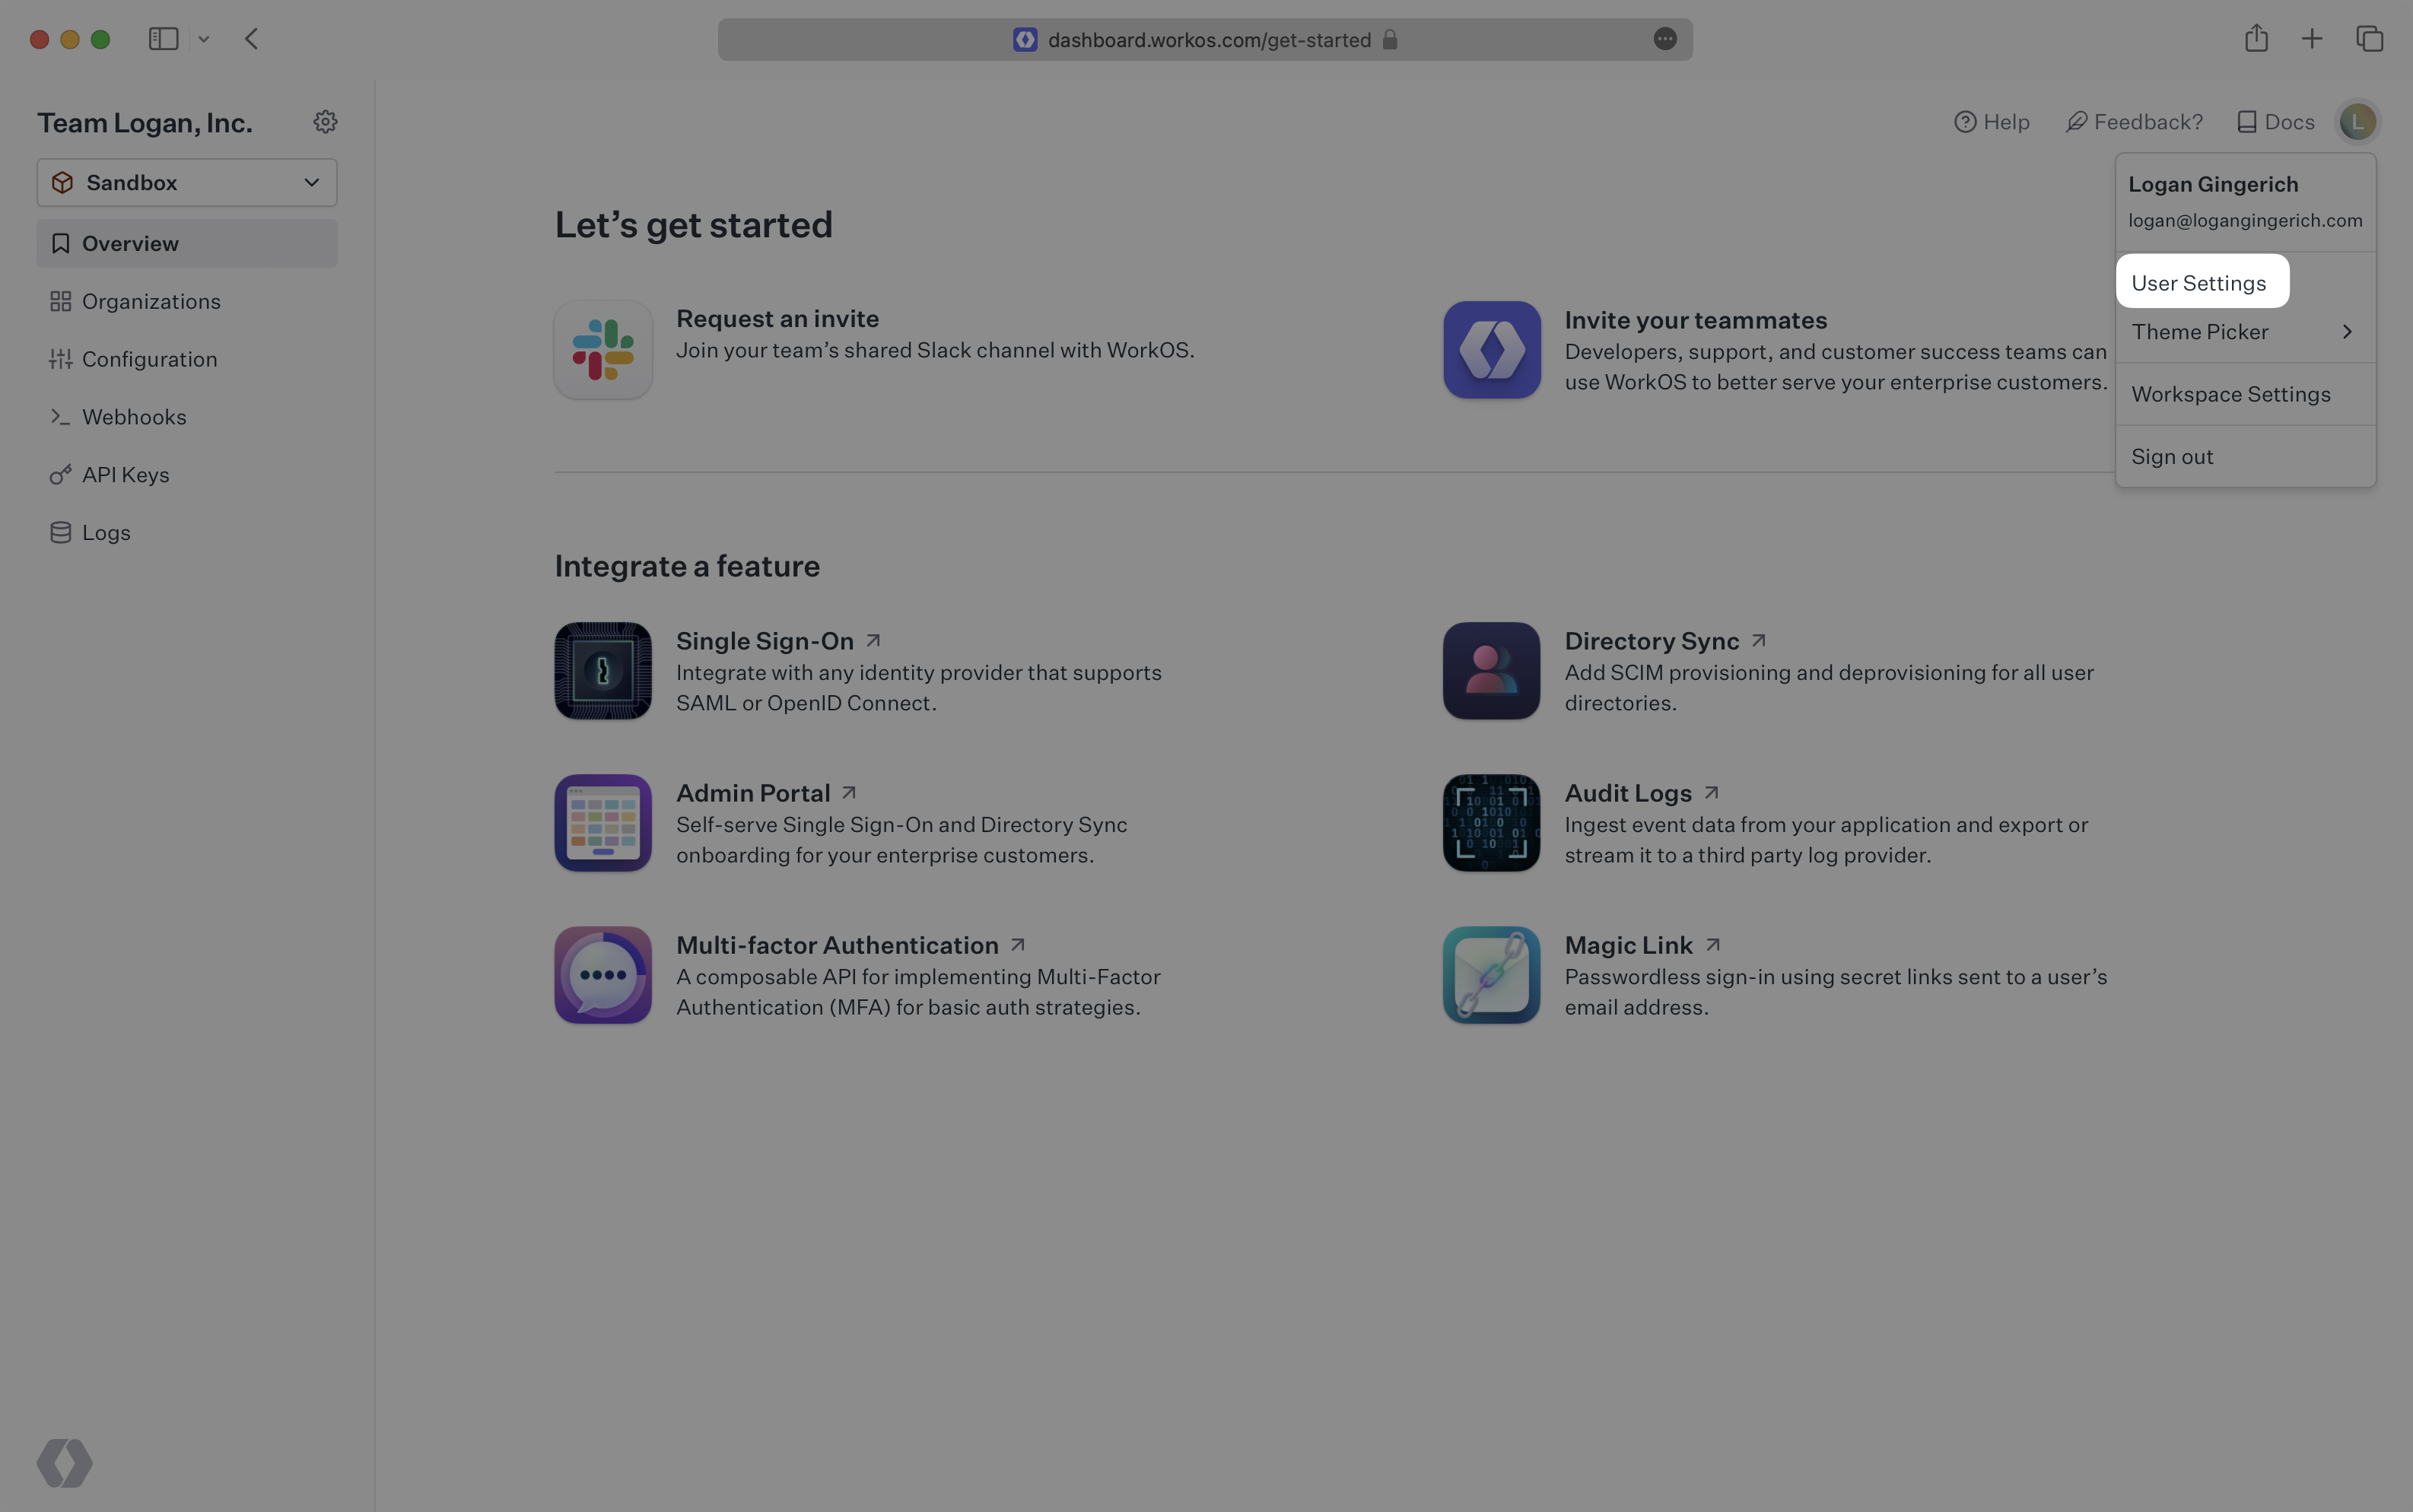
You can manage your user account from the profile page. Select the dropdown menu under your name in the top right corner, and then select the “User Settings” menu option.
On the Profile page, you can update your email notification settings. At this time, it’s not possible to update your user information. Reach out to us if you need this information updated.
Add a support email in the Dashboard to streamline communication with your customers’ organization admins. This email will be included in the footer of messages sent to them and set as the reply-to address, making it easy for admins to reach out with any questions. Learn how to update the support email in team settings.
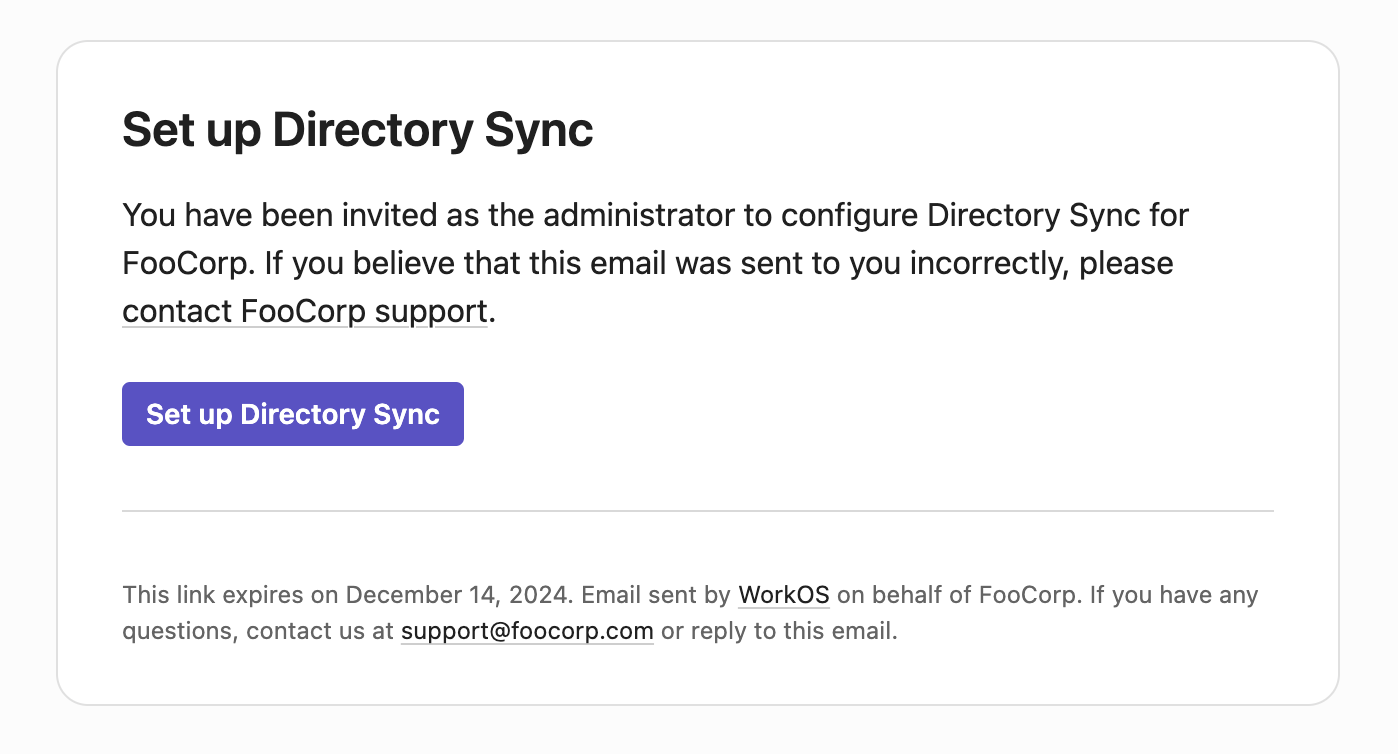
You can add the email addresses of your organization’s IT administrators directly to an organization. This enables you to send Admin Portal setup links directly to an organization’s admin. Additionally, WorkOS will automatically email admins about important organization-related events that require their attention.
The organization admin email addresses can be set on the Settings page of each organization.
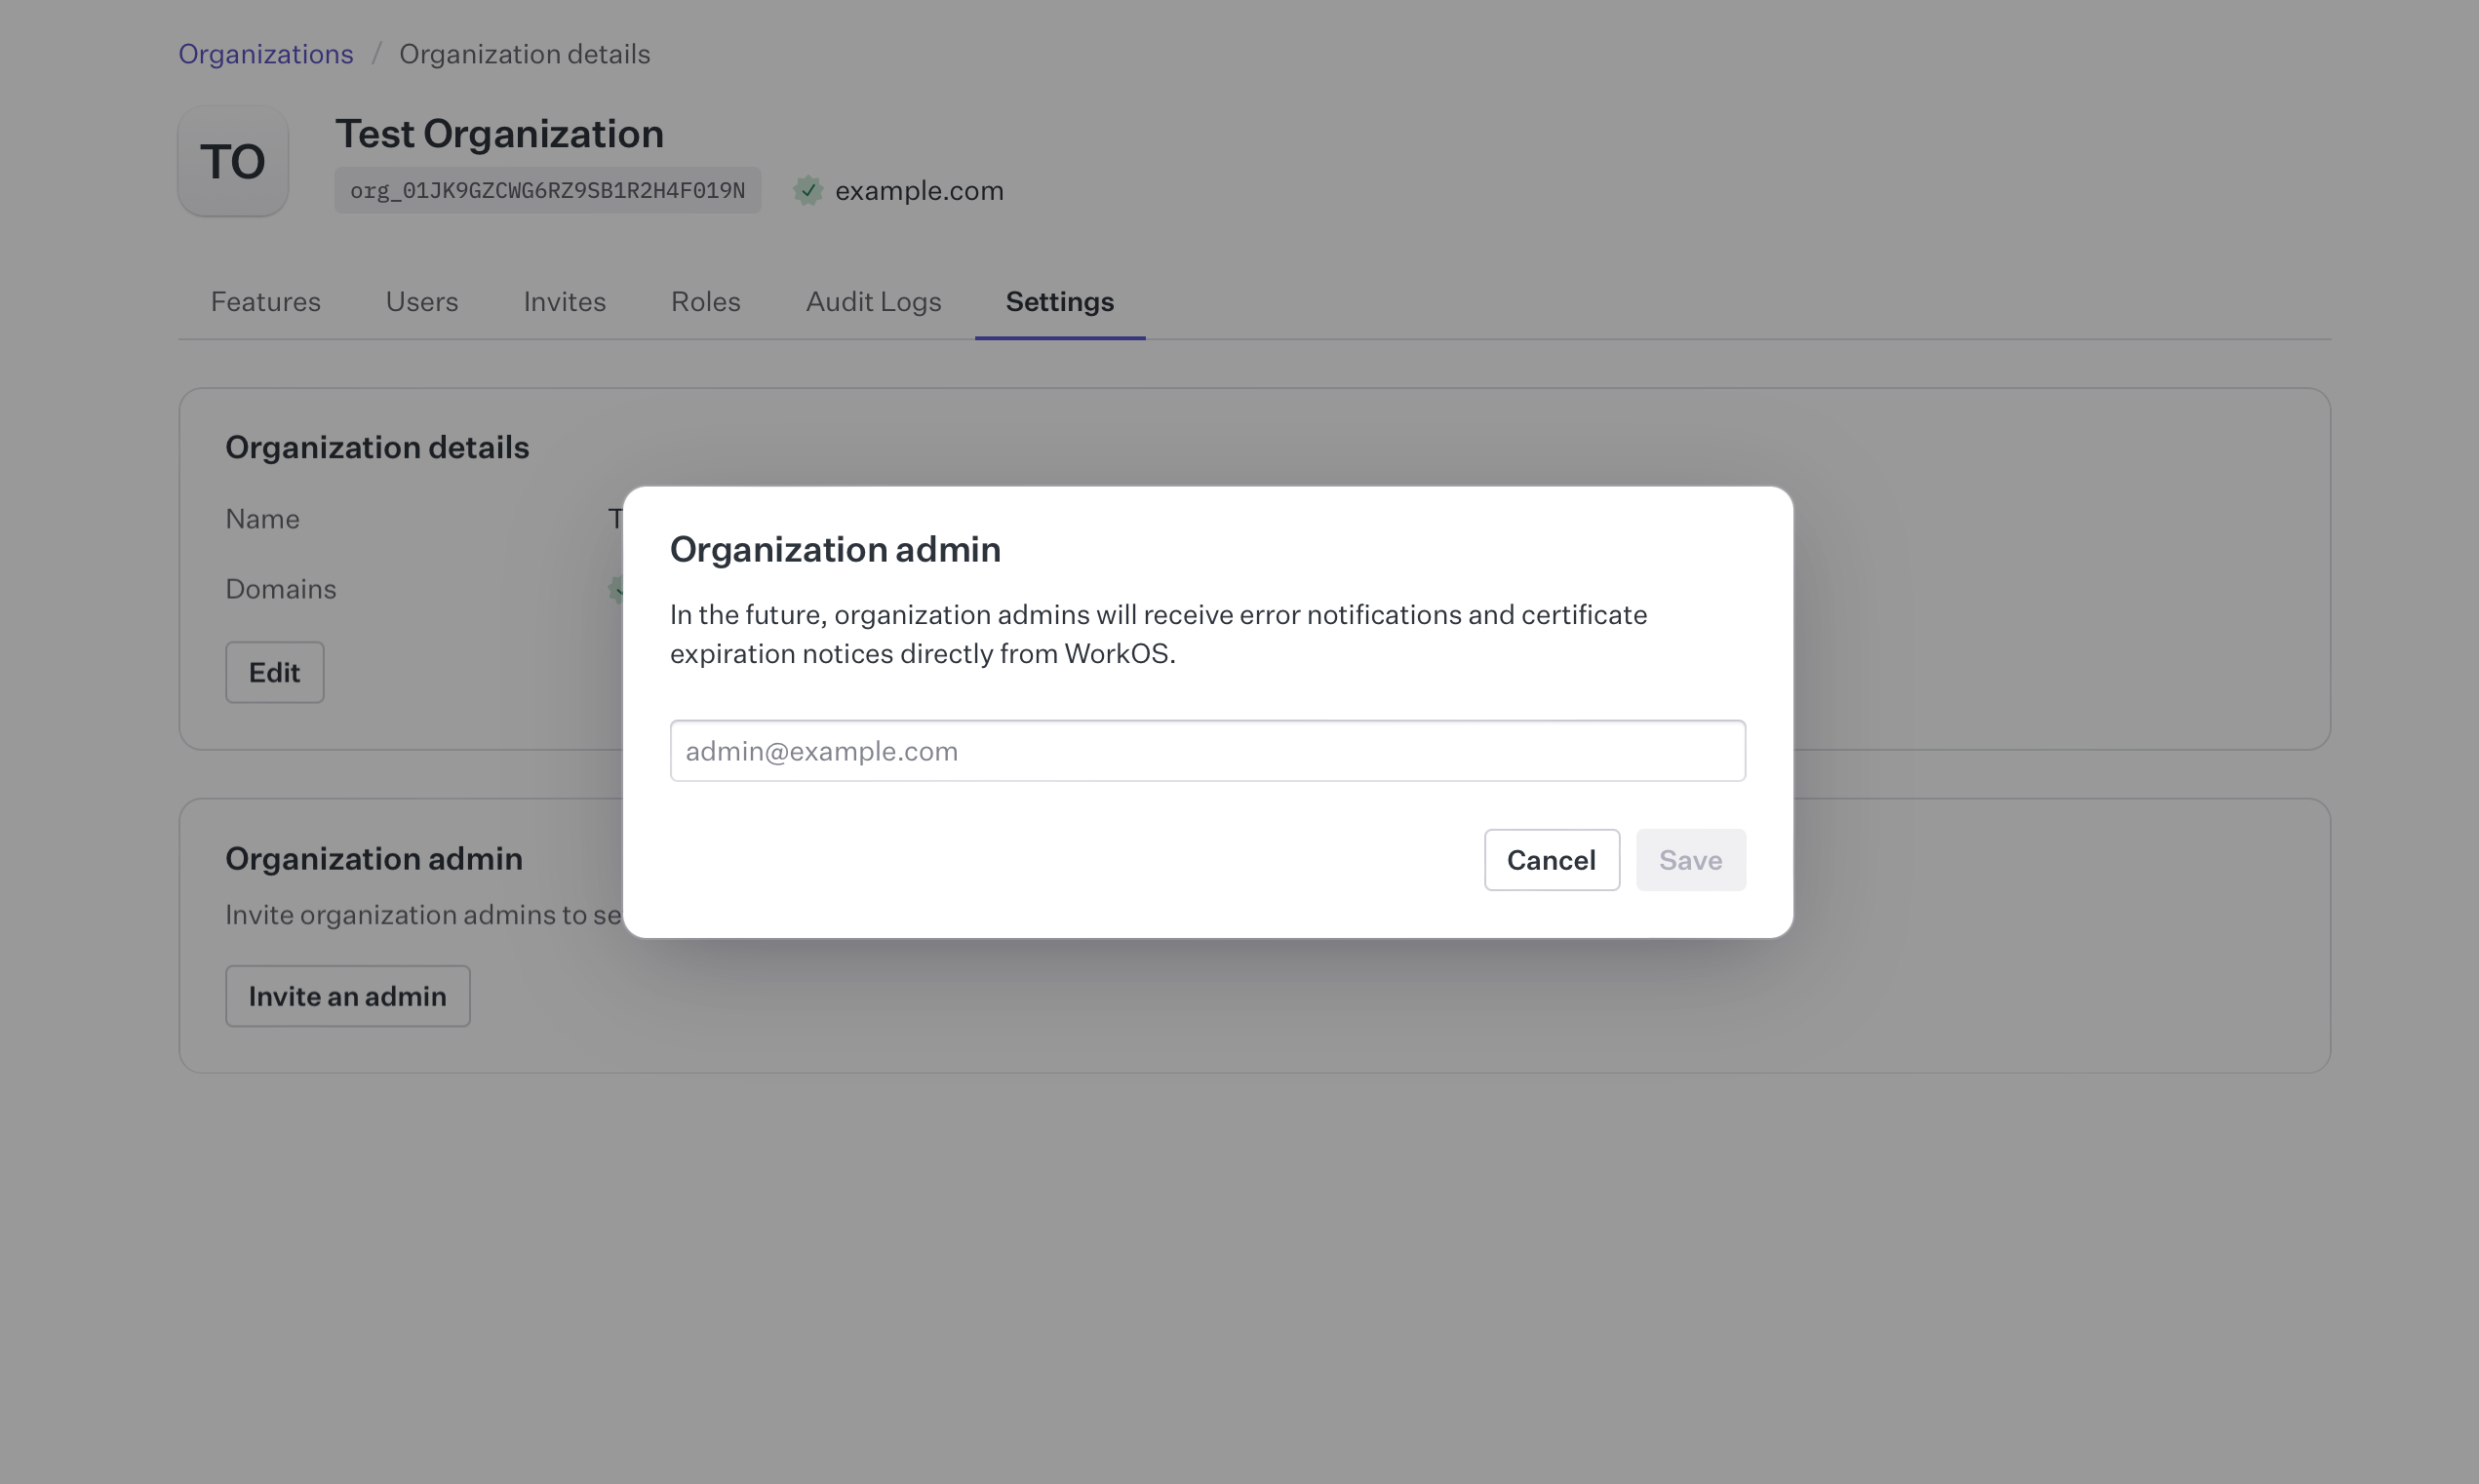
Once added to an organization, the organization admin can receive the following types of automated emails:
- X509 certificate expiration: Sent when the X509 certificate for a SAML connection is about to expire or has already expired.
- SSO connection misconfiguration: Sent when a SAML connection is misconfigured in the Identity Provider.
- Admin Portal setup: Sent when an admin is invited to set up various products in the Admin Portal, such as SSO, Directory Sync, and more.
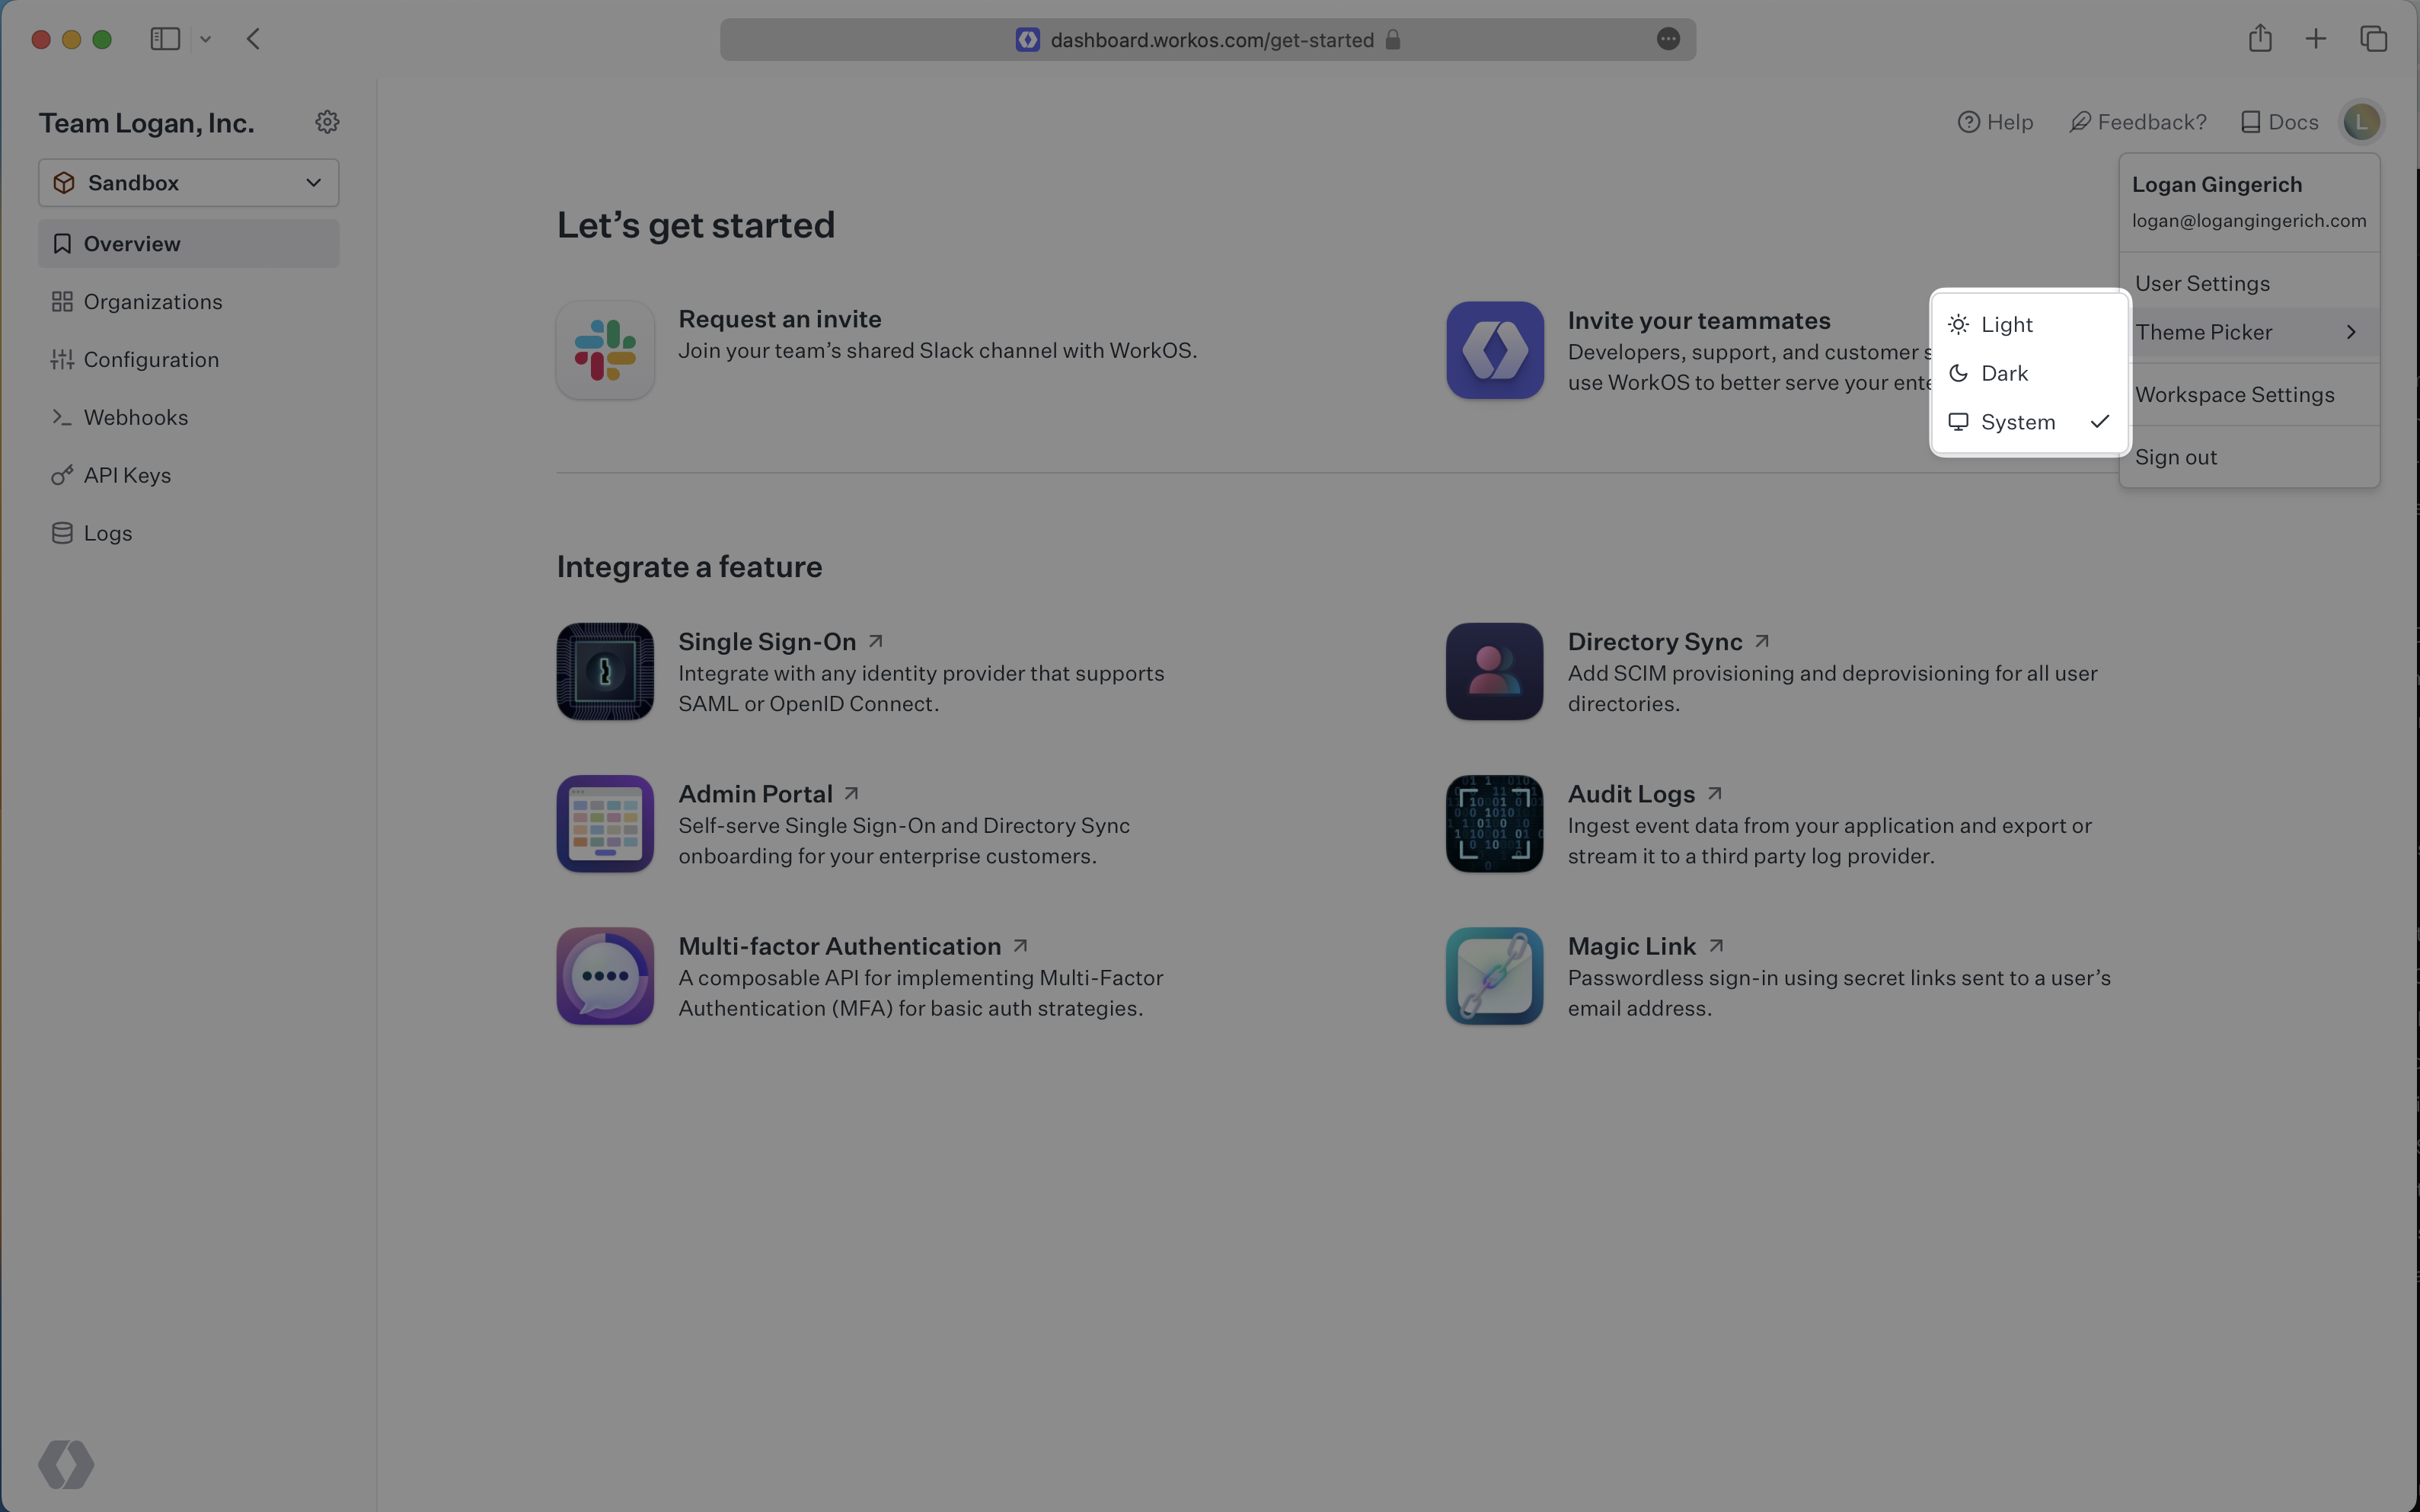
You can change the dashboard theme from the dropdown menu under your name in the top right corner.
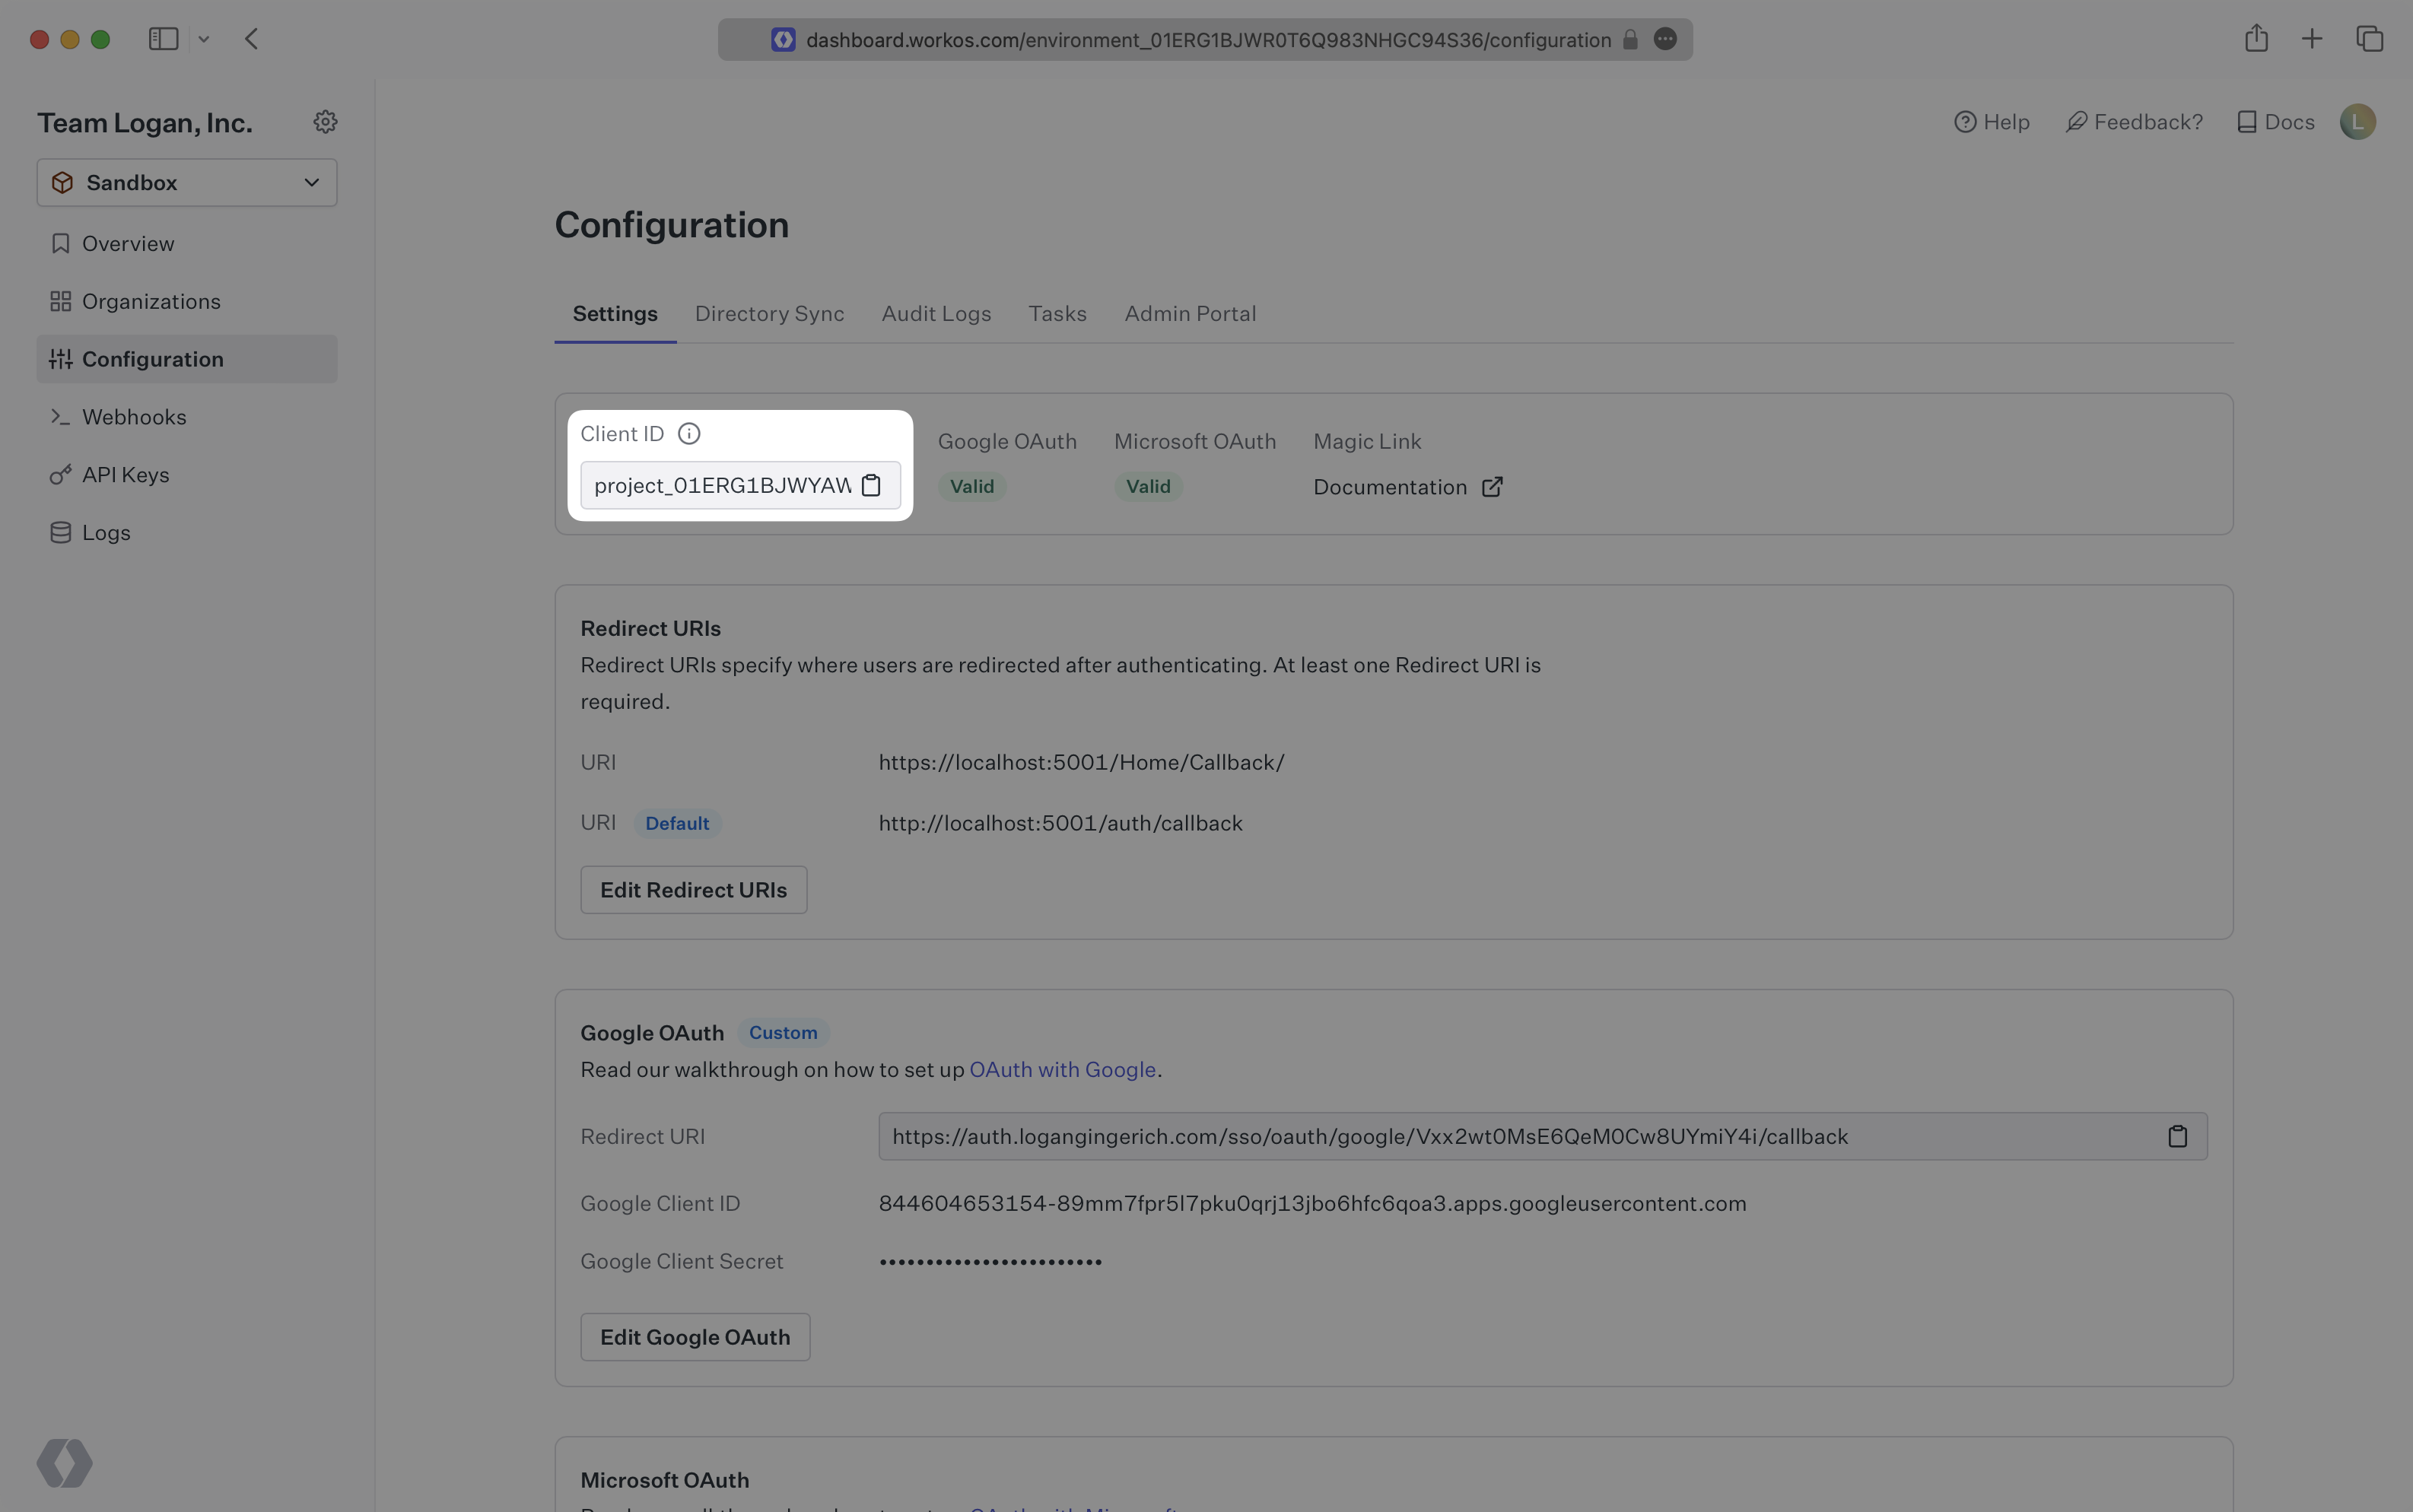
Navigate to the Configuration page on your WorkOS Dashboard to see your Client ID. This is needed in many API calls, including the Get Authorization URL endpoint. The Client ID is specific to the environment in the WorkOS dashboard.
Set your allowed Redirect URIs on the Configuration page. The Redirect URI is the callback route where you’ll receive a code if a user successfully authenticates. You can then exchange this code for a user profile via the Get Profile and Token API endpoint.
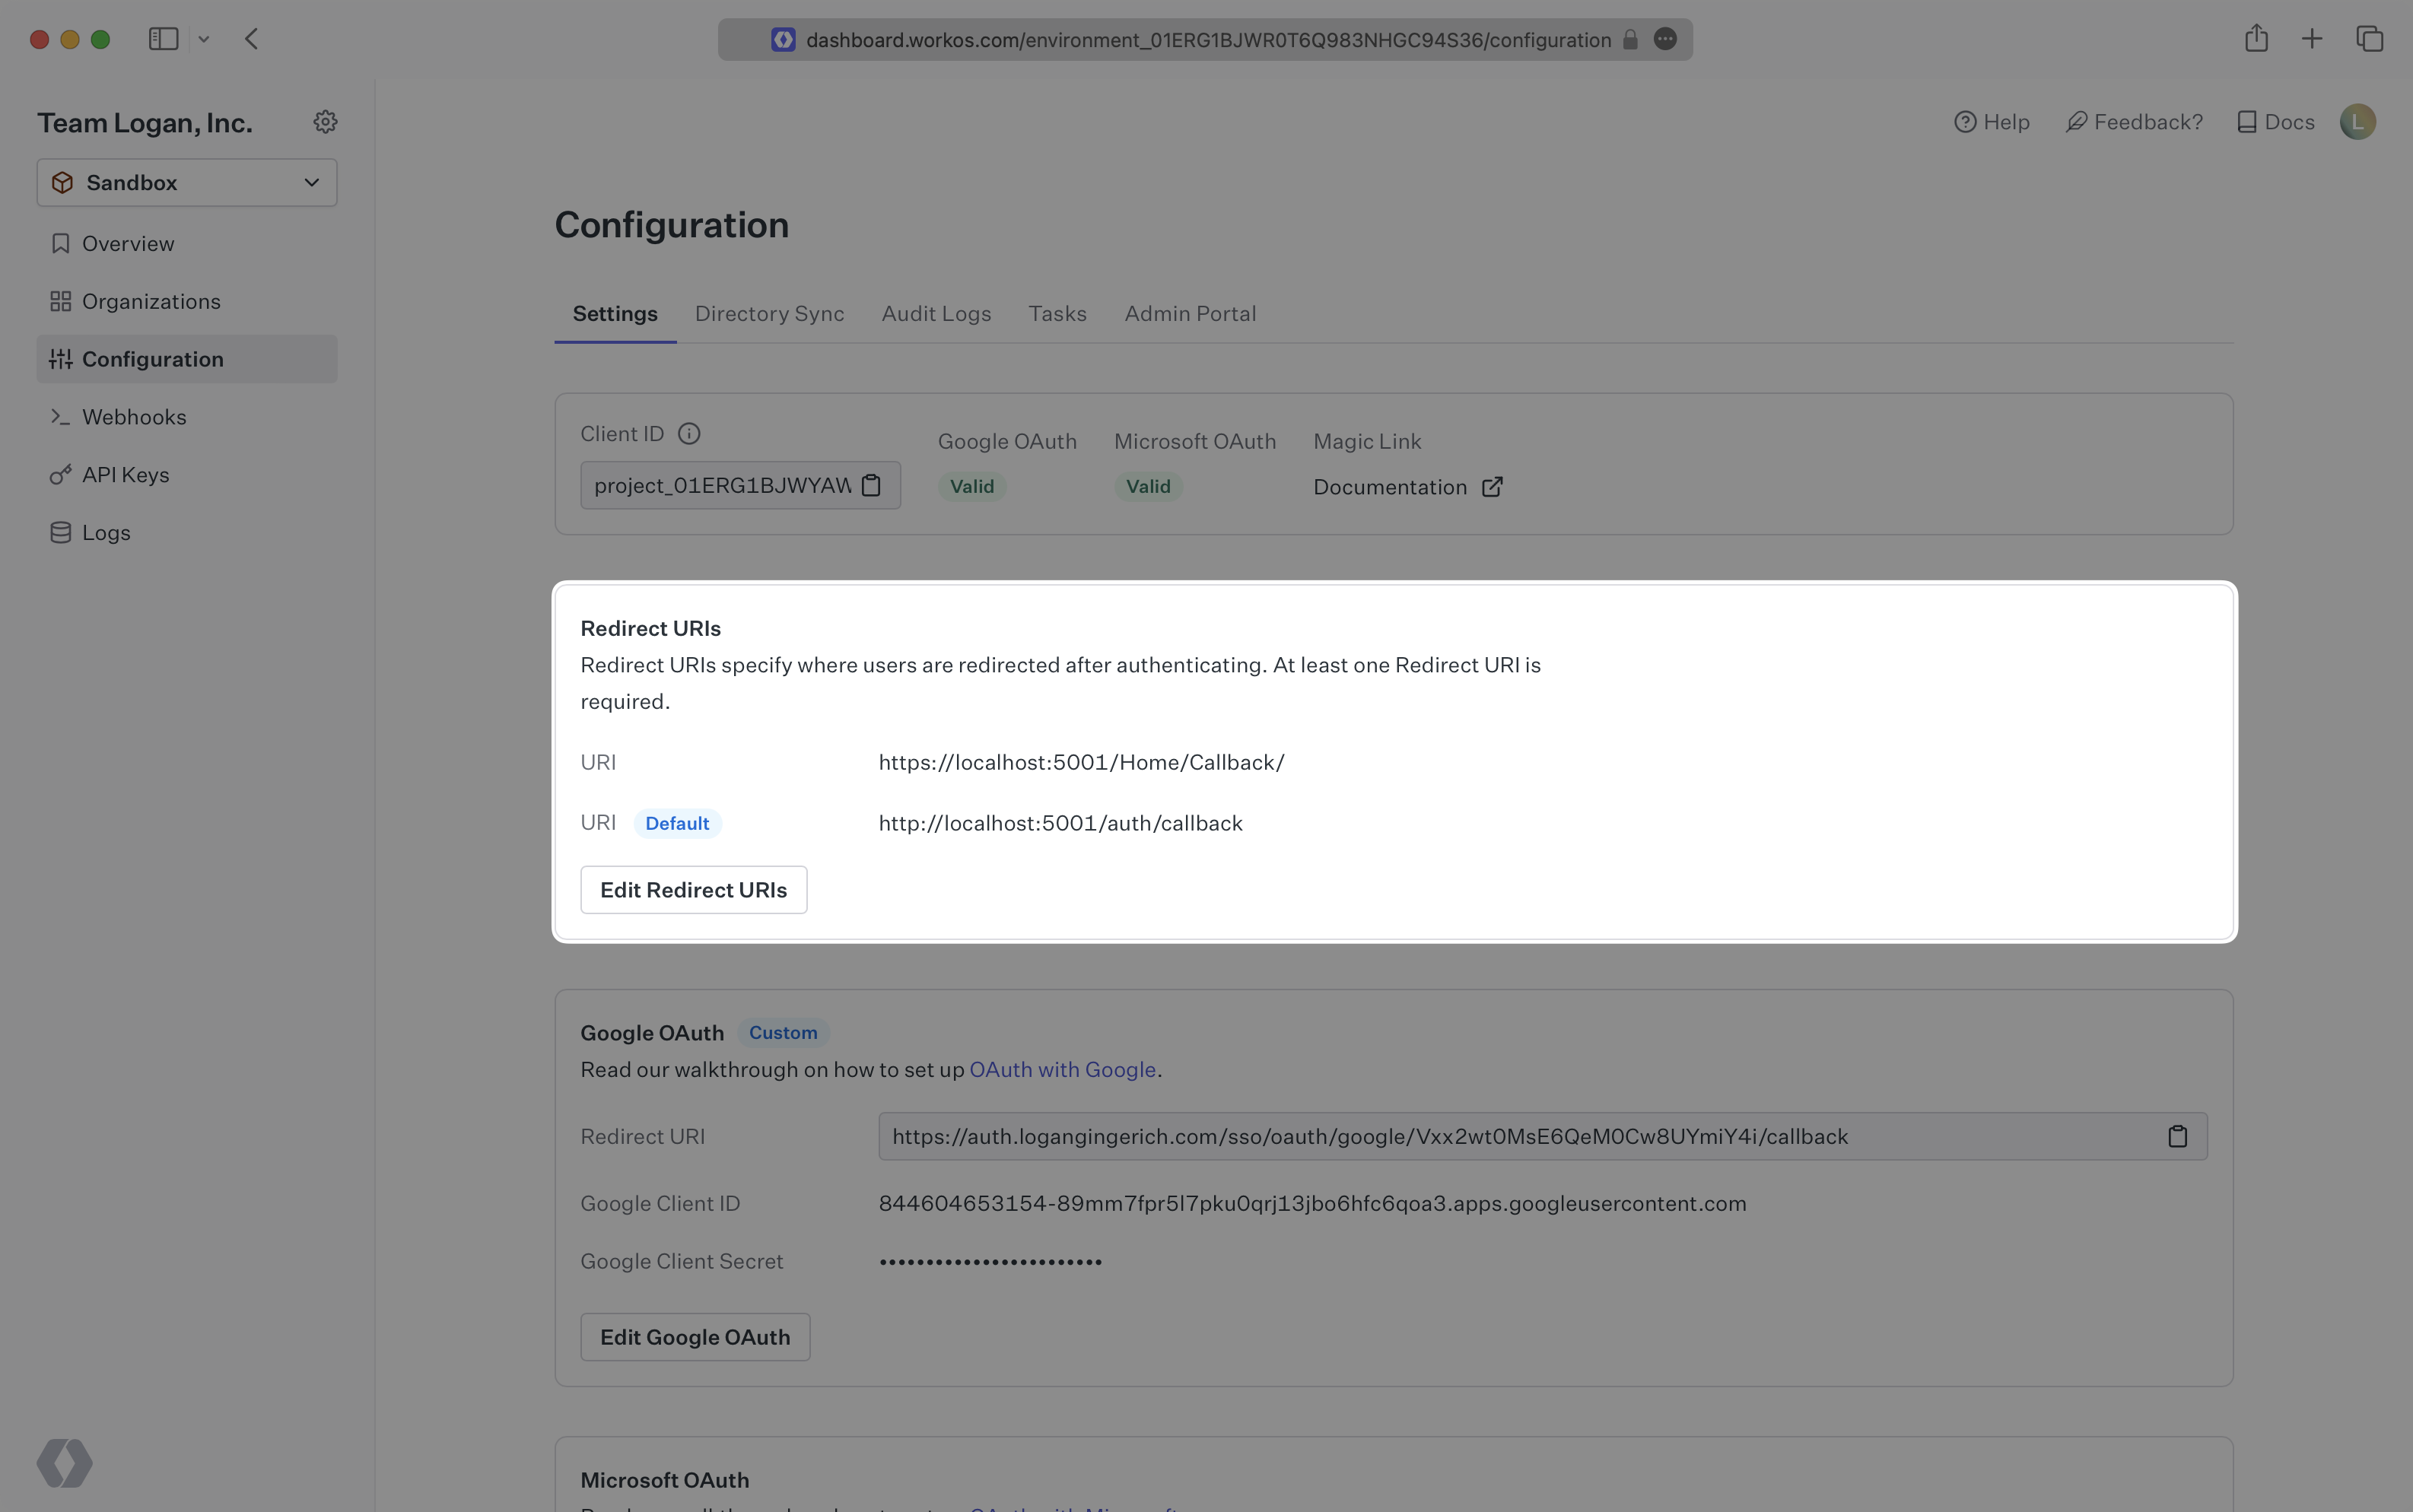
Check out our Redirect URI tutorial for information on Redirect URI best practices.
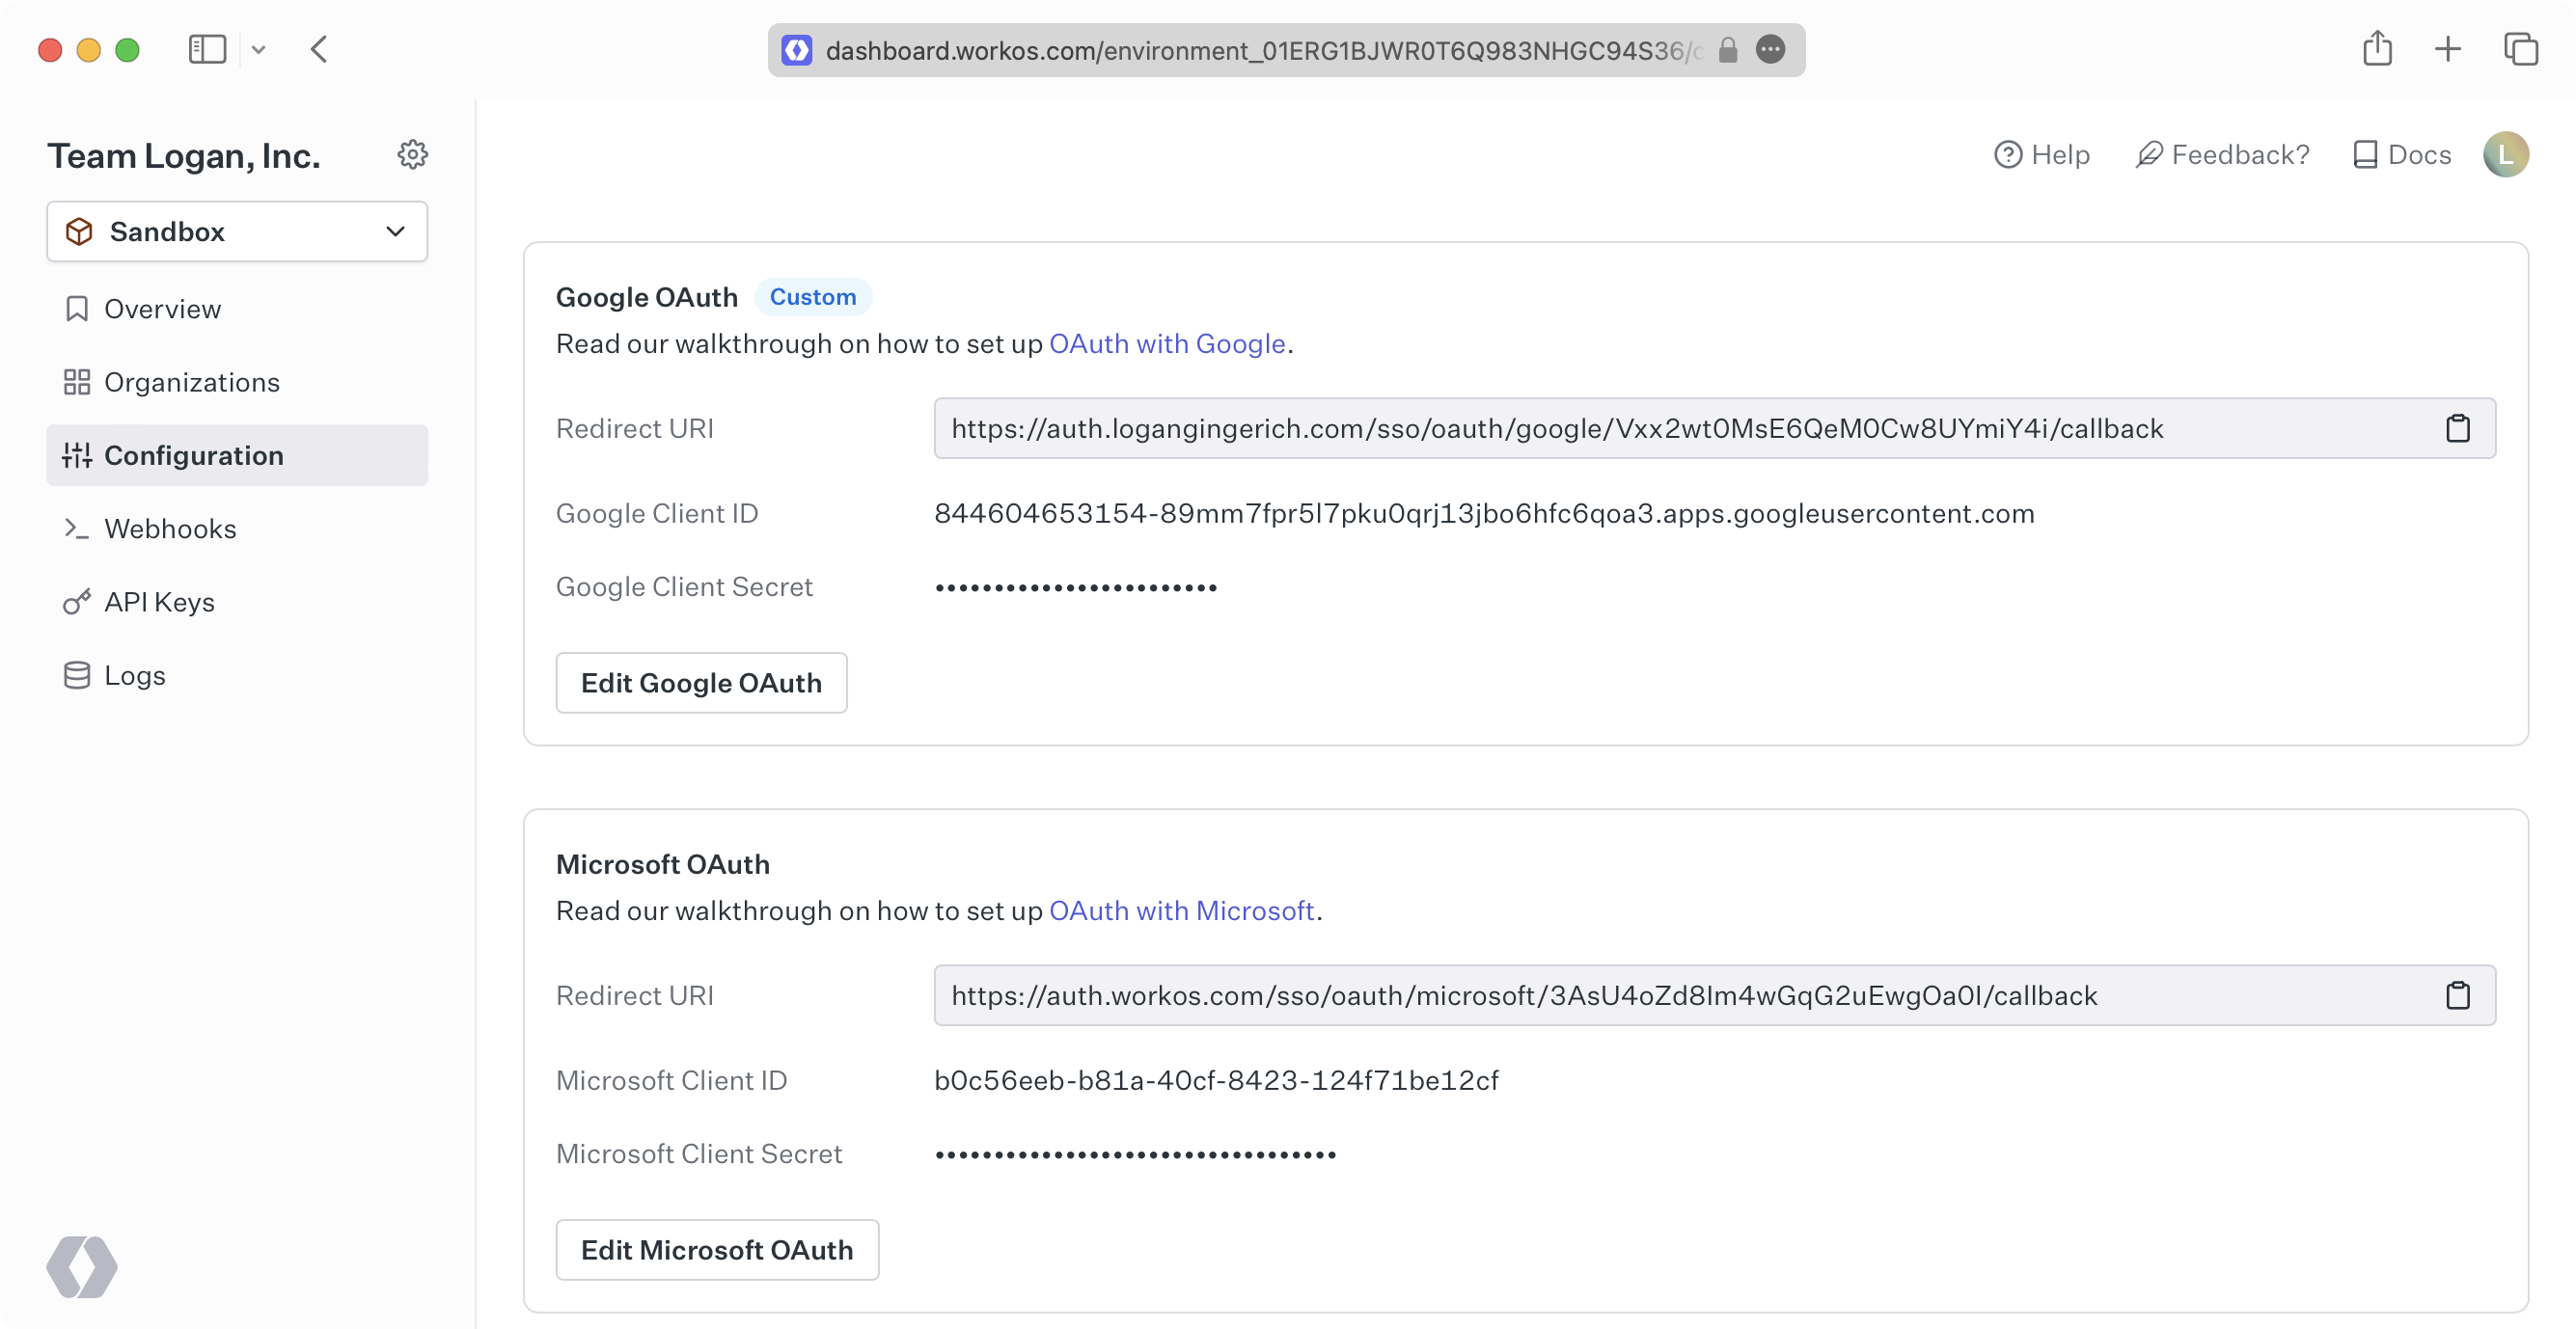
You can configure global settings for Google OAuth and Microsoft OAuth on the Configuration page. These providers allow anyone that can log in to Google or Microsoft to authenticate to your application. Our provider documentation on Google OAuth, Microsoft OAuth, GitHub OAuth, and Sign in with Apple can help you set up these authentication methods.
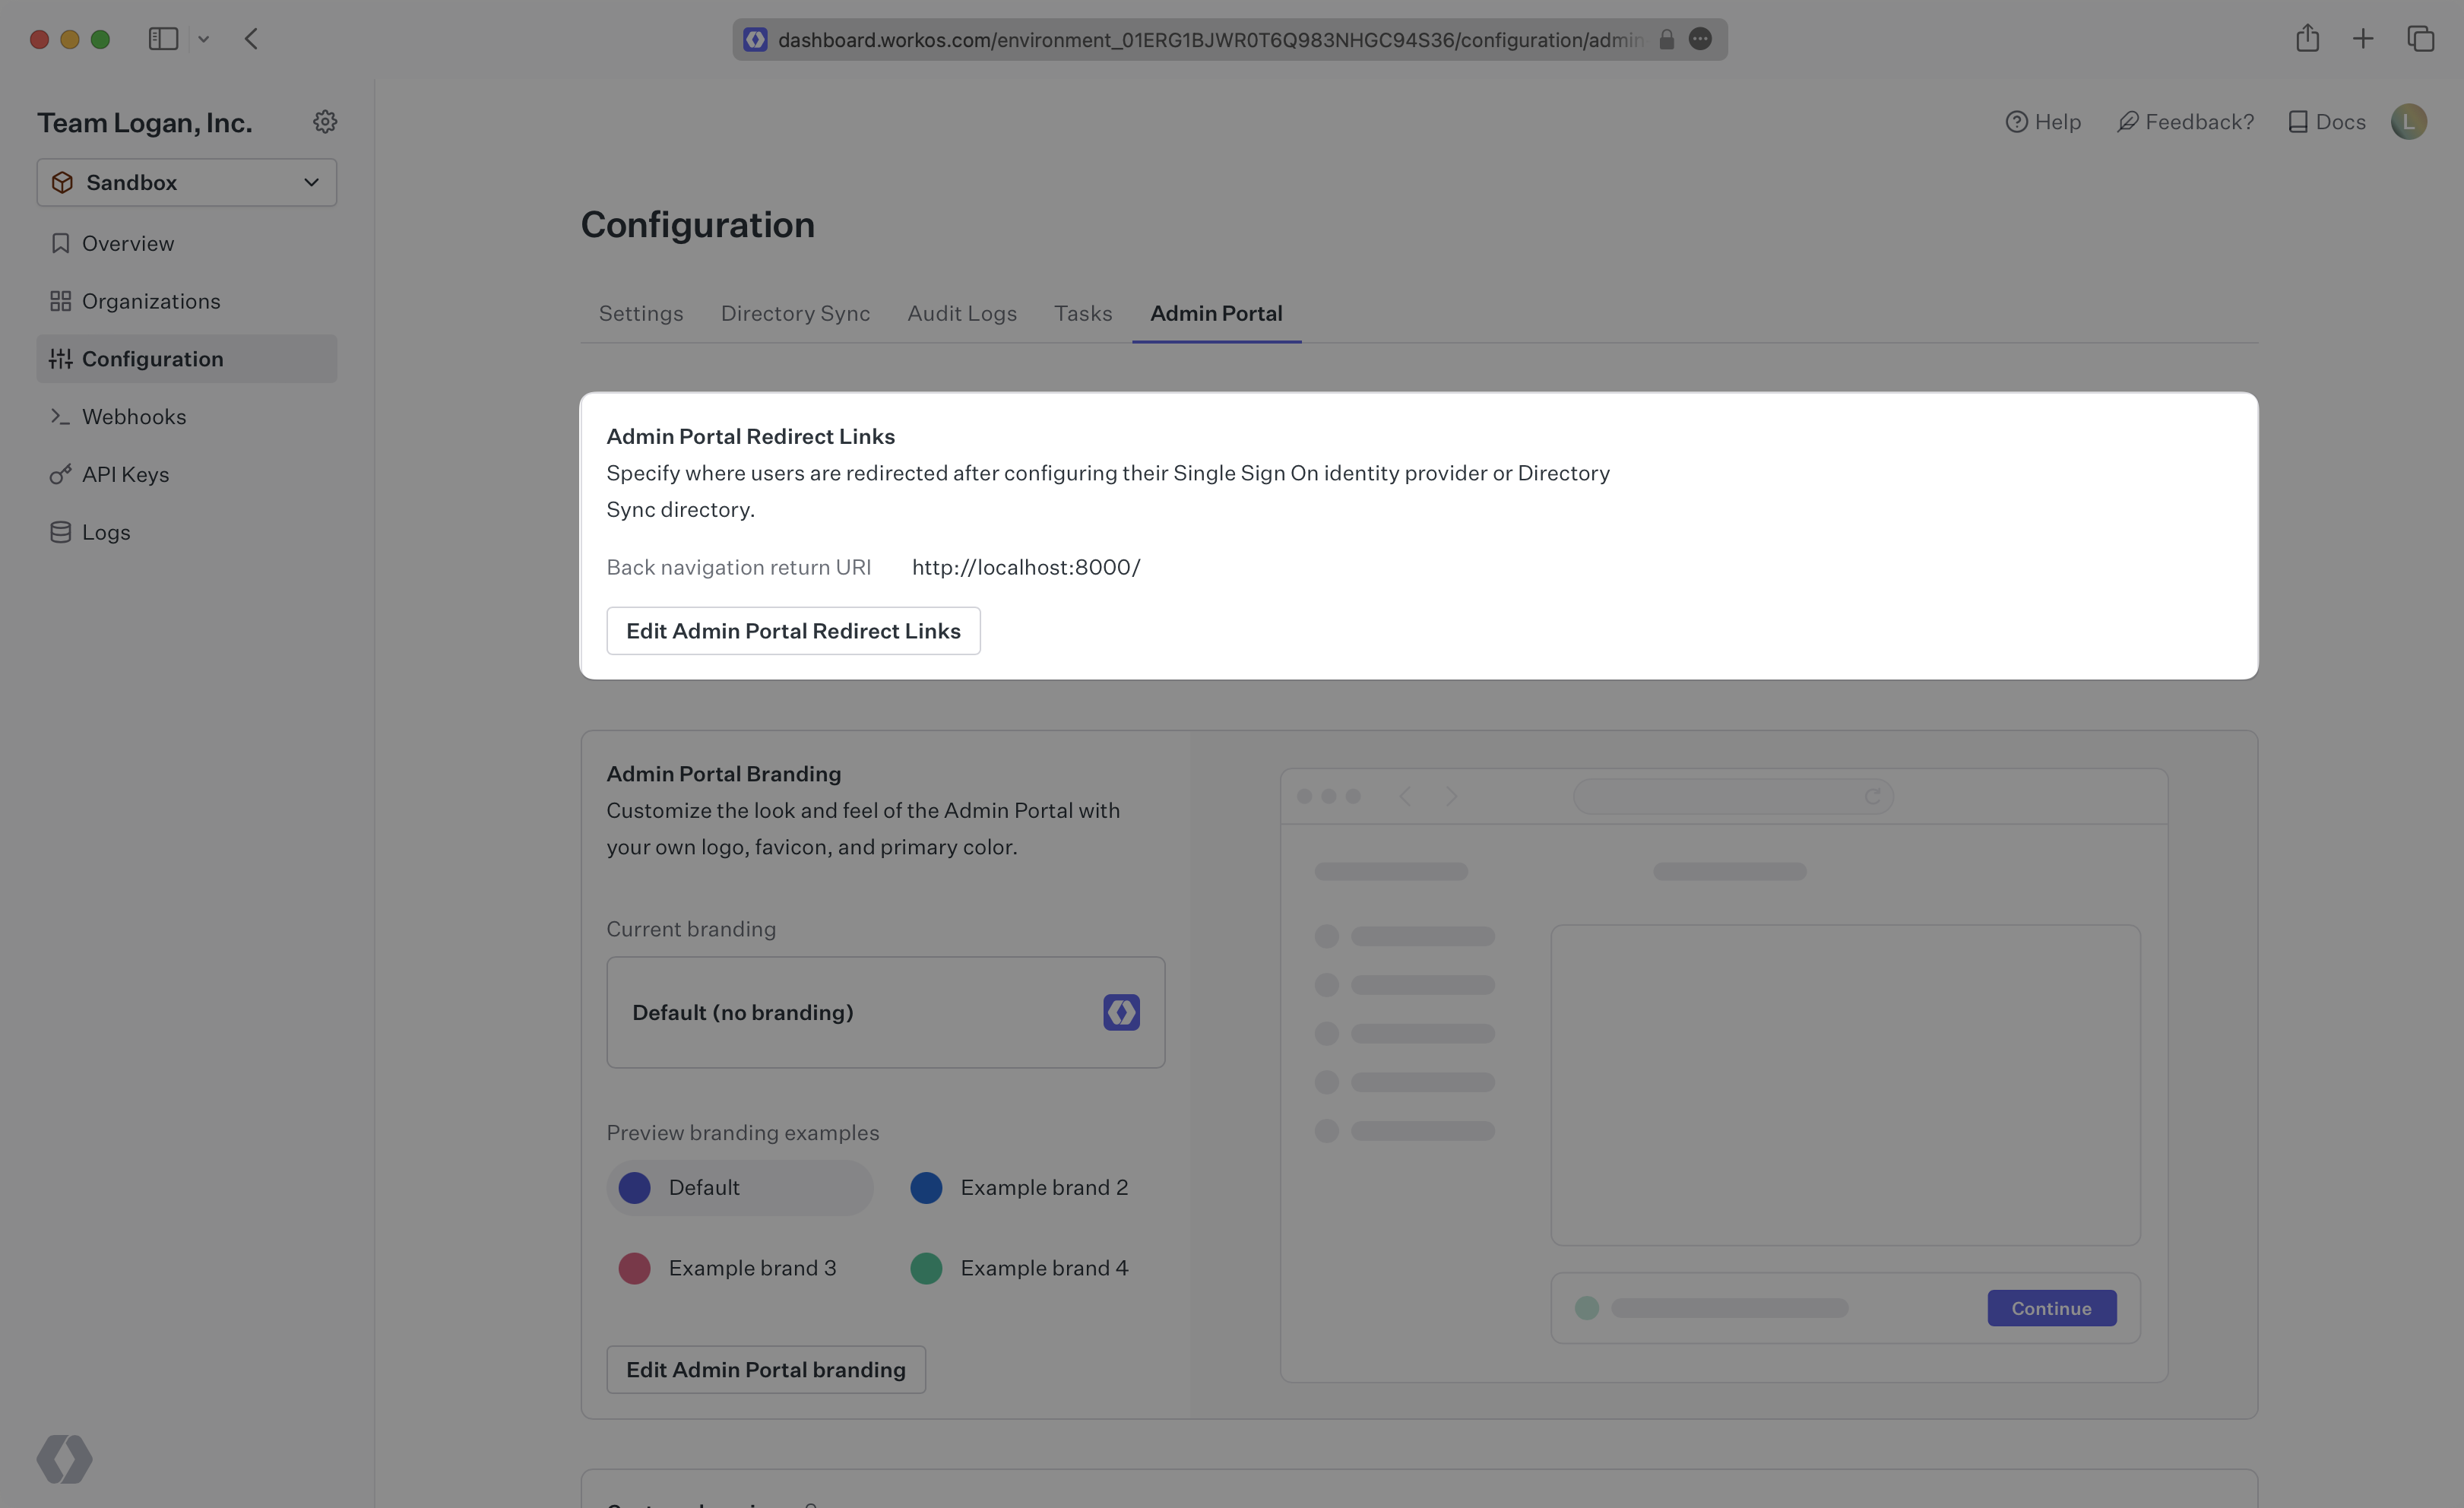
You can set the Admin Portal Redirect Link on the Configuration page. This is where users will be directed after setting up a connection in the Admin Portal. We also offer custom labeling of the Admin Portal. Reach out to us to learn more.
On the “Custom Attributes” tab of the Configuration page, you can define custom standardized attributes for your Directory Sync connections. By default, fields like first_name and email are standardized in Directory Sync. However, you may want to standardize other fields, such as manager. On the Configuration page, you can set the custom attributes you’d like to standardize.
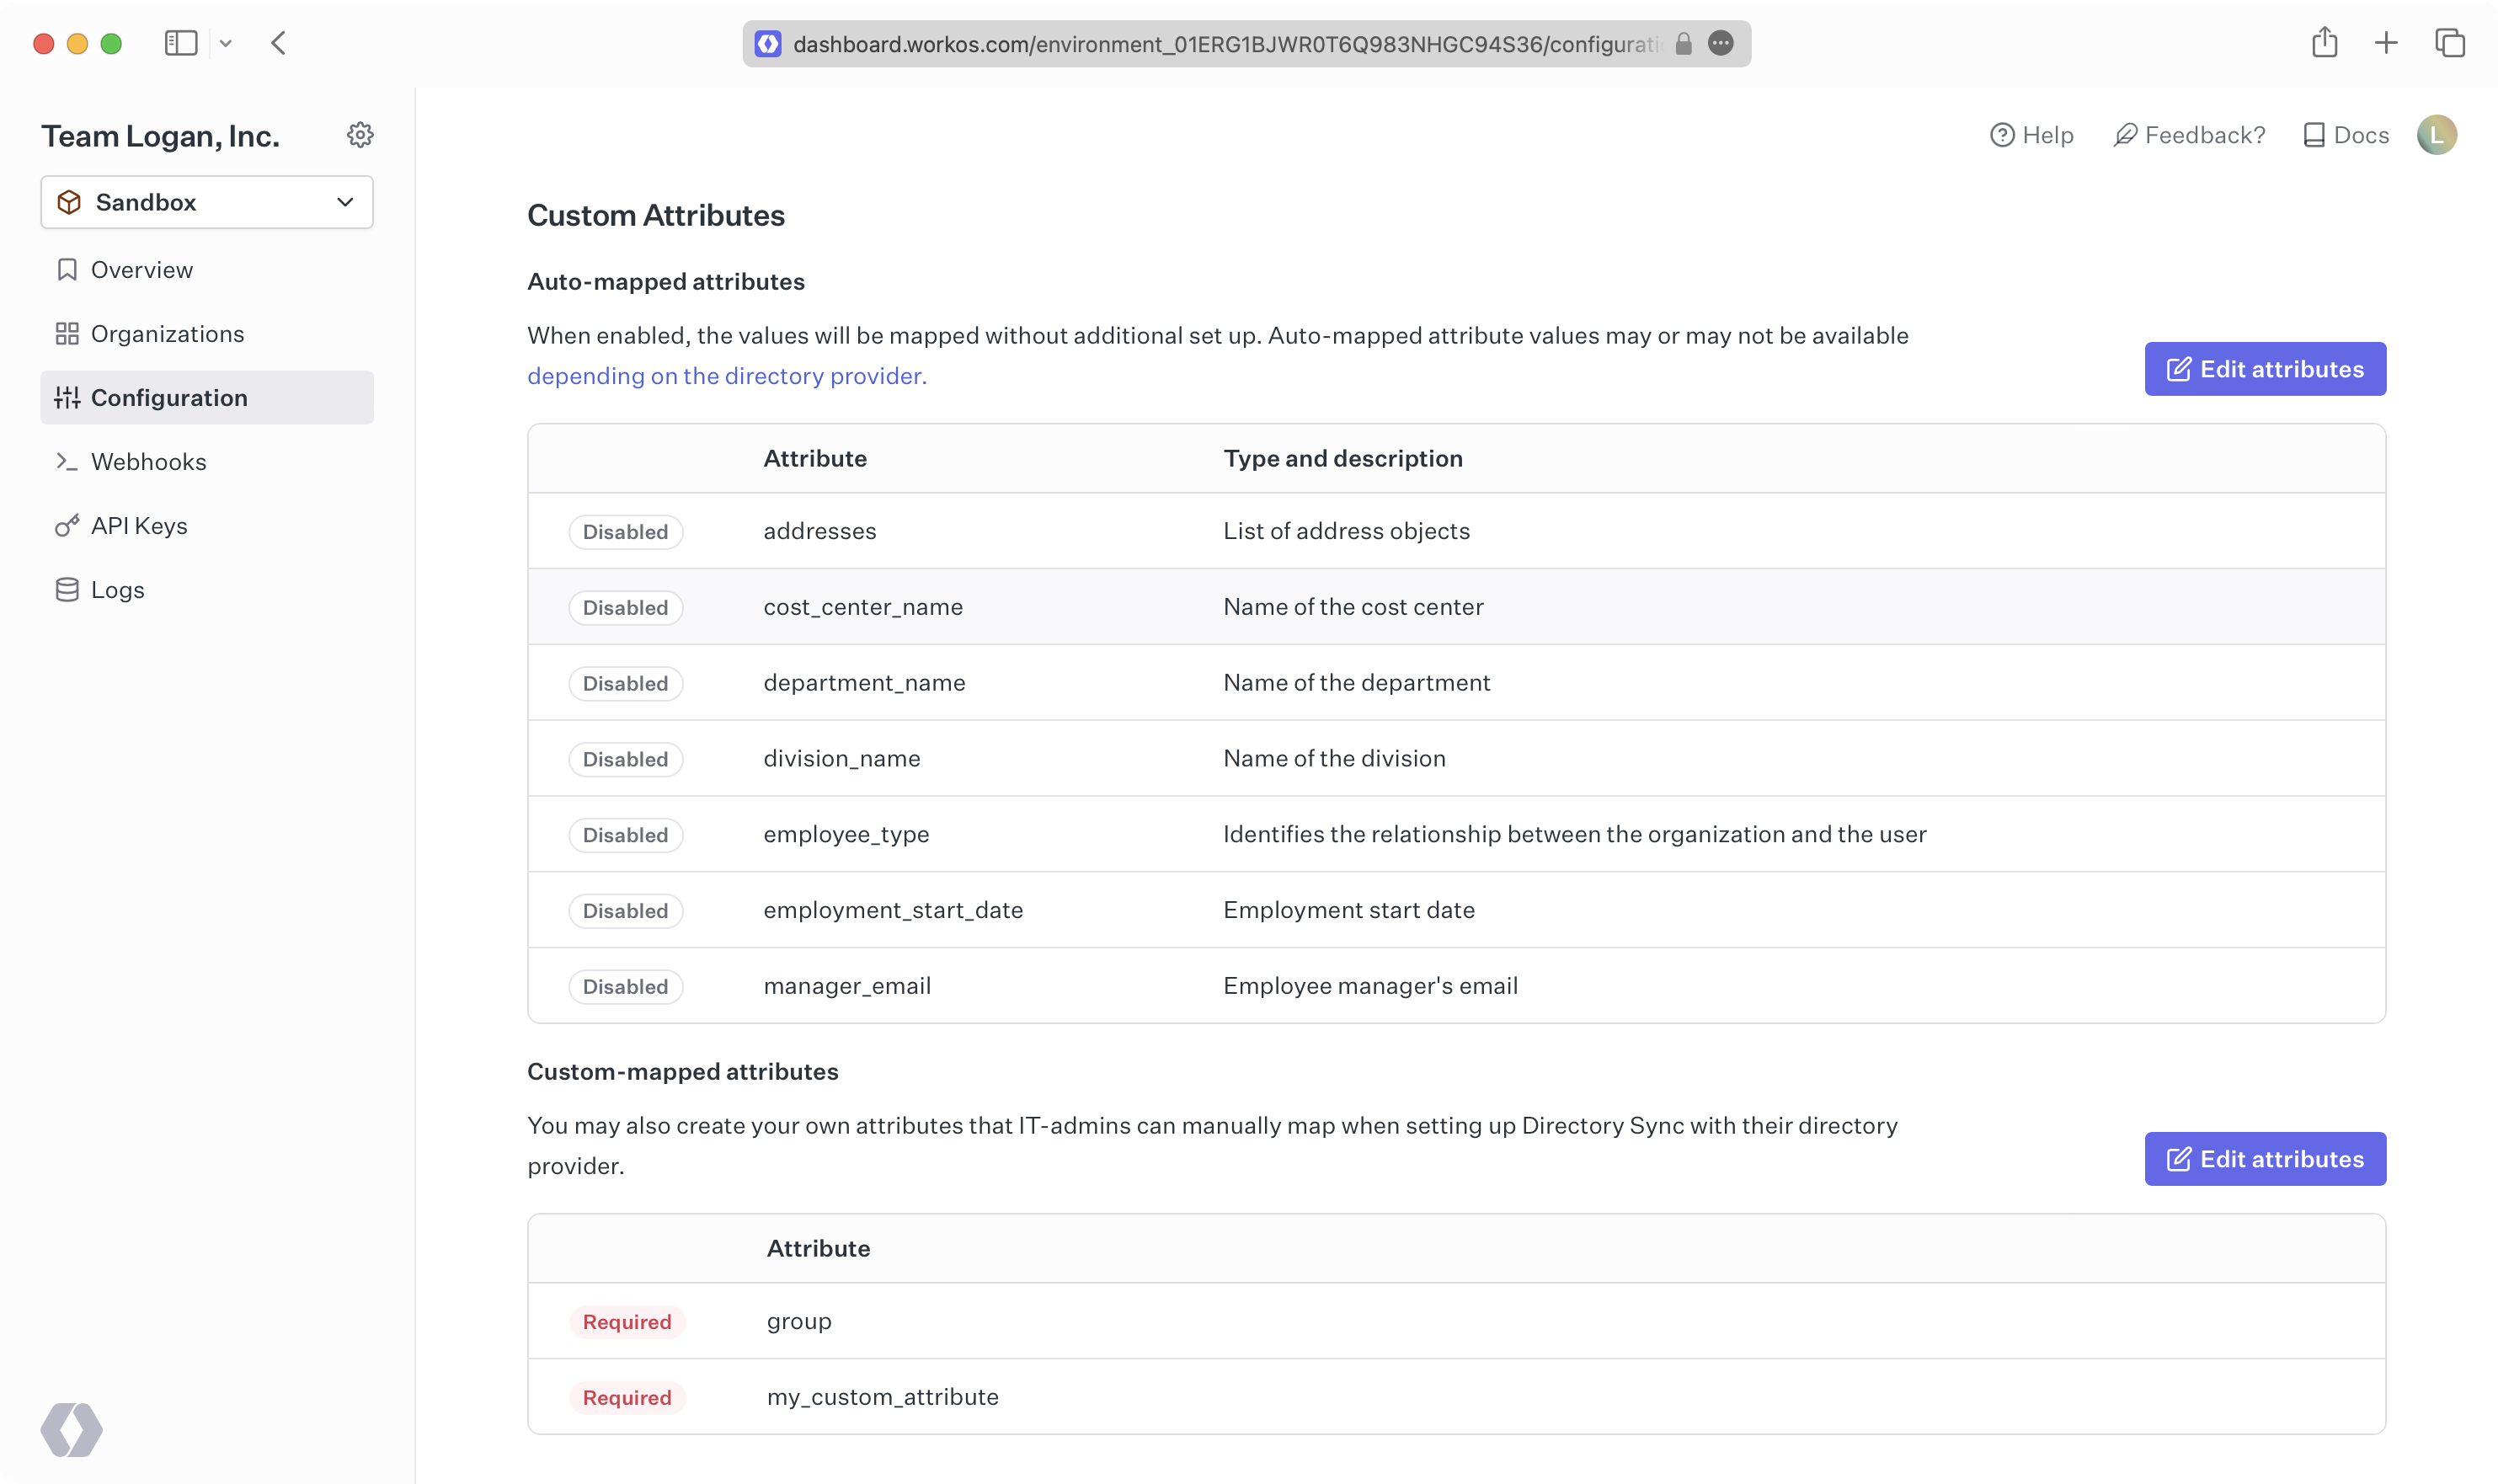
When custom attributes are configured, you can map them to a specific attribute for a given directory sync connection.

The attribute mapped needs to be found in the raw data from the directory, and once mapped to a custom attribute, you’ll see it in the custom_attributes for a Directory User. Check out our blog post on custom attributes for more information.
To assist users in debugging their SAML SSO connections, there is a “Sessions” tab in the Connection Details view for all SAML SSO connections.
Here you can see logs for SAML sessions from these connections which enables you to quickly understand the status and health of each connection. You can see the details of each session, its status, if there are any errors, and what those errors are.
The Sessions tab is available on the Connection Overview page of each SAML based connection.

When you navigate to the Sessions tab, you are presented with a list of recent user sessions for the given connection in chronological order from newest to oldest. Some basic information is available here, including the state, error message, user, truncated session ID, and when the session was created.
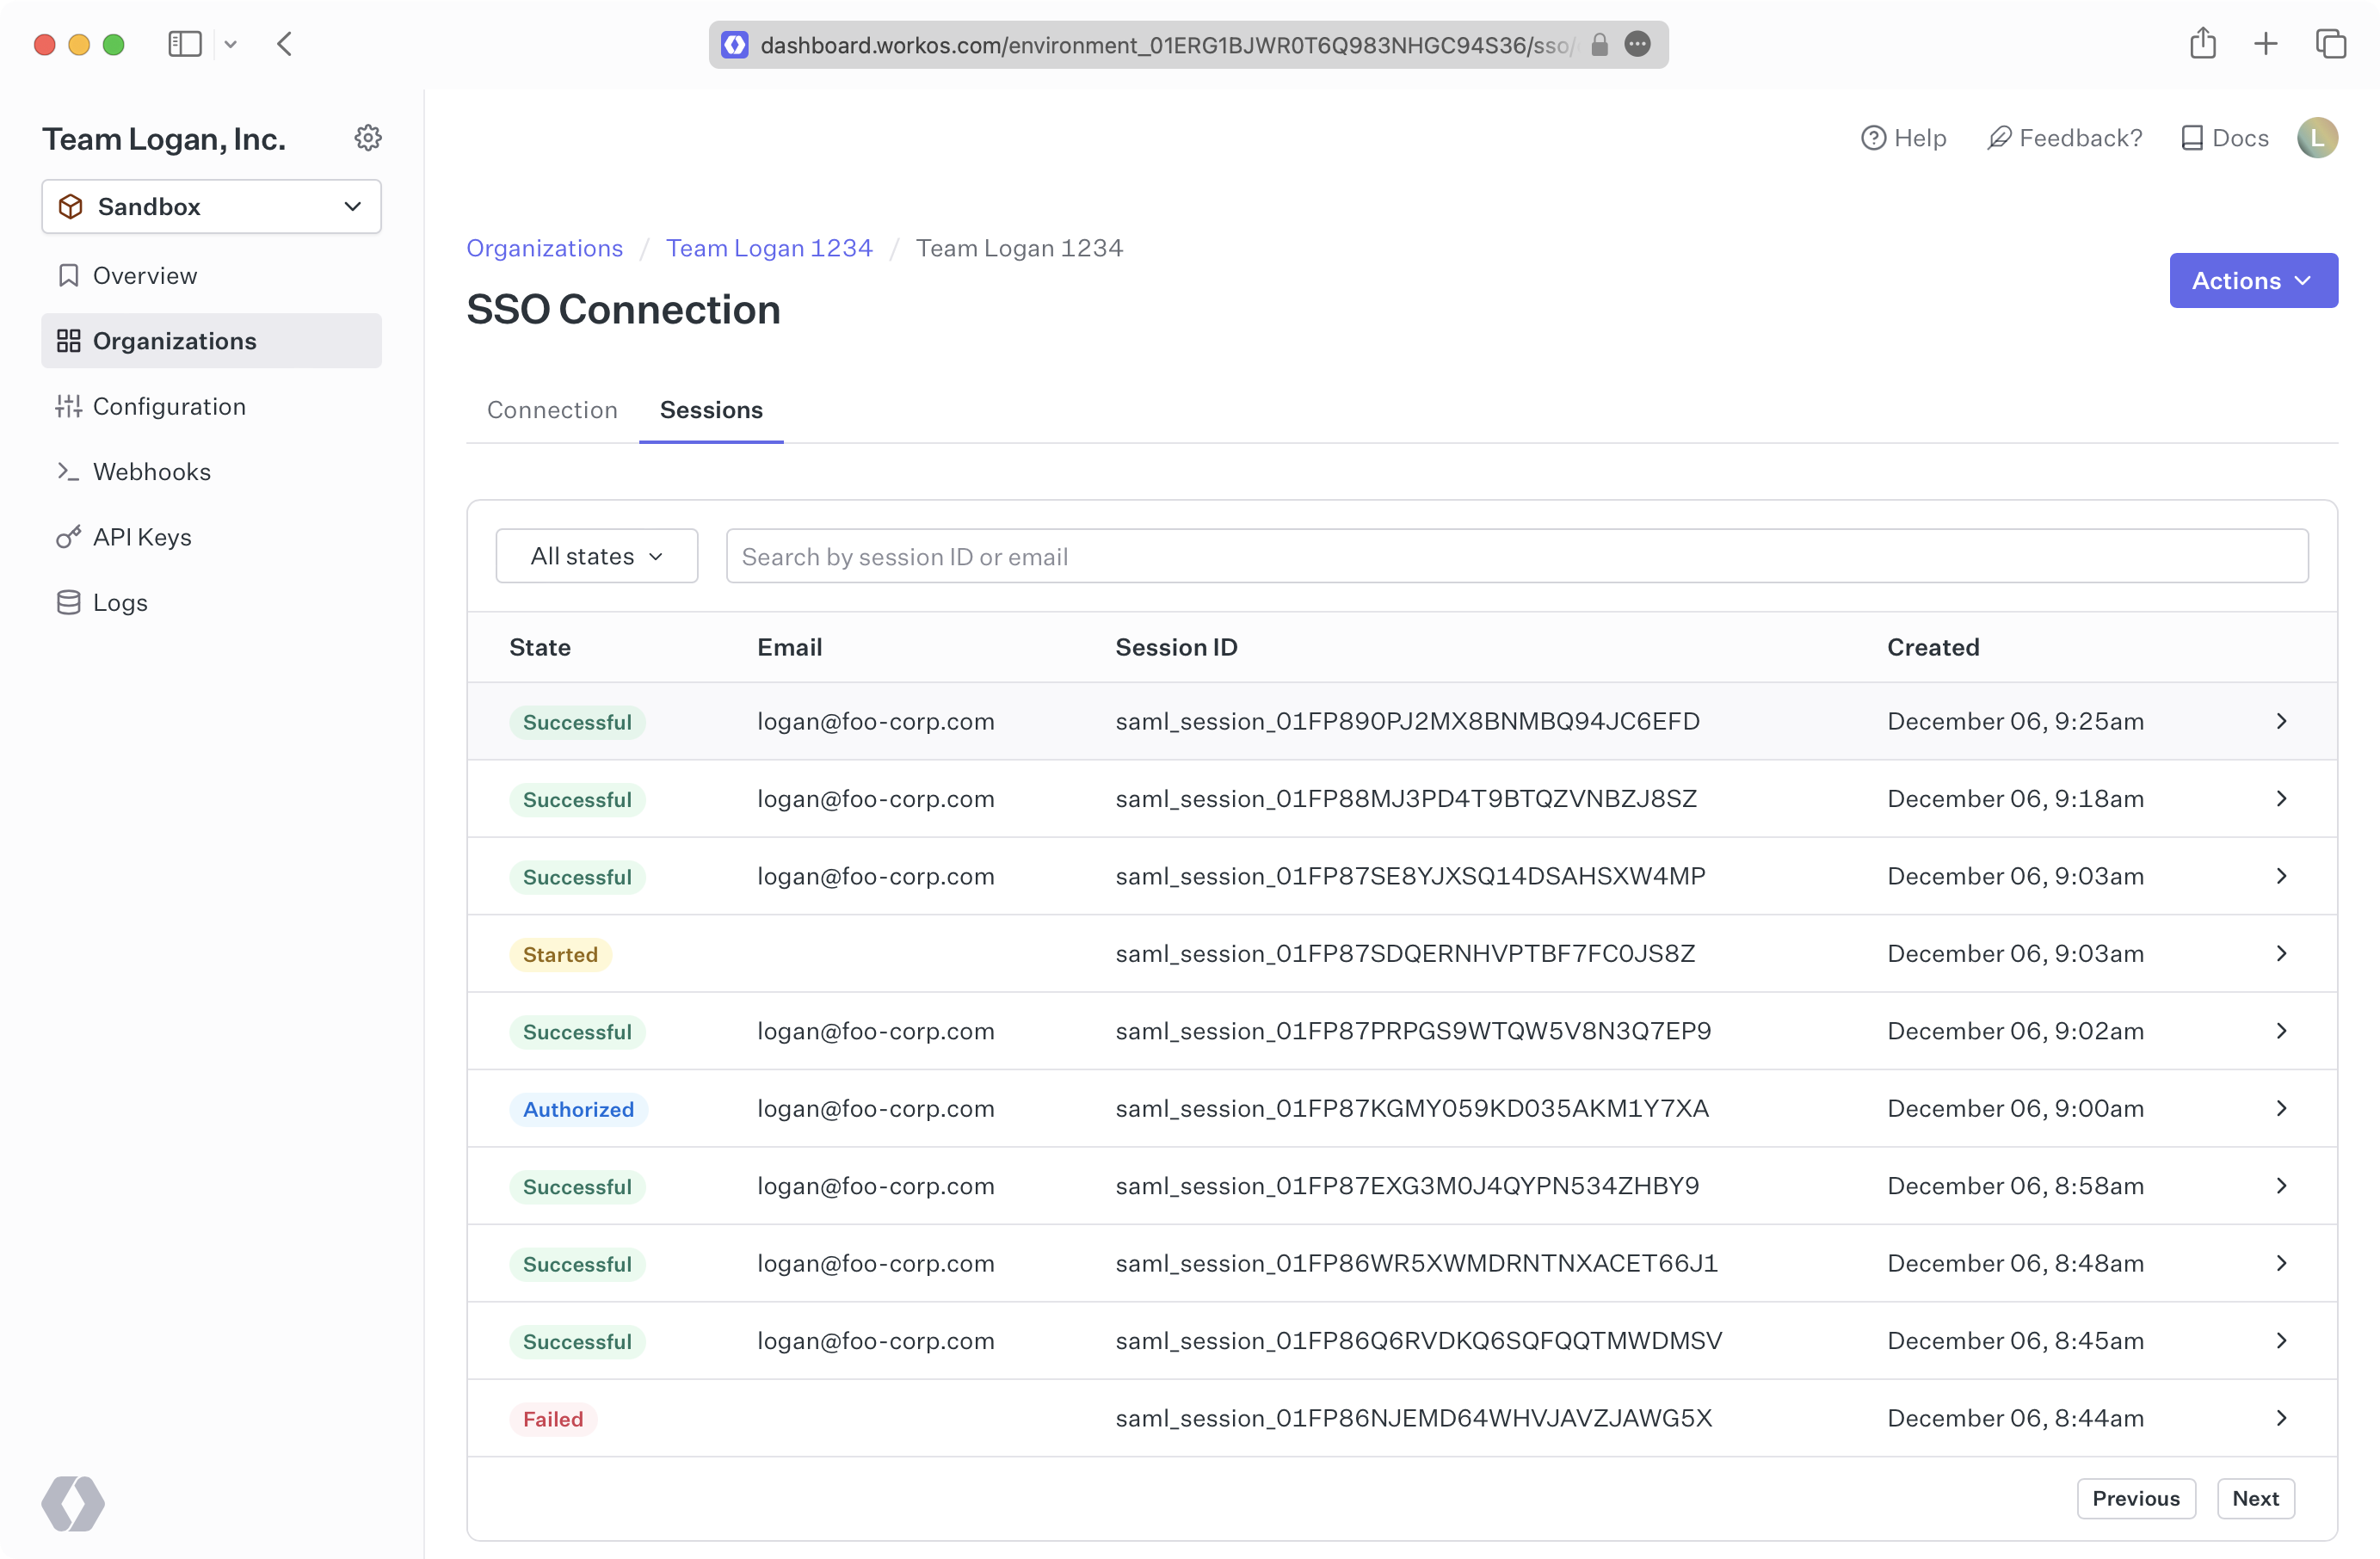
To find more detail for each session, click on the individual session entry. This will navigate you to the Session Details page where you can find the full Session ID along with other more in depth information about the user authenticating via the session.
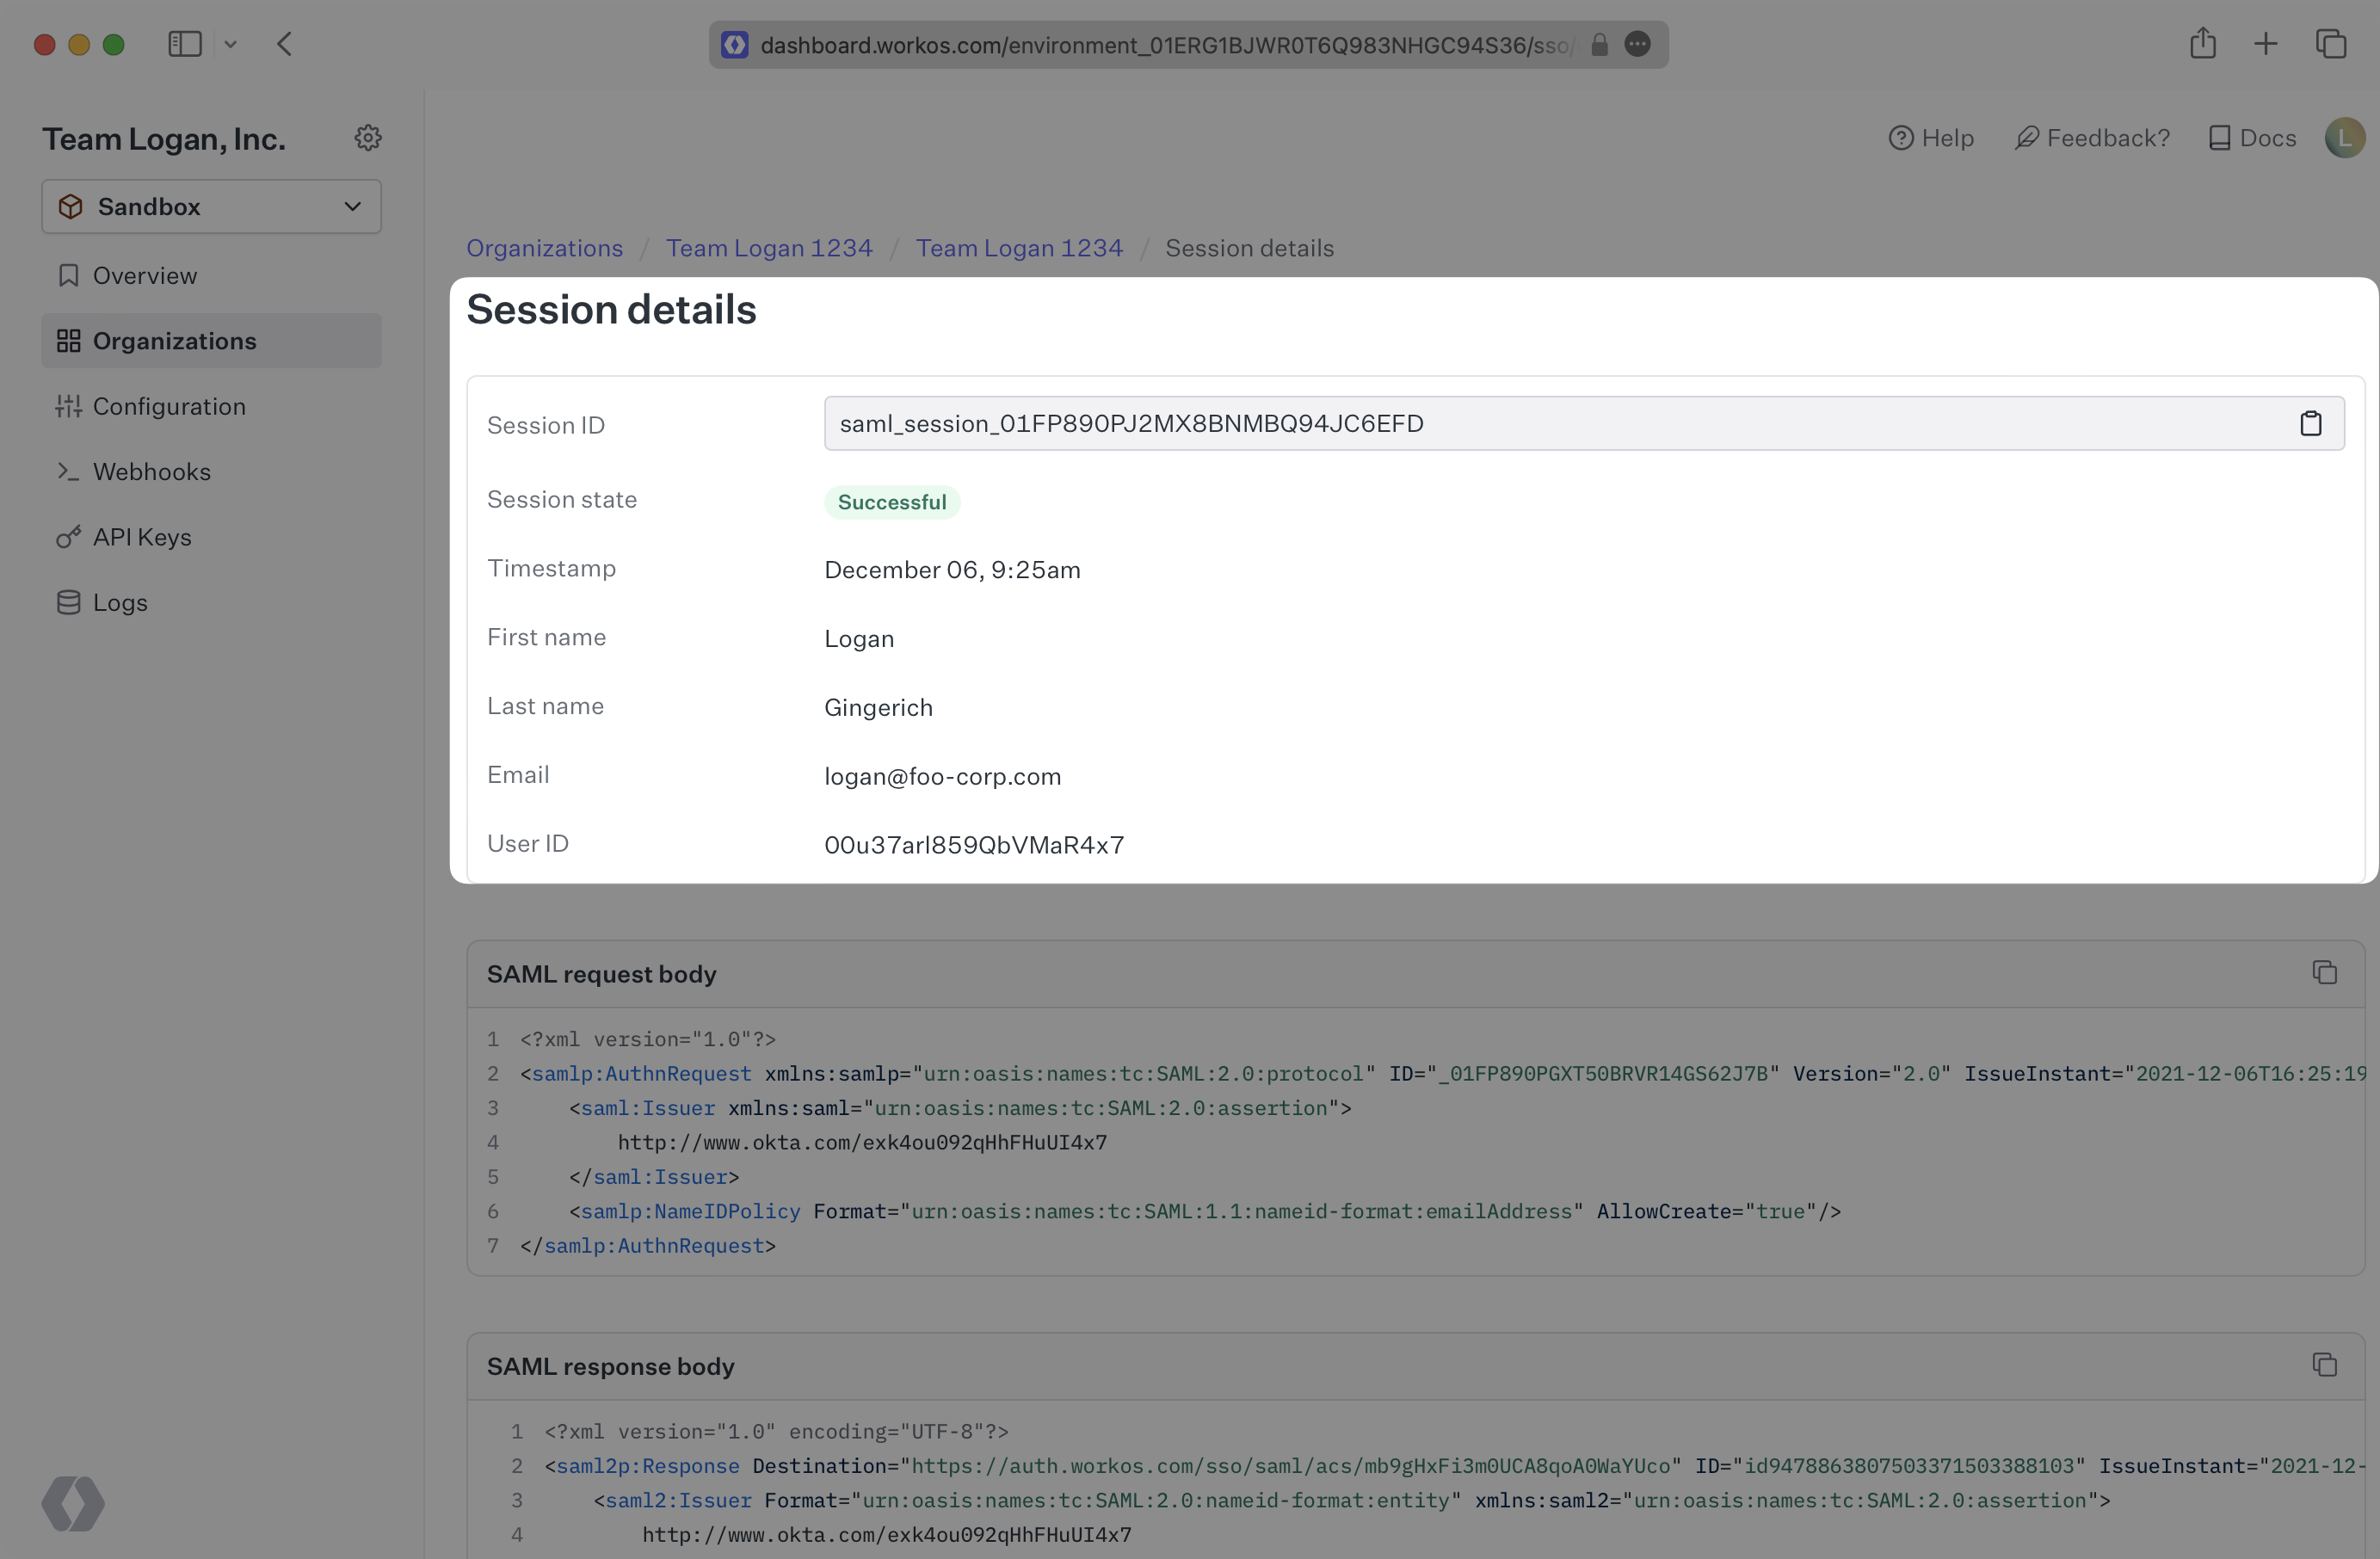
One of the most useful aspects of this tool is that it exposes the error messages when a session is not successful. When there are errors, you are presented with the details of the error for review.
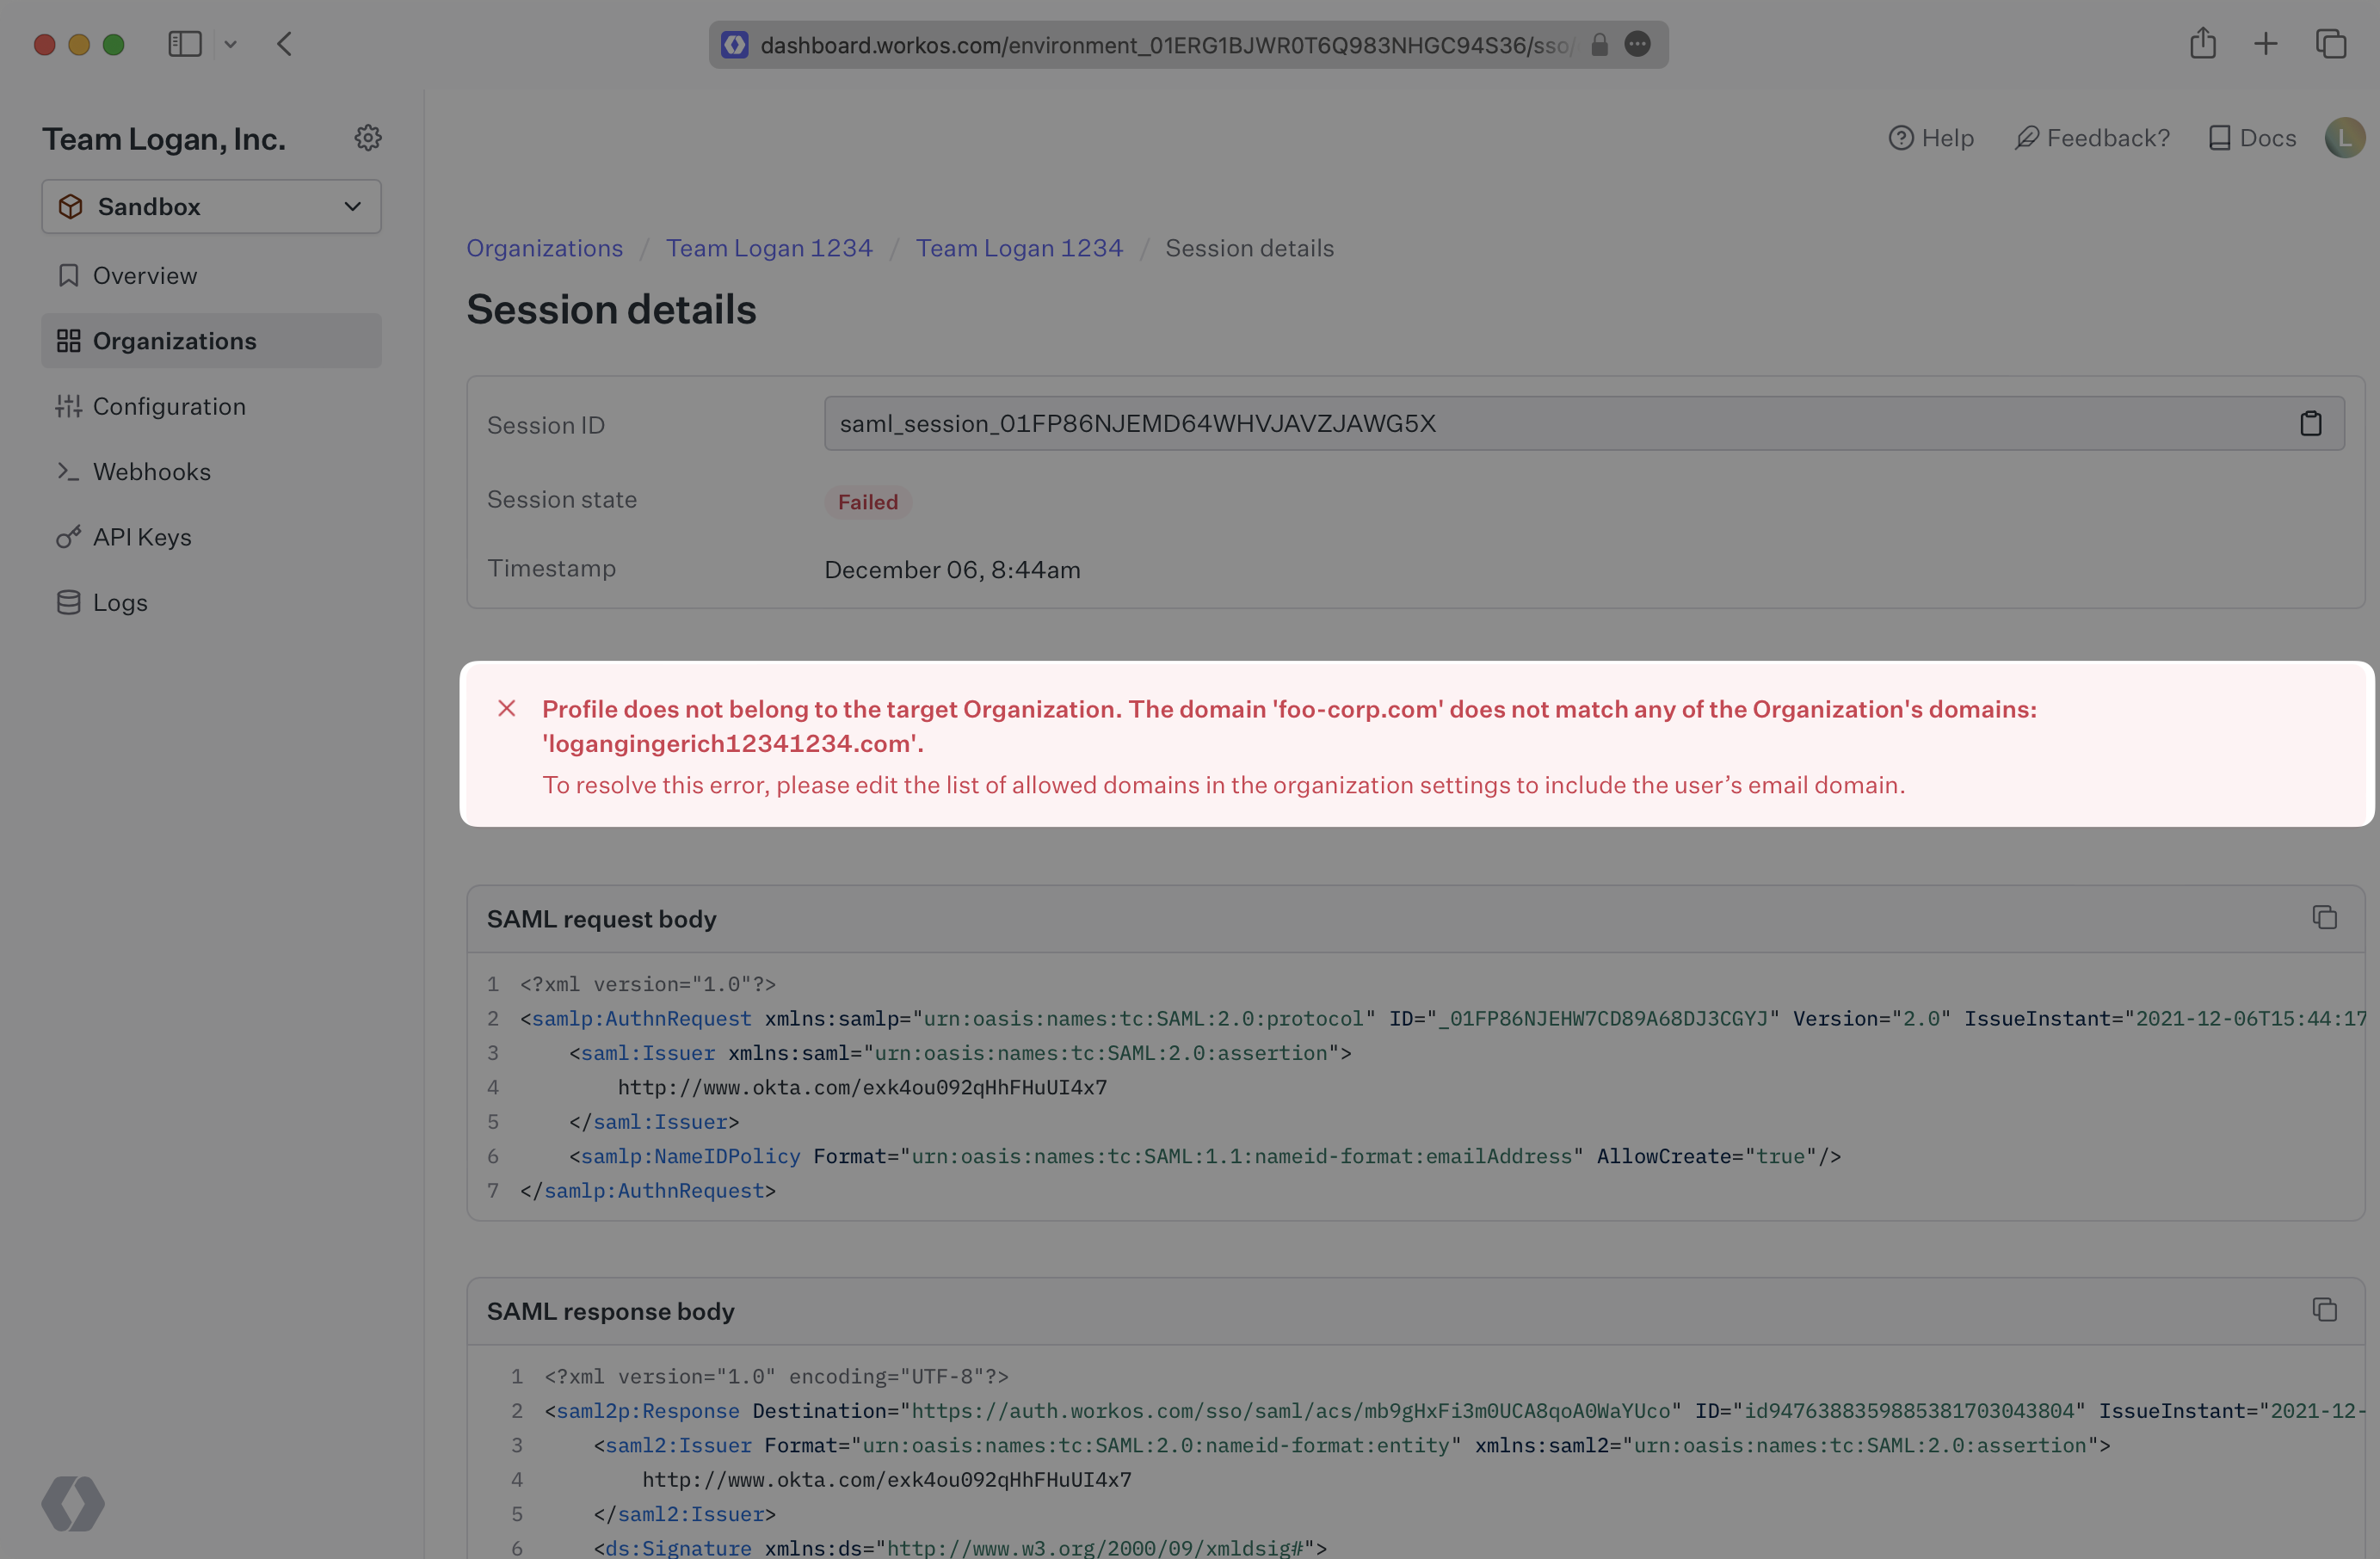
There are 5 different errors that can be returned: “Invalid Attributes”, “Invalid X509 Certificate”, “Malformed SAML Response”, “Profile Not Allowed Outside Organization”, and “Decryption Failed”.
WorkOS requires that there are certain user attributes included in each SAML Response at minimum. In most cases firstName, lastName, email, and id are required. If these attributes are not present in the SAML Response, the Invalid Attributes error is thrown. The received attributes will appear in the error details so you can see what attributes may be missing.
This error occurs when the X.509 Certificate provided by the Identity Provider in the SAML Response does not match the X.509 Certificate that has been uploaded to WorkOS for the connection. If you receive this error, you’ll want to double check that the certificates match between the IdP and WorkOS for this connection and that the certificate is not expired.
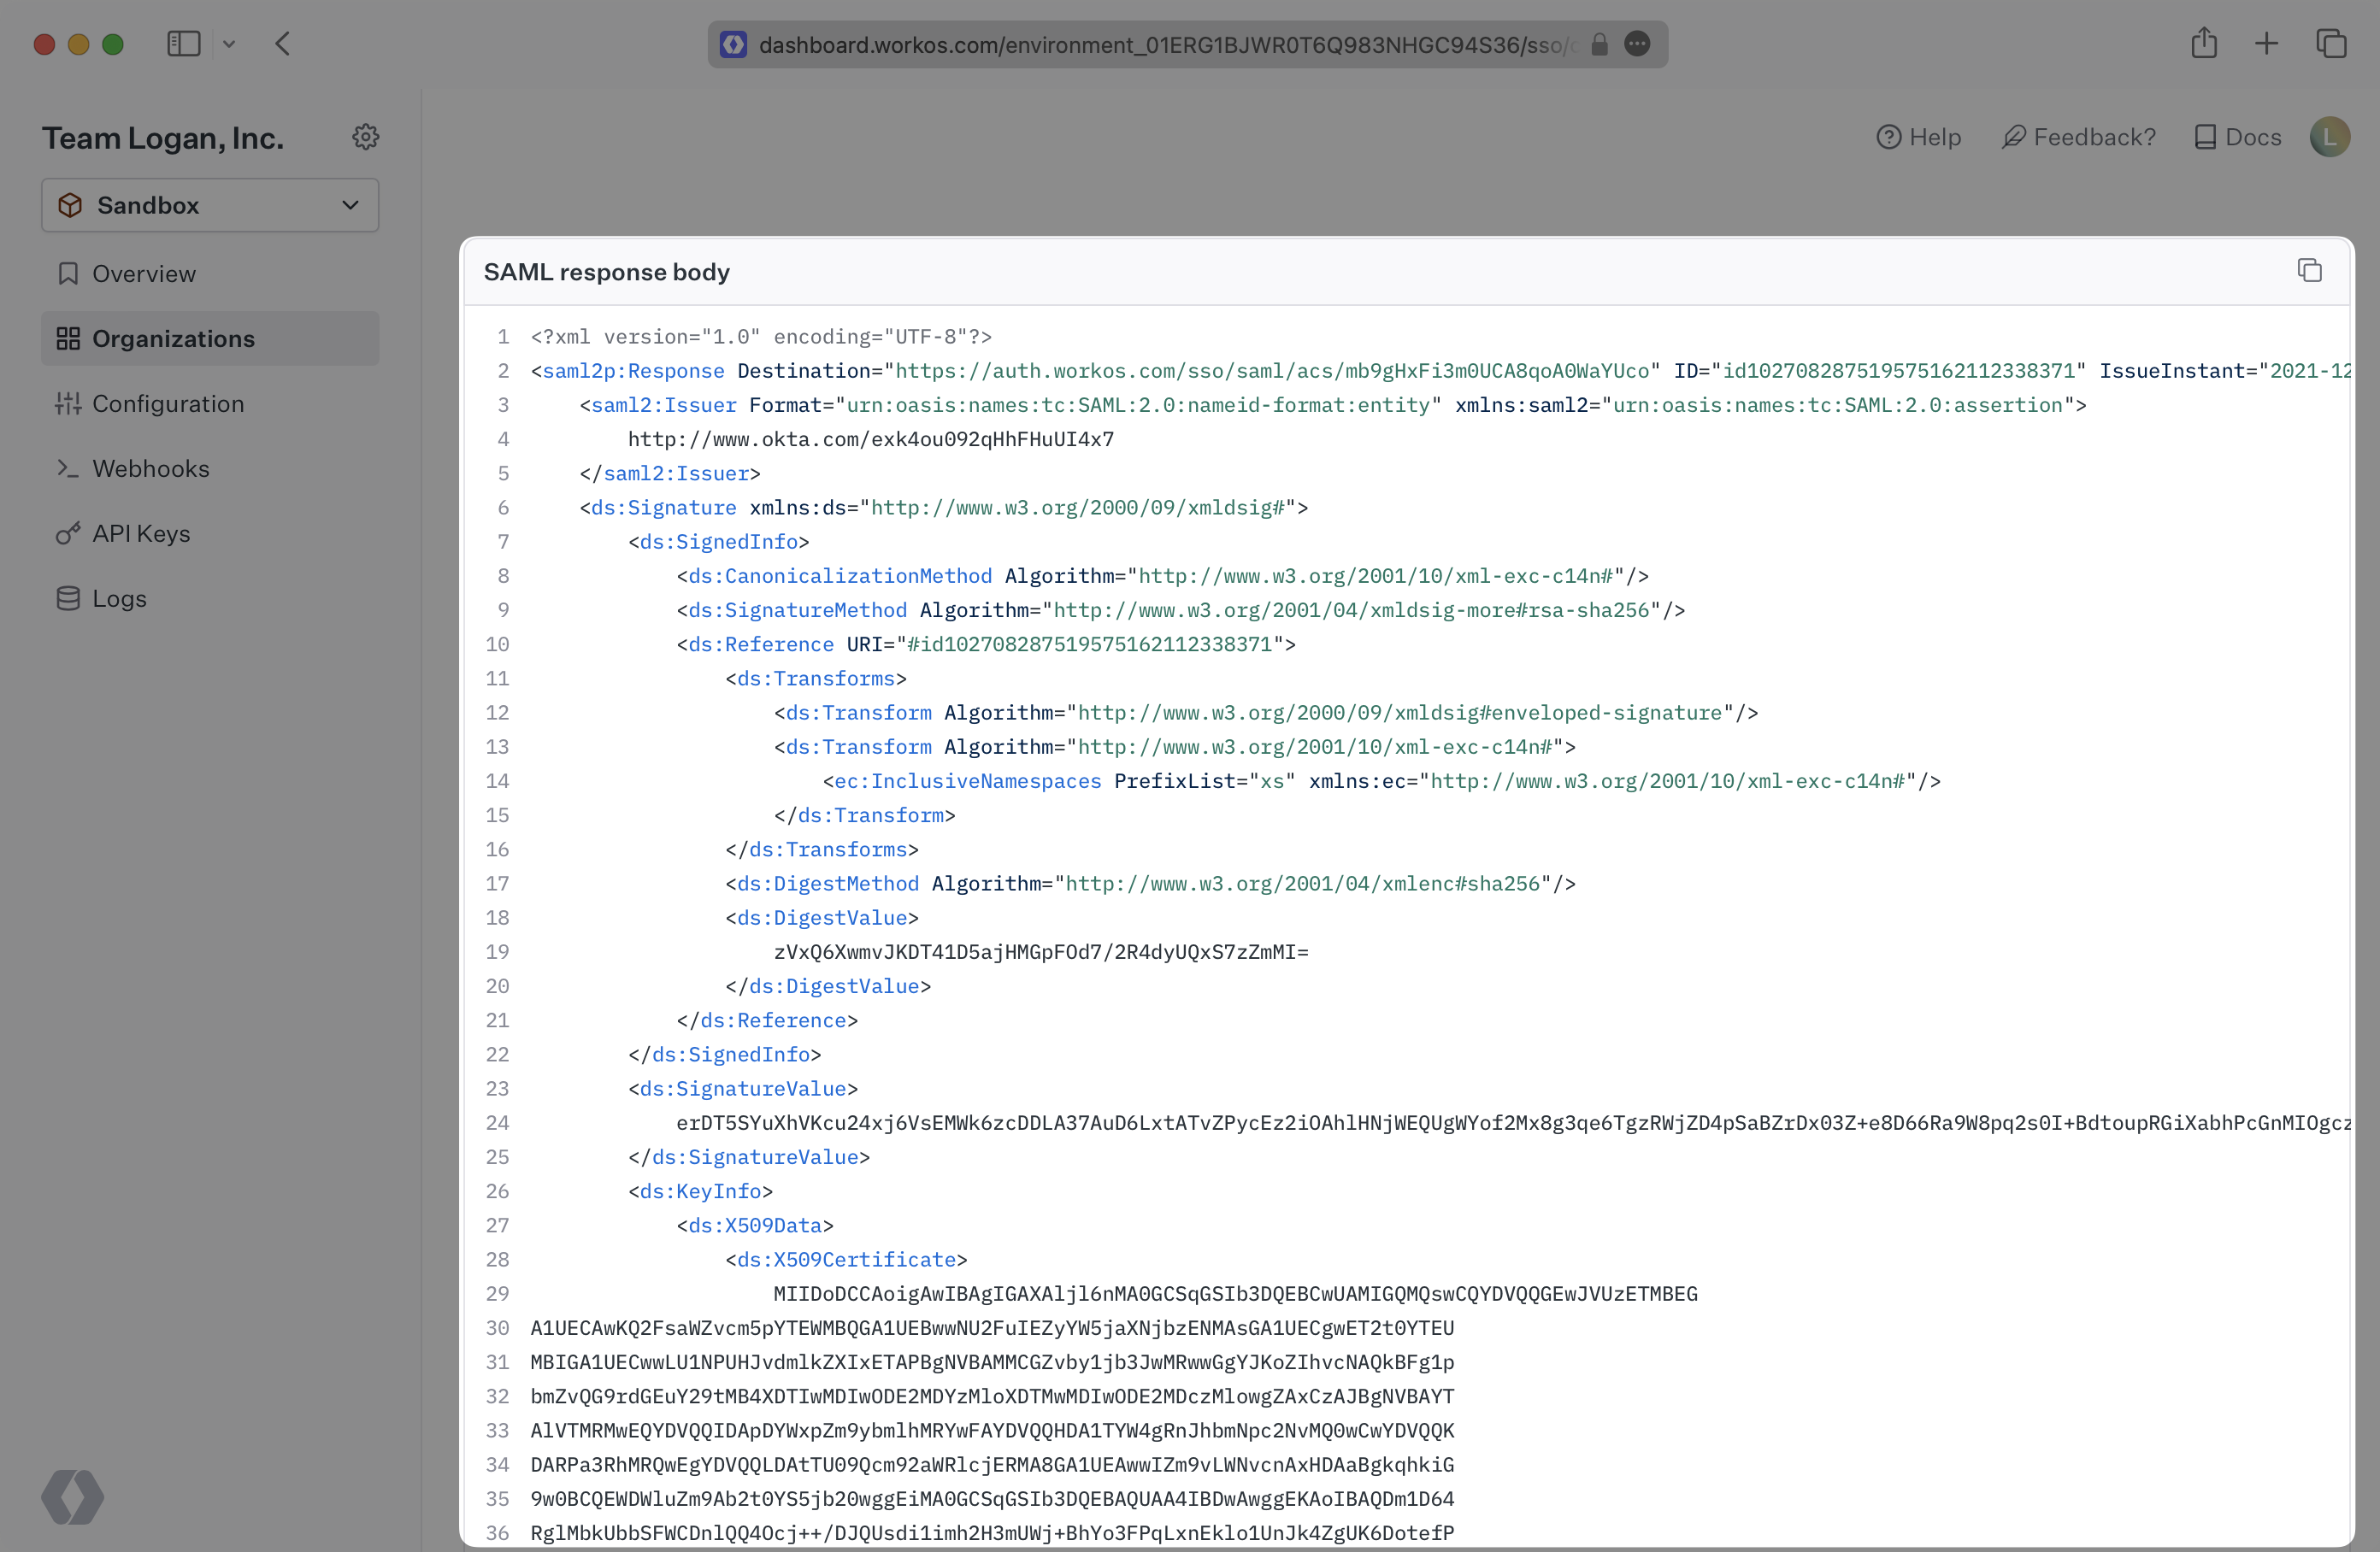
You can view the X.509 certificate that is being sent by the IdP in the SAML Response Body which is provided below, within the <X509Certificate> tags. The X.509 certificate that is uploaded to WorkOS can be found in the Connection’s settings page. These two values should match exactly.
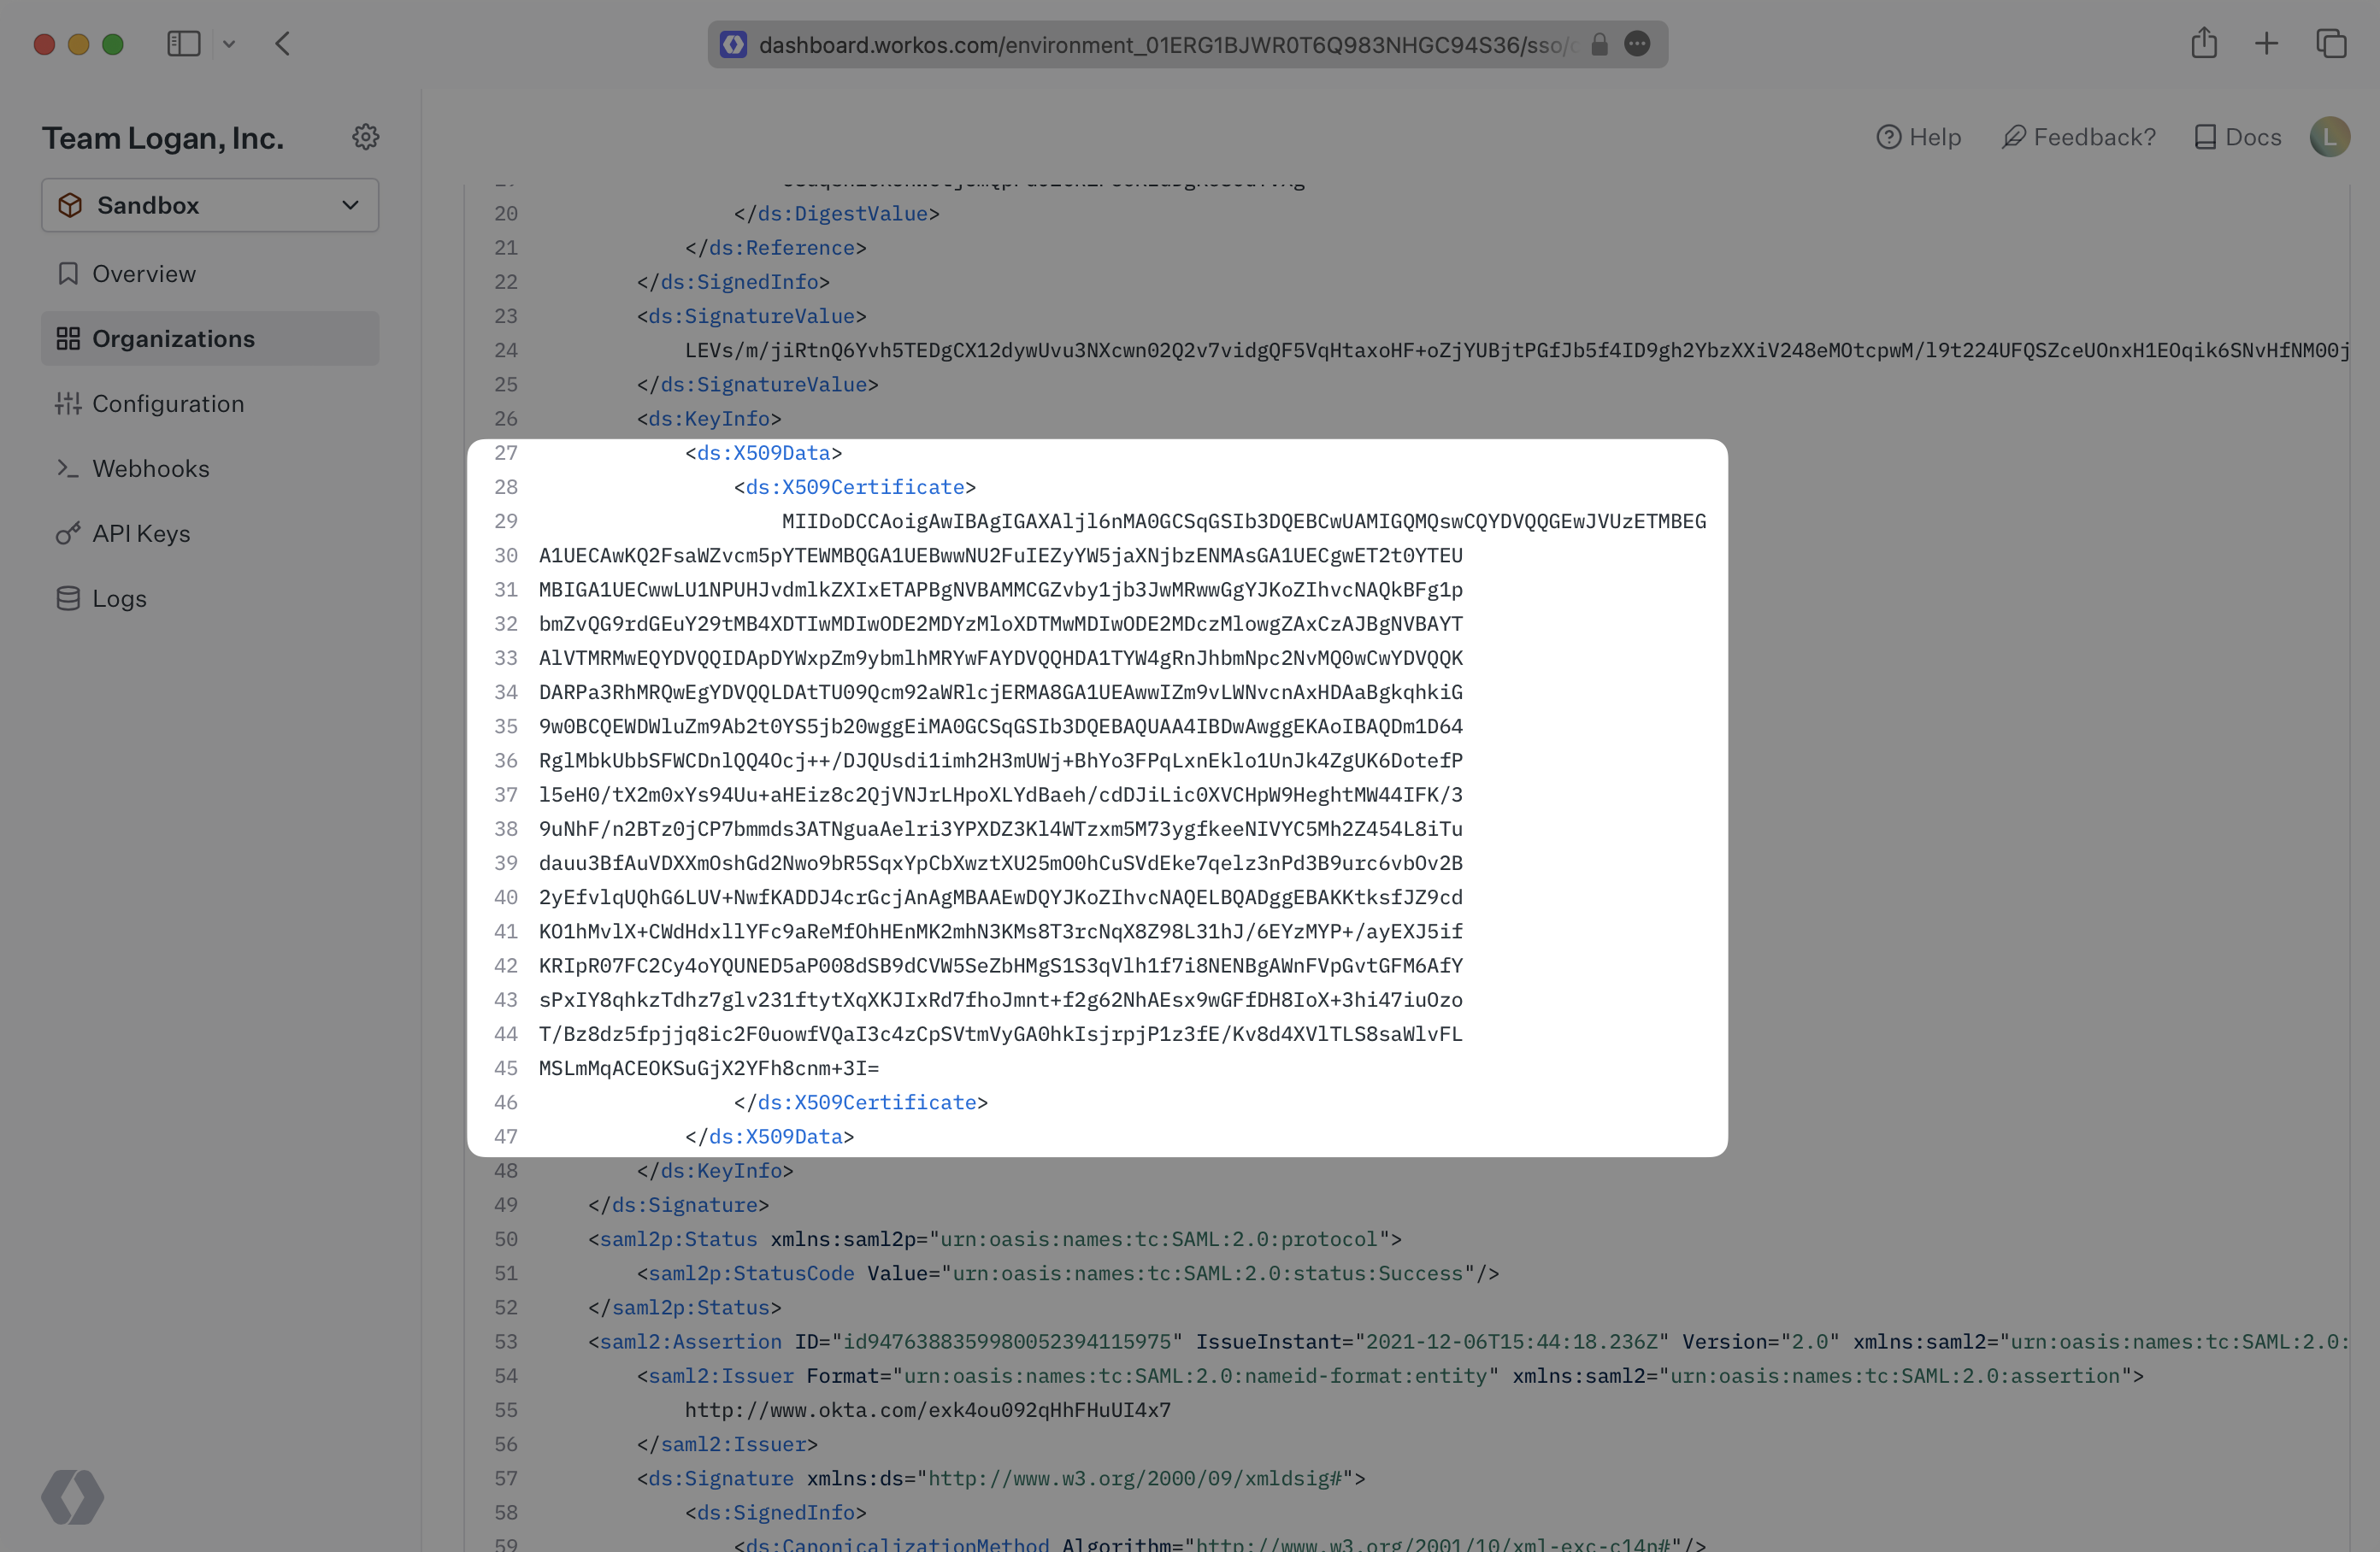
This error means that there is an issue with the SAML Response structure or contents and the SAML Response is unable to be validated. There are many factors that could lead to this error, however, there will need to be steps taken on the IdP side in order to resolve it. If you receive this error, please contact support@workos.com for help.
This error occurs when a user with an email domain that does not appear on the Organization’s User Email Domains allowlist attempts to authenticate with the connection.
To resolve this error there are 2 options. The user’s domain can be added to the Organization’s allowlist, or if you do not wish to restrict the Organization to specific domains, you can select the option to allow users with any domain to authenticate with the Organization. Both of these options can be configured on the Organization Overview page.
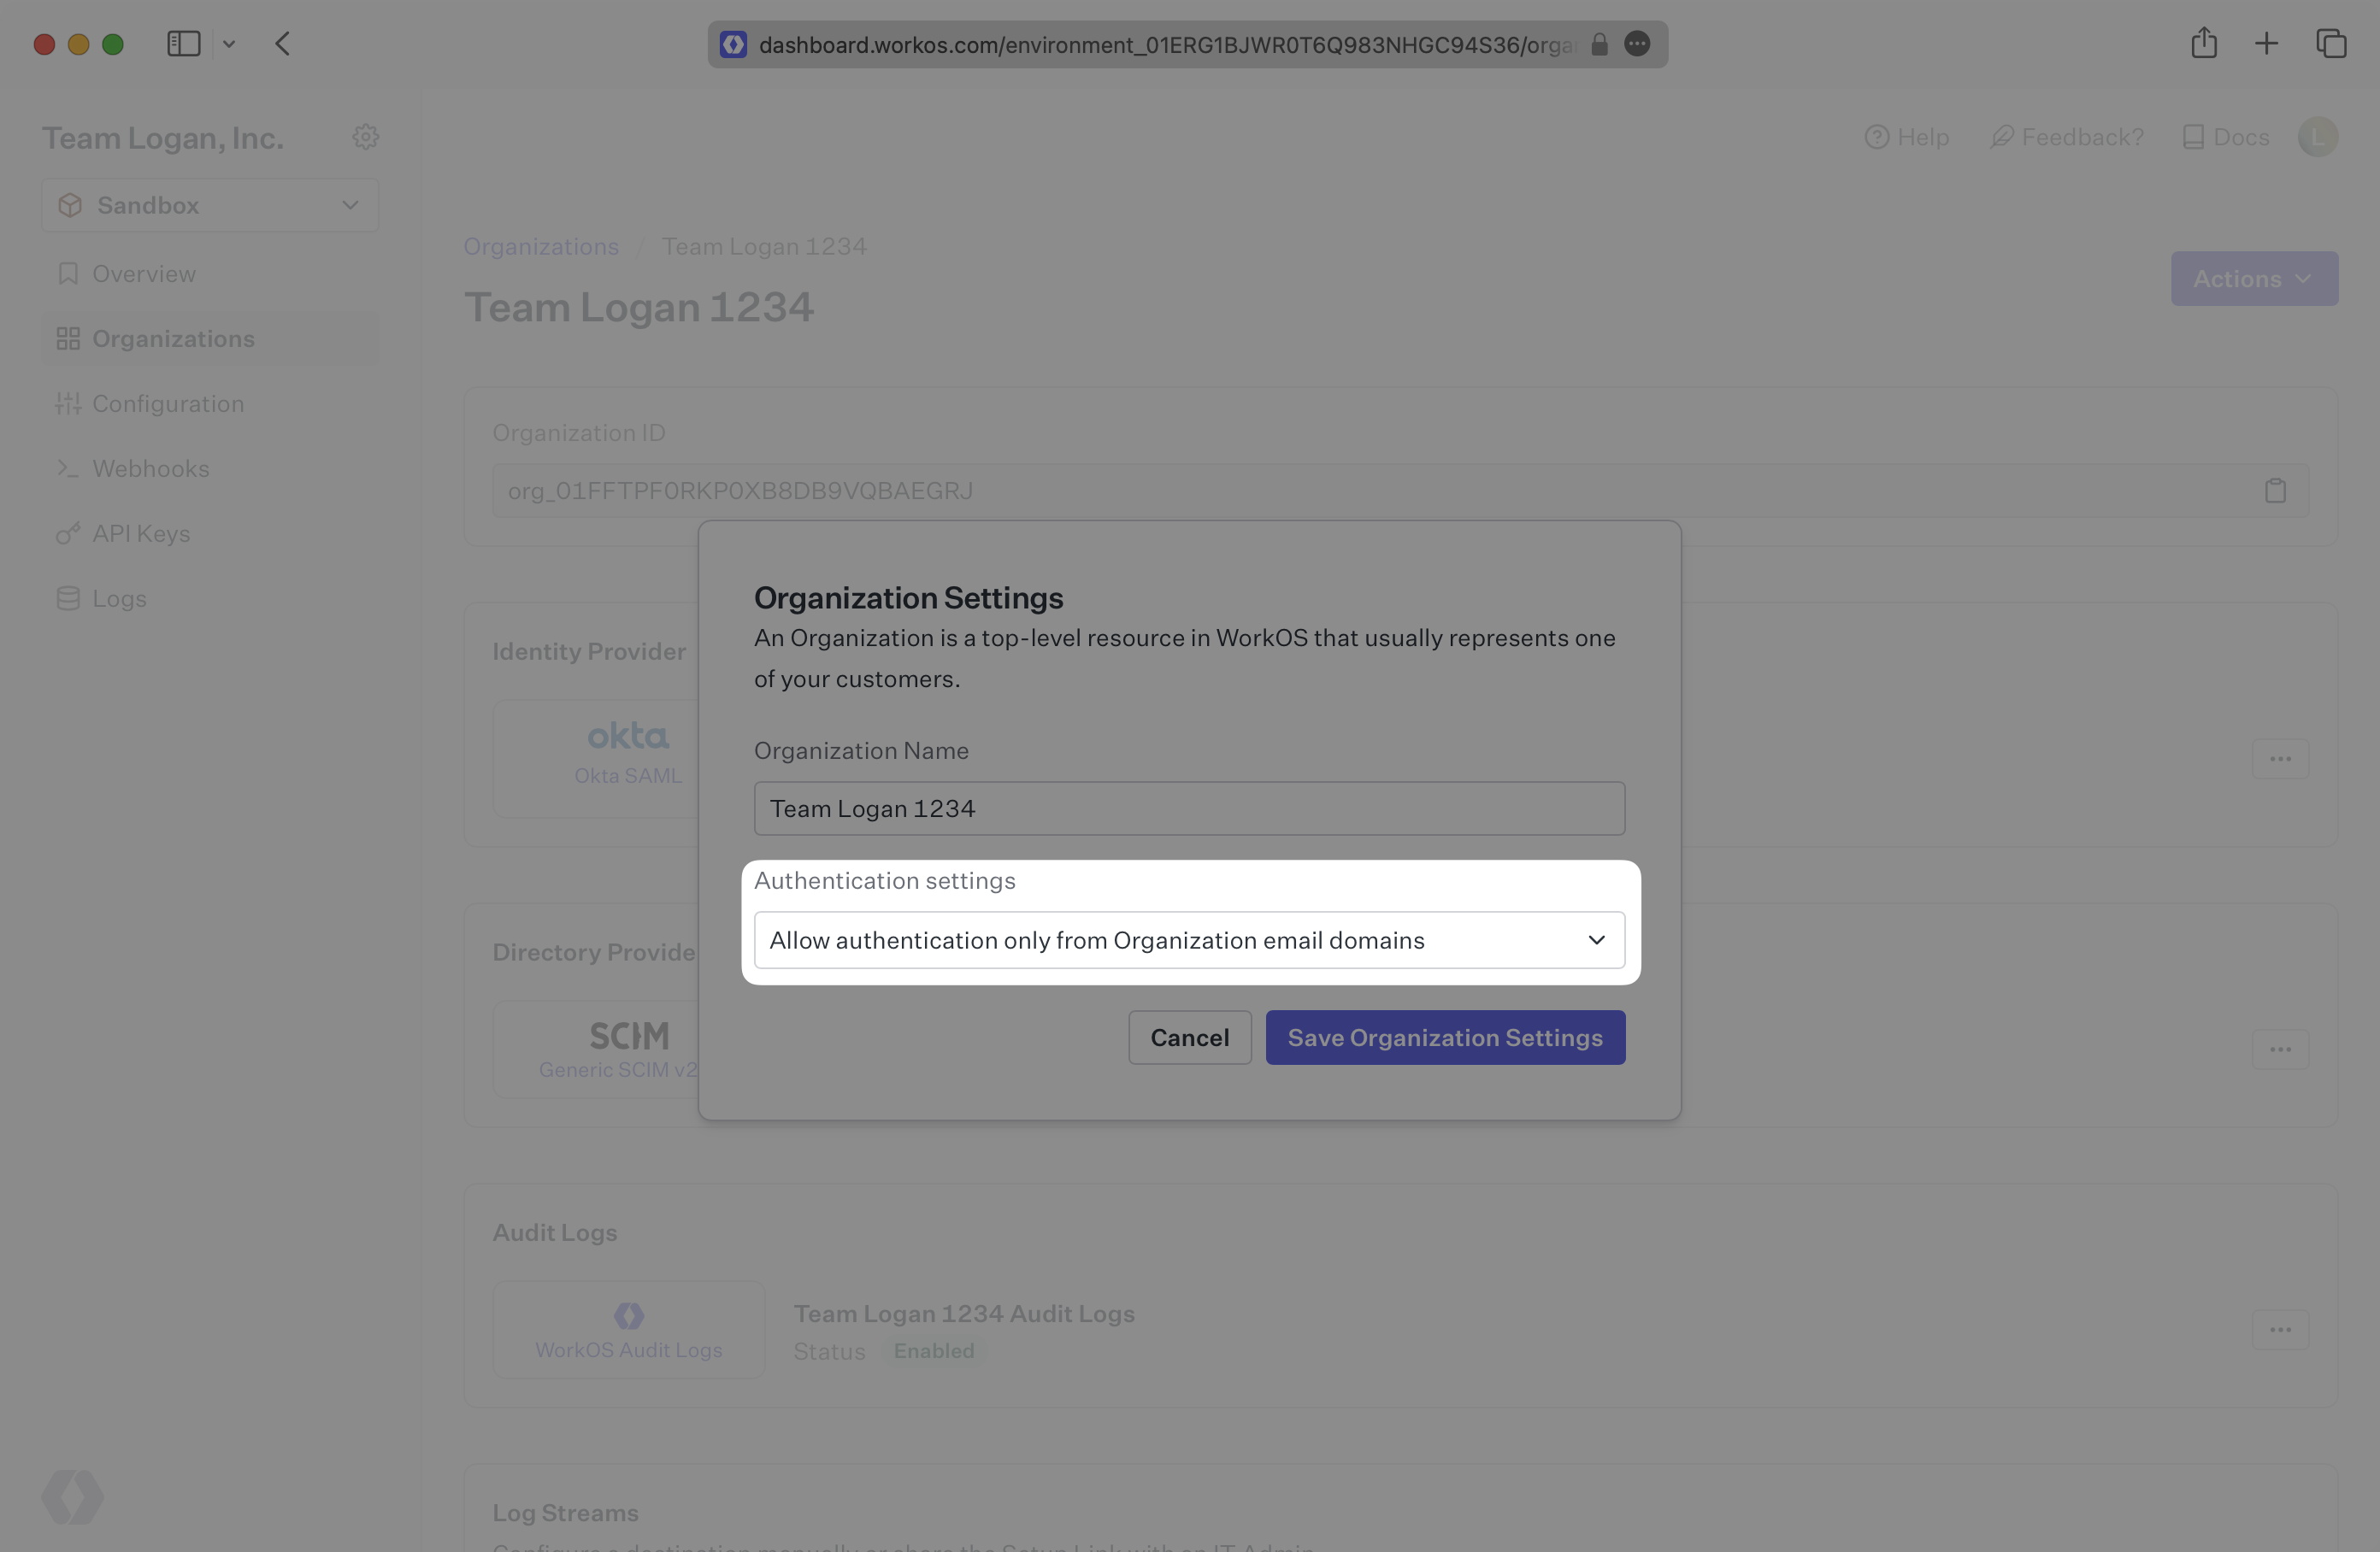
This error can occur if you are encrypting the SAML Response and WorkOS is unable to successfully decrypt the response. This most often occurs when there is an X.509 certificate used to encrypt the response has a mismatch between the Identity Provider and WorkOS. A good first step towards resolution in this case is to ensure that the certificates in the IdP and WorkOS match.
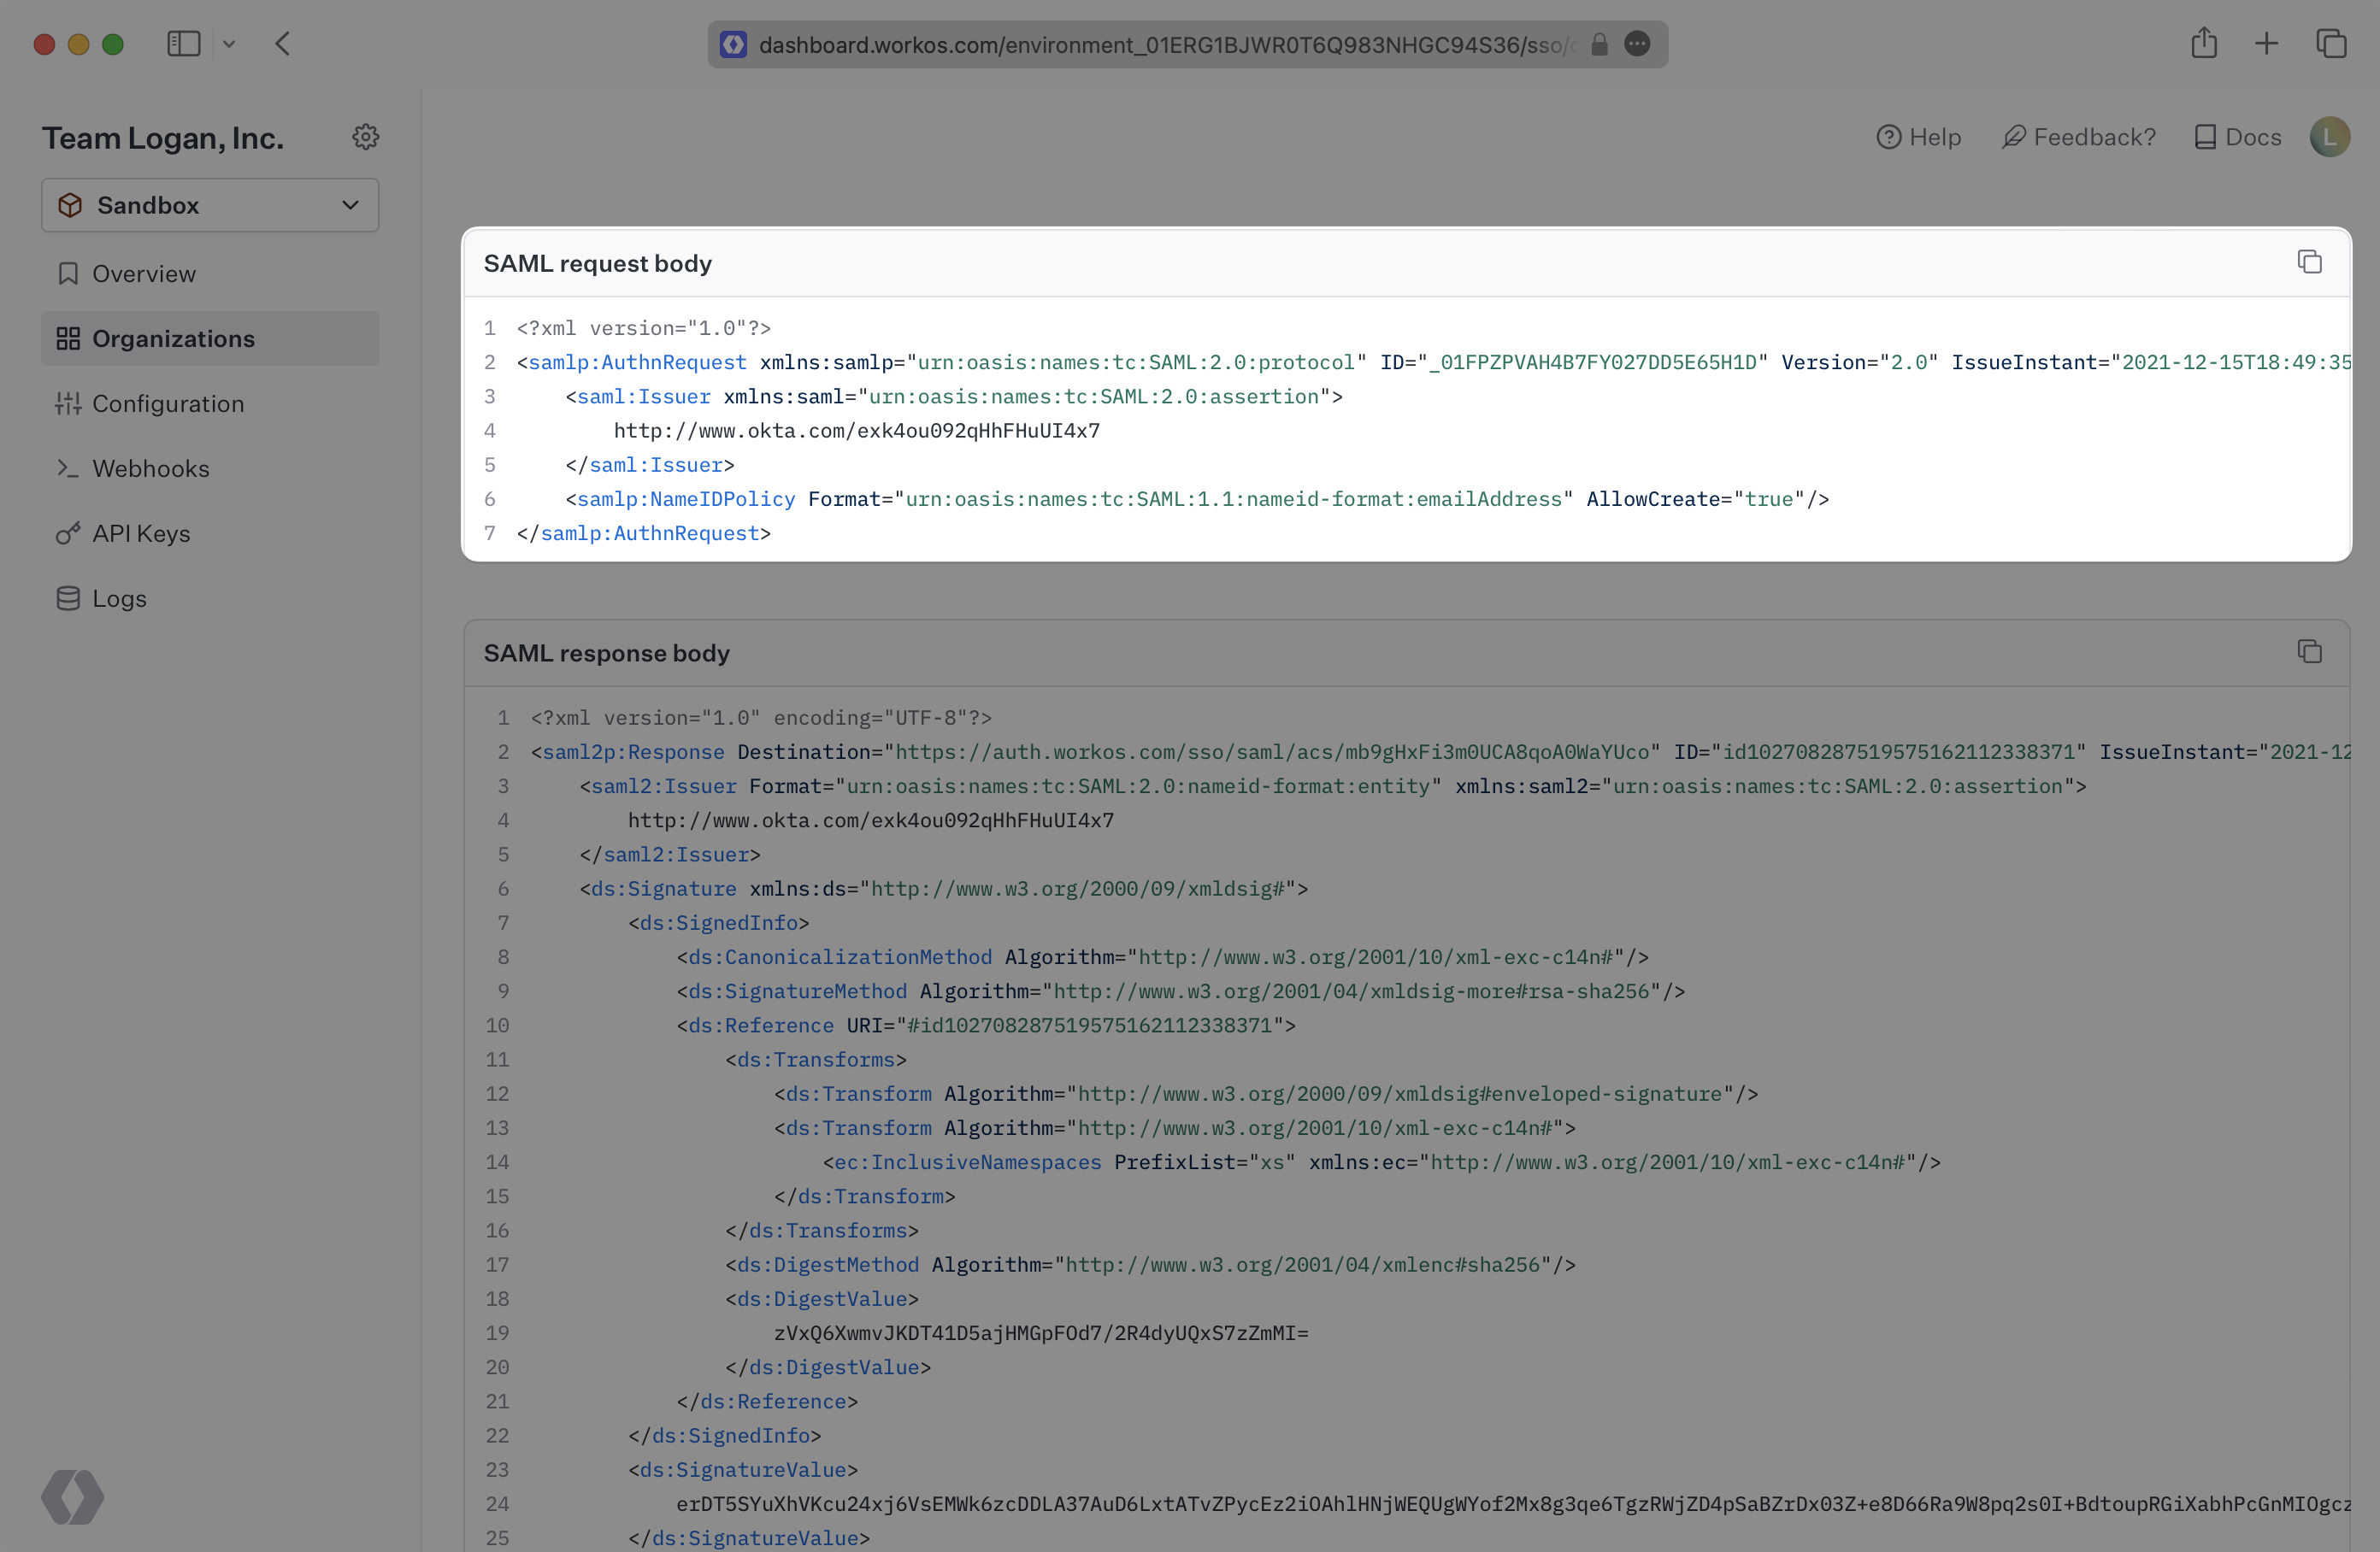
The Session Detail page also shows the raw SAML Request and SAML Response.
The SAML Request is the XML request that is sent to the Identity Provider from a Service Provider (SP), WorkOS in this case, to initiate the login attempt. This will only appear for SP-Initiated login attempts.
The SAML Response is what is returned to WorkOS from the Identity Provider after a user has authenticated with the IdP. It will contain the user attributes that get processed into the user Profile object.
Indicates a user began the authentication process, and a SAML request was sent to the IdP, however, we have yet to receive a SAML response.
Indicates the user successfully authenticated through the IdP and we returned an auth code to the callback route, but it hasn’t exchanged the auth code for a profile.
Indicates a successful login where WorkOS was able to exchange the callback auth code for a profile.
Indicates that there was a successful SAML Request and a Response was provided from the IdP, however, WorkOS was not able to generate a profile from the data in the SAML response.
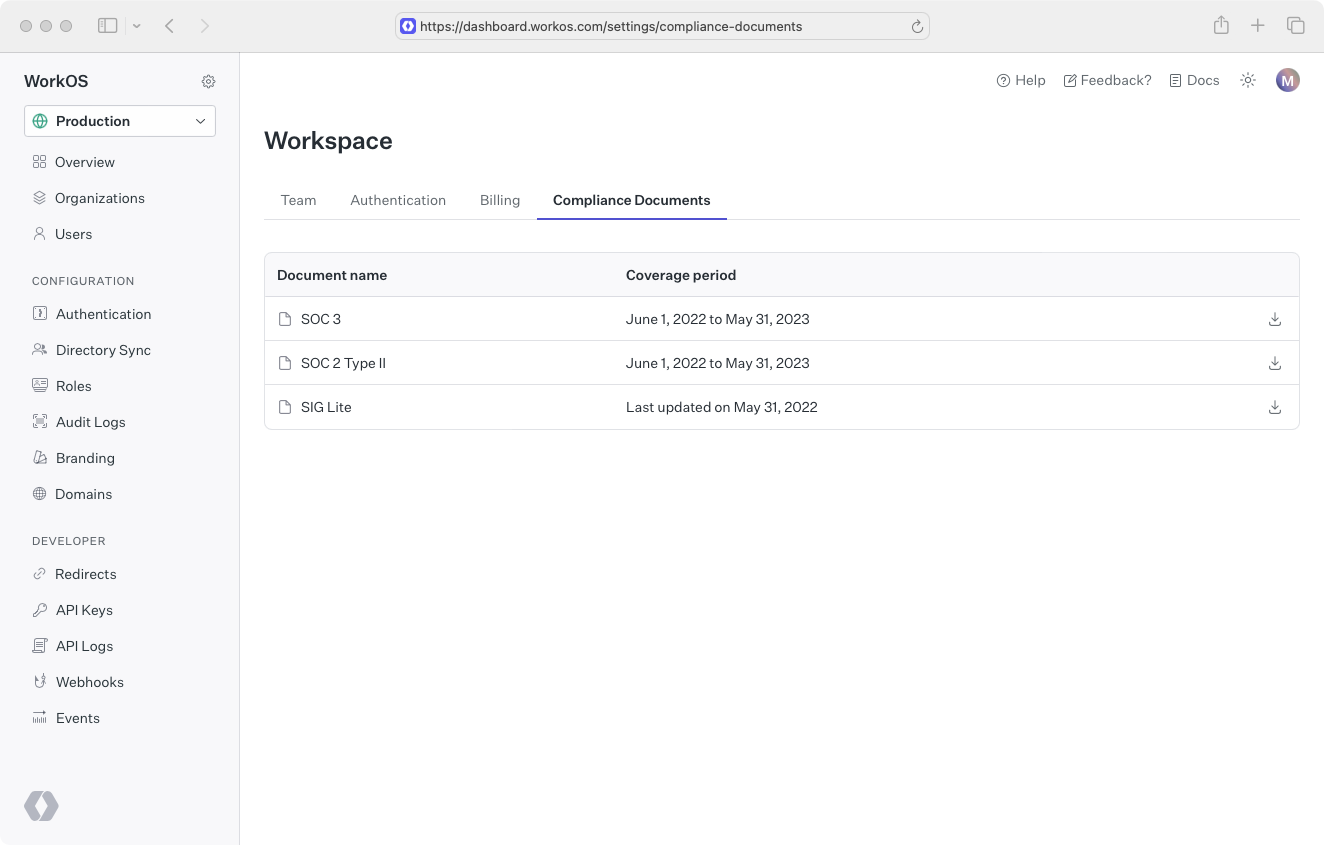
You can download the following documents from the Compliance Documents page:
- SIG Lite
- SOC 3
- SOC 2 Type 2
Only users with the Workspace Admin role are able to download documents from the Compliance Documents page.
