WorkOS Docs Homepage
FGA
API referenceDashboardSign In
OverviewOverviewQuick StartQuick StartCore ConceptsResource TypesResource TypesResourcesResourcesRoles and PermissionsRoles and PermissionsAssignmentsAssignmentsAccess ControlAccess ChecksAccess ChecksResource DiscoveryResource DiscoveryIntegrationsAuthKit IntegrationAuthKit IntegrationIdP Role AssignmentIdP Role Assignment
API Reference
API Reference
Events
Events
Integrations
Integrations
Migrate to WorkOS
Migrate to WorkOS
SDKs
SDKs

Quick Start

Build a complete authorization model from resource types to access checks in minutes.

On this page

  • What you’ll build
  • 1. Configure resource types
  • 2. Create roles and permissions
    • Define permissions
    • Define roles
  • 3. Create resources
    • Top-level resources
    • Child resources
  • 4. Assign roles
    • Assign a workspace role
    • Assign a resource-specific role
    • View assignments in the Dashboard
  • 5. Check permissions
    • Check by resource external ID
    • Check by resource ID
    • Integrate into your application
  • 6. Discover access
    • List resources a user can access
    • List users with access to a resource
  • Putting it all together
  • Next steps

What you’ll build

This guide walks you through the entire FGA workflow using a real-world example: a project management application where organizations contain workspaces, and workspaces contain projects. By the end, you’ll have:

  • A resource type hierarchy modeled in the Dashboard
  • Roles and permissions scoped to each resource type
  • Resources registered via the API
  • Role assignments granting users access
  • Access checks verifying permissions
  • Discovery queries listing accessible resources

The guide follows the same order you’d use when integrating FGA into your product.

1. Configure resource types

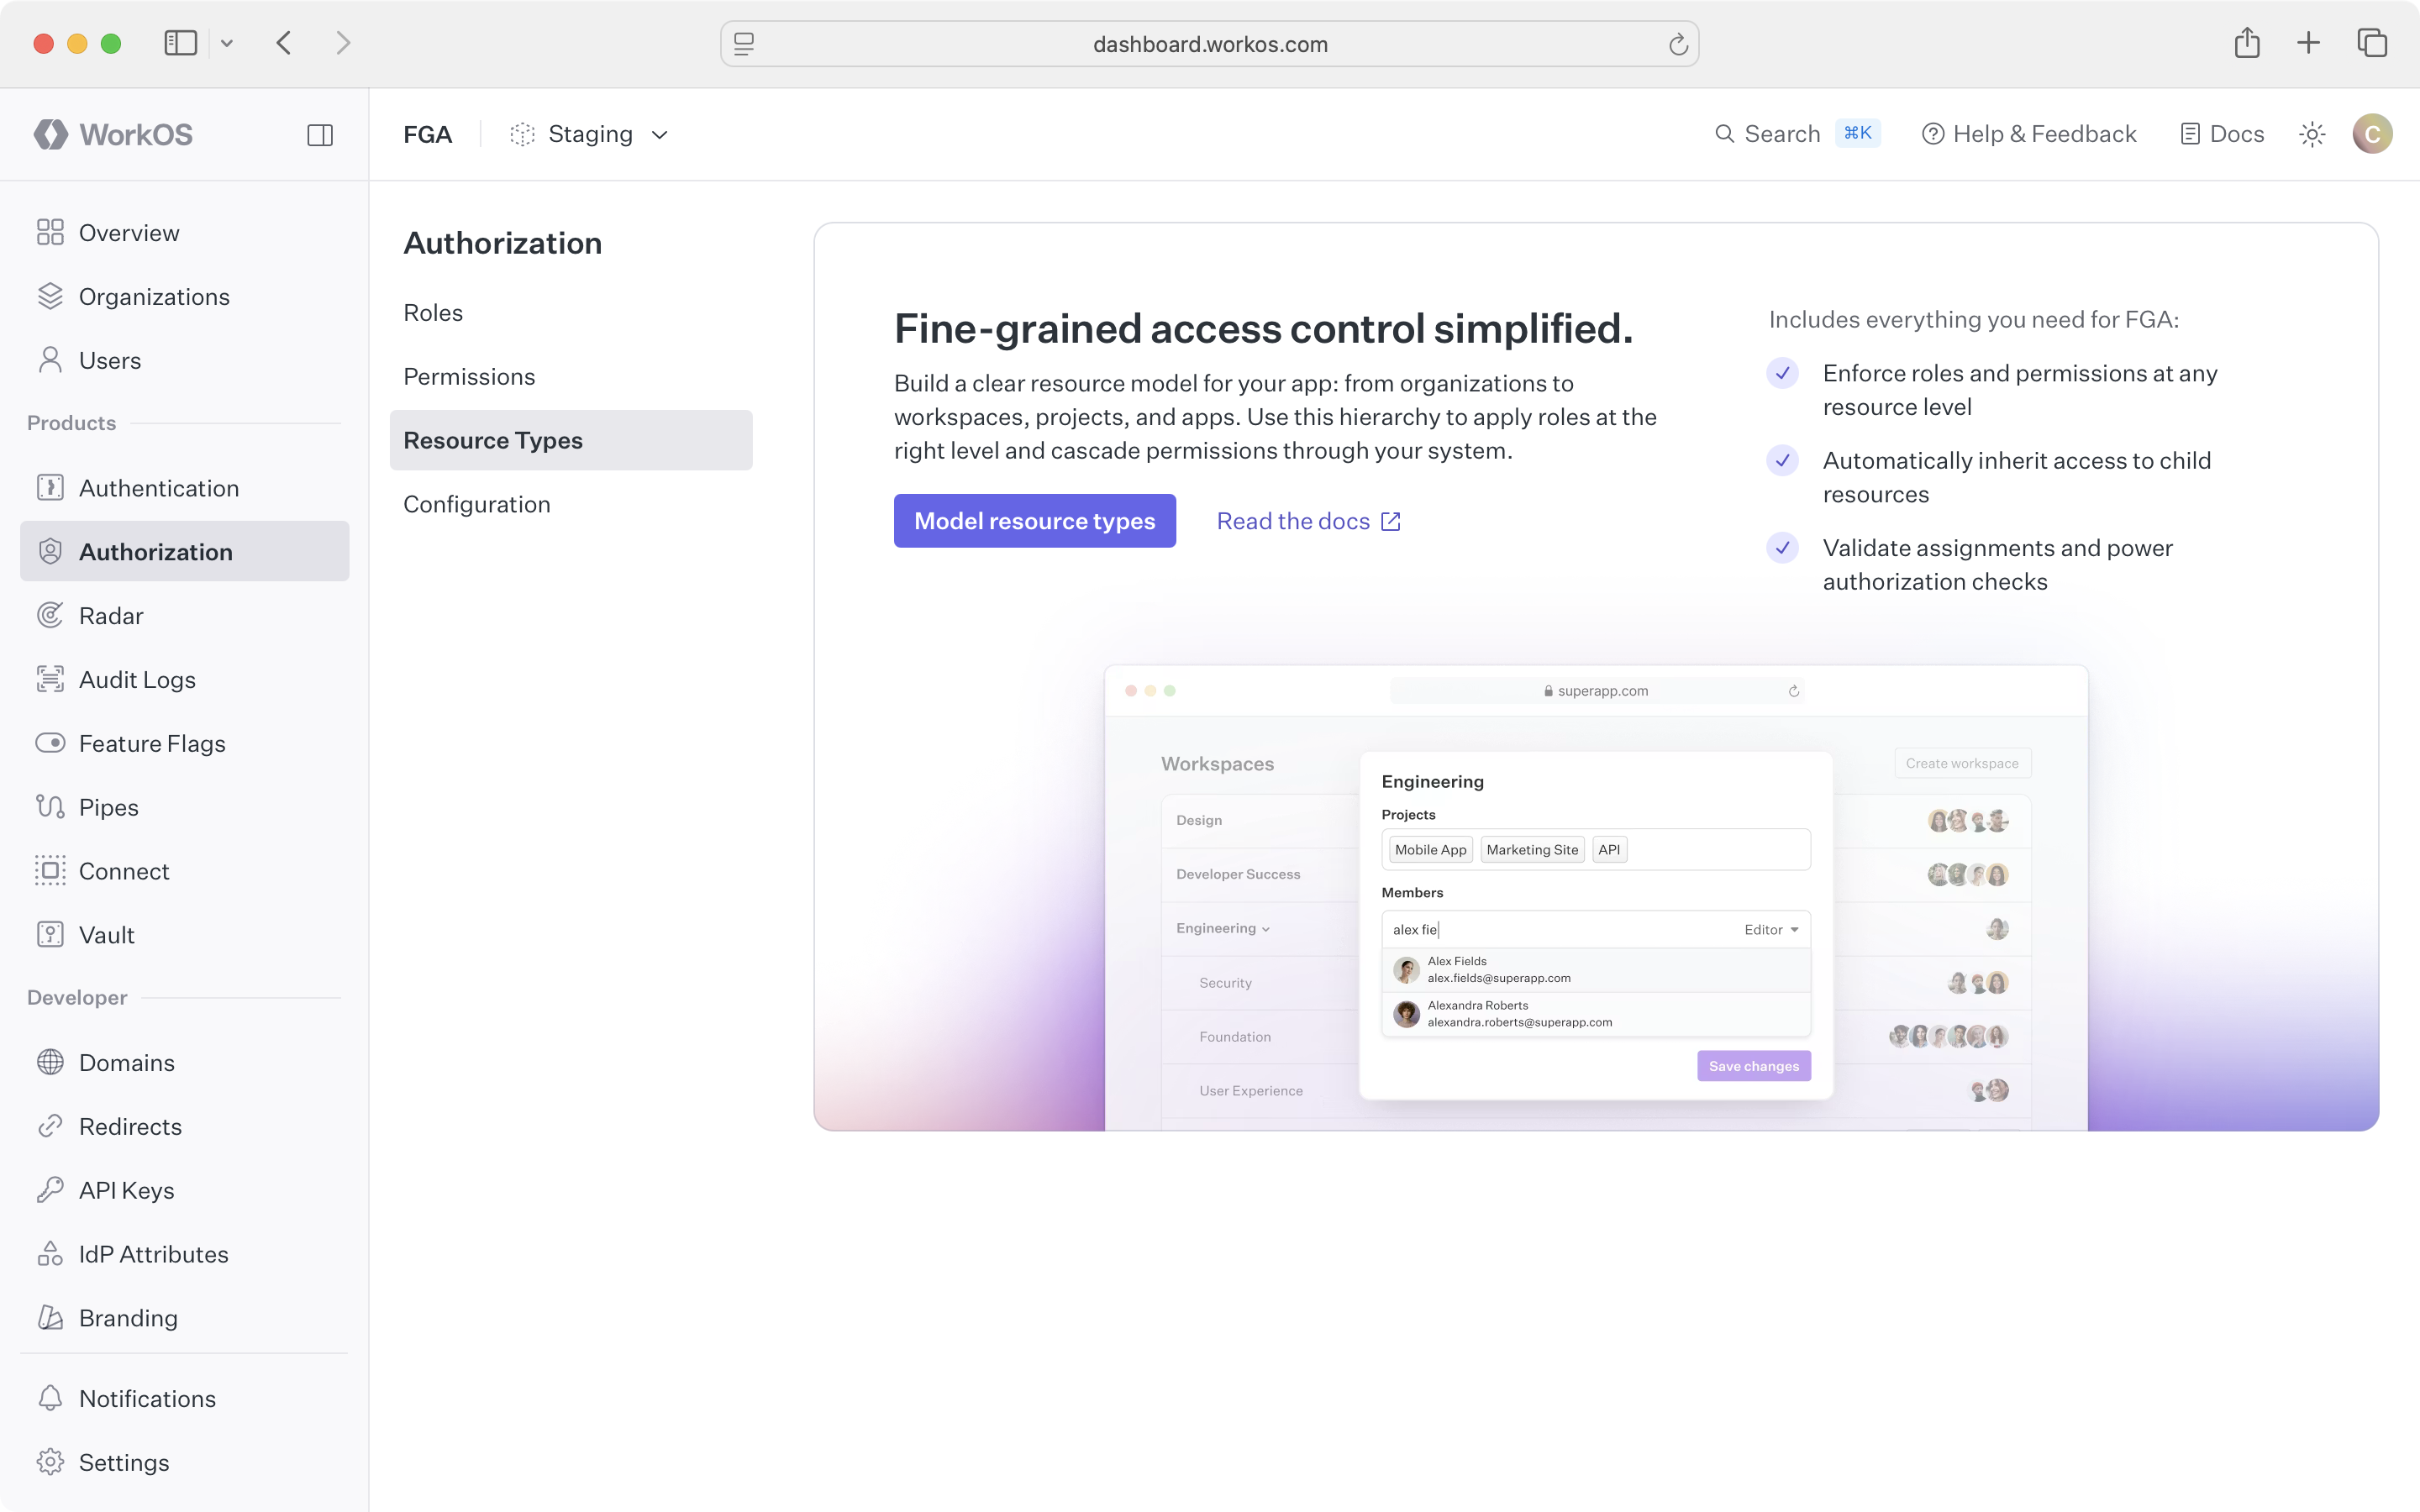
Resource types define the schema of your authorization model. Start by mapping your product’s entity hierarchy in the WorkOS Dashboard.

For our project management app, the hierarchy looks like:

organization (implicit root)
└─ workspace
└─ project

Navigate to Authorization > Resource Types and click Model resource types.

FGA model resource types

Create the workspace resource type first. Give it a name, a slug, and set its parent to organization. Then create project with its parent set to workspace.

FGA project resource type

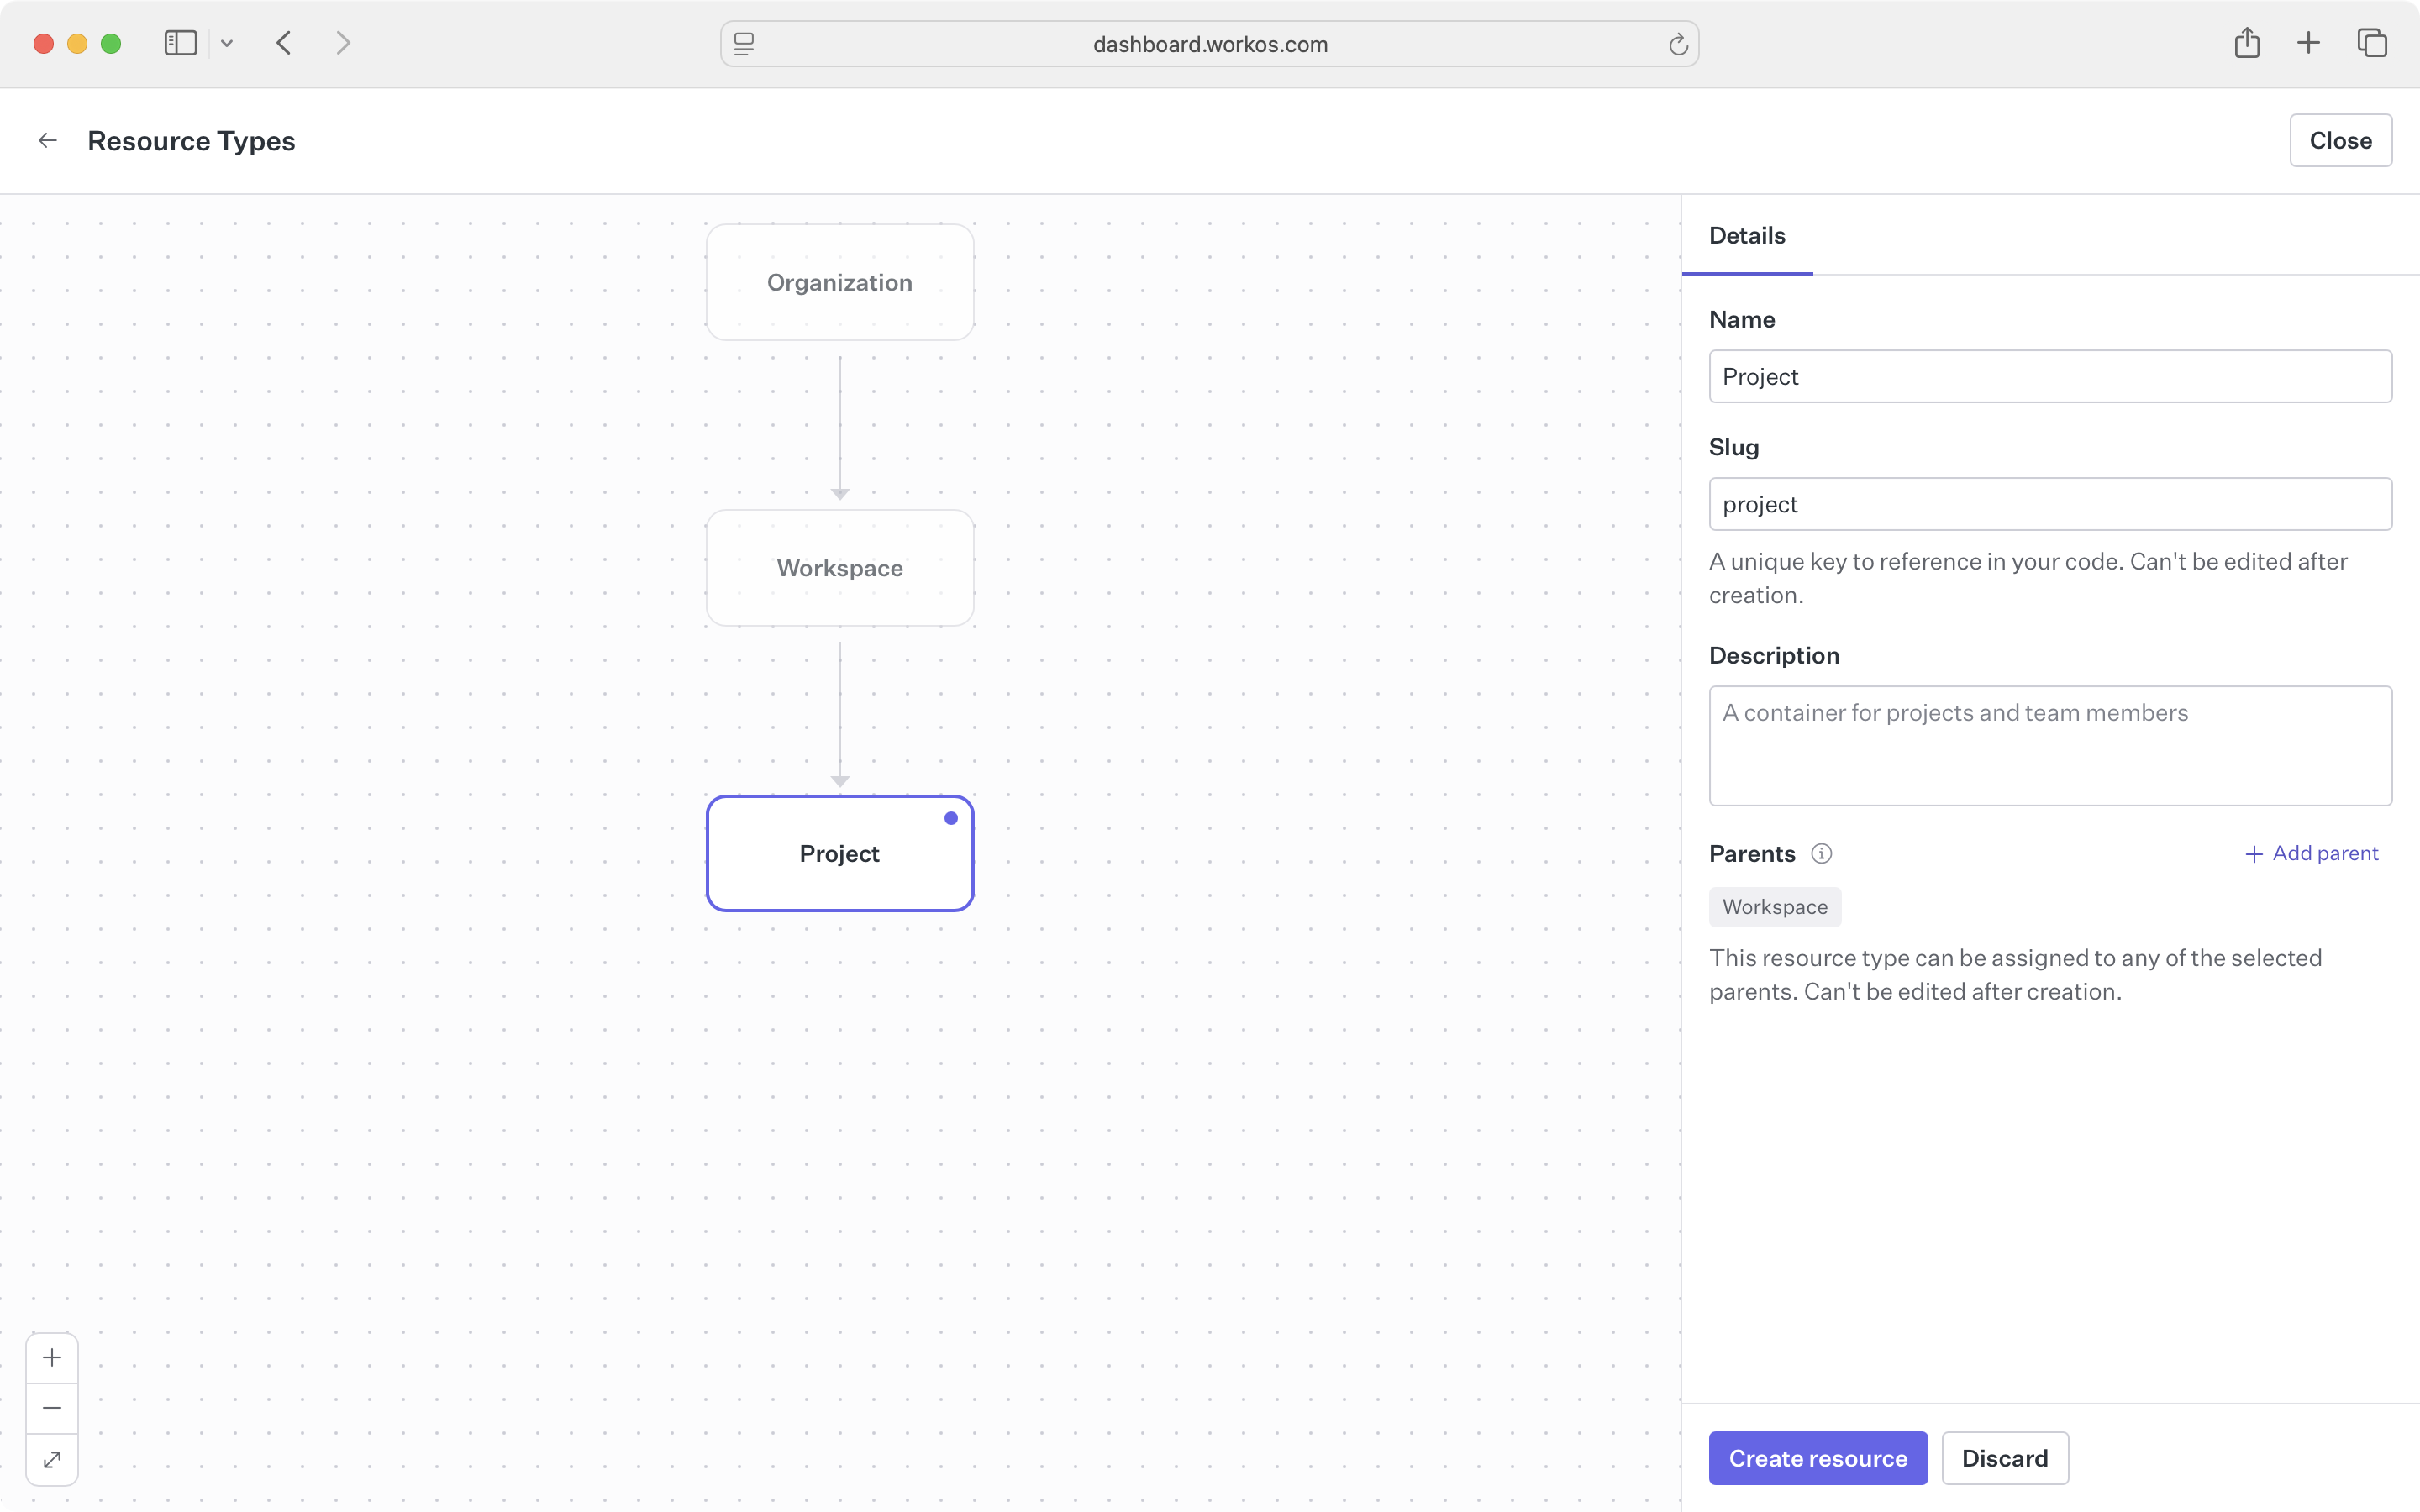
The Dashboard validates your hierarchy as you build it, ensuring constraints like single-parent relationships and maximum depth are respected.

2. Create roles and permissions

With resource types defined, create the roles and permissions that describe what users can do. Navigate to Authorization > Permissions in the Dashboard.

Define permissions

Permissions represent specific actions on a resource type. We recommend a {resource_type}:{action} naming pattern.

Navigate to Authorization > Permissions and click Create permission. Select the resource type the permission applies to, give it a name and slug, and save.

FGA workspace viewer permission

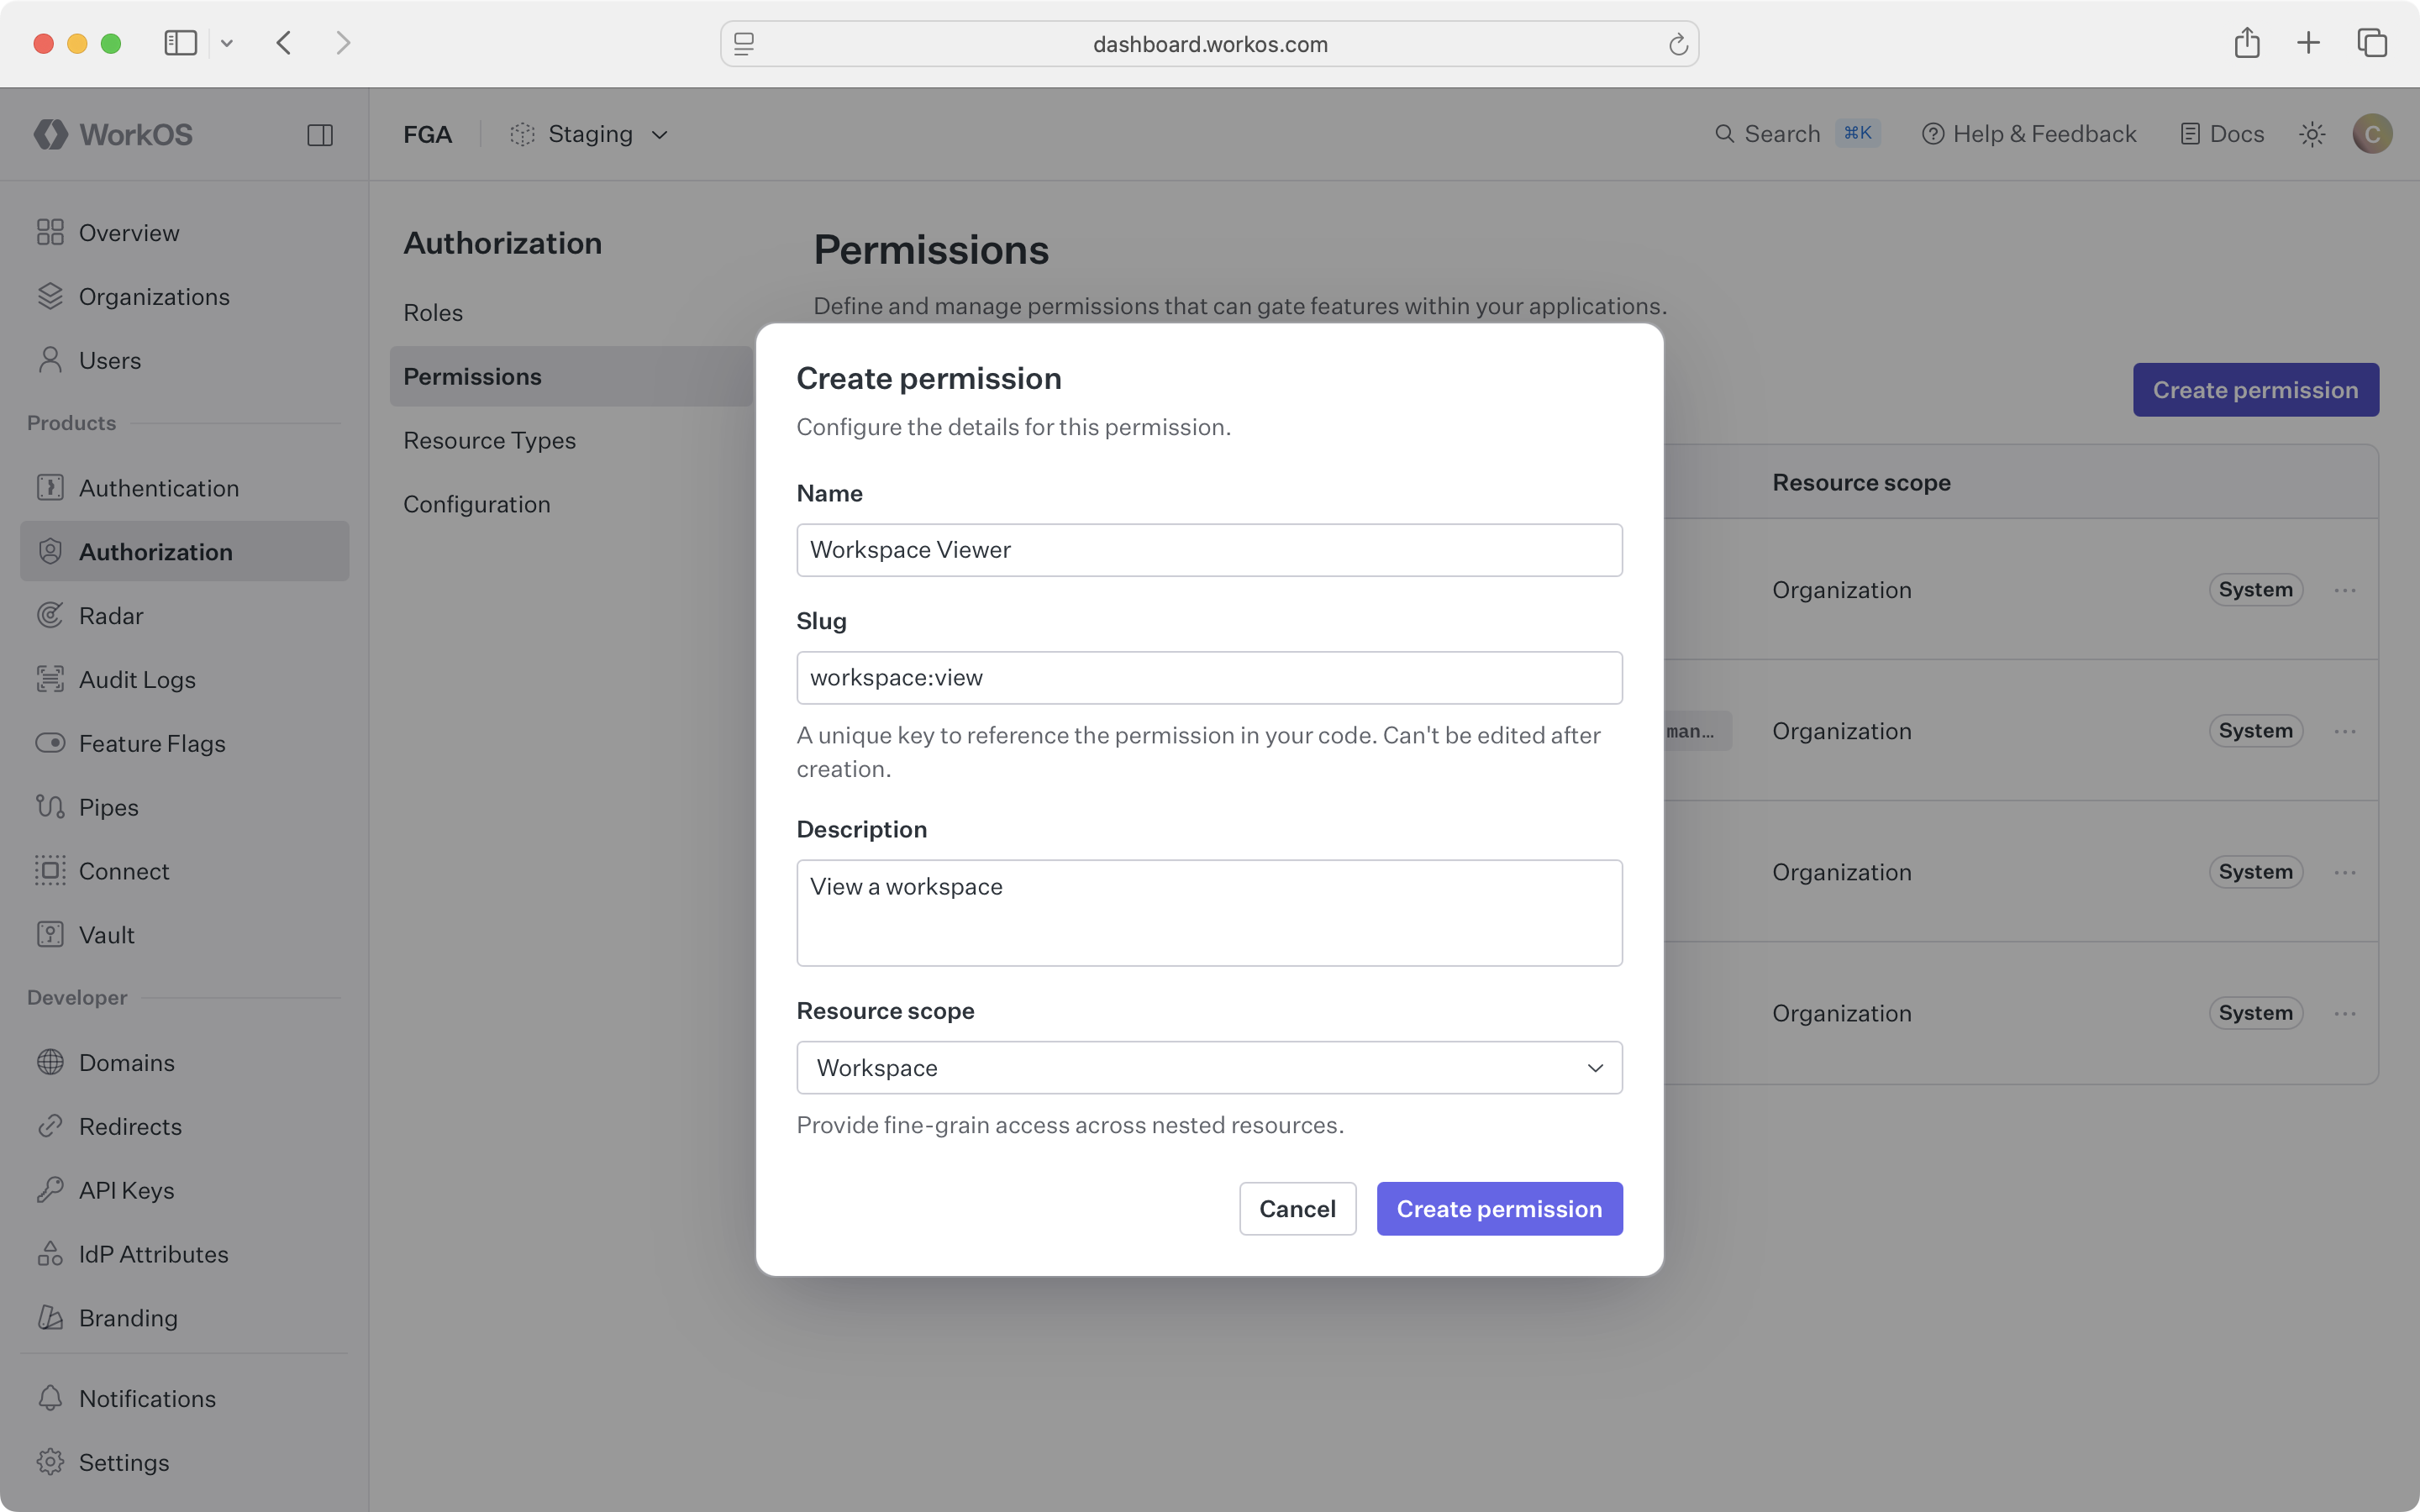
Create the following permissions for our example:

PermissionResource TypeDescription
workspace:viewworkspaceView a workspace
workspace:editworkspaceEdit workspace settings
project:viewprojectView a project
project:editprojectEdit a project
project:createprojectCreate projects in a workspace
project:deleteprojectDelete a project

Define roles

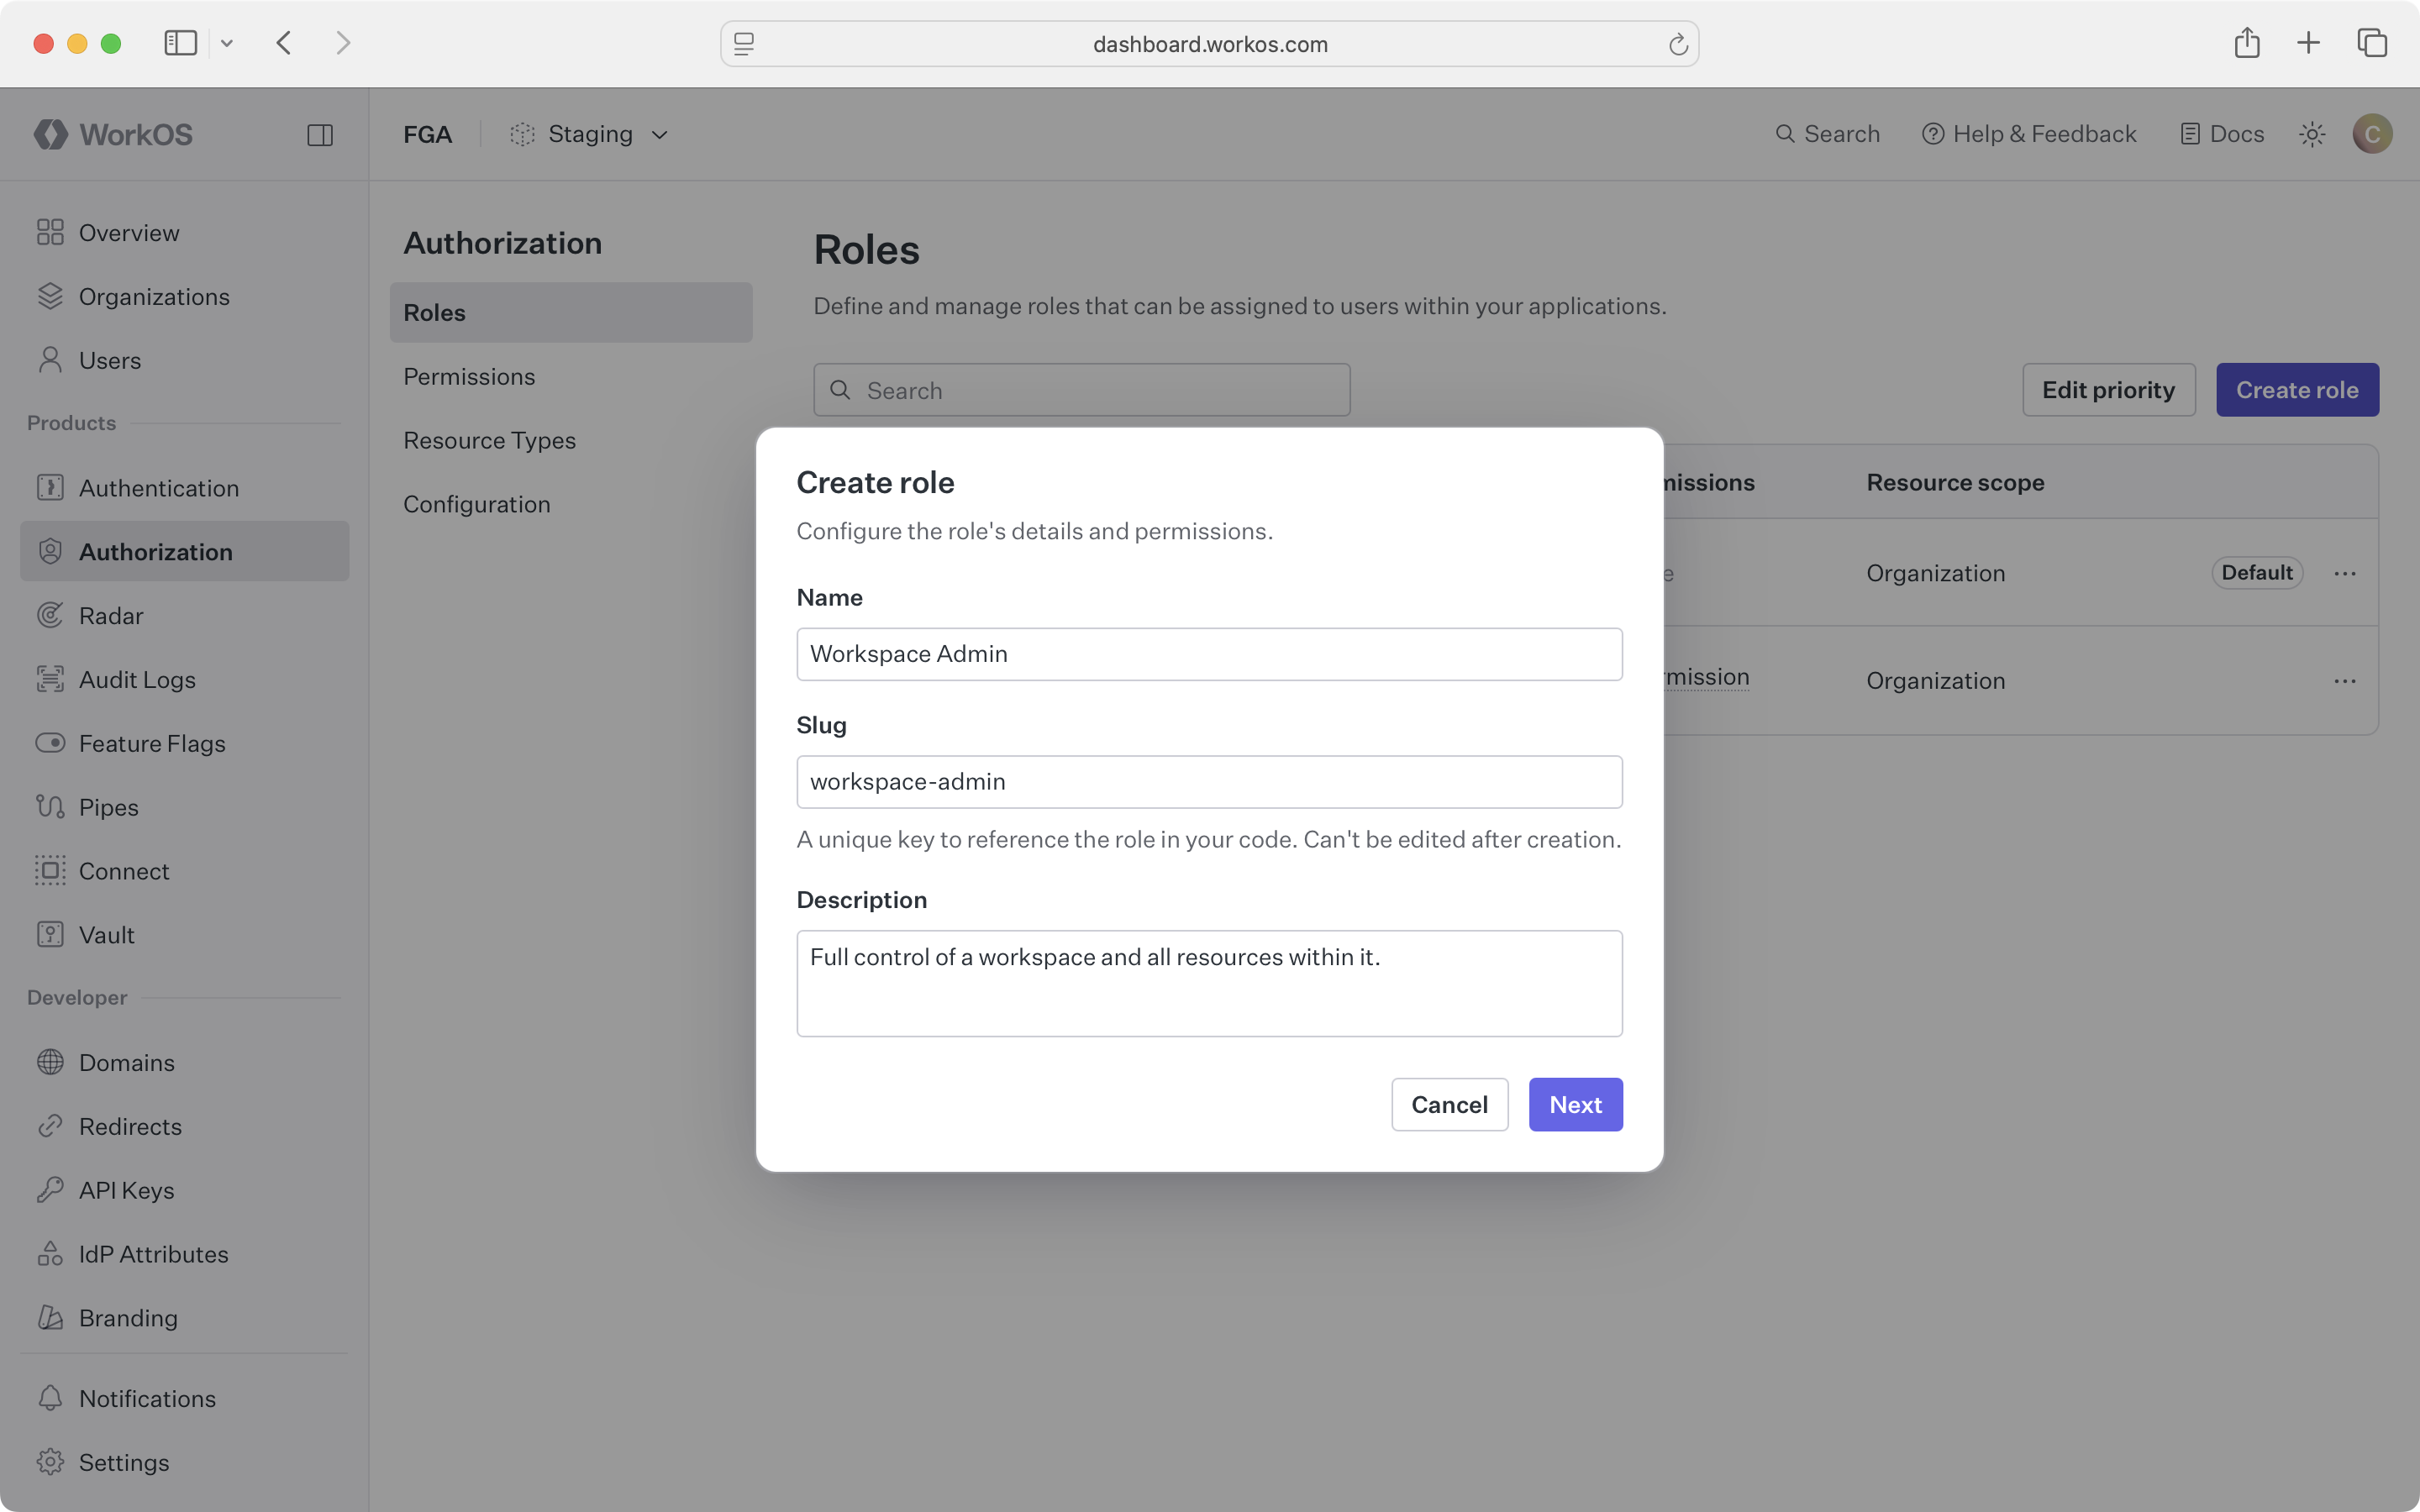
Roles bundle permissions and are scoped to a resource type. The key feature is that roles can include permissions for child types, enabling inheritance.

Create a workspace-admin role scoped to the workspace resource type. Include permissions for the workspace itself and its child types:

FGA create role set details

Select which permissions to include – both same-type and child-type permissions:

FGA create role assign permissions

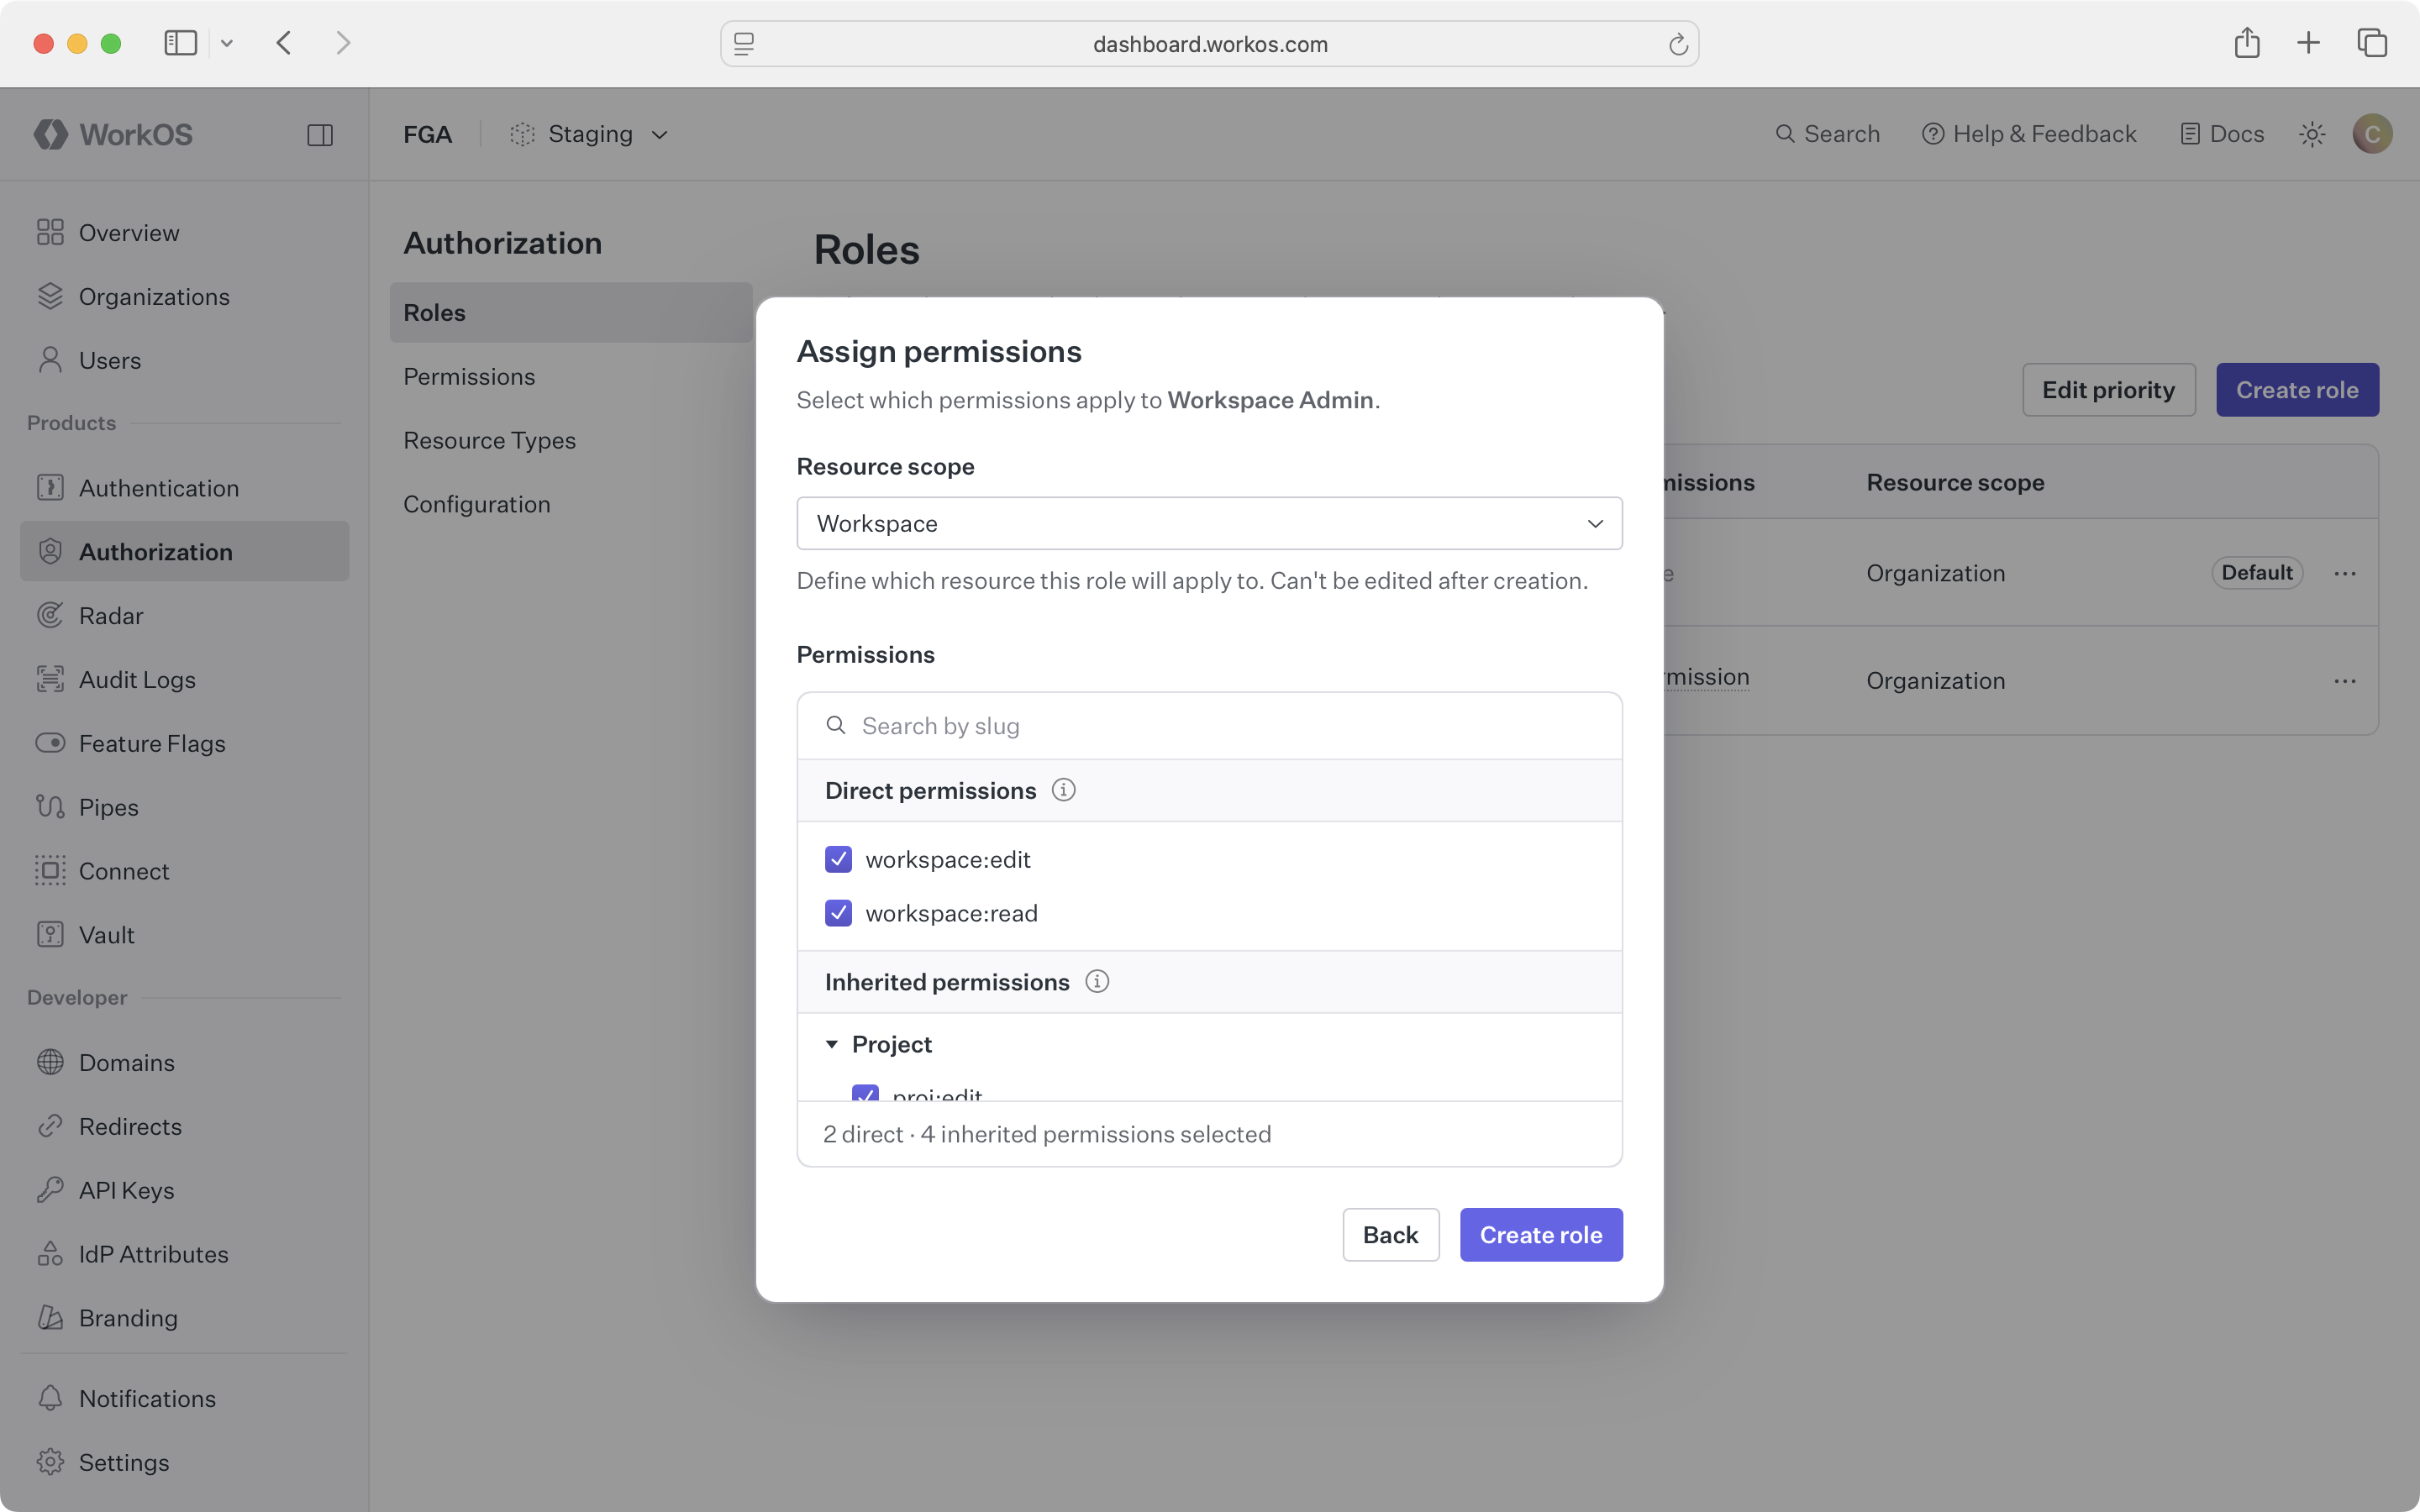
Here’s a useful set of roles for our example:

RoleScoped toPermissions included
workspace-adminworkspaceworkspace:view, workspace:edit, project:view, project:edit, project:create, project:delete
workspace-memberworkspaceworkspace:view, project:view
project-editorprojectproject:view, project:edit
project-viewerprojectproject:view

A workspace-admin assignment on a single workspace grants access to all projects within it. A project-editor assignment grants access to only that specific project. This layered approach minimizes the number of assignments you need to manage.

3. Create resources

Resources are runtime instances of your resource types. Register them via the API as users create entities in your application.

Top-level resources

When a user creates a workspace, register it as a resource. Top-level resources default to the organization as their parent:

curl https://api.workos.com/authorization/resources \
-X POST \
-H "Authorization: Bearer sk_example_123456789" \
-H "Content-Type: application/json" \
-d '{
"resource_type_slug": "workspace",
"external_id": "workspace_01H",
"organization_id": "org_01HXYZ",
"name": "Engineering"
}'

Response:

{
"id": "authz_resource_01HABC",
"resource_type_slug": "workspace",
"external_id": "workspace_01H",
"organization_id": "org_01HXYZ",
"name": "Engineering",
"parent_resource_id": null,
"created_at": "2025-01-15T10:30:00Z",
"updated_at": "2025-01-15T10:30:00Z"
}

The external_id is your application’s identifier for this entity – typically the primary key from your database. Use it to reference this resource in future API calls without needing to store the WorkOS resource ID.

Child resources

When a user creates a project inside a workspace, register it with a parent reference. You can reference the parent by its external ID and type:

curl https://api.workos.com/authorization/resources \
-X POST \
-H "Authorization: Bearer sk_example_123456789" \
-H "Content-Type: application/json" \
-d '{
"resource_type_slug": "project",
"external_id": "project_02H",
"organization_id": "org_01HXYZ",
"parent_resource_type_slug": "workspace",
"parent_resource_external_id": "workspace_01H",
"name": "API Backend"
}'

Or reference the parent by its internal WorkOS ID:

curl https://api.workos.com/authorization/resources \
-X POST \
-H "Authorization: Bearer sk_example_123456789" \
-H "Content-Type: application/json" \
-d '{
"resource_type_slug": "project",
"external_id": "project_03H",
"organization_id": "org_01HXYZ",
"parent_resource_id": "authz_resource_01HABC",
"name": "Mobile App"
}'

Register resources immediately after saving the entity to your database. The resource needs to exist in WorkOS before you can assign roles or check permissions on it.

4. Assign roles

Assignments connect a user (through their organization membership) to a role on a specific resource. This is what actually grants access.

Assign a workspace role

Give Alice (om_01HXYZ) the workspace-admin role on the Engineering workspace:

curl https://api.workos.com/authorization/organization_memberships/om_01HXYZ/role_assignments \
-X POST \
-H "Authorization: Bearer sk_example_123456789" \
-H "Content-Type: application/json" \
-d '{
"role_slug": "workspace-admin",
"resource_type_slug": "workspace",
"resource_external_id": "workspace_01H"
}'

Because workspace-admin includes child-type permissions like project:view and project:edit, Alice now has access to all projects within the Engineering workspace – without needing separate assignments on each project.

Assign a resource-specific role

Give Bob the project-editor role on just the API Backend project:

curl https://api.workos.com/authorization/organization_memberships/om_02HXYZ/role_assignments \
-X POST \
-H "Authorization: Bearer sk_example_123456789" \
-H "Content-Type: application/json" \
-d '{
"role_slug": "project-editor",
"resource_type_slug": "project",
"resource_external_id": "project_02H"
}'

Bob can view and edit the API Backend project, but has no access to other projects in the workspace unless separately assigned.

View assignments in the Dashboard

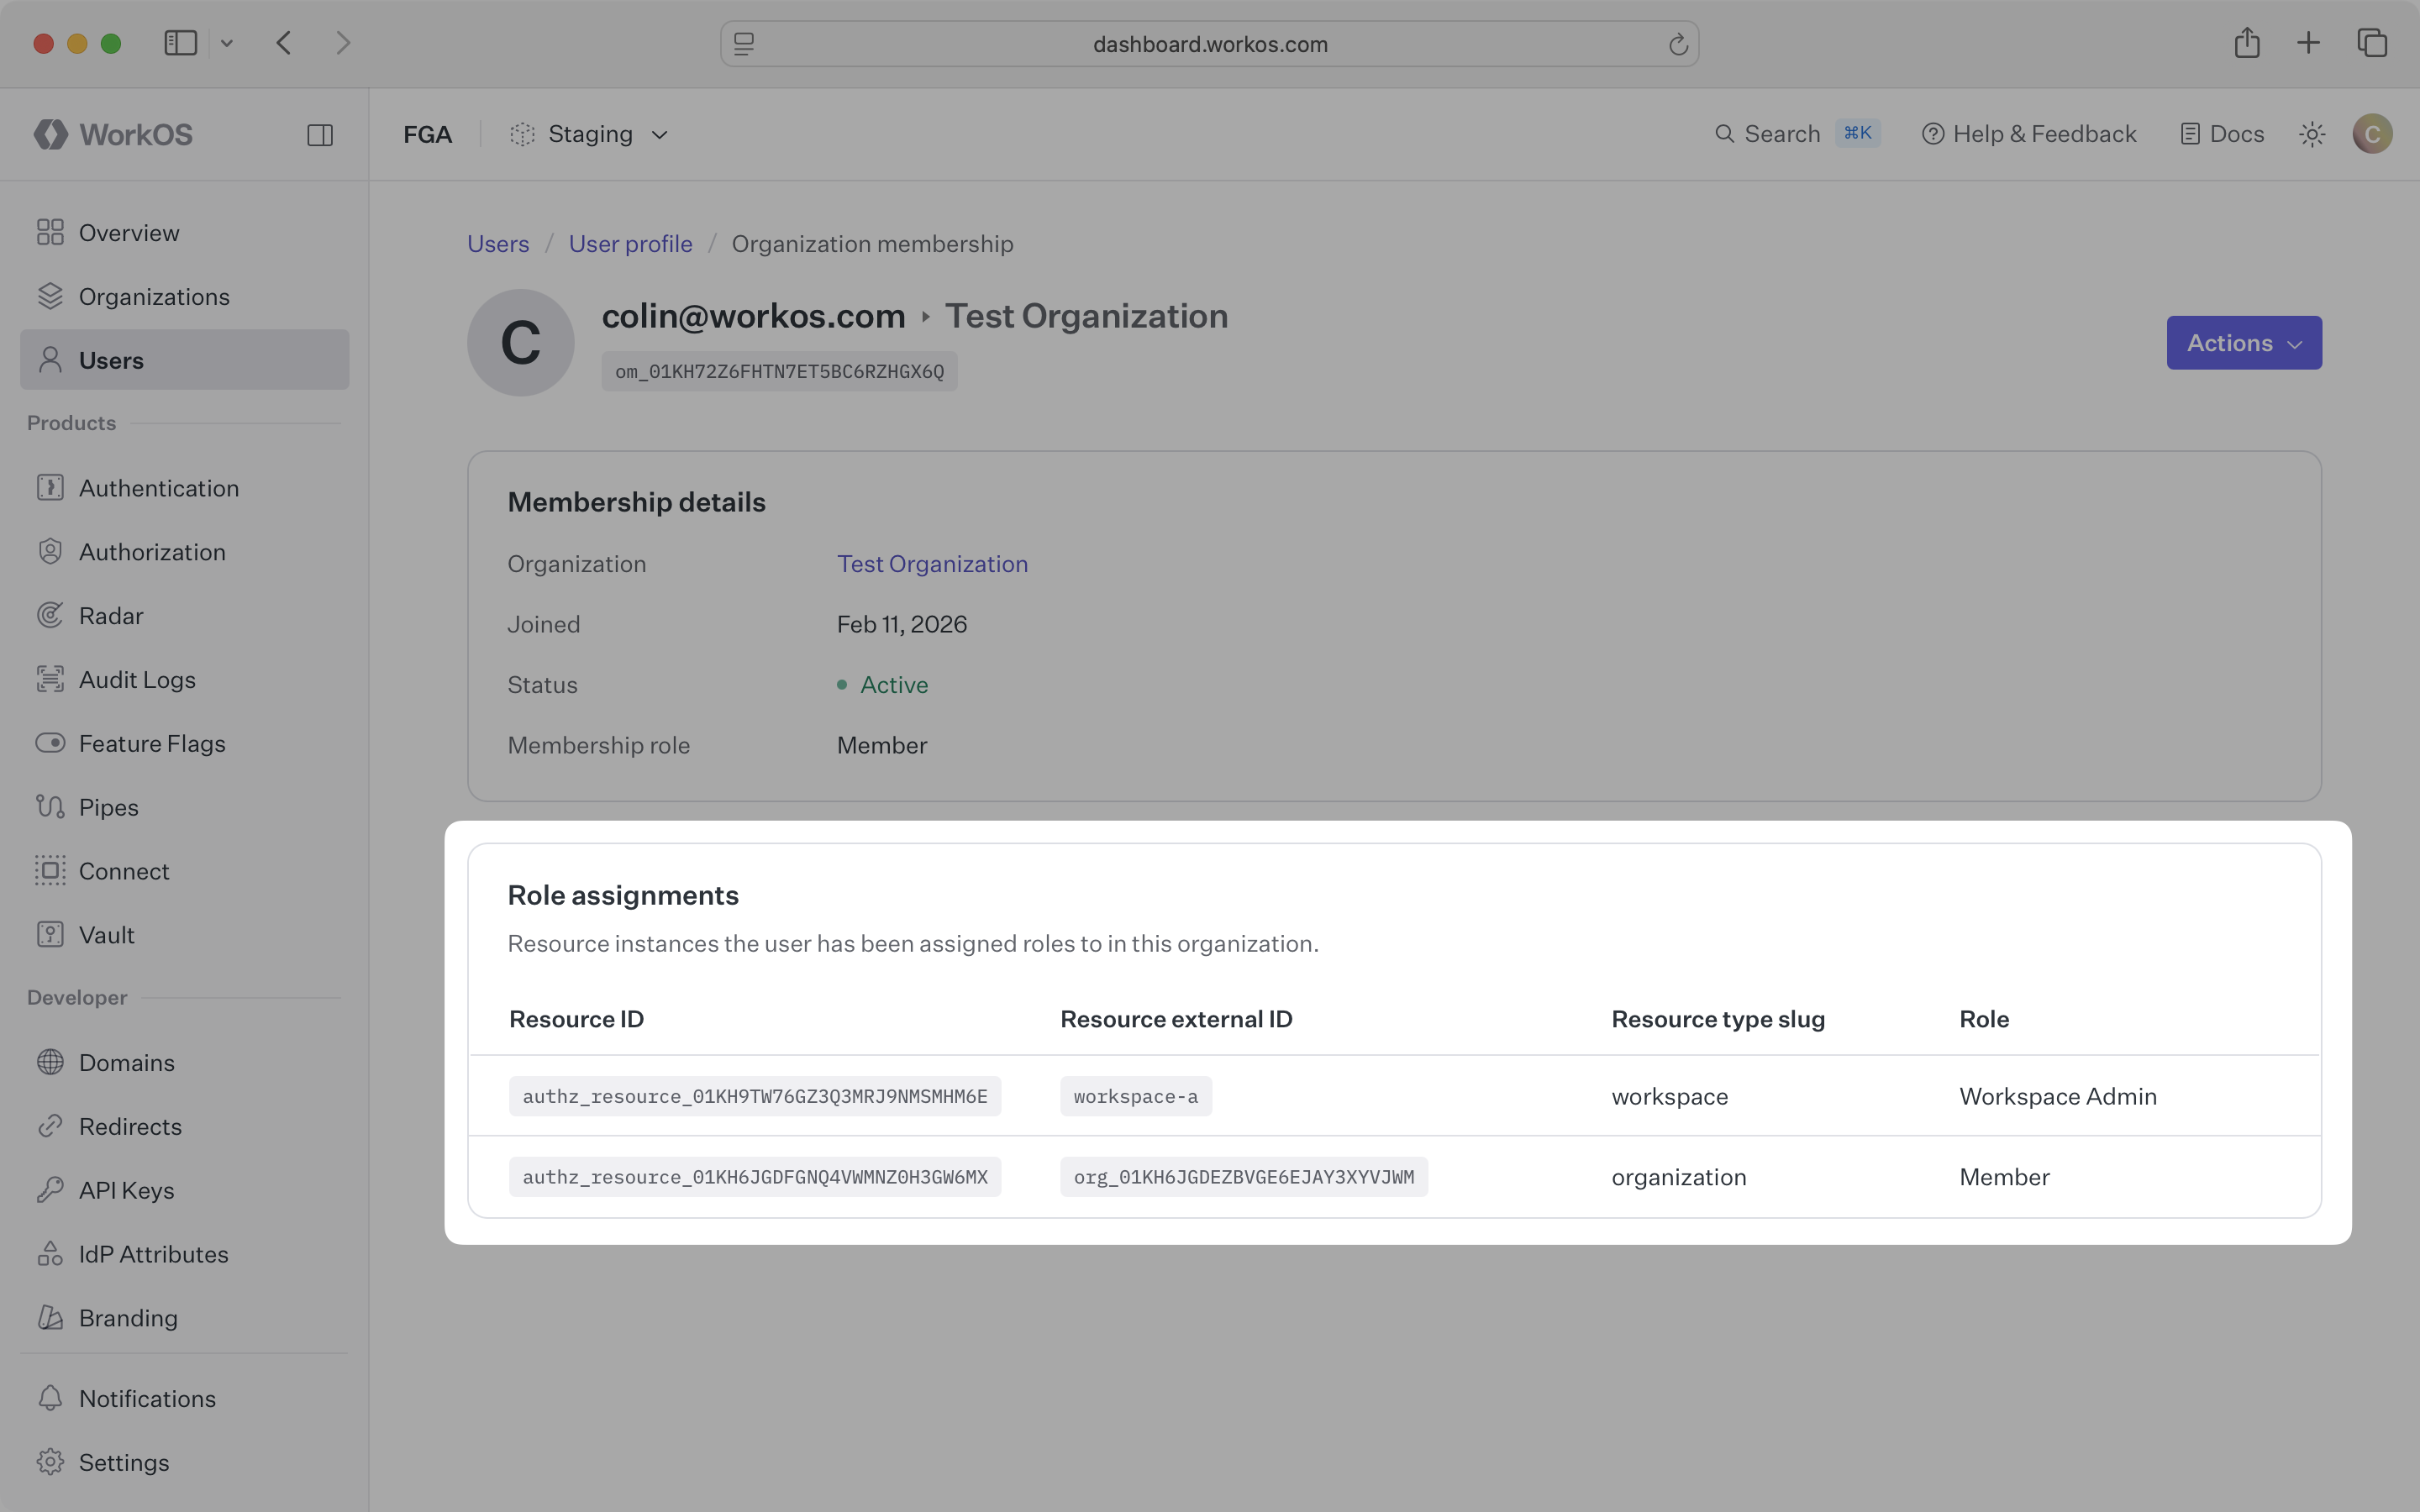
Navigate to an organization membership in the Dashboard to see all role assignments for that user:

FGA assignments

5. Check permissions

Access checks answer: “Can this user perform this action on this resource?” FGA evaluates all possible sources of access – direct assignments, inherited permissions from parent resources, and organization-level roles.

Check by resource external ID

Check whether Alice (om_01HXYZ) can edit the API Backend project:

curl https://api.workos.com/authorization/organization_memberships/om_01HXYZ/check \
-X POST \
-H "Authorization: Bearer sk_example_123456789" \
-H "Content-Type: application/json" \
-d '{
"permission_slug": "project:edit",
"resource_type_slug": "project",
"resource_external_id": "project_02H"
}'

Response:

{
"authorized": true
}

Alice is authorized because her workspace-admin role on the Engineering workspace includes project:edit, which flows down to all projects in that workspace.

Check by resource ID

You can also reference resources by their internal WorkOS ID:

curl https://api.workos.com/authorization/organization_memberships/om_01HXYZ/check \
-X POST \
-H "Authorization: Bearer sk_example_123456789" \
-H "Content-Type: application/json" \
-d '{
"permission_slug": "project:edit",
"resource_id": "authz_resource_02HDEF"
}'

Integrate into your application

Here’s how an access check looks in practice, protecting an API endpoint:

import { WorkOS } from '@workos-inc/node';
const workos = new WorkOS(process.env.WORKOS_API_KEY);
app.patch('/projects/:projectId', async (req, res) => {
const { organizationMembershipId } = req.user;
const { projectId } = req.params;
const { authorized } = await workos.authorization.check({
organizationMembershipId,
permissionSlug: 'project:edit',
resourceExternalId: projectId,
resourceTypeSlug: 'project',
});
if (!authorized) {
return res.status(403).json({ error: 'Forbidden' });
}
const project = await updateProject(projectId, req.body);
return res.json(project);
});

Access checks are designed to be low-latency and reflect role changes immediately – without requiring cache invalidation or waiting for propagation delays.

6. Discover access

FGA provides discovery endpoints that power common product features like filtered navigation, member lists, and sharing dialogs.

List resources a user can access

Find all projects Alice (om_01HXYZ) can edit within the Engineering workspace:

curl "https://api.workos.com/authorization/organization_memberships/om_01HXYZ/resources?permission_slug=project:edit&parent_resource_type_slug=workspace&parent_resource_external_id=workspace_01H" \
-H "Authorization: Bearer sk_example_123456789"

This powers features like a sidebar that shows only the projects a user has access to, or a project picker filtered to resources the user can modify.

List users with access to a resource

Find all users who can edit a specific project:

curl "https://api.workos.com/authorization/resources/authz_resource_02HDEF/organization_memberships?permission_slug=project:edit" \
-H "Authorization: Bearer sk_example_123456789"

By default, this returns users with direct role assignments on the resource. To include users with inherited access (from workspace or organization roles), use the assignment parameter:

# All users who can edit this project (direct + inherited)
curl "https://api.workos.com/authorization/resources/authz_resource_02HDEF/organization_memberships?permission_slug=project:edit&assignment=indirect" \
-H "Authorization: Bearer sk_example_123456789"

This powers sharing dialogs, member lists, and compliance audits.

Putting it all together

Here’s the complete flow for our project management app:

1. Resource type hierarchy → Define workspace and project resource types in the Dashboard
2. Privileges → Create roles (workspace-admin, project-editor) with scoped permissions
3. Resources → Register workspaces and projects via API as users create them
4. Access → Assign roles to users on specific resources
5. Enforce → Check permissions before allowing actions
6. Discover → Query which resources a user can access for navigation and UI

The hierarchy does the heavy lifting. A single workspace-admin assignment grants access to every project in that workspace. When new projects are created, the admin automatically has access – no additional assignments needed.

Next steps

  • Resource Types – Design your hierarchy for different product patterns
  • Roles and Permissions – Understand permission inheritance in depth
  • Resources – Learn about external IDs, sync strategies, and modeling guidance
  • Access Checks – JWT vs. API checks and integration patterns
  • AuthKit Integration – Embed permissions in access tokens
Resource TypesDefine the schema of your application's resource hierarchy in the WorkOS Dashboard
Up next
© WorkOS, Inc.
FeaturesAuthKitSingle Sign-OnDirectory SyncAdmin PortalFine-Grained Authorization
DevelopersDocumentationChangelogAPI Status
ResourcesBlogPodcastPricingSecuritySupport
CompanyAboutCustomersCareersLegalPrivacy
© WorkOS, Inc.