How to build a Claude Code connector secured with WorkOS AuthKit
A step-by-step guide to authenticating your MCP server with AuthKit and connecting it to Claude Code.

Claude Code can now connect to remote MCP servers the same way Claude.ai does: you point it at a URL with claude mcp add, and if the server requires authentication, Claude Code walks the user through an OAuth flow automatically. That's good news if you're building an MCP server, because it means you don't have to write your own login screen, token issuer, or consent page. You just need an authorization server that speaks the MCP auth spec, and AuthKit already does.
This guide walks through turning any MCP server into a Claude Code connector that's gated behind real authentication, using WorkOS Connect and AuthKit as the authorization server.
Who this is for
You should already have (or be about to build) an MCP server using one of the official Model Context Protocol SDKs. This guide covers the authentication layer on top of it: verifying tokens, exposing the right metadata, and making sure Claude Code can discover and use your server without extra configuration on the user's end.
The two roles in the flow
MCP authorization splits responsibility between two parties:
- Your MCP server is the resource server. It holds the tools and data, and its only job with respect to auth is to check that incoming requests carry a valid token.
- AuthKit is the authorization server. It issues tokens, handles login and consent, and exposes the standard OAuth metadata endpoints that clients like Claude Code look for.
Because AuthKit already implements the OAuth side, your server never has to implement /authorize, /token, or a login page. It just has to trust and verify what AuthKit issues.
Step 1: Turn on Client ID Metadata Document support
Claude Code, like most MCP clients, has no prior relationship with your server. The first time it connects, it needs a way to register itself. The current MCP spec handles this with Client ID Metadata Document (CIMD), which lets a client identify itself without a manual registration step.
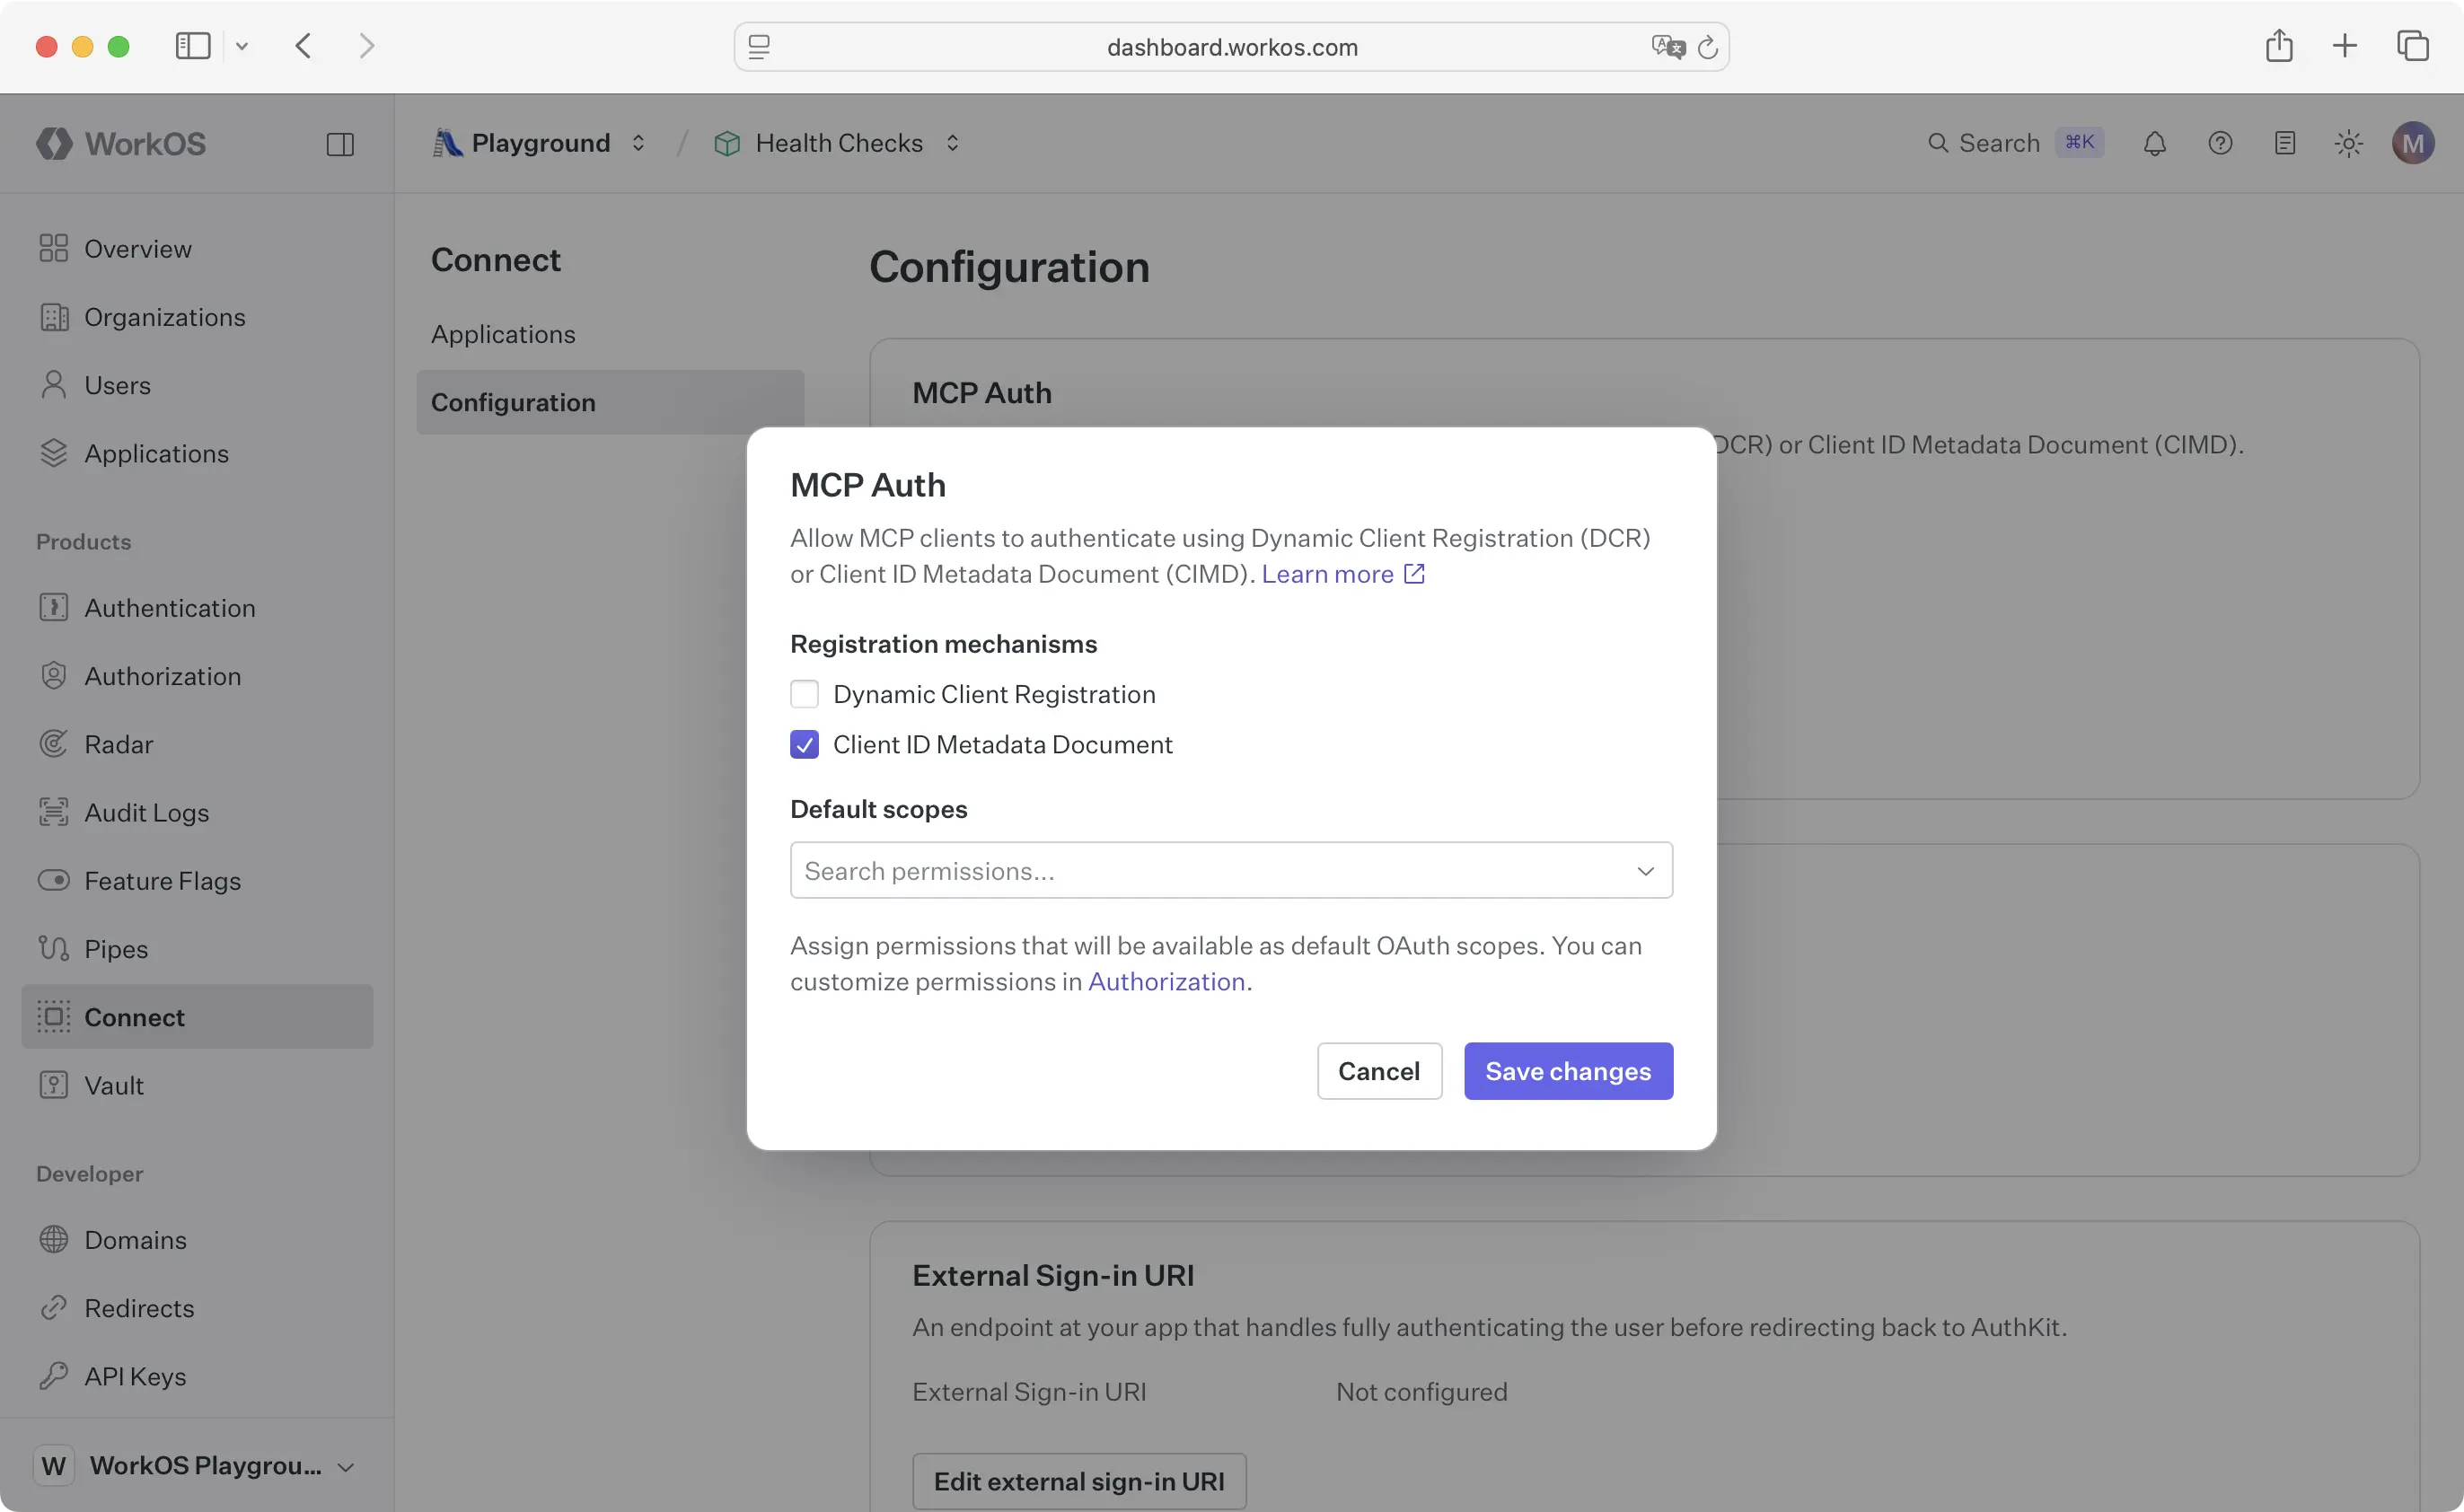
In the WorkOS dashboard, go to Connect → Configuration and turn CIMD on. It's off by default. If you need to support older clients that haven't adopted CIMD yet, you can also enable Dynamic Client Registration alongside it for backward compatibility.
Step 2: Register your MCP server's URL as a resource indicator
In the same dashboard area, add the URL of your MCP endpoint as a resource indicator. This is the value MCP clients send as the resource parameter during authorization, and it should match the resource field you'll return from your metadata endpoint in step 4.
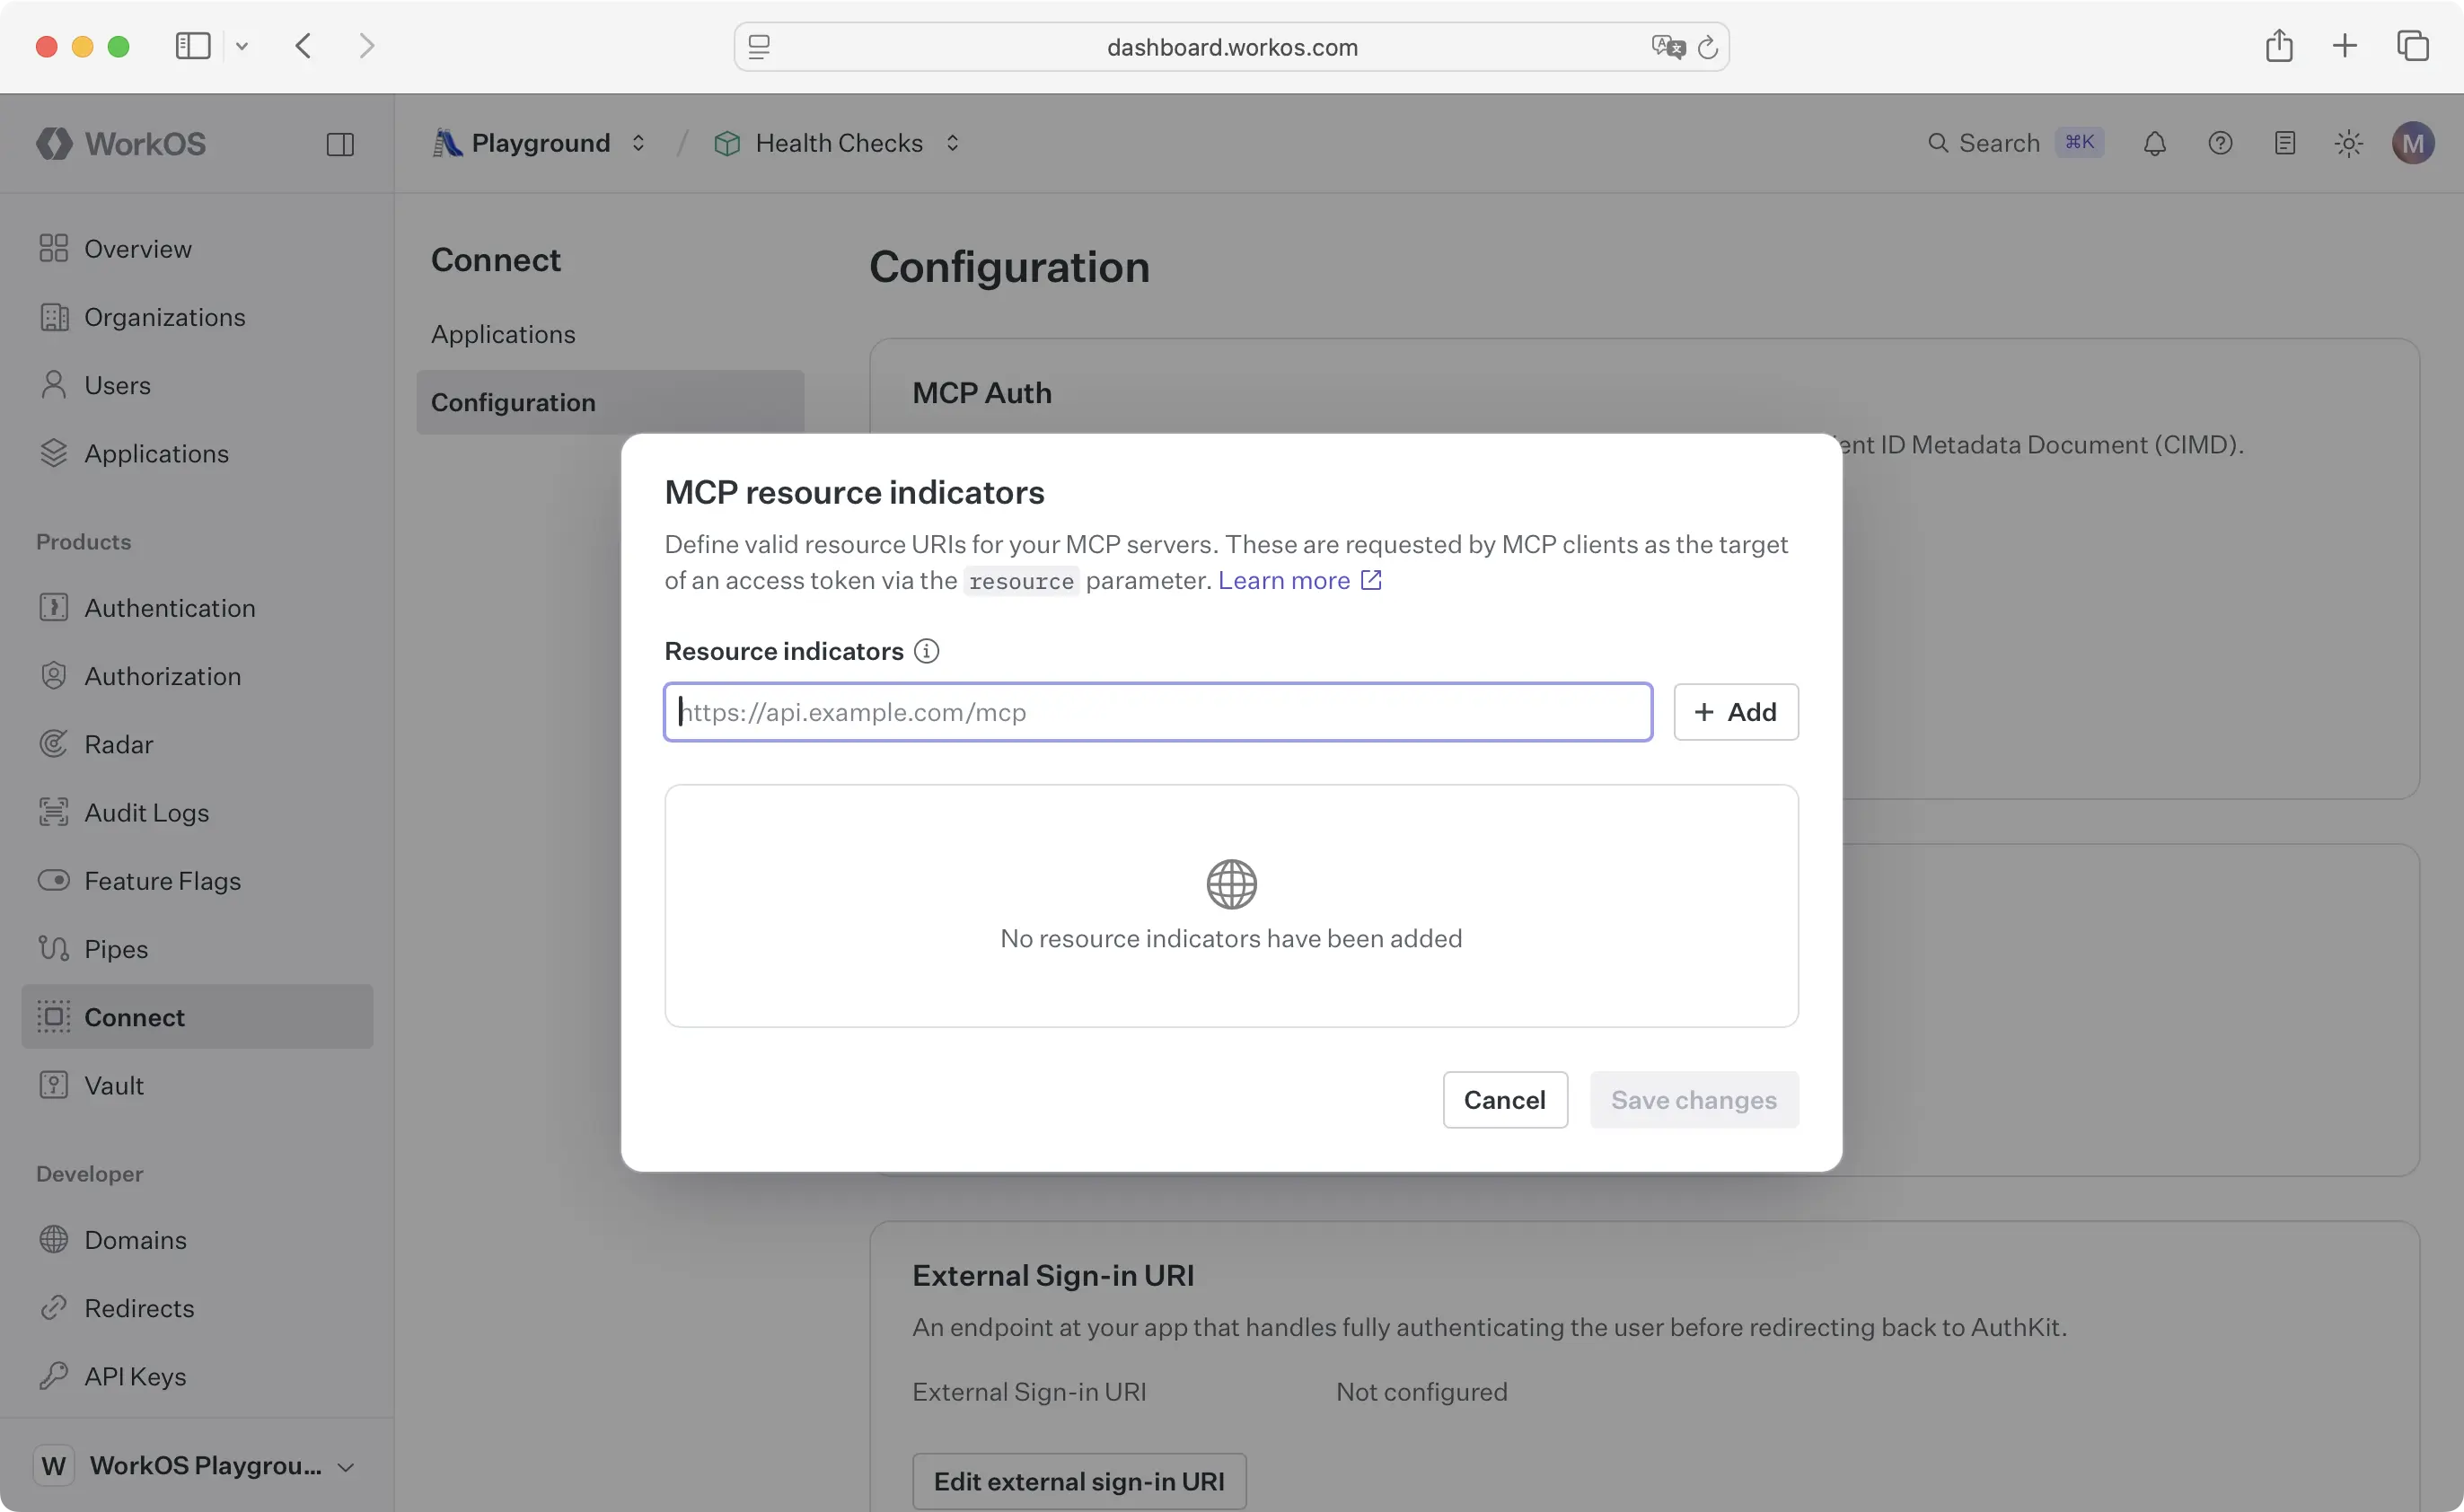
This step matters more than it looks. If you skip it, AuthKit issues tokens with a default audience tied to your WorkOS environment rather than your specific server, and the resource parameter gets ignored. Setting it explicitly is what lets the aud claim on issued tokens actually match your server, which you'll check during verification.
Step 3: Verify tokens on every request
Your server's real job is checking that each request carries a valid, unexpired token issued by AuthKit for your resource. This looks like standard JWT verification against AuthKit's JWKS endpoint, with one detail specific to MCP: your middleware also needs to return a WWW-Authenticate header pointing to your metadata endpoint whenever a request is missing or has an invalid token.
A minimal version in Express looks like this:
That resource_metadata challenge parameter is what lets Claude Code find its way to your authorization server without any manual setup on the user's side. When Claude Code hits a 401, it reads that header, fetches the metadata it points to, and takes the user through login from there.
Step 4: Expose your protected resource metadata
Implement the /.well-known/oauth-protected-resource endpoint your middleware just advertised. It only needs to return a small JSON document:
This is the piece that ties everything together: it tells any MCP client, including Claude Code, that AuthKit is the authorization server for this resource. From here, AuthKit handles the rest of the OAuth dance on its own.
Step 5: Connect it from Claude Code
Once the server is deployed, connecting it is a one-line command:
The first time Claude Code calls a tool on the server, it'll get a 401, discover your metadata, and prompt the user to authenticate through /mcp. If a token later gets revoked or a refresh fails, Claude Code surfaces a re-authenticate prompt rather than failing silently, so users aren't stuck guessing why a tool stopped working.
If you already have your own login system
If you already have your own auth stack, WorkOS Connect supports a standalone mode for exactly this case: AuthKit still issues the OAuth tokens Claude Code expects, but it redirects users to your own login page instead of its own, and your app calls AuthKit's completion API once the user is authenticated. Token verification and the metadata endpoints stay identical either way, so switching to standalone mode later doesn't change anything on the resource server side.
One tradeoff worth knowing about: Cross App Access, which lets users skip the OAuth prompt entirely if they're already signed in via SSO to a related app, currently only works with the standard AuthKit login flow, not the standalone one.
A note on older clients
Not every MCP client supports the newer protected resource metadata discovery yet. Some still look for /.well-known/oauth-authorization-server directly on your server. If you want to support those clients too, you can proxy that endpoint through to AuthKit:
Claude Code itself supports the current spec, so this step is more about hedging for other clients in the ecosystem than for Claude Code specifically.
Recap
Getting an MCP server working as an authenticated Claude Code connector comes down to five things: turn on CIMD, register your server's URL as a resource indicator, verify tokens with the right audience check, expose the protected resource metadata endpoint, and point Claude Code at your URL. AuthKit does the actual OAuth work; your server just needs to ask the right questions and trust the answers.