Connect your app to GitLab without building OAuth
Let users sync their GitLab projects in your app, using a fresh access token, without writing any OAuth logic.
Most modern applications need to pull data from services their users already rely on, whether that is GitLab, a CRM, or an internal tool. The APIs themselves tend to be simple enough, but wiring up the OAuth authorization flow, storing credentials safely, and handling token refreshes adds real complexity that has nothing to do with the feature you are actually building.
WorkOS Pipes takes all of that off your plate. It lets users connect third-party services to your app while WorkOS manages the OAuth flow, credential storage, and token refresh behind the scenes. When your application needs data, it simply requests a valid access token from Pipes and calls the provider API directly.
In this tutorial you will use Pipes to connect GitLab and fetch project data in a Node app. Specifically, you will:
- Use the Pipes widget so users can connect and manage their GitLab account.
- Fetch a refreshed GitLab access token from WorkOS on the backend.
- Call the GitLab REST API to list projects for the authenticated user.
This same approach works for any provider that Pipes supports, so once you have the pattern down, adding more integrations is straightforward.
What are WorkOS Pipes
Pipes is a WorkOS feature that lets your users securely link their third-party accounts to your application. It supports popular services like GitLab, GitHub, Slack, Google, Salesforce, and others, all without requiring you to manage OAuth flows, token refresh logic, or credential storage.
Here is how it works at a high level:
- You configure a provider (like GitLab) in the WorkOS dashboard.
- Your app renders the Pipes widget so users can connect and manage their accounts.
- Your backend calls WorkOS to fetch a provider access token whenever it needs to talk to the provider API.
- Pipes refreshes tokens automatically so your app always receives a usable token.
- You use that token to retrieve whatever data you need from the configured provider (for example, GitLab projects).
Step 1: Configure GitLab
Open the WorkOS dashboard and navigate to Pipes.
Click Connect provider and select GitLab from the list.
.webp)
Choose the scopes your application requires. To list a user's projects (including private ones), select read_api. This grants read-only access to the API, which is sufficient for fetching project metadata. If your app also needs to push code or create merge requests, you would select api instead. For a full breakdown of what each scope grants, see the GitLab OAuth scopes documentation.
Copy the Redirect URI and create a GitLab OAuth application. After you are done, enter the GitLab Client ID and Secret in the GitLab configuration dialog.
Step 2: Add the Pipes Widget
Next we will add the Pipes widget to your app.
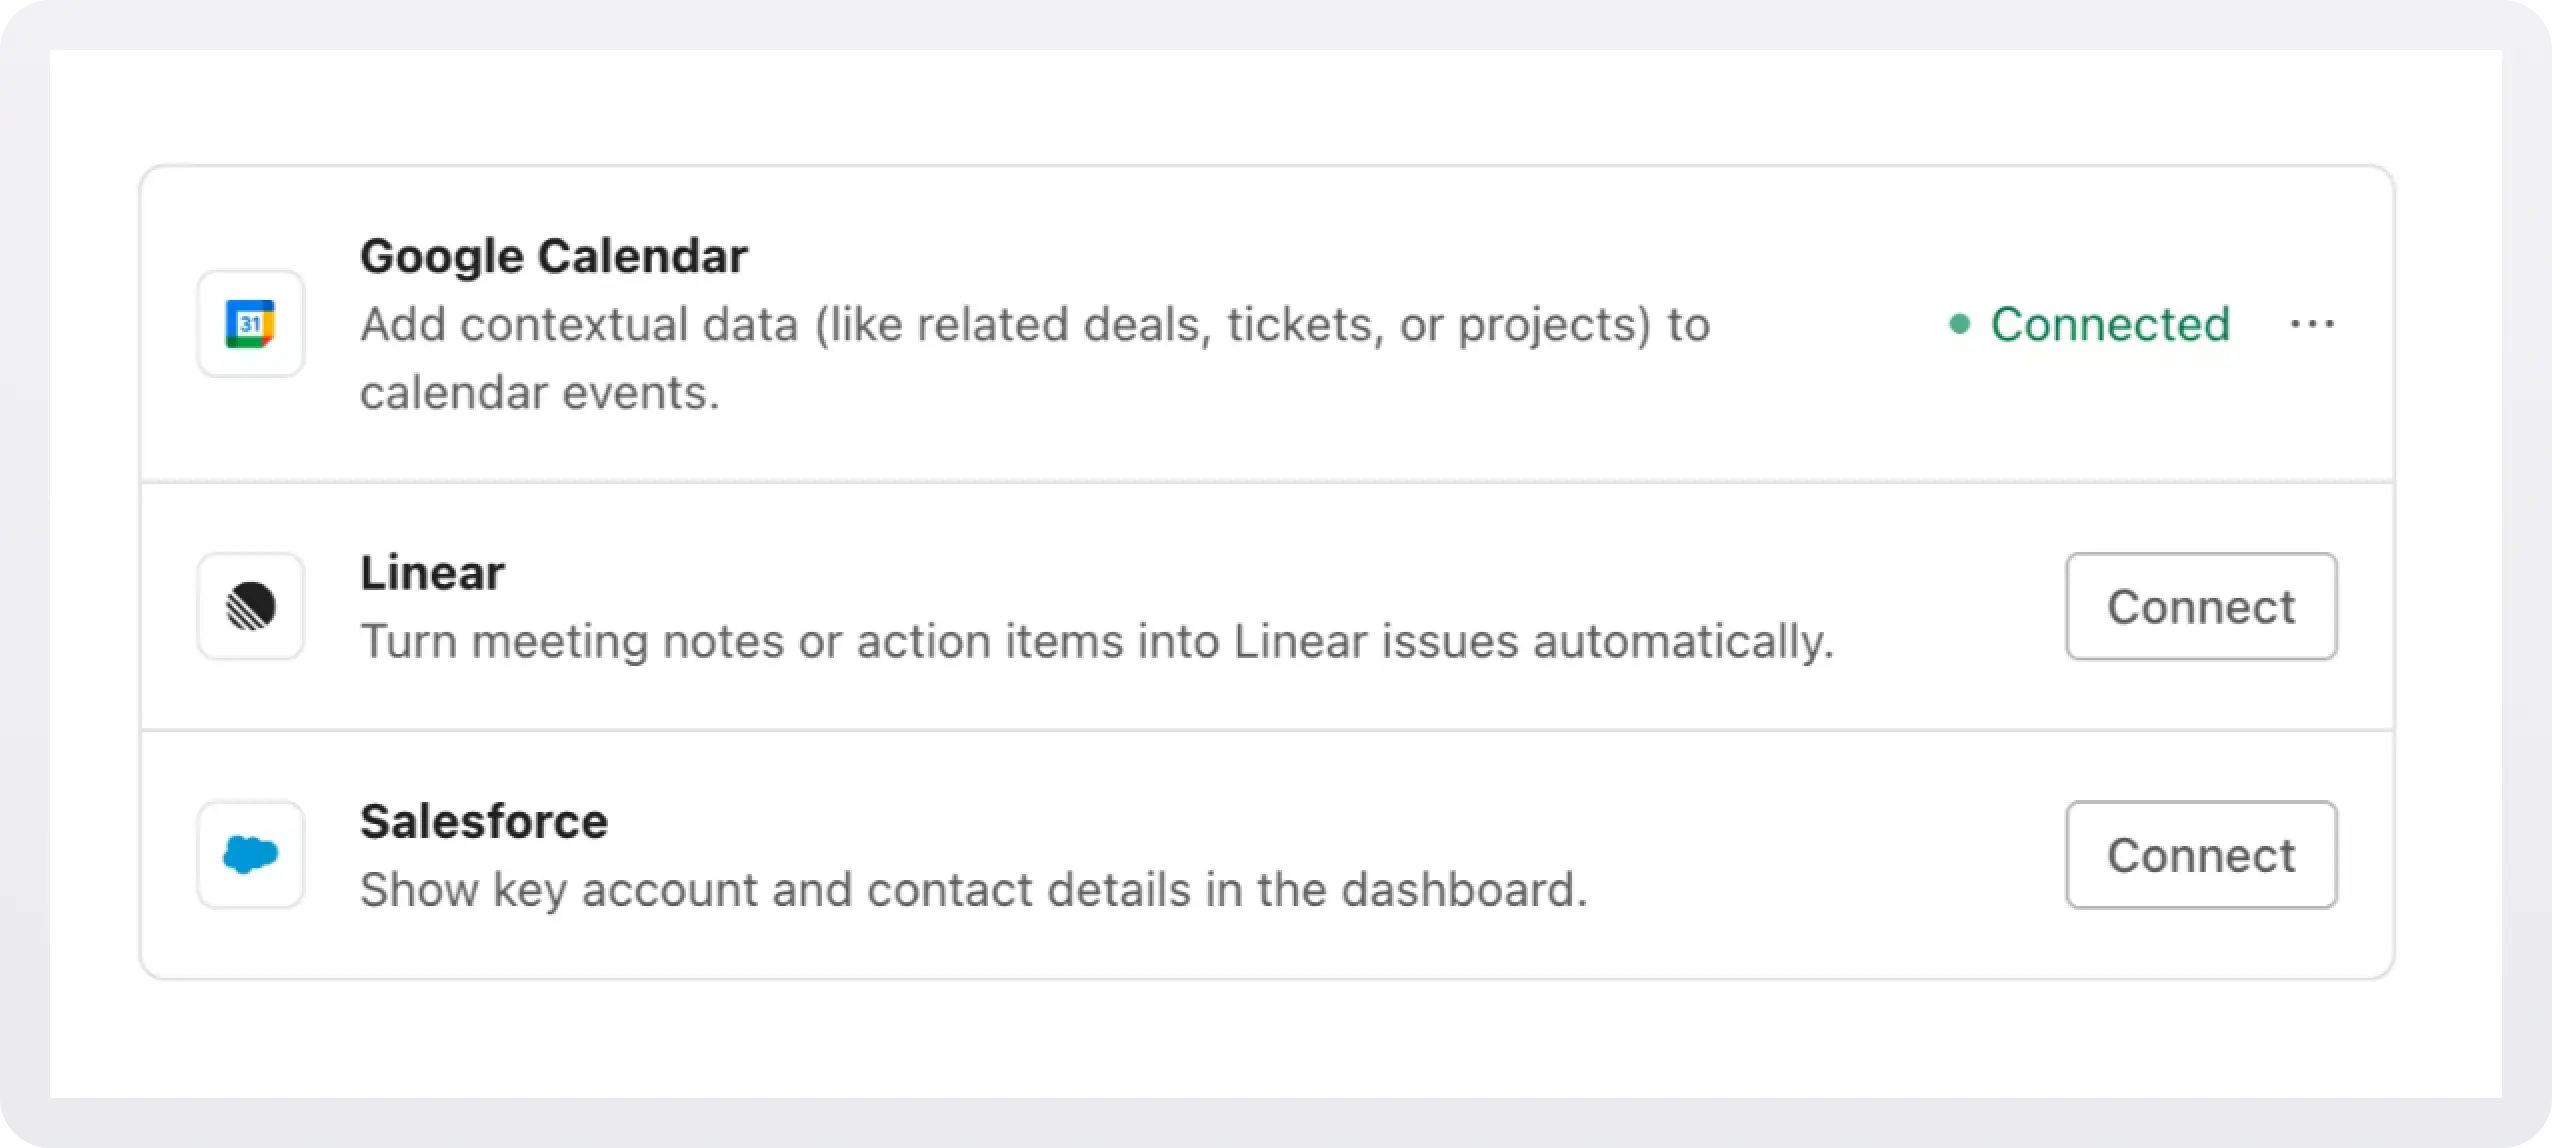
The Pipes widget is a pre-built UI that shows available providers and lets users connect and manage accounts. It displays a list of all the 3rd party services you have enabled and the user has the option to connect them or not.
In order to add the widget to our app we need to install some dependencies, configure keys and URLs, and then get a valid token for the user.
2a. Install dependencies
WorkOS Widgets uses Radix Themes for its UI components and style customization APIs, while TanStack Query is used for data fetching and caching. Since both libraries are often used in applications, we require them as peer dependencies to avoid duplication, version conflicts, and bloated bundles.
Install these dependencies:
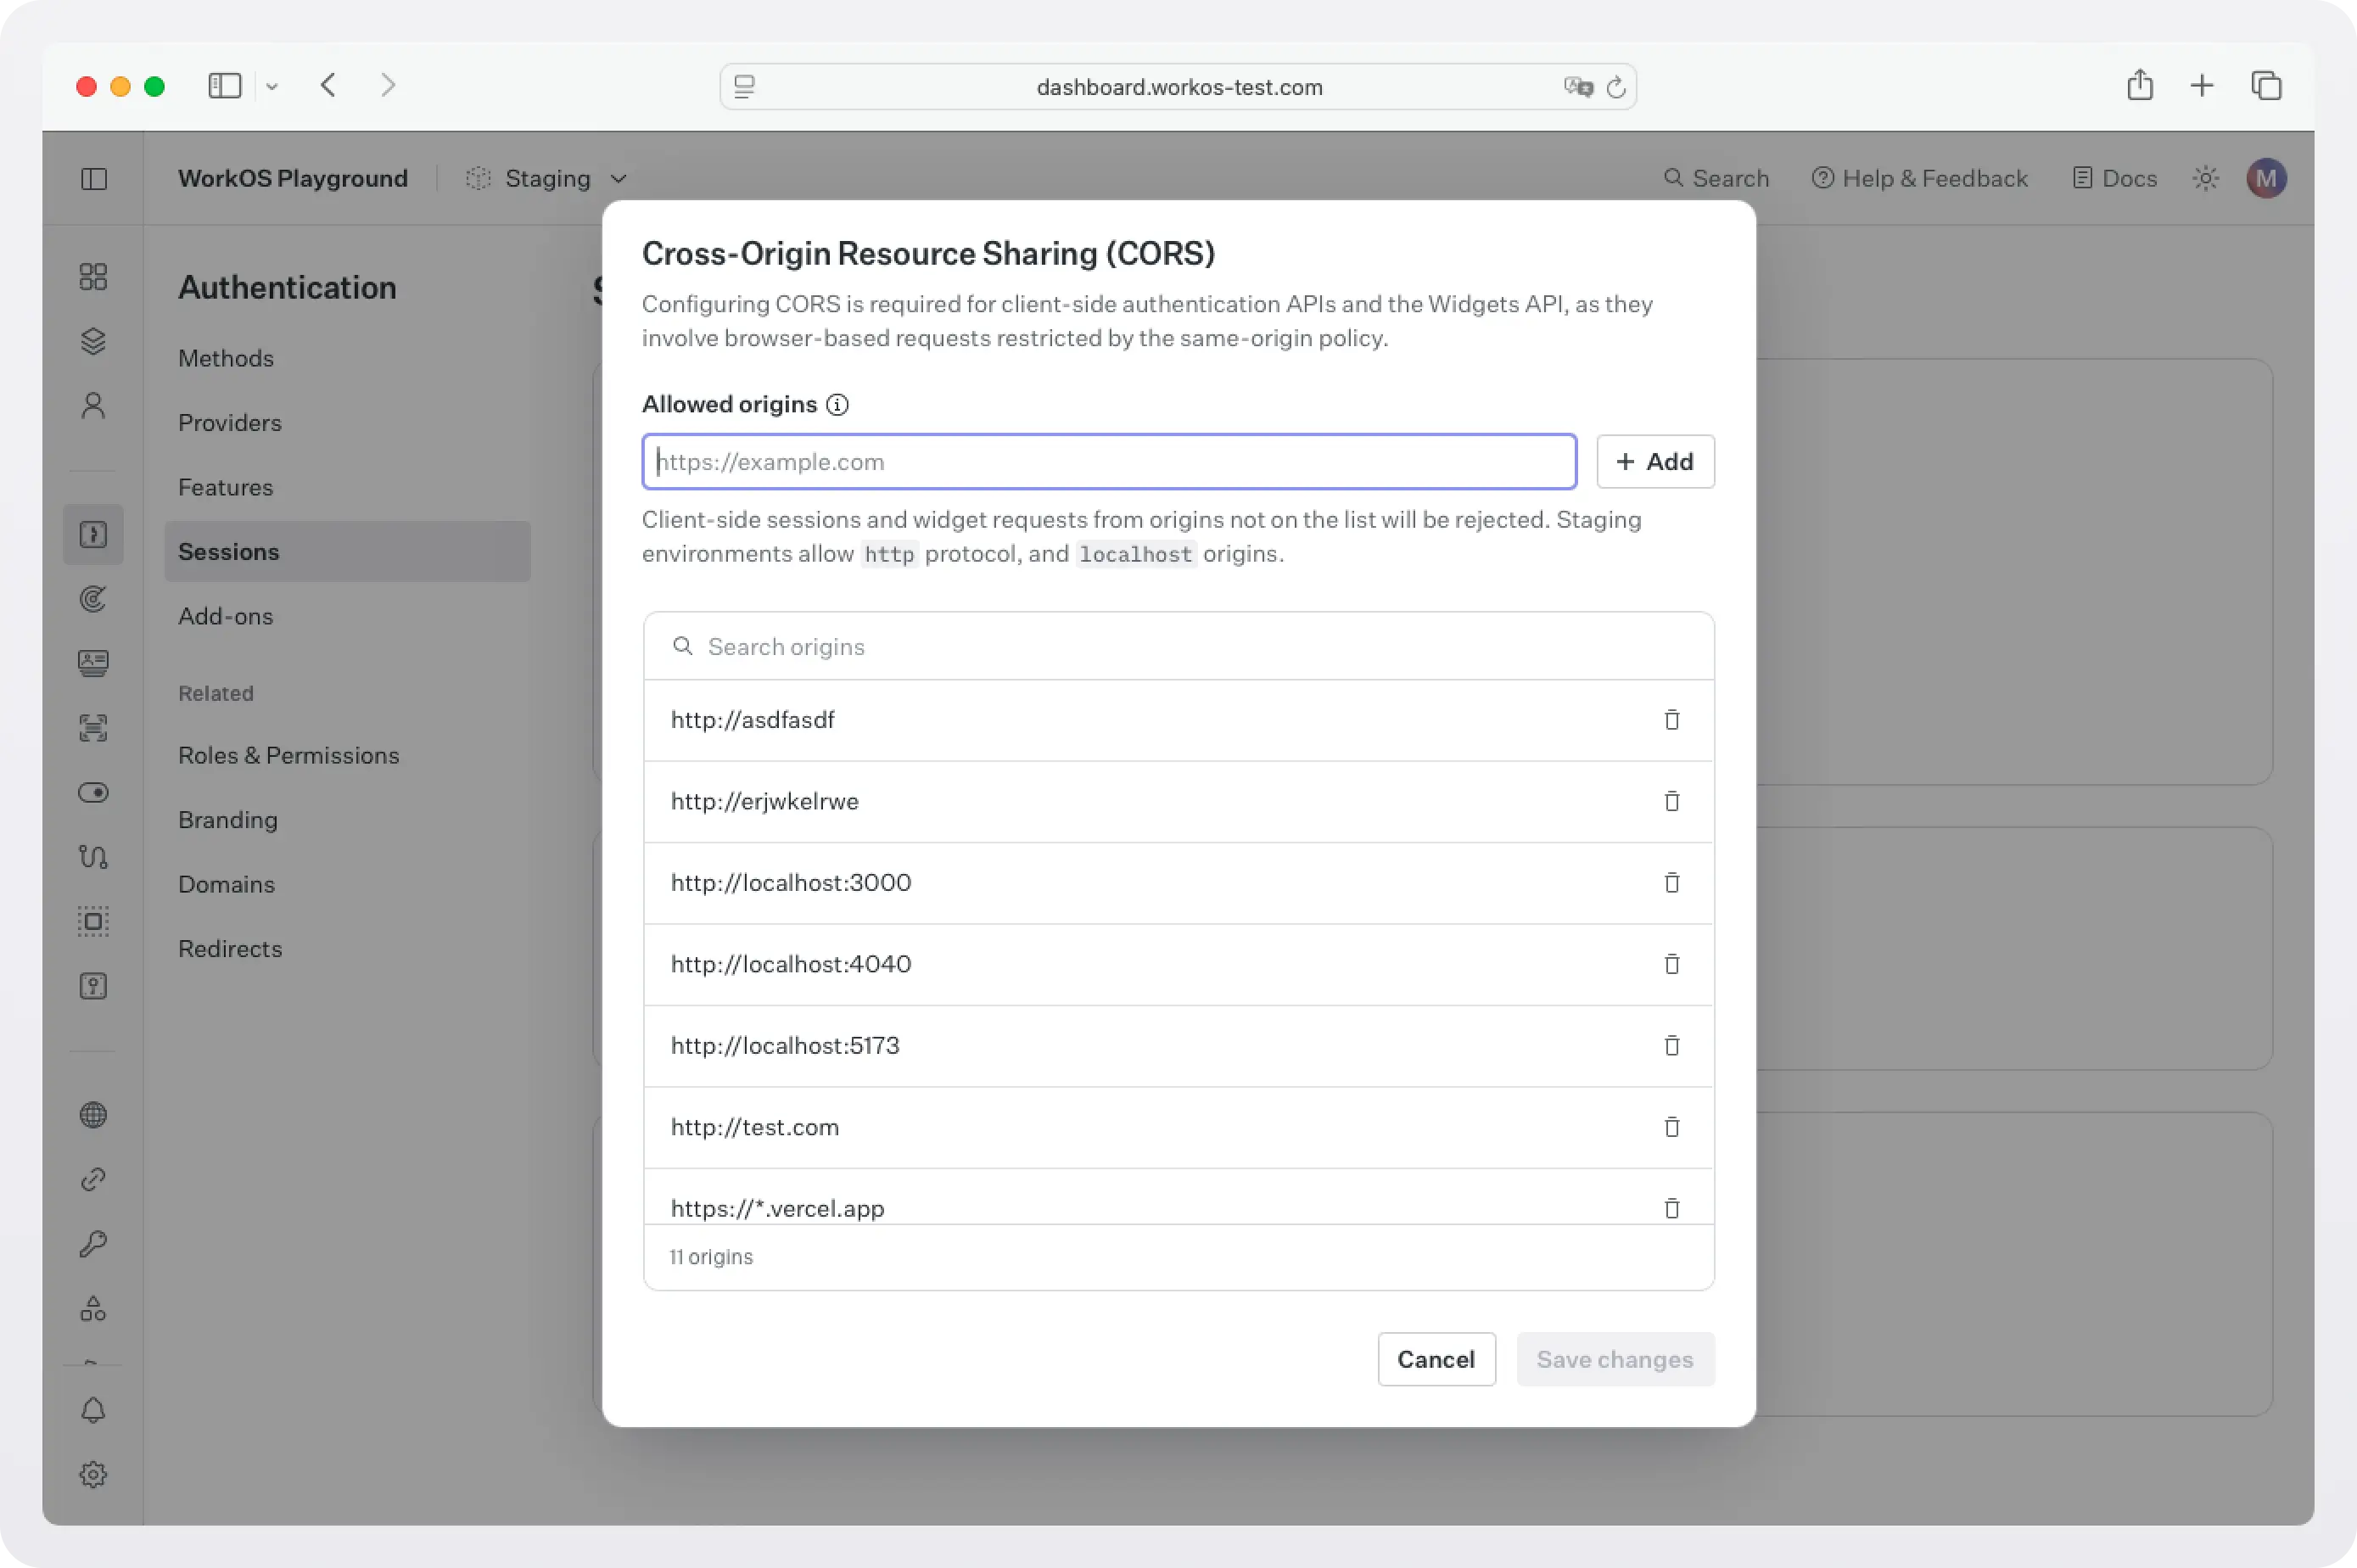
2b. Configure WorkOS API key and CORS
Next, because WorkOS widgets issue client-side requests to WorkOS, it is necessary to configure your site as an allowed web origin. Adding this in the Authentication section of the WorkOS dashboard will prevent CORS issues when using the widget.
You also need to set the WorkOS API key and client ID in order to make calls to the WorkOS API. Copy these values from the WorkOS dashboard.
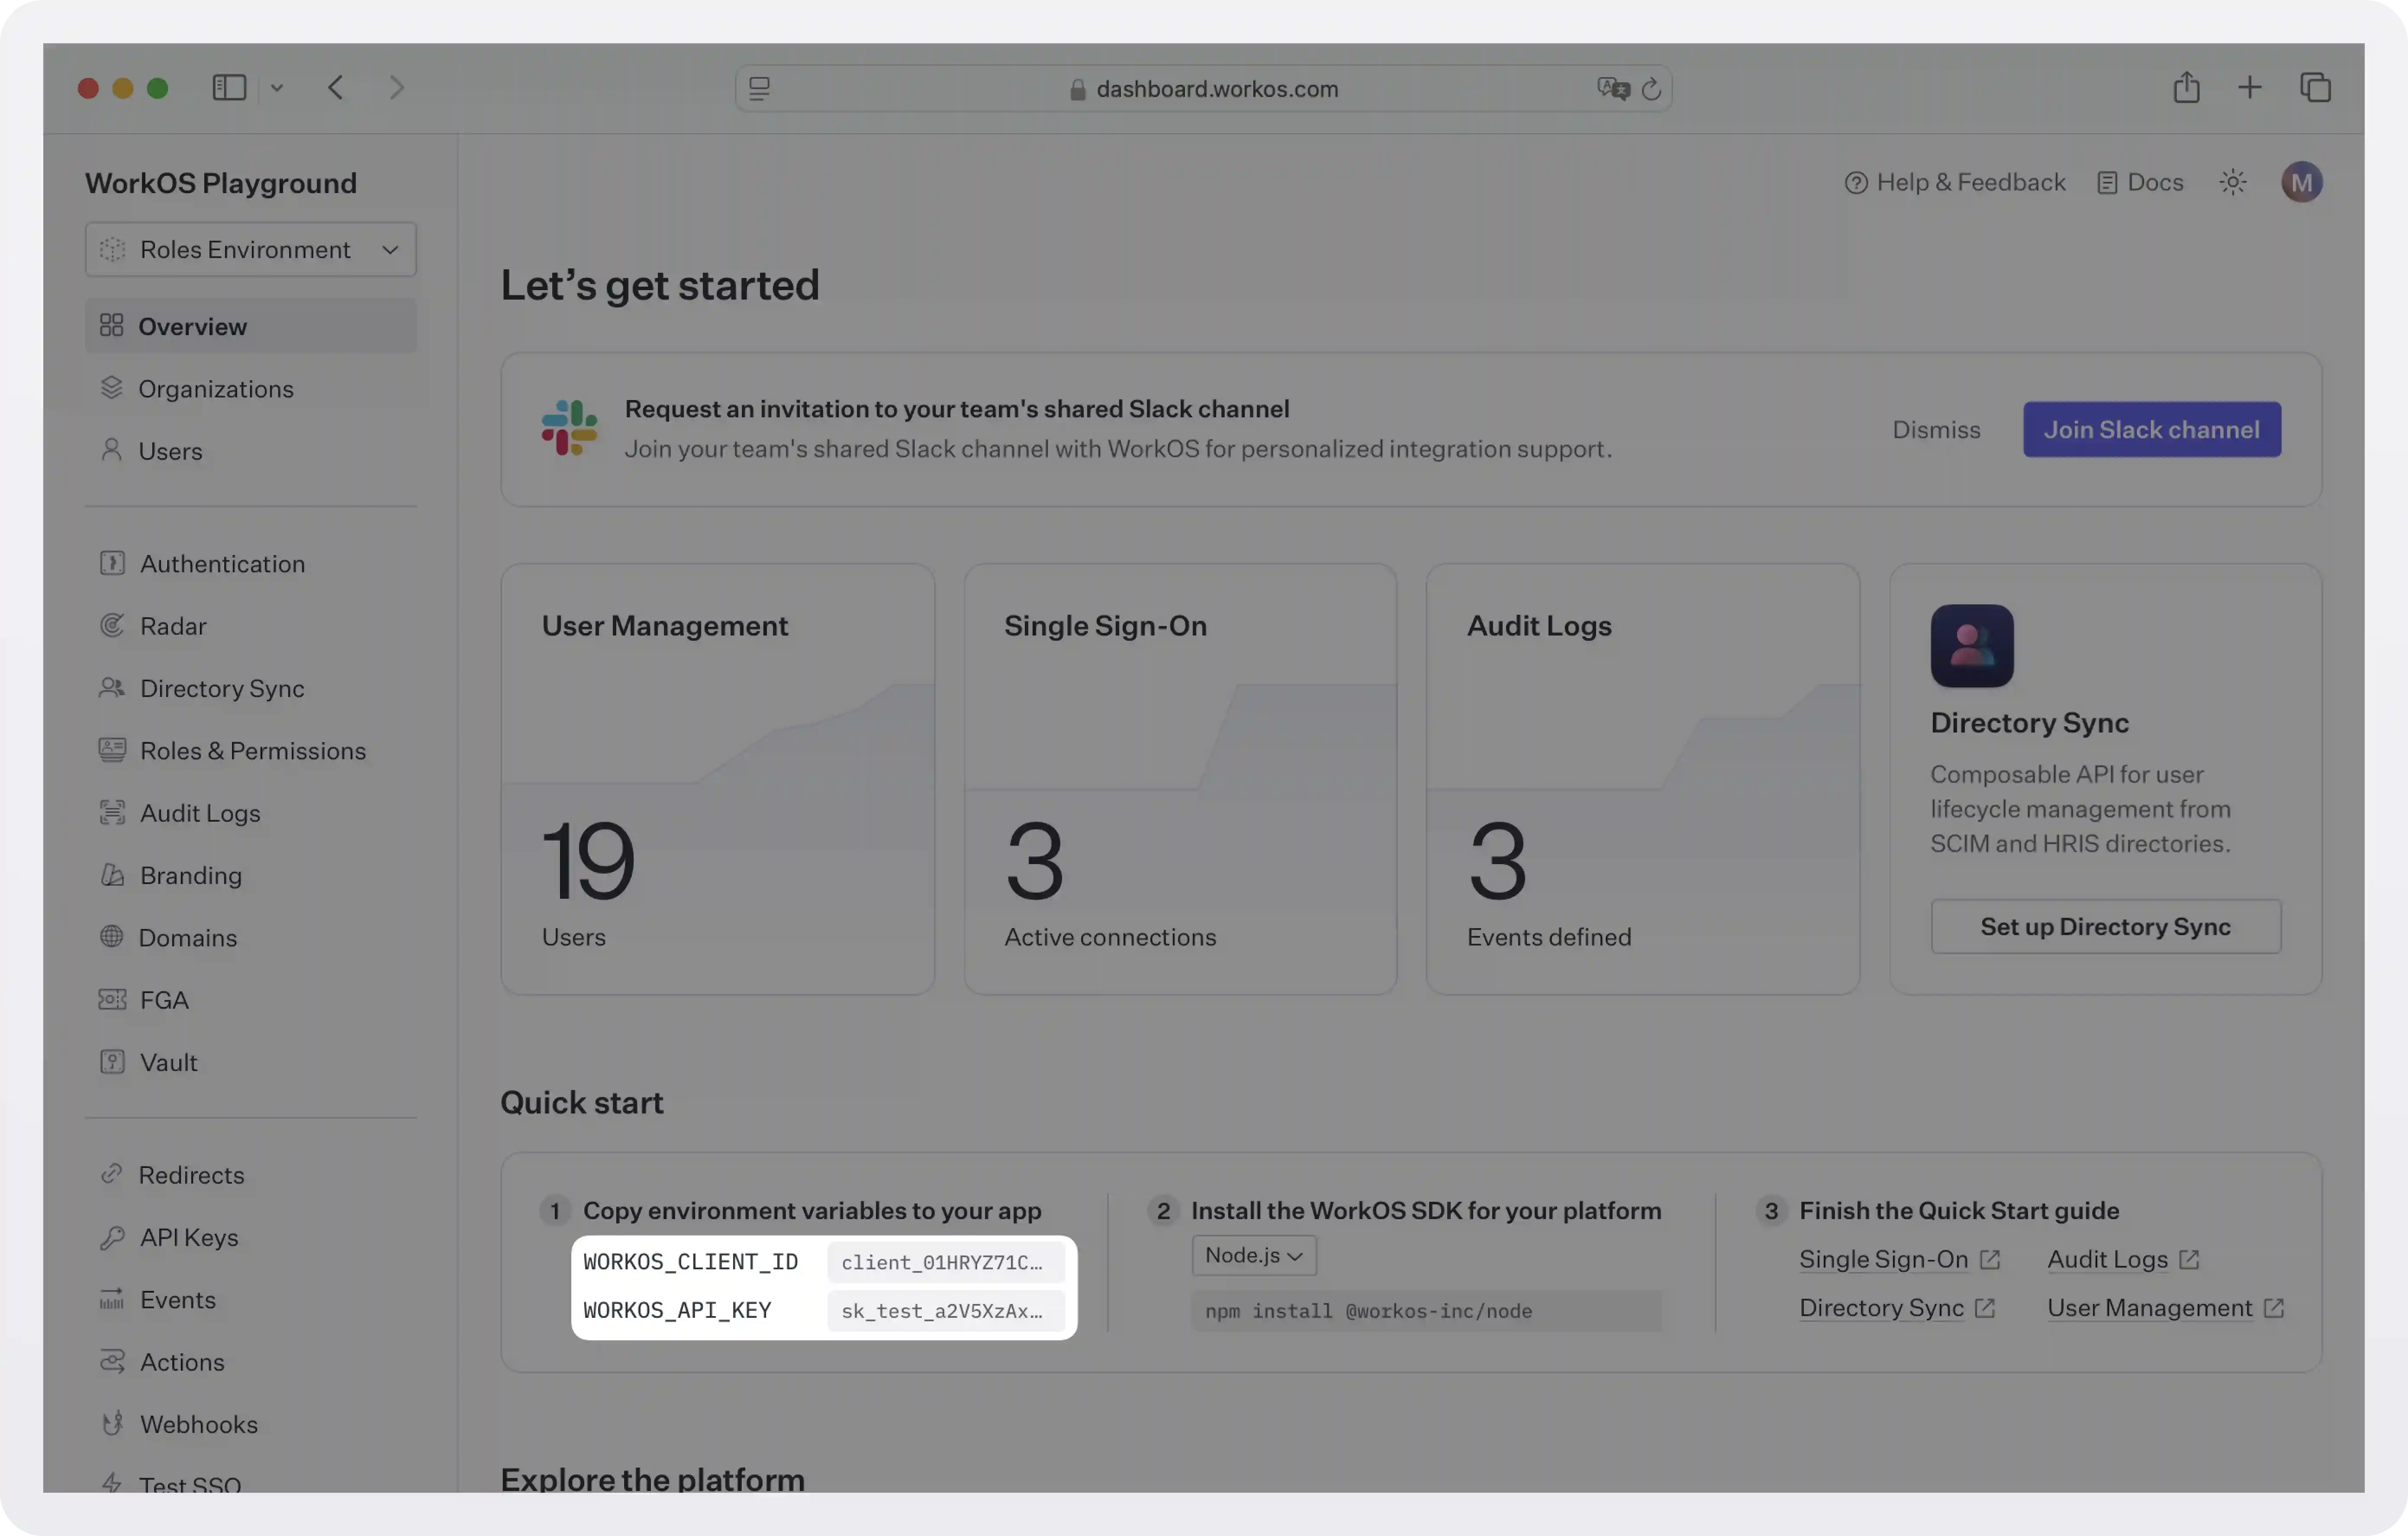
Store the values as managed secrets and pass them to the SDK as environment variables:
Environment variables example:
!!For more information on safely handling secrets, see Best practices for secrets management.!!
2c. Get authorization token
The Pipes Widget makes a call to the WorkOS API to retrieve information about all the 3rd party services the user has the option to enable and their corresponding status, so it needs an authorization token. There are two ways you can get one:
- If you are using the authkit-js or authkit-react libraries, you can use the provided access token.
- If you use one of our backend SDKs, use the
getTokenmethod in the SDK to request a token with the appropriate scope for the widget you want to use. Widget tokens expire after one hour. Node example:
!!To customize the look and feel of the widget see Styling.!!
Step 3: Get an access token and call GitLab
Once a user has connected their GitLab account through the widget, your backend can request a fresh access token from WorkOS at any time. Pipes takes care of refreshing the token, so you can treat whatever you receive as ready to use.
Create pages/api/projects.js:
Here is what is happening:
- The handler calls
workos.pipes.getAccessTokenwithprovider: 'gitlab'along with the user and organization identifiers. - If the user has not connected GitLab yet (or their authorization has expired), the response includes an error you can use to redirect them back to the widget.
- If the call succeeds, you receive
accessToken.token, which is a valid GitLab OAuth token. This is where Pipes removes the complexity: your app never implements the OAuth redirect flow, never stores refresh tokens, and never worries about expiry. It just asks for a token and calls GitLab.
A sample response from workos.pipes.getAccessToken looks like this:
Note that the GitLab REST API uses query parameters like membership=true to filter results to projects the user belongs to, and order_by=updated_at to sort by recent activity. You can adjust these parameters or call entirely different GitLab endpoints depending on your needs. The GitLab Projects API documentation has the full reference.
Next steps
You now have a working pattern for pulling external data into your application through Pipes. GitLab is just one example. The same flow applies to every supported provider with minimal changes.
From here, you could:
- Connect additional providers. Pipes supports GitHub, Slack, Google, Salesforce, HubSpot, and more. Each one follows the same widget-plus-token pattern.
- Let users manage all their integrations in one place. The same Pipes widget handles multiple providers, so users can connect or disconnect services without extra UI work on your end.
- Expand what your backend fetches. Swap the projects endpoint for merge requests, issues, pipelines, or any other GitLab resource. The access token works across the full scope you configured.
If you need a provider that is not yet listed, reach out to the WorkOS team. Pipes is built to grow alongside your product, and new providers are added based on what customers need most.
As your integration surface grows, Pipes stays as the connection layer so you can spend your time building features rather than maintaining OAuth infrastructure.