From RBAC to Fine-Grained Authorization part II: integrate with your app
A technical guide on how you can migrate your RBAC implementation to Fine-Grained Authorization (FGA) using WorkOS. Learn how to check a user’s access to resources, manage your FGA implementation, and favor performance vs consistency on a per request basis.
The first installment of this guide was all about designing, creating, and testing an authorization model. We talked about what Fine-Grained Authorization (FGA) is, how to map an RBAC model to FGA resource types, how to define relationships between these resources, and how to test the model before deploying to production.
In this second part, we will see how to use the authorization model once it’s in place. We will talk about how you can check a user’s access to resources using Query Language and the WorkOS Check API, and how to manage your FGA implementation using the Query API, SDKs, the dashboard, or the WorkOS CLI.
We will also talk about warrant tokens and how you can use them to favor performance or consistency on a per-request basis depending on your application's requirements. Finally, we will see how you can use the dashboard for event logs.
Query which resources users have access to
Once we have our access model defined and tested, it’s time to start using it.
We will use the Query Language, a declarative SQL-like language, and the Query API to:
- List the resources a subject has access to (e.g., list all resources
user:Xhas access to). - List the subjects who have access to a resource (e.g., list all users who are
editors ofapplicant:john-doe).
Use queries and Node to check access to resources
A query consists of a select clause and either a for clause (if querying for subjects) or a where clause (if querying for resources).
The select clause specifies whether a query should return resources a subject has access to or return subjects that have access to a resource.
- To return the list of resources a subject has access to, use
select <resource_types>, whereresource_typescan be a comma separated list of one or more resource types or a wildcard (*). - To return the list of subjects that have access to a resource, use
select <relations> of type <subject_types>. Again,<relations>and<subject_types>can be a comma-separated list of one or more relationships or resource types or a wildcard (*).
Let’s see some examples to clear things up:
Now let’s see how we can make these checks using the Node SDK.
Let’s select all the applicants that user:A can see.
If user:A could see two applicants at the moment (applicant:john-doe and applicant:jane-doe) the results would look like this.
Notice the is_implicit value? It shows how the relationship was granted to the subject, explicitly or implicitly:
- Explicit results have warrants that match one or more of the relations specified in the query.
- Implicit results may implicitly match the relations specified in the query through relation inheritance.
Keep reading to find out how you can differentiate between the two when you are writing your queries.
Implicit vs explicit results
A query can optionally include the explicit keyword immediately following the select keyword to indicate that the query should only return results that explicitly match the provided relations. Without the explicit keyword specified, a query will return both explicit and implicit results.
For example, in our sample implementation of an applicant are also. We granted this relationship using inheritance rules. But we might want to get a list of the of an applicant that were explicitly given this relationship, and not include in the results the who are automatically also. In cases like this, the explicit keyword can come in handy.
Make fast access checks for a specific user
To make fast access checks for a specific subject we will use the Check API. We will see how you can use the API to make single checks, multiple checks, or batch checks using the Node SDK.
First, let’s check if user:A has the right to view the applicant:john-doe .
What if we want to check if user:A has the right to view both the applicant:john-doe and the applicant:jane-doe ? In this case we add the op: CheckOp.AllOf to our request.
The operator op is used when warrants contain a list of more than one warrant. The available options for op are:
all_of: The result isAuthorizedif all of the specified warrants are matched. Otherwise, the result isnot_authorized.any_of- The result isAuthorizedif any of the specified warrants are matched. Otherwise, the result isnot_authorized.
Finally, we have the option to execute a batch of checks and get a list of results in a single operation using the batch endpoint.
Let’s say that we want to do the previous check (if user:A has the right to view both the applicant:john-doe and the applicant:jane-doe) but we want to get a list of results, instead of a single check result.
The response will contain the list of results:
Check API vs. Query API
As we saw, WorkOS FGA offers two APIs that you can use to check for permissions: the Check API and the Query API.
These two have different use cases and it's important to know which one to use each time.
The Check API is the way to go if you want to check if a specific user has specific permissions:
- Does
user:5djfs6have the right to viewreport:avk2837? - Is
user:5djfs6the owner ofreport:pkd9743? - Is
user:5djfs6a member ofteam:HR?
The Query API is for when you want the list of all permissions for a subject or resource.
- Get the list of all reports that
user:5djfs6can edit. - Get the list of all users who are viewers of
document:doc1. - Get the list of all subjects of any type who have any relation on
document:doc1
Manage your FGA implementation
Once your access model is in place, the next, and final step, is to figure out how to manage it.
Access models are meant to be evolving and your apps will be adding new resources and relationships all the time. In this section, we will see the options that WorkOS offers so you can manage your FGA implementation as effortlessly as possible.
Manage resource types
Modifying resource types for an application already using FGA in production can be a potentially dangerous operation. It’s like modifying a DB schema, i.e., not something to be taken lightly. We recommend that you do that using the dashboard, or using the CLI.
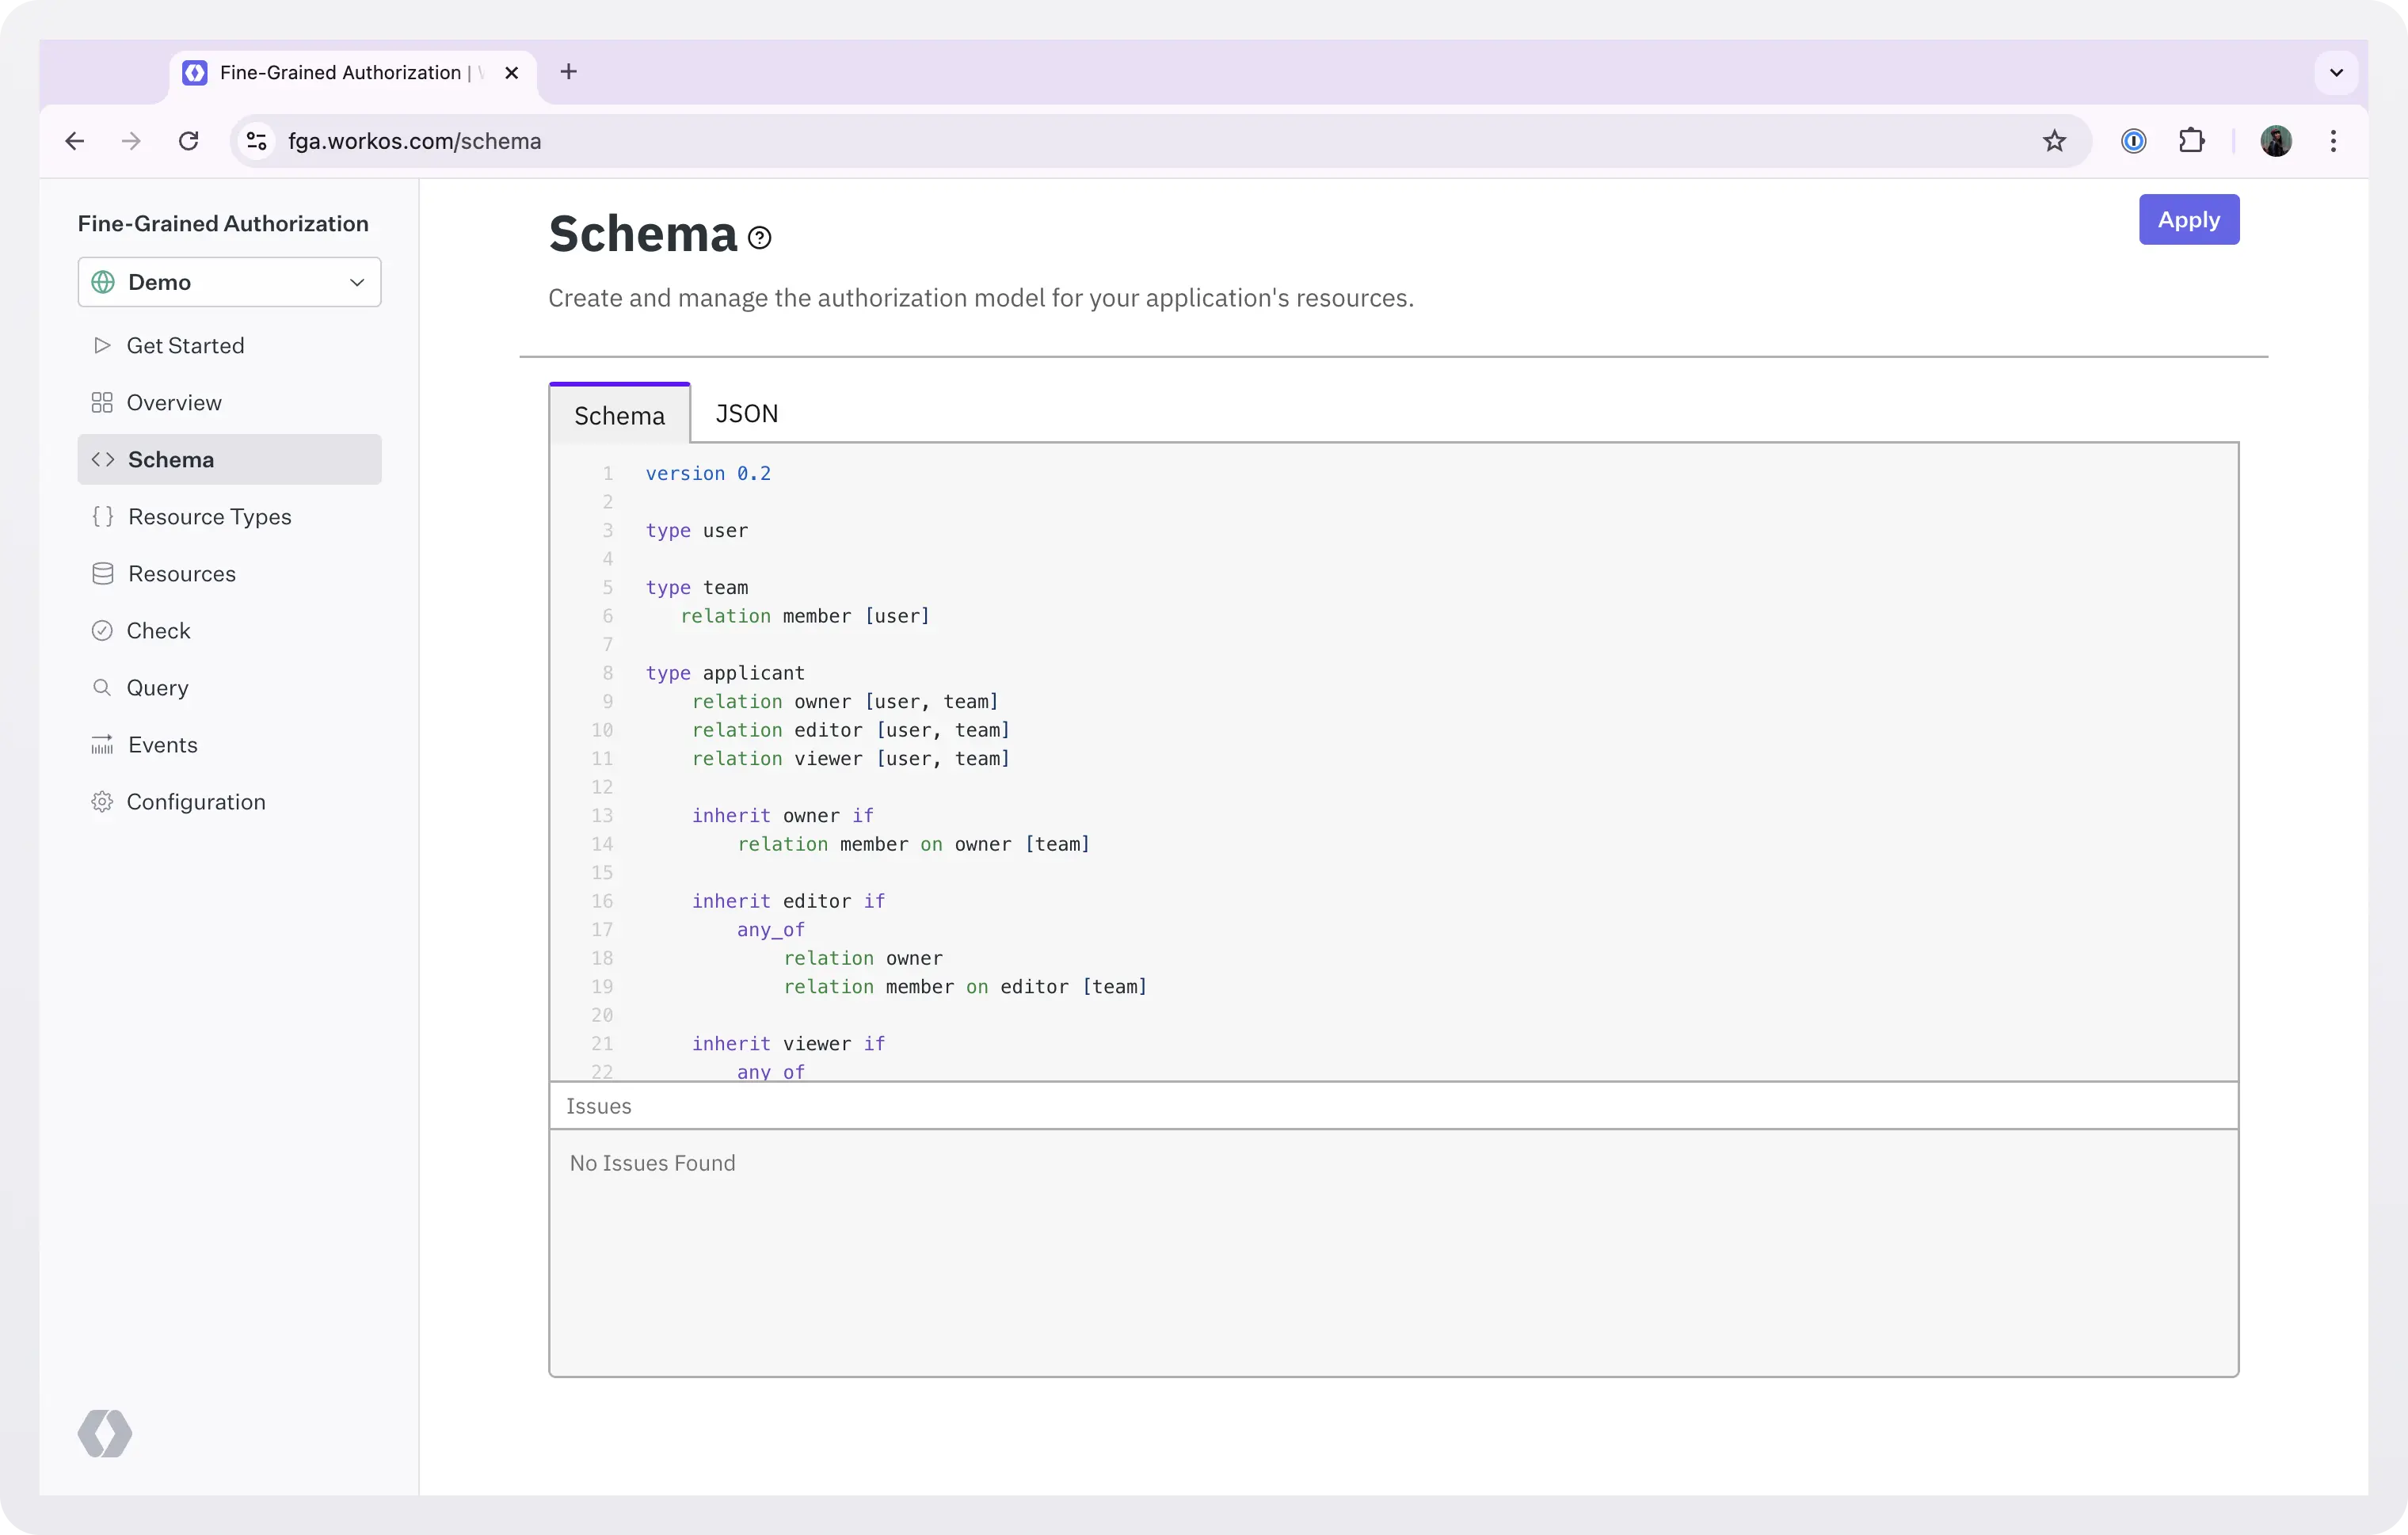
To make changes using the dashboard, go to the schema tab, make your changes, and click Apply.

To make changes using the CLI, you need to:
- store your resource types in your repository as json, and
- set up a test script and a CI job that tests and safely applies resource types changes in production.
To do this:
- Choose your desired repository and create a new directory where you’ll store your resource types (e.g.,
access-model). - Using the dashboard, copy your resource types JSON schema and save it in a file.
- Commit and push the JSON file to
main.
Now that your object types are committed to your Git repository, developers can submit pull requests to change them.
The only step missing is to set up an automated CI workflow to run tests on these pull requests (to validate the changes) and automatically apply them to production on successful merges. To do this:
- Create a test script (the process we saw in the Test and validate the access model section).
- Create a CI workflow that will run the tests in the staging environment on each pull request and apply the changes to production on successful merges.
When you do all of these, the development workflow for modifying resource types will look like this:
- The developer creates a new pull request with resource types schema changes (JSON and/or tests).
- CI workflow applies the changes to the test environment and runs tests against it.
- Once tests pass and the change is code reviewed, it can be merged into main.
- Upon merging into main, CI workflow applies the changes in the production environment.
Manage resources and warrants
You can also manage resources and their relationships using the dashboard or the CLI.
However, since these data change all the time, it’s more common for apps to make the changes themselves using an SDK. You don’t want to push a PR every time you add a new user or you give them permission to edit a document.
What you want to do instead is to call the WorkOS API and have the changes applied immediately. In this section, we will see how you can use the Node SDK to read, create, update, and delete resources and their relationships.
Let’s see some examples.
- List all the resources of type
applicant:
- Create a new user (i.e. a new resource of type
user):
For more details, sample responses, and a complete list of the endpoints you can call, refer to the WorkOS Resource API.
Now let’s see some examples about warrants.
- Make user
15ads7823a9df7as433gk23ddthe editor of the applicant23ft346:
- Now remove this permission from the user:
You can also make batch changes. For more details, see the WorkOS Warrant API.
Performance vs consistency
All traffic to the FGA API flows through a single endpoint (api.workos.com/fga). To ensure reliability, data is replicated to multiple cloud regions behind the scenes. To maximize performance, FGA is an eventually consistent service by default.
In order to balance performance and consistency, FGA supports a bounded staleness protocol similar to Google Zanzibar’s Zookie protocol. This allows applications to specify what they prefer for each request: fastest results or immediately consistent results.
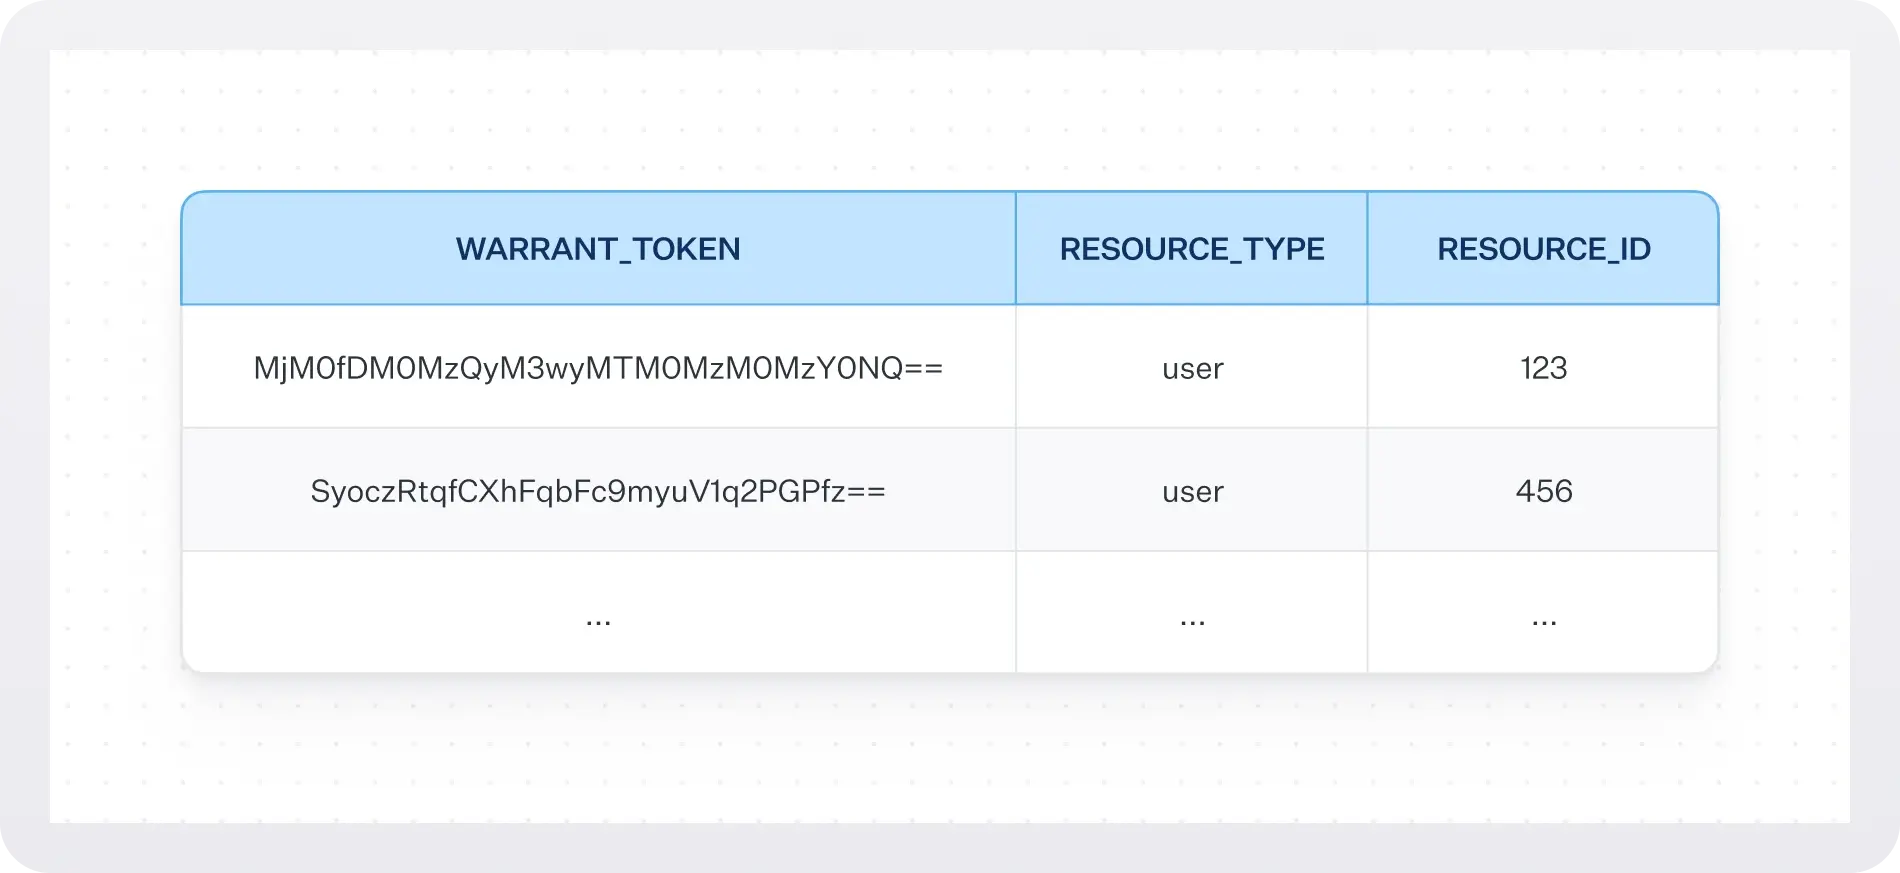
To support immediately consistent results WorkOS generates an opaque token, known as a warrant token, every time a warrant is created or deleted. Each warrant token uniquely identifies a warrant write operation and is included in the response body.
Applications can pass a previously generated token via the Warrant-Token header on check, query, and list requests to instruct the server to process the request using data no older than the write operation identified by the specified token. This allows applications to ensure that a particular check has the data necessary to give the most up-to-date result.
In this example, we want to check if user:A has the right to view the applicant:john-doe , and we need the result to be up-to-date.
If the application needs an up-to-date result but does not have a token to use, it can pass the special value latest in the Warrant-Token header to instruct FGA to use the most up-to-date data.
Note that using the latest token effectively instructs FGA to bypass all caches in favor of hitting the database for the most up-to-date result. Therefore, it can incur additional performance overhead, so it’s recommended to only use this option only when absolutely necessary.
If a token is not provided, FGA uses a default staleness window to fulfill check and query requests. This window is cache-optimized and is the recommended approach for the 90-95% of read requests that can tolerate short periods (on the order of seconds) of inconsistent results.
How to store warrant tokens
Applications can store warrant tokens in their system per subject. For example, if creating a new warrant (e.g., user:123 is an editor of applicant:y) generates a token with value 45f87sdf=, the application can store that token in their DB along with subject user:123. Any checks for user:123 should include that stored token for optimal balance of performance and consistency.

View event logs
Once you have everything up and running, you will need access to an event log: a list of all the events that show how your model is being used.
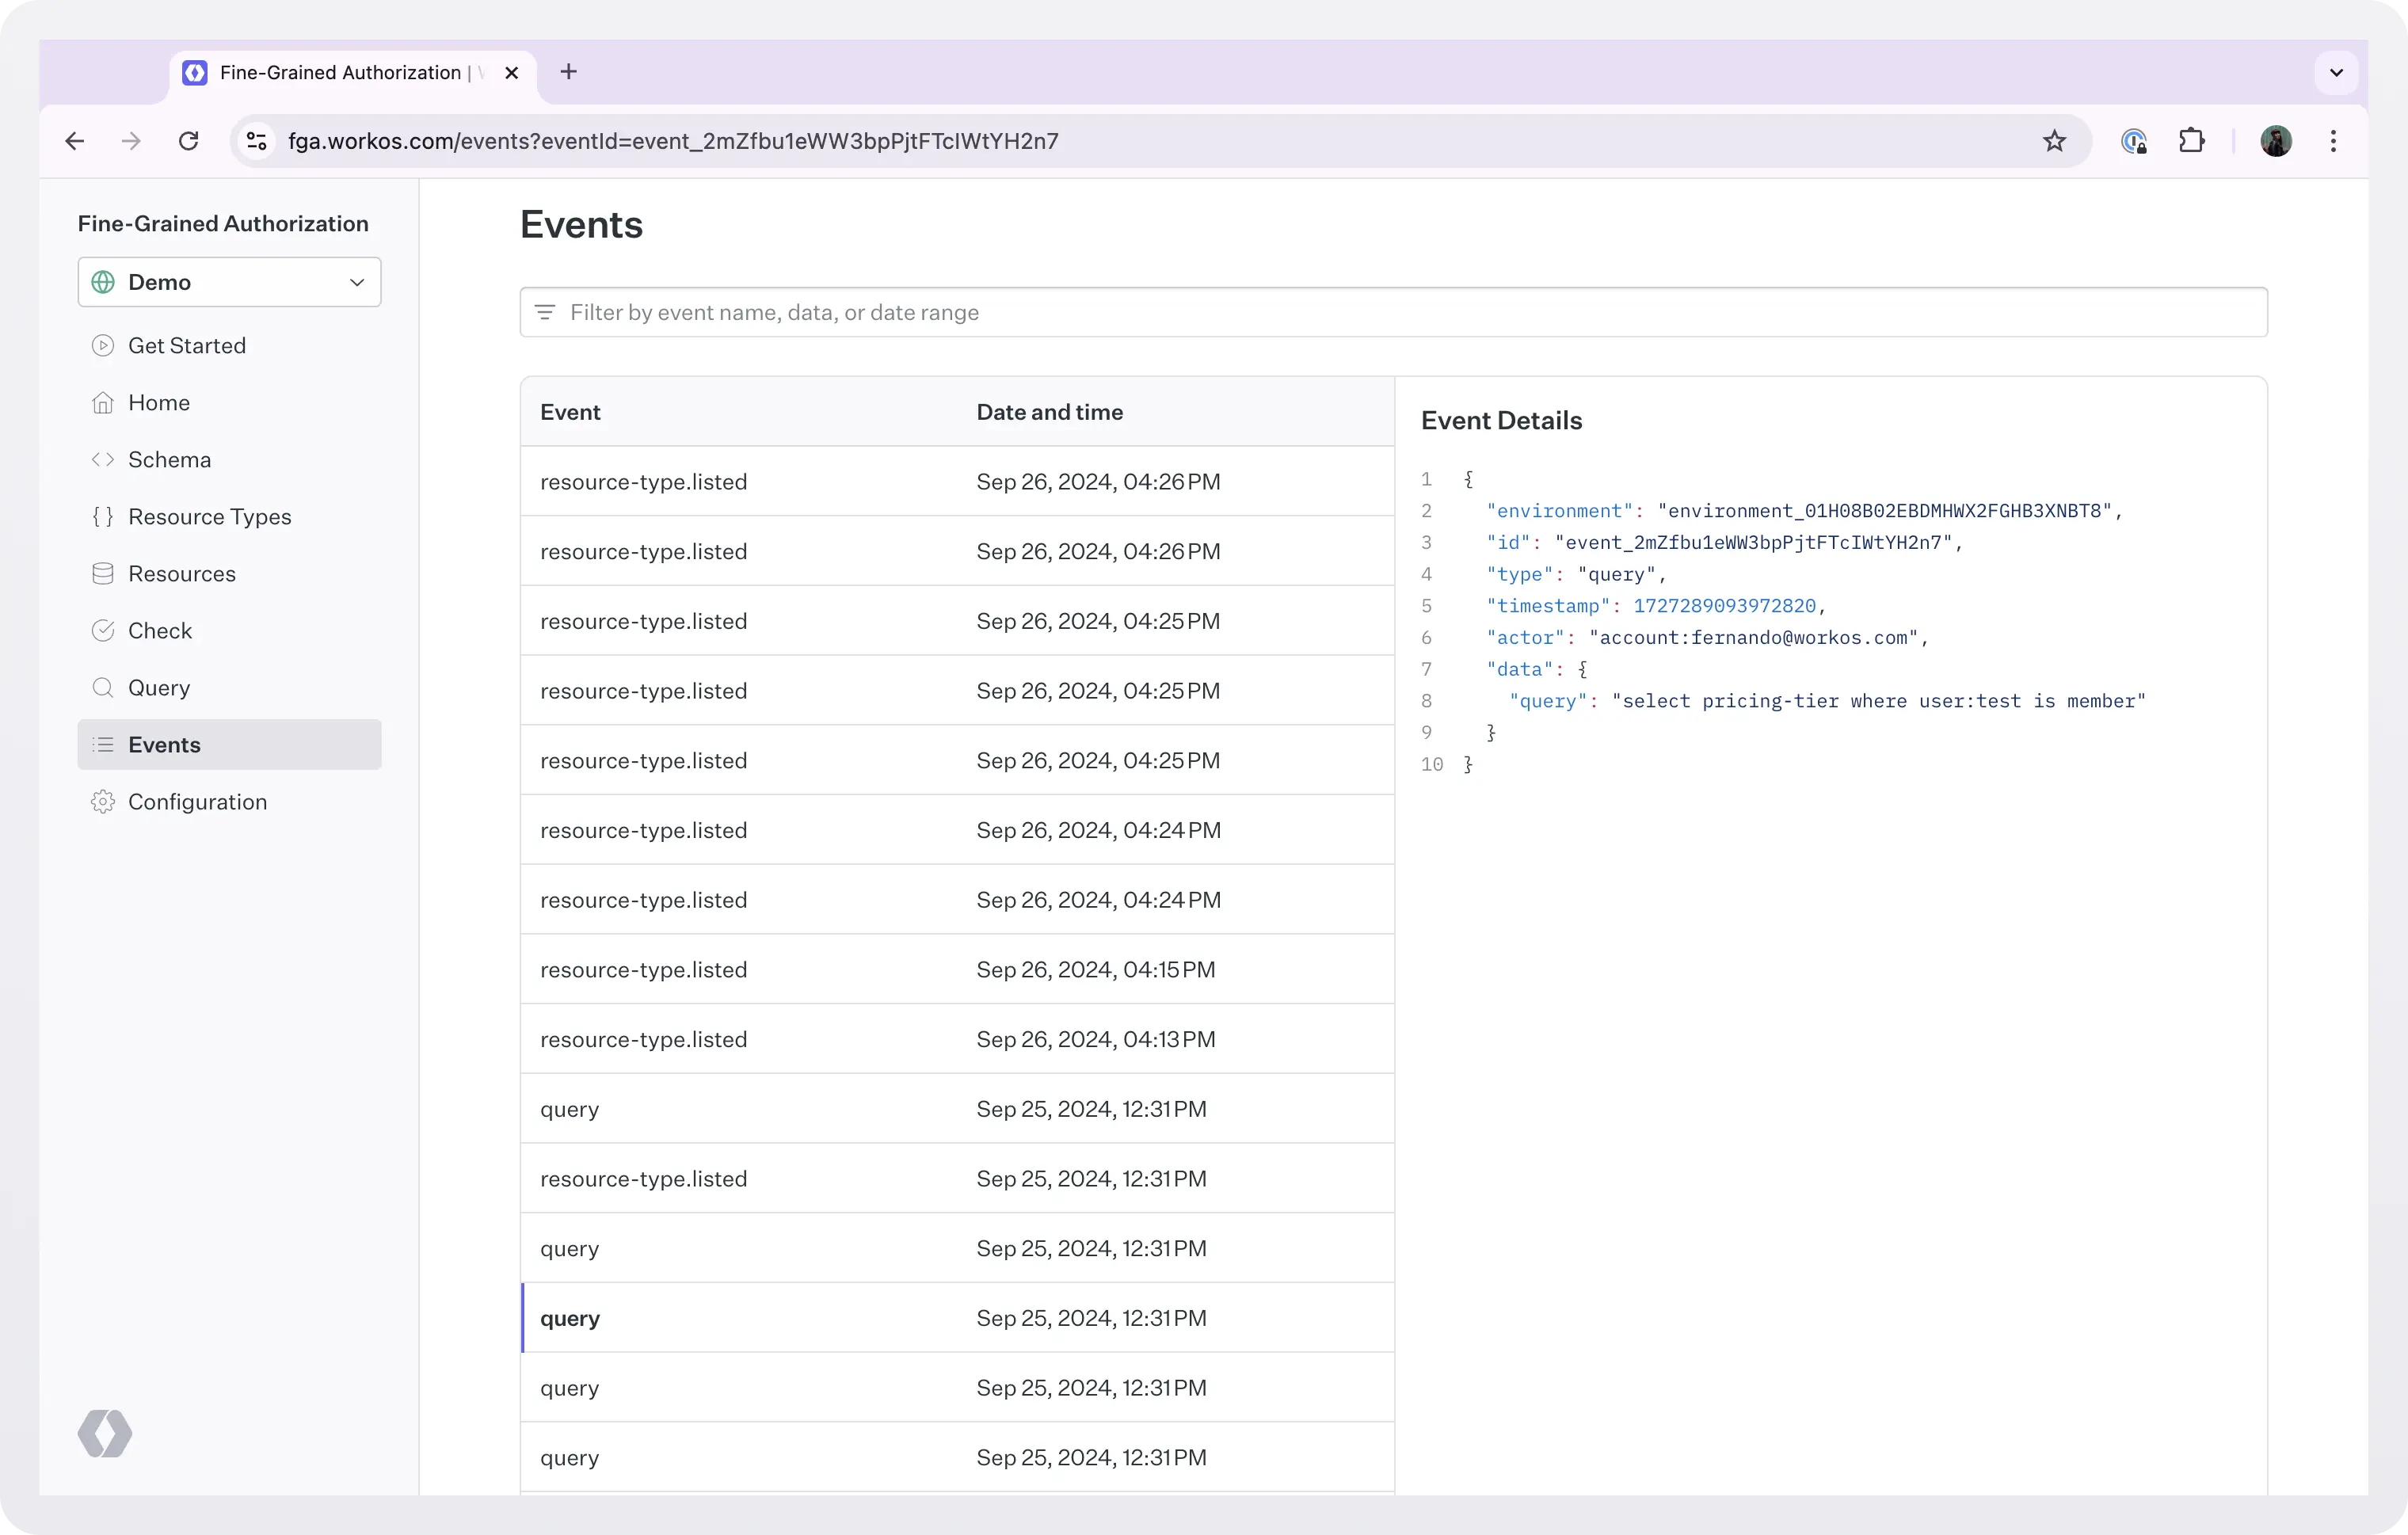
At dashboard > Events you can see a chronologically ordered list of the events that took place.
In this screenshot’s example we can see when and who executed the query select pricing-tier where user:test is member.

This can be essential for root cause analysis of problems and incidents, and can also help detect security breaches. It can also be a must-have for regulatory compliance. By monitoring event logs, you can ensure that you meet regulatory requirements and avoid potential issues.
Wrapping things up
Congratulations, you now know more things about FGA than most people! In this two-part series we saw what FGA is, and how to define, test, use, and manage an access model with WorkOS FGA.
If you are ready for a highly scalable, centralized fine-grained authorization service built for enterprise applications, sign up today and start making authorization checks with WorkOS.