How to implement row-level security with WorkOS FGA and Postgres: tutorial and code
Your support ticketing system contains sensitive data from multiple organizations and customers. How do you ensure users only see tickets they're authorized to view?
This tutorial demonstrates how to implement row-level security in a Next.js application using WorkOS FGA (Fine-Grained Authorization) integrated with Postgres.
We'll build a complete ticketing system where:
- Admins can view all tickets
- Support agents see only tickets they're assigned to or within their organization
- Customers see only tickets they created
The companion repository is available here if you'd like to skip ahead and run the demo yourself.
There’s also a live demo instance of the companion application that you can play with.
App at a glance
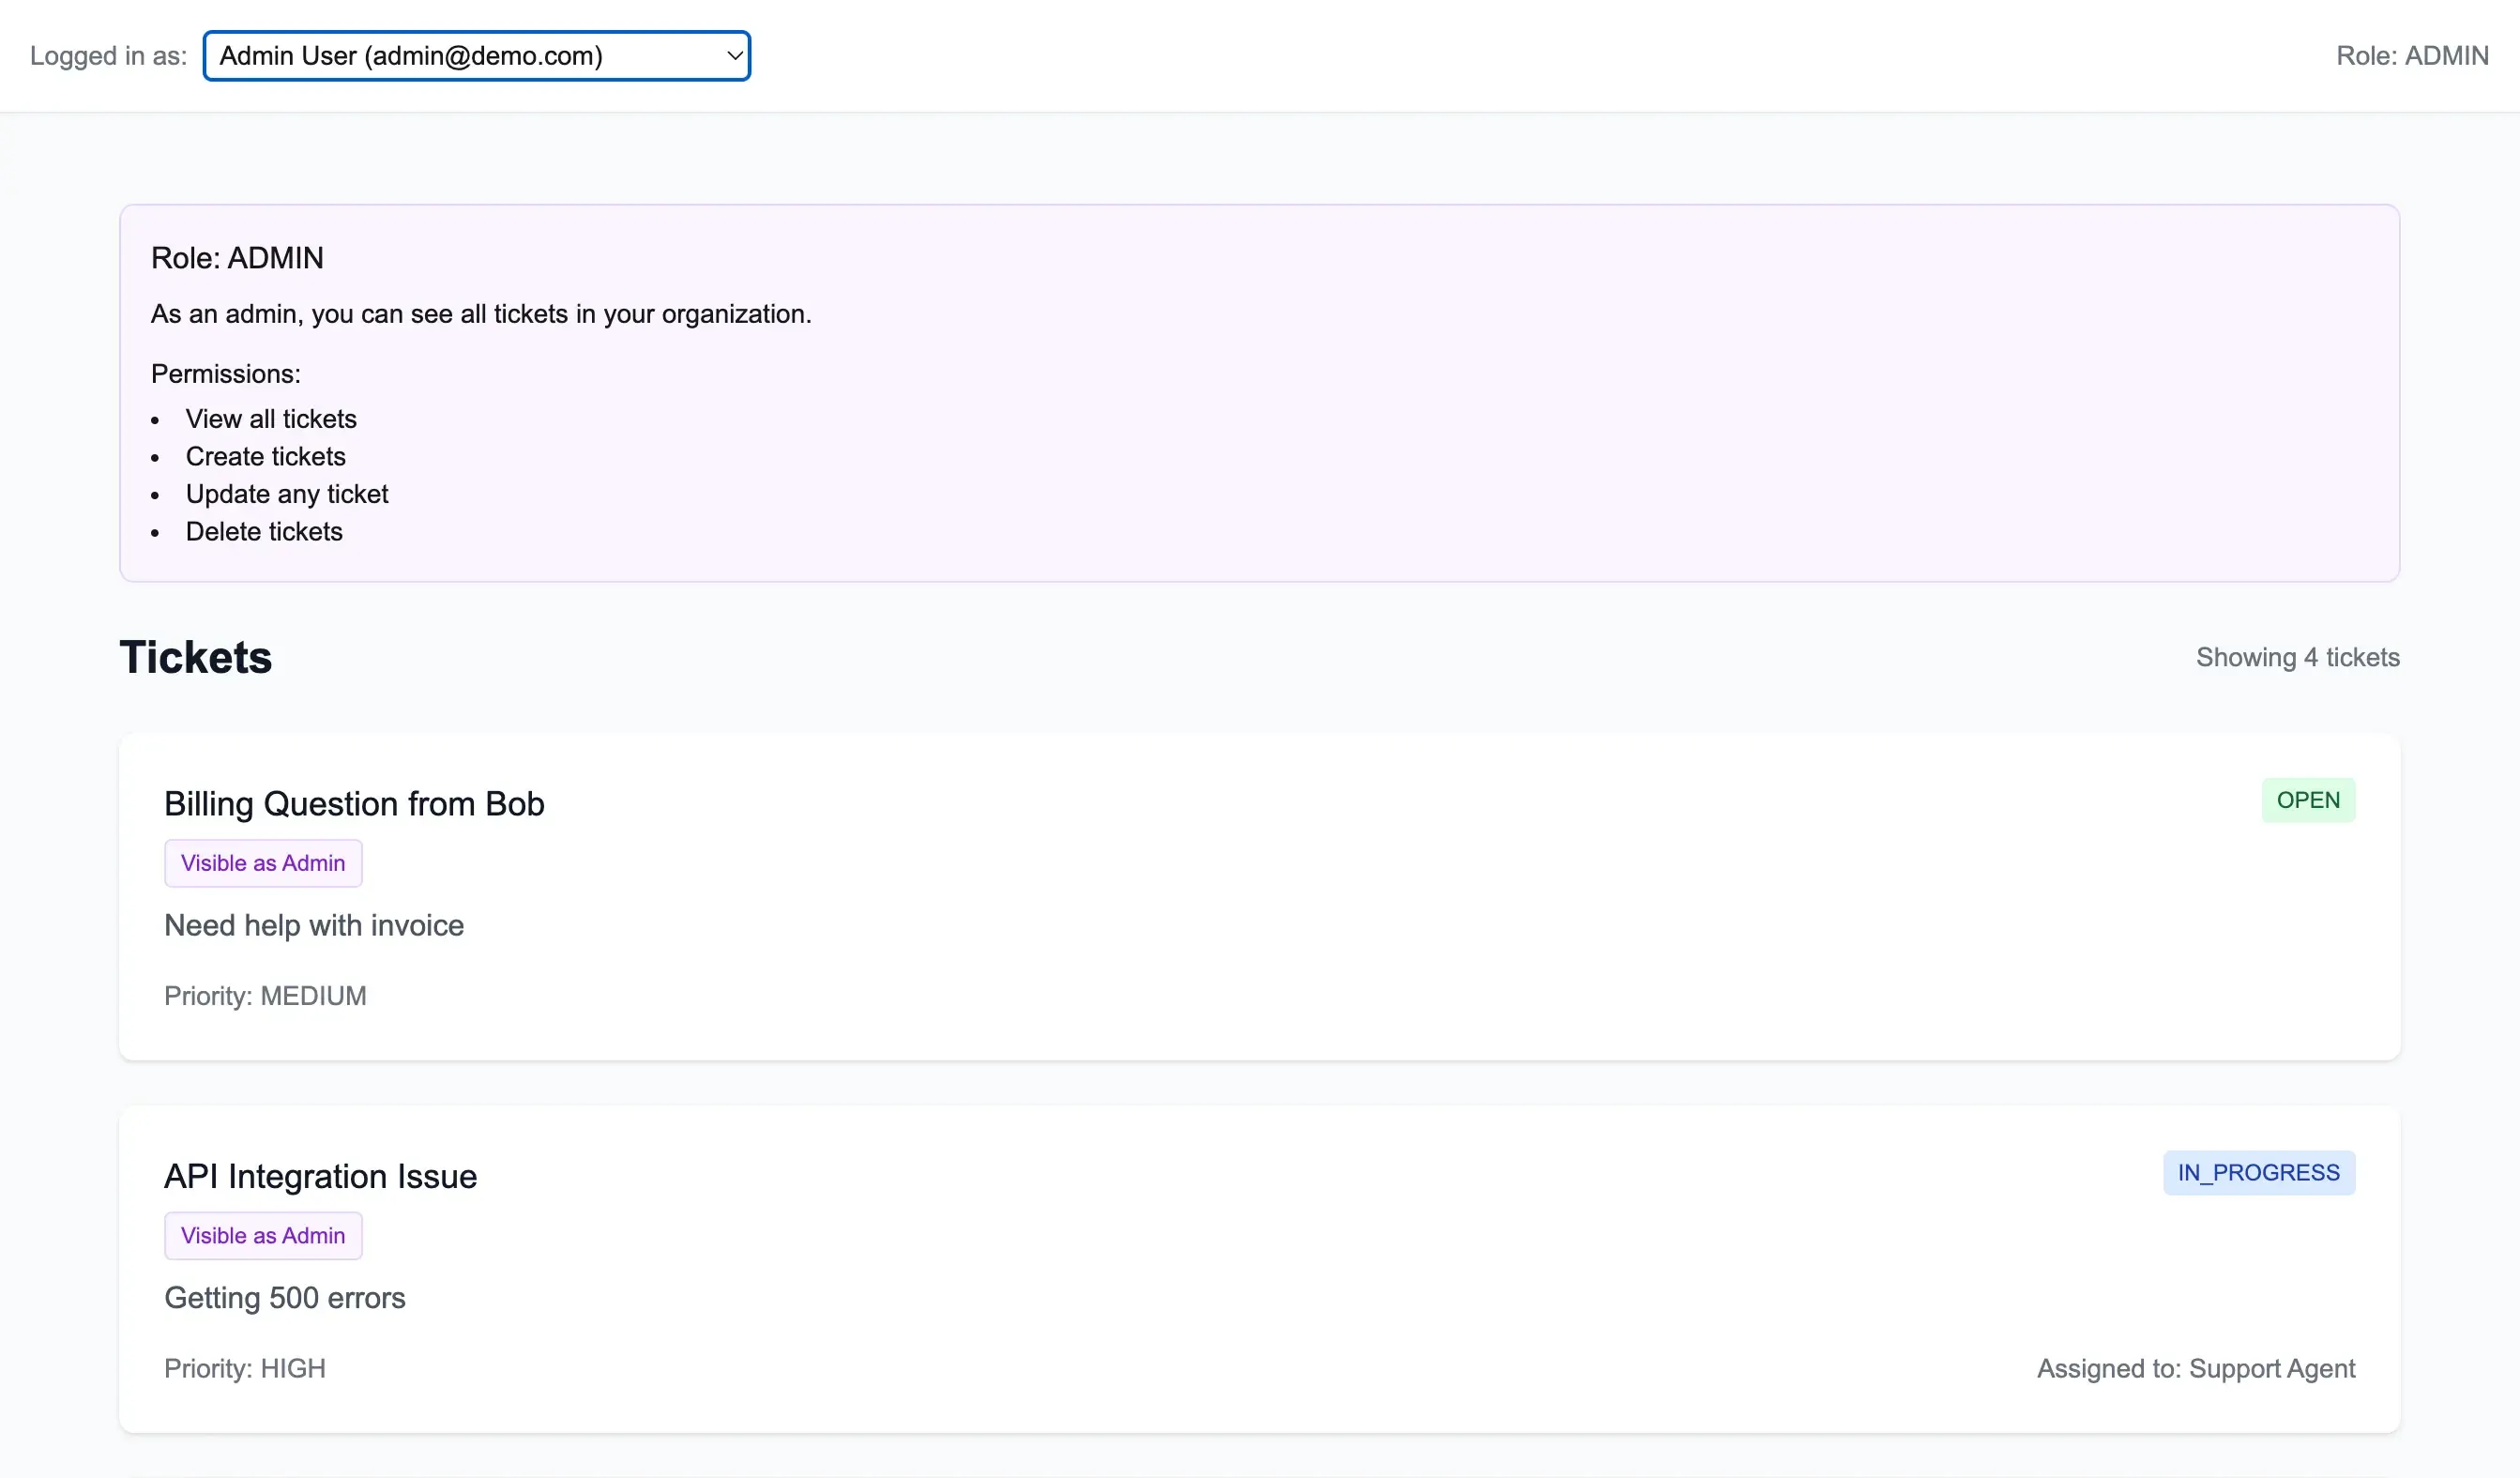
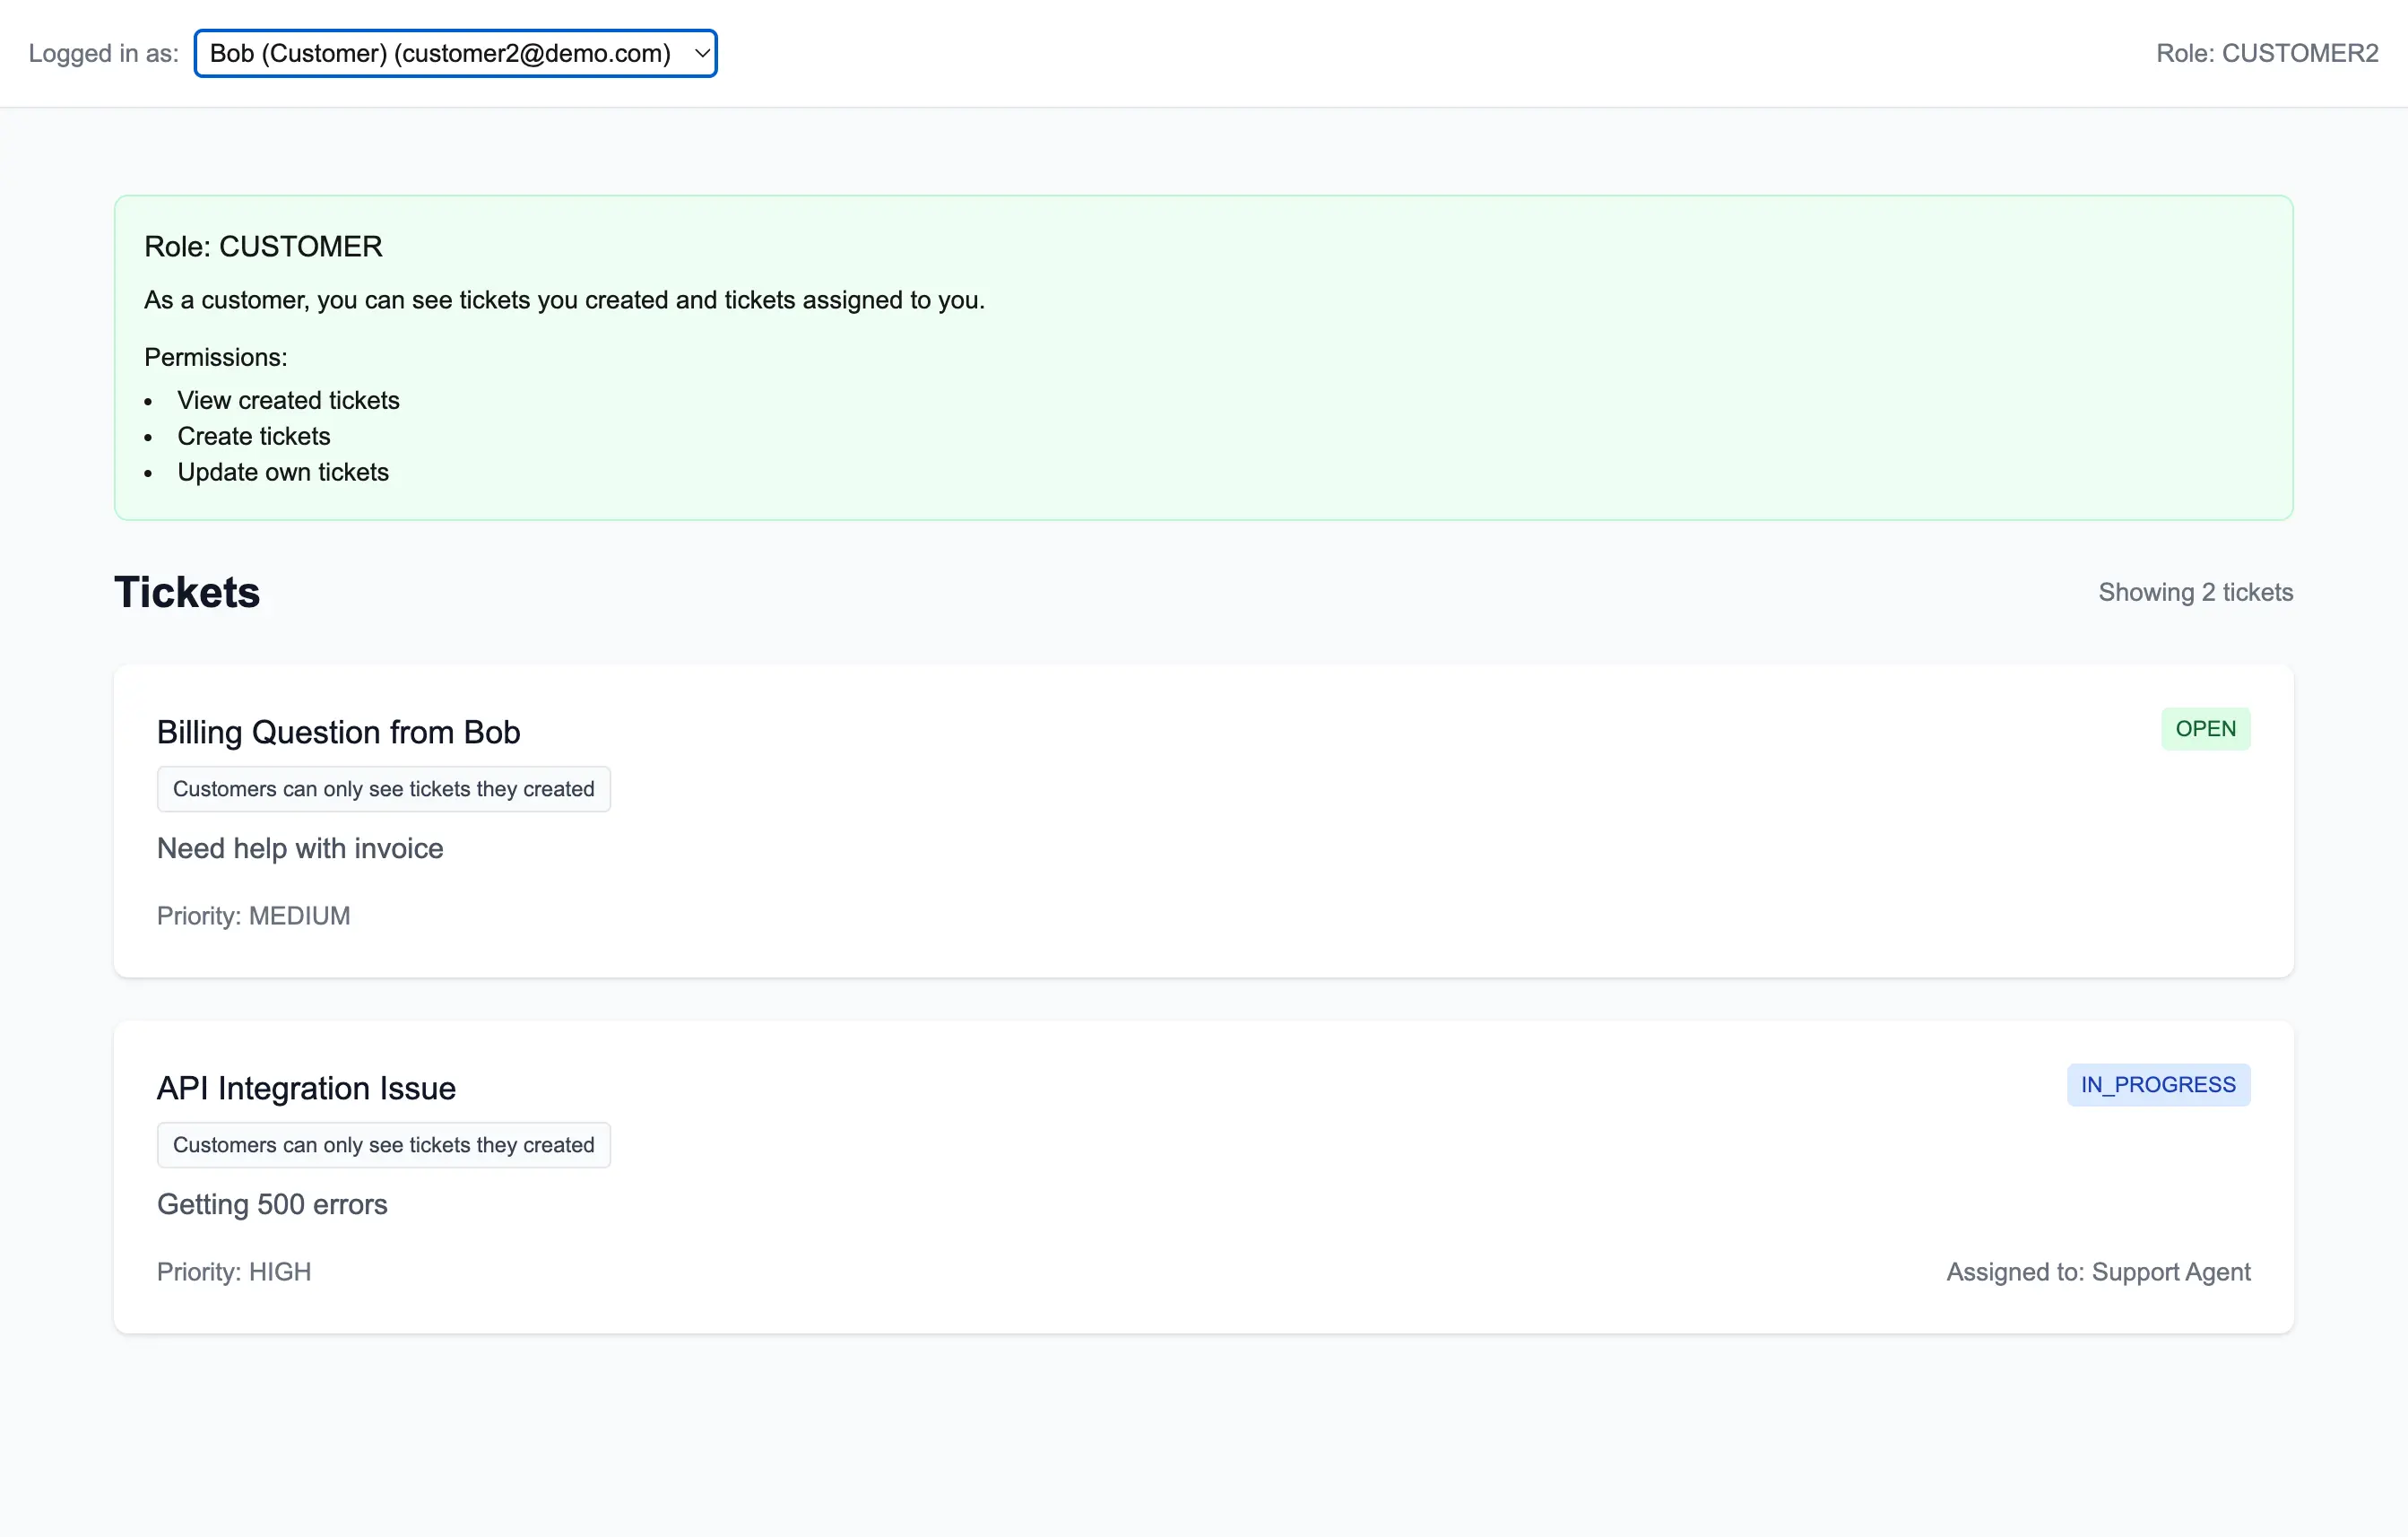
When different users log into the system, they see different views based on their permissions:

Admins have full visibility across all tickets in the system. They can see and manage tickets from any organization.

Customers, on the other hand, only see tickets they've created. This ensures data privacy and prevents customers from seeing other organizations' support requests.
Support agents fall somewhere in between—they can view and manage tickets assigned to them and any tickets within their organization.
Database schema and FGA integration
This system's power comes from integrating traditional database relationships with FGA's permission model.
We're using the Prisma ORM to interact with our Postgres database for this project.
Let's look at our Prisma schema:
model Organization {
  id        String   @id @default(cuid())
  name      String
  createdAt DateTime @default(now())
  updatedAt DateTime @updatedAt

  tickets   Ticket[]
  users     User[]
}

model User {
  id            String   @id @default(cuid())
  email         String   @unique
  name          String?
  orgId         String
  organization  Organization @relation(fields: [orgId], references: [id])
  assignedTickets Ticket[] @relation("AssignedTickets")
  createdAt     DateTime @default(now())
  updatedAt     DateTime @updatedAt

  createdTickets  Ticket[] @relation("CreatedTickets")
}

model Ticket {
  id          String      @id @default(cuid())
  title       String
  description String
  status      TicketStatus @default(OPEN)
  priority    TicketPriority @default(MEDIUM)
  createdAt   DateTime    @default(now())
  updatedAt   DateTime    @updatedAt

  // Relations
  orgId       String
  organization Organization @relation(fields: [orgId], references: [id])
  assigneeId  String?
  assignee    User?       @relation("AssignedTickets", fields: [assigneeId], references: [id])
  creatorId   String
  creator     User        @relation("CreatedTickets", fields: [creatorId], references: [id])

  @@index([orgId])
  @@index([assigneeId])
  @@index([creatorId])
}
This schema establishes the basic relationships:
- Organizations have many users and tickets
- Users belong to organizations and can create or be assigned tickets
- Tickets belong to organizations and have creators and optional assignees
Here's how we map these database relationships to FGA permissions:
Organization membership: When a user is created in the database with an orgId, we create corresponding FGA warrants, which define the relationships between entities.
The following warrant says the current user is a member of organization 1:
await workos.fga.writeWarrant({
     op: WarrantOp.Create,
     resource: {
       resourceType: 'organization',
       resourceId: org1.id,
     },
     relation: 'member', // or 'admin' or 'agent'
     subject: {
       resourceType: 'user',
       resourceId: userId,
     },
 });
Ticket creation: When a ticket is created, we establish both database relationships and FGA permissions:
// First create in database - this is correlative to an INSERT statement
const ticket = await prisma.ticket.create({
  data: {
    title,
    description,
    organization: { connect: { id: orgId } },
    creator: { connect: { id: userId } },
    assignee: assigneeId ? { connect: { id: assigneeId } } : undefined,
  },
});

// Then set up FGA permissions for the ticket we just created
await workos.fga.writeWarrant({
  op: WarrantOp.Create,
  resource: {
    resourceType: "ticket",
    resourceId: ticket.id,
  },
  relation: "creator",
  subject: {
    resourceType: "user",
    resourceId: userId,
  },
});
This dual approach ensures that:
- Database integrity is maintained through foreign keys and indices
- Access control is managed through FGA's flexible permission system
- Performance is optimized by using database relationships for data fetching and FGA for permission checking.
Stated another way: each piece of technology is doing what it's good at, and you don't need to make any changes to your database to implement WorkOS Fine-Grained Authorization (FGA).
Building the app: step by step
Step 1. Define the WorkOS FGA authorization model
First, we define our authorization model using WorkOS FGA.
The model consists of three resource types: user, ticket, and organization.
FGA's schema syntax makes it easy to define complex permission models quickly and with minimal boilerplate.
Visit the FGA WorkOS dashboard and enter the following schema:
type user

type ticket
    relation assignee [user]
    relation creator [user]
    relation parent [organization]
    relation viewer [user]

    inherit viewer if
        any_of
            relation creator
            relation assignee
            relation admin on parent [organization]
            relation agent on parent [organization]
            relation member on parent [organization]

type organization
    relation admin [user]
    relation agent [user]
    relation member [user]
This creates:
- Resource types for users, tickets, and organizations
- Relations defining who can interact with tickets (creator, assignee)
- Organization roles (admin, agent, member)
- Permission inheritance: users get viewer access to tickets if they:
- Created the ticket
- Are assigned to the ticket
- Are an admin/agent/member of the ticket's organization
Step 2. Implement row-level security
There are two common patterns for implementing row-level security:
- Pre-filtering (Recommended): Query WorkOS FGA first to get authorized resource IDs, then use them in your SQL WHERE clause
- Post-filtering: Run your SQL query first, then filter results based on FGA permissions
Let's look at how we implement pre-filtering in our app/api/tickets/route.ts:
// Query WorkOS FGA to get tickets the user can view
const response = await workos.fga.query({
  q: `select ticket where user:${userId} is viewer`
});

// Map the response to an array of ticket IDs the user can view
const accessibleTicketIds = response.data.map(obj => obj.resourceId);

// Get tickets user can view
const tickets = await prisma.ticket.findMany({
  where: {
    id: { in: accessibleTicketIds }
  },
  include: {
    creator: true,
    assignee: true,
  }
});
Under the hood, this Prisma query translates to the following SQL:
SELECT
  t.*,
  creator.id as "creator_id",
  creator.name as "creator_name",
  creator.email as "creator_email",
  assignee.id as "assignee_id",
  assignee.name as "assignee_name",
  assignee.email as "assignee_email"
FROM "Ticket" t
LEFT JOIN "User" creator ON t.creator_id = creator.id
LEFT JOIN "User" assignee ON t.assignee_id = assignee.id
WHERE t.id IN ('ticket_id1', 'ticket_id2', /* ... allowed ids from FGA query */)
This demonstrates how FGA's authorization rules are enforced through a simple WHERE IN clause at the database level.
Step 3. Set up permissions via WorkOS warrants
When tickets are created, or users are added to organizations, we must establish appropriate relationships in FGA. Here's how we create warrants (access rules) for a new ticket:
// Grant creator access to the ticket
await workos.fga.writeWarrant({
  op: WarrantOp.Create,
  resource: {
    resourceType: 'ticket',
    resourceId: ticket.id,
  },
  relation: 'creator',
  subject: {
    resourceType: 'user',
    resourceId: userId,
  },
});

// Link ticket to organization
await workos.fga.writeWarrant({
  op: WarrantOp.Create,
  resource: {
    resourceType: 'ticket',
    resourceId: ticket.id,
  },
  relation: 'parent',
  subject: {
    resourceType: 'organization',
    resourceId: organizationId,
  },
});
Thanks to our inheritance rules, this automatically grants viewing permissions to:
- The ticket creator
- Organization admins
- Organization agents
- Organization members
Step 4. Test the system
The repository includes API tests that verify our permission system works correctly:
npm run test:api
The tests verify that:
- Admins can create, view, and delete tickets
- Agents can view and update tickets
- Customers can view tickets in their organization
- Permission checks are enforced correctly
For detailed debugging output that includes API call info and response bodies:
DEBUG=true npm run test:api
Get started with WorkOS Fine-Grained Authorization
With WorkOS FGA, you get:
- Fast, scalable authorization checks
- Flexible permission modeling
- Built-in inheritance and relationship rules
- Simple integration with any database or system
To start with WorkOS FGA:
- Sign up for a free WorkOS account
- Clone the example repository
- Follow the setup instructions in the README