Create Salesforce leads from your app without building OAuth
How to create Salesforce Lead records on behalf of your users in minutes, without writing a single line of OAuth plumbing, using WorkOS Pipes.
Many applications need to write data back to tools their users already use. Salesforce is at the top of that list. Whether a prospect fills out a form, completes a chat flow, or triggers any qualifying event in your app, your users want that person to appear as a Lead in their Salesforce org automatically.
The API call to create a Lead is straightforward. Getting a valid, per-user Salesforce access token to make that call is not.
To support multi-tenant Salesforce writes (where each of your users connects their own Salesforce org, not a shared integration), you normally have to:
- Register and configure a Salesforce Connected App.
- Implement the full OAuth 2.0 authorization code flow.
- Build a callback endpoint to exchange codes for tokens.
- Store and encrypt access tokens and refresh tokens in your database.
- Write token refresh logic and handle expiry.
- Handle errors when tokens are revoked or orgs change.
That's days of work before you create a single Lead.
WorkOS Pipes removes all of it. Pipes handles OAuth flows, token storage, and refresh logic so your app just asks for a valid Salesforce access token when it needs one. You call the Salesforce API. Done.
In this tutorial, we'll build a Node.js app that lets users connect their Salesforce org via the Pipes widget, then creates a Lead record in their org when triggered from your backend.
What we’ll build:
- A Pipes widget that lets users connect and manage their Salesforce account.
- A backend endpoint that fetches a fresh Salesforce access token from WorkOS.
- A Salesforce REST API call that creates a Lead object in the user's org.
!!The same pattern works for any provider. WorkOS Pipes supports GitHub, Linear, Google, Slack, and more.!!
Prerequisites
- A WorkOS account (free to sign up + up to 1 million active users / month).
- Node.js 18+ installed.
- Basic familiarity with Express and React.
What is WorkOS Pipes?
WorkOS Pipes lets your users securely connect their third-party accounts (Slack, GitHub, Linear, Google, Salesforce) to your application without implementing the underlying OAuth flow.
Instead of building and maintaining OAuth infrastructure for each provider, you configure the provider once in the WorkOS dashboard, drop the Pipes widget in your app, and call the third-party account you want using the access token WorkOS gives you.
At a high level, the flow works like this:
- You configure Salesforce as a provider in the WorkOS dashboard.
- Add the Pipes widget to your app. Your frontend renders the Pipes widget so users can connect their Salesforce account.
- When your app needs to create a Lead, your backend calls WorkOS to fetch a fresh Salesforce access token.
- WorkOS returns a valid token, refreshing it in the background if needed.
- You use that token to call the Salesforce REST API and create the Lead.

Step 1: Configure Salesforce in the WorkOS dashboard
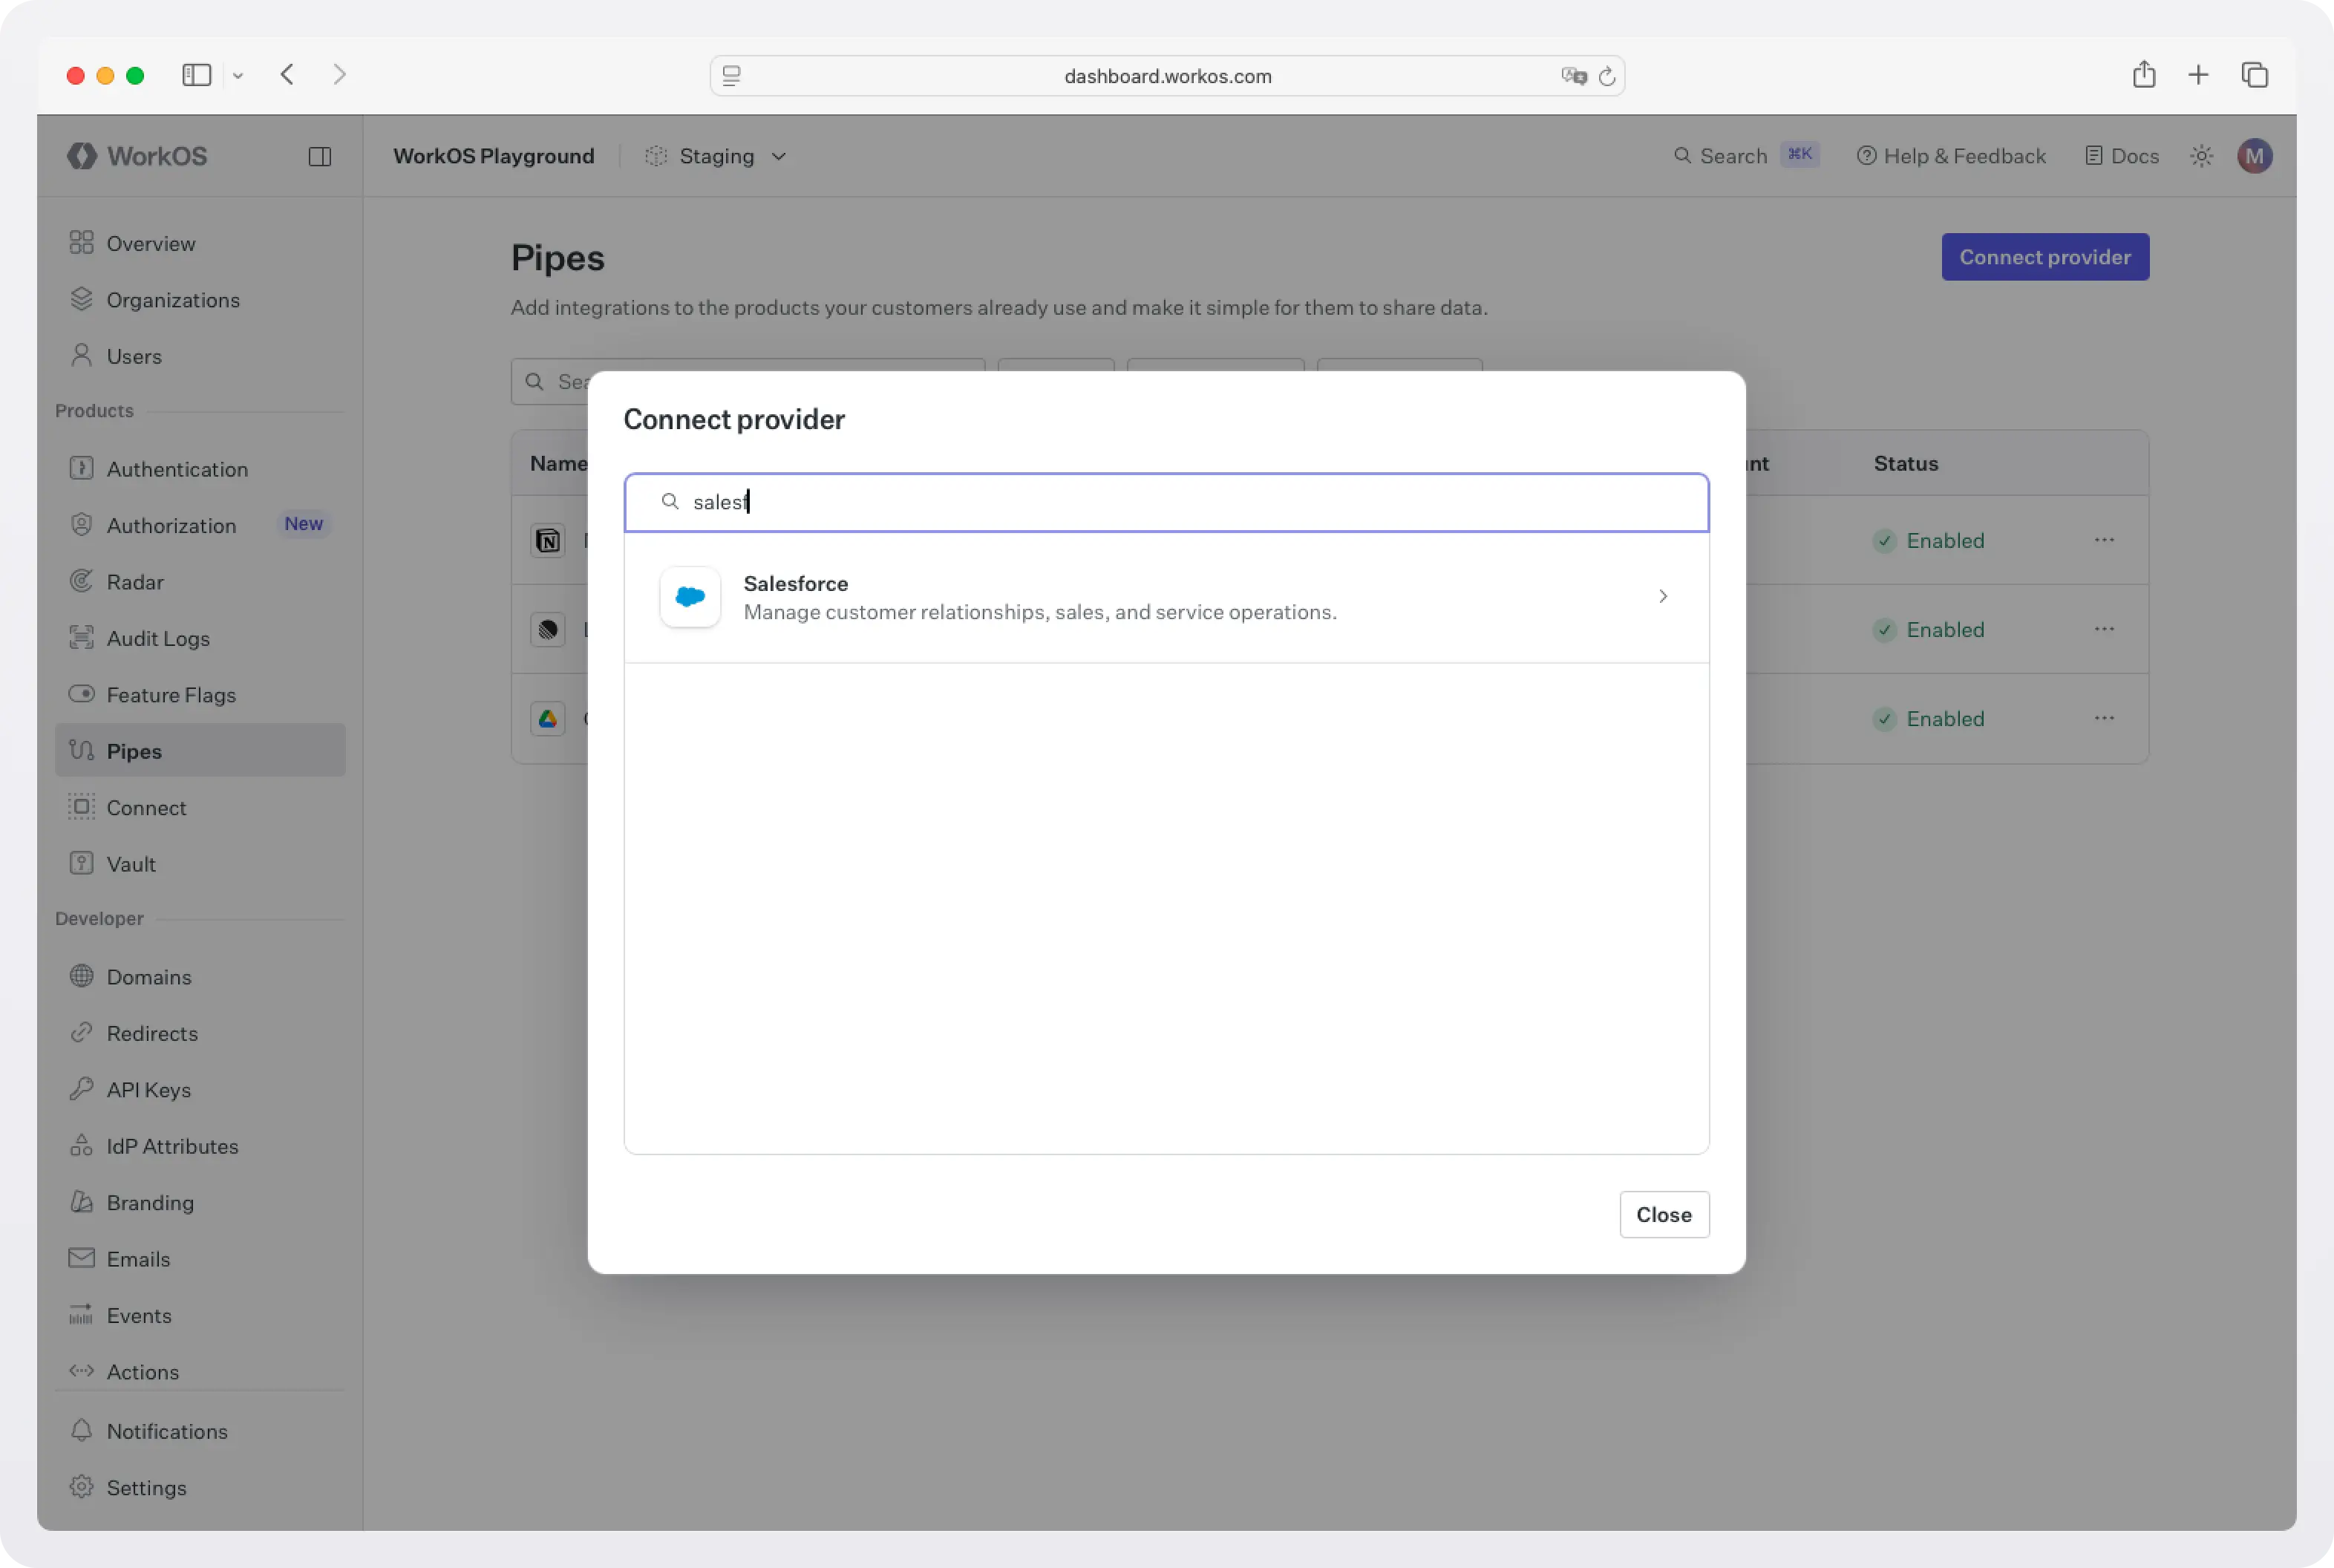
Go to the WorkOS dashboard > Pipes.
Click Connect provider and select Salesforce from the list.
Choose your OAuth scopes
To create Lead records on behalf of your users, you need the following scope:
-
api→ Grants access to the Salesforce REST API, including creating and updating records.
Select this scope in the configuration dialog. Add an optional description, like "Used to create Lead records in your Salesforce org when prospects engage with your app." This description appears in the Pipes widget and helps your users understand why they're connecting their account.
Shared credentials vs. your own OAuth app
For the fastest local development, use the shared credentials option. This uses WorkOS-managed OAuth credentials so users can connect immediately, with no Salesforce Connected App setup required. Shared credentials are available in sandbox environments only.
For production, you'll configure the provider with your own OAuth credentials. Create a Connected App in your Salesforce org under Setup > App Manager, copy the Redirect URI from the WorkOS dashboard into your Connected App's OAuth settings, then paste the Consumer Key and Consumer Secret back into WorkOS.
.webp)
Step 2: Add the Pipes widget to your frontend
The Pipes widget is a pre-built React component that shows users which providers are available, lets them connect or disconnect accounts, and handles the OAuth flow entirely on their behalf. You embed it once and it handles everything.
Install dependencies
WorkOS Widgets uses Radix Themes for its UI components and TanStack Query for data fetching. Install all three:
Configure your WorkOS API key and allow CORS
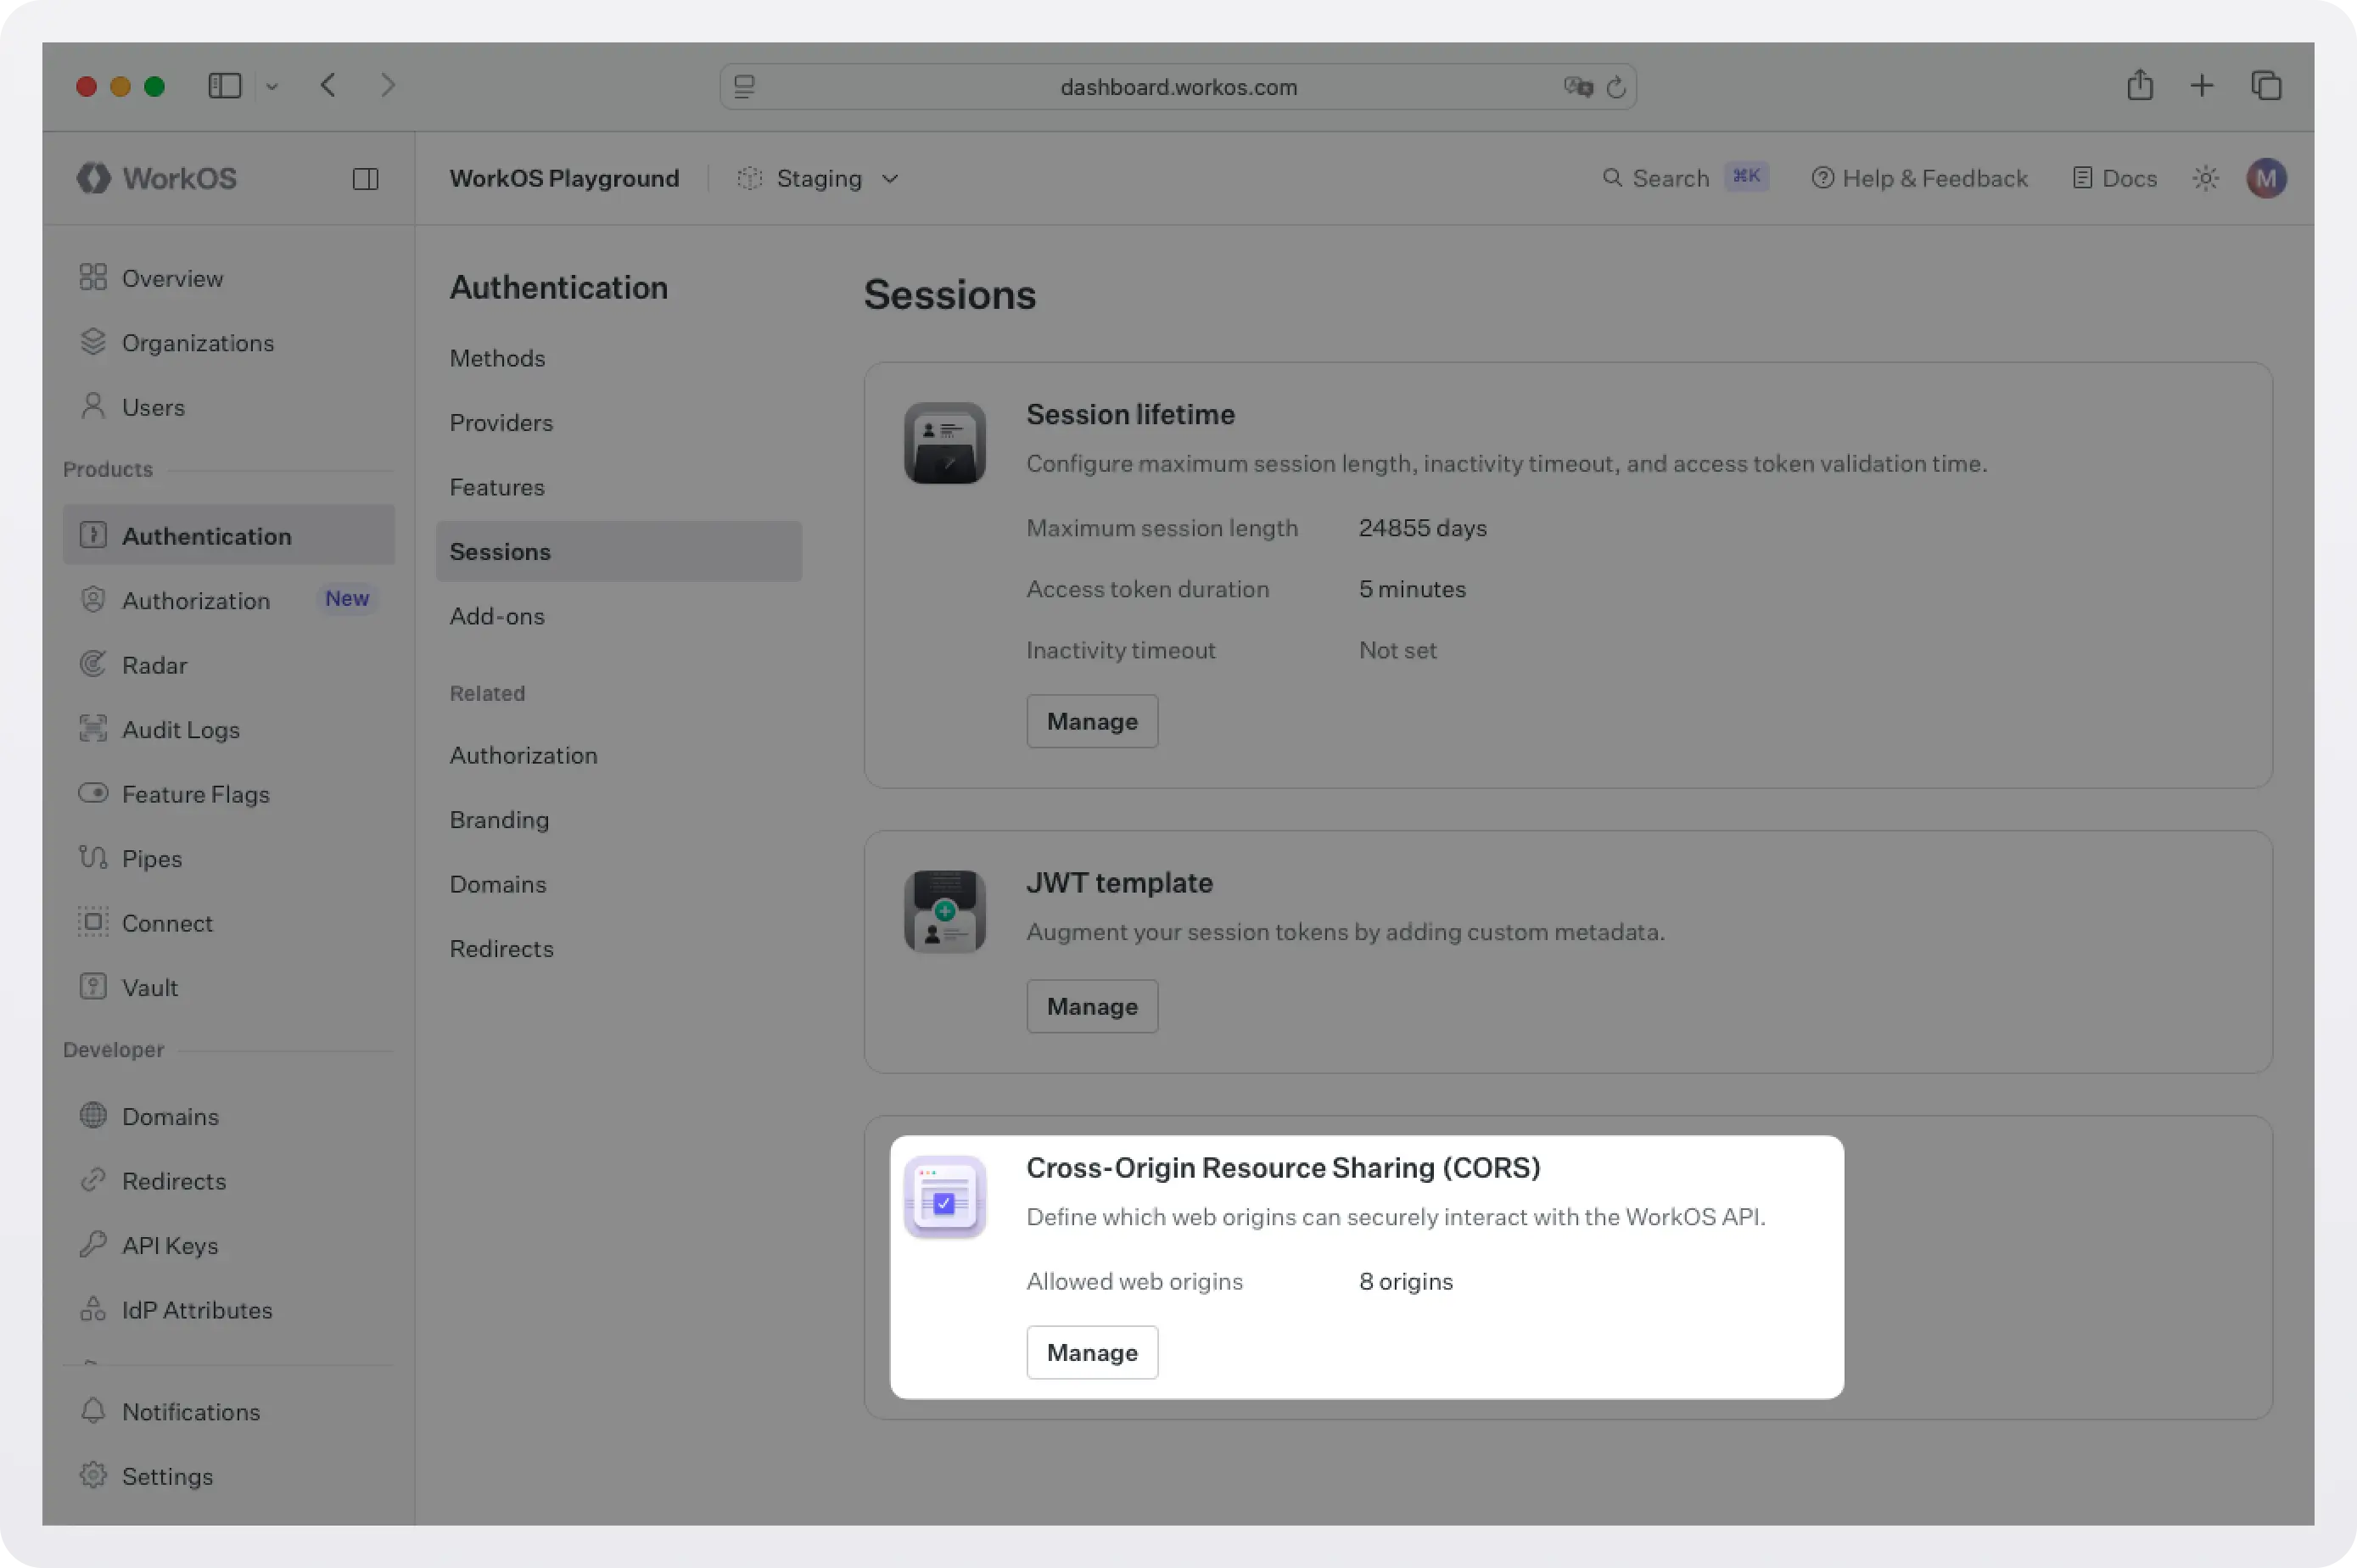
Because the Pipes widget makes client-side requests to WorkOS, you need to add your app's origin to the allowed origins list in the WorkOS dashboard. Go to Authentication → Sessions and add your local URL (for example, http://localhost:3000). This prevents CORS errors when the widget initializes.
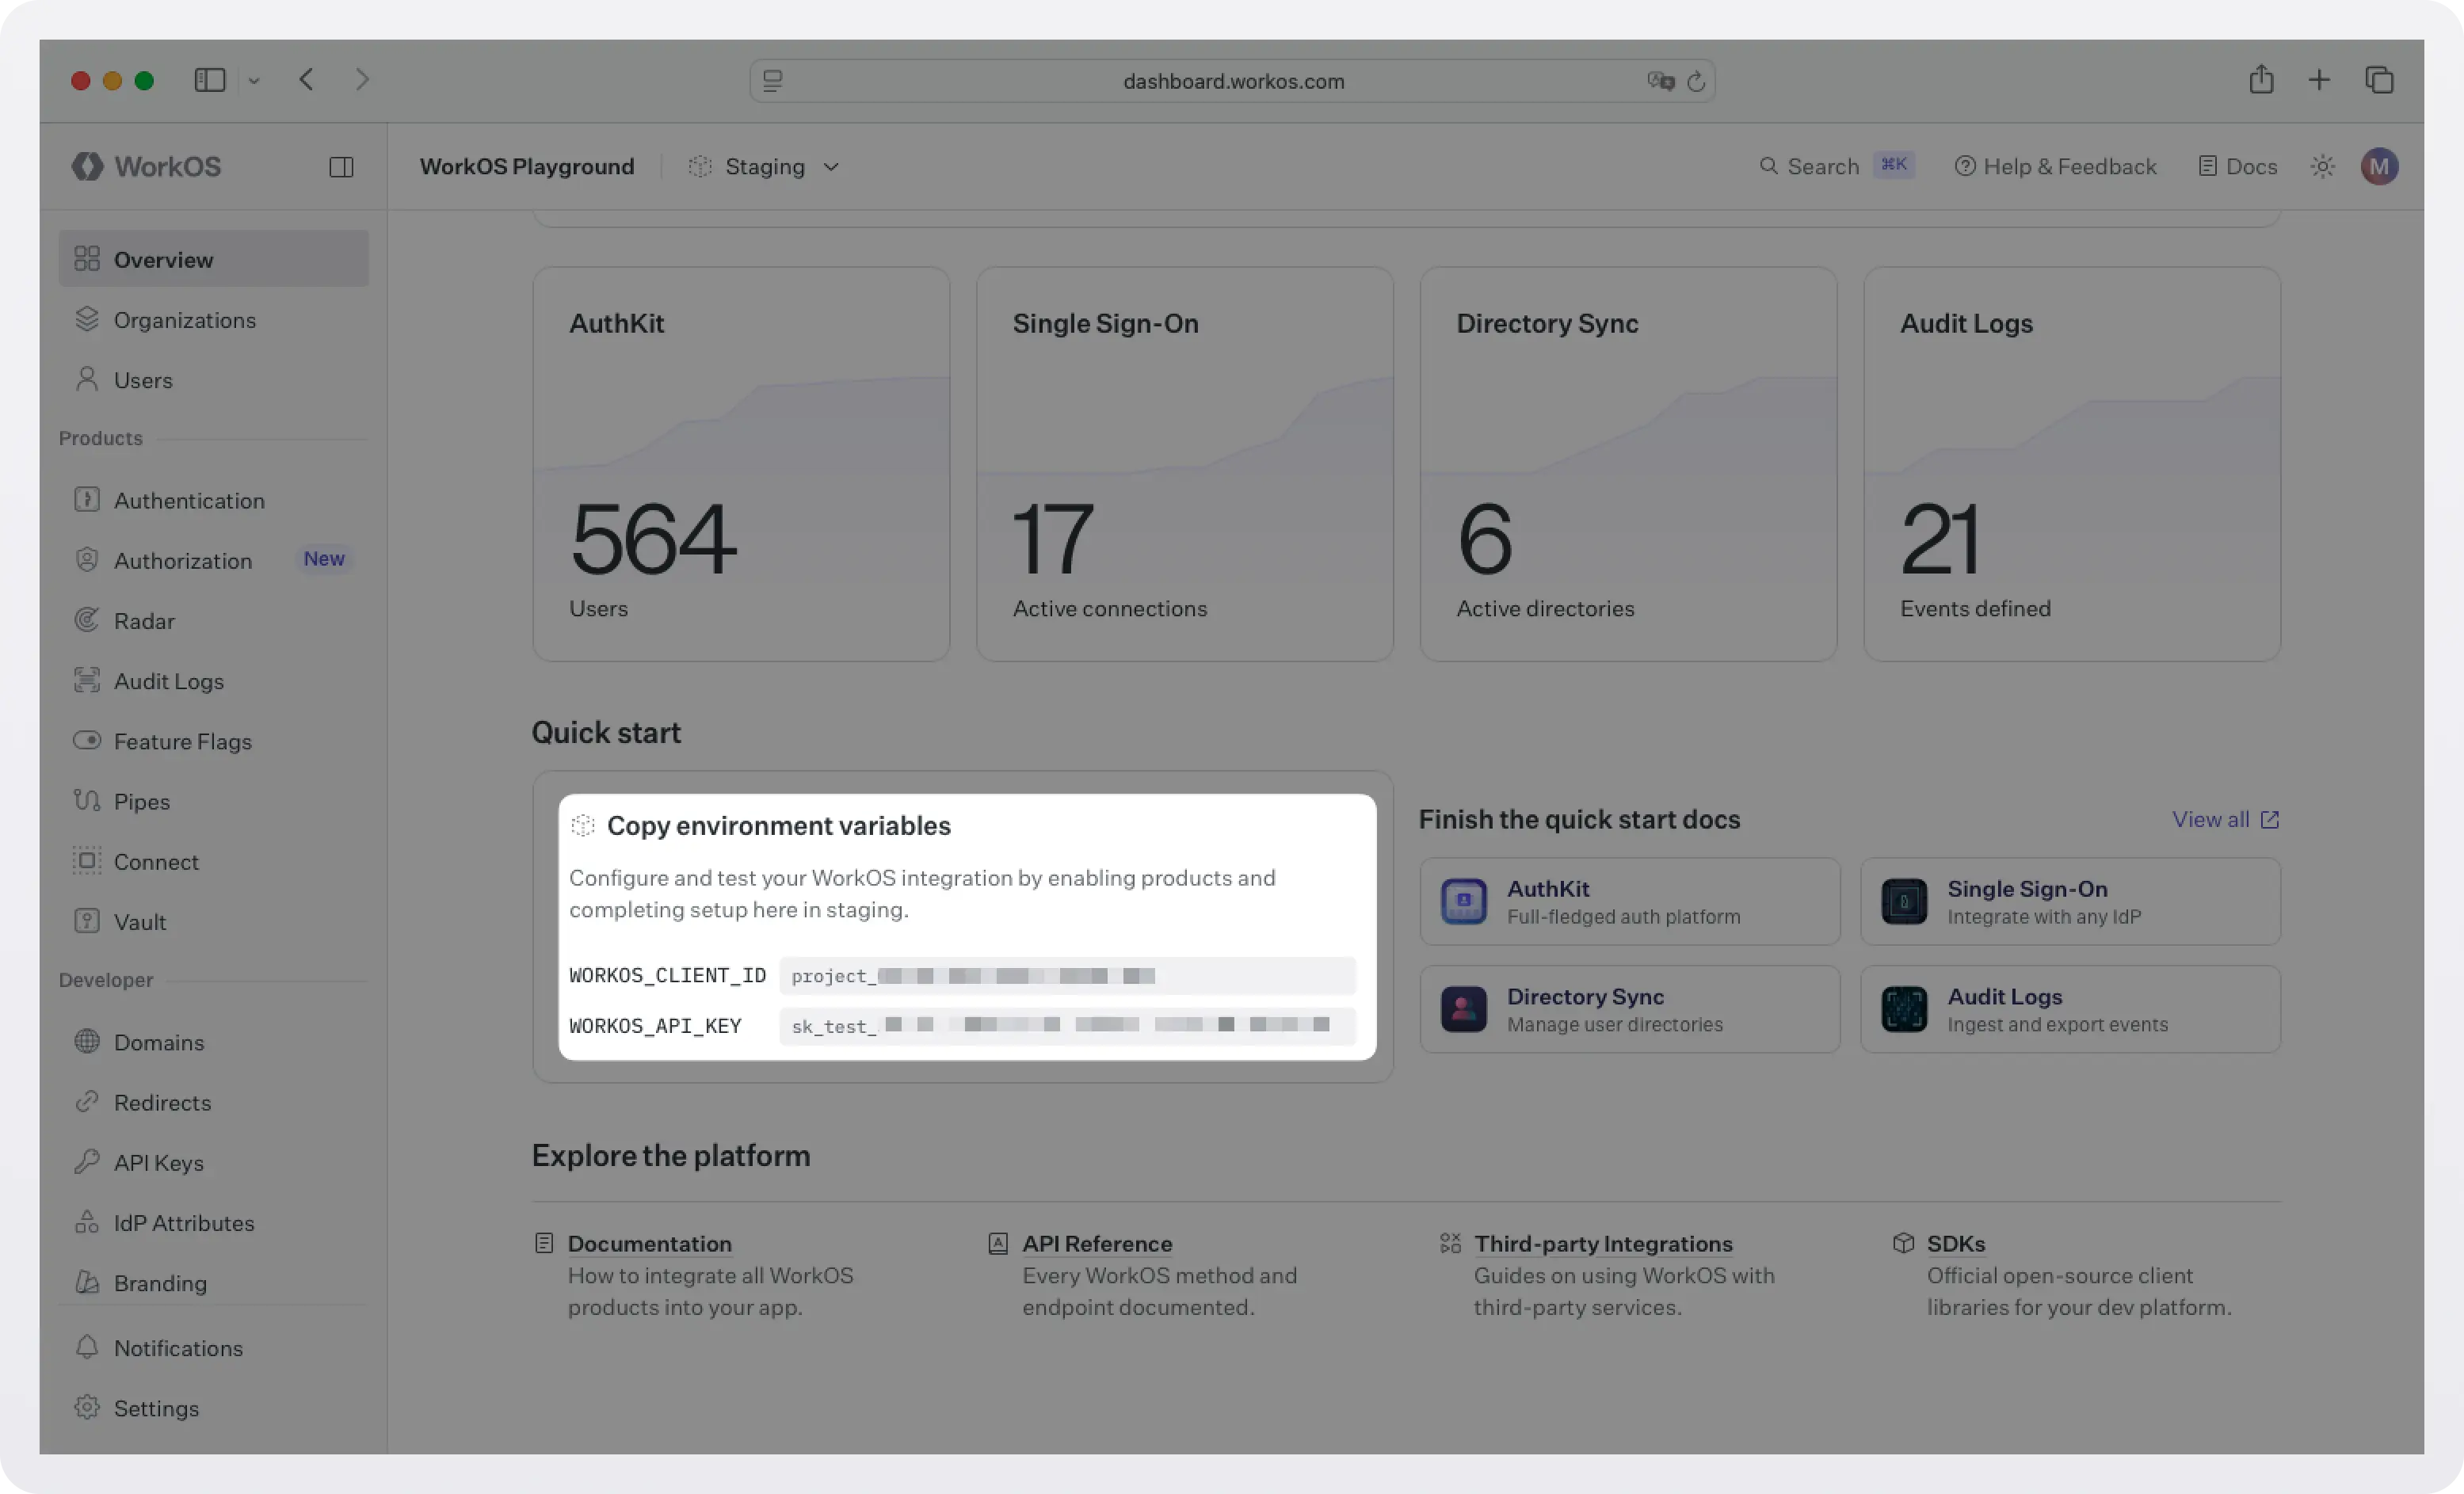
Next, set your WorkOS credentials in your environment:
You can find your credentials at the WorkOS dashboard landing page.
Generate a widget token on your backend
Widgets must be supplied with an authorization token tied to the current user. The token can be acquired in one of two ways:
- If you are using the
authkit-jsorauthkit-reactlibraries, you can use the provided access token.
- If you use one of our backend SDKs, use the “get token” method in the SDK to request a token with the appropriate scope for the widget you want to use. Widget tokens expire after one hour.
To successfully generate a token, the user must be assigned a role with the correct permissions for the widget.
Render the Pipes widget
Add the widget to the settings or integrations page of your app:
When a user visits this page, they'll see a Salesforce connection card. Clicking it launches the Salesforce OAuth flow, and after authorizing, the widget shows their org as connected. If the token ever expires or is revoked, the widget automatically prompts the user to reconnect.
Step 3: Fetch a fresh Salesforce token on your backend
When your app needs to create a Lead, it calls WorkOS to get a valid Salesforce access token for that user. WorkOS handles token refresh transparently — you always get a usable token.
Add a helper function to your backend:
If the user hasn't connected their Salesforce org yet, this call returns a descriptive error you can use to redirect them to the integrations page. If the token has expired, WorkOS refreshes it automatically before returning.
Step 4: Create a Lead using the Salesforce REST API
Now put it together. When a qualifying event occurs in your app, call the Salesforce REST API using the token you just fetched to create a Lead in the user's org:
A couple of things to note here:
instanceUrl: Salesforce is multi-instance, meaning each org lives on a different subdomain (e.g.,na1.salesforce.com,eu6.salesforce.com). WorkOS includes the correct instance URL in the token response so you always hit the right endpoint.Companyis required: The Salesforce Lead object requires aCompanyfield. If your app doesn't capture it, pass a placeholder like"Unknown"and let the user fill it in later.
Call this from wherever the triggering event happens in your app:
Putting it all together
Here's the complete flow, end to end:
- User visits your integrations page → sees the Pipes widget → clicks Connect Salesforce → completes the OAuth flow → returns to your app with their org connected.
- A qualifying event fires in your app (a form submission, a chat completion, a signup, anything) → your backend calls
workos.pipes.getAccessToken()→ gets a fresh Salesforce token → calls the Salesforce REST API → a Lead appears in the user's org.
No tokens in your database, refresh cron jobs, or callback routes. WorkOS handles all of it.
What to build next
Once you have the Salesforce Lead integration in place, the same Pipes pattern extends naturally:
- Write more record types. The same token and instance URL work for any Salesforce object. Use
/sobjects/Contactto create contacts,/sobjects/Taskto log activities, or/sobjects/Opportunityto track deals; the code is identical, just swap the endpoint and fields. - Add more providers. The Pipes widget automatically shows any providers you've configured in the WorkOS dashboard. Add Slack to notify your users when a Lead is created, or Linear to sync tasks; your backend uses the same token-fetching pattern for every provider.
- Query before you create. Use a
GETrequest to/services/data/v59.0/query?q=SELECT+Id+FROM+Lead+WHERE+Email='...'to check whether a Lead already exists before creating a duplicate. - Combine providers. WorkOS Pipes is designed to grow with your product. If you need to integrate with a data source not currently listed, reach out. We actively add new providers based on customer needs.
Frequently Asked Questions
Do I need to build and maintain a Salesforce Connected App? For sandbox environments, no, you can use WorkOS shared credentials and start creating leads immediately. For production, you'll need to create a Connected App in Salesforce to get your own Consumer Key and Secret, but WorkOS handles everything after that.
What happens if a user's Salesforce token expires or is revoked? WorkOS automatically refreshes tokens in the background. If a token is revoked (for example, the user deauthorized your Connected App from their Salesforce settings), getAccessToken returns an error with a clear reason and you can direct the user back to the Pipes widget to reconnect.
Can I write to multiple users' Salesforce orgs from the same app? Yes. Each user who connects Salesforce via Pipes gets their own access token, scoped to their org. Your backend simply calls getAccessToken with the relevant userId and WorkOS handles per-user credential isolation.
Why does instanceUrl matter? Unlike most APIs that have a single base URL, Salesforce routes each org to a specific server instance. The instanceUrl in the token response tells you exactly where to send API requests for that user's org. Always use it instead of hardcoding a Salesforce domain.
What Salesforce API version should I use? This tutorial uses v59.0. You can use any version your org supports. To check the latest available version for a connected org, call GET ${instanceUrl}/services/data/ with the access token; it returns a list of all supported versions.