How to add enterprise SSO to your CLI
Implement OAuth 2.0 Device Code and PKCE flows in TypeScript, route users through Okta SSO, and pick the right pattern for headless and local environments, with WorkOS AuthKit.
When a CLI hits its first enterprise security review, "does it support SSO?" is the question that kills naive implementations. A static API key cannot speak SAML or OIDC, and writing a SAML library inside a Node CLI is not the answer either.
The good news: your CLI does not need to speak SAML at all. The OAuth 2.0 Device Code flow and the Authorization Code flow with PKCE both delegate authentication to a browser, which means whatever your web app's login screen supports (Okta, Entra ID, Google Workspace, MFA, conditional access) works in the terminal too, with no extra code on your side.
This tutorial walks through building both flows in TypeScript against AuthKit, wiring them up to an Okta SSO connection, and choosing between them based on where your CLI runs.
!!If you'd rather skip to a working integration, check out the WorkOS CLI, a comprehensive tool for integrating and managing WorkOS from the terminal. Its headline feature is the AI Installer – run one command and it handles framework detection, SDK installation, route creation, environment setup, and build validation. It also installs WorkOS skills into AI coding agents like Claude Code and Cursor, which is worth running before you start this tutorial if you're pairing with an agent.!!
What we'll build
A TypeScript CLI with two login commands, one for each of the two patterns CLIs use to delegate authentication to a browser:
- Authorization Code with PKCE (
mycli login): opens a local browser, the user signs in there, and the CLI captures the result on a loopback HTTP server it spins up athttp://127.0.0.1:<port>/callback. This is whatgcloud auth loginandaws sso logindo and the default for users on their own machine. - Device Code (
mycli login --device): the CLI prints a short code and a URL. The user opens the URL on any device (their laptop, their phone), enters the code, and signs in. This is the pattern behindgithub.com/login/deviceand the fallback flow for SSH sessions, containers, CI runners, or anywhere a local browser is impractical.
Both end the same way: the CLI receives an OAuth access token and refresh token. Both route the user through whatever IdP their organization has configured in AuthKit, so SSO works in either case without any extra code on your part. The reason to ship both is that each one assumes something different about the environment, which the next section unpacks.
Picking the proper OAuth flow for your CLI
You can use either Device Code or PKCE for auth in a CLI. The question is which one runs when the user types mycli login with no flag.
PKCE is the more phishing-resistant flow, since the authorization code is bound to the browser session the CLI started rather than to a code the user types by hand. Device Code, on the other hand, is what gives you the recognizable github.com/login/device style UX, which some teams want for brand reasons.
Two reasons PKCE wins when both are available:
- No phishing window. Device Code has a known attack pattern: the attacker initiates a device flow against your real CLI, gets a real
user_codefrom the legitimate IdP, and tricks a victim into entering it. The victim signs in to a real Okta page, the IdP issues real tokens, and the attacker collects them by polling. PKCE's loopback redirect closes this gap because the authorization code is bound to the browser session that initiated it, not to a code the user types in by hand. - No polling loop. PKCE returns the code synchronously to the loopback handler. Device Code requires polling, and polling intervals are tuned by the spec for safety, not speed.
This is exactly why AWS CLI v2.22 made PKCE the default for aws sso login and moved Device Code behind a --use-device-code flag, and why Microsoft has begun blocking Device Code in some Entra tenants via conditional access.
But Device Code is non-negotiable for headless environments. SSH into a remote dev box and PKCE has nowhere to redirect. So the right answer is to ship both, default to PKCE, and document the --device escape hatch. We'll build Device Code first because it's the simpler mental model, then layer PKCE on top.
Prerequisites
- A WorkOS account (free up to 1 million MAU, no credit card required)
- An Okta tenant (the Developer Edition is free)
- Node.js 20+ and
npm - A CLI app registered as a public application in the WorkOS dashboard
What if I use a different IdP?
The CLI code in this tutorial is identical regardless of which IdP your customers bring. AuthKit handles the SAML or OIDC handshake on its end, and your CLI only ever sees standard OAuth tokens. For step-by-step setup guides covering Entra ID, Google Workspace, OneLogin, JumpCloud, and the rest, see the WorkOS integrations directory.
Setting up SSO in WorkOS
Step 1: Create an application
In the WorkOS dashboard, go to Applications and create a new application. Note the Client ID. You'll need it in the CLI.
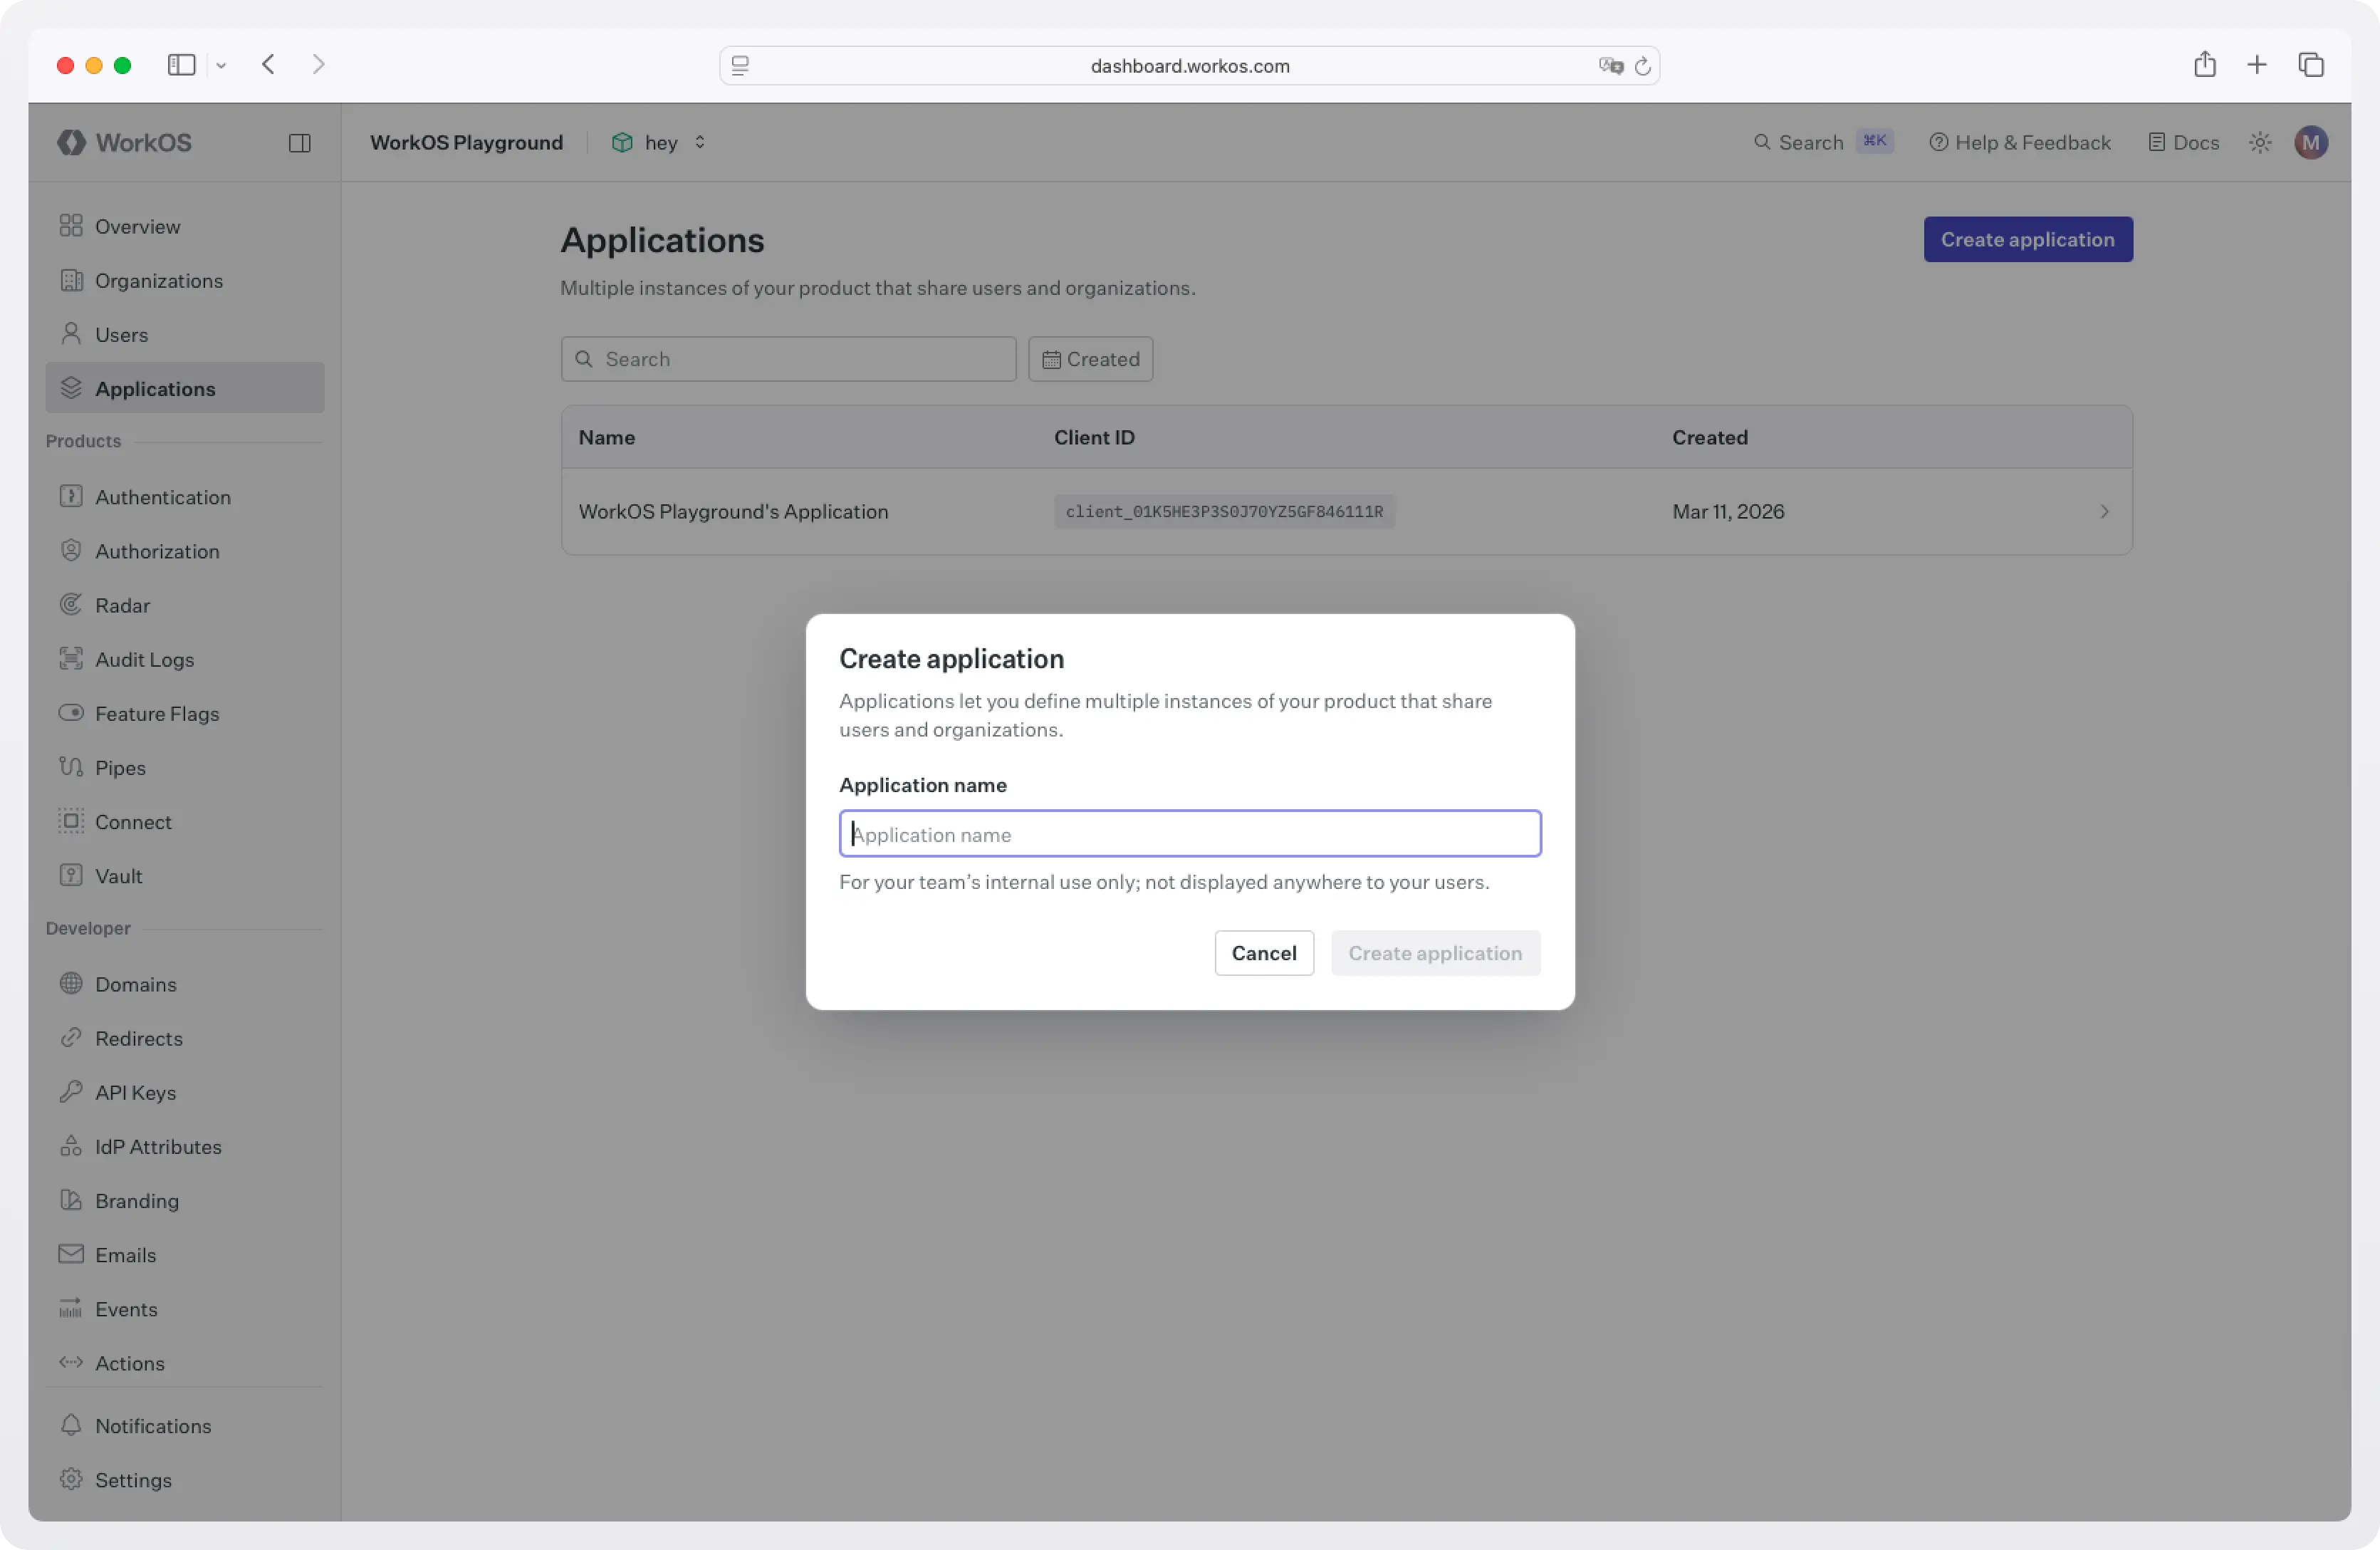
In the application's Redirect URIs, add a loopback redirect for the PKCE flow:
The 0 tells WorkOS to allow any port, which matches RFC 8252's recommendation for native apps. The CLI will pick a free port at runtime.
Step 2: Configure an organization with Okta SSO
In the dashboard, create an Organization for your test customer (for example, "Acme Corp") and add their domain (e.g. acme.com).
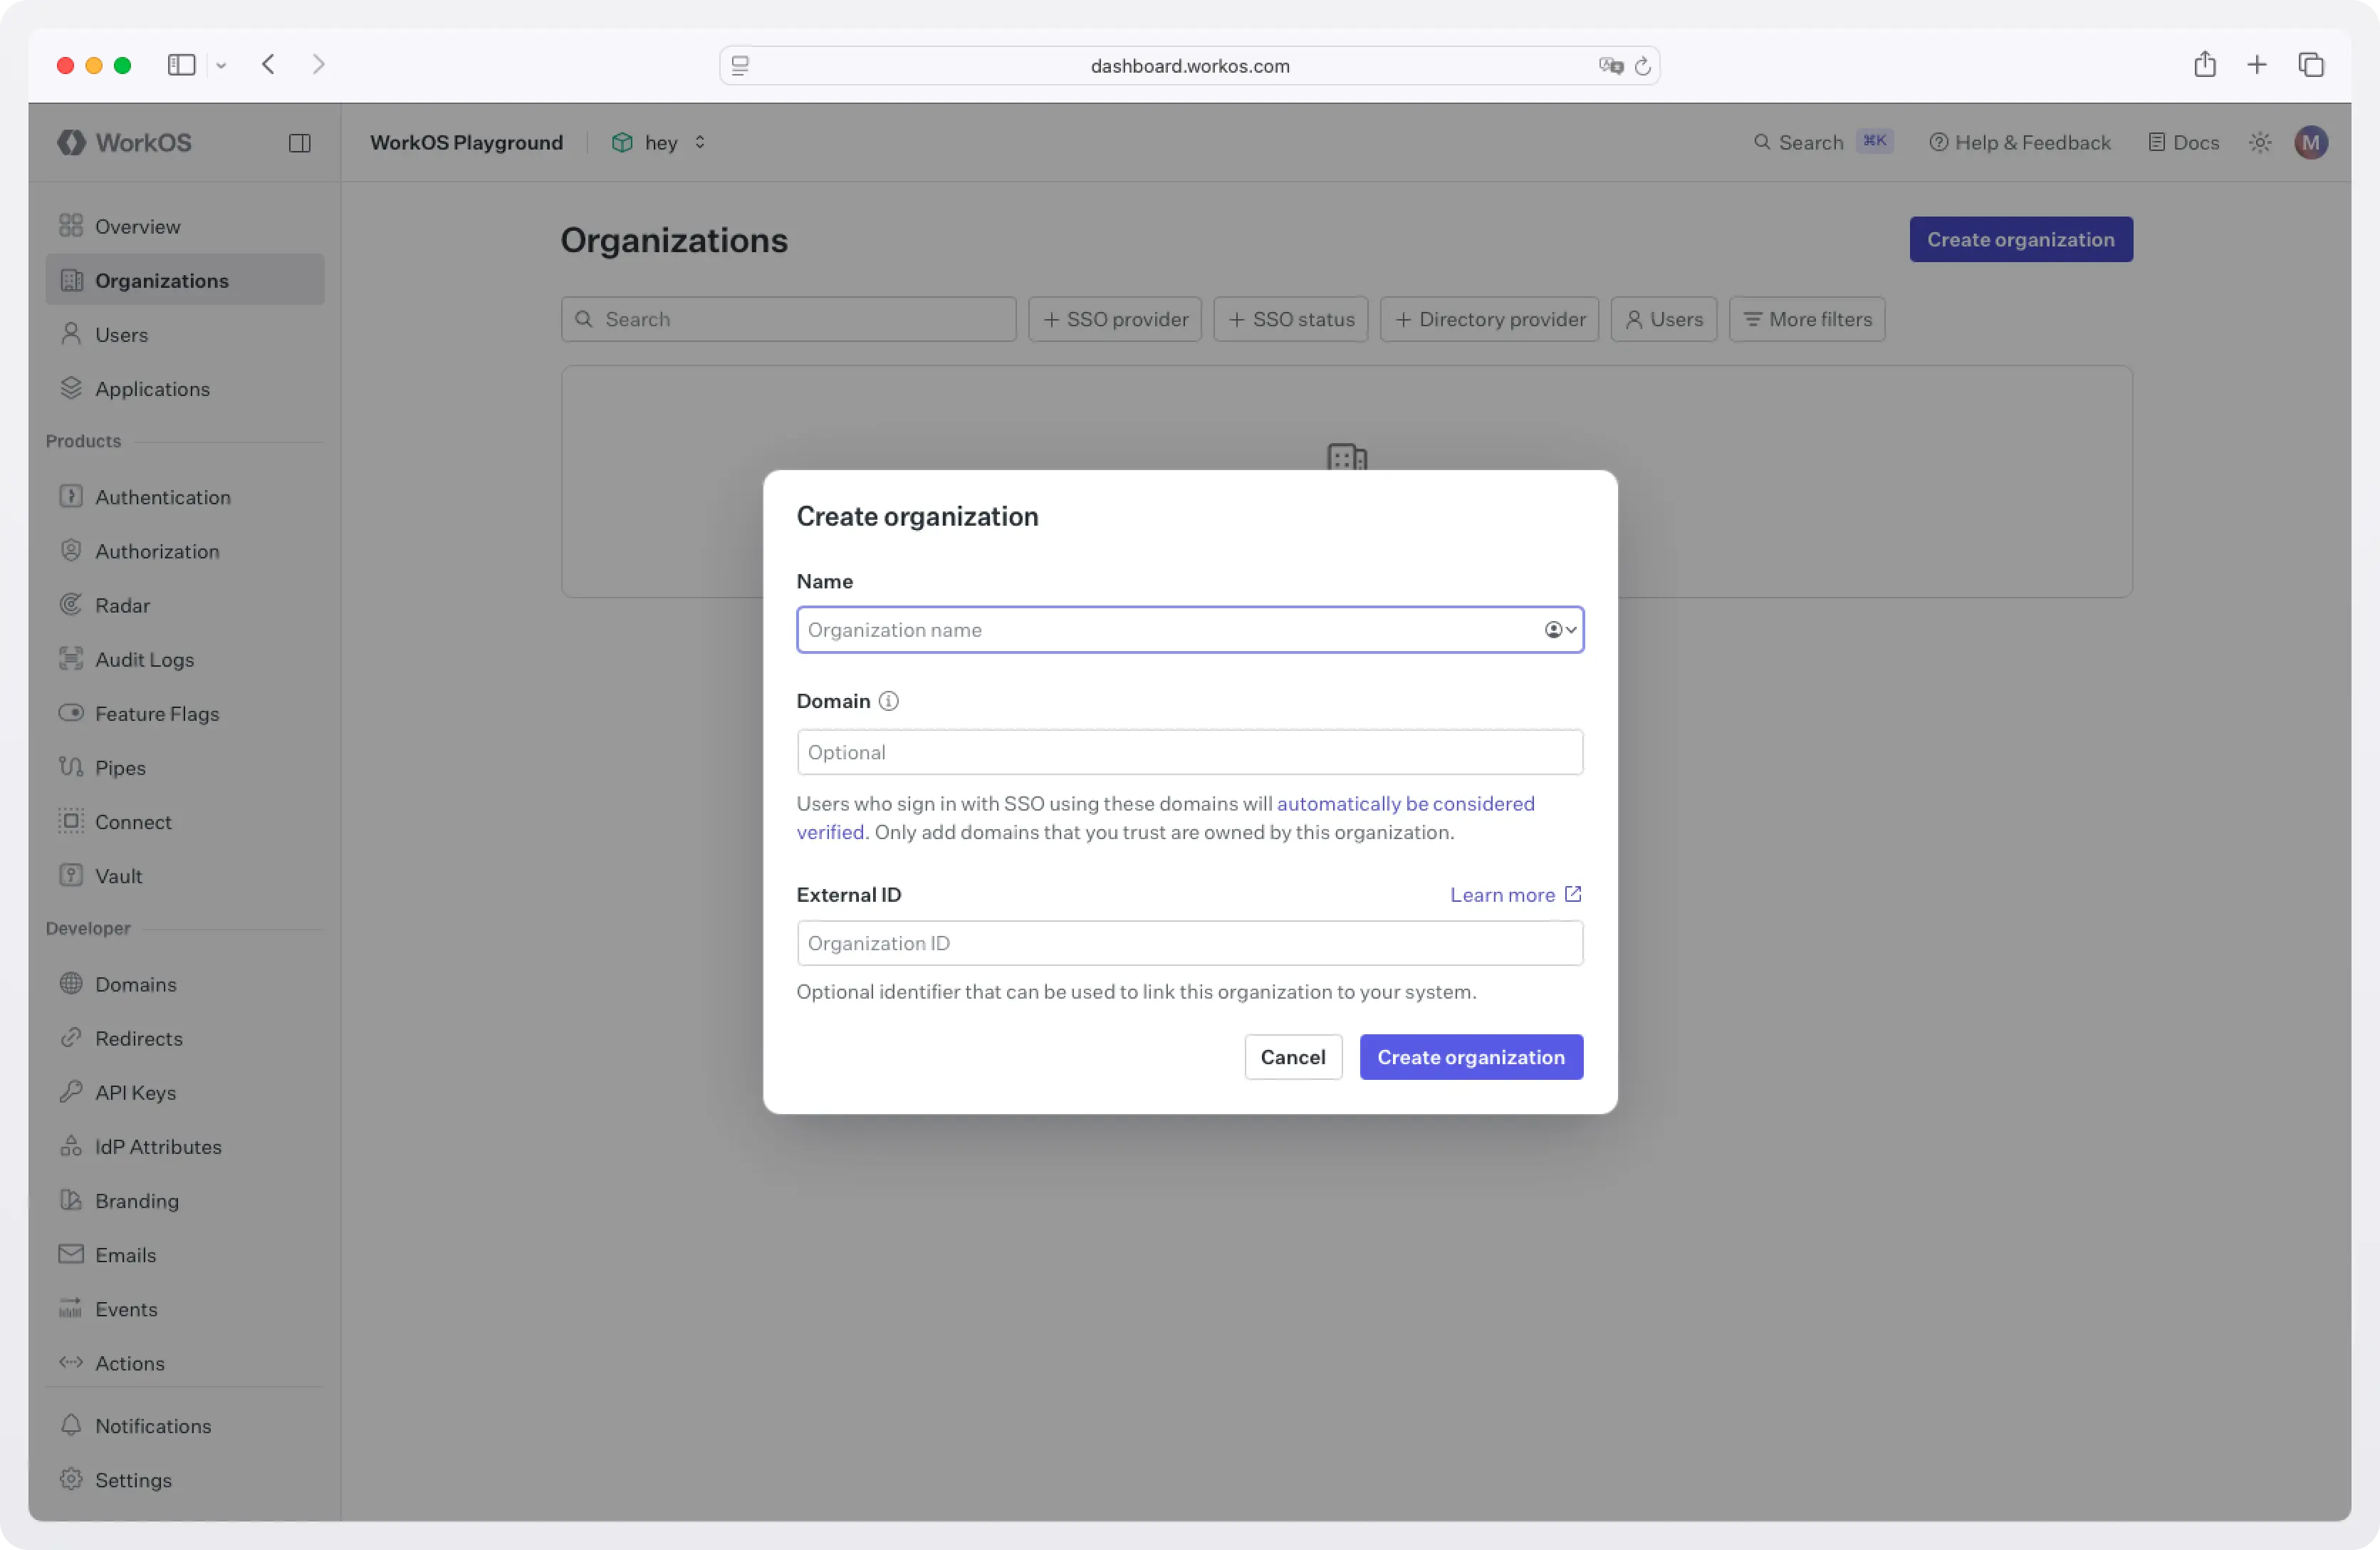
Inside the organization, add a new SSO connection and select Okta. The dashboard walks through the SAML or OIDC handshake with Okta's admin console: download the WorkOS metadata, paste the IdP metadata back, and map the email attribute. Detailed steps are in the WorkOS Okta SSO guide.
Once this is done, any user who lands on AuthKit with an @acme.com email gets redirected to Okta. AuthKit handles the SAML round-trip, normalizes the response, and gives the CLI back a clean OAuth token pair.
You don't write any of that yourself.
Project setup
Create a new project:
We'll use commander for the CLI scaffolding, open to launch the browser, and undici for HTTP. Node's built-in fetch would also work; undici gives a slightly nicer interface for form-encoded posts.
Create src/config.ts for shared constants and the response shape:
The Client ID is hardcoded for distribution; it's a public identifier, not a secret. Treat the env override as a convenience for local development.
Flow 1: Device Code
The Device Code flow does the following:
- The CLI asks WorkOS for a
device_code(kept private) and auser_code(shown to the user). The response includes two URLs:verification_urifor manual code entry andverification_uri_completefor one-click confirmation with the code pre-filled. - The CLI displays the user code and the URLs. Print the bare
verification_uriso users on a different device (a phone, a separate machine) can type the short code, and passverification_uri_completetoopen()so users with a local browser skip the typing. See the CLI Auth docs for details on each option. - The user signs in, routed through Okta or whichever IdP their org has configured, and approves.
- The CLI polls a token endpoint until the user finishes, then receives access and refresh tokens.
Create src/device.ts:
Note the following:
- The
slow_downhandler is required by RFC 8628. WorkOS will return it if you poll faster than the advertised interval, and the spec says you should bump your interval by at least one second when you see it. - Never display the
device_code. It's the secret half of the pair; only theuser_codeshould ever be shown. - Failing to open the browser is non-fatal. SSH and headless contexts won't have one. The user can copy the URL to a phone.
Flow 2: Authorization Code with PKCE
When the user is on their own laptop and a local browser is available, this flow is strictly better than Device Code: same UX, no phishing window, no polling loop.
The shape:
- The CLI generates a random
code_verifierand its SHA-256 hash, thecode_challenge. - The CLI starts a tiny HTTP server on a loopback port and opens the browser to AuthKit's
/authorizeendpoint, passing the challenge and the loopback URL asredirect_uri. - The user signs in (Okta in our case). AuthKit redirects the browser back to the loopback URL with an authorization code.
- The CLI captures the code, exchanges it for tokens by sending the
code_verifier(proving it's the same client that started the flow), and shuts the server down.
Create src/pkce.ts:
Note the following:
- The
stateparameter is a CSRF check. Verify it matches what you sent before trusting the code. - The loopback server binds to
127.0.0.1, notlocalhost. Some operating systems resolvelocalhostto IPv6 first, which can break the round-trip on machines where the OAuth provider only allows IPv4 loopback. code_challenge_method=S256is the only acceptable method. Theplainvariant exists in the spec but is widely deprecated.- If you know the user's organization in advance (for example, from a prior login or a
--orgflag), passorganization_idon the authorize URL. AuthKit will skip the email-discovery step and route straight to that org's IdP.
Wiring it up
src/index.ts:
Run it:
Storing tokens
Now that you have tokens, where should you store them?
The access token is short-lived enough that many CLIs keep it in memory only and re-derive it from the refresh token on each invocation. The refresh token is the long-lived asset and the real target if it leaks, so it's the one whose storage matters most.
Different CLIs use different approaches when it comes to token storage:
- AWS CLI v2 writes SSO tokens as
0600-permissioned JSON files in~/.aws/sso/cache/. - gcloud stores credentials in files under
~/.config/gcloud/. - GitHub CLI uses the OS keychain (macOS Keychain, Windows Credential Manager, libsecret on Linux) when one is available, and falls back to a
0600file otherwise. You can opt out of the keychain entirely with--insecure-storage.
A 0600 file is portable, has no native dependencies, and works in containers, WSL, and CI runners that don't have a keyring service running.
A keychain gives stronger protection at rest and integrates with OS-level access controls like Touch ID and Windows Hello, at the cost of a native dependency and graceful-fallback logic for environments where no keyring is available. If you go the keychain route in a Node CLI, note that keytar, the long-time standard, was archived in late 2022; the maintained alternative is @napi-rs/keyring.
For most CLIs, a permission-restricted file under the platform config directory is a sensible default, with the keychain as an upgrade path if your threat model warrants it.
Refreshing an access token
AuthKit's framework SDKs (Next.js, Remix, React, Expo) refresh access tokens transparently because they hook into a request lifecycle and can intercept calls in middleware. A CLI doesn't have that lifecycle. Each invocation is a fresh process, so the usual pattern is to check the access token's exp claim before each API call and refresh when it's expired or close to expiring. Refresh tokens may be rotated on use, so always replace your stored refresh token with whatever the refresh response returns.
Once the access token expires, exchange the refresh token for a new pair by posting to /authenticate with grant_type=refresh_token:
The @workos-inc/node SDK exposes the same call as userManagement.authenticateWithRefreshToken({ clientId, refreshToken }).
What AuthKit does behind the scenes
This is a few hundred lines of TypeScript. Worth a quick inventory of what AuthKit handled that you didn't write:
- The SAML or OIDC handshake with Okta, including request signing and assertion validation.
- IdP-side certificate rotation.
- Email-domain routing to the right organization's SSO connection.
- MFA enforcement: if the customer's IdP requires it, the CLI flow inherits it automatically.
- Conditional access policy enforcement.
- JIT user provisioning on first login.
- The hosted UI for code entry, code confirmation, and consent screens.
- The token format and rotation semantics.
- A swap to a different IdP. The same CLI binary works for a customer on Entra ID, Google Workspace, or any custom SAML provider with zero code changes.
Wrapping up
Two flows, one IdP wired up through AuthKit, and your CLI now passes an enterprise security review. The whole pattern fits in roughly a day of work, most of which is the dashboard configuration rather than the code.
Two natural next extensions:
- A
mycli logoutcommand that clears the keychain entry and revokes the refresh token via the WorkOS API. For details on Single Logout, see the docs. - A multi-org workflow: persist multiple sessions keyed by
organization_idand add amycli switch <org>command, modeled onkubectlcontexts.
Sign up for WorkOS and the first 1 million MAU are free, no credit card required.