How to add Sign in with Slack to your app using WorkOS
Add a "Sign in with Slack" button to your app in minutes using WorkOS AuthKit.
If your users are already on Slack, they spend their workday there. It handles their messages, huddles, and workflows. Asking them to create yet another account to use your app is friction you do not need to introduce.
Sign in with Slack is Slack's official OAuth/OIDC provider, and it has a straightforward setup compared to some other social logins: you create a Slack App, grab a Client ID and Client Secret, configure a Redirect URI, and you are done.
WorkOS handles all the OAuth plumbing on your behalf. Once you have wired up your Slack credentials in the WorkOS dashboard, AuthKit will automatically surface a "Sign in with Slack" button on your hosted login page, with no custom UI required.
In this guide, we will cover:
- Getting the Redirect URI from WorkOS.
- Creating and configuring a Slack App in the Slack API portal.
- Configuring Slack credentials in the WorkOS dashboard.
- Setting up AuthKit in a Next.js app.
!!Want to skip the manual setup? The CLI Installer detects your framework, installs the SDK, configures your dashboard, and writes the integration code, all with a single command. Check it out.!!
We are using Next.js here because it is the most common framework for AuthKit integrations, and the @workos-inc/authkit-nextjs SDK makes everything clean and straightforward. If you are on a different framework, the Slack and WorkOS dashboard steps are identical, only the SDK integration differs. Check the WorkOS docs for samples in your language of choice.
Let's get started.
Prerequisites
Before we begin, you will need:
- A Slack workspace and access to the Slack API portal to create or manage apps.
- A WorkOS account (free for up to 1 million users at workos.com).
- A Next.js app (or create one with
npx create-next-app@latest).
Step 1: Get the Redirect URI from WorkOS
Before touching the Slack API portal, you need one piece of information from WorkOS: the Redirect URI. This is the endpoint Slack will call after a successful login, and it must be registered in your Slack App's OAuth settings.
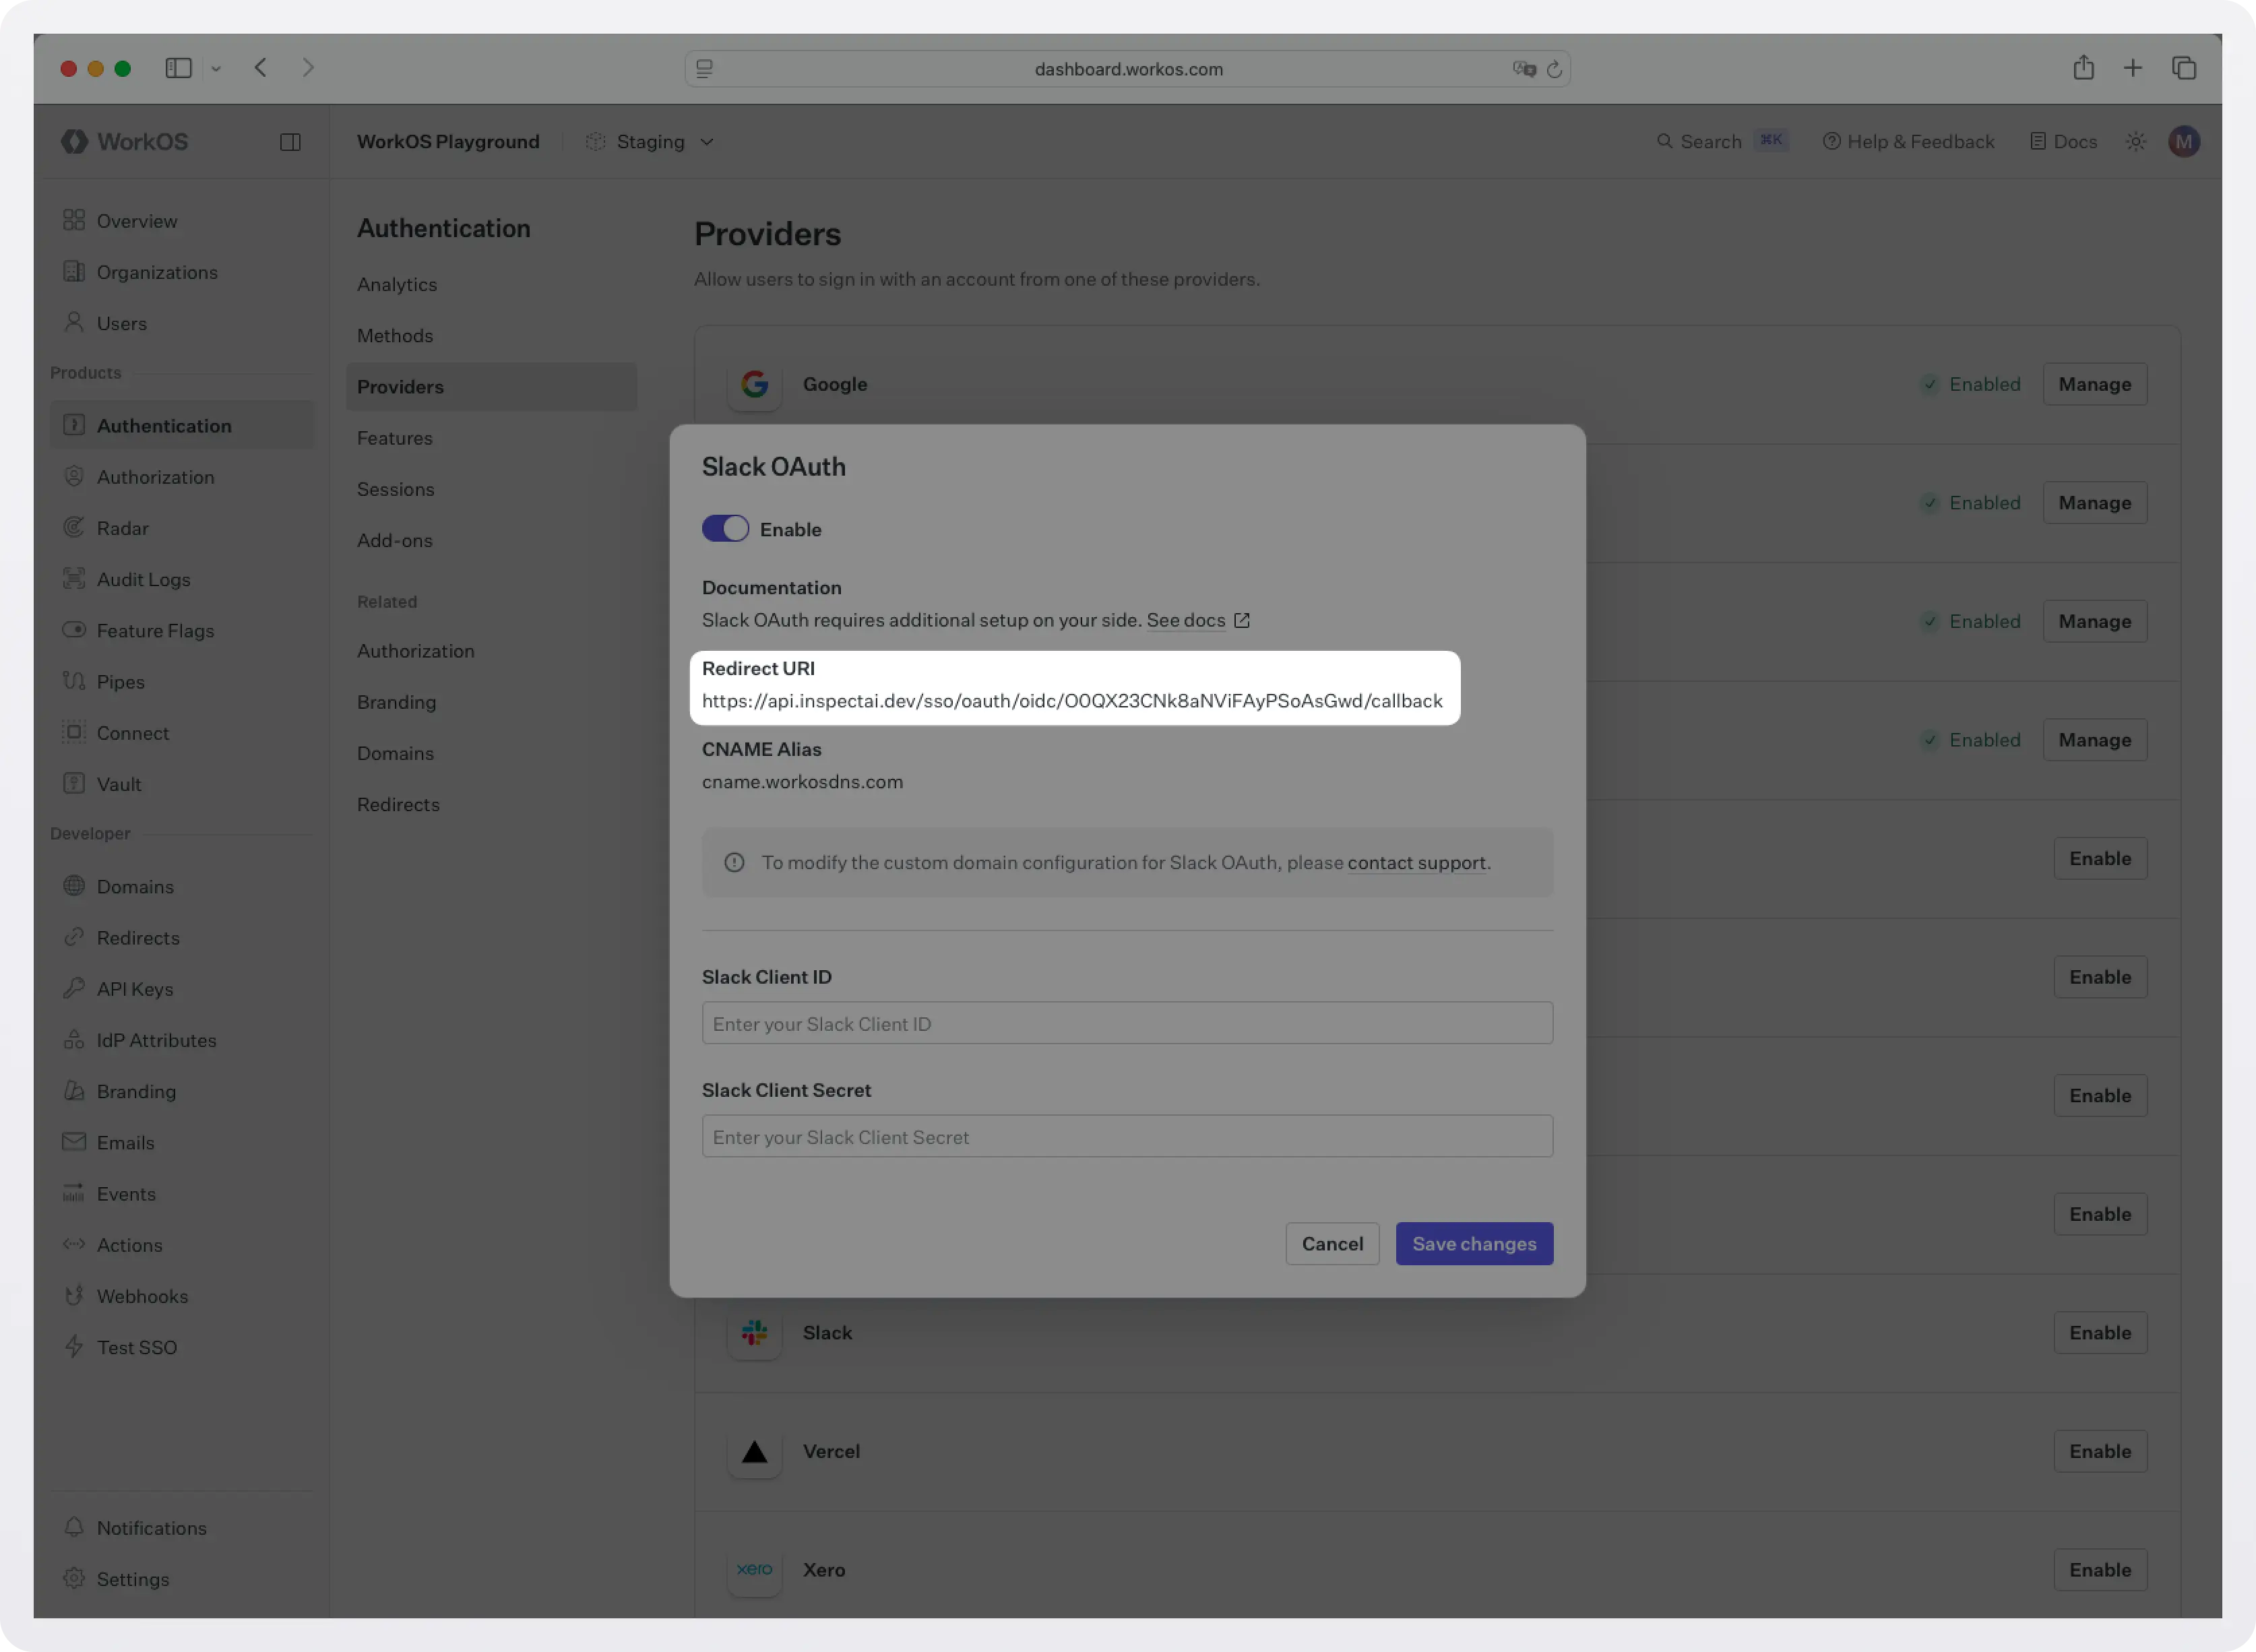
- Go to the WorkOS dashboard > Authentication > OAuth Providers.
- Locate the Sign in with Slack section and click Enable.
- The configuration dialog will open. Copy the Redirect URI.
Keep this tab open. You will return to it in Step 3.
Step 2: Create and configure a Slack App
Create the app
- Go to the Slack API portal and click Create New App.
- Select From scratch.
- Give your app a name and choose the development workspace where you will test.
- Click Create App.
Configure OAuth permissions
- In your new Slack App's settings, click OAuth & Permissions in the left sidebar.
- Under Redirect URLs, click Add New Redirect URL.
- Paste the Redirect URI you copied from the WorkOS dashboard in Step 1.
- Click Add, then Save URLs.
Copy your client credentials
Still in the Slack API portal, navigate to Basic Information in the left sidebar. Under App Credentials, you will find your Client ID and Client Secret. Copy both values. You will need them in the next step.
Keep your Client Secret safe. It is a server-side secret used by WorkOS to communicate securely with Slack and should never be exposed to the client.
Step 3: Configure Slack credentials in WorkOS
You now have everything WorkOS needs:
- Slack Client ID (from Step 2)
- Slack Client Secret (from Step 2)
Return to the WorkOS dashboard and open the Sign in with Slack configuration dialog (the one you opened in Step 1).
- Toggle Enable on.
- Paste your Client ID and Client Secret into their respective fields.
- Click Save changes.
At this point, AuthKit's hosted UI will automatically show a "Sign in with Slack" button on your login page, with no additional code required.
Step 4: Set up AuthKit in your Next.js app
With Slack and WorkOS fully configured, all that is left is to wire up the authentication flow in your app.
The easiest way is to run the CLI Installer. It detects your framework, installs the SDK, configures your dashboard, and writes the integration code, all with a single command:
If you prefer to do it manually, keep reading.
1. Install the SDK
Open your terminal in the root of your project and install the AuthKit Next.js SDK:
2. Configure your app's URLs in the WorkOS dashboard
Before writing any code, you need to configure two things in the WorkOS dashboard.
- Set a redirect URI: this is the callback endpoint WorkOS will redirect to after a user authenticates. Go to the Redirects section of the dashboard and add:
http://localhost:3000/callback - Set a sign-in endpoint: this tells AuthKit where to send users if they land on the hosted sign-in page directly (for example, from a bookmarked link or a password reset email). In the same Redirects section, set your sign-in endpoint to:
http://localhost:3000/login
You will update both of these to your production domain before deploying.
3. Set your environment variables
Grab your API key and client ID from the WorkOS dashboard.
Then create a .env.local file in the root of your project:
WORKOS_COOKIE_PASSWORD is used to encrypt cookies and must be at least 32 characters long. You can generate a secure password by using the 1Password generator or the openssl library via the command line:
Note: NEXT_PUBLIC_WORKOS_REDIRECT_URI uses the NEXT_PUBLIC_ prefix so it is accessible in edge functions and proxy configurations (useful for Vercel preview deployments).
4. Wrap your app layout with AuthKitProvider
AuthKitProvider adds protections for auth edge cases and is required to wrap your app. Open your root layout file (app/layout.tsx) and add it:
5. Add the middleware
Create a middleware.ts file (or proxy.ts for Next.js 16+) at the root of your project:
Any route not listed in unauthenticatedPaths will require a signed-in user. Unauthenticated visitors are automatically redirected to the WorkOS-hosted AuthKit login page.
6. Create the login and callback routes
You need two route handlers: one to kick off the sign-in flow, and one to handle the redirect back from WorkOS after a successful login.
7. Display user info and protect routes
Your home page should handle both authenticated and unauthenticated visitors:
Make sure you have configured a Sign-out redirect in the WorkOS dashboard (same Redirects section). Without it, users will see an error after signing out.
For routes where authentication is mandatory, use ensureSignedIn: true:
8. Test it locally
Start your dev server:
Visit http://localhost:3000. Click Sign in and you will be redirected to the AuthKit hosted UI. You should see a "Sign in with Slack" button. Click it, authenticate with your Slack credentials, and you will be redirected back to your app as a signed-in user.
To confirm everything is wired up correctly, open the WorkOS dashboard > Users. The user who just signed in will appear there.
What you have built
In a handful of steps, you have gone from zero to a working Sign in with Slack integration:
- A Slack App configured with the correct OAuth Redirect URI and client credentials.
- WorkOS configured to handle the Slack OAuth flow and normalize Slack profiles into a consistent user object.
- AuthKit's hosted UI automatically showing the Slack sign-in option, with no custom button required.
- A Next.js app with encrypted session management, route protection, and user profile access, all handled by the
@workos-inc/authkit-nextjsSDK.
Because WorkOS abstracts the OAuth plumbing, you can add more providers (Google, GitHub, Apple, Microsoft, and more) with no changes to your application code, plus a whole lot more functionality for free:
- Email + password auth: Automatic password strength enforcement and breach detection.
- Social login (Google, GitHub, Apple, and more): Enable additional providers with a single toggle in the dashboard.
- Magic auth: Passwordless sign-in via a one-time code sent to the user's email.
- Multi-factor auth (MFA): Additional authentication with TOTP and SMS.
- Passkeys: Biometric, passwordless authentication.
- CLI authentication: Auth support for command-line tools.
- Email verification: Verify user email addresses with magic codes.
- Organization auth policies: Restrict domains, enforce MFA, and require SSO on a per-organization basis.
- Just-in-time (JIT) provisioning: Automatically provision users on first sign-in based on email domain or SSO.
- Role-based access control (RBAC): Flexible, fine-grained permissions for your users.
Next steps
With auth in place, your app is ready for real users. If you are targeting enterprise customers, WorkOS also gives you:
- Enterprise SSO: When an enterprise customer wants to sign in with Okta, Azure AD, or Google Workspace, WorkOS handles the full SAML/OIDC flow automatically.
- Directory Sync: Automatically provision and deprovision users from Okta, Azure AD, and more.
- Audit Logs: A tamper-proof record of every action in your app.
- Radar: Realtime protection against bots, fraud, and abuse.
- Feature Flags: Manage rollout of new features for specific users and organizations.
You can add all of these incrementally as your needs grow, with no need to rearchitect anything.