Actions
Customize authentication flows with your own logic.
Actions allow you to change the behavior of various flows within the WorkOS platform including user registration and authentication using your own custom logic.
When an action is configured for a particular request type, WorkOS synchronously calls the associated action endpoint and waits for a response that allows or denies the operation. When WorkOS calls an actions endpoint, the request includes contextual metadata such as the profile of the user performing the operation, the organization associated with the operation, or the IP address, all of which you can use for decisioning within the endpoint.
WorkOS allows you to configure actions that execute during various user operations:
- Authentication: Authentication actions run after a user completes Email + Password, Magic Auth authentication, SSO, or Social Login and before they are redirected to your application.
- User registration: User registration actions run after a user attempts to register for your application using Email + Password, Magic Auth sign up, SSO, or Social Login and before they are provisioned.
To configure actions, you’ll need to:
- Host an actions endpoint that receives requests from WorkOS
- Register your endpoints with WorkOS
- Implement the custom logic of your endpoint
- Test your endpoints
Create a public endpoint that WorkOS can make requests to. This endpoint should use HTTPS and should accept POST requests with the workos-signature header. This header is used for verifying the request’s authenticity from WorkOS.
| export async function POST(req: Request) { | |
| const payload = await req.json(); | |
| const sigHeader = req.headers.get('workos-signature'); | |
| // Verify the signature and process the event | |
| return new Response(null, { status: 200 }); | |
| } |
| const express = require('express'); | |
| const app = express(); | |
| app.use(express.json()); | |
| app.post('/user-registration-action', async (req, res) => { | |
| const payload = req.body; | |
| const sigHeader = req.headers['workos-signature']; | |
| // Verify the signature and process the event | |
| res.sendStatus(200); | |
| }); |
WorkOS-Signature, but many web servers normalize HTTP request headers to their lowercase variants.
Set the actions endpoint URL in the WorkOS Dashboard. Set Enable action and choose Save changes.
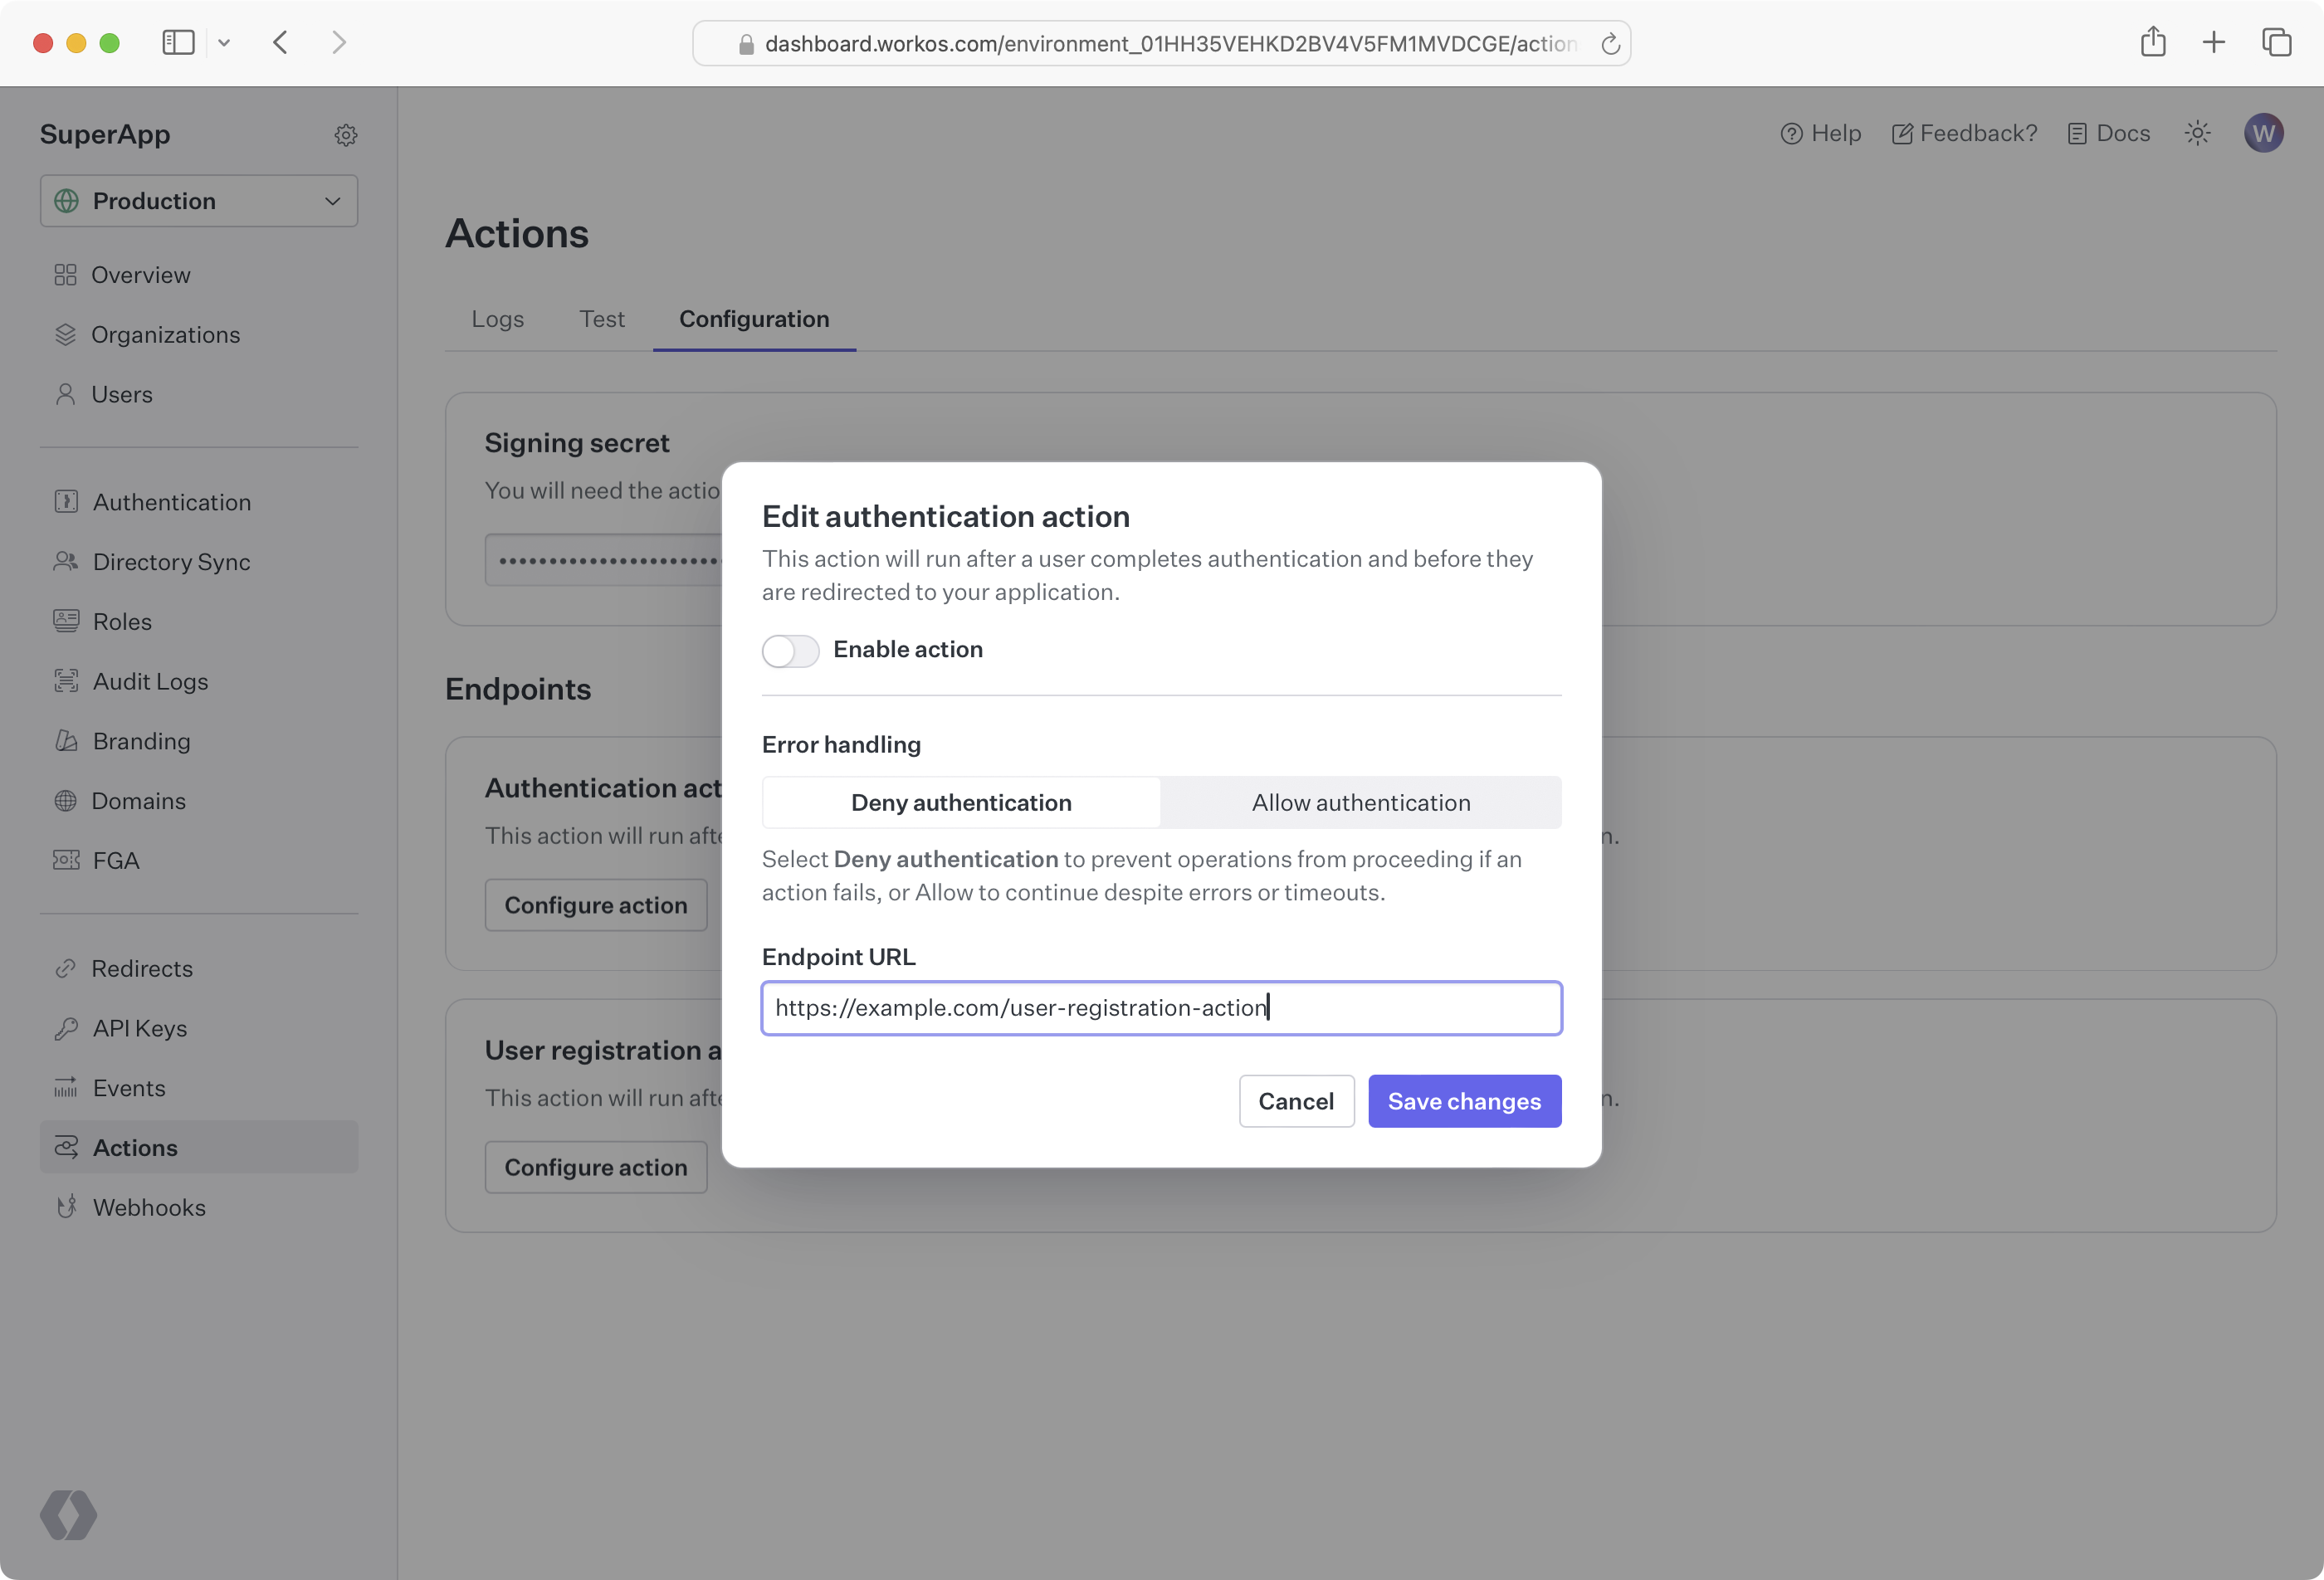
Each actions endpoint must specify its error handling behavior. By default, if there is an issue reaching your endpoint or validating the response, WorkOS will deny the operation. If this is not the desired behavior for your use case, you can choose a different behavior depending on the action endpoint type; for example, for authentication actions, you can choose Allow authentication.
Upon receiving a request, you should respond with an HTTP 200 OK as well as a valid response body to signal to WorkOS that the request was successfully handled.
Before processing the request payload, verify the request was sent by WorkOS and not an unknown party.
WorkOS includes a unique signature in each actions request that it sends, allowing you to verify the authenticity of the request. In order to verify this signature, you must obtain the secret that is generated for you when you set up your actions endpoint in the WorkOS dashboard. Ensure that this secret is stored securely on your actions endpoint server as an environment variable.
The SDKs provide a method to validate the timestamp and signature of an actions. Examples using these methods are included below. The parameters are the payload (raw request body), the request header, and the actions secret.
| import { SignatureVerificationException, WorkOS } from '@workos-inc/node'; | |
| const workos = new WorkOS(process.env.WORKOS_API_KEY); | |
| export async function POST(req: Request) { | |
| const payload = await req.json(); | |
| const sigHeader = req.headers.get('workos-signature'); | |
| if (!sigHeader) { | |
| console.error('WorkOS signature missing'); | |
| return Response.json( | |
| { error: 'WorkOS signature missing' }, | |
| { status: 401 }, | |
| ); | |
| } | |
| if (!process.env.WORKOS_ACTIONS_SECRET) { | |
| console.error('Actions secret missing'); | |
| return Response.json({ error: 'Actions secret missing' }, { status: 500 }); | |
| } | |
| let action; | |
| try { | |
| action = await workos.actions.constructAction({ | |
| payload: payload, | |
| sigHeader: sigHeader, | |
| secret: process.env.WORKOS_ACTIONS_SECRET, | |
| }); | |
| } catch (err) { | |
| if (err instanceof SignatureVerificationException) { | |
| console.error(err.message); | |
| return Response.json({ error: 'Invalid signature' }, { status: 401 }); | |
| } | |
| } | |
| // Verify the signature and process the event | |
| return new Response(null, { status: 200 }); | |
| } |
| const express = require('express'); | |
| const { WorkOS, SignatureVerificationException } = require('@workos-inc/node'); | |
| const app = express(); | |
| const workos = new WorkOS(process.env.WORKOS_API_KEY); | |
| app.use(express.json()); | |
| app.post('/user-registration-action', async (req, res) => { | |
| const payload = req.body; | |
| const sigHeader = req.headers['workos-signature']; | |
| let action; | |
| try { | |
| action = await workos.actions.constructAction({ | |
| payload: payload, | |
| sigHeader: sigHeader, | |
| secret: process.env.ACTIONS_SECRET, | |
| }); | |
| } catch (err) { | |
| if (err instanceof SignatureVerificationException) { | |
| console.error(err.message); | |
| } | |
| } | |
| // Verify the signature and process the event | |
| res.sendStatus(200); | |
| }); |
There is an optional parameter, tolerance, that sets the time validation for the actions request in seconds. The SDK methods have default values for tolerance, usually 3 – 5 minutes.
If implementing actions request validation yourself, you’ll need to use the following steps:
First, extract the timestamp and signature from the header. There are two values to parse from the WorkOS-Signature header, delimited by a , character.
| Key | Value |
|---|---|
issued_timestamp |
The number of milliseconds since the epoch time at which the event was issued, prefixed by t= |
signature_hash |
The HMAC SHA256 hashed signature for the request, prefixed by v1= |
To avoid replay attacks, we suggest validating that the issued_timestamp does not differ too much from the current time.
Next, construct the expected signature. The expected signature is computed from the concatenation of:
issued_timestamp- The
.character - The request’s body as a utf-8 decoded string
Hash the string using HMAC SHA256, using the actions secret as the key. The expected signature will be the hex digest of the hash. Finally, compare signatures to make sure the actions request is valid.
Once you’ve determined the event request is validly signed, it’s safe to use the event payload in your application’s business logic.
WorkOS sends actions requests from a fixed set of IP addresses. It’s recommended to restrict access to your actions endpoint to only these IP addresses:
The endpoint must respond with a signed JSON object indicating a verdict of Allow or Deny as well as an optional error_message in the event the verdict is Deny.
Based on the payload data received, you can determine whether to allow or deny the operation. Each action type receives a different payload model, so be sure to handle the appropriate data in your handler.
The SDK provides a method to create the signed response.
| import { | |
| SignatureVerificationException, | |
| UserRegistrationActionResponseData, | |
| WorkOS, | |
| } from '@workos-inc/node'; | |
| const workos = new WorkOS(process.env.WORKOS_API_KEY); | |
| export async function POST(req: Request) { | |
| const payload = await req.json(); | |
| const sigHeader = req.headers.get('workos-signature'); | |
| if (!sigHeader) { | |
| console.error('WorkOS signature missing'); | |
| return Response.json( | |
| { error: 'WorkOS signature missing' }, | |
| { status: 401 }, | |
| ); | |
| } | |
| if (!process.env.WORKOS_ACTIONS_SECRET) { | |
| console.error('Actions secret missing'); | |
| return Response.json({ error: 'Actions secret missing' }, { status: 500 }); | |
| } | |
| let action; | |
| try { | |
| action = await workos.actions.constructAction({ | |
| payload: payload, | |
| sigHeader: sigHeader, | |
| secret: process.env.WORKOS_ACTIONS_SECRET, | |
| }); | |
| } catch (err) { | |
| if (err instanceof SignatureVerificationException) { | |
| console.error(err.message); | |
| return Response.json({ error: 'Invalid signature' }, { status: 401 }); | |
| } | |
| } | |
| let responsePayload: UserRegistrationActionResponseData; | |
| // Determine whether to allow or deny the action | |
| if ( | |
| action?.object === 'user_registration_action_context' && | |
| action?.userData.email.split('@')[1] === 'gmail.com' | |
| ) { | |
| responsePayload = { | |
| type: 'user_registration', | |
| verdict: 'Deny', | |
| errorMessage: 'Please use a work email address', | |
| }; | |
| } else { | |
| responsePayload = { type: 'user_registration', verdict: 'Allow' }; | |
| } | |
| const response = await workos.actions.signResponse( | |
| responsePayload, | |
| process.env.WORKOS_ACTIONS_SECRET, | |
| ); | |
| return Response.json(response); | |
| } |
| const express = require('express'); | |
| const { WorkOS, SignatureVerificationException } = require('@workos-inc/node'); | |
| const app = express(); | |
| const workos = new WorkOS(process.env.WORKOS_API_KEY); | |
| app.use(express.json()); | |
| app.post('/user-registration-action', async (req, res) => { | |
| const payload = req.body; | |
| const sigHeader = req.headers['workos-signature']; | |
| let action; | |
| try { | |
| action = await workos.actions.constructAction({ | |
| payload: payload, | |
| sigHeader: sigHeader, | |
| secret: process.env.ACTIONS_SECRET, | |
| }); | |
| } catch (err) { | |
| if (err instanceof SignatureVerificationException) { | |
| console.error(err.message); | |
| } | |
| } | |
| let responsePayload; | |
| // Determine whether to allow or deny the action | |
| if (action.userData.email.split('@')[1] === 'gmail.com') { | |
| responsePayload = { | |
| type: 'user_registration', | |
| verdict: 'Deny', | |
| errorMessage: 'Please use a work email address', | |
| }; | |
| } else { | |
| responsePayload = { type: 'user_registration', verdict: 'Allow' }; | |
| } | |
| const response = await workos.actions.signResponse( | |
| responsePayload, | |
| process.env.ACTIONS_SECRET, | |
| ); | |
| res.json(response); | |
| }); |
If implementing the construction of the actions response yourself, you’ll need to use the following steps:
First, store the current epoch timestamp to a variable.
Next, construct the JSON response. The JSON response must contain the following:
timestamp: The epoch timestamp you recordedverdict: Indicates whether to allow or deny the action. Allowed values:'Allow' | 'Deny' | 'allow' | 'deny'error_message: An optional, 500 character maximum string. This should only be provided with averdictofdenyorDeny
Next, construct the signature. The expected signature is computed from the concatenation of:
- The current epoch timestamp
- The
.character - The JSON response body as a utf-8 encoded string
Hash the string using HMAC SHA256, using the actions secret as the key. The expected signature will be the hex digest of the hash.
Finally, the endpoint should respond with a JSON object containing the following properties:
object:'authentication_action_response' | 'user_registration_action_response'payload: The JSON response you formed abovesignatureThe hex digest of the hash you created above
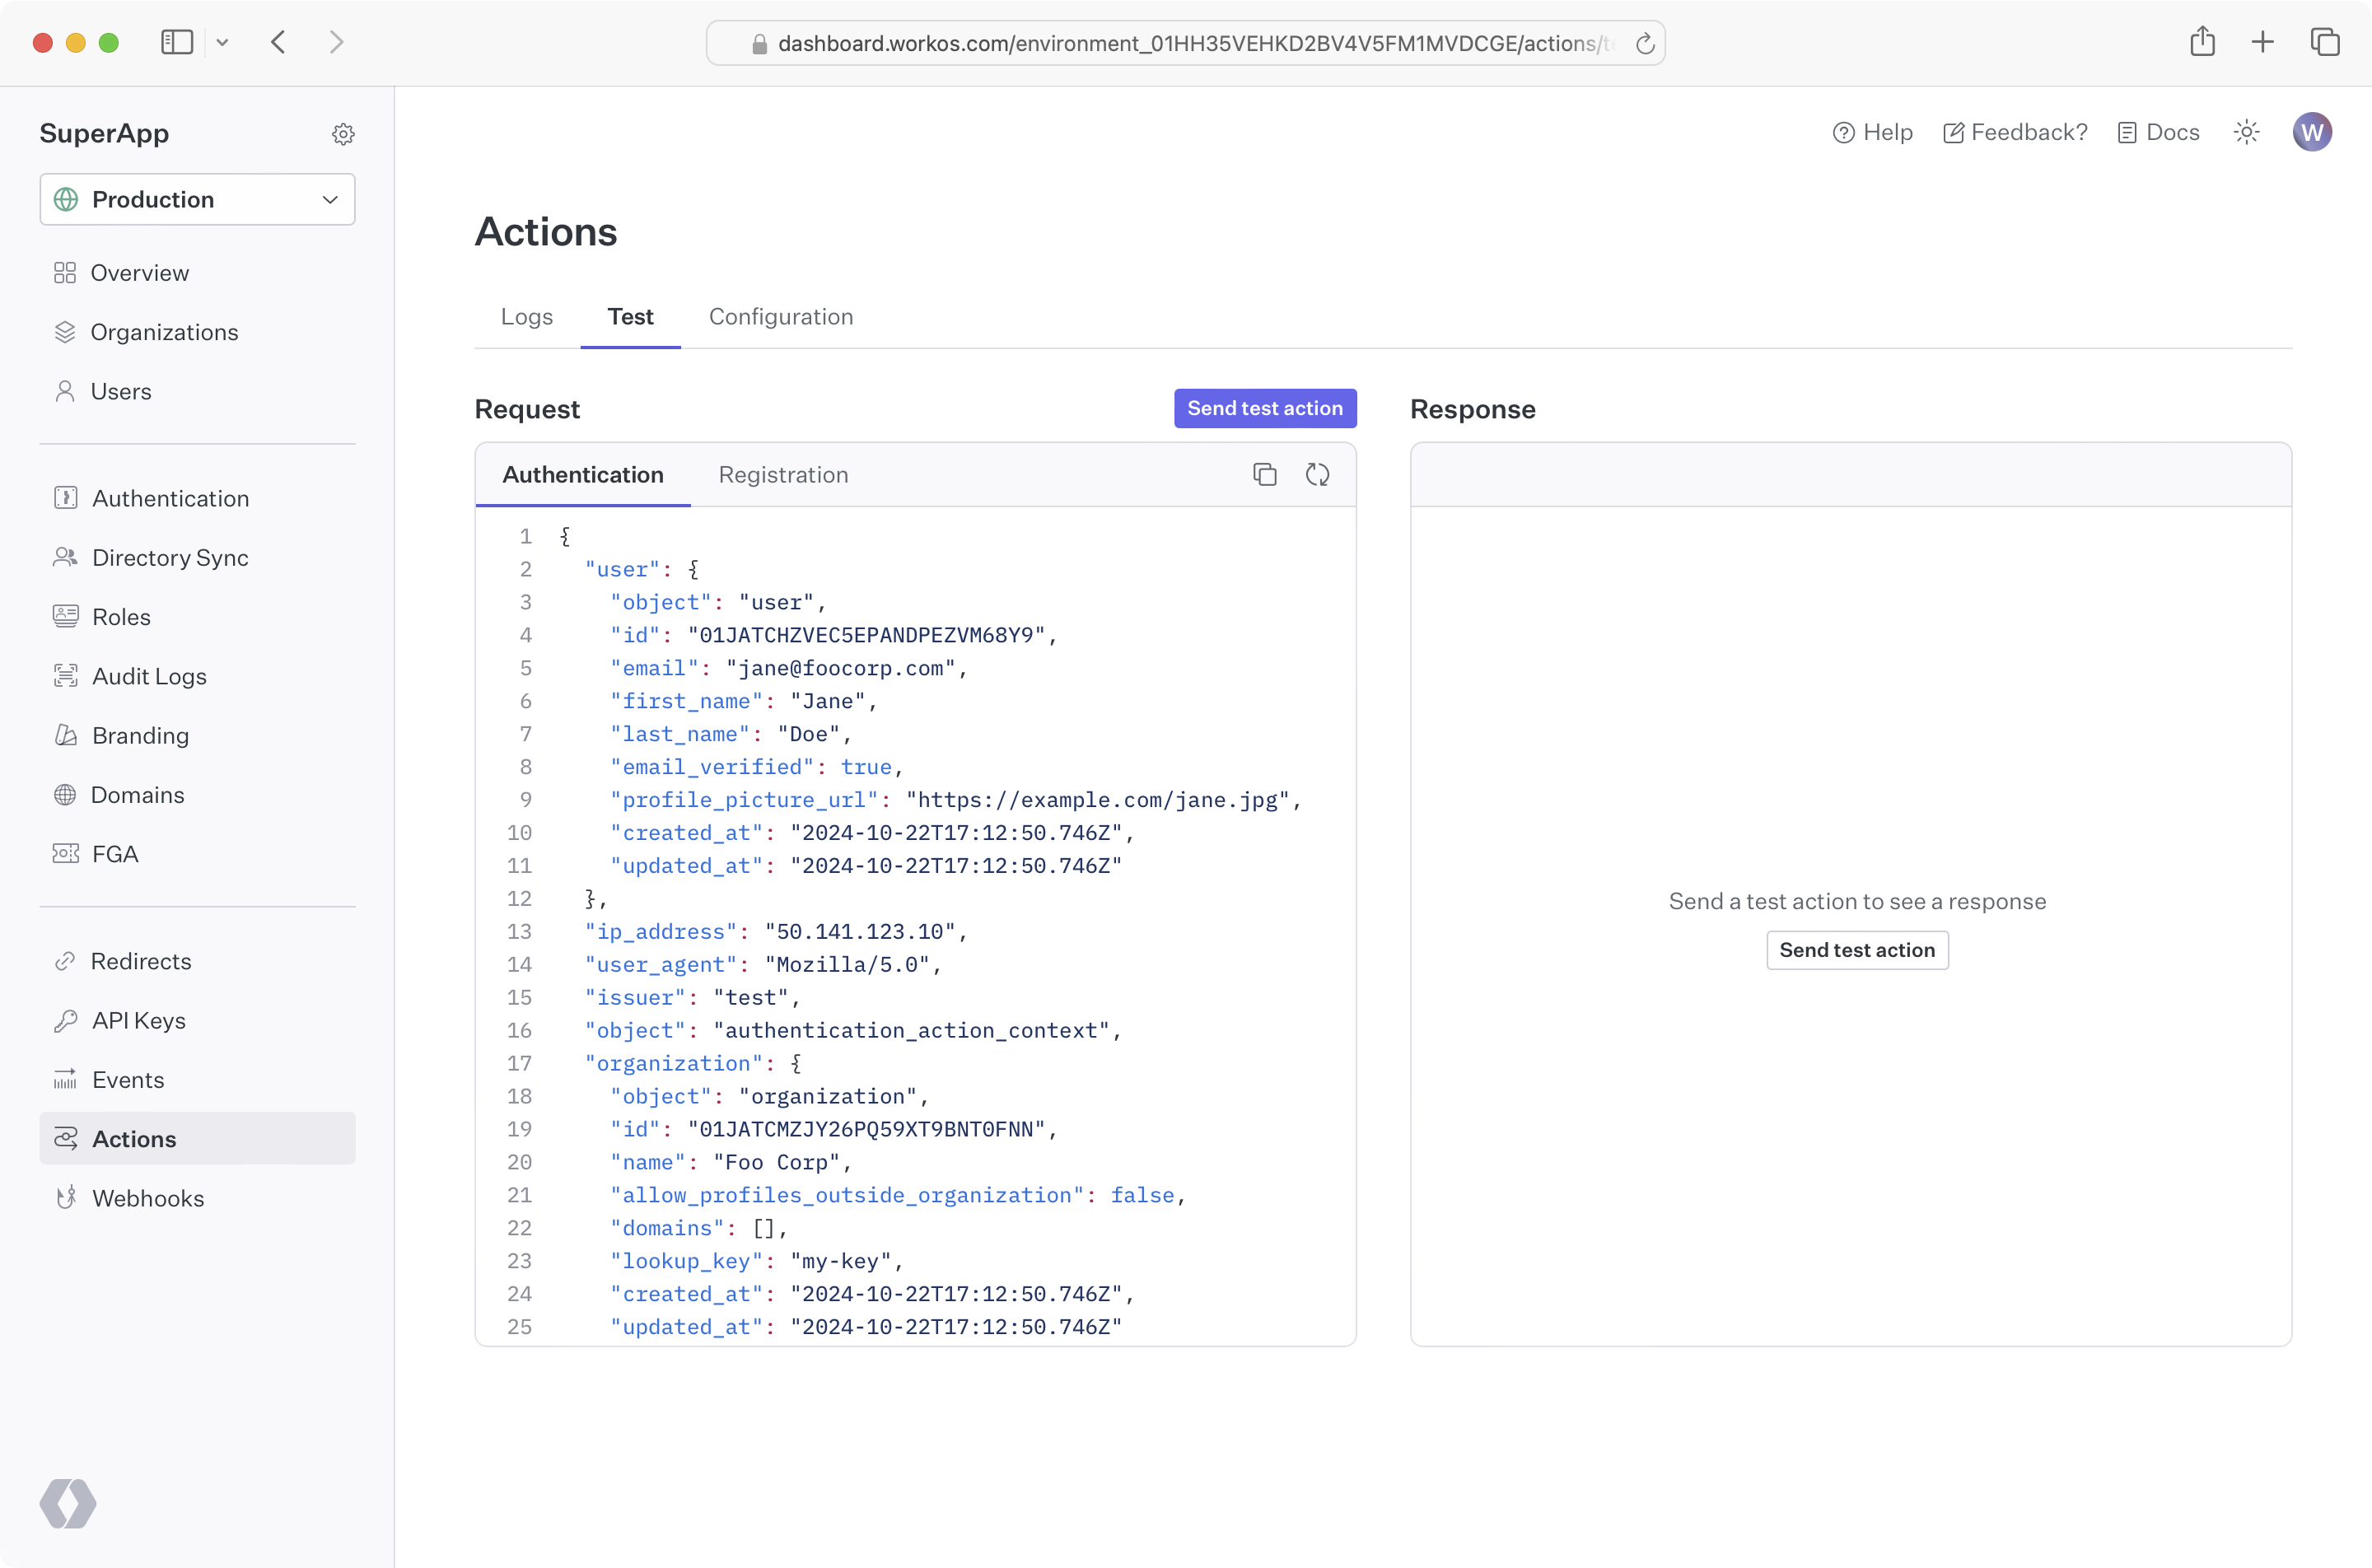
From the dashboard, you can send test actions after configuring an endpoint. Go to the actions Test tab and click the Send test action button.
If you would like to test against your local development environment, we recommend using a tool like ngrok to create a secure tunnel to your local machine, and sending test webhooks to the public endpoint generated with ngrok. See our blog post to get more details on how you may want to test webhooks locally with ngrok.